


Get Started
Sales Suite
Field Ops
Marketing
Service CRM
Integrations & Apps
FloStack
Opportunity Distribution Automation
1. Feature Overview
This article covers how the Distribute Opportunity card works in automations. It allows you to set conditions to distribute opportunities among your users. For example, you may want to distribute opportunities based on their location, industry type, and so on.
With the Opportunity Distribution automation card, you can build a series of rules and assign opportunities to one specific user, groups of users, or based on user properties, in a round-robin manner. When a new opportunity is created in your account (or based on any other trigger), the opportunity distribution engine executes each rule, one by one, till the conditions defined in your rule match the new opportunity. Once a rule’s conditions match the opportunity, no more rules are executed.
When no rule matches the incoming opportunity, then the default rule is executed.
2. Set Up Automation
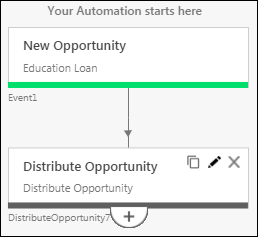
- Navigate to Workflow>Automation, and click Create Automation.
- From the list of available triggers, you can set up the automation using any trigger.
- After selecting a trigger, click Sales Execution, and then click Distribute Opportunity.
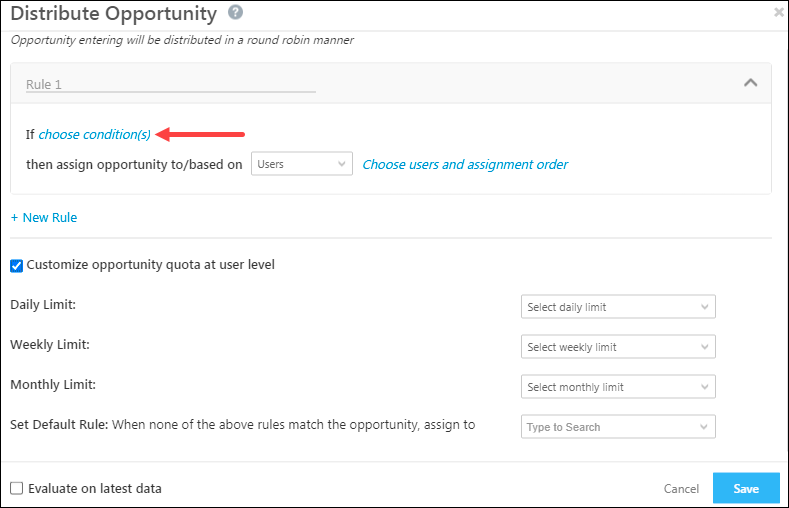
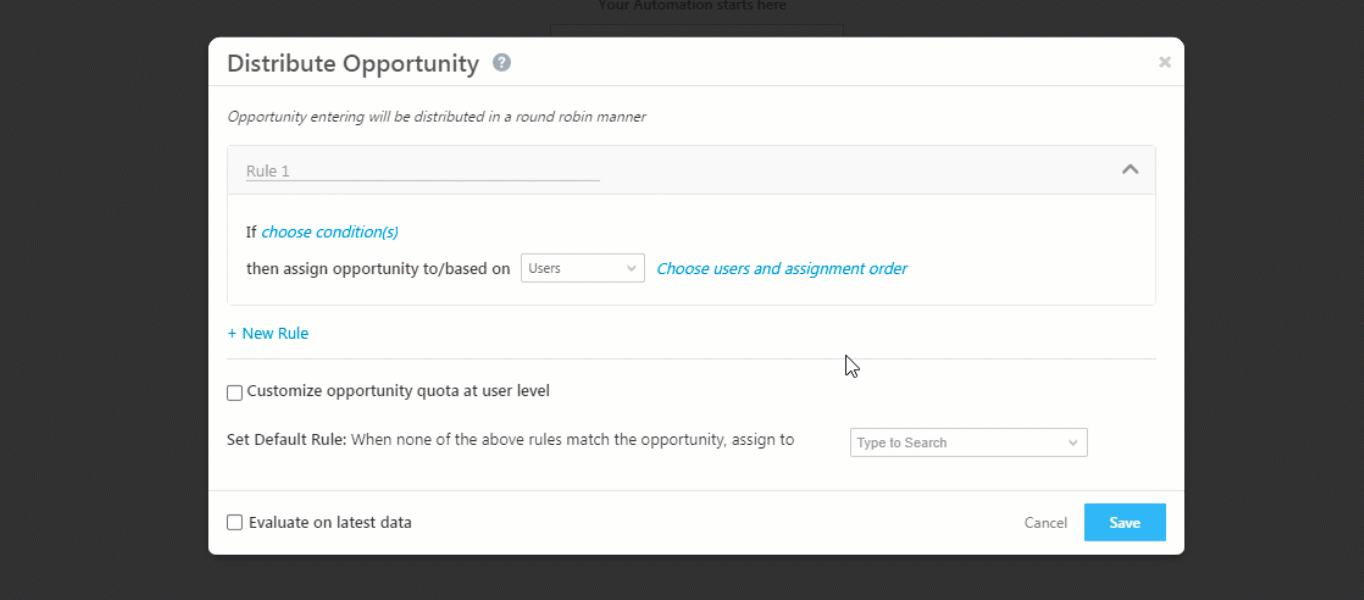
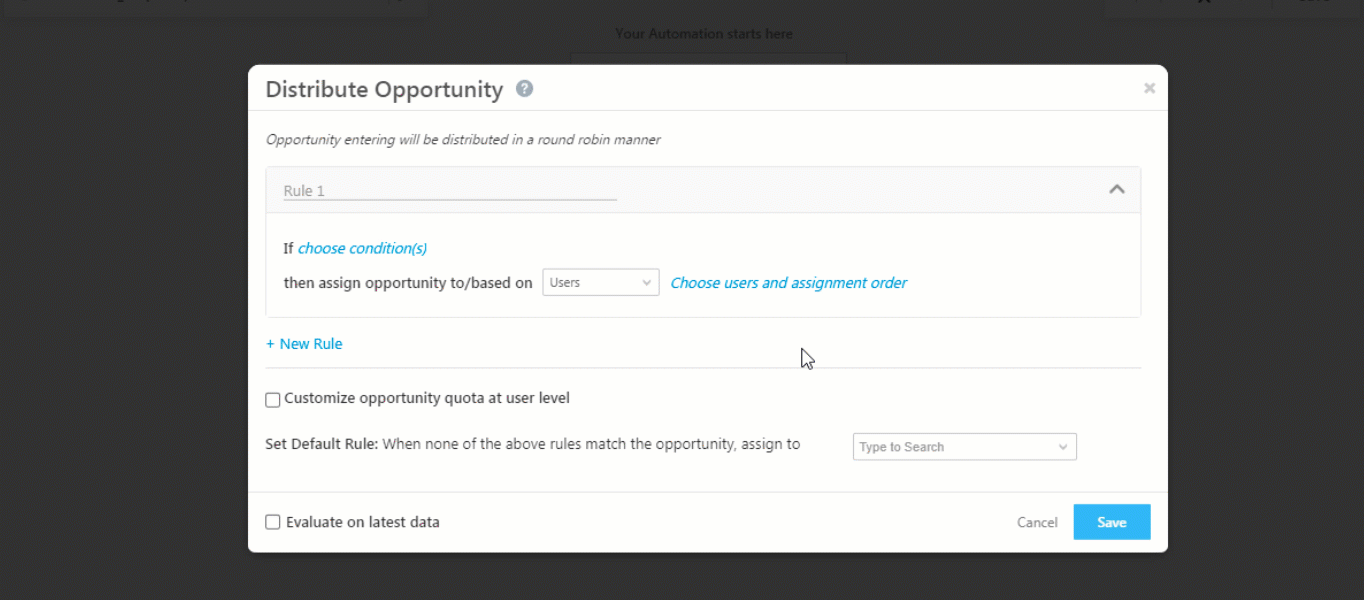
- On the Distribute Opportunity pop-up, you can create opportunity distribution rules. Based on these rules, you can –
- Distribute opportunities to users
- Distribute opportunities to user groups
- Distribute opportunities based on user properties
3. Create Opportunity Distribution Rules
The distribute opportunity action allows you to set conditions to distribute opportunities among your users.
For example, you may want to distribute opportunities based on deal size (e.g., below ₹5,00,000, ₹5,00,000-10,00,000, etc.) to specific users. Click the Distribute Opportunity action to open the Distribute Opportunity pop-up window.
Enter a rule name in the space provided and then click the choose conditions(s) link.
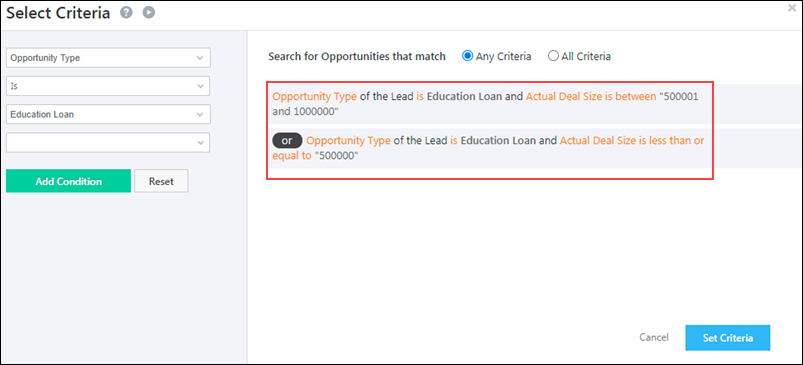
On the Select Criteria pop-up, select the opportunity type, then select Actual Deal Size, and then enter the deal size as 5,00,000. Next, click Add Condition.
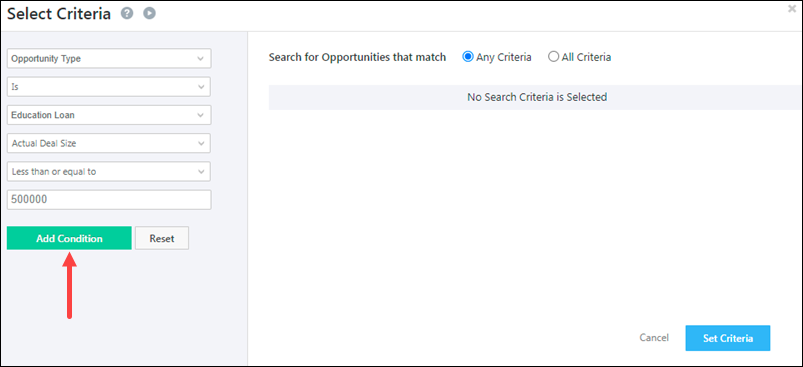
Your criteria will show up as highlighted below. Click Set Criteria to proceed.
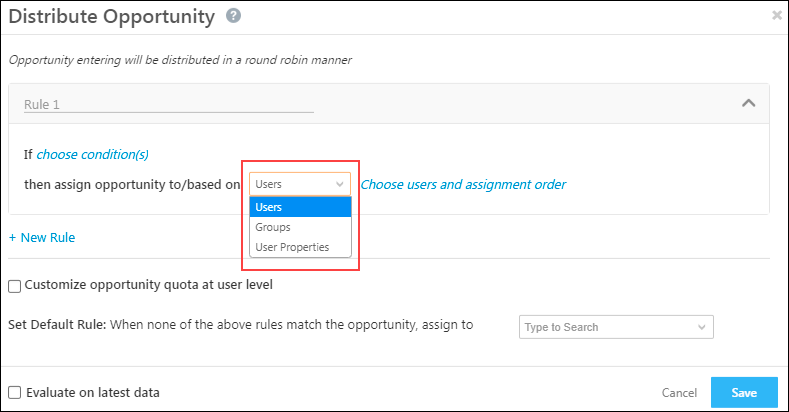
Now select one of the following options from the drop-down –
- Users – Select particular users to distribute the opportunities to.
- Sales Groups – Select the group you want to distribute opportunities to.
- User Properties – Perform an advanced search based on user attributes. For more information, see User Advanced Search.
3.1 Distribute Opportunities to Individual Users
Through this option, you can distribute opportunities to individual users. From the dropdown, select Users.
On the Select Users pop-up, choose the users and the sequence you want your distribution to follow.
You’ll see an Availability Status section at the bottom if you’ve enabled the Check In and Check Out feature for user management. You can toggle the between the All and Available options to distribute opportunities to all users or to available users only. Click Save when you’re done.

You can proceed to add multiple rules by using the New Rule link. You can name each rule and then re-order them by simply dragging and dropping. The rules will execute in the sequence you set up.
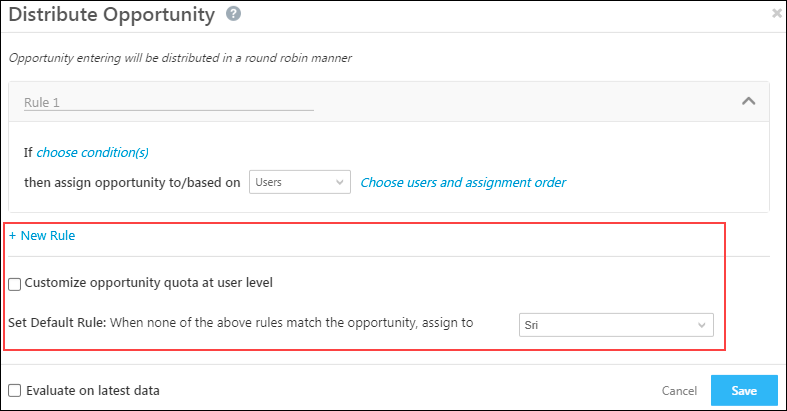
You must set a default rule that will execute when no other rules match the set criteria. The default rule will automatically distribute the opportunity to a user you select.
Your automation is now set up to distribute opportunities to your users based on the Actual Deal Size field.
3.2 Distributing Opportunities to Sales Groups
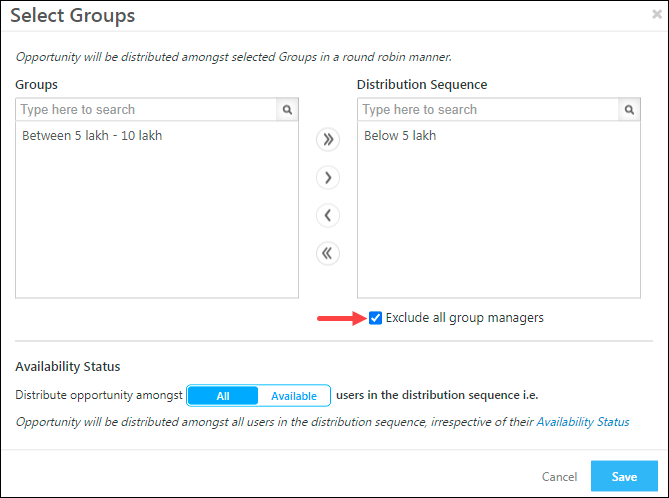
You can distribute opportunities to multiple sales groups (in different regions for instance). For example, you can create two rules, such that opportunities for which deal size is below ₹5,00,000 get assigned to one sales group, and opportunities for which deal size is between ₹5,00,001 to ₹10,00,000 get assigned to another sales group –
- On the Distribute Opportunity pop-up, once you’ve set up the conditions for the rule, select the Groups option and click Choose groups and assignment order.
- The Select Groups pop-up will appear. Select the groups you want to distribute the opportunities to.
- You can also distribute opportunities to only the available users in a group by clicking the
 option. This feature will only work if you’ve configured the Check-in/Check-Out functionality.
 - Click Save when you’re done.
- Back on the Distribute Opportunity pop-up, you’ll have to set a default rule that will execute when no other rules match the set criteria. The default rule will automatically distribute the opportunity to a user you select.
- Click Save.
Note: If you don’t want to distribute opportunities to the managers of a sales group, click the Exclude all group managers checkbox as shown below –
3.3 Distributing Opportunities based on User Properties
You can also distribute opportunities to users based on user properties. For instance, you can distribute opportunities to users based on their designation, department, manager name, etc. You can even combine multiple properties using the All Conditions (And) and Any Condition (Or) operators. For example, you can assign opportunities to users who are from a particular department and have a particular designation.
In this example, we’re setting up the opportunity distribution such that If an opportunity is present in the Indian state of Karnataka, then we’re assigning him to users who work out of Bangalore Or Mysore (cities within that state) –
- On the Distribute Opportunity pop-up, once you’ve set up the conditions for the rule, select the User Properties option and click Choose user properties.
- The Select Users pop-up will appear. You can also distribute opportunities to only the available users in a group by clicking the option. This feature will only work if you’ve configured the Check-in/Check-Out functionality.
- Choose the operator you want to use between condition groups (AND/OR). Select the user details from the drop-down. To add another condition within the same group click the And/Or button inside the condition group box.
- If you want to add multiple condition groups, click Add Condition Group on the bottom left side of the pop-up.
- When your conditions are set up, click the Set Criteria button.
- Back on the Distribute Opportunity pop-up, you’ll have to set a default rule that will execute when no other rules match the set criteria. This default rule will automatically distribute the opportunity to a user you select.
- Click Save.
4. Assign Opportunities based on Opportunity Distribution Quota
After you have configured opportunity distribution in the previous step, you can further define quotas determining how many opportunities will be assigned to your users. You can further define quotas for different durations (daily, weekly, monthly) for each individual user. To learn more, please refer to Opportunity Assignment Quotas.
To enable this –
- On the Distribute Opportunity pop-up, check the
 checkbox against Customize opportunity quota at user level.
 - Depending on your preference, choose the Custom Quota options from the dropdown. This will ensure that opportunities are distributed to only the users who fulfil the criteria of that specific quota.
- You can set quotas for the daily, weekly, and monthly durations. These quotas have to be configured on the Opportunity Assignment Quota page.
- For example, if you select a monthly duration, then the opportunities captured for that month will get distributed based on the quota you’ve set for that month.
- Once you’re done, click Save.

Any Questions?
Have any questions you’d like to voice? Or any experiences with this feature you’d like to share? Please feel free to start a discussion in the comments section.
How to delete Distribution
Hi, Prabhat. Thanks for writing to us. There are two ways to delete opportunity distribution –
1) Delete the Distribute Opportunity card in the automation, or
2) Unpublish the automation.
Hope this helps!