


Get Started
Sales Suite
Field Ops
Marketing
Service CRM
Integrations & Apps
FloStack
User Management Features: Check-In and Check-Out
1. Feature Overview
The Check-In/Check-Out feature is an attendance management solution that lets you know when and where your users’ check-in and check-out, and their online statuses. You also get insights on the general attendance trends of your users through reporting.
What’s more, you can also distribute leads only to users who are available/checked-in to LeadSquared.
To automate check-in/check-out for your users, see Auto Check-In/Check-Out Guide.
2. Configuration
- Navigate to My Account>Settings>Users and Permissions>User Availability>User Check-In.
- Click the slider alongside ‘User Check-In’.
- Next, click the Configure button
You can configure the feature at either the roles or the groups level.
- To configure at the roles level
- Click the Role icon then click Next.
- Now use the sliders to enable the check-in feature for the roles you wish to include.
- If you wish to exclude individual users within a role, click Exclude Users from selected Roles. Move the users you want excluded into the User Exceptions list and click the Add Exceptions button.
- Finally, click Done to save your settings.

To configure at the groups level
-
- Click the Groups icon, then click Next.
- Move the Groups you want to include into the Selected Groups list.
- You can exclude all group managers by selecting the Exclude all group managers checkbox.
- If you wish to exclude individual users within a role, click Exclude Users from selected Groups. Move the users you want excluded into the User Exceptions list and click the Add Exceptions button.
- Finally, click Done to save your settings.
3. Checking In and Out
All users you enabled the feature for will now see this pop-up when they log in to the LeadSquared web or mobile app.
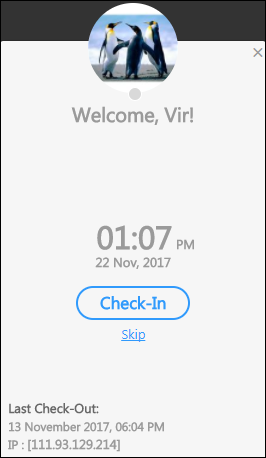
Users can choose to Check-In if say they just arrived at work or Skip if say it’s a holiday but they just wanted to quickly check on their leads. If they check-in or skip, they’ll still see this widget on the right of their screens.
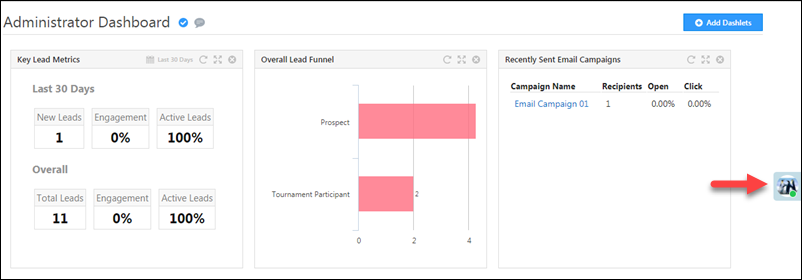
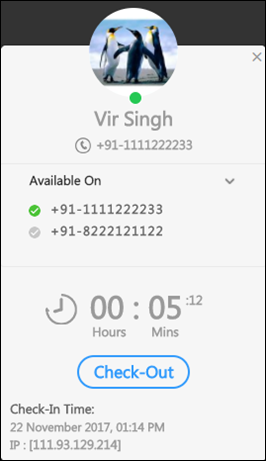
Clicking the widget opens up the Check-In pop up. From here, users can change their availability status (Online/Away/Offline), the phone number they are available on, and also check out.
4. Lead Distribution
Once you’ve enabled and configured check-in/check-out, you can distribute leads to checked-in users only. For the detailed procedure, see the ‘Distribute Leads’ section of Automation Actions – Sales Execution.
5. Reporting
As an administrator, you want to know things like – when a user checked in/out, the location they checked in/out from and maybe even the source of they used to check-in or out (WebApp/MobileApp). The ‘User Check-in and Check-out History’ report (CICO report) gives you all the information you need. To access it –
- Navigate to Reports>Reports Home>User Activity Reports>Check-in and Check-out History.
- Use the drop-down to select the user whose check-in and check-out history you want to view.
- Alongside the user select drop-down, click Show. You can even use the MS Excel icon on the top-right corner of your screen to export the report in CSV format.
6. Some Points to Remember
- Users will not be checked out on closing either the WebApp or the Mobile App. Checking out and checking in have to be performed manually.
- Users check in and check out location will only be saved for mobile app check-ins/check-outs provided the location sharing permission is granted and location services are on.
- De-activated users will automatically get checked out of LeadSquared.
7. Troubleshooting
1. Only Check-out has been captured for a particular day in the Check-in and Check-out report (CICO report).
In this case, the user may have checked-in on the previous day. Change the date to yesterday and re-check the report for the previous day.
2. I set up an automation to auto check-in and check-out my user, but my user’s haven’t been checked-in/out.
In this case the automation might not have triggered. On the Manage Users page, alongside the concerned users, click the Settings icon, then click View Automation Report. Check if the automation triggered and also check if the users meet the entry conditions you set. If you still face issues, contact us at support@leadsquared.com.
3. The recorded check-out time doesn’t tally with the actual time a user checked-out.
This may be due to an auto check-in/out automation. The automation checks users in and out based on the Workday Template assigned to the user’s team. Check the timings of the workday template used in the automation. To view the automation, on the Manage Users page, alongside the concerned users, click the Settings icon , then click View Automation Report
4. Resolving Slowness in Mobile App Check-In and Check-Out
- Why is there a delay in check-in and check-out on the LeadSquared mobile app?
If users are in remote areas, the app may take longer to fetch the location due to GPS limitations. - How can I fix this issue?
To improve app performance during check-in and check-out:- Calibrate Google Maps:
- Open Google Maps, tap the blue location dot, and select “Calibrate Compass.”
- Move your phone in a figure-eight motion to improve GPS accuracy.
- Adjust Battery Saver Settings:
- Go to your device’s App Settings for the LeadSquared app.
- Set background settings to ‘No Restrictions’ to allow uninterrupted location tracking.
- Calibrate Google Maps:
These steps will enhance the app’s ability to capture location data efficiently.
5. Leads are being assigned to users even though the user’s status is inactive
- Issue: Sales users are receiving leads even when they are out of the office and haven’t checked in. Users who haven’t used the platform for 2-3 days are still being assigned leads, despite user availability checks in workflows.
- Root Cause Analysis: Users may have checked in on their last working day but failed to check out, leaving them marked as available, which triggers the lead distribution process.
- If users have soft-closed their browser or allowed their system to sleep without actively logging out, their session may time out, but they remain listed as available.
- This can be verified via the User Audit Log.
- Solution:
Ensure users consistently check in and check out to accurately reflect their availability. Communicate this requirement clearly to users, providing evidence from the User Audit Log if necessary.
Any Questions?
Run into any trouble while setting up check-in and check-out? If there’s anything you’d like to share that would help us improve this article, we’d love to hear it in the comments section below.