


Get Started
Sales Suite
Field Ops
Marketing
Service CRM
Integrations & Apps
FloStack
Opportunity Assignment Quotas
1. Feature Overview
You can set daily, weekly and monthly limits on the number of opportunities that can be assigned to users through opportunity distribution automations.
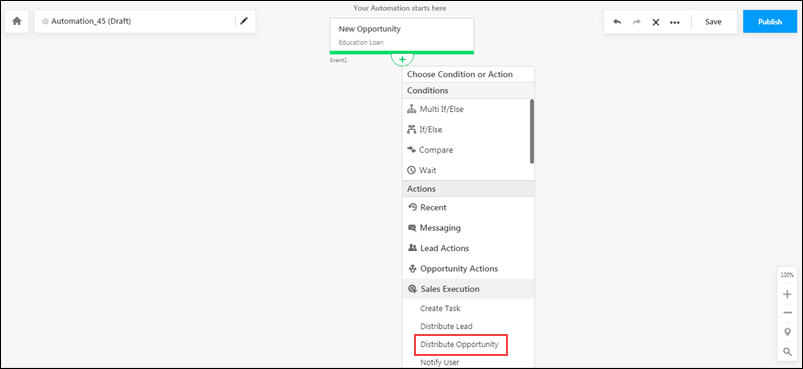
Once set up, you’ll have to configure the Distribute Opportunity card of an Automation to execute the opportunity assignment quotas defined here. To know how to do this, please refer to Opportunity Distribution Automation.
2. Prerequisites
To enable this feature, please reach out to your account manager, or write to support@leadsquared.com.
3. How It Works
- Create a custom user field (or use an existing one) of number type.
- Update this field with the maximum number of opportunities you want to assign for each of your users.
- Enable and configure the Opportunity Assignment Quota setting under Users and Permissions.
- During configuration, specify the custom user field you created in step 1.
- While creating an automation, in the distribute opportunity action card, apply the assignment quotas you configure here. To know more, see Automation Actions – Sales Execution.
When your automation runs, opportunities will be distributed according to the quotas defined for each user (based on the value of the specified custom field). If the custom field value is empty, the default value defined during quota configuration will be used.
4. Create a Custom User Field
While configuring the rules, you’ll need to use a custom user field (see Manage User Custom Fields) under Configuration Value (for example, a custom user field called “Opportunity Assignment Daily Limit”). This field should contain the opportunity assignment quota for each user. This field will then be used to configure the opportunity assignment quota as shown below.
5. Configure Opportunity Assignment Quota
Once set up, you’ll be able to set quotas to assign opportunities to individual users in your account. As an example, let’s look at a vehicle insurance disbursal company that has five sales users (Joe, Ed, Paul, Leo, and Rex), and wants to assign 10 opportunities each to three users (Joe, Ed, and Paul) and 15 opportunities each to the remaining two users (Leo and Rex). In order to do this, the organization will have to configure user-specific opportunity assignment quotas. The organization can further define quotas for different durations (daily, weekly, monthly) for each individual user.
To enable this feature –
- Navigate My Account>Settings>Users and Permissions>Opportunity Assignment Quota.
- Click the Enable Opportunity Assignment Quota slider.
Enter the following details –

| Configuration | Description |
| Configuration Key | The name of the configuration that you set. This will help you distinguish the configurations on the Distribute Opportunity card automation. |
| Configuration Value | The custom user field based on which opportunities get distributed to your users. |
| Default Value | The default field value you want to assign to the selected custom user field. If the custom user field is blank for a particular user, then the default value will get assigned to the user. But if the field already has an existing value, then the default value will be ignored. |
| Add | To add additional configurations, click Add. |
The assignment quota limit for a user will apply across all automations. So for example, if a user’s quota is defined as 10, and multiple automations are set up, opportunities assigned from either automation will increase the assignment quota counter. Once the quota is exceeded, more opportunities won’t be assigned to the user from any of the automations.
Once you’re done, click Save.
Notes: If an existing non-number custom field (such as a DateTime or Text field) with existing non-number values (such as ‘Dec’, ‘BLR lead’, etc.), is edited and converted into a Number field, then the default value will be assigned in place of the non-number values.
Next Steps
Once you’ve configured the opportunity assignment quota, you can set up an opportunity distribution automation where it can be applied. The settings configured here can be used to configure your automation. To proceed, please refer to Opportunity Distribution Automation.
Any Questions?
Did you find this article helpful? Please let us know any feedback you may have in the comments section below. We’d love to hear from you and help you out!
Once the limit is exceeded, can i assign leads to the agents manually ??
Hi, Chaitanya. Yes, you can assign them manually.