


Get Started
Sales Suite
Field Ops
Marketing
Service CRM
Integrations & Apps
FloStack
Ozonetel v2 Connector
The Ozonetel v2 connector lets you integrate your Ozonetel account with LeadSquared. It makes it possible for you to –
- Prevent lead leakage by logging incoming and outgoing calls as leads and activities.
- Make calls directly from LeadSquared.
- Access call recordings
- Automatically route calls to lead owners.
- Trigger the agent pop-up to easily update lead and activity details.
- Manage inbound/outbound campaigns and send leads to campaigns through lists and automation.
This article takes you through –
- Installing the connector from the apps marketplace.
- Configuring the connector in your LeadSquared and Ozonetel accounts.
- Actions that appear in Lists and Automation after successful configuration.
Note: Existing customers using the previous version of the Ozonetel connector can first uninstall the old version and then install and configure Ozonetel v2 as instructed in this article.
Installation
Prerequisites for using the connector –
- You must be a LeadSquared administrator user.
- You must have an Ozonetel CloudAgent account.
To install the connector, from your LeadSquared account –
- Navigate to Apps>Apps MarketPlace>Telephony.
- Click Install under the Ozonetel v2 connector. Once installed, click to open the connector.

Configuration
- Under Settings, click Configure.
- On the Configure Ozonetel v2 pop-up, you’ll see multiple configuration steps starting with Virtual numbers. The followings sections will take you through each configuration step.

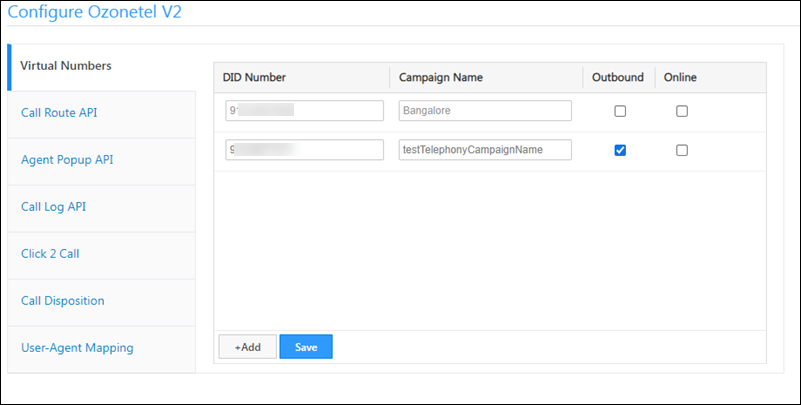
Virtual Numbers
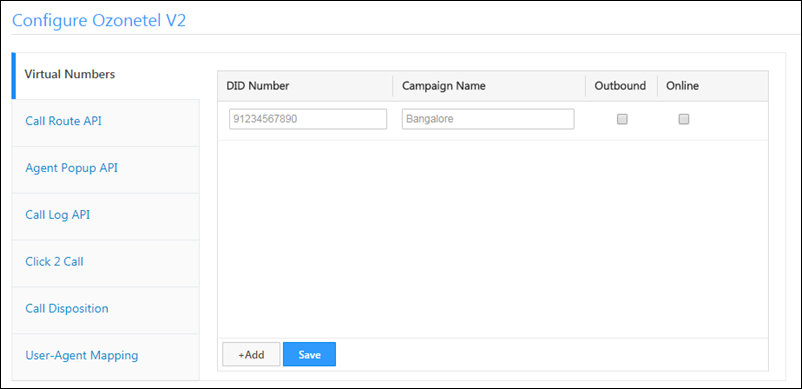
Enter these details in the ‘Virtual Numbers’ section –
- DID Number: These are Direct Inward Dialing numbers unique to your OzoneTel Cloud Agent account.
- Campaign Name: The name of the call campaign in your Ozonetel account.
- Outbound: Whether the campaign is inbound or outbound.
- Online: Whether the campaign is online or offline.
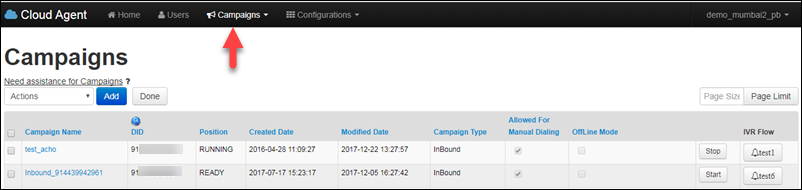
To find these details, navigate to the Campaigns tab of your Ozonetel account.
Call Route API
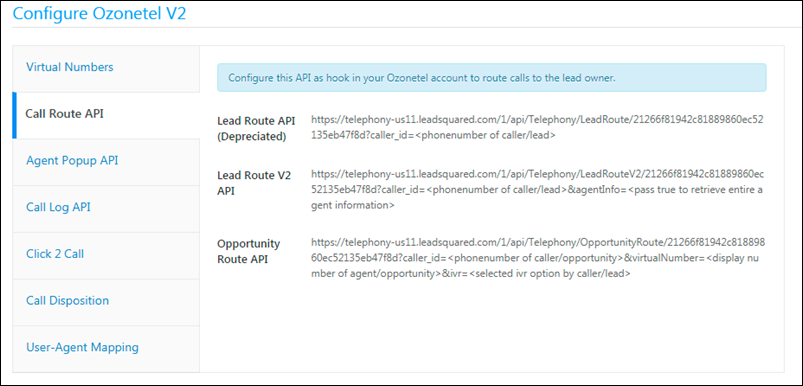
This API is used to get the lead/opportunity owner. It is setup up automatically. You aren’t required to do anything in this step.
Agent Popup API
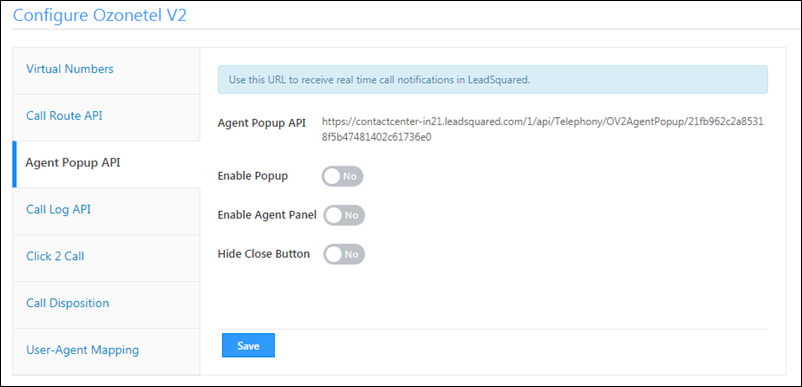
You can configure these options (Yes/No) –
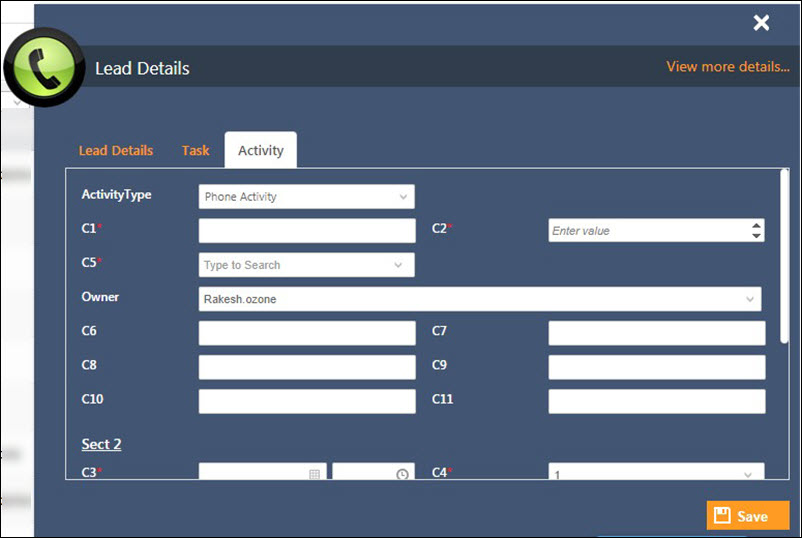
- Enable Popup: Choosing ‘Yes’ triggers the agent pop-up to appear everytime an incoming or outgoing call takes place. It allows users to enter lead, task and activity details as the call progresses. The agent pop also has a ‘Pause Campaign’ option which allows users to temporarily pause receiving incoming calls.
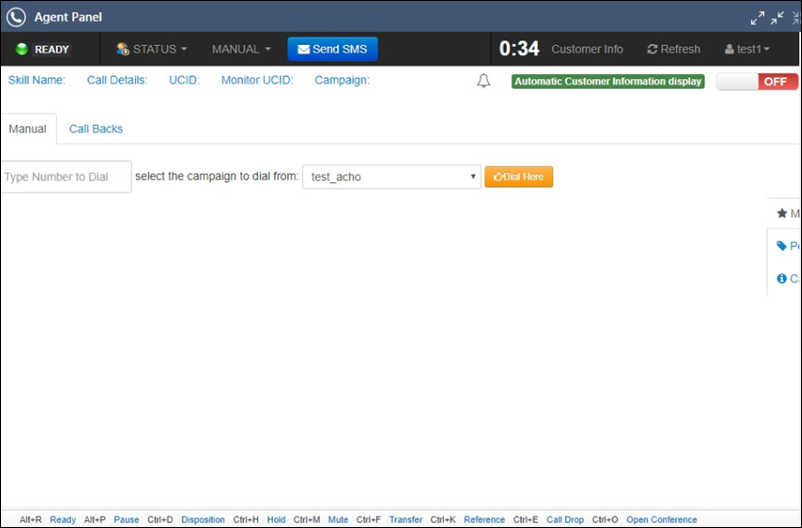
- Enable Agent Panel: The agent panel gives you a convenient way to manage your call center actions directly from your LeadSquared account. You can add a custom URL here, and append mail merge parameters (click the help
 icon).
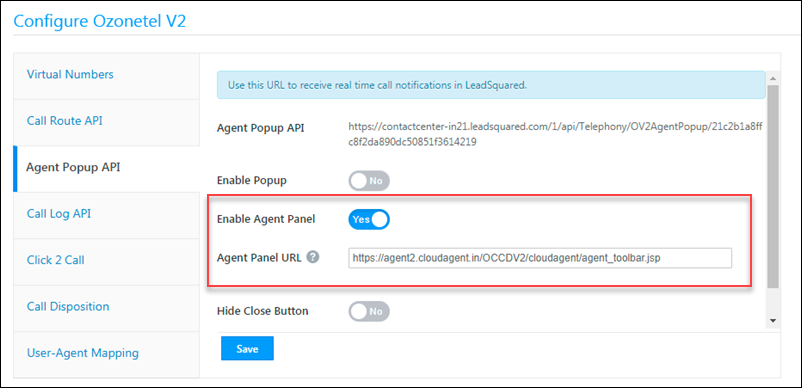
- Hide Close Button: If you enable this option, users won’t be able to see the close button on the agent pop-up. This prevents them from accidentally closing the pop-up in the middle of a conversation.
LeadId in the Agent Popup API. This will ensure that the correct lead details appear in the agent popup. For e.g., "LeadId": "4c70ce73-0732-4977-85a2-fb49a978b85c".Here’s an example of an agent pop-up –
And here’s an agent panel –
Call Log API
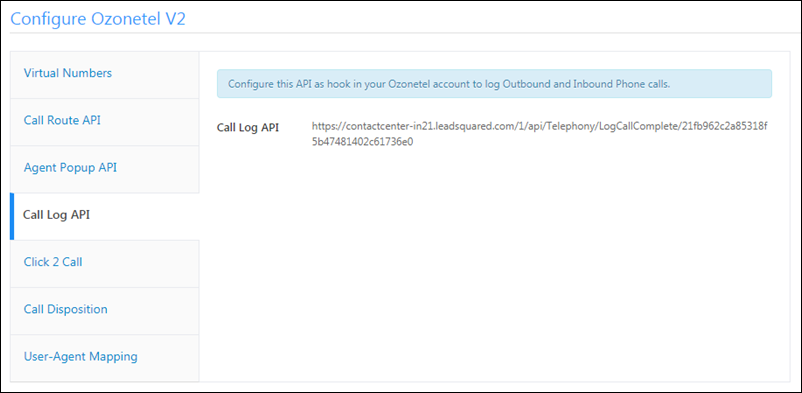
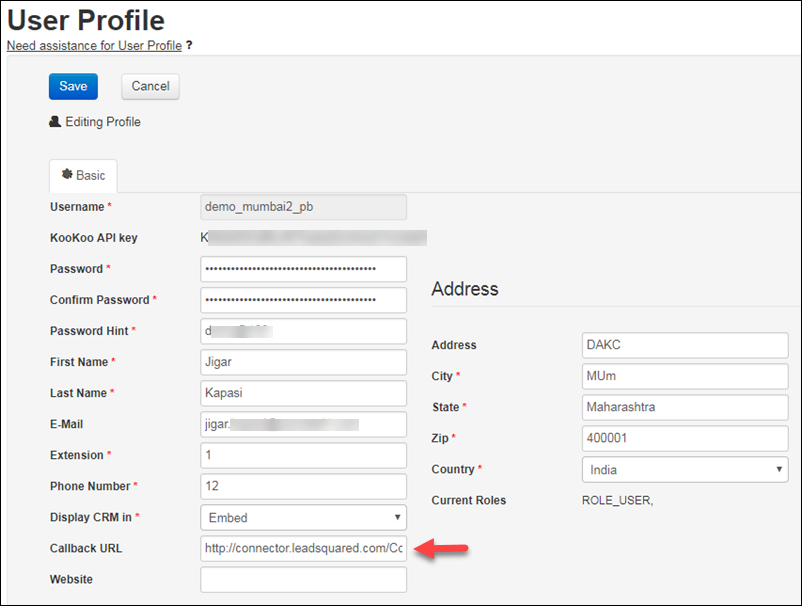
The call log API enables LeadSquared to capture all the details of your phone calls. Copy the Call Log URL and paste it in the Callback URL field in the profile page of your Ozonetel account.
Click 2 Call
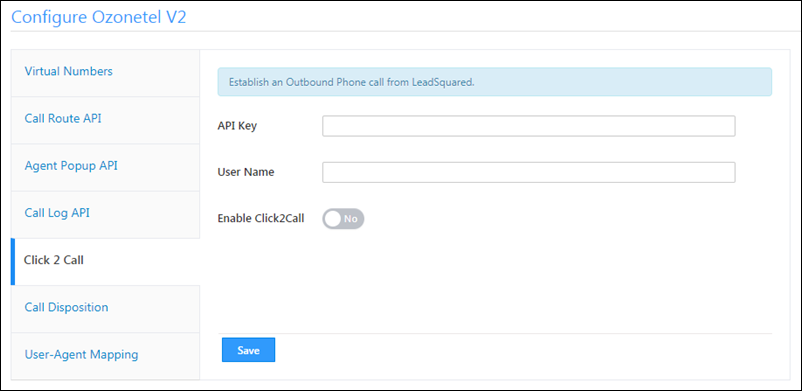
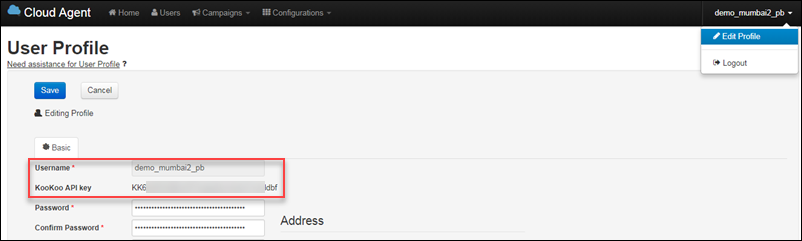
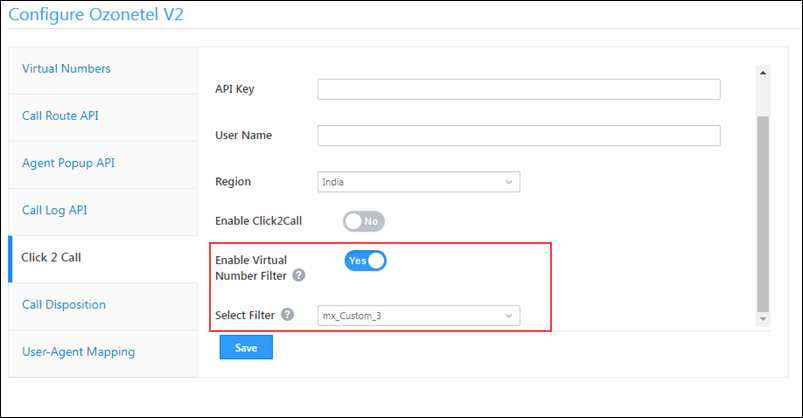
If you want to make outbound phone calls from LeadSquared, you have to enter your Ozonetel API key, User Name and then enable the Click2Call option. You can find your API key and username on the profile page of your Ozonetel account.
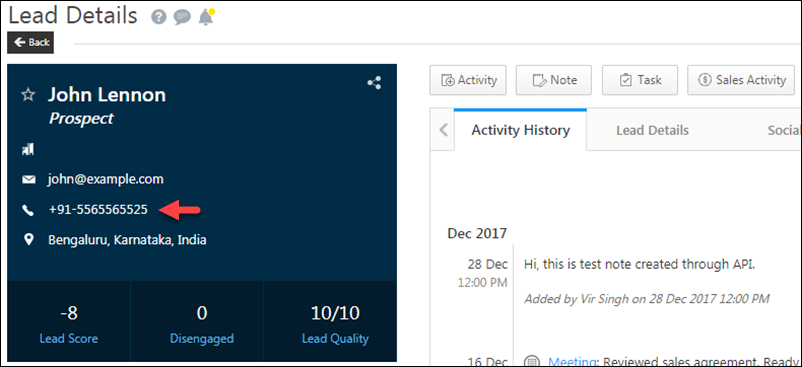
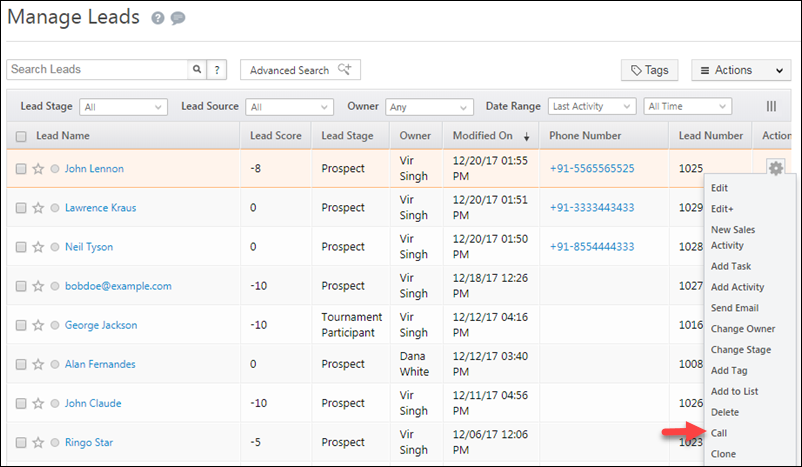
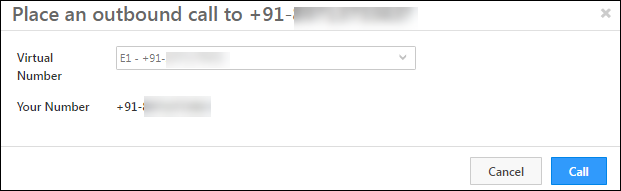
Once configured, you can make phone calls directly from the Lead Details page.
And the Manage Leads page.
Call Disposition
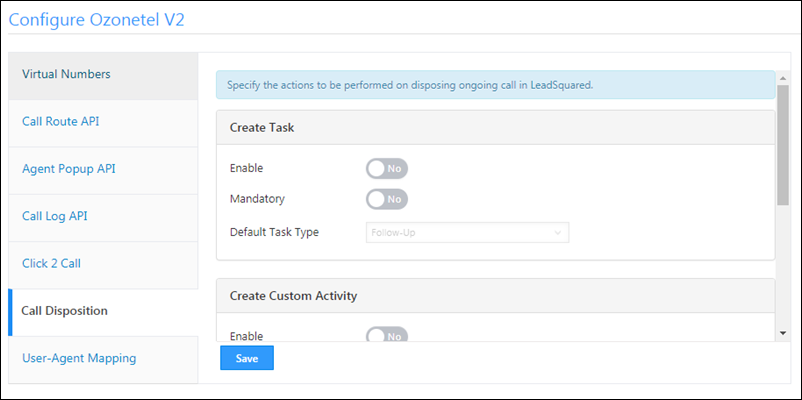
Set up your call disposition preferences here –
- Create Task: Automatically creates a task when a call is completed. You must also specify the default task type (meeting, follow-up, etc.).
- Create Custom Activity: Automatically creates a custom activity in LeadSquared. If you enable this option, you have to select a custom activity type.
- Lead Field Update: Automatically updates a lead field when a call is completed. You must specify the lead field to update.
User-Agent Mapping
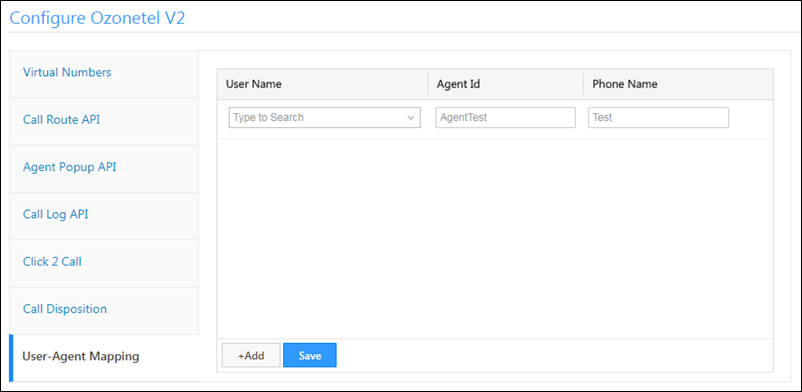
Here’s where you map your Ozonetel agents to LeadSquared users.
- In the User Name column, enter the name(s) of your LeadSquared users.
- In the Agent Id column, enter the Ozonetel Agent Id(s). You can find them on the Agents page under Configurations in your Ozonetel account.
- You can find the Phone Name on the Phone Numbers page under the Configurations tab in your Ozonetel account.
Lists & Automation Actions
You can trigger new actions in Lists and Automation after successfully configuring the Ozonetel v2 connector.
1. Send leads in a list to an outbound campaign from the Manage Lists page.
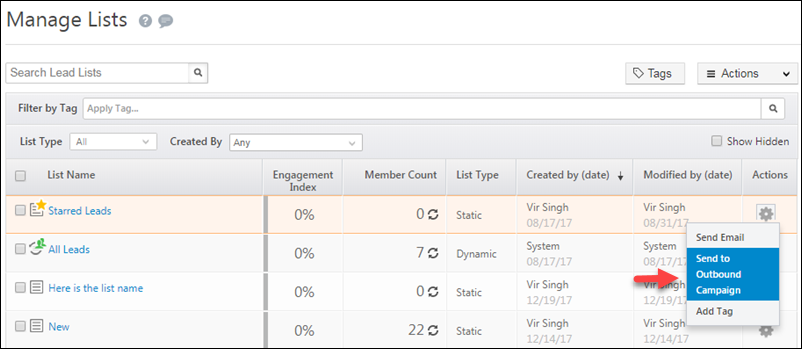
2. You can also ‘Send to Campaign’ as an automation action.

Mapping Virtual Numbers/Campaigns to Users
- For customers using the Ozonetel telephony connector, you can now assign campaigns/virtual number to individual agents. To do this –
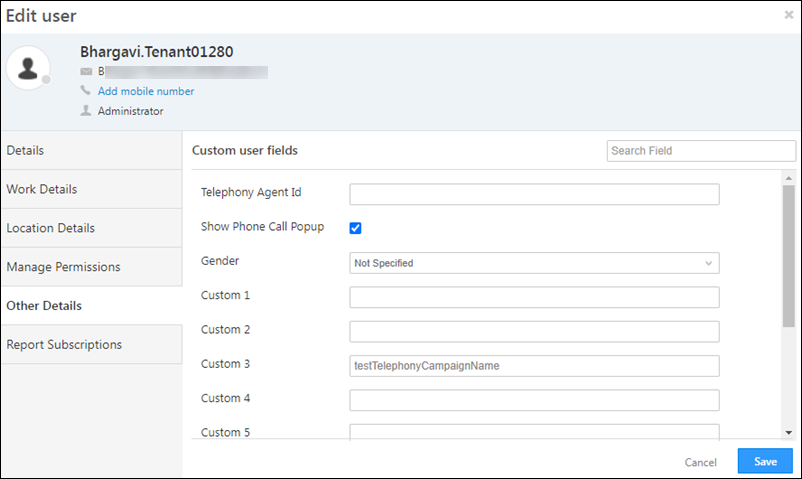
Step 1 – Store the Telephony Campaign name in a User Custom Field
- Navigate to My Profile>Settings>Users and Permissions>User Fields, and Edit the user you want to assign a campaign/virtual number to.
- Enter the campaign name in the custom user field. The campaign name is case-sensitive, therefore enter the campaign name as configured in the Ozonetel connector.
- Once you’re done, click Save.
Step 2 – Update the Connector Configuration
- Navigate to Apps>Apps Marketplace, and open the Ozonetel V2 connector configuration.
- Alternatively, if you are using the Universal Telephony Connector (UTC), then navigate to the Ozontel instance within the Universal Telephony Connector.
- In the virtual numbers tab, ensure the campaign names are listed correctly, alongside the virtual numbers.
iii. Then, navigate to the Click 2 Call tab, and enable the ![]() slider alongside Enable Virtual Number Filter, select the custom field you’ve created in the previous step, and click Save.
slider alongside Enable Virtual Number Filter, select the custom field you’ve created in the previous step, and click Save.
iv. Finally, when an agent places a phone call, only the virtual number/campaign mapped to the user will be available to place the phone call from.
Troubleshooting
Why is the agent panel not working?
The Ozonetel Agent panel is loaded in our iframe. If the login page is not being loaded please reach out to us at support@leadsquared.com. If the login page is loaded and you can’t log in, contact the Ozonetel team.
Integrate with Opportunities
You can integrate the Ozonetel v2 connector with LeadSquared Opportunities. To know how to do this, please refer to Opportunity Integrations in Telephony.
This will enable you to track phone call interactions with your leads, for each opportunity or potential deal. Completed calls will get posted as activities, against the respective opportunities, on the Opportunity Details page.
Any Questions?
Did you find this article helpful? Please let us know any feedback you may have in the comments section below. We’d love to hear from you and help you out!
Why Agents can’t view the virtual numbers after added the virtual number from admin side
Hi Remya,
Virtual Numbers are the part of ClickToCall configuration, so after adding Virtual Numbers, one should always re-save the Click2Call Config also to burst the active cache. Hope this helps!