


Get Started
Sales Suite
Field Ops
Marketing
Service CRM
Integrations & Apps
FloStack
Opportunity Integrations in Telephony
1. Feature Overview
The Opportunities feature can be used to manage your potential deals. Opportunities can now be integrated with the LeadSquared Generic Telephony Connector, Ozonetel v2 Connector and the Ameyo Connector.
Additionally, you can also integrate opportunities with the Universal Telephony Connector, by adding an instance of the LeadSquared Generic Telephony Connector or the Ozonetel v2 Connector. This will enable you to track phone call interactions with your leads, for each opportunity or potential deal. Once the call is completed, a call activity, with all the call details, is posted on the Opportunity Details page.
2. Prerequisites
- You must be the Administrator of your account.
- You must have opportunities enabled in your account. To enable opportunities in your account, please reach out to your account manager, or write to support@leadsquared.com.
- From the Advanced Configuration settings page, the Enable Opportunity – Telephony setting must be enabled. To know more, please refer to Organization Settings – Advanced Configuration.
- The Opportunity Telephony Mapping must be enabled on your account. To enable this setting, please reach out to your account manager, or write to support@leadsquared.com.
- You must have either the LeadSquared Generic Telephony Connector, the Ameyo Connector or the Ozonetel v2 Connector installed in your account.
3. How it Works
To integrate opportunities with your telephony providers –
- Map your telephony provider’s virtual number to opportunity types in your account.
- Configure the telephony connector in LeadSquared.
- Create an agent pop-up form to capture inbound/outbound call details.
Once steps 1-3 are completed successfully, your phone call activities will now be tracked against the relevant opportunity. The activities can be viewed on the Opportunity Details page.
4. Virtual Number Mapping
As part of this configuration, you must map your virtual numbers to specific opportunity types. Let’s understand this better with the example of a bank.
The bank offers credit cards, debit cards and loans, each of which is an opportunity type. In this scenario, one unique virtual number is mapped to each opportunity type. This helps keep track of phone calls related to each opportunity.
To map your virtual number to an opportunity type –
- From the main menu, navigate to My Profile>Settings>Opportunities>Telephony.
- On the Add Mapping pop-up –
- Against Virtual Number, enter the virtual number of your telephony service. This field is mandatory.
- If there’s an IVR number you want to list, then against IVR Number, enter the number.
- From the Opportunity Type dropdown, select the opportunity type to which you want to map the virtual number.
- Once you’re done, click Save. If you want to add more agents or add telephony to different opportunity types, then click Save and Add New.

5. Configuration
You can configure the opportunity integration in the LeadSquared Generic Telephony Connector and Ozontel v2 Connector. The following configuration steps are common for both the connectors –
- From the main menu, navigate to Apps>Apps Marketplace, and search for either the LeadSquared Generic Telephony Connector or the Ozonetel v2 Connector.
- Alternatively, you can find both the connectors on the left panel, under Telephony.
- Against the connector name, hover your cursor over the
 icon, and click Configure.
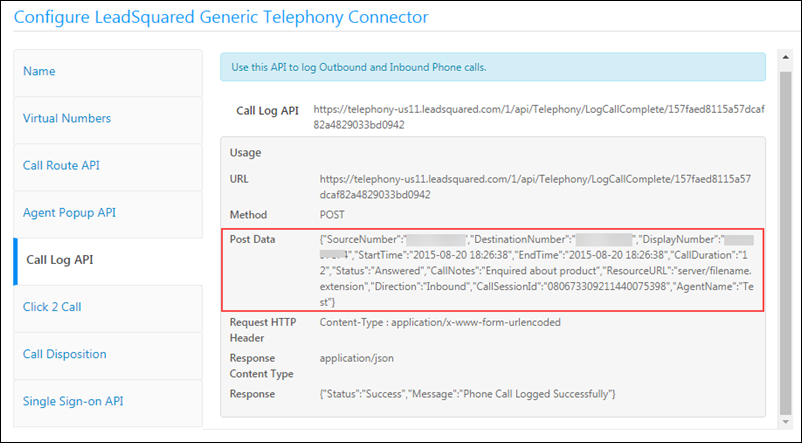
 - On the pop-up, click Call Route API, and copy the Opportunity Route API. For both the connectors, call this API to route calls directly to the opportunity owner.
- All the other steps remain the same, as detailed in the documentation links given above.

6. Share Opportunities via Agent Pop-up
When configuring the Telephony Agent pop-up, you may want to grant access to opportunity details to users that are not opportunity owners. This allows them to have the relevant information available on the pop-up while conversing with leads.
Navigate to Settings>Telephony Settings>Entity share via popup and click on Configure to Enable opportunity share via agent pop-up.
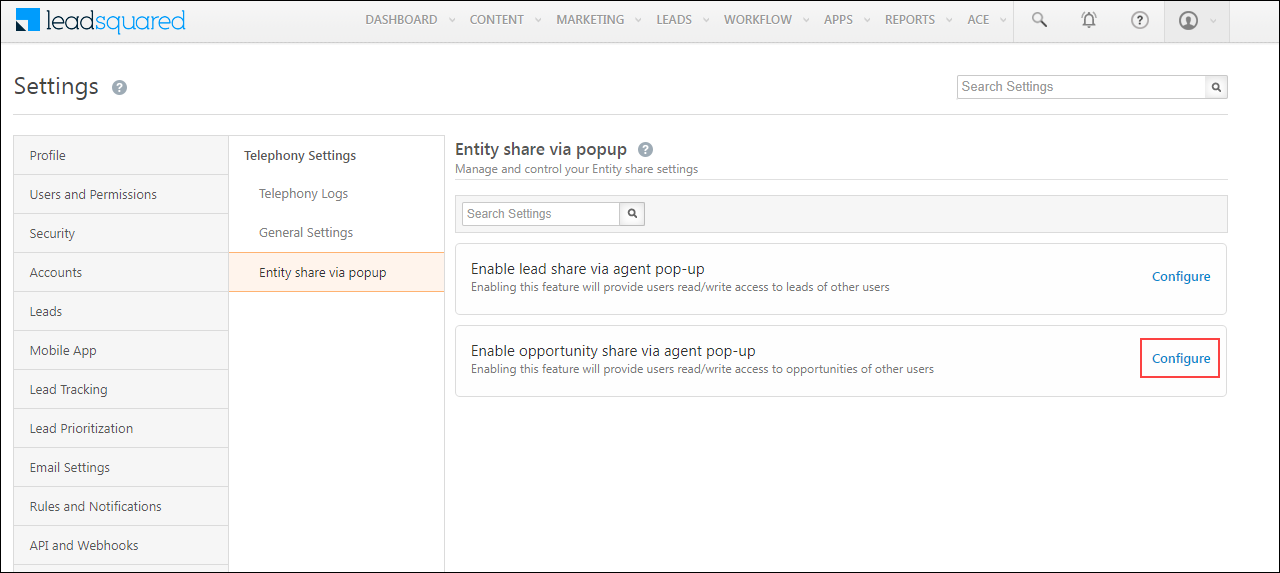
The configuration will have the following permission settings –
- Enable – Select to enable the configuration.
- Access Type – Define the access type for the configuration –
- View – Non-lead owners can only view the lead details.
- Modify – Non-lead owners can view and modify the lead details.
- Duration In Min – Specify the duration (in minutes) of lead share allowed while the agent is on the call.

7. Create Agent Pop-Up Form
Once you’ve configured the connector, you must create an agent pop-up form to enable users to capture opportunity details while on call with your leads. This will ensure that the call is mapped to the correct opportunity type, and all the relevant lead details are captured on the call. To do this, you’ll first have to create a form, then, create and publish a process, to integrate the form with the agent pop-up for incoming and outgoing calls.
7.1 Create Form
- From the main menu, navigate to Workflow>Manage Forms, and click Create Form.
- On the Create Form pop-up, under Choose the type of fields to use, you must select Opportunity Fields.
- You can also select other fields, but the Opportunity Fields are mandatory.
- Then, from the Select Opportunity dropdown, select the opportunity type for which you’re creating the form.
- Now add the opportunity fields you want to capture using the agent pop-up during your phone calls.
- On the form designer, ensure that all the relevant opportunity fields (such as Associated Lead, Opporrtunity Name, Owner, Status and Stage) are present in the form. For the subsequent steps on creating the form, please refer to How to Create a Form.
- Once you’re done, click Publish.
7.2 Create a Process
- From the main menu, navigate to Workflow>Process Designer, and click Create Process.
- On the Where do you want to start the process pop-up, select At Specific Work Area.
- On the Choose starting point pop-up, click Others. Under Available Work Areas>Telephony>Agent Popup, you must select Inbound Phone Call and Outbound Phone Call by clicking the
 . Once you’re done, click Save.
 - Then, click
 . From under Actions, click Show Form.
 - On the Show Form, from the Select Form dropdown, select the form that was created in the previous step. To complete the rest of the process, please refer to How to Create a Process.
- Once you’re done, click Publish.
8. Capture Phone Calls Details
Once the agent pop-up form is published, you can now capture inbound and outbound call details on the form.
8.1 Outbound Phone Calls
To place an outbound call, and capture details –
- From the main menu, navigate to Leads>Manage Opportunities>Opportunity Type.
- On the Manage Opportunities page, under Enquiry, click on the desired opportunity.
- On the Opportunity Details page, under Related Lead, click the lead’s phone number.
- On the Confirm pop-up, click Ok. This will open the agent pop-up. Fill in the necessary details here.
- Once you’re done, on the pop-up, click Save.

Alternative Implementation
If you prefer to not use the pop-up form, you can alternatively pass the opportunityTelephonyMappingId code in the Click 2 Call URL, and then pass the value for this parameter in the Call Log API, to ensure the call is logged. To do this –
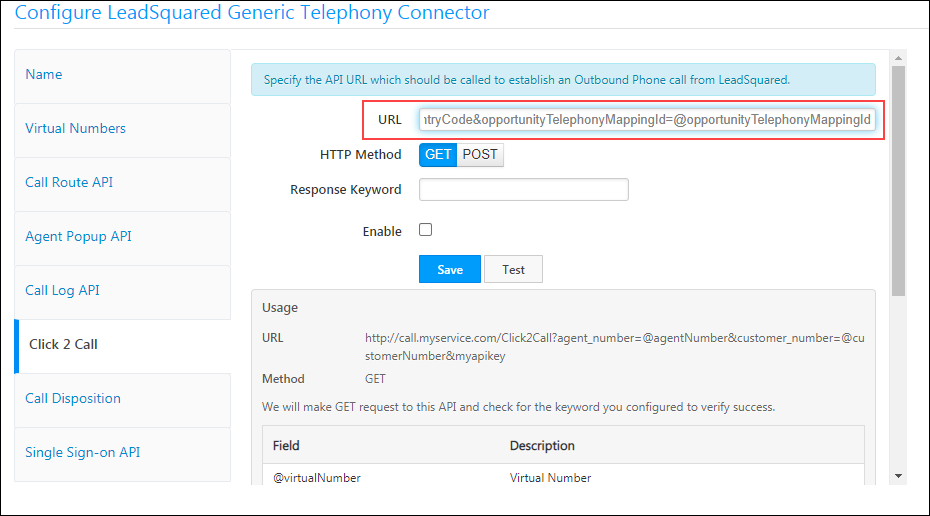
- On the configuration screen of a connector (on which the pop-up form is not configured), open the Click 2 Call tab.
- In the URL field, at the end of the existing URL, add the following parameter –
&opportunityTelephonyMappingId=@opportunityTelephonyMappingId. This will mailmerge the opportunity telephony mapping Id when the Click 2 Call API is being called. - Once you’re done, click Save.
iv. Next, pass the @opportunityTelephonyMappingId (received from the Click 2 Call API) as a key-value pair in the post-body of the Call Log API.
The outbound calls will now be logged automatically.
opportunityTelephonyMappingId, you can now directly use the OpportunityId in the Click2Call URL and in the post data of the Call Log API. This allows the activity to be posted directly on the respective opportunity.8.2 Inbound Phone Call
An inbound call will trigger the agent pop-up on any page within LeadSquared. On the agent pop-up, fill in the necessary details, and then click Save.
9. Telephony Logs
To view the telephony logs of all the opportunity related calls in your account, navigate to My Profile>Settings>Opportunities>Telephony.

10. Points to Note
- You must place a call to an opportunity from the Opportunity Details page in order for the phone call activities to be posted against the opportunity. If a call is placed to the related lead from the Lead Details page, then the opportunity details will not get captured, and the phone call activity will be posted against the lead.
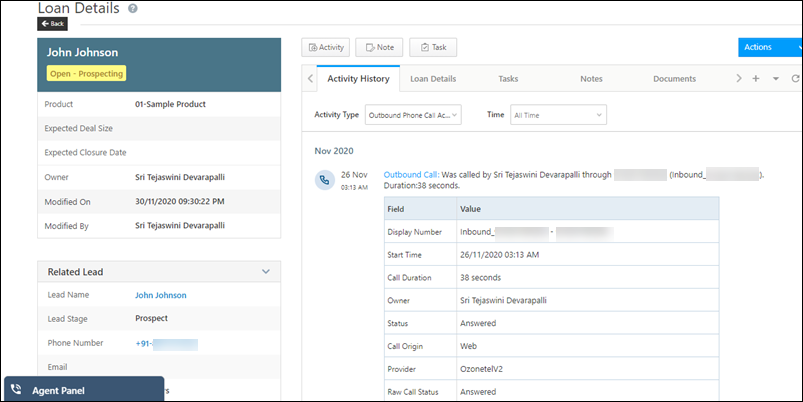
Once the call is complete, you can view the phone call activity on the Opportunity Details page.
- If an agent doesn’t select an opportunity type from the agent pop-up, then information collected on the call is posted only on the lead, and not the opportunity.
Any Questions?
Did you find this article helpful? Please let us know any feedback you may have in the comments section below. We’d love to hear from you and help you out!
why i am not able to see Opportunity route api in the telephony connector?
Hi. If Opportunities are enabled on your account, but you can’t see the opportunity routing API on your telephony connector, contact your account manager or write to support@leadsquared.com.