


Get Started
Sales Suite
Field Ops
Marketing
Service CRM
Integrations & Apps
FloStack
Property Listing UAE Connector
1. Feature Overview
Add your property details in LeadSquared (through Mavis DB) and sync data across various Dubai-based listing platforms, including Property Finder, Bayut, and Dubizzle. This simplifies managing and distributing your property advertisements, ensuring maximum exposure and up-to-date information across these platforms. The benefits of using this connector include –
- Centralized Listing Management – Input your listing details in one place, and sync it seamlessly across all the listing platforms you choose.
- Effortless XML Feed Generation – Generate XML sync feeds with a single click for your listing’s partners, streamlining the process and ensuring compatibility with various platforms.
- Customizable SmartView – Enhance the visualization of your listing data by creating multiple SmartViews. Tailor these views to your preferences for an efficient and organized experience.
- Collaboration Capabilities – Collaborate with others by inviting team members and partners. You can also restrict specific actions to maintain control over changes made to your listings.
- Quick Filtering – Utilize quick filters for easy searching of specific listing details, making it simple to find the information you need.
- Image Viewing Made Simple – Conveniently view property images attached to your listings.
Sales Users can view, add, and update property listing details through Smart Views. Changes made will sync and reflect on property listing platforms. Once the listings are live, you can capture potential customers as leads in your LeadSquared account, monitor their activities, and convert them to customers (which is purchasing/leasing/renting the property in this case) directly from your LeadSquared account.
2. Prerequisites
- You must be the Administrator of your LeadSquared account to install and configure this connector.
- This is a paid connector. To enable it, reach out to your account manager, or write to support@leadsquared.com.
3. How it Works
- Install the Property Listing UAE connector.
- During the configuration, a Mavis Table (with pre-defined schemas) is automatically created. Check and verify the table schema. If required, you may also add property listings in this step.
- Integrate the generated XML feed with the property listing platforms. This initiates the sync process.
- Create a Smart View for your Sales Users and integrate it with the Mavis Table. This allows users to add their property listings to LeadSquared and sync them across property listing platforms.
This improves collaboration among your users and enables you to control the actions your collaborators can perform.
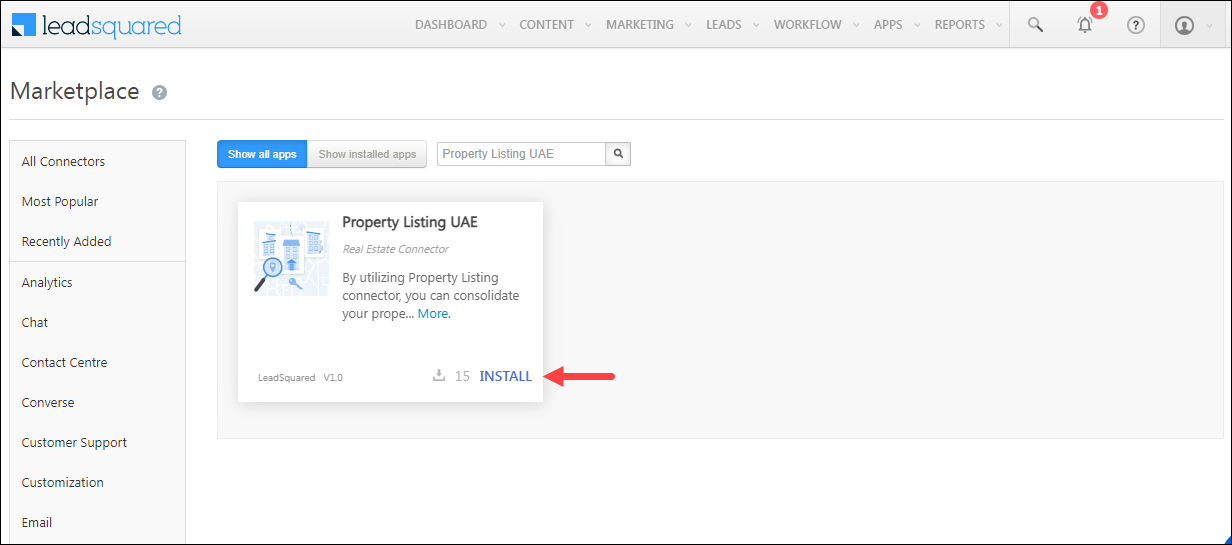
4. Install the Connector
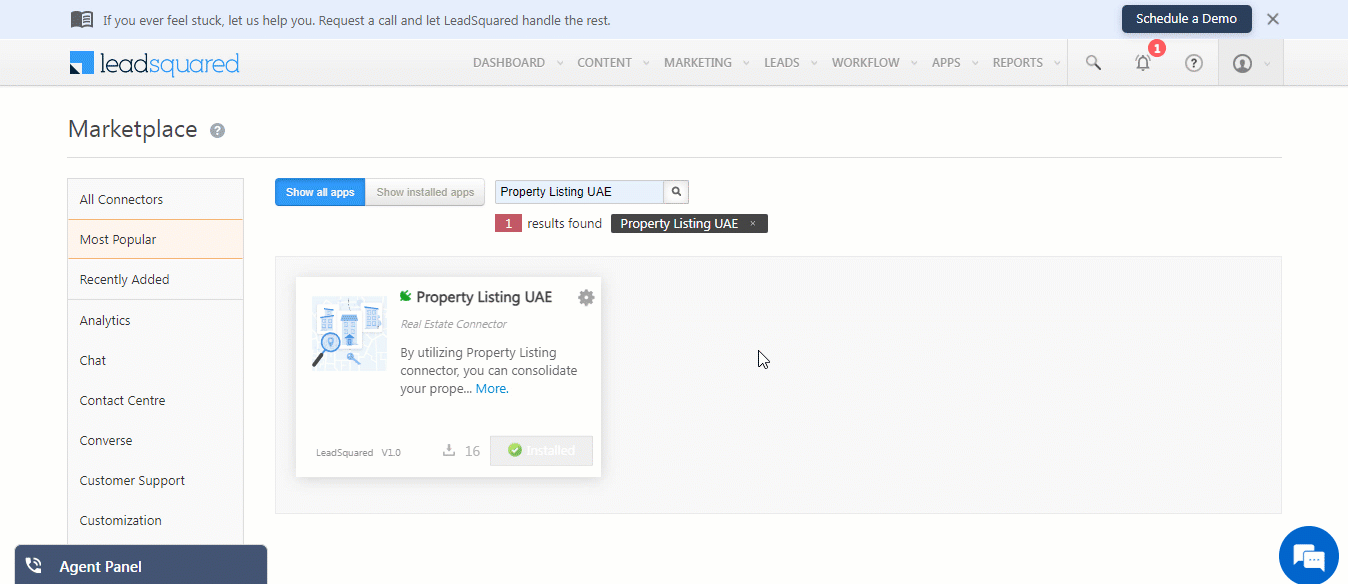
- Navigate to Apps>Apps Marketplace.
- Search for Property Listing UAE, and click Install.
- Alternatively, you can find the connector on the left panel, under Real Estate.
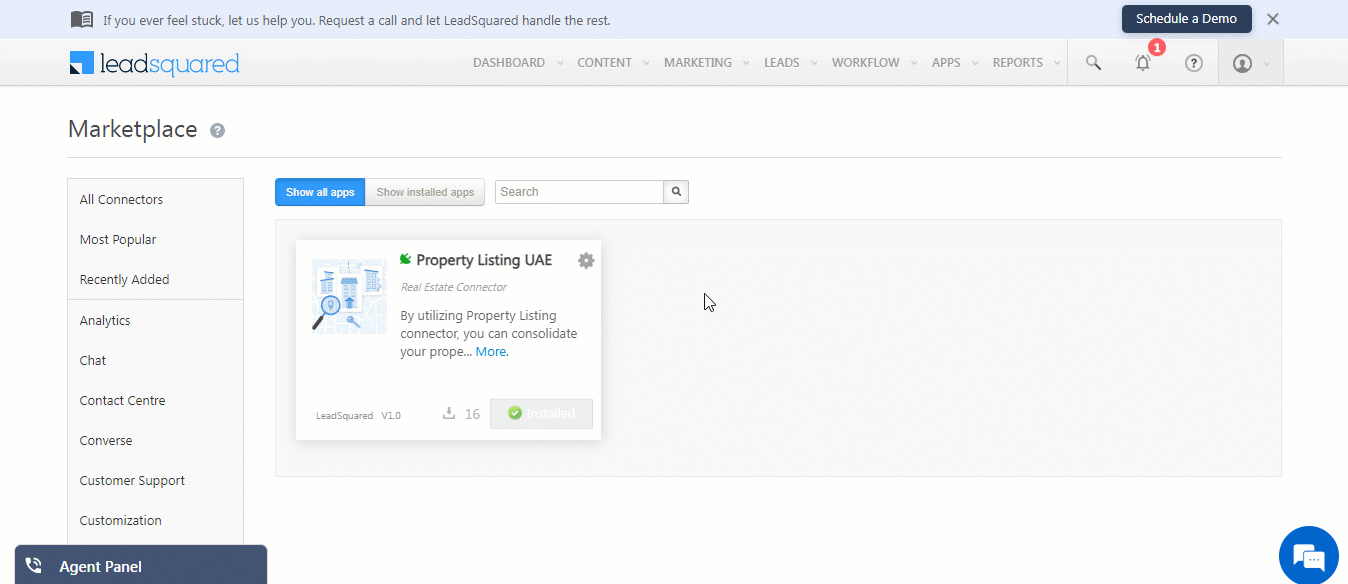
5. Configure the Connector
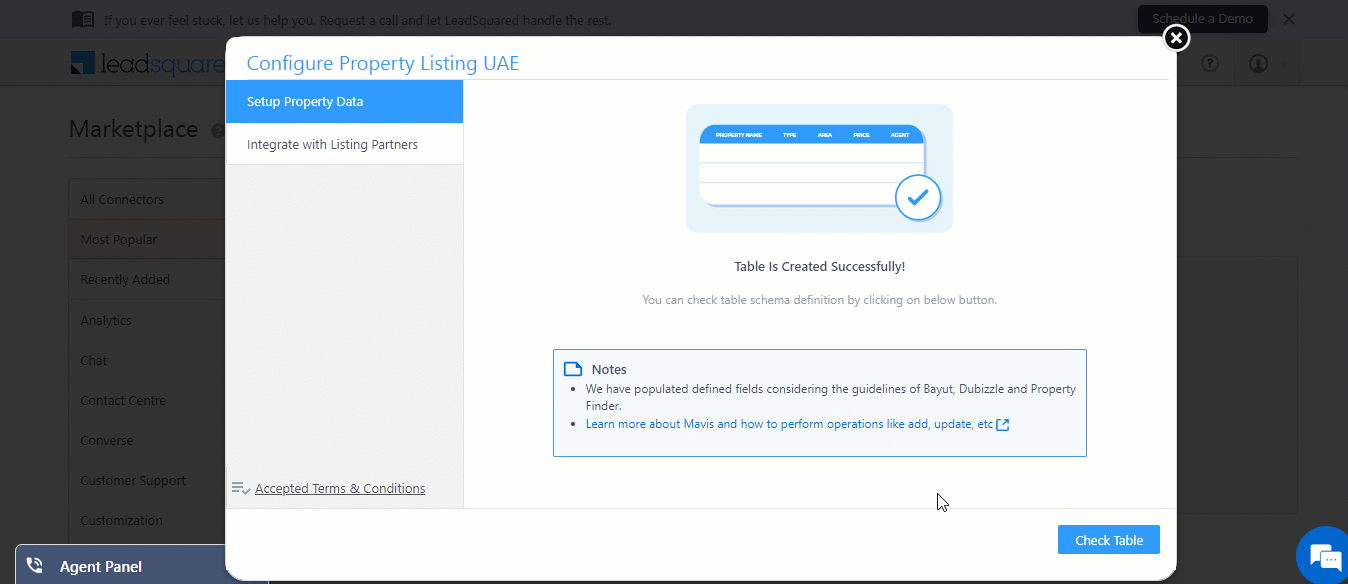
Once the connector is installed, hover your cursor over ![]() , click Configure. On the Configure Property Listing UAE screen, carefully read the Terms & Conditions, and click Accept. This is mandatory.
, click Configure. On the Configure Property Listing UAE screen, carefully read the Terms & Conditions, and click Accept. This is mandatory.
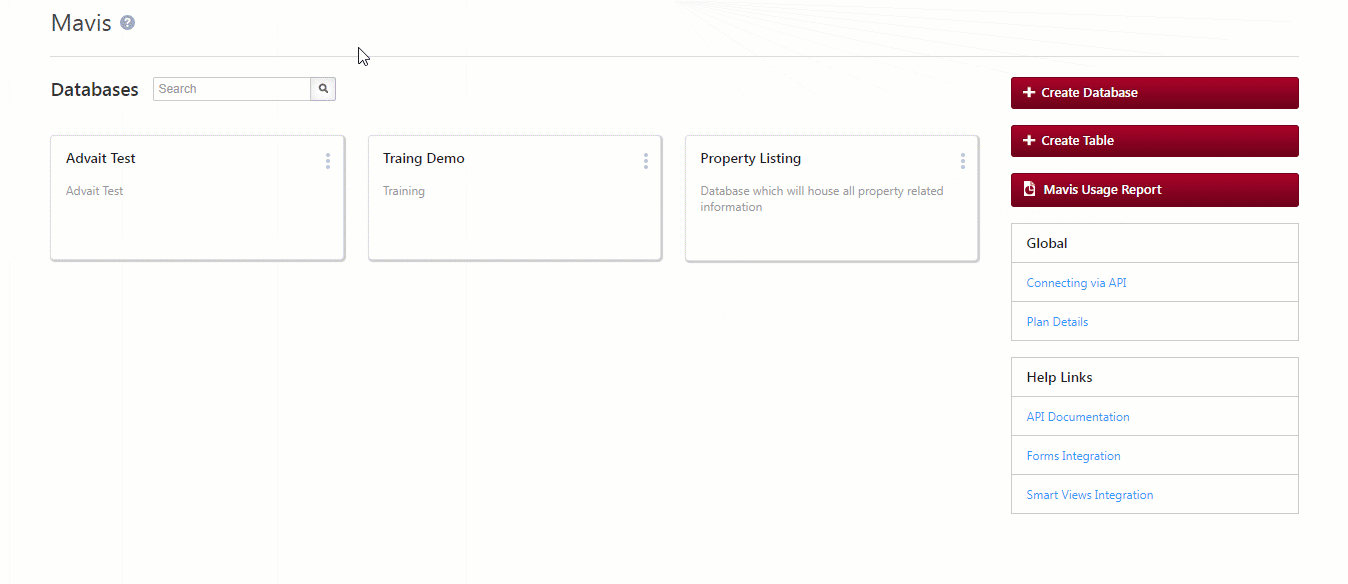
On the Setup Property Data screen, enter the Mavis x-api-key. After you’ve entered the key, click Create Table. A Mavis Table, containing all the fields required by Bayut, Dubizzle and Property Finder is automatically created.
Note:
- To obtain the Mavis x-api-key, refer to Mavis – Connecting via APIs.
- To know how to perform actions (like Add, Update, etc.) on a Mavis table, refer to Manage Data.
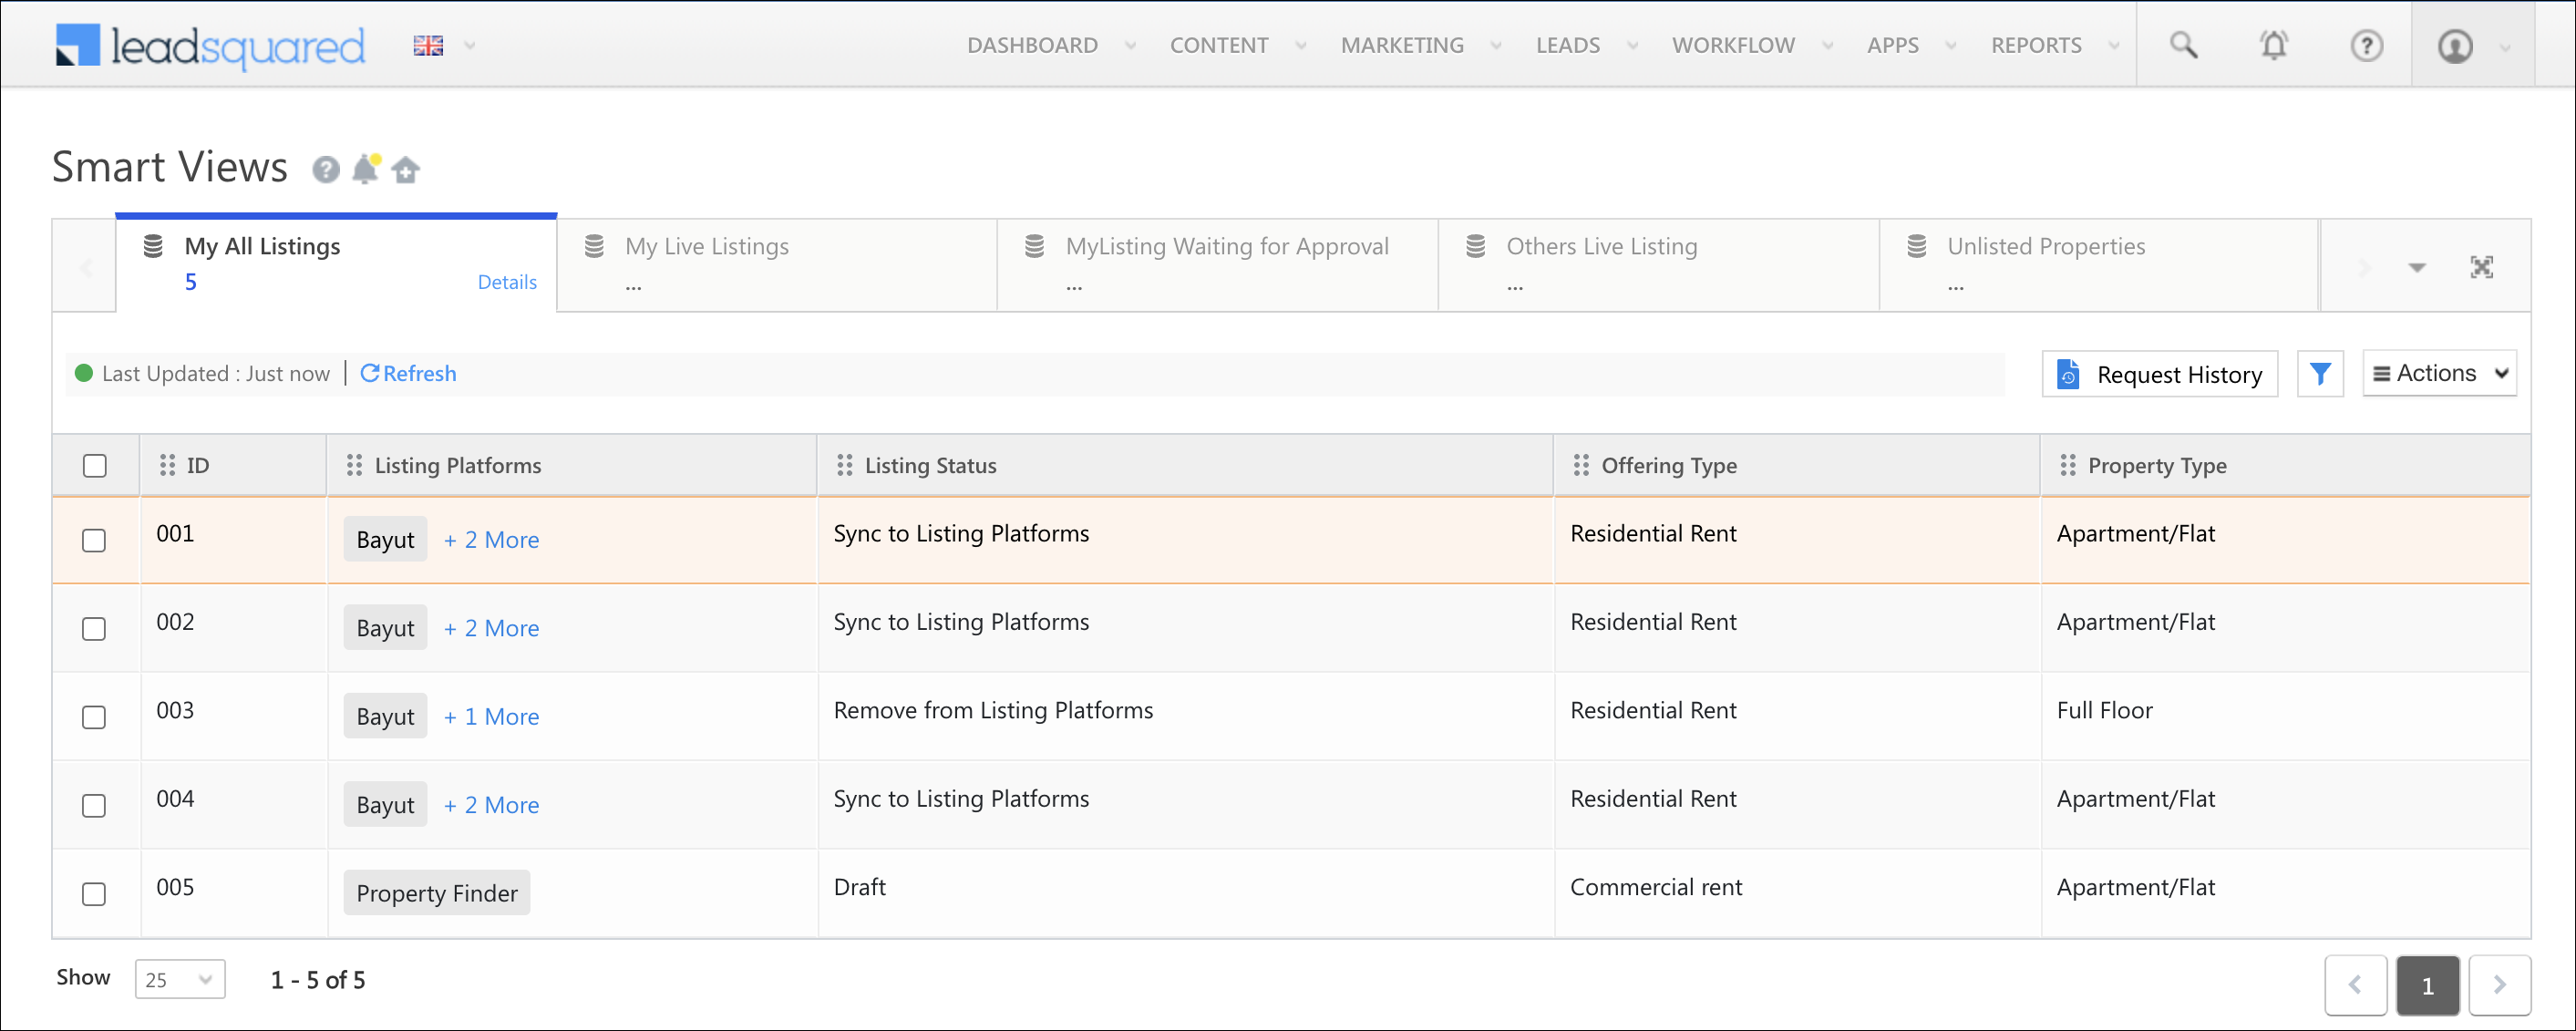
6. Manage Listing Details in Mavis Table
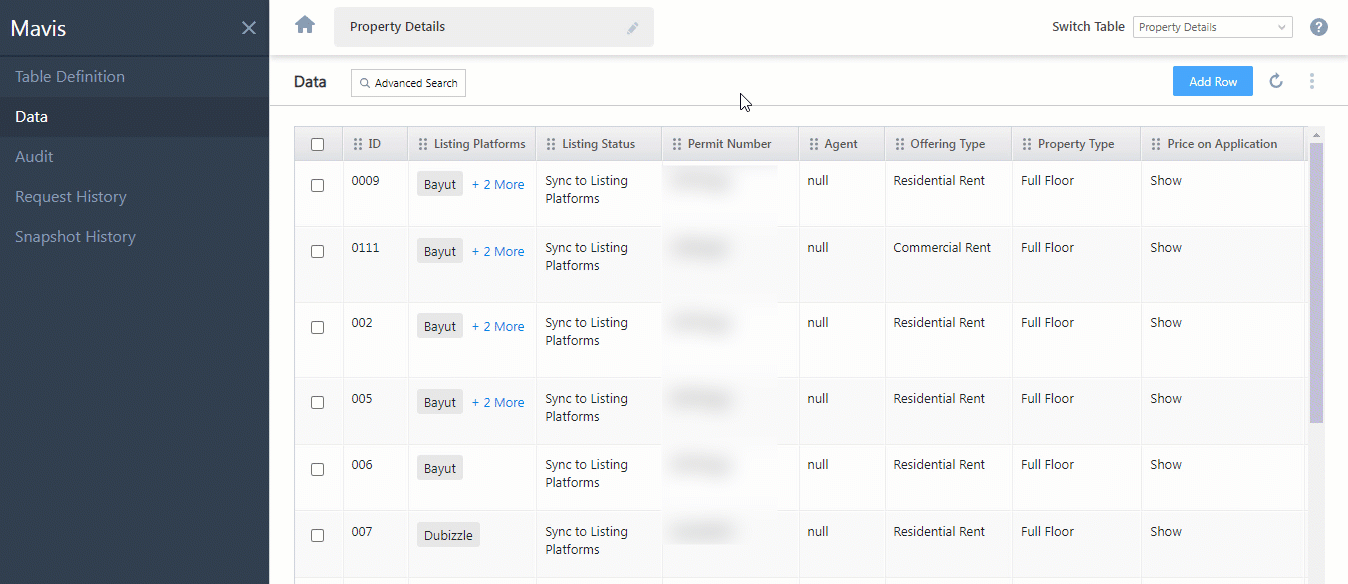
Once the table is created, to configure it, click Check Table. Alternatively, you can navigate to Apps>Mavis>Property Listing>Property Details>Data.
The columns and schema are predefined to align with Property Finder, Bayut, and Dubizzle guidelines. To add listing data, go to the Mavis Data screen and click Add Row.
The mandatory table fields are –
- ID – A unique listing ID that can be used to identify a property listing.
- Listing Platforms – The real-estate platforms on which you want to list the property details. You can choose all three* platforms.
- Listing Status – The following listing statuses are available –
- Draft – The listing details will not be synced with the selected platforms.
- Send for Approval – When the listing is sent to an internal employee (within your organization) for approval.
- Sync to Listing Platforms – Select this when the listing details are ready to be synced with the property listing platforms. The details will not get synced until you select this option.
- Remove from Listing Platforms – Select this option to remove existing listing details from a platform.
- Permit Number – The DLD permit number provided by the Government of Dubai.
- Offering Type – Select the relevant property type for the property you’re listing.
- Agent – The LeadSquared user handling the property.
In addition to the required fields, you can optionally fill in additional information such as Price in AED, City, Floor Size in sqft, Video Tour URL, etc.
Note:
- *If you want to list the property on any UAE-based platforms besides Property Finder, Bayut, and Dubizzle, contact your account manager, or write to support@leadsquared.com
- If you choose to add a video URL under View 360, this video must be pre-approved by your listing platform.
7. Integrate with Listing Partners
Once the Mavis table is populated with the property listing data, to sync it with the real-estate listing partners of your choice –
- Navigate back to Apps>Apps Marketplace, and search for Property Listing UAE.
- Hover your cursor over
 , click Configure, and on the Configure Property Listing UAE pop-up, click Integrate with Listing Partners.
 - Copy the Sync URL, and pass it on to your account manager on the listing platform side. They’ll configure it in their accounts.
- Once they give you a confirmation that the URL is configured, in your LeadSquared account, under Actions, enable the
 slider. This will begin syncing the property data between your LeadSquared and listing partner’s accounts.
Note:
- Data from your Leadsquared account will sync with the listing partner every 15 minutes.
- Use Bayut’s Sync URL on Bahut and Dubizzle. Given that Bayut is the parent organization for both, the same URL will function for both platforms.
8. Create Smart Views
Now create a Smart View integrated with Mavis. This enables Sales Users to view and add their property listings.
We’re creating an example Smart View that allows the logged-in Sales User to see properties assigned to them that are live on the listing platform, with the permission to only Add and Update Rows –
- Navigate to My Profile>Settings>Leads>Views>Smart Views.
- Click
 , enter a name for the Smart View, and click Create Tabs.
 - Choose Type as Mavis and enter a Name and Description.
- Click the Select Condition link.
- Select Property Listing as the database.
- Select Property Details as the table within the database.
- Add filter conditions to filter the data from the table. For example, you can filter the view to display live properties assigned to the logged-in users:
- Column Name – Created By | Operator – Equals | Value – Logged in User
- Column Name – Listing Status | Operator – Equals | Value – Sync to Listing Platforms
- For more information on filter conditions, see filter conditions.
- Click Add to add more filter conditions. You can add up to 20 filter conditions by default. To increase this limit, reach out to your account manager or support@leadsquared.com.
- For multiple filter conditions, select whether you want All Criteria (and) or Any Criteria (or) to apply.
- Click Save.
- Verify the filter conditions, then click Save.
- To add Actions, click Configure. We’re enabling the users to –
- Add Rows
- Export Rows
- Once you’re done, click Save.
Any Questions?
Did you find this article helpful? Let us know your thoughts in the comments section below.