A trigger is the starting point of an automation. Users can enter the automation based on 3 triggers –
- On a Specific Date
- Start of a Workday
- End of a Workday

On a Specific Date
Use this trigger to initiate your automation on a specific date.
It works best for sending greetings on special occasions like birthdays, joining dates, anniversaries etc.
Note: You have to create these dates (birthdays, joining dates, etc.) as custom fields of type date-time for your users if you want to use this trigger. For more information, see Manage User Custom Fields.
Example Use Case
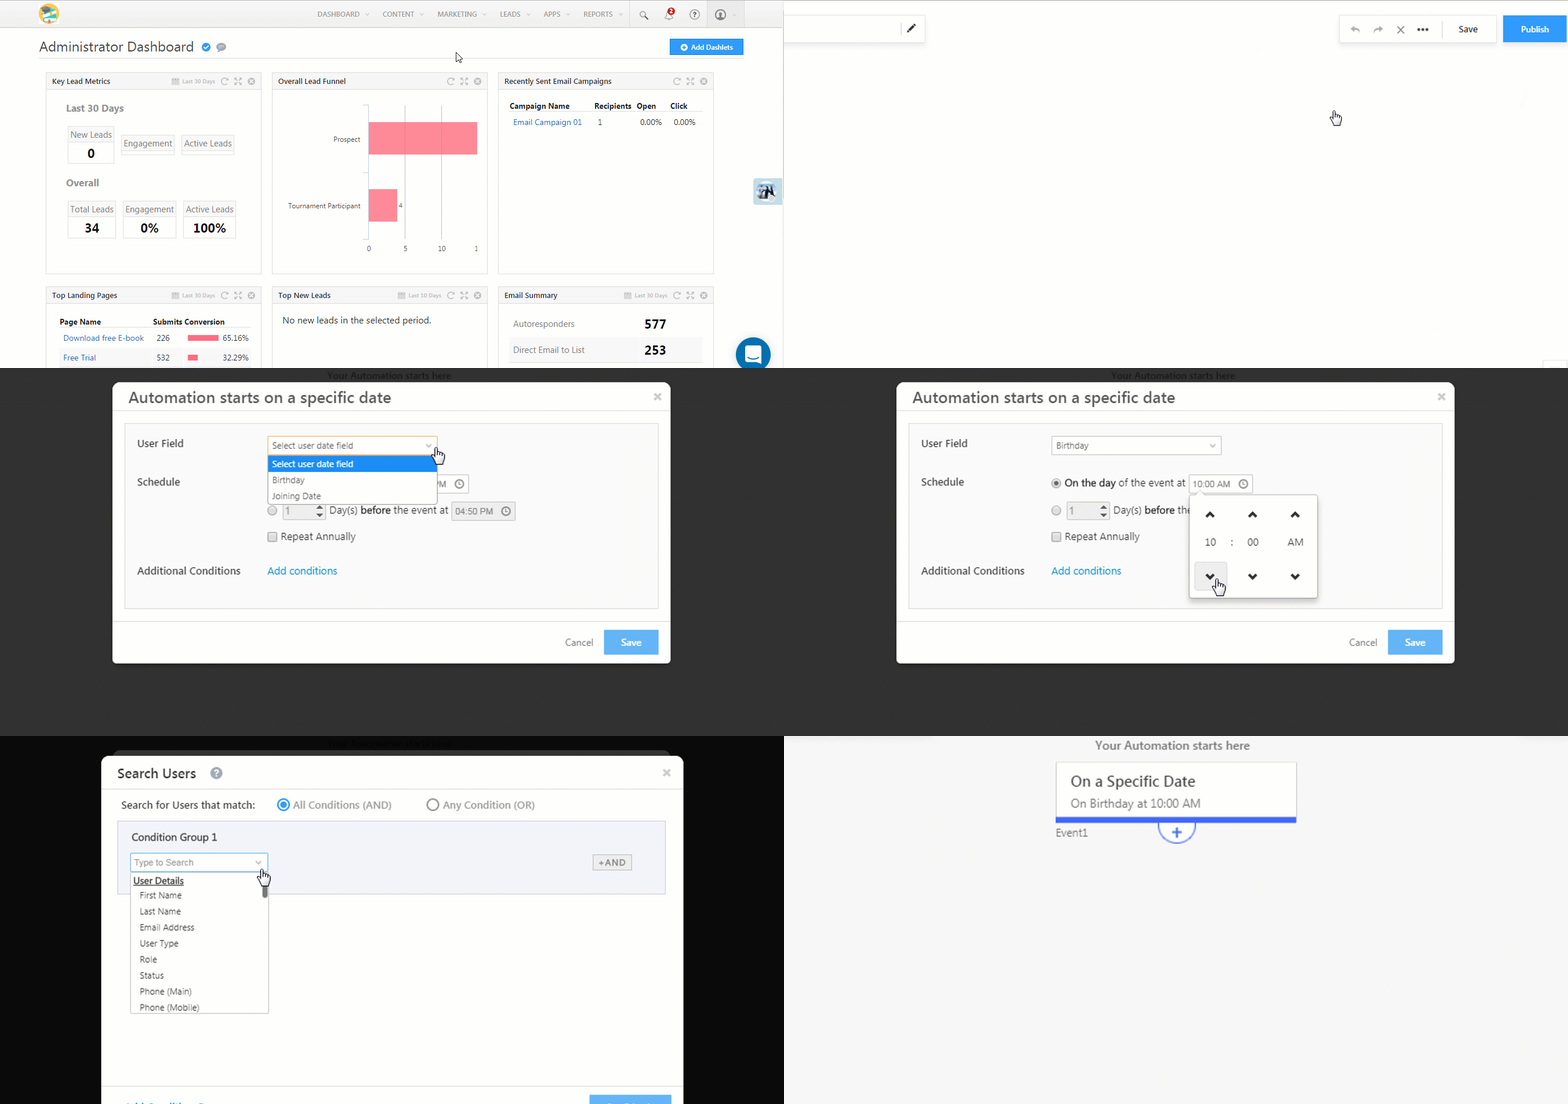
Let’s say you want to send a warm greeting to all your users on their birthdays. Here’s how you do it –
- From the main menu, navigate to Marketing>Automation and click the Create Automation button.
- On the Choose a Template pop-up, select the Build From Scratch option.
- Select the On a Specific Date trigger.
- In the User Field drop-down, select Birthday. You have to create ‘Birthday’ as a custom field of type date-time from the Manage User Custom Fields page.
- You can Schedule the automation to trigger on the day of the event at a particular time, a number of days before the event and also repeat the trigger annually (great for birthdays).
- Use the Additional Conditions link if you want to set more conditions, like setting the Is Working Today field to True for instance. In that case, your message won’t be sent to users who are on leave.
- Click Save when you’re done.
Once your trigger is set up, use the Notify User action to set up the birthday email. For more information on actions, see

Start of a Workday
You can trigger an automation at the start of each workday.
This works best for automatically checking-in your users at the start of their shifts.
Note: This trigger works according to the Workday Templates you define. If you’re unfamiliar with the auto check-in/check-out features, see LeadSquared Teams. The article introduces you to the teams feature and links to the workday templates, holiday calendar and leave tracker features that give you a complete attendance and leave management solution for your users.
Example Use Case
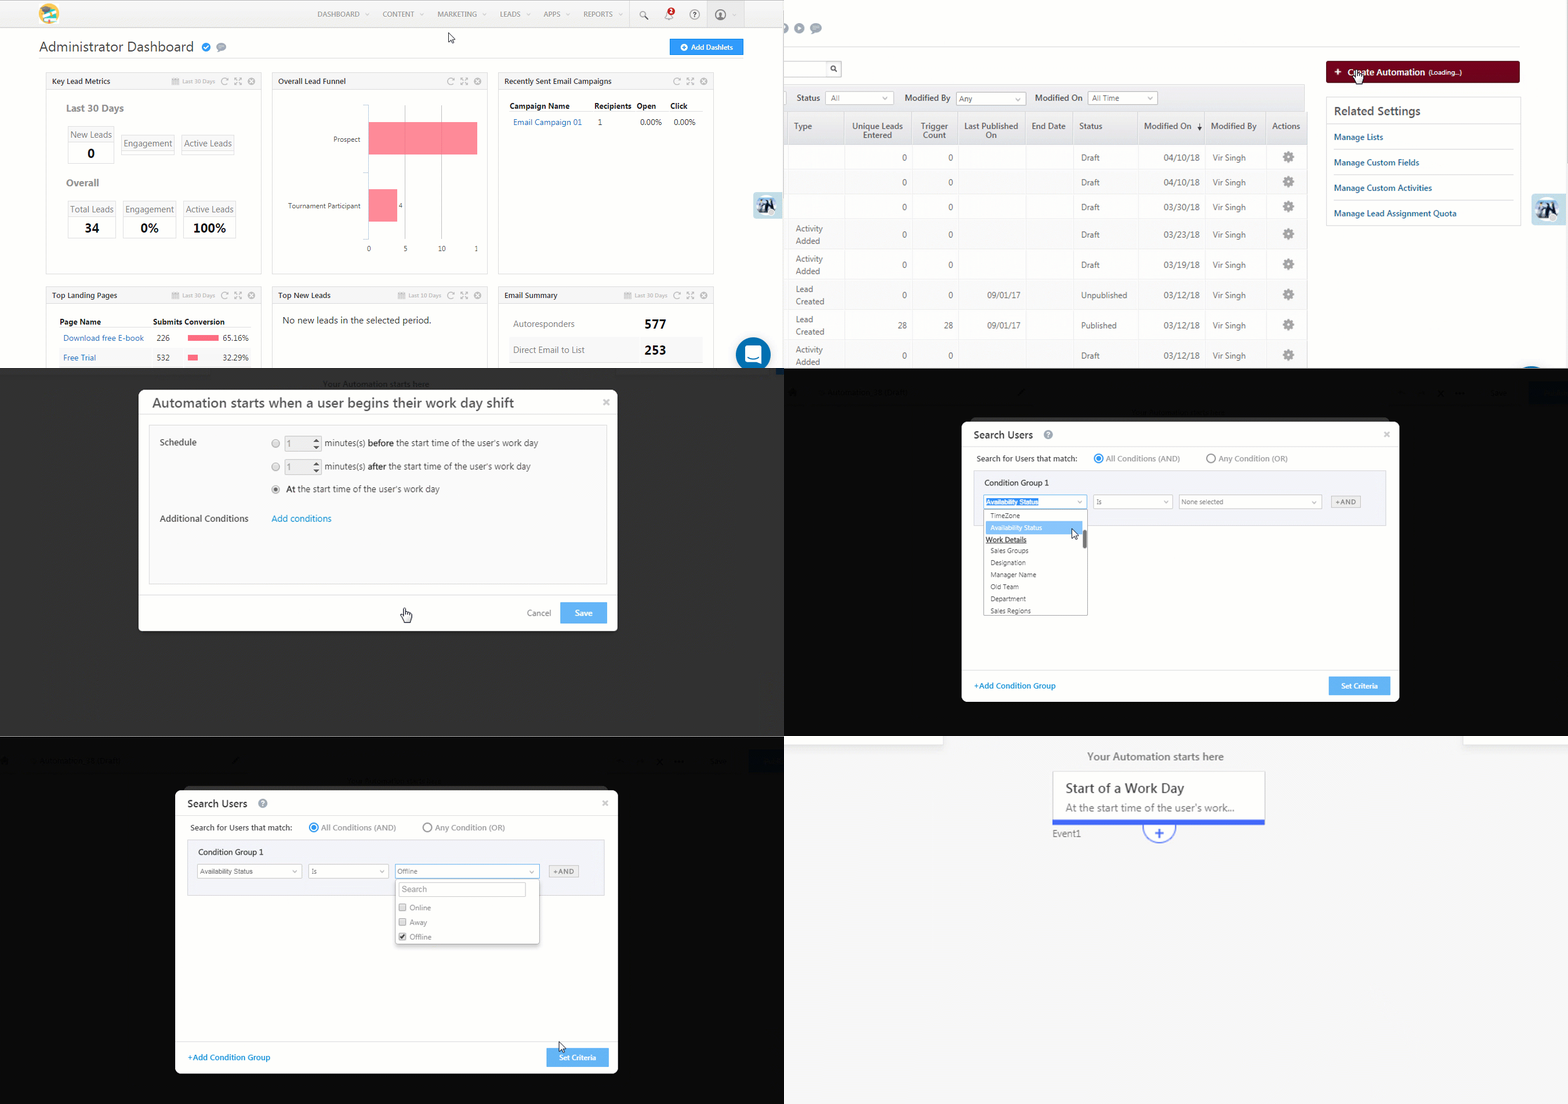
Let’s assume you want to automatically check-in your users at the start of a workday (we’re assuming you’ve already set up a workday template). Follow these steps –
- From the main menu, navigate to Marketing>Automation and click the Create Automation button.
- On the Choose a Template pop-up, select the Build From Scratch option.
- Select the Start of a Workday trigger.
- You can choose to Schedule the automation to trigger minutes before or after the start of the workday, or at the exact start time of the workday. This is helpful if, for example, you want to send users a reminder to check-in if they’re available earlier than their regular shift timing.
- Use the Additional Conditions link if you want to set more conditions. For example, you can set a condition to only check-in users who are offline. In this way, you’ll avoid attempting to check-in users who’ve already checked themselves in manually. To do this, set the Availability Status field to Offline.
- Click Save.

End of a Workday
You can trigger an automation at the end of each workday.
This works best for automatically checking-out your users at the end of their shifts.
Note: This trigger works according to the Workday Templates you define. If you’re unfamiliar with the auto check-in/check-out features, see LeadSquared Teams. The article introduces you to the teams feature and links to the workday templates, holiday calendar and leave tracker features that give you a complete attendance and leave management solution for your users.
Example Use Case
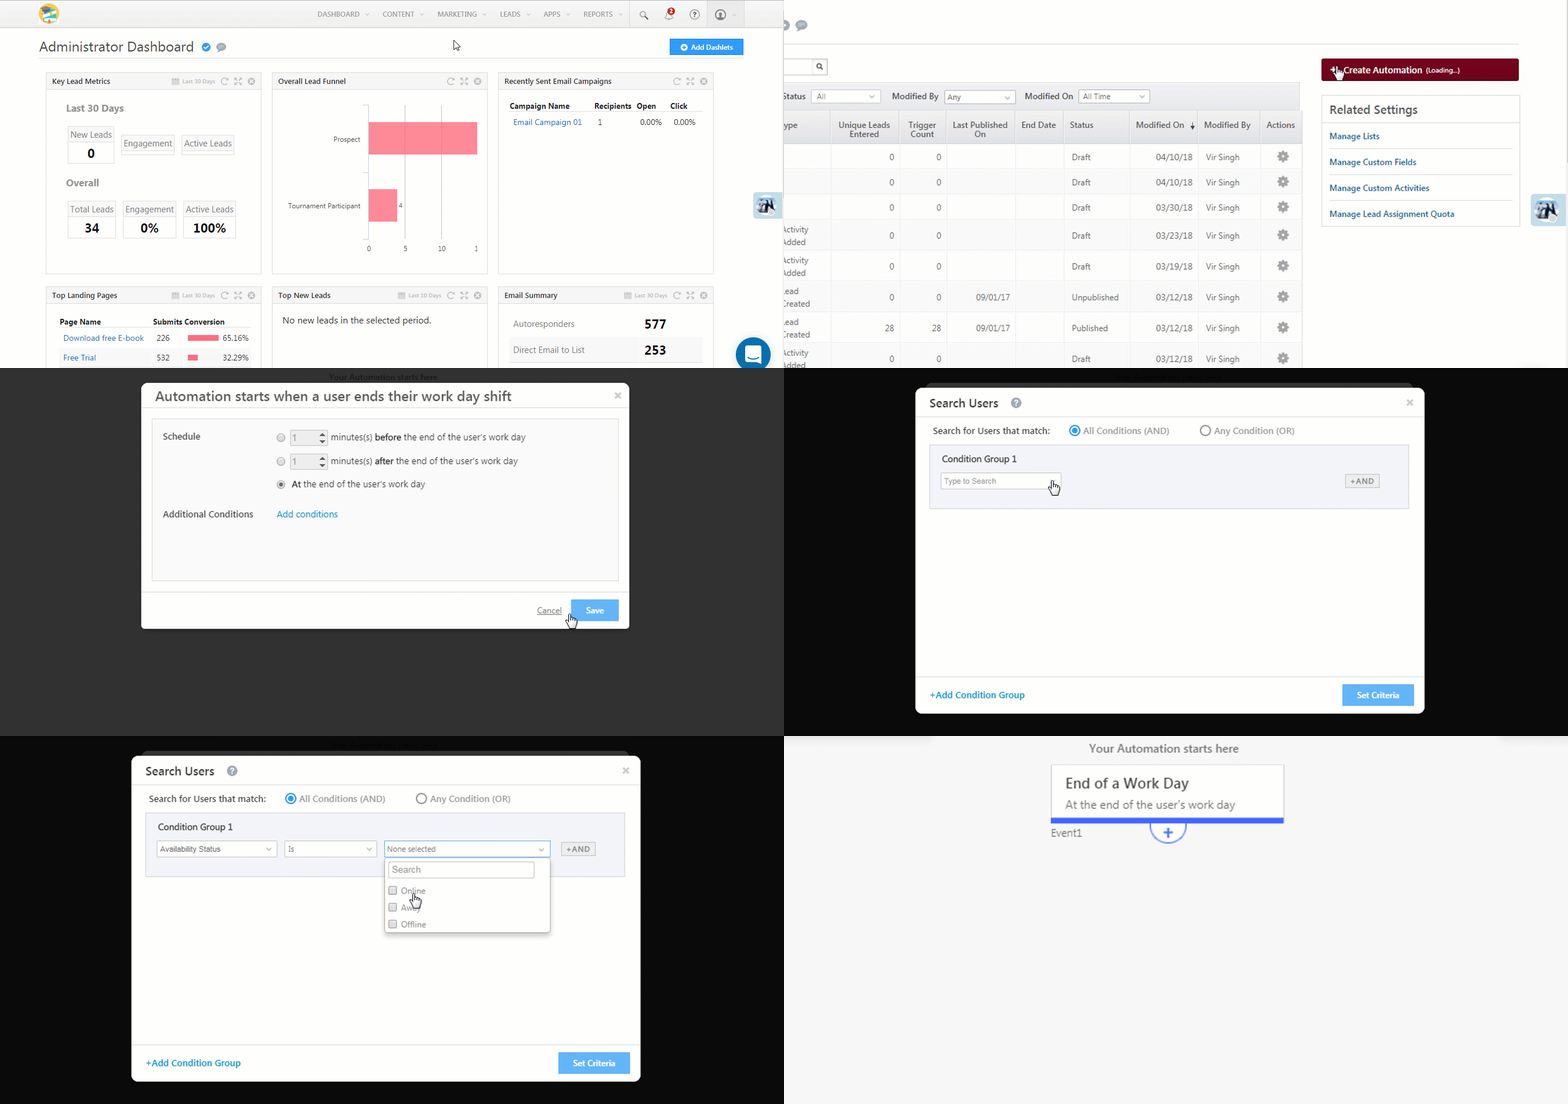
Let’s assume you want to automatically check-out your users at the end of a workday (we’re assuming you’ve already set up a workday template). Here’s what you have to do –
- From the main menu, navigate to Marketing>Automation and click the Create Automation button.
- On the Choose a Template pop-up, select the Build From Scratch option.
- Select the End of a Workday trigger.
- You can choose to Schedule the automation to trigger minutes before or after the end of the workday, or at the end time of the workday. This is helpful if, for instance, you want to send users a reminder to check-out before the workday is over.
- Use the Additional Conditions link if you want to set more conditions. For example, you can set a condition to only check-in users who are Online and Away. In this way, you’ll avoid attempting to check-in users who’ve already checked themselves in manually. To do this, set the Availability Status field to Online and Away.
- Click Save.


