1. Feature Overview
When you create users, there are a number of system fields available (such as first name, last name, etc.) to store their information. You can also create custom user fields (like their work anniversaries, gender, marital status, etc.). You can choose the data types you want the fields to accept and customize them according to your preferences.
You can also setup automations on the basis of some of these fields. To know more, see How to Create a User Automation.
2. Prerequisites
You must be an Admin user to create and edit user fields. If you require more than the available number of custom fields, please write to support@leadsquared.com.
3. Create Custom Fields
To create a custom user field –
- Navigate to Settings>Users and Permissions>User Fields.
- Click Create.
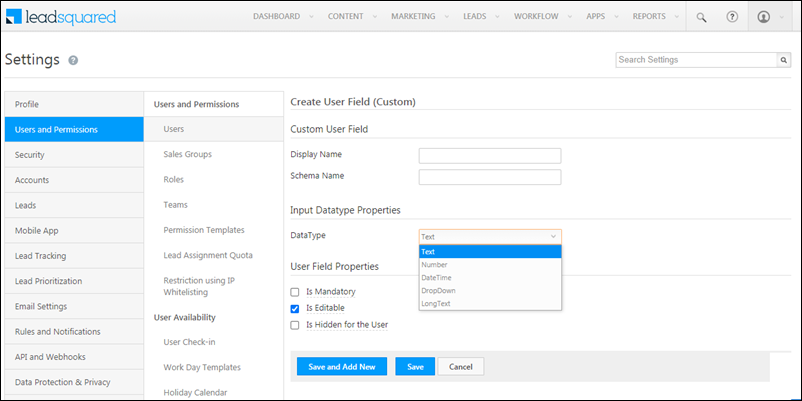
- On the Create User Field (Custom) form, enter relevant details in the following properties –
| Property | Description |
| Enter the display name (eg, “Birthday”, “Work Anniversary”, etc.) of the field that’s being created. | |
| Enter the schema name of the field. Only alphanumeric characters and underscores are allowed. | |
| DataType | The data type of the field. The following are the data types available, along with their limits –
|
| Is Mandatory | To make this field mandatory for your users to fill in, enable the checkbox. |
| Is Editable | To allow your users to edit this field on the My Profile page, after they’ve submitted the details, enable the checkbox. |
| Is Hidden for the User | To hide this field for the user on the My Profile page, enable this checkbox. |
Once you’re done, click Save. You can now enter the details of each custom field while creating or editing a user from the Manage Users page. For more information, see Manage Users.

3. Edit Custom User Fields
To edit a custom user field –
- Navigate to Settings>Users and Permissions>User Fields.
- Against the field you want to edit, hover your cursor over the
 icon, and click Edit.
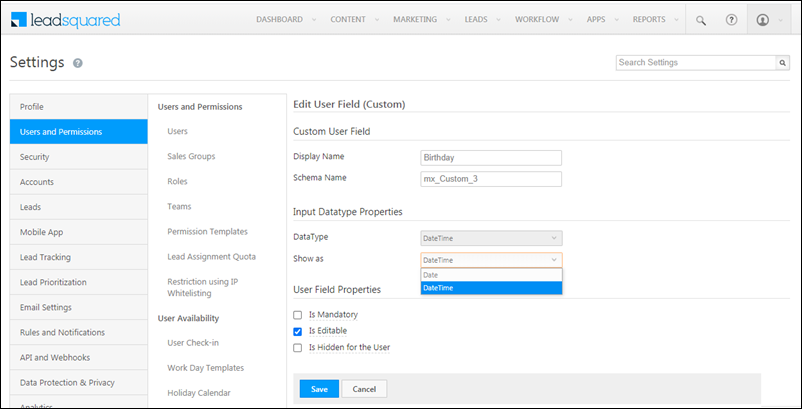
 - On the Edit User Field (Custom) form, you can edit the following fields –
| Property | Description |
| Edit the display name (eg, “Birthday”, “Work Anniversary”, etc.) of the field that’s being created. | |
| Edit the schema name of the field. Only alphanumeric characters and underscores are allowed. | |
| Show As | This option will show up only for a DateType field. You can choose how the field is displayed, either as a ‘Date’ field or a ‘DateType’ field. |
| Is Mandatory | To make this field mandatory for your users to fill in, enable the checkbox. |
| Is Editable | To allow your users to edit this field on the My Profile page, after they’ve submitted the details, enable the checkbox. |
| Is Hidden for the User | To hide this field for the user on the My Profile page, enable this checkbox. |
Once you’re done, click Save.

Populate Custom Fields for Users
Once you’ve created and configured custom user fields in your account, you can populate them with data for each user.
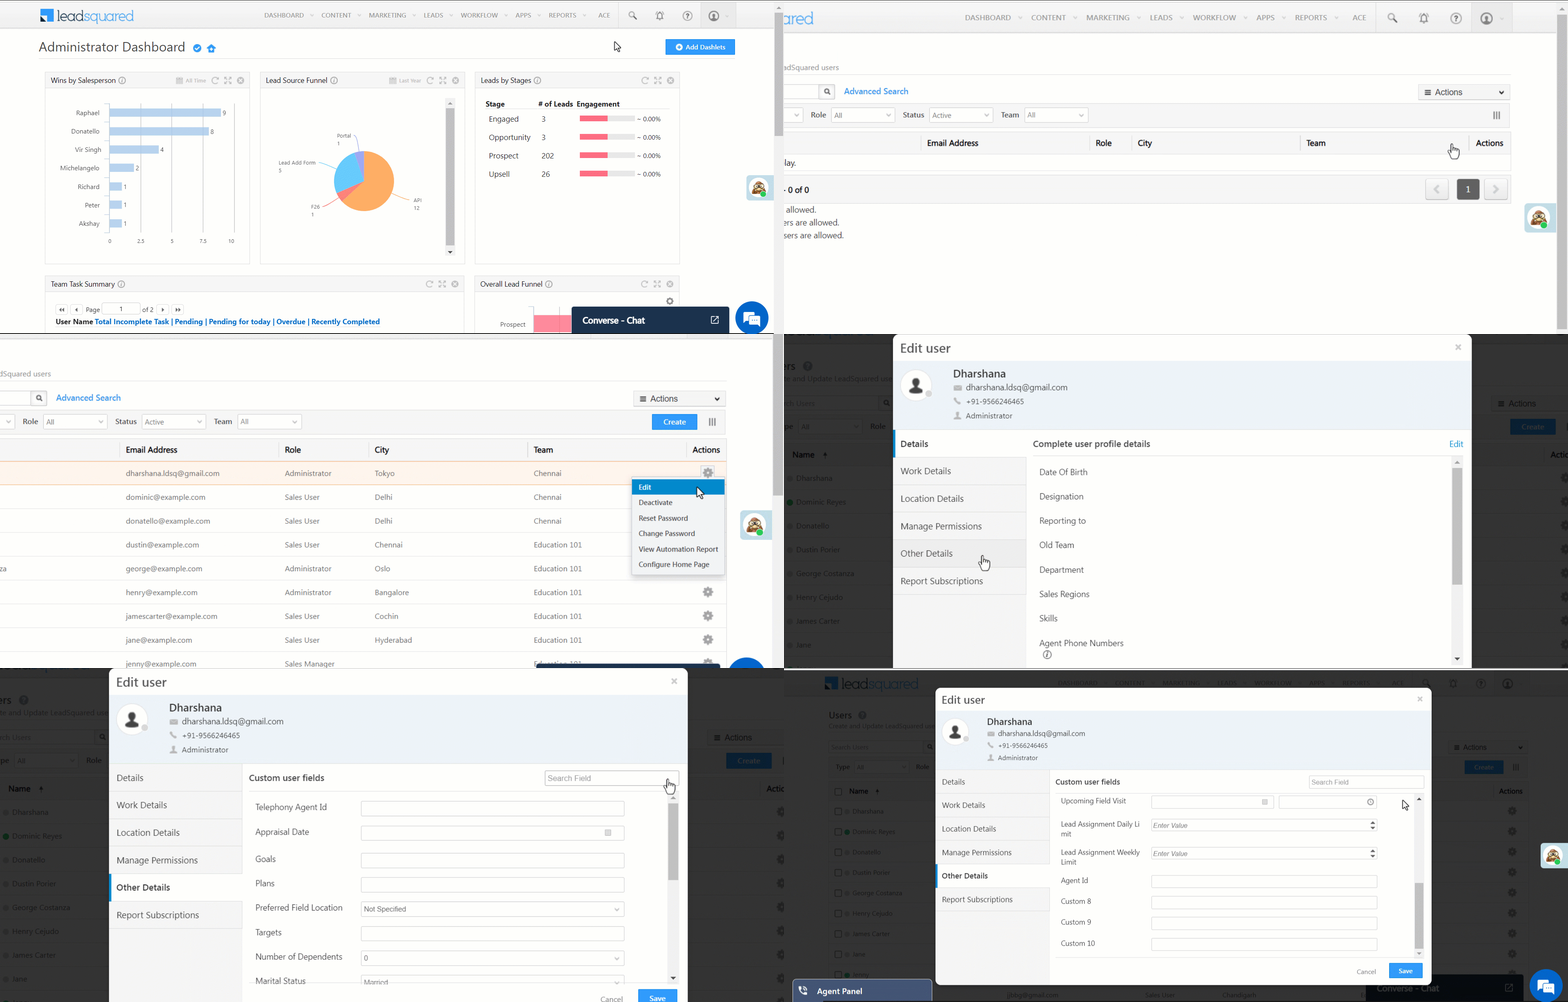
- Navigate to the Manage Users page.
- When creating or editing a user, click the Other Details tab.
- All the custom fields are available here. Click Edit to populate them with values.

Any Questions?
Have any questions you’d like to voice? Or any experiences with this feature you’d like to share? Please feel free to start a discussion in the comments section.


