


Get Started
Sales Suite
Field Ops
Marketing
Service CRM
Integrations & Apps
FloStack
Send SMS and WhatsApp Messages on Tickets – For Agents
Updated
10 Jun 2025 | 01:28 PM
1. Feature Overview
In addition to the automatic SMS and WhatsApp notifications sent based on events, you can manually send messages from the Ticket Details page. If you have access to LeadSquared Automations, you can also configure automations to send SMS and WhatsApp messages when triggered.
Note:
- This article is for agents and explains how to send direct messages to customers. If you’re an admin looking to configure this feature, refer to Email, SMS, and WhatsApp Notifications Configuration for Admins.
- You can only send SMS and WhatsApp message templates when responding to your customers.
2. Prerequisites
- The SMS Connector and/or the WhatsApp Business Connector needs to be configured on your account.
- The SMS and/or WhatsApp templates need to be configured on your account by your admin.
- For SMS templates, refer to DLT-approved templates.
- For WhatsApp templates, refer to WhatsApp-approved templates.
- LeadSquared Automations is a paid feature. To enable it on your account, contact your account manager, or write to support@leadsquared.com.
3. Send Direct SMS and WhatsApp Messages
Once you log in to Service CRM (https://marvin-in21.leadsquared.com/service-cloud), to send direct messages –
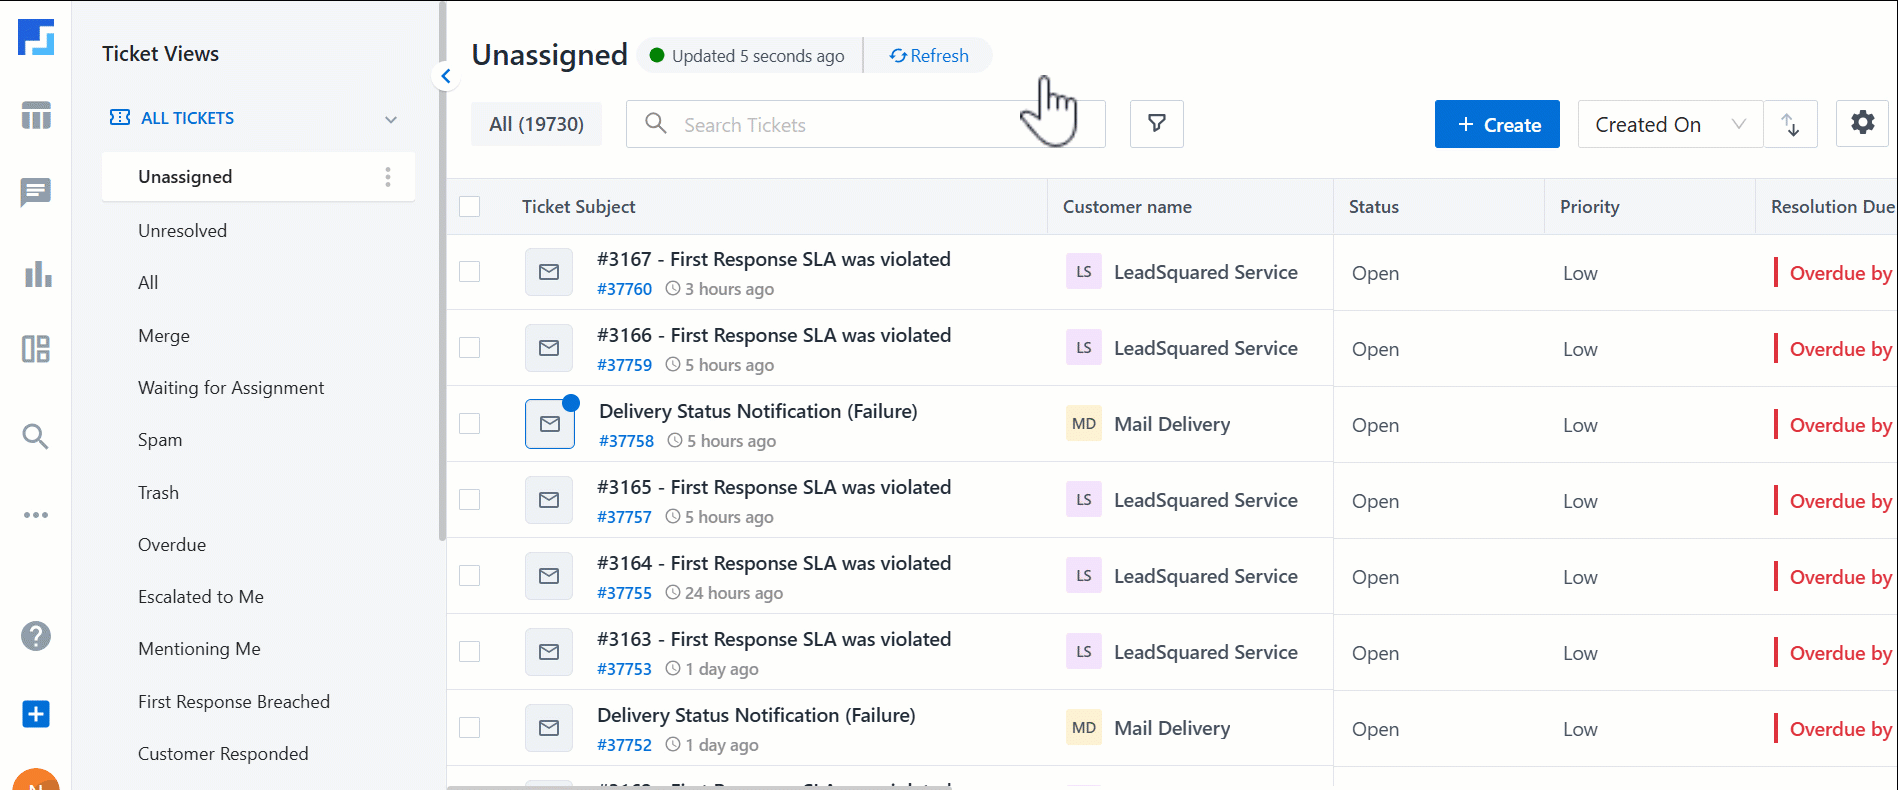
- On the left panel, click Tickets
 .
. - On the All Tickets page, select the ticket tagged to the customer you want to reply to.
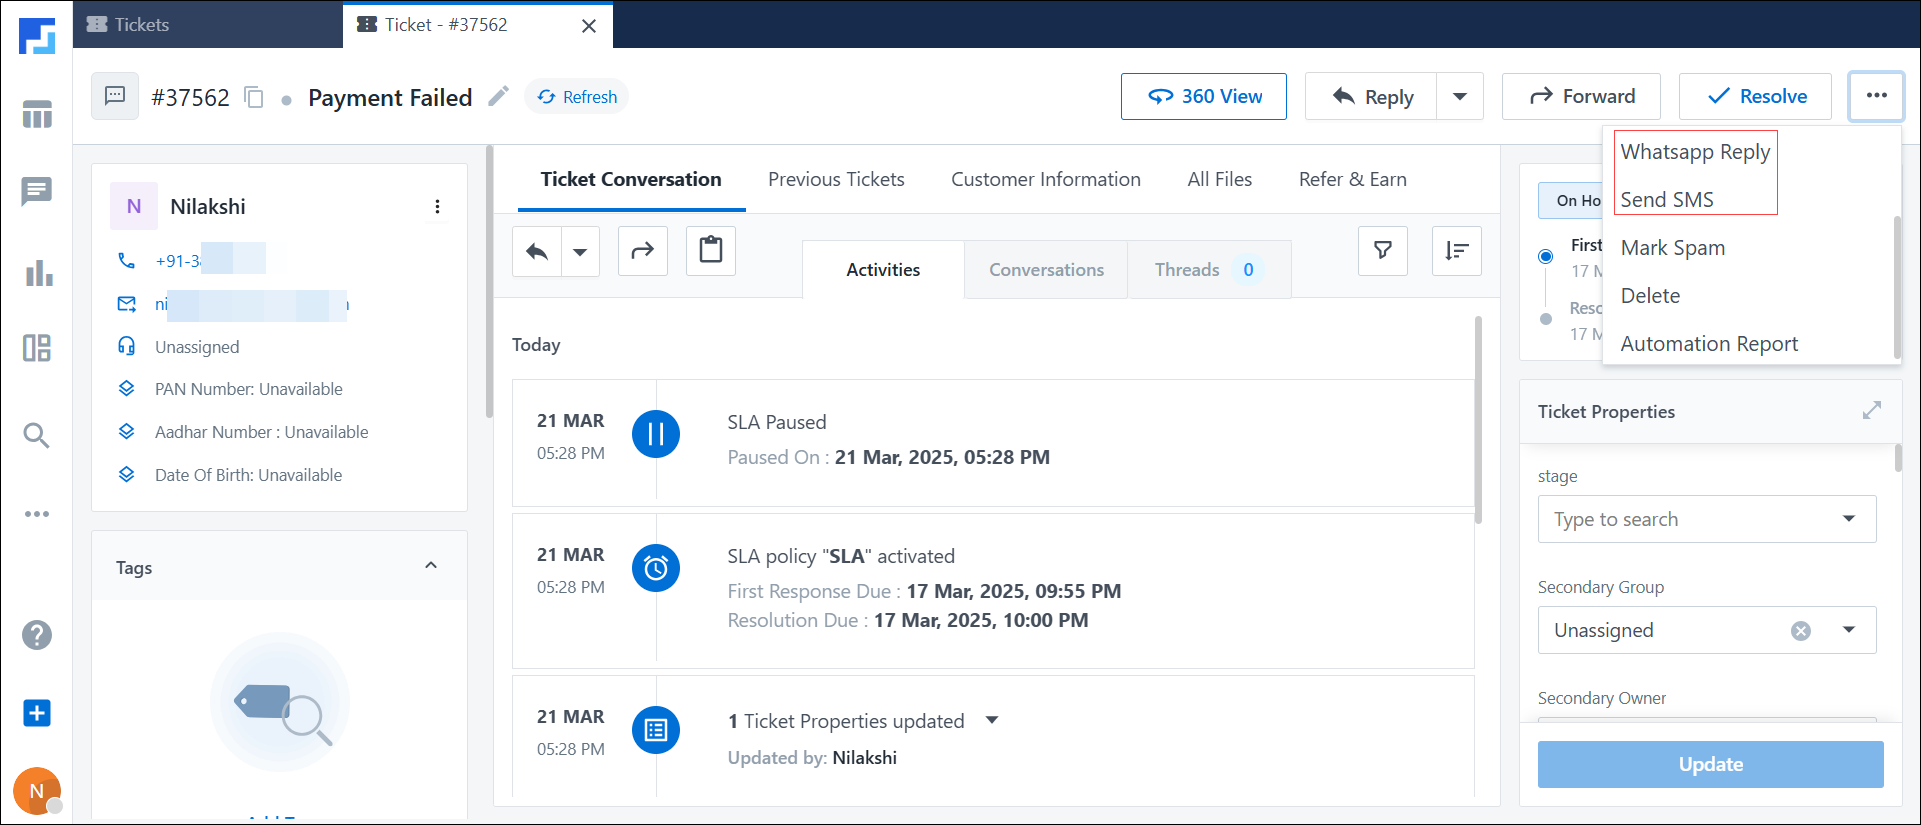
- In the top-right corner of the Ticket Details page, click the three-dots menu
 , and from the list of options, select WhatsApp Reply or Send SMS.
 - On the Send SMS/WhatsApp Reply pop-up, configure the following details –
- Choose your SMS Provider/Choose your WhatsApp Provider – Choose an option from the list of providers configured in your account.
- Customer Contact – If only one contact is configured in your account, it is selected by default and cannot be edited. If multiple contacts are added for the customer, select the number you want to message.
- Sender’s Contact (for WhatsApp) – If only one sender contact is configured in your account, it is selected by default and cannot be edited. If multiple contacts are available, select the number to send the message from.
- Sender ID (for SMS) – If only one sender ID is configured in your account, it is selected by default and cannot be edited. If multiple IDs are available, select the ID to send the message from.
- Choose your Template – Select a template from the templates configured in your account.
- Message Preview – The message content available in the template is previewed. This cannot be edited.
- Once you’re done, click Send.
Note: You can also upload and send PDF attachments when replying manually to customers via WhatsApp.
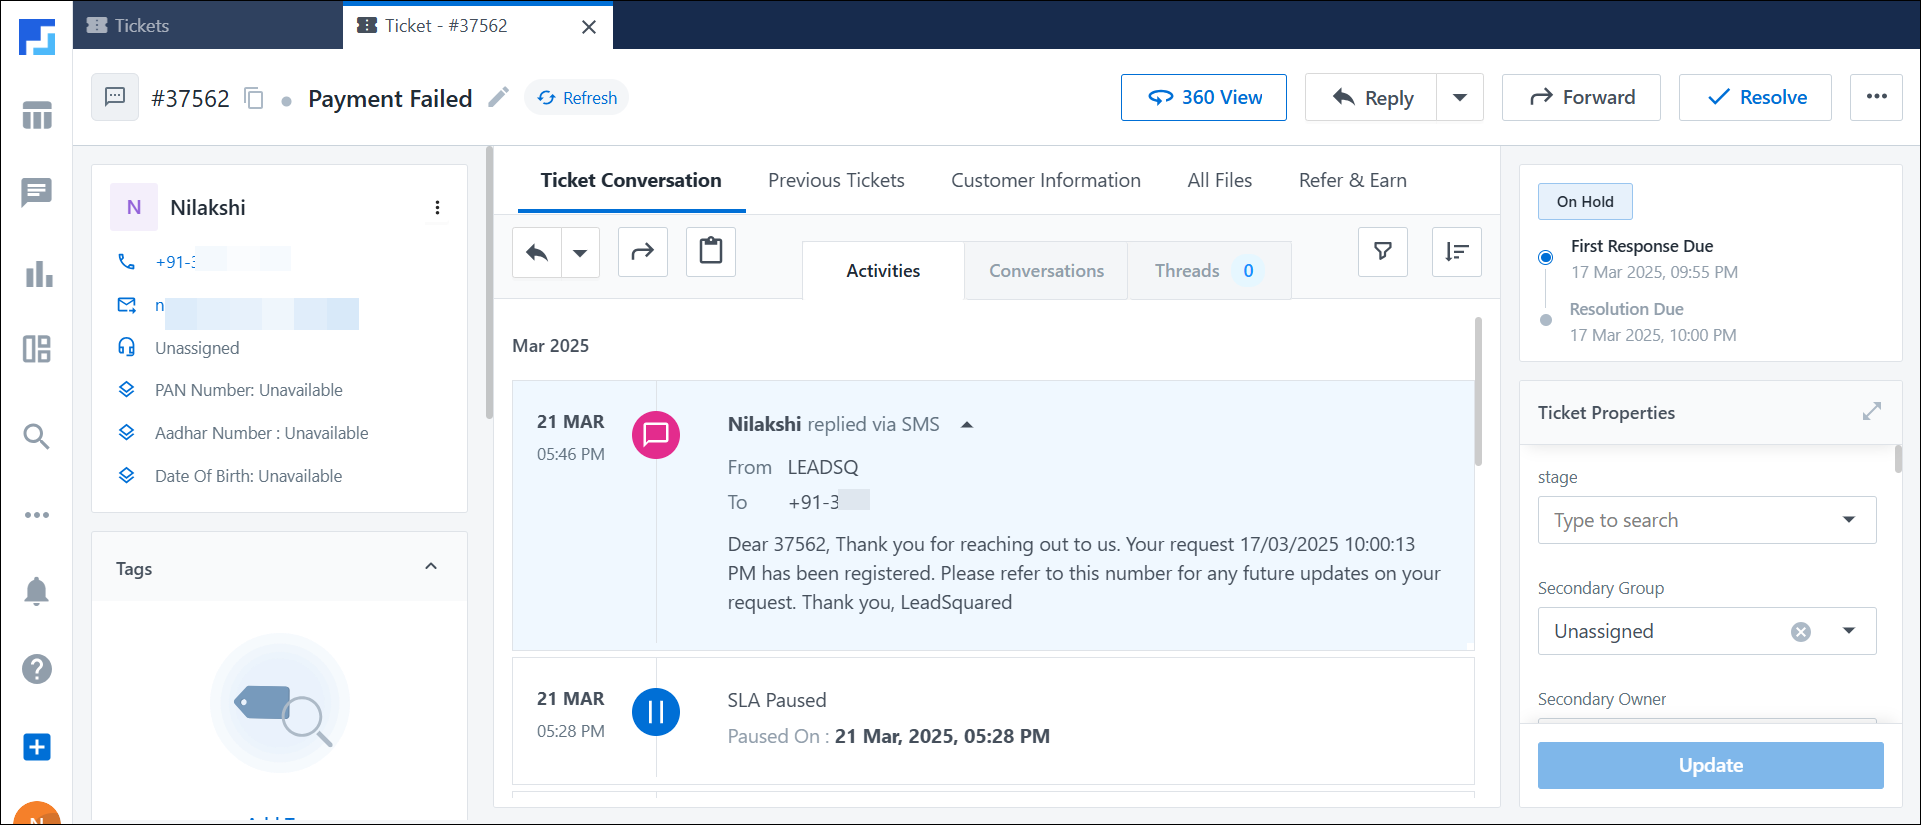
Once the SMS/WhatsApp message is sent, a corresponding activity is posted on the ticket, where you can view the message content along with other customer and ticket details.
Any Questions?
Did you find this article helpful? Please let us know your feedback in the comments section below. We’d love to hear from you and help you out!