


Get Started
Sales Suite
Field Ops
Marketing
Service CRM
Integrations & Apps
FloStack
Create an Incentive Program
1. Feature Overview
Use LeadSquared’s Incentives feature to set up program criteria and rewards to incentivize your sales teams. Once set up, LeadSquared will track and automatically calculate payouts based on each sales rep’s achievements toward their targets. Once the rewards have been calculated, managers can review and approve or reject the rewards through the Incentives dashboard.
2. Prerequisites
- Only Admins can create an incentive program.
- To create an incentive program through Rulesets, you must have a published Ruleset.
- To create an incentive program through Goals, you must have a published Goal.
- Ensure that the Organization Hierarchy for your organization is set up.
3. How it Works
As an example, consider a team of 6 people. Kevin is the Admin and Splinter is the Sales Manager. The Sales Users are Donatello, Leonardo, Michelangelo, and Raphael.
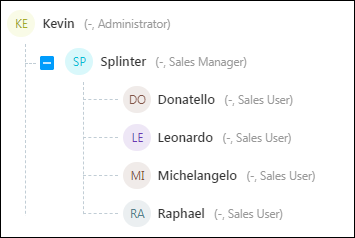
Kevin can set up an Incentive program for the Sales Users based on certain Program Criteria (for example, revenue generated, leads generated, etc.). If they satisfy the criteria, their rewards will be calculated and sent to Splinter and Kevin for approval.
There are 2 ways to create an incentive program –
- Through Rulesets
- Through Published Goals
Rulesets are the fundamental building blocks from which you can build Goals and Incentive programs. If you’re already using LeadSquared’s Goals feature, you can build incentive programs directly on published goals (where you just need to define the rewards and payouts for the sales reps).
You can also build an incentive program from scratch, by first creating a new ruleset (where you define and measure the required sales performance metrics) and then creating the incentive program (where you define the rewards and payouts).
To create an incentive program –
- On the Incentives page, click on Create a Program and enter the program details.
- Select the Rulesets, Calculation type, and Program duration.
- Next, select the users you would like to incentivize. If you have chosen to build the program on top of a Goal, the users from the Goal will be automatically inherited into the incentives program.
- Select the approvers for the incentive program.
- Set up the Program Criteria and Rewards for the users.
- Publish the program.
4. Create an Incentive Program Through Rulesets
Navigate to Ace>Incentives>Manage Program>Create Program.
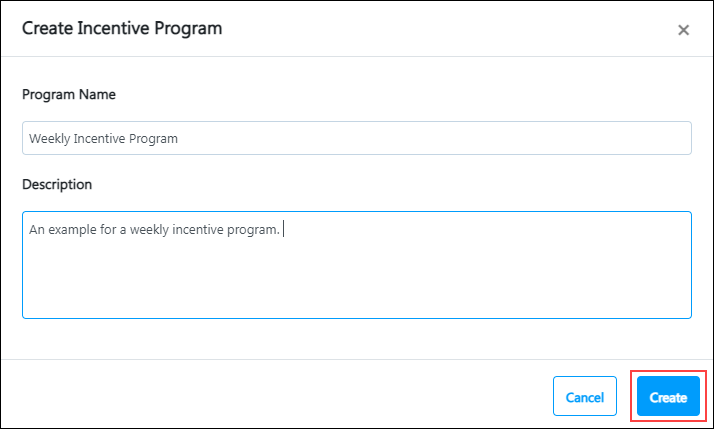
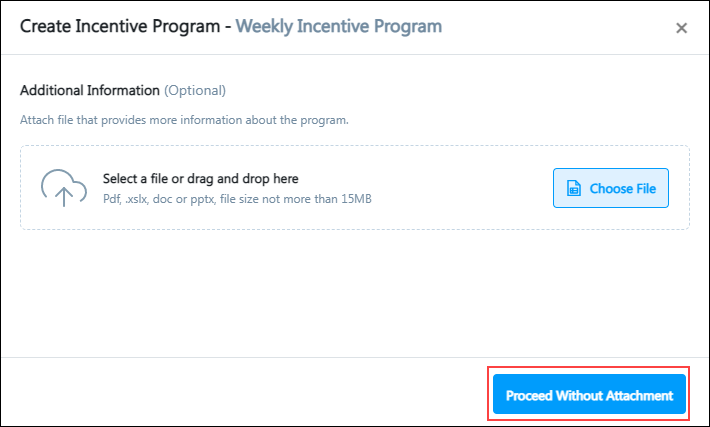
Enter a Program Name and Program Description. Once done, click Create.
You can upload a document that further details the incentive program by clicking Choose File – it can be a policy document, sales deck, presentation, etc. This step is optional. To proceed without an attachment, click Proceed Without Attachment.
5. Configure the Program Attributes
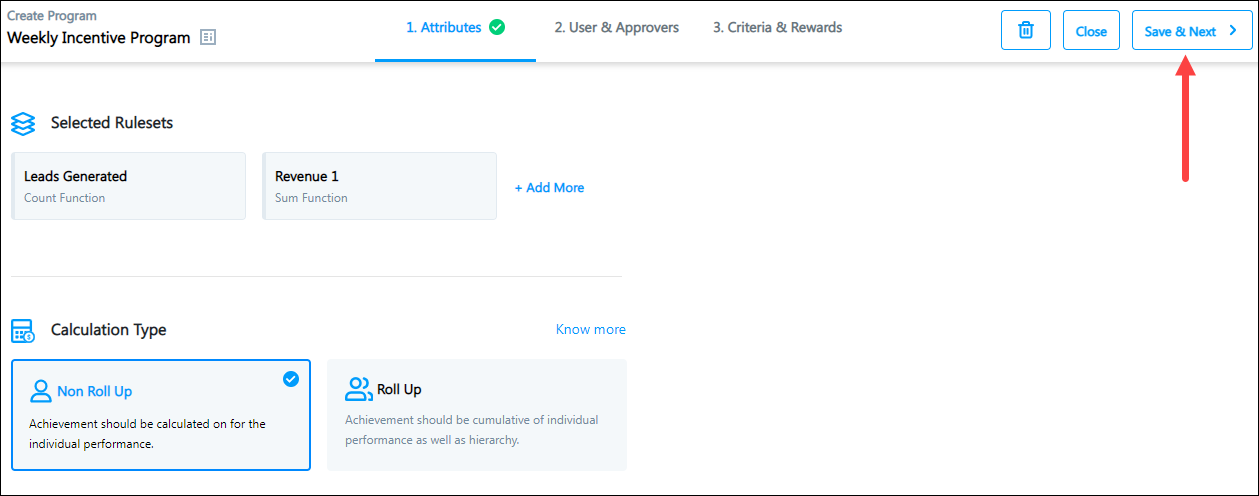
Here, you’ll select a Ruleset that will later be used to define the rewards. For example, if you select a ‘Revenue’ rule set here, the rewards will be calculated on the revenue metric defined in your ruleset.
Click Select Rulesets. You can select up to 5 Rulesets. Once done, click Use Selected Rulesets.
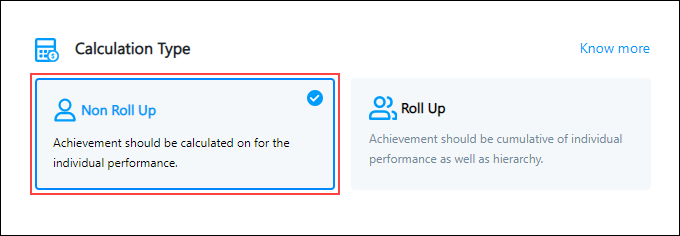
Next, you must select a Calculation Type.
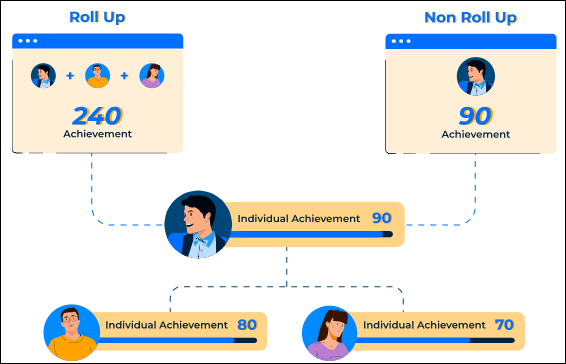
- Roll Up – In a Roll Up calculation, the result will be the summation of the achievements of the entire team in the hierarchy.
- For Example, the reward is paid out to the users based on the total revenue generated by the entire team.
- Non Roll Up – In a Non Roll Up calculation, the result will depend only on the individual achievements of the users.
- For example, the reward is paid out to the users based on the revenue generated individually.
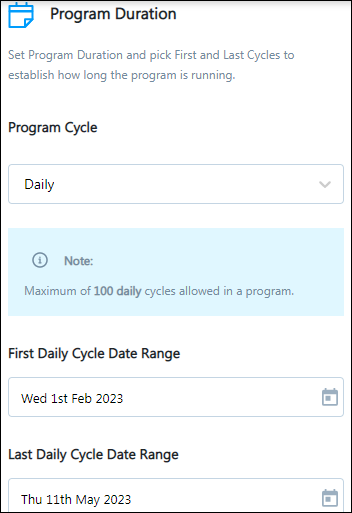
Set the Program Duration.
- Select the Program Cycle – The total reward will be calculated based on the completion of each cycle. For example, if you want to reward users based on their daily achievements, select Daily.
- Select the First Cycle Date Range – Select the start date for the program.
- Select the Last Cycle Date Range – Select the end date for the program.
Note:
- If you select Weekly as your Goal Cycle duration –
- By default the starting day of the week is Monday. This cannot be changed to a different day.
- You can set the Cycle Start Date to Monday for the present week, even if your current day is Wednesday.
- If you select Monthly as your Goal Cycle duration, you can set the Cycle Start Date to any day in the current month only. For example, if the current date is 10th February, you can set the Cycle Start Date to 1st February (but not 25th January).
- The maximum Goal Cycle duration for –
- Daily is 700 Goal Cycles.
- Weekly is 104 Goal Cycles.
- Biweekly is 52 Goal Cycles.
- Monthly is 24 Goal Cycles.
- Quarterly is 10 Goal Cycles.
- Yearly is 16 Goal Cycles.
- Custom is 700 Days (to configure a Custom Cycle for the Incentive Program, refer to this article).
In the following example, the Incentive Program will have a Daily Program Cycle. The First Cycle of the program will start and end on the 1st of February. On completion of the first cycle, the rewards (if any) can be disbursed. The program will repeat until its Last Cycle, which is on the 11th of May.
Select the number of Buffer Days for each Cycle. Buffer Days lets users edit or revise their tasks and activities in the event of a missed deadline, resulting in more accurate reward calculations.
Note:
- Daily, Weekly, and Biweekly cycles can have buffer days from 0 to 30 days.
- Monthly, Quarterly, and Yearly cycles can have buffer days from 0 to 90 days.

Click Save & Next to move to the next stage.
6. Select the Program Users and Approvers
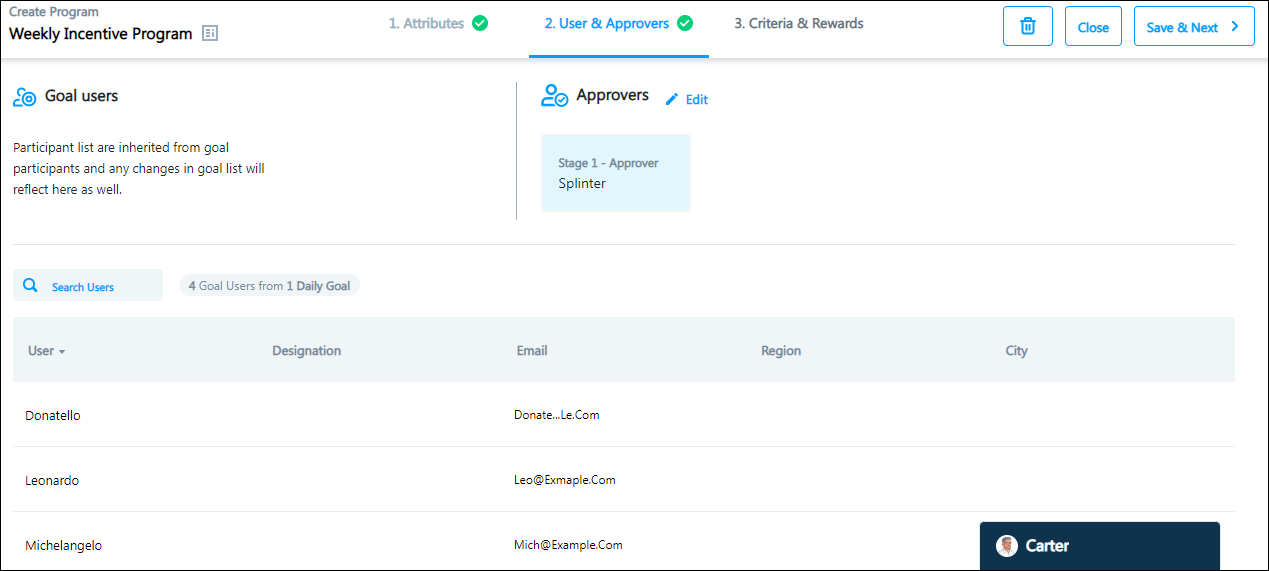
Program users are sales users eligible for the incentives. Approvers are usually team leads and sales managers (or someone higher up in the organization hierarchy) who can edit, reject or approve the incentive.
Select a cycle through the dropdown and add the users who will be part of the program.
You can also copy the users to different cycles –
- Click Copy Users to Selected Cycles.
- You can click on the Filter option to select a specific year you want to copy to.
- Next, select the cycles where the users will be added – you can select individual cycles or all cycles.
- Once done, click Copy Users to Selected Cycles.

Next, you must select the user(s) who will be responsible for approving the rewards once they are calculated –
- Click Edit to select the approvers.
- You can change the Stage 1 approver by clicking the Change button.
- Enter the name or email address of the approver.
- Click on Add Stage + if you would like to add an additional approver.
- Once done, click Save & Next.
Note:
- You can have a minimum of 1 and a maximum of 3 approvers.
- The reward approval must pass through all stages of approvers.
- An approver in a higher stage can override a decision made by the approver in a previous stage.
- For example, if a Stage 1 approver has rejected a payout, the Stage 2 approver can override and approve the payout.
- Admin users can approve or reject rewards on behalf of all the assigned approvers.

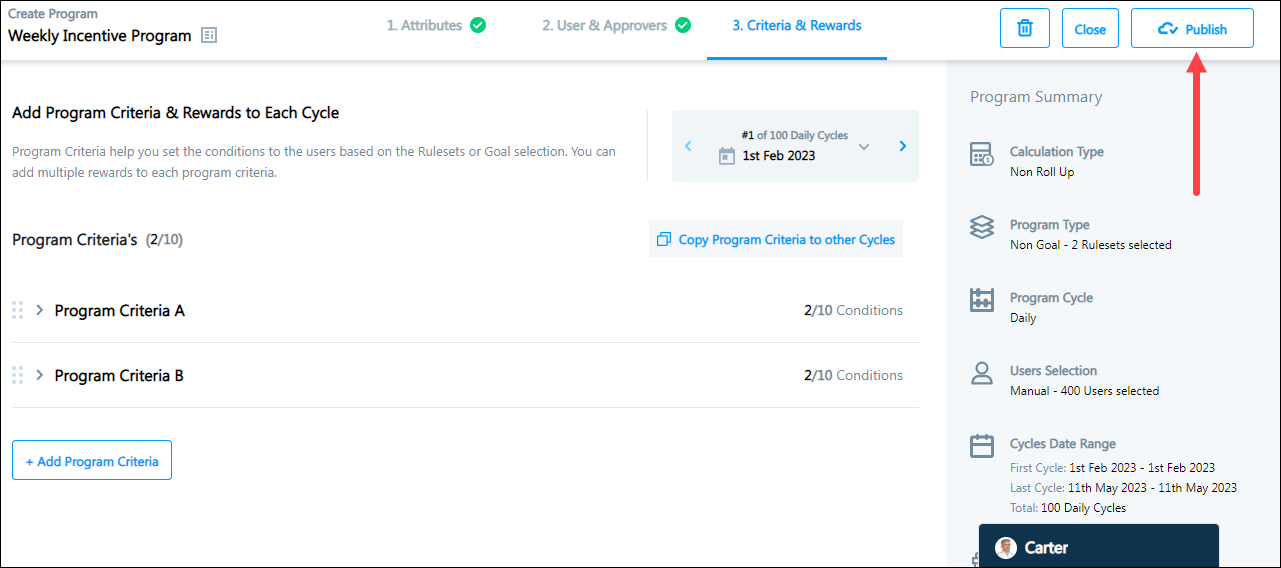
7. Set Up the Program Criteria and Rewards
Each cycle can have a different Program Criteria. For example, you can define a 0.5% commission on the first cycle and a 1% commission on the next cycle.
To add a criteria, click + Add Program Criteria. Next, click on Add Condition.
Add a condition –
- Select a Ruleset for the condition
- Select the conditional operator.
- Enter the desired value.
- Click Add Conditions.
- To add an additional condition, click on the
 icon.
icon.
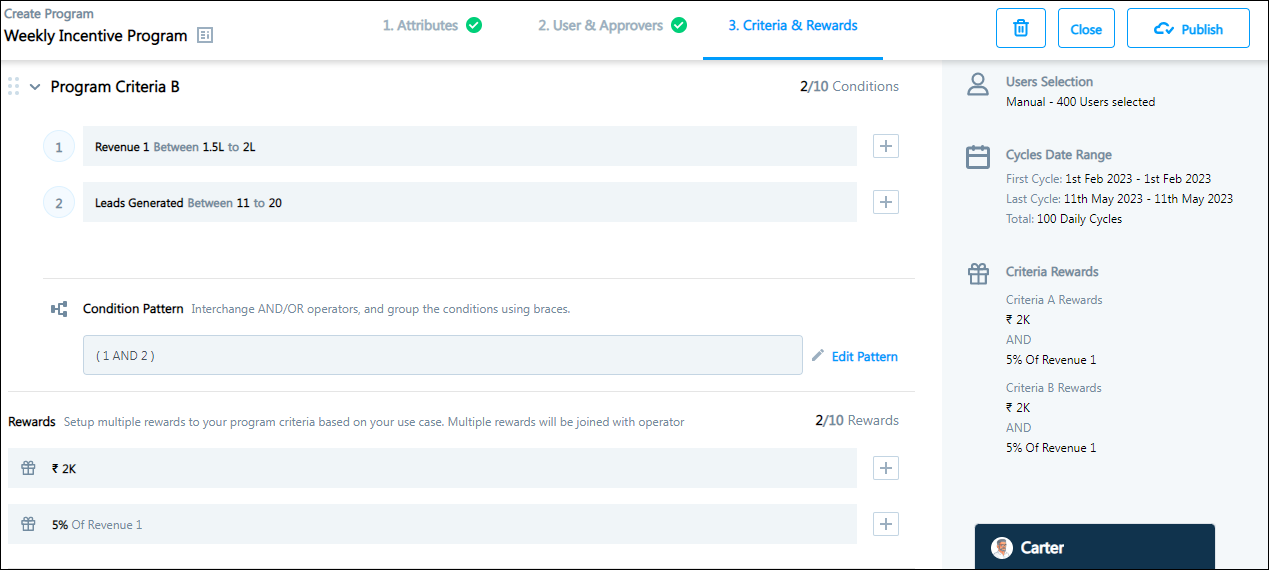
In the following example, we have added 2 conditions. To achieve Condition 1, the user must generate revenue between Rs. 1 Lakh and 1.5 Lakhs. And to achieve Condition 2, the user must generate between 5 and 10 leads.
Once you have set up the conditions, you must set a Condition Pattern. It can be either an AND or an OR operator.
| Operator | Description |
| AND | To receive an award all conditions wrapped with an AND operator must be satisfied. |
| OR | To receive an award either one condition wrapped with an OR operator must be satisfied. |
In the following example, we have selected an AND operator. Hence, both condition 1 and condition 2 must be met to satisfy Program Criteria A.

Next, you can configure Rewards–
- Click Add Reward.
- Select the reward calculation.
- Enter the reward value.
- Select a Ruleset if the reward value is dependent on a particular Ruleset.
- Click Add Reward.
- To add an additional reward, click on the icon.
| Reward Calculation | Description | Example |
| Fixed | The reward is a fixed amount. | A fixed payout of Rs. 1000 |
| Percentage | The reward is a percentage of the achievement generated by the user. | 5% of the total revenue generated by the user. |
| Percentage Slab | The reward is a specific percentage in a slab. | For revenue between Rs. 1 Lakh and Rs. 2 Lakhs –
|
| Multiplier | The reward is a multiple of the achievement generated by the user. | For each lead generated, the user will get Rs. 100. |
| Multiplier Slab | The reward is a specific multiplier in a slab. | For leads generated between 1 and 10 –
|
In the following example, we have set up 2 rewards. Reward 1 is a percentage slab of 5% and 6% for revenue generated between Rs. 1 Lakh and 1.5 Lakhs. And Reward 2 is a multiplier of Rs. 100 for each lead generated between 5 and 10. Each time a user meets the conditions of Program Criteria A, the rewards are calculated.
You can also configure Custom Rewards for your users, such as vouchers, travel experiences, gadgets, and more. To do this, first create a custom reward by navigating to the ACE Settings page and selecting Custom Rewards. Once created, the reward will be available for selection in the Rewards section when configuring your incentive program.
If you would like to add additional incentives for the users, you can add an additional program criteria which can be triggered once Progam Criteria A is met. The steps are the same as above.
Click Publish to publish the incentive program.
8. Create an Incentive Program Through Goals
If you have a Goal set up for your organization or team, you can also build an Incentive Program for it –
8.1 Program Attributes
- In the Attributes section, set up the Rulesets, Calculation Type, and Program Duration (refer to section 5 for a detailed walkthrough of the Attributes setup).
- Toggle the switch
 for Do You Want To Add Goals To The Program?
 - Click Select Goals.
- The Goals matching the program attributes will be shown.
- Select the Goals for the incentive program.
- Click Use Selected Goals.
- Click Proceed.
8.2 Users & Approvers
The users are automatically inherited from the Goal. To make any changes to the user list, you will need to edit the list in your Goal configuration.
Next Steps
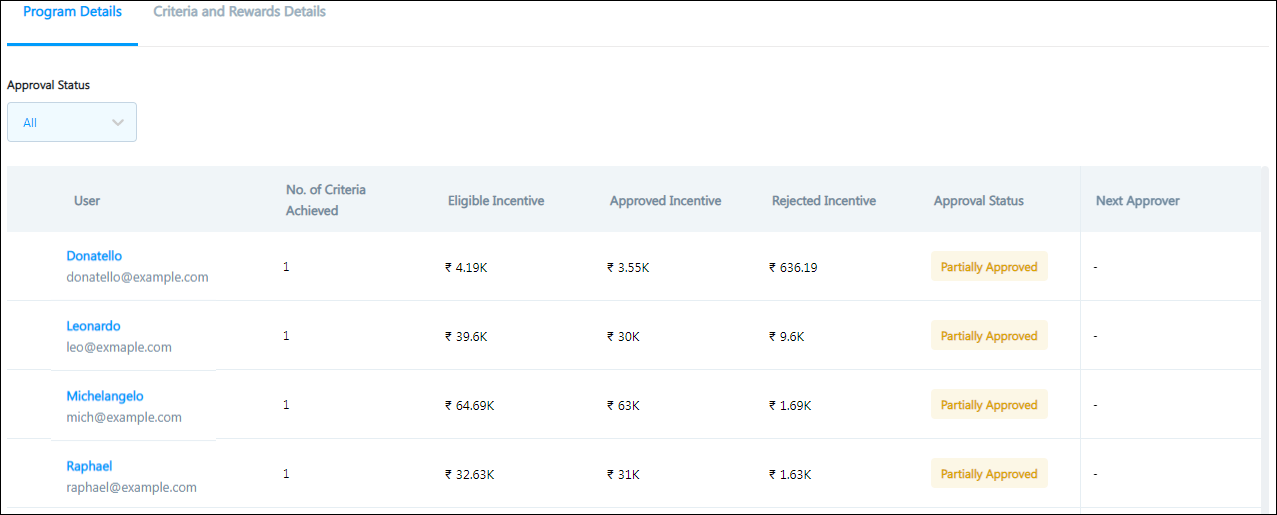
The View and Manage Incentives article will show you how to view the Incentive calculations, approve payouts, and manage the progress of the Incentive program.
Any Questions?
Did you find this article helpful? Please let us know any feedback you may have in the comments section below. We’d love to hear from you and help you out.