1. Feature Overview
For lead fields that contain multiple options (such as course, product type, salary range, etc.), you can create dropdown type lead fields from which leads can select the option most relevant to them. The following dropdown types are available in LeadSquared –
- Dropdown – A regular dropdown field that displays all the available options.
- Searchable Dropdown – A dropdown that shows options based on the search words your leads enter.
- Dropdown with Others – A dropdown field that includes the option “Others”.
Note:
- When adding Dropdown fields, you can add up to 1,000 options directly. If you want to add more than 1,000 fields, choose Searchable Dropdown as the Show As option, and then import up to 100,000 options through the CSV import option.
- When adding Dependent dropdown fields, you can add up to 1,000 parent options, and up to 5,000 child options (across all the parent fields).
Articles related to this feature are –
- To create a dependency between two dropdown fields, see Dependent Lead Fields.
- You can also create multi-select dropdown type lead fields.
- To know how to create other lead field types, refer to How to Create Custom Lead Fields.
2. Prerequisite
You must be an Admin User of your LeadSquared account.
3. Create a Dropdown Field
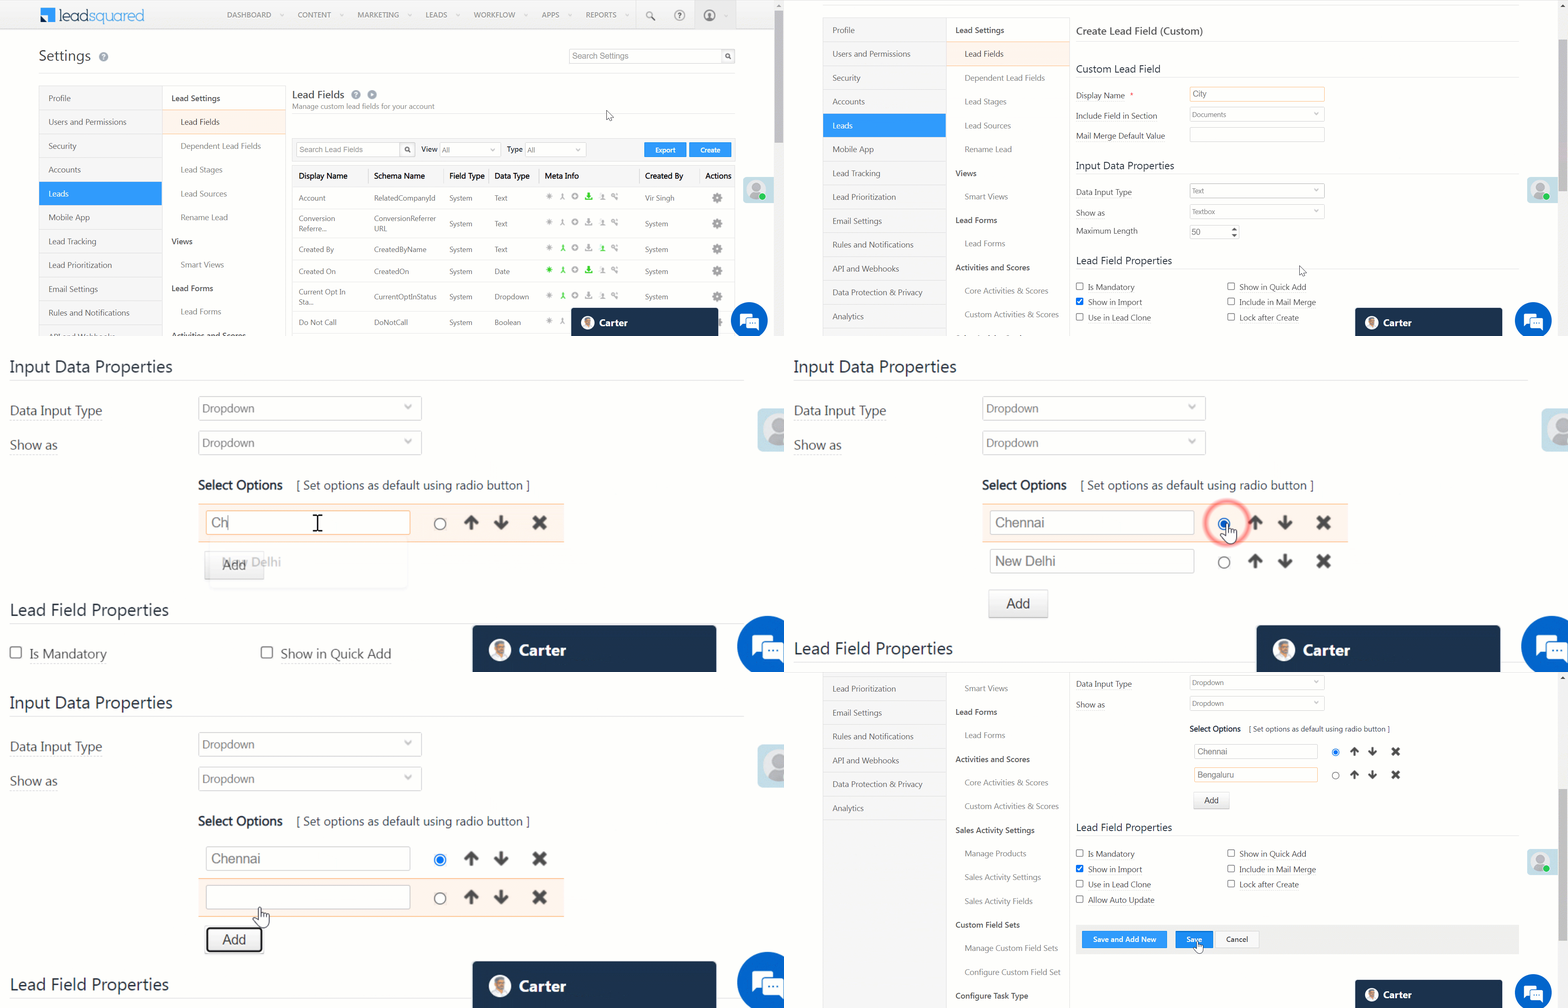
- Navigate to Settings>Leads>Lead Fields, and click Create.
- From the Data Input Type dropdown, select Dropdown.
- From the Show as dropdown, select Dropdown.
- Under Select Options, enter your options.
- To set an option as default, click
 .
. - To rearrange the order of the options, click
 or
or  .
. - To remove an option, click
 .
.
- To set an option as default, click
- To add more options, click Add
- Once you’re done, click Save.

4. Create a Searchable Dropdown
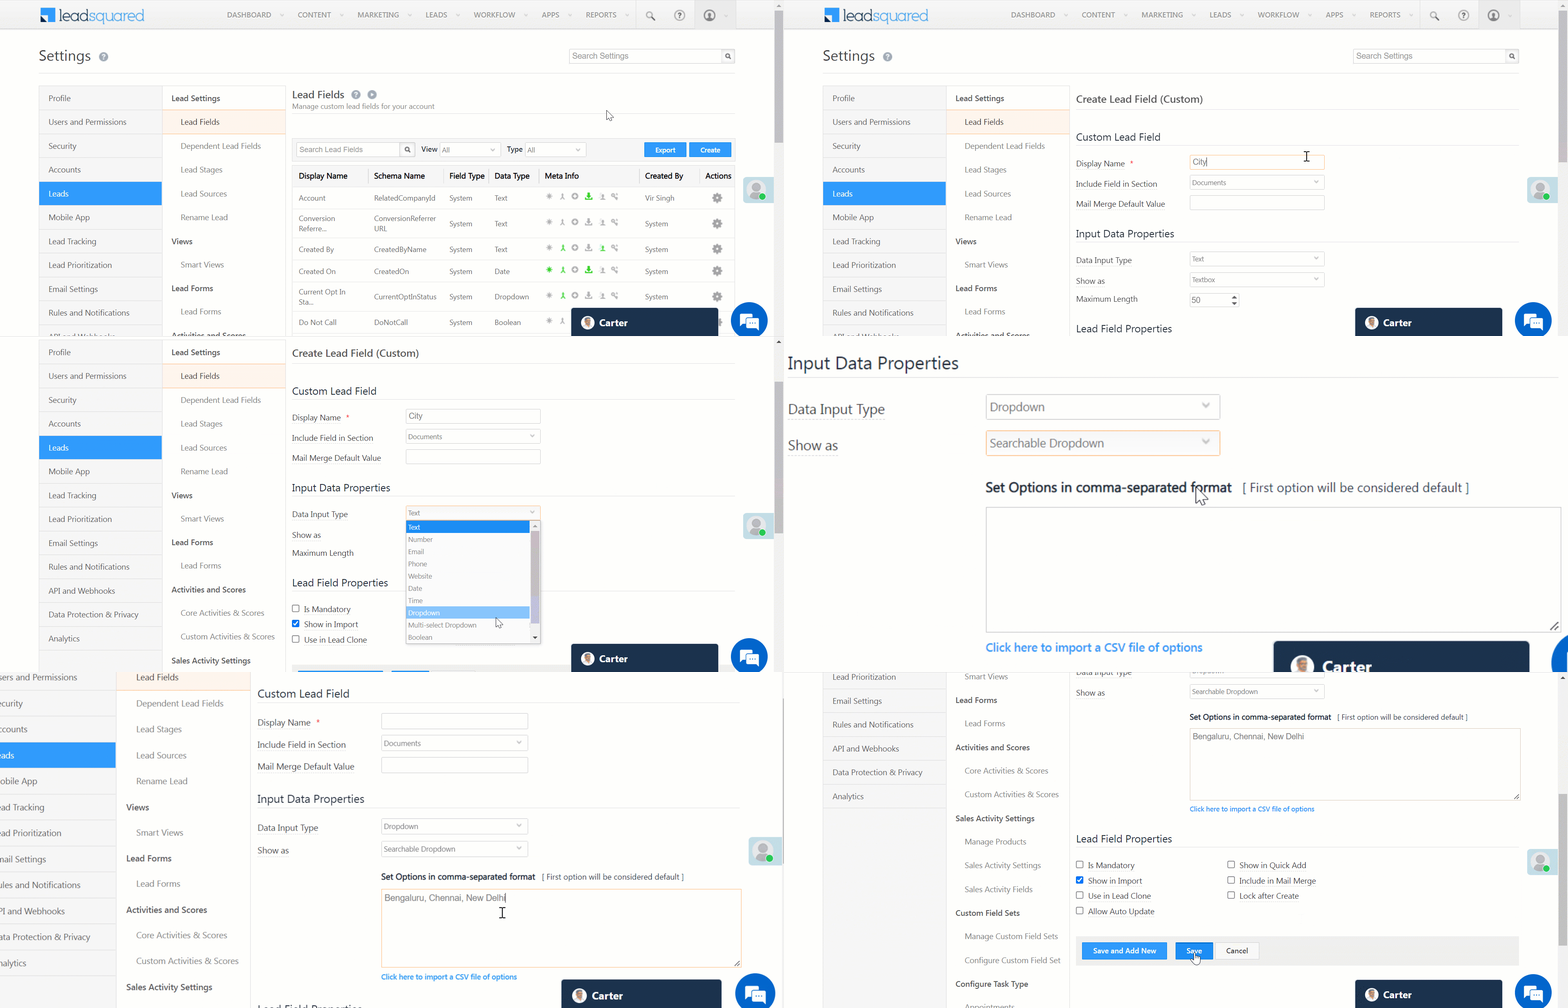
- Navigate to Settings>Leads>Lead Fields, and click Create.
- From the Data Input Type dropdown, select Dropdown.
- From the Show as dropdown, select Searchable Dropdown.
- In the textbox displayed, enter your options in comma-separated format, or click Click here to import a CSV file of options*.
- To set an option as default, click
 .
. - To rearrange the order of the options, click
 or
or  .
. - To remove an option, click
 .
.
- To set an option as default, click
- To add more options, click Add
- Once you’re done, click Save.
*Note: To create dropdown fields with more than 1lakh options/values, see Large Options Set.

5. Create a Dropdown with Others
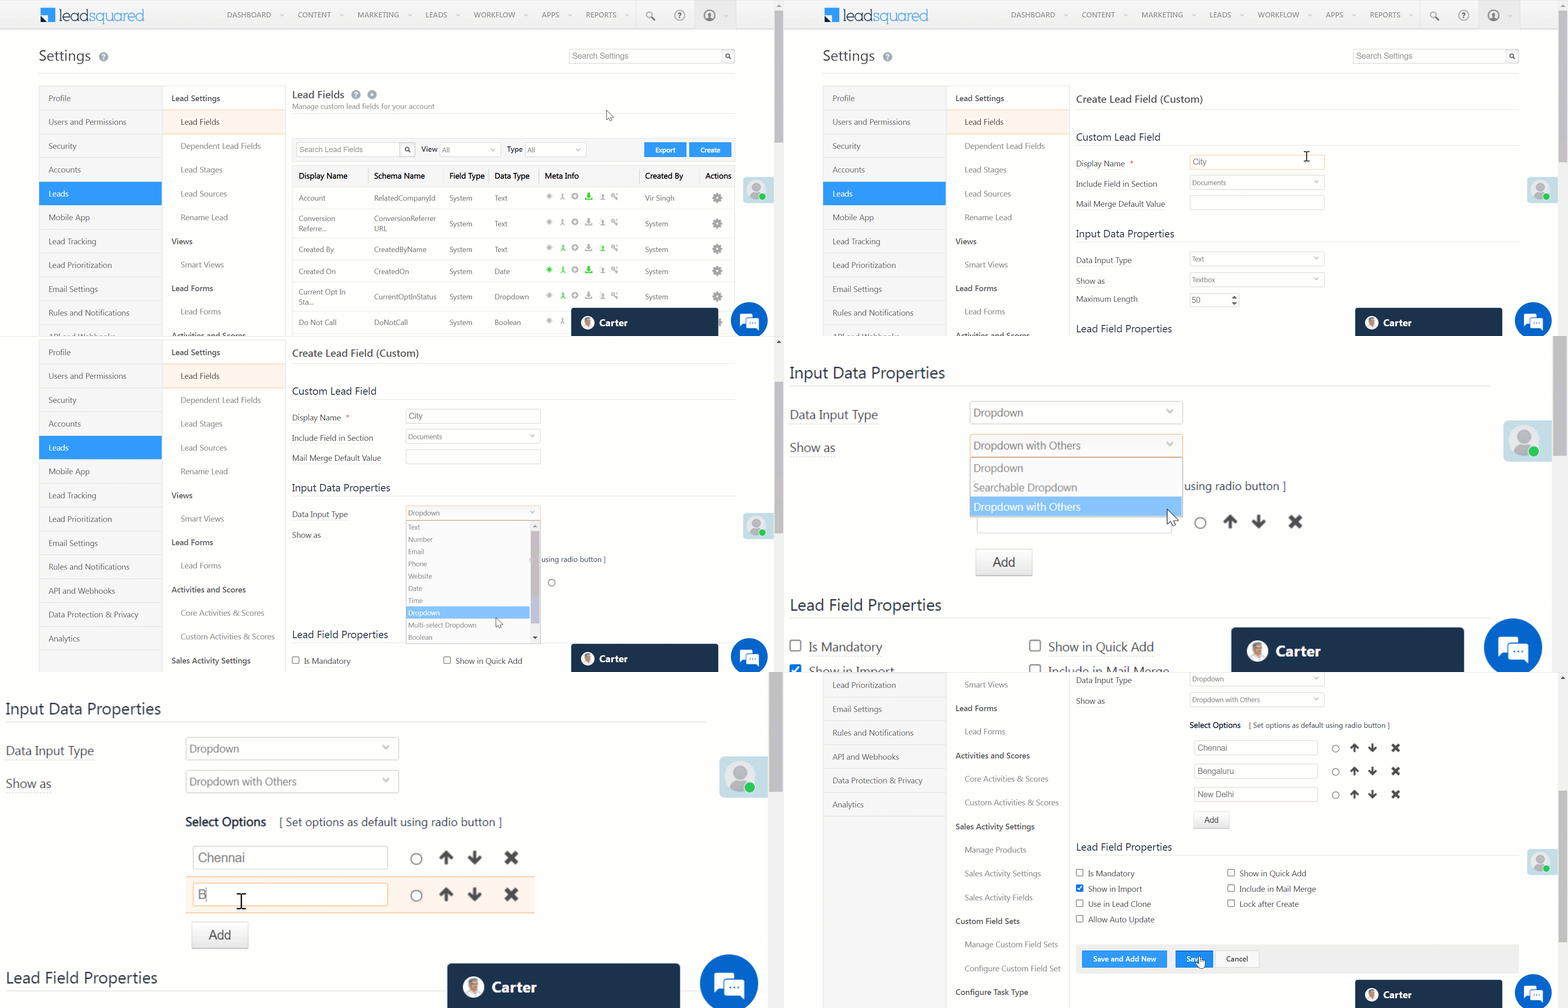
- Navigate to Settings>Leads>Lead Fields, and click Create.
- From the Data Input Type dropdown, select Dropdown.
- From the Show as dropdown, select Dropdown with Others.
- Under Select Options, enter your options.
- To set an option as default, click
 .
. - To rearrange the order of the options, click
 or
or  .
. - To remove an option, click
 .
.
- To set an option as default, click
- To add more options, click Add
- Once you’re done, click Save.

Any Questions?
Do you have questions or issues with the content in this article? Let us know in the comments section below. We’ll get back to you asap!


If i change a data type of a field from string -> number
Will the past entered data be in numbers or strings?
Hi, Srivatsan. The past data will continue to remain as strings. We do not change the data type of existing data when the field data type is changed. Hope this helps.
yes thanks
Welcome! 🙂
Can we change the “show as” option from normal dropdown to “searchable dropdown” without affecting existing data?
Hi Remya,
Your data will not be affected when you change the ‘show as’ option from normal to a searchable dropdown.