


Get Started
Sales Suite
Field Ops
Marketing
Service CRM
Integrations & Apps
FloStack
Integrate CallGear with LeadSquared Telephony
1. Feature Overview
CallGear is a cloud-based VoIP (Voice over Internet Protocol) phone system. Once you integrate your CallGear account with LeadSquared through the Universal Telephony Connector, you can –
- Make calls and automatically track the calls in Lead Activity History.
- Utilize the Agent Popup to store or view lead information during phone calls.
- Automatically create new leads through incoming phone calls from unknown numbers.
- View your call logs as LeadSquared activities together with downloadable recordings.
2. Prerequisites
- You must be an administrator user of your LeadSquared account.
- Your account plan must support Telephony integration.
- You must have an active admin account with CallGear.
- You must have the integrations package available with your CallGear account; for more information, contact CallGear.
3. Enable LeadSquared on CallGear
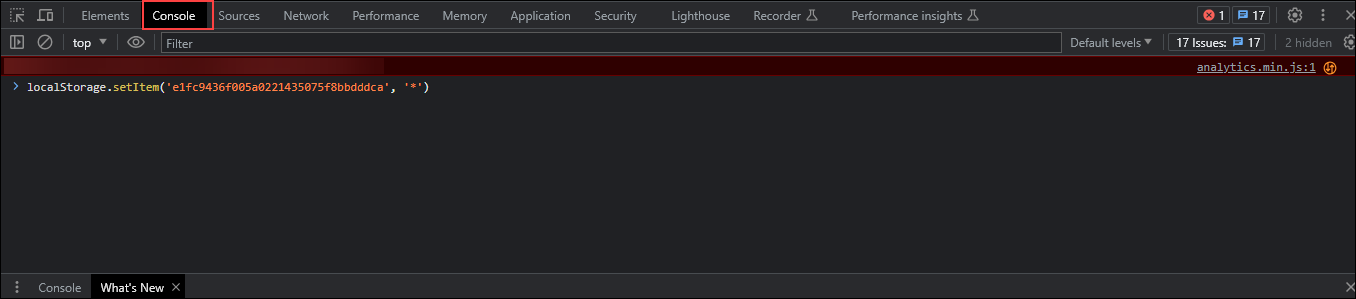
- Log in to CallGear through an admin account.
- Open the developer console on your browser and enter the following code –
localStorage.setItem('e1fc9436f005a0221435075f8bbdddca', '*')
Next,
- Refresh the page on your browser.
- Navigate to Settings>Marketplace, under the LeadSquared logo press Enable.
- Now press Add.
You will now see the following fields –
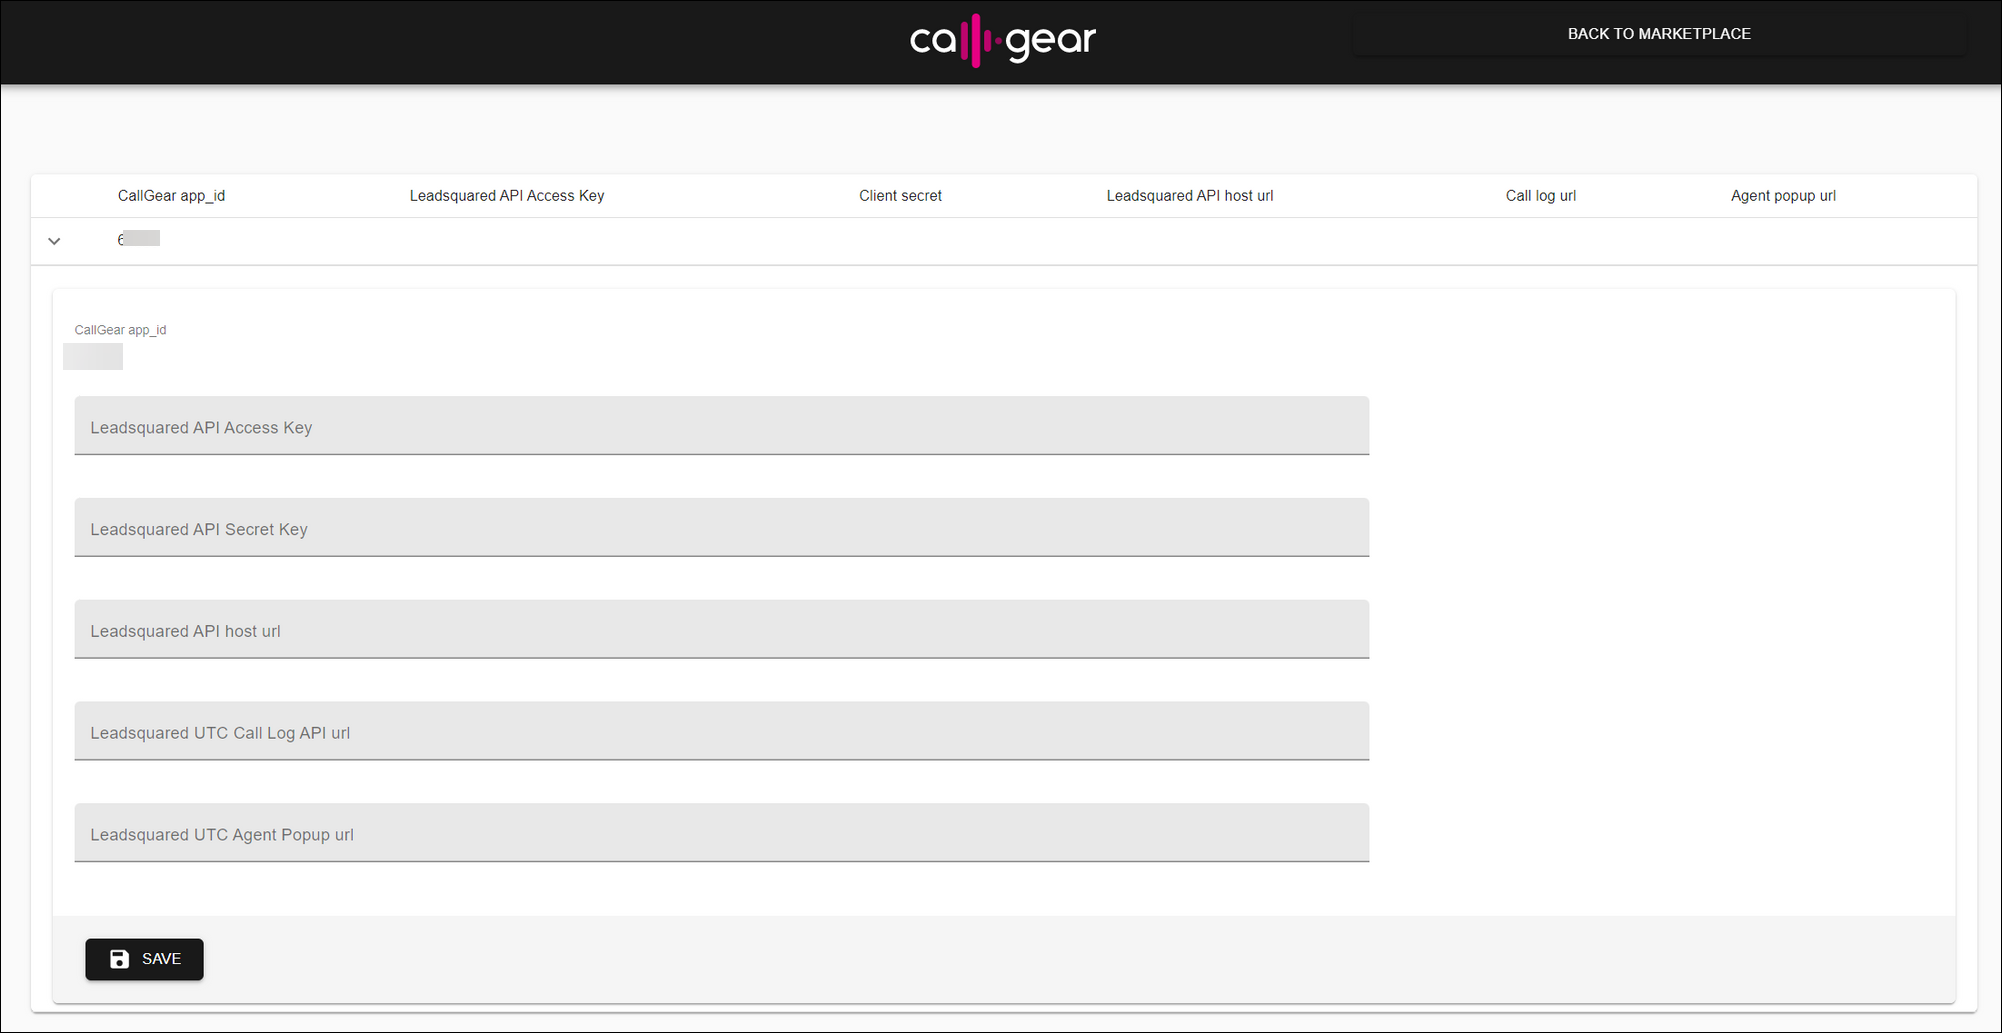
To find your LeadSquared API Access Key, Secret Key, and Host URL: navigate to Settings>API and Webhooks>API Access Keys on LeadSquared. For help, read Where can I find my LeadSquared API Host URL, Access Key, and Secret Key?
You can find the Call Log URL and Agent Popup URL by following the steps in the next section.
4. Install and Configure UTC
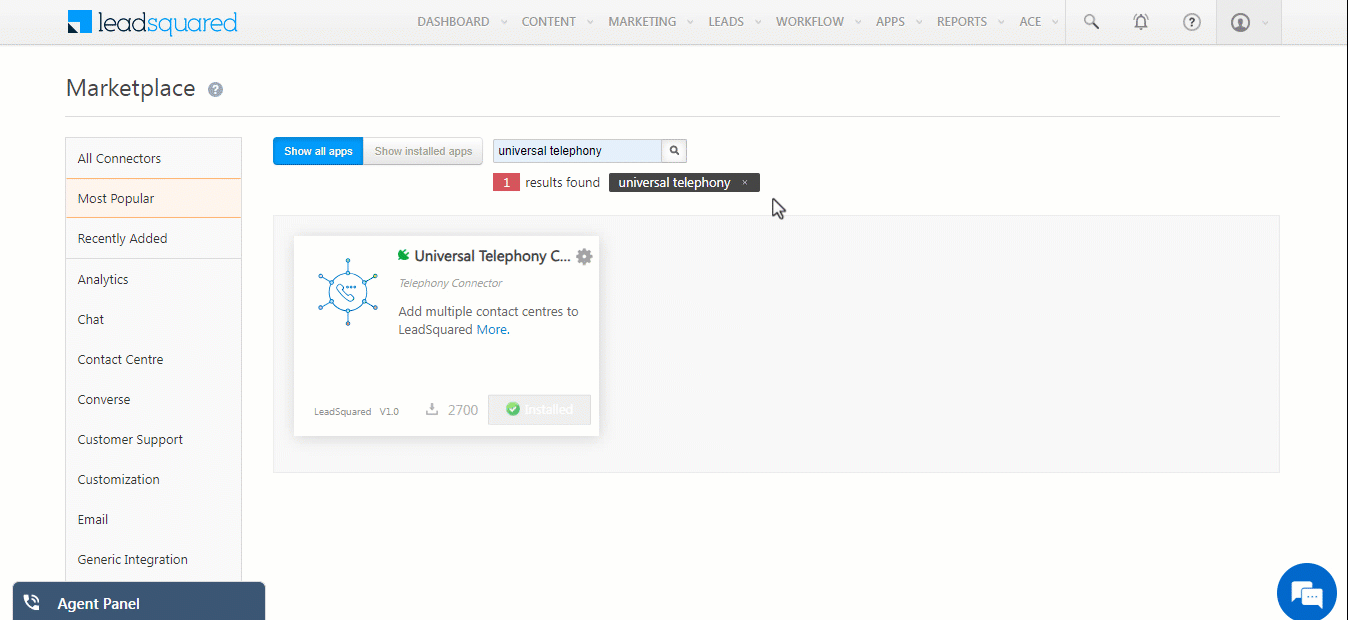
On LeadSquared, navigate to Apps>Apps Marketplace, search for the Universal Telephony Connector, and click Install.
Next –
- Hover the cursor over the settings
 icon and click Configure.
 - Click the
 icon to add a new connector.
 - Select LeadSquared Generic Telephony Connector as the Connector Type.
- Name the connector as CallGear and click Add.
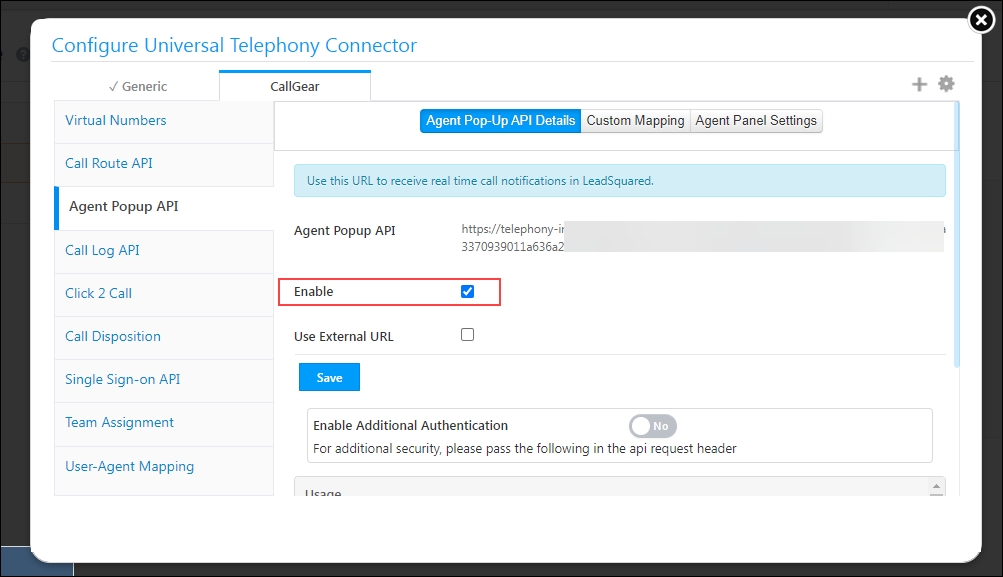
4.1 Agent Popup API and Call Log API URL
Now, you can navigate to the Agent Popup API and Call Log API tab to copy the URLs. Paste these URLs into the LeadSquared configuration page on CallGear.
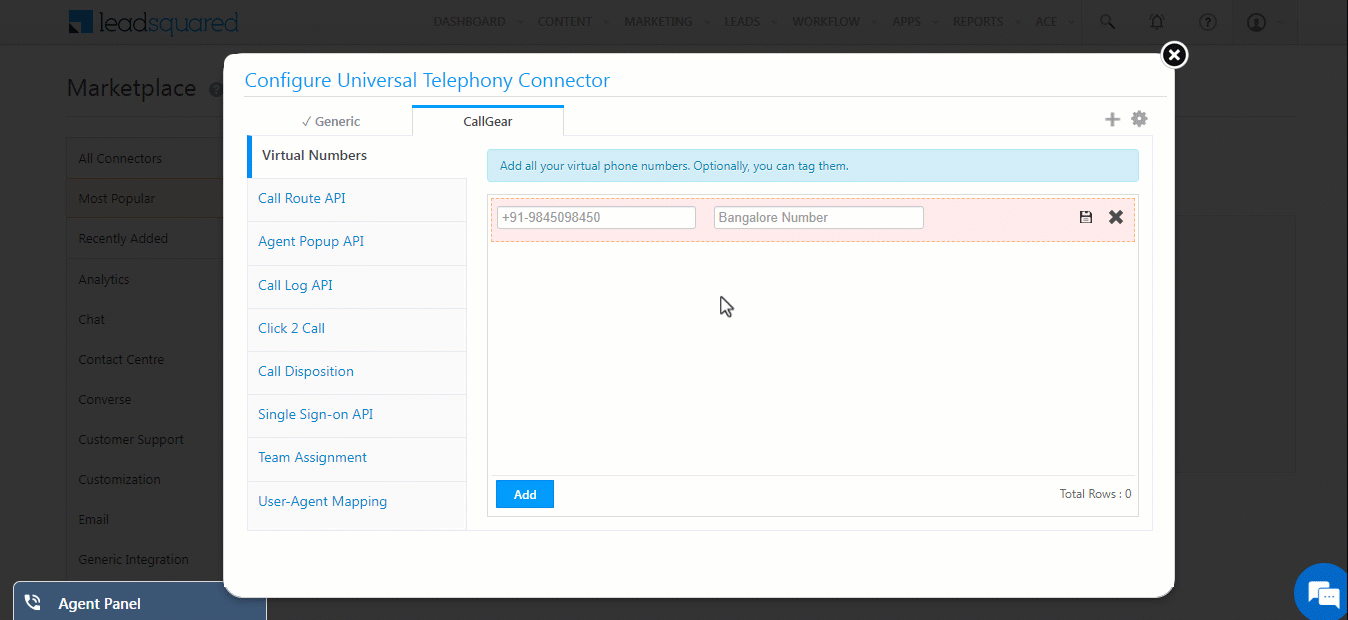
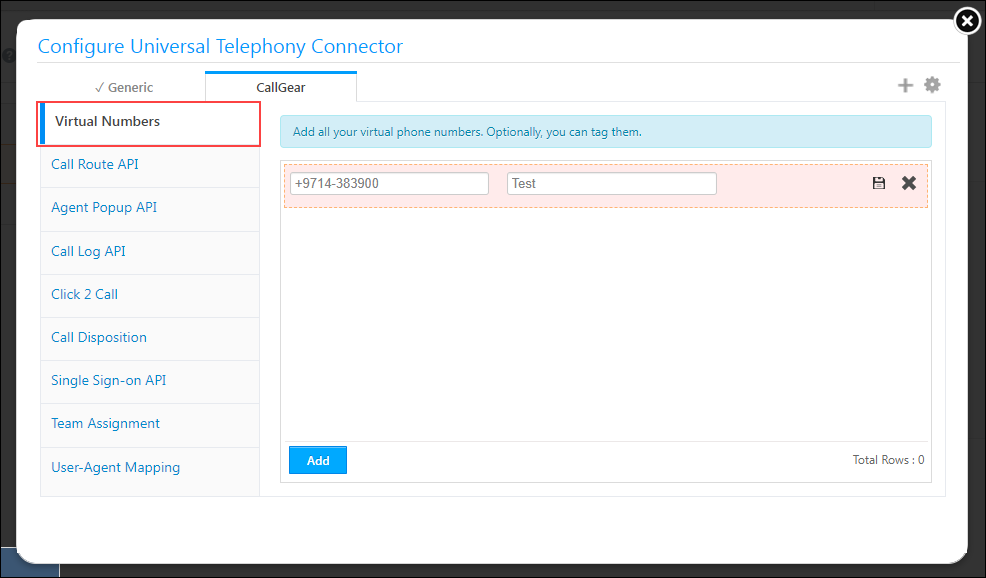
4.2 Configure Virtual Numbers
Navigate to the Virtual Numbers tab to add one or more virtual numbers (these numbers will be provided by CallGear). If the agent (employee) in CallGear doesn’t have a SIP line connected (navigate to, CallGear account>Employees>your agent’s name>sip line with the outbound number) then Click 2 Call will be made from this number.
Once done, click on the ![]() to save the numbers.
to save the numbers.
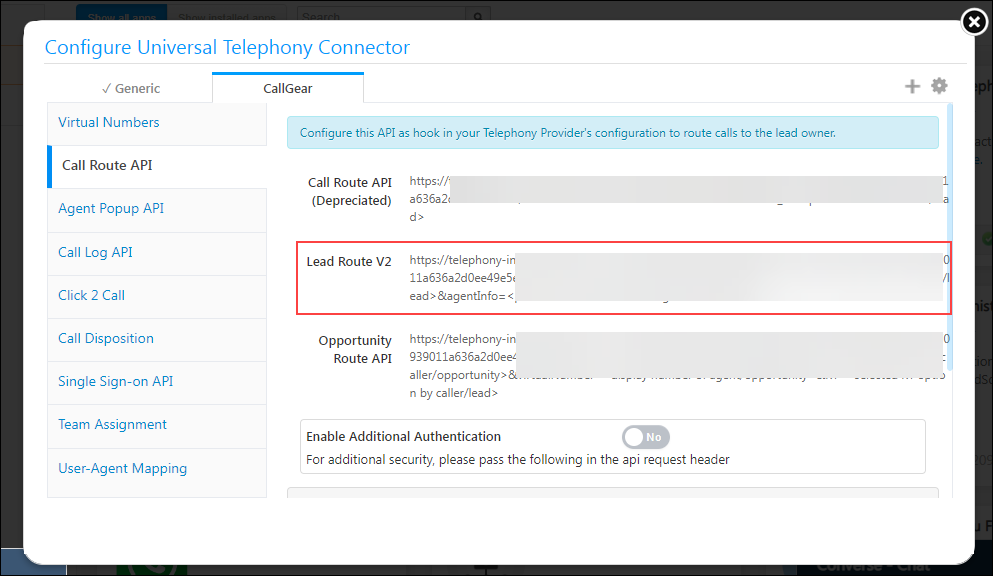
4.3 Configure Call Route API
The Call Route API automatically routes incoming calls from existing leads to the respective Lead Owner in your LeadSquared account. The API (Lead Route V2) must be configured as a hook on CallGear.
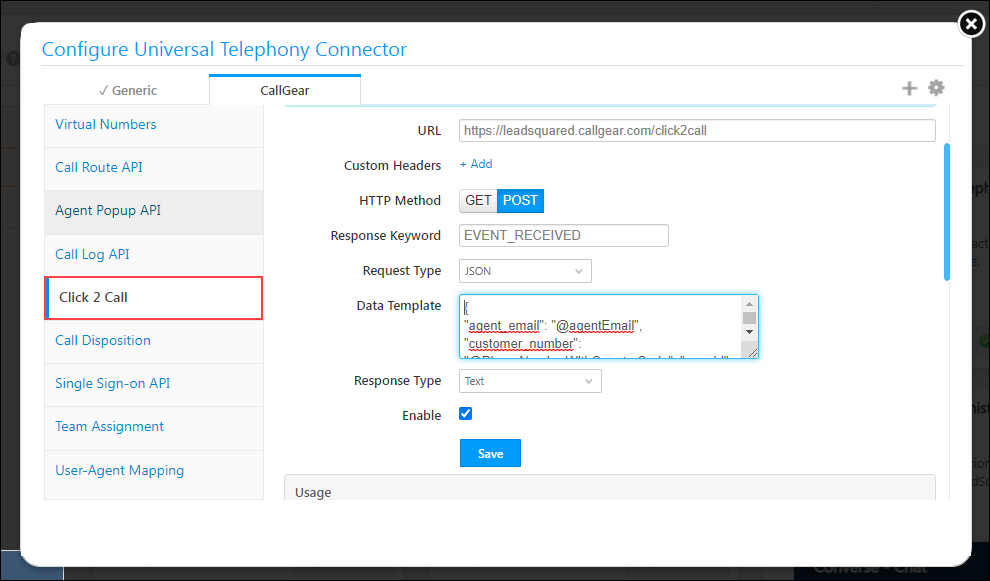
4.4 Configure Click 2 Call
Navigate to the Click 2 Call tab and configure the following settings –
| Parameter | Value |
| Method | Server Side API |
| URL | https://leadsquared.callgear.com/click2call |
| HTTP Method | POST |
| Response Keyword | EVENT_RECEIVED |
| Request Type | JSON |
| Data Template | {"agent_email": "@agentEmail", "customer_number": "@PhoneNumberWithCountryCode", "app_id": xxxx}
Note: Replace the
app_id value with your CallGear app id. For example, "app_id": 6666. |
| Response Type | Text |
| Enable | Select this value to enable Click 2 Call |
Once done, click Save.
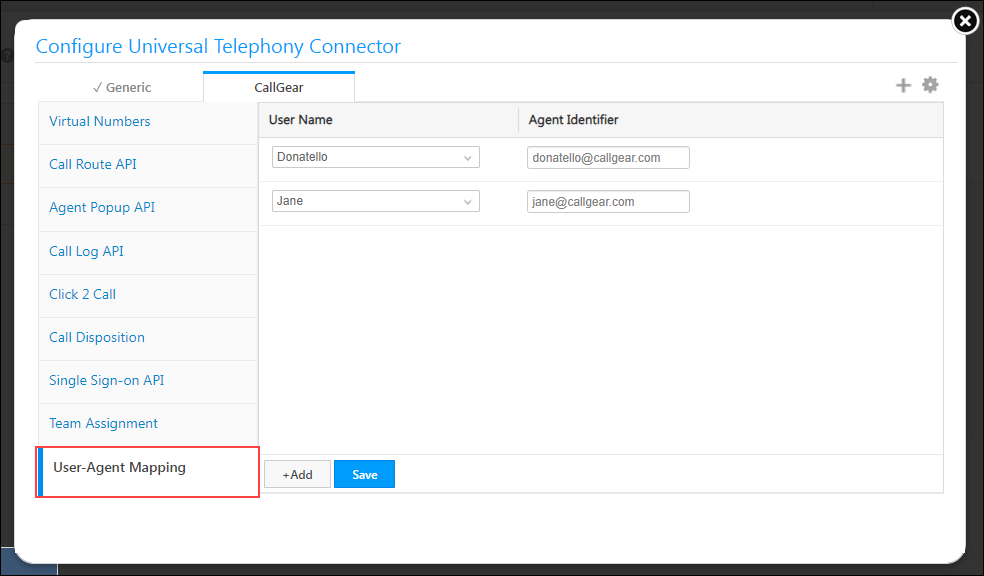
4.5 Configure User-Agent Mapping
Navigate to the User-Agent Mapping tab, click + Add, and map your users with their respective CallGear email addresses or extension numbers. Once you do, users will be able to Click 2 Call and see the Agent Popup widget for inbound and outbound calls. Once done, click Save.
Any Questions?
Did you find this article helpful? Please let us know any feedback you may have in the comments section below. We’d love to hear from you and help you out!