


Get Started
Sales Suite
Field Ops
Marketing
Service CRM
Integrations & Apps
FloStack
LeadSquared Outlook Integration
1. Feature Overview
Through this integration, you can directly create new leads, update existing leads, post activities, create and update tasks on LeadSquared from your Microsoft Outlook account.
Note:
- This integration is supported on the mobile and desktop Outlook app, as well as the Outlook web version.
- This integration only supports the Lead Details view and Actions on incoming emails to your users.
2. Prerequisites
- You must have an active Microsoft Outlook account.
- You must have an active LeadSquared account.
3. Installation
You can install the LeadSquared app to your Outlook account through any of the following options –
From the Outlook desktop app
- Open your Outlook desktop app, and on the app banner, click
 .
. - In the search box, enter LeadSquared.
- On the LeadSquared for Outlook screen, click Add.
- Once the app is added, click Get Started. The app is now installed on your Outlook account.
From your web browser
- If you’re signed in to your Outlook account on your web browser, click
 and then click Add Ins.
- Alternatively, you can navigate to the Microsoft AppSource page, and sign in.
- In the Search box, search for LeadSquared.
- On the LeadSquared for Outlook page, click Get it now.
- On the One more thing pop-up, enable the permissions
 checkbox.
 - Once you’re done, click Continue.
- Once the app is successfully added to your account, click Open in Outlook Web. The app is installed.
4. Log in to LeadSquared
Once you’ve installed the app on your Outlook account, you must link your LeadSquared account to the app.
From the desktop app
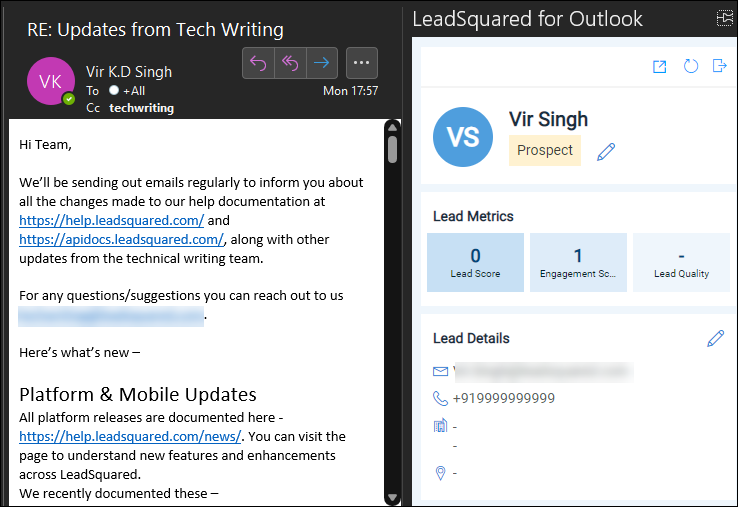
- On your Outlook home screen, from the app banner, click LeadSquared for Outlook.
- On the Welcome screen, enter your LeadSquared account’s Access Key and Secret Key. To obtain these keys, refer to How do I obtain API Access keys in LeadSquared?
- Once you’ve entered the keys, click Log in to LeadSquared. Your LeadSquared account is successfully linked with your Outlook account.

From the web browser
- On the Outlook web browser screen, click on any lead from whom you’ve received an email.
- On the email, click the More actions
 icon, and from the available options, click LeadSquared for Outlook.
 - On the Welcome screen, enter your LeadSquared account’s Access Key and Secret Key. To obtain these keys, refer to How do I obtain API Access keys in LeadSquared?
- Once you’ve entered the keys, click Log in to LeadSquared. Your LeadSquared account is successfully linked with your Outlook account.
From the mobile app
- On the Outlook mobile app home screen, tap on any lead you’ve received an email from.
- On the email, tap the
 icon, and from the available options, tap
  .
. - On the Welcome screen, enter your LeadSquared account’s Access Key and Secret Key. To obtain these keys, refer to How do I obtain API Access keys in LeadSquared?
- Once you’ve entered the keys, click Log in to LeadSquared. Your LeadSquared account is successfully linked with your Outlook account.
5. Add Leads from Outlook
Once your LeadSquared account is integrated with Outlook, you can start adding leads.
- On your Outlook account, open the email that you’ve received from your lead, and from the inbox banner, click LeadSquared for Outlook.
- On the LeadSquared for Outlook screen, click Create Lead in LeadSquared.
- Under Create New Lead, in the default lead fields, enter the relevant lead details.
- The email field is pre-populated with the lead’s email Id, and this value cannot be edited.
- Once you’re done, click Save in LeadSquared.
- To view this lead on the LeadSquared Manage Leads page, click
 .
.

6. Update Lead Details & Lead Stage
6.1 Lead Details
To update an existing lead’s details –
- On your Outlook account, open the email that you’ve received from your lead, and from the inbox banner, click LeadSquared for Outlook.
- Alongside Lead Details, click
 .
. - Enter the updated value in the relevant lead fields, and click Update. The lead details are updated in LeadSquared.
Note:
- You cannot update a lead’s email Id from your Outlook account.
- Only lead fields configured in the Lead vCard can be updated from the LeadSquared for Outlook screen.

6.2 Lead Stage
To update the lead stage of a lead from Outlook –
- On your Outlook account, open the email that you’ve received from your lead, and from the inbox banner, click LeadSquared for Outlook.
- Alongside the lead stage, click .
- On the LeadSquared for Outlook screen, alongside the lead stage, click .
- On the Update Lead Stage screen, from the New Lead Stage dropdown, select a lead stage.
- Once you’re done, click Update. The lead stage is updated.

7. Add Activities from Outlook
You can post the following email activities to the leads in your account –
- Negative Response to Email
- Neutral Response to Email
- Inbound Lead through Email
- Positive Response to Email
- Unsubscribed
To post an activity to a lead –
- On your Outlook account, open the email that you’ve received from your lead, and from the inbox banner, click LeadSquared for Outlook.
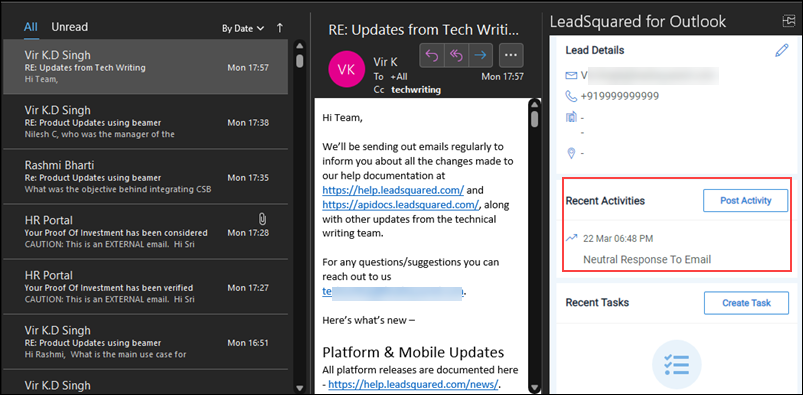
- On the LeadSquared for Outlook screen, click Post Activity.
- On the Post Activity screen, from the Select Activity dropdown, select the email activity you want to post.
- Once you’re done, click Post Activity. The activity is posted to your lead.
You can also view the activities added to the lead on the LeadSquared for Outlook screen.
8. Add & Update Tasks from Outlook
8.1 Add Tasks
You can add the following default task types to the leads in your account –
- To-Do
- Follow-up
- Phone call
- Appointment
- Meeting
To assign a task –
- On your Outlook account, open the email that you’ve received from your lead, and from the inbox banner, click LeadSquared for Outlook.
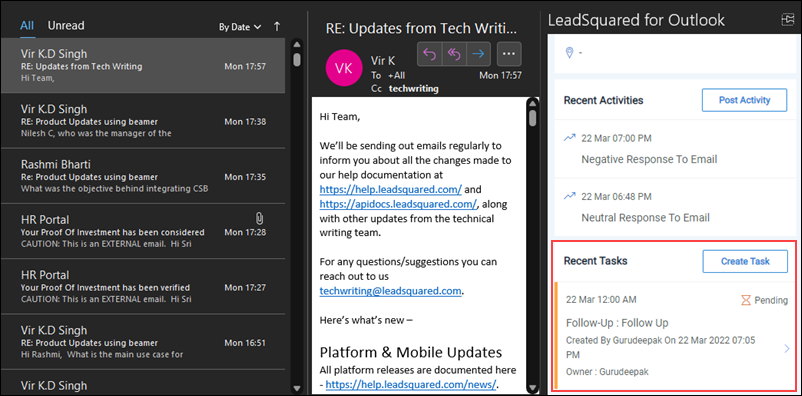
- On the LeadSquared for Outlook screen, click Create Task.
- On the Create Task screen, from the Task Type dropdown, select the task type you want to create.
- Assign the task to your user, and enter other details that are required to create the task.
- Once you’re done, click Create Task. The task is successfully created and assigned to your user.

You can also view the tasks created from the LeadSquared for Outlook screen.
8.2 Update Tasks
To update a task through your Outlook account –
- Open the email that you’ve received from your lead, and from the inbox banner, click LeadSquared for Outlook.
- Under Recent Task, click on the task you want to update.
- On the Task Details screen, you can –
- Mark the task as complete. To do this, against Mark as completed, toggle
 .
. - Edit and update the task fields. To do this, click the Edit button.
- Mark the task as complete. To do this, against Mark as completed, toggle
- Once you edit the fields, click Update Task. The task is successfully updated.
Any Questions?
Did you find this article helpful? Please let us know any feedback you may have in the comments section below. We’d love to hear from you and help you out!
What does a neutral response means?
Hi Resham,
A neutral response could be if a lead says something like “I will get back to you later”, “Not now, but maybe in the future”, “I’m not sure”, etc.