


Get Started
Sales Suite
Field Ops
Marketing
Service CRM
Integrations & Apps
FloStack
List Management – Feature Guide
1. Feature Overview
Lists are groups or collections of leads organized based on specific criteria. You can create lists to segment leads by location, stage, activity, tasks, etc. For example, leads from a particular city, those who opened an email campaign, or those scheduled for follow-ups.
The Manage Lists page lets you create, edit, and view all your lists in one place. You can access lists created by you as well as those shared by other users. Once created, lists can be used to –
- Send email or SMS campaigns
- Set up automations
- Perform bulk actions like updates, exports, or posting activities
Note: Users cannot create dynamic or refreshable lists with wildcard operators (Contains, Does not contain, Starts with, and Ends with). To know more, refer to
2. How It Works
You can create lists based on conditions and use them to organize and act on your leads efficiently. Depending on your use case, choose between static, dynamic, or refreshable lists.
3. Types of Lists on LeadSquared
LeadSquared supports three types of lists:
- Static Lists: Contain a fixed set of leads. Leads must be added or removed manually. When a lead who meets the criteria of the static list is added to your system, the list won’t get updated automatically. For example, a list of participants from a specific webinar.
- Dynamic Lists: Automatically update when a lead who fulfills the criteria of the dynamic list is added. For example, once conditions are set up to add leads from a particular city (Bangalore), whenever a new lead’s location is selected as “Bangalore”, it will automatically be added to the list.
- Refreshable Lists: Contain leads based on specific criteria but do not update automatically. The list gets updated only when the list is manually refreshed. For example, a list of leads who opened an email campaign in the past week, refreshed periodically to include the latest data.
4. Create a List
On LeadSquared, you can create static, dynamic, refreshable and empty lists.
4.1 New List (Static, Dynamic or Refreshable)
- From the LeadSquared main menu, navigate to Lead Management>Lists.
- Click Add List.
- On the Create List pop-up, select the search conditions from the available drop-downs and click Add.
- Once you’re done, click View Leads. On viewing the list, click Proceed To Save.
- On the next page, depending on your requirement, you can Save List as Static List, Dynamic List. or Refreshable List.
- Enter a name and description for the list and click Create List.
4.2 Empty List
If you don’t have any data yet but expect to add some in the future, you can create an empty list as a placeholder. For example, if you want to keep track of important leads, you can create an empty list beforehand. As you interact with new leads and identify those with strong interest, you can simply add them to the pre-created list.
- From the LeadSquared main menu, navigate to Lead Management>Lists.
- Click Create Empty List.
- Provide a name and add a description to the list.
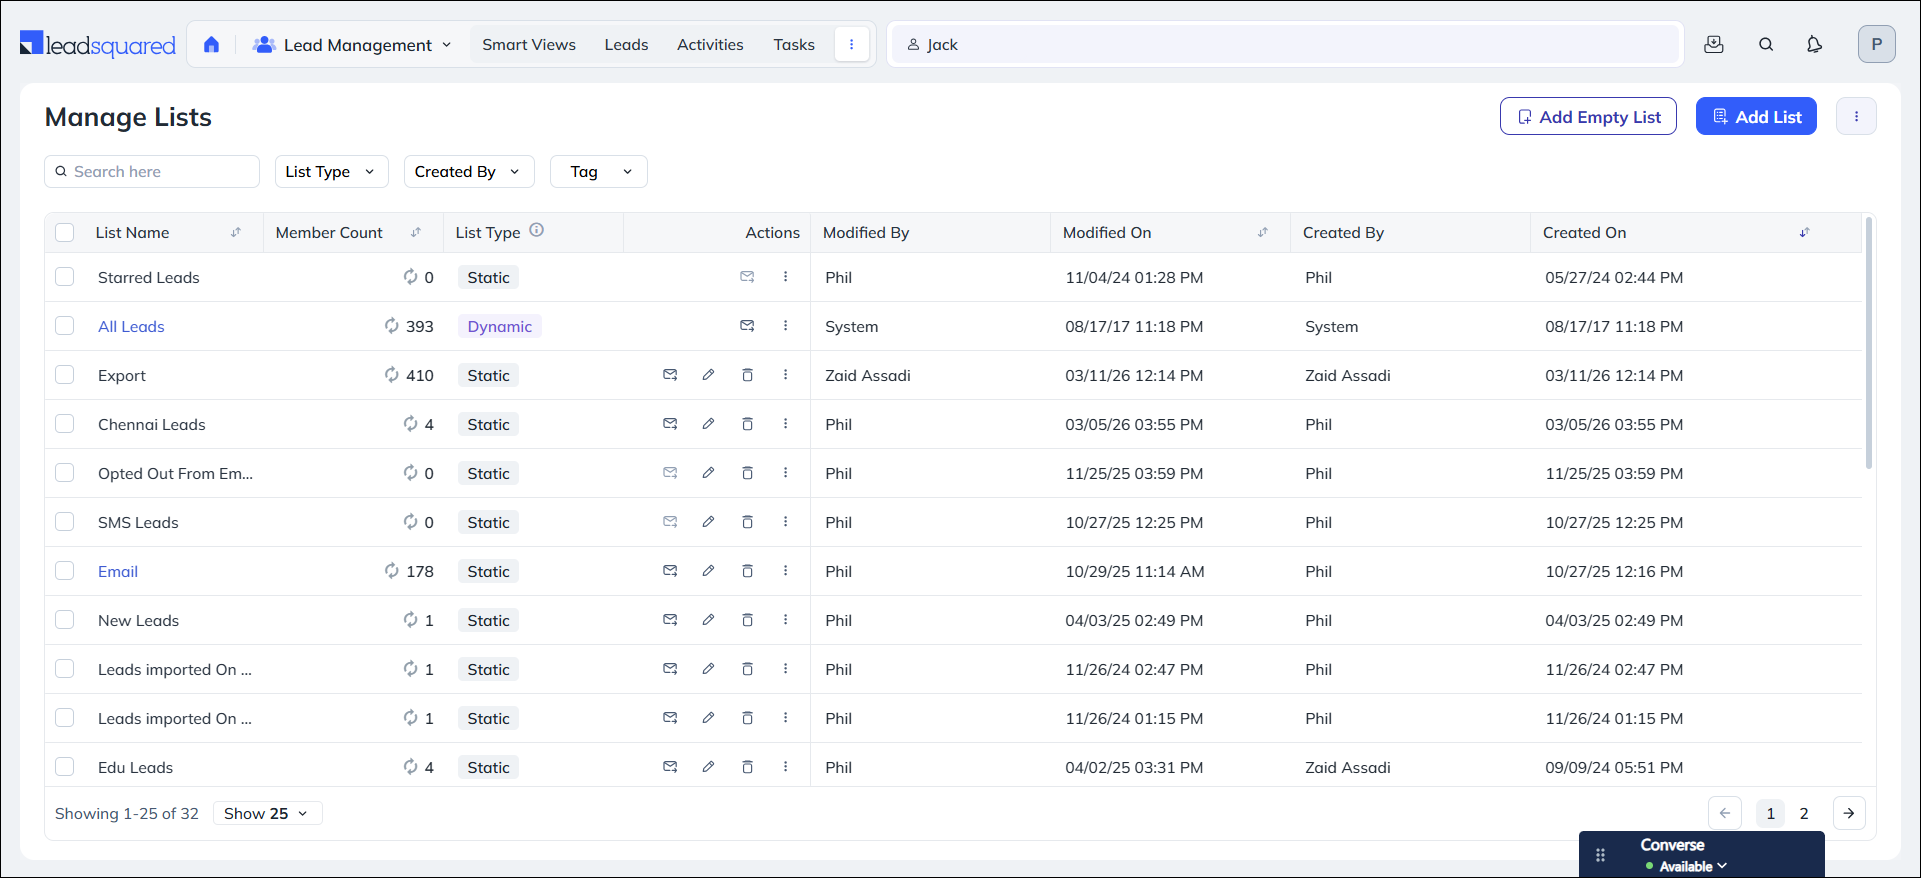
5. Manage Lists Page
On the Manage Lists page, you can perform the following actions –
- View all lists
- Send emails and SMS to lists
- Edit, delete, hide lists, and other custom actions
Note:
- Sales Users cannot share lists. When a Sales user creates a list, it can only be viewed by that individual user. No other users (including other Sales users, Admins, Marketing users, and Sales Managers) will be able to view these lists.
- When Admins, Marketing users, and Sales Managers create a list, it can be viewed by these three user types but not by Sales Users.
5.1 Search Lead Lists
Use the search bar on the top-left corner to find existing lead lists. You can also search by the List Type, Created By and Tag filters.

5.2 Row Actions
To view the list of actions available, on the Manage Lists page, hover your cursor over the Actions icon alongside the relevant list.
| Action | Description |
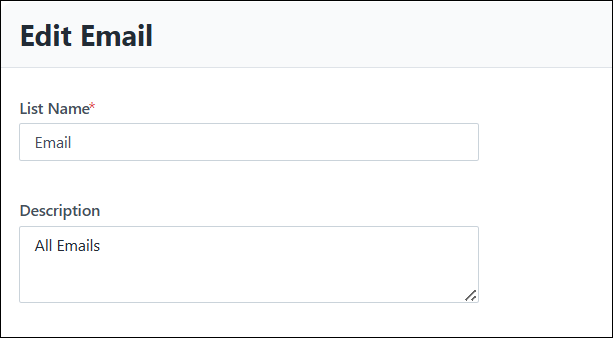
| Edit | Edit the name and description on the pop-up.
|
| Delete | Delete an existing list. |
| Hide | Hide an existing list. |
| Send Email | Send emails to the leads in the list.
|
| Send SMS | Send SMS to the leads in the list.
|
Note:
- Custom Actions you create using the Custom Lead and List Actions Connector will also show up here.
- Lists cannot be deleted once they are added to email campaigns. To remove a list, you must first stop the campaign and then delete it.
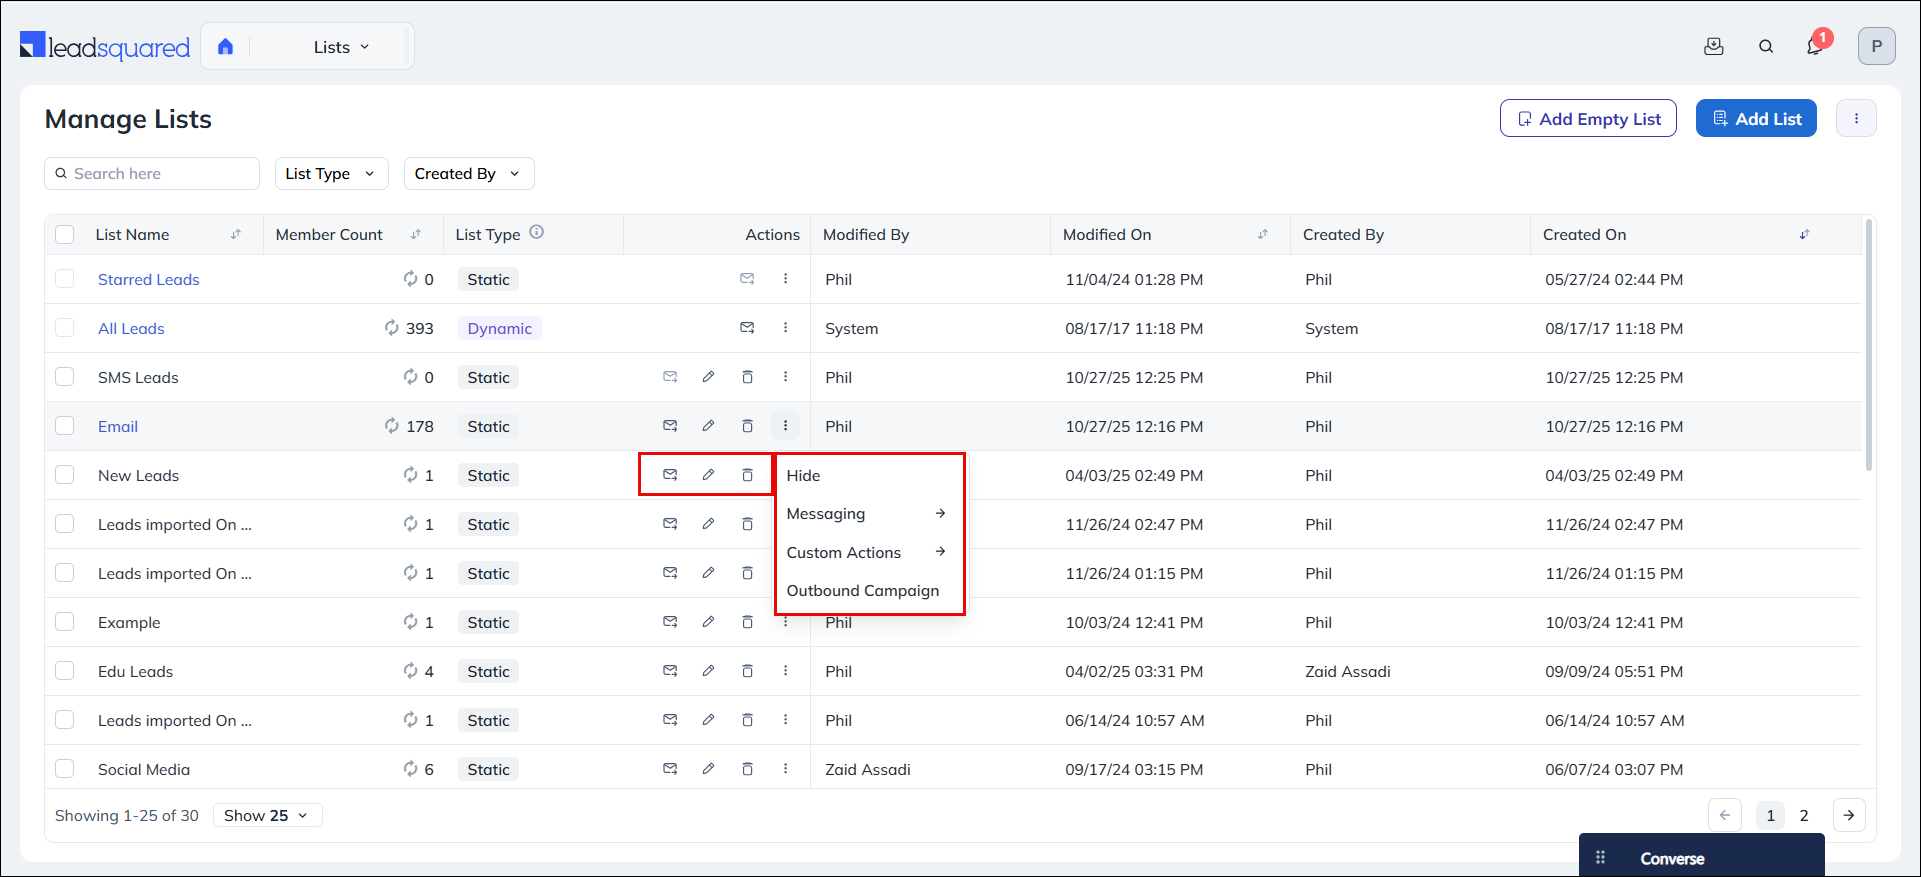
5.2.1 Hide and Unhide Lists
You can hide irrelevant lists from the Manage Lists page. To hide a list –
- Click the Actions icon alongside the relevant list and select Hide.
- On the Hide List popup, click Yes, Hide.

You can view your hidden lists by hovering over the Actions icon on the top-right corner of the screen and selecting Show Hidden Lists. You can also unhide lists from this page.

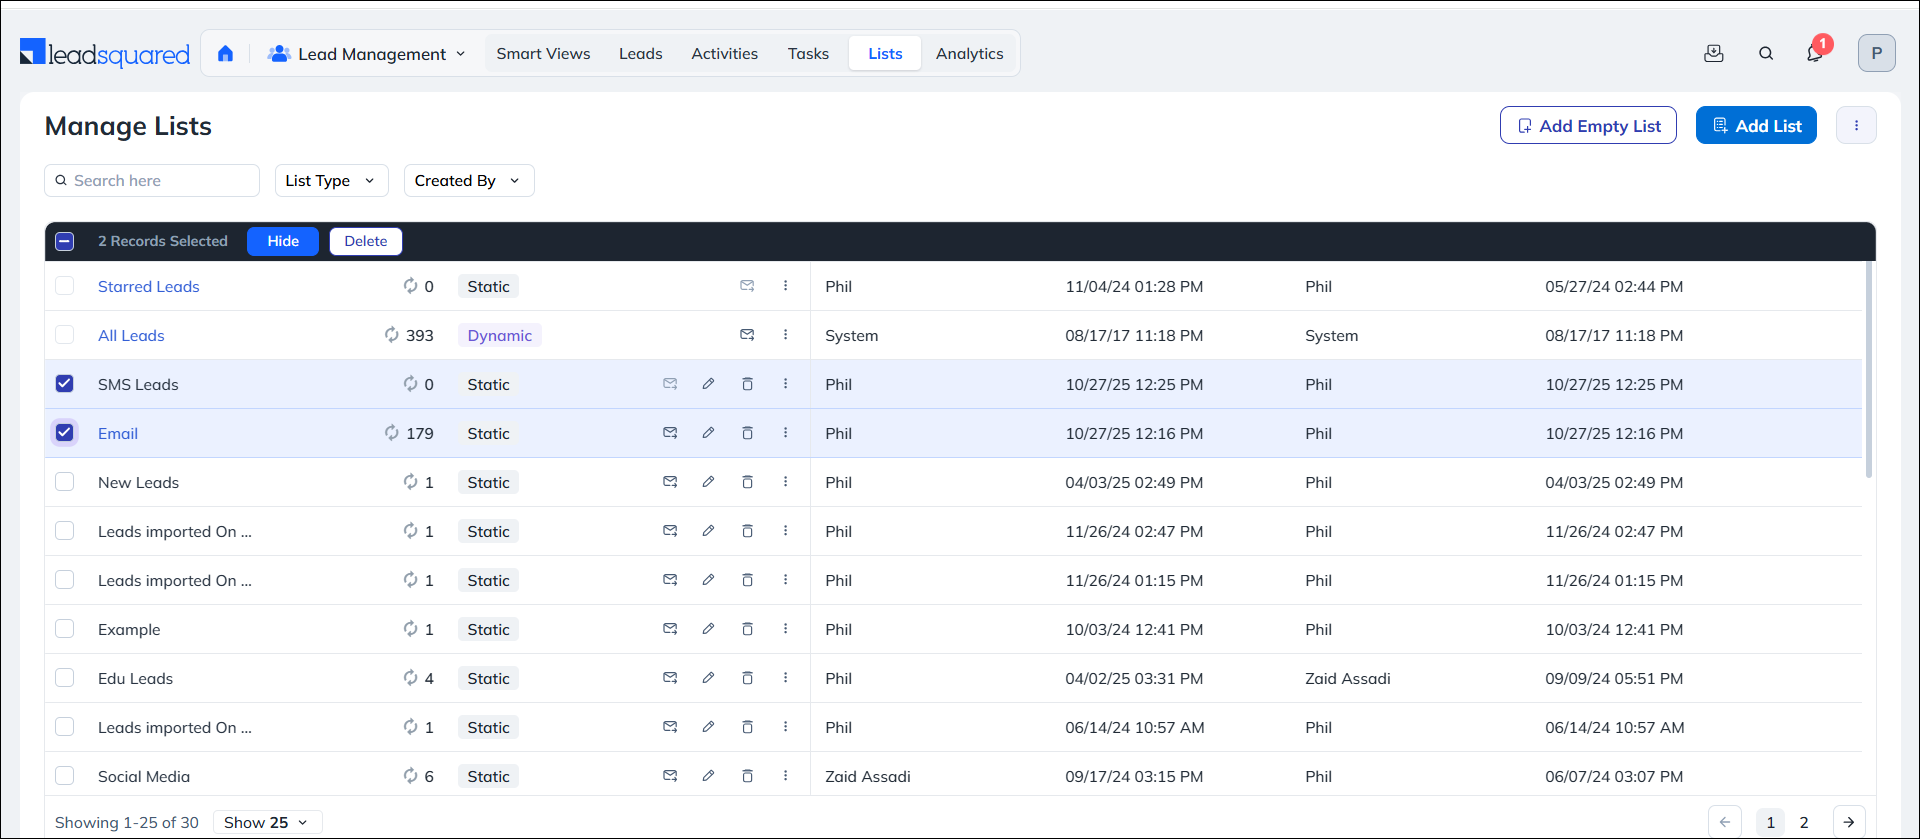
5.3 Bulk Actions
This allows you to delete and hide lists on the Manage Lists page. To do this –
- Select the list on which you want to perform these actions by clicking the checkbox next to the list.
- Select Delete or Hide from the Bulk Actions.
- Confirm your choice on the confirmation pop-up.
6. List Details Page
You can perform the following actions on the List Details Page –
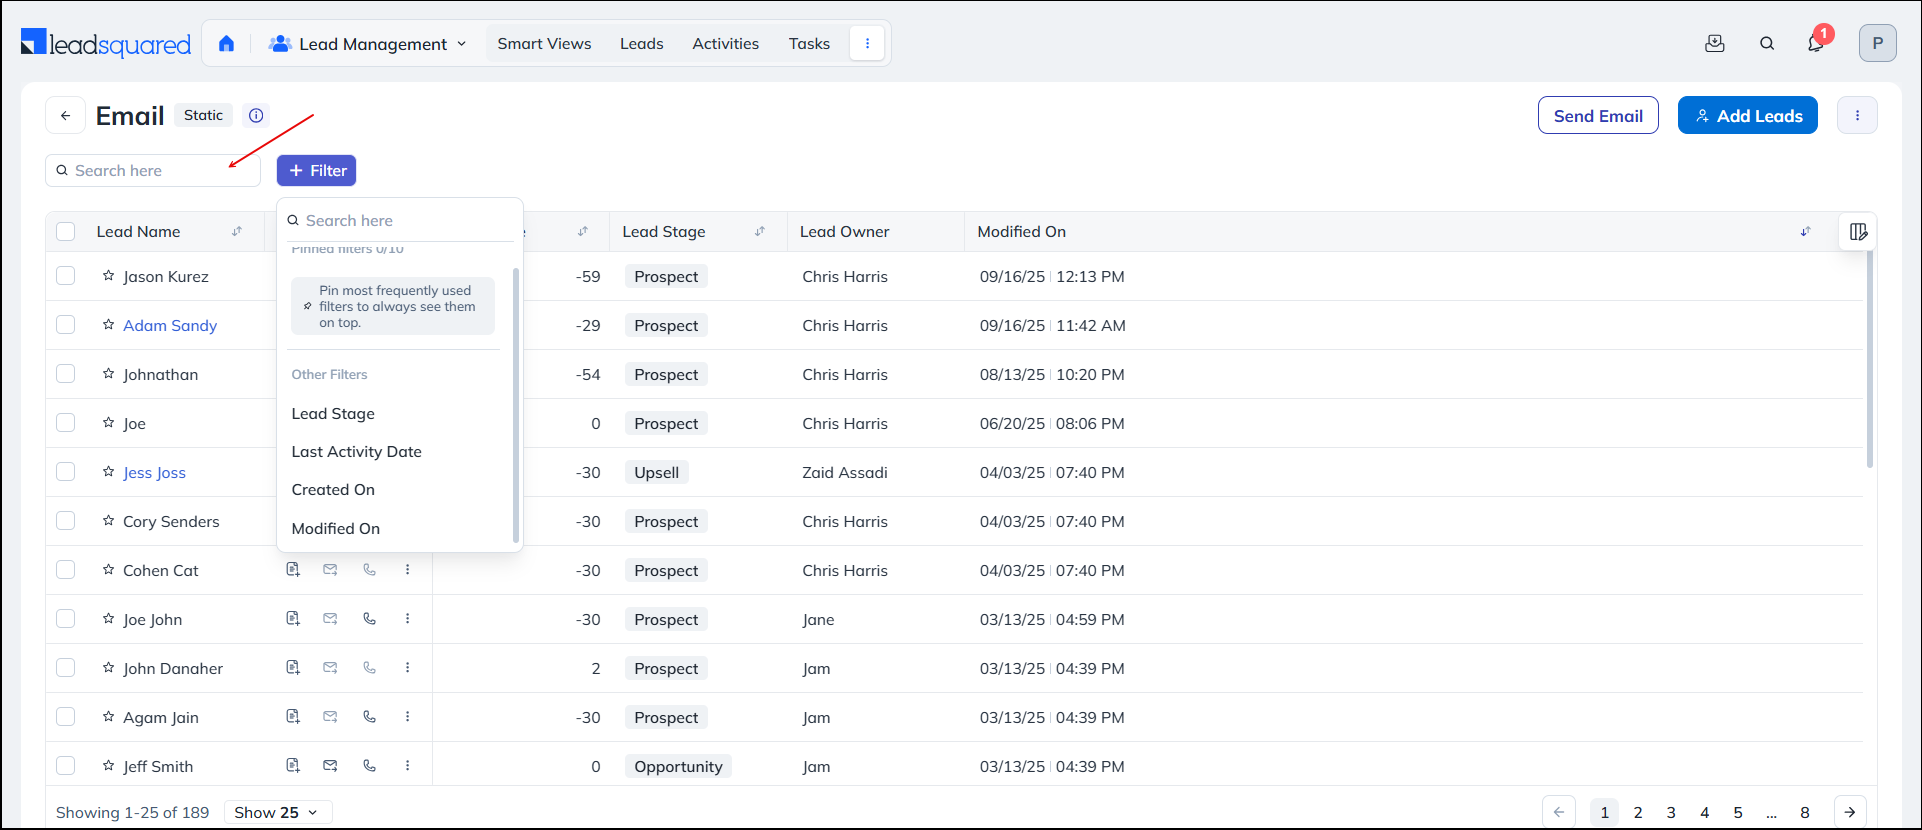
6.1 Search for Leads
You can find specific leads within the list by using different search criteria from the Search Tab or the Filter option. They are –
| Attribute | Description |
| Search Leads | Search for leads in the list using any of the lead’s details (such as first name, second name, email Id, etc.). |
| Lead Stage | Search for leads in the list who are currently in any one of the lead stages that you’ve created. |
| Last Activity Date | Search for leads in the list based on when was an activity last posted on them |
| Created On | Search for leads in the list based on when they were created |
| Modified On | Search for leads in the list based on when they were last modified on |
6.2 Add Leads
In addition to creating new leads to add to your list, you can also add existing leads from your account to a list, based on a particular criteria. To add existing leads to Static and Empty Lists –
- Click the Add Leads button on the List Details page.
- Set the relevant condition to find leads and click Add.
- Click View Leads to see the count of the leads who satisfy this criteria, their names and email address.
- Click Add To List to add all the leads to the list.

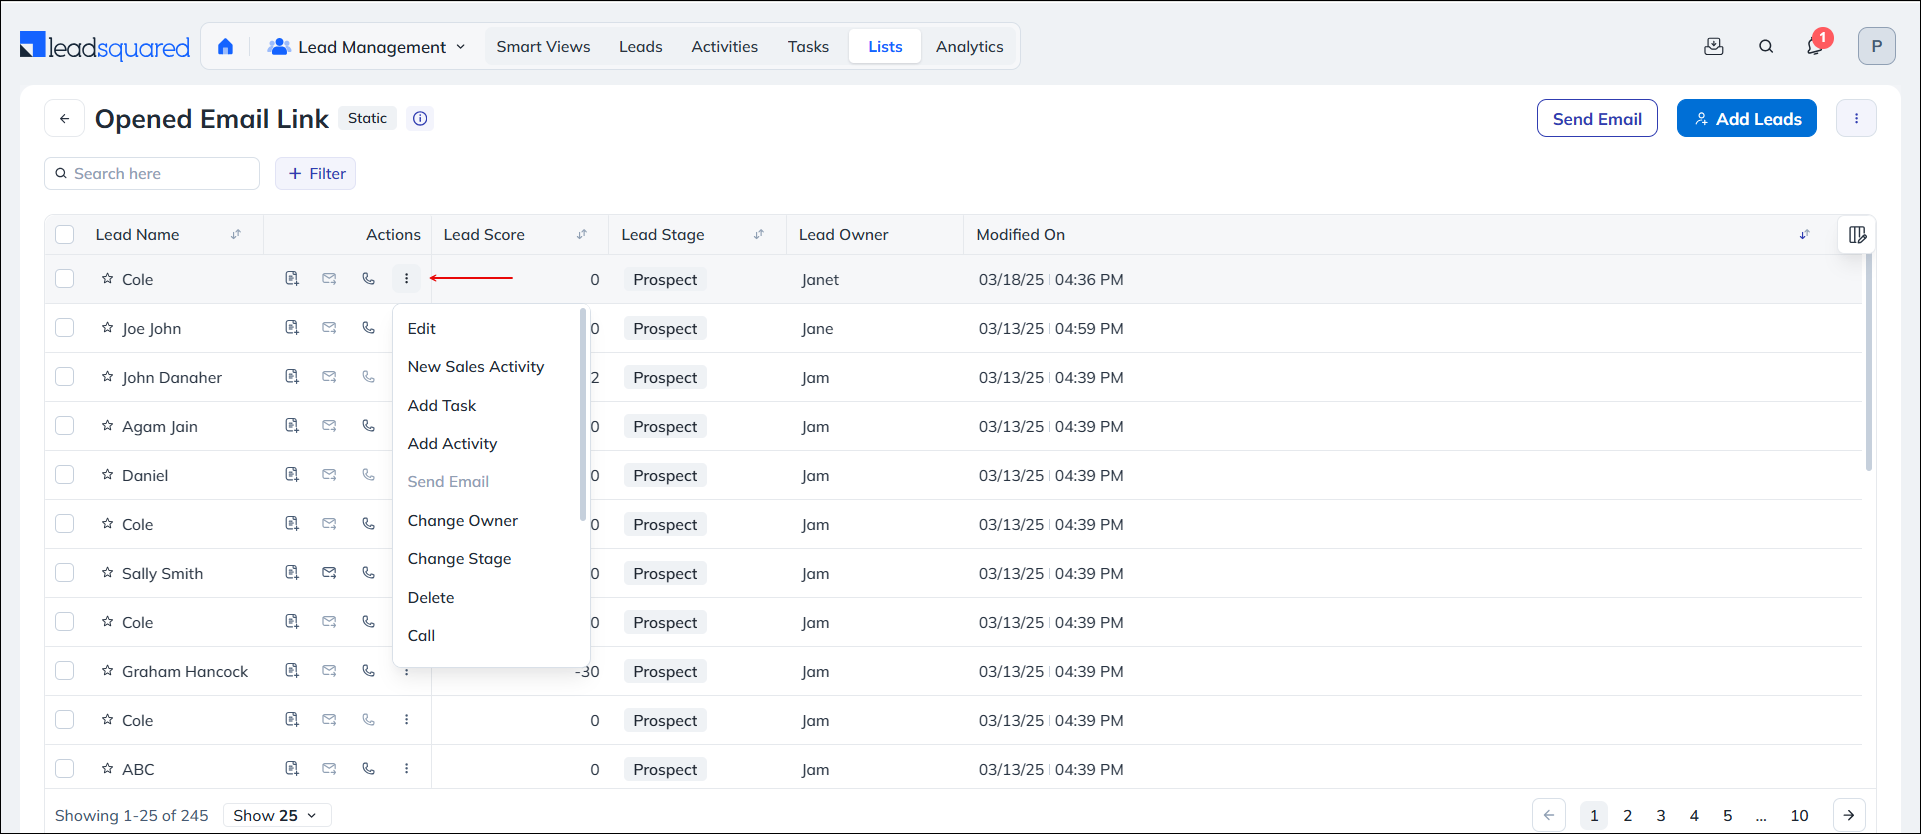
6.3 Row Actions
You can perform lead actions on the leads available within the list. To know how to perform these actions, refer to Manage Leads.
Individual Lead – Alongside a lead, hover your cursor over the Actions icon, and select the action you want to perform from the list of available actions.
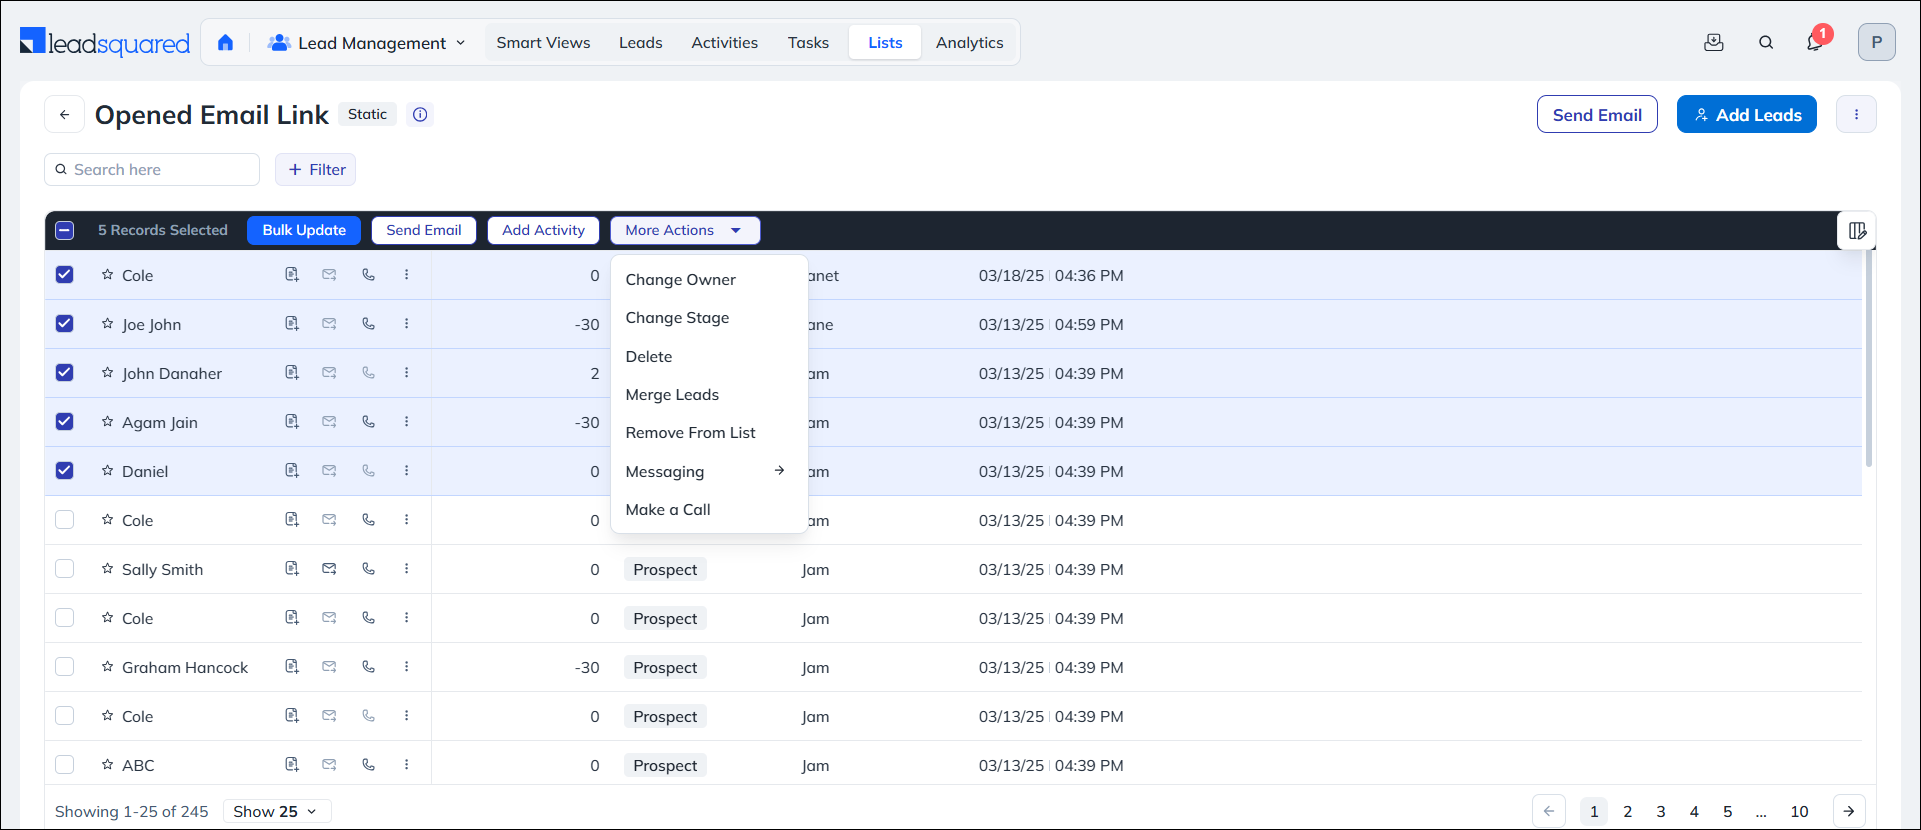
Bulk Actions – Select the leads, and hover your cursor over the More Actions button. From the dropdown list, select the action that you want to perform.
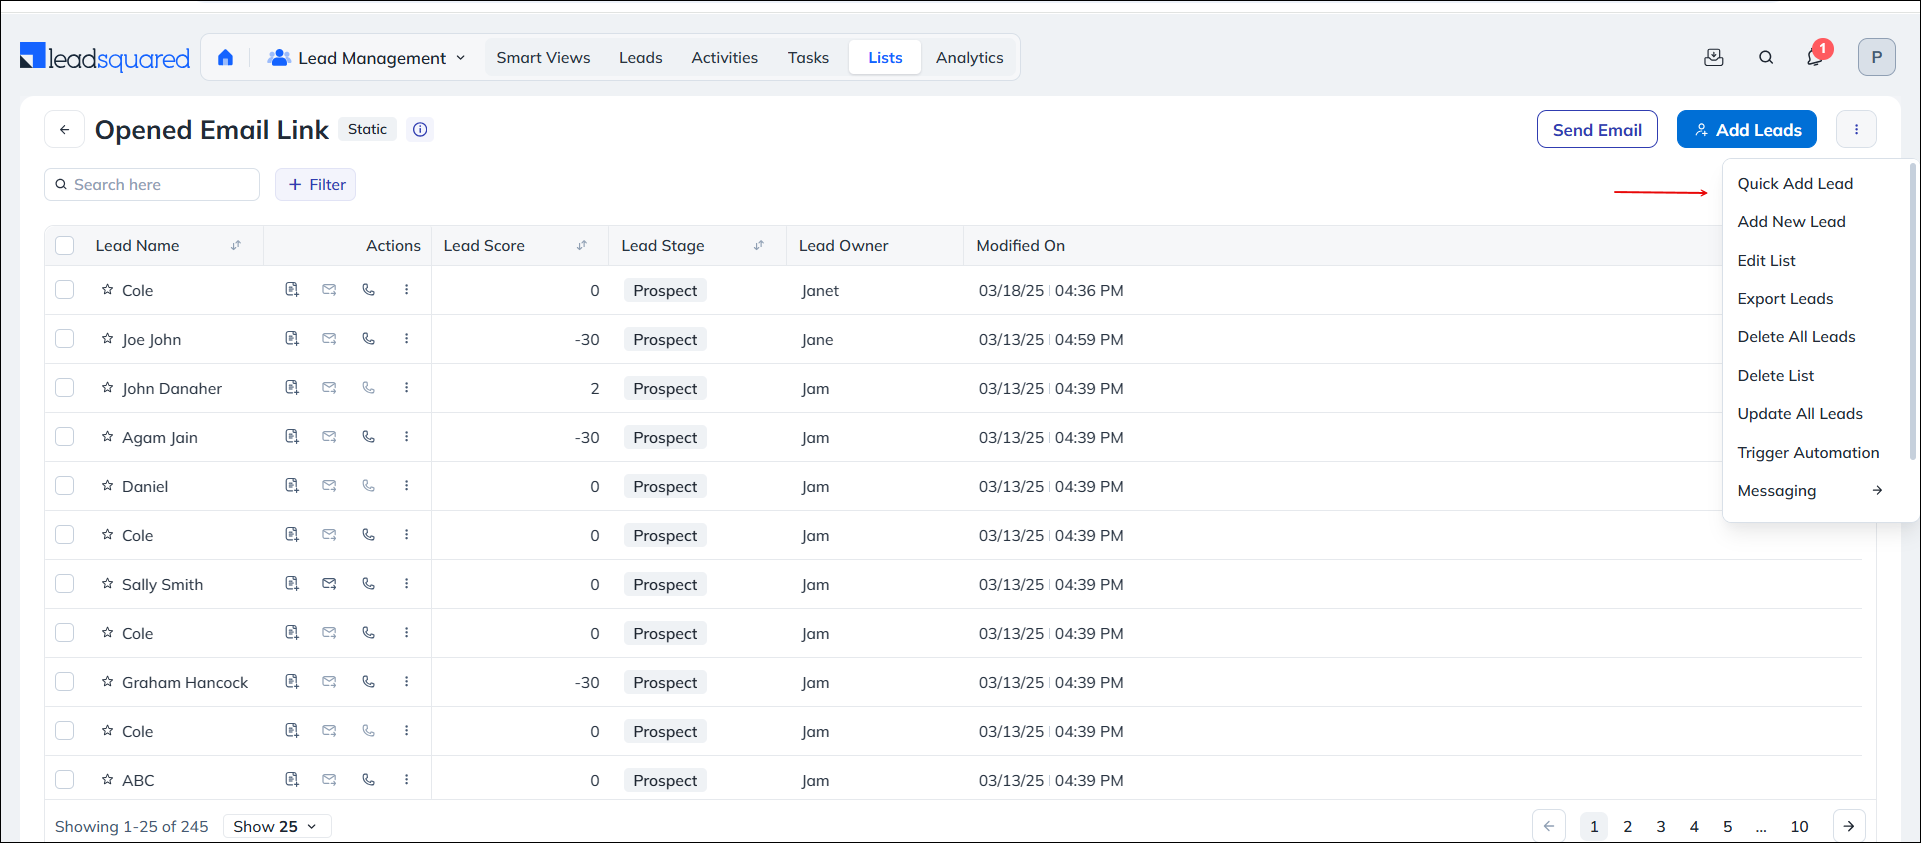
6.4 List Actions
You can perform actions on the entire list, which includes all the leads present within the list. To do this, hover your cursor over the List Actions button available on the top-right corner of the page. The list of available actions are –
| Actions | Description |
| Quick Add Lead | Add a lead directly to the list by providing minimal information. (Only in Static & Empty Lists) |
| Add New Lead | Add a lead directly to the list by providing detailed information. (Only in Static & Empty Lists) |
| Edit List | Edit the list name and list description. |
| Export Leads | Export leads in the list as a CSV file. |
| Add Leads | Add leads to your list from existing leads in your account. (Only in Static & Empty Lists) |
| Delete List | Delete the list (This doesn’t delete any lead data). |
| Delete All Leads | Delete all the leads available in the list, from your entire account. All the lead details will be deleted on fields present across your account. (Only in Static List) |
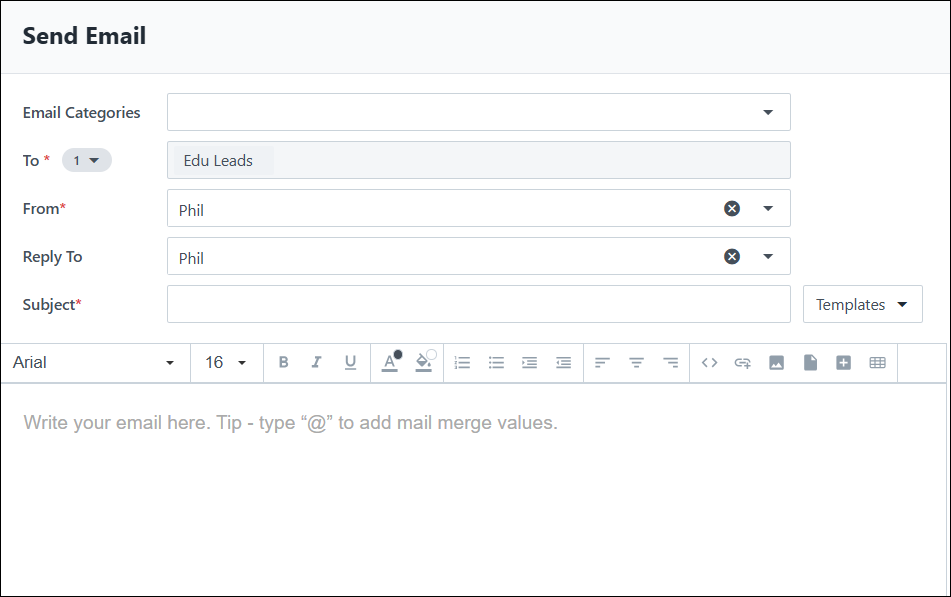
| Send Email | Send an email to the entire list from the email pop-up. |
| Update All Leads | On the Update Leads pop-up, from the lead fields dropdown, you can update all the leads in the list. |
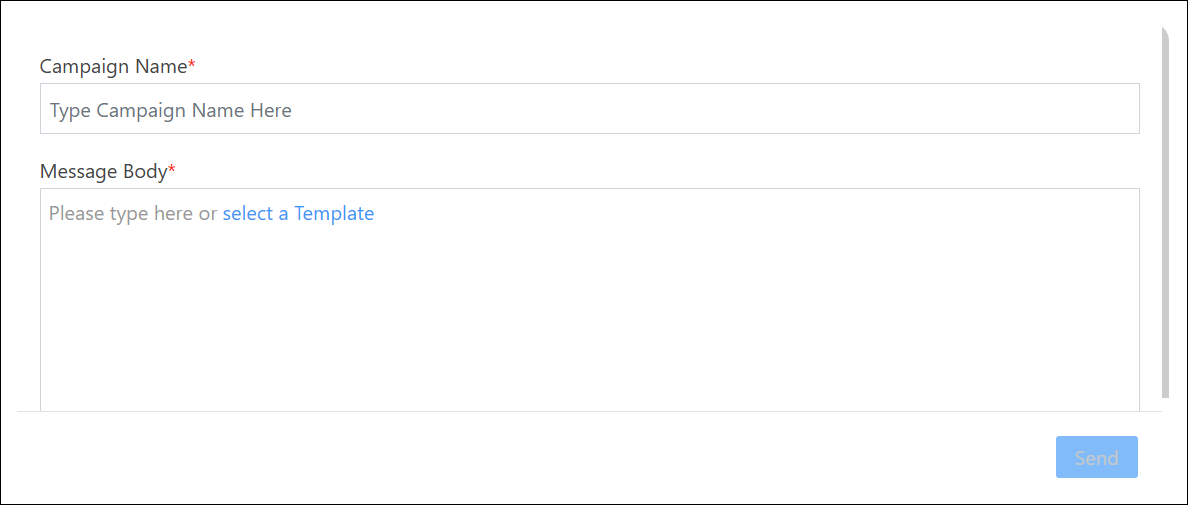
| Send SMS | Send an SMS to the entire list from the SMS pop-up. |
| Trigger Automation | You can trigger automations on the list. |
6.5 List View
On the List Details page, you can change the fields that are displayed on the grid. To do this –
- One the right side of the grid, click the Manage Columns icon.
- On the Manage Columns pop-up, select the fields that you want to view on the grid.
- Once you’re done, click Update.
- You can also change the current view to default by clicking Restore Default.
- Additionally, click the Pin icon alongside the relevant selected column to freeze it in front of the grid.
To learn more, see How to Customize Columns.
7. FAQs
Why can’t I see the ‘Delete All Leads’ option under the list actions for dynamic and static lists.
The option to ‘Delete All Leads’ is only available for static lists (under list actions). To delete leads from dynamic or refreshable lists, bulk select the leads and then under the Actions menu, click Delete.
Any Questions?
Did you find this article helpful? Please let us know any feedback you may have in the comments section below. We’d love to hear from you and help you out!