1. Feature Overview
Sync your Jira account with LeadSquared to manage Jira projects and issues from a single interface. After setup, you can:
- View Jira projects, issues, and details from the Ticket Details page.
- Create new Jira issues directly from a ticket in LeadSquared.
- Search and link existing Jira issues to tickets.
This connector brings issue tracking into your CRM, allowing agents to manage customer and internal tasks in one place.
2. Prerequisites
- This is a paid connector. To enable it, contact your account manager, or write to scsupport@leadsquared.com.
- Only admin users on LeadSquared’s Sales and Service CRM platforms can install and configure this connector.
3. How it Works
This connector enables sync between LeadSquared and Jira. You can create new Jira issues from LeadSquared and view existing Jira issues as activities on LeadSquared’s Ticket Details page.
- Install and configure the connector from the Apps Marketplace.
- Connects your Jira account and grants permissions.
- Enable sync for all Jira issues with your LeadSquared account.
- The Jira widget appears on the Ticket Details page.
- Agents can create new Jira issues or link existing ones directly from a ticket in LeadSquared.
All synced issues appear as activities under the ticket for easy tracking.
4. Install the Connector
- Log in to LeadSquared (https://in21.leadsquared.com/), and navigate to Apps>Apps Marketplace.
- Search for Jira, and click Install.
- Alternatively, you can find the connector on the left panel, under Ticketing.
- Once the connector is installed, hover over the settings
 icon, and click Configure.
 - Choose user roles from the Select Role dropdown to grant connector access. Only the user roles selected here can view and access the connector.
- Based on Role – From the Specify Roles dropdown, choose LeadSquared Sales CRM user roles who can view this connector from the Apps menu.
- Advanced (User Level) – From the Select User Field dropdown, select a boolean-type user field. If this field contains ‘Yes’ (e.g., ‘Is Employee’ = ‘Yes’ for Sam), the user can access the Jira connector.
- If you don’t grant permissions to other user roles, skip this step and click Save.
- Once you’re done, click Save. The connector is successfully installed.
Note:
- By default, all Admin users can access the connector.
- Connector access settings do not affect Jira widget visibility. Any user with access to the Ticket Details page can view the widget.
5. Configure the Connector
Once the connector is installed, connect your Jira account to LeadSquared.
5.1 Authentication Variables
- Navigate to Apps>Jira, and click on Authentication Variables.
- Enter your Project Keys
- To get your Jira Project Key, refer to Editing a Project Key.
- Under accessToken, click Configure.
- On the OAuth Settings pop-up, select the acknowledgment checkbox and click Save & Next.
- Click Sign-in with Jira, and authorize access…
- Once you’re done, click Close, and Save Details.

5.2 All Flows
Here, enable sync for all listed Jira issue flows. When an issue is logged in Jira, a corresponding ticket is created in LeadSquared.
- Next to a Jira issue, click the three-dots menu
 and select Edit Configurations. Review the configuration, then return to the All Flows screen.
 - On the configuration page, review the listed flow. No other action is needed here. Navigate back to the All Flows screen.
- Alongside Sync Disabled, enable the slider
 .
. - Repeat these three steps for all the 11 issues that are listed here.
- Once you’re done, navigate to the Ticket Details page to access the Jira widget.
6. Create New Jira Issues
Once the connector is configured, to create Jira tickets from LeadSquared –
- Log in to LeadSquared Marvin (https://marvin-in21.leadsquared.com/service-cloud). On the left panel, click Tickets
 , and open an existing ticket.
 - On the Left-panel, click Jira Integrations, and then click the Create New button.
- On the New Issue pop-up, select the Project and Issue Type, and enter a Summary. All fields are required.
- Click Save to create the issue in Jira.

You can post comments on the ticket through LeadSquared, and this is reflected on your Jira ticket.
You can also add attachments to the ticket through LeadSquared, and this is reflected on your Jira ticket.
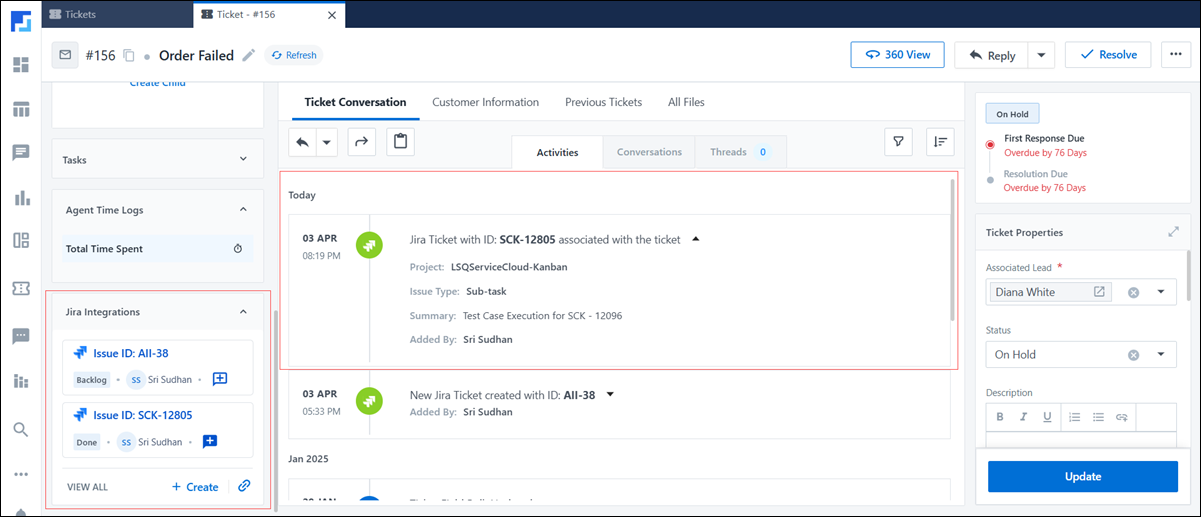
7. Link Existing Issues
To link existing Jira Issues (Work Items) with LeadSquared –
- On the Left-panel of the Ticket Details page, click Jira Integrations, and then click the Link Issue
 button.
 - In the Link Issue pop-up, start typing the issue name in the dropdown. Select the correct issue from the list.
- Select the issue and click Save.
- The following details are logged as an Activity on the Ticket Details page –
- Project
- Issue Type
- Summary
- Added By
Any Questions?
Did you find this article helpful? Please let us know any feedback you may have in the comments section below. We’d love to hear from you and help you out!


