


Get Started
Sales Suite
Field Ops
Marketing
Service CRM
Integrations & Apps
FloStack
Email, SMS and WhatsApp Notifications Configuration for Admins
1. Feature Overview
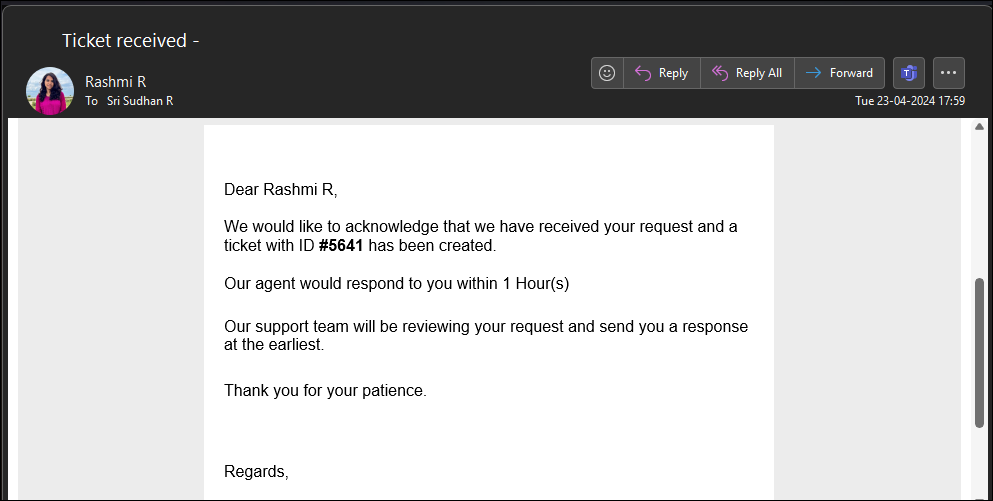
Send email, SMS and WhatsApp notifications to your customers and agents on important events, like ticket creation, tickets resolved, etc. This ensures transparency and that all the stakeholders are aware of the progress made on tickets.
You can also set-up LeadSquared Automations that send SMS and WhatsApp message notifications to your customers.
2. Prerequisites
- Service CRM is a paid feature. To enable it, contact your account manager, or write to scsupport@leadsquared.com.
- To send SMS notifications, install and configure the LeadSquared SMS Connector in your account and ensure you have an active SMS service provider account. To enable it, contact your account manager, or write to support@leadsquared.com.
- To send WhatsApp message notifications, install and configure the LeadSquared WhatsApp Connector in your account and ensure you have an active WhatsApp service provider account. To enable it, contact your account manager, or write to support@leadsquared.com.
- You must be a Service CRM Admin to configure the Notifications feature on your account.
- To set up automations that send WhatsApp and SMS messages to customers, the automation feature must be enabled on your account. Contact your account manager or email support@leadsquared.com to enable it.
3. How it Works
You can send emails for Customer Notifications and Agent Notifications categories. You can send SMS and WhatsApp messages only for Customer Notifications categories.
Each category includes ticket-related events (e.g., Agent Closes Ticket, Agent Resolves Ticket, etc.). Whenever any of these events occur, a corresponding message notification is sent. Customer Notifications are sent out to customers, whereas Agent Notifications are internal emails sent to your agents.
For emails, default message templates are configured and available for each notification. If required, edit these templates to reflect your requirements. Once you’re satisfied, preview the template and send a test message to ensure it works as expected.
Note:
- For SMS messages, you can only use DLT-approved templates.
- For WhatsApp, you can only use WhatsApp-approved message templates.
4. Access the Notifications
Once you log in to LeadSquared (https://login.leadsquared.com/), to access Notifications –
- Navigate to My Profile>Settings>Service Cloud.
- On the Service Cloud Settings page, under Workflows, click Notifications.
5. Configure Email Notifications
By default, on the Notifications page, all the email notifications are enabled. These notifications are sent out whenever the corresponding event (such as SLA reminder, Agent closes a ticket, etc.) occurs. You can perform the following actions on these notifications –
- To turn off a notification, disable the slider
 .
. - To edit a notification, hover your cursor next to the slider, and click
 .
. - To preview a notification, hover your cursor next to the slider, and click
 .
.
6. Configure SMS Notifications
Before you configure the content for SMS notifications, enable the LeadSquared SMS connector on your account. To enable it, contact your account manager, or write to support@leadsquared.com.
- On the Notifications page, next to the event for which you want to send a message, under SMS, enable the slider .
- On the Fetching SMS Connector pop-up, click Configure.
- On the Edit SMS Notification page, configure the following details –
- Sender ID – From the list of sender IDs associated with your SMS service provider, select one.
- Template ID – From the list of DLT-approved templates available in your account, select one.
- Message – The content from your message template is autopopulated here. You cannot edit or update this content from this screen.
- Map Variables – If the message template contains variables, map them by clicking this button. On the Variable Mapping pop-up, map the Entity to the relevant Placeholder. Once you’re done, click Save.
- The Entity are the Service CRM entity types (Customer, User and Ticket).
- Placeholders are the LeadSquared fields available under that entity type, which can be mailmerged with the message template.
- Map Variables – If the message template contains variables, map them by clicking this button. On the Variable Mapping pop-up, map the Entity to the relevant Placeholder. Once you’re done, click Save.
- Once you’re done, click Save Template.
- You can navigate between different customer notifications from the right panel.
- Once you’re done, click Save Template.
Note:
- Even after the connector is installed and configured in your account, and if the connector isn’t identified, contact your account manager, or write to scsupport@leadsquared.com.
- You can send SMS messages only for Customer Notifications.
7. Configure WhatsApp Notifications
Before you configure the content for WhatsApp notifications, enable the LeadSquared WhatsApp connector on your account. To enable it, contact your account manager, or write to support@leadsquared.com.
- On the Notifications page, next to the event for which you want to send a message, under WhatsApp, enable the slider .
- On the Fetching WhatsApp Connector pop-up, click Configure.
- On the Edit SMS Notification page, configure the following details –
- Sender ID -Select a sender ID from the list associated with your WhatsApp service provider.
- Template ID – Select one from the list of WhatsApp-approved templates available in your account.
- Message – The content from your message template is autopopulated here. You cannot edit or update this content from this screen.
- Map Variables – If the message template contains variables, map them by clicking this button. On the Variable Mapping pop-up, map the Entity to the relevant Placeholder. Once you’re done, click Save.
- “Entity” is the Service CRM entity types (Customer, User, Ticket and Customer Satisfaction).
- Placeholders are the LeadSquared fields available under that entity type, which can be mailmerged with the message template.
- Map Variables – If the message template contains variables, map them by clicking this button. On the Variable Mapping pop-up, map the Entity to the relevant Placeholder. Once you’re done, click Save.
- Once you’re done, click Save Template.
- You can navigate between different customer notifications from the right panel.
- Once you’re done, click Save Template.
Note:
- Even after the connector is installed and configured in your account, and if the connector isn’t identified, contact your account manager, or write to scsupport@leadsquared.com.
- You can send WhatsApp messages only for Customer Notifications.
8. Edit Notifications
Alongside an event’s notification, click ![]() to edit it. Once you’re on the Edit Notification page –
to edit it. Once you’re on the Edit Notification page –
- Allow Agent/Customer to Reply – Enable the slider to allow your agents/customers to reply to the email notification they receive.
- Send Email From – Select the email ID from which you want to send the notification. You can only select a verified email ID.
- If you disable the Allow Agent/Customer to Reply slider, the prefix “no-reply” will automatically be added to the sender email ID.
- Subject – Enter the email subject.
- Message – In the message textbox, enter the content of the email notification. Using the editor, you can stylise the message (such as changing the font style, and color, aligning the text, etc.).
- To mail merge ticket or customer fields, click
 , and from the Merge Tags option list, select the ticket field you want to merge with the template content. Mail merging a field will automatically populate the content stored in that field in the email.
- To mail merge ticket or customer fields, click
- Then, click Preview, and on the Message Preview pop-up, click Send Test Email. A test email is sent to the admin’s email ID that’s displayed on the pop-up.
- Once you’re satisfied with the email content, click Save.
- You’ll be redirected to the Notifications page, where you must click Save. An email notification is sent to your customer/lead every time the selected event occurs.

9. Configure Automations
Leverage LeadSquared automations to send SMS and WhatsApp messages to customers whenever a ticket is created or updated. For example, you can send an SMS when a ticket is created, a WhatsApp status update when the ticket moves to the next stage, a survey message is sent when a phone call activity is posted on the ticket, and more.
Once you log in to LeadSquared (https://login.leadsquared.com/), to configure an automation –
- Navigate to Workflow>Automation, and click Create Automation.
- Alongside Ticket Triggers, select and configure a relevant trigger. To know more, refer to Service CRM Automations.
- Click
 , and under Actions, select –
- WhatsApp – This sends a WhatsApp message when the automation is triggered.
- Send Text – This sends an SMS message when the automation is triggered.
- On the Configure WhatsApp Template/Send Text pop-up, Select a Message Template you want to use, and click Save.
- Publish the automation. Each time the automation is triggered, the selected message will be sent to your customer.
10. Next Steps
- To send email notifications, refer to Email Notifications.
- To send SMS and WhatsApp notifications, refer to Send SMS and WhatsApp Messages on Tickets – For Agents.
Any Questions?
Did you find this article helpful? Please let us know your feedback in the comments section below. We’d love to hear from you and help you out!