


Get Started
Sales Suite
Field Ops
Marketing
Service CRM
Integrations & Apps
FloStack
Field Force Insights – Feature Guide
1. Feature Overview
Use Field Force Insights to monitor and evaluate the daily on-ground activities of individual field sales users from your LeadSquared Web and Mobile Applications. This feature gives managers real-time visibility into user movements and productivity. It is designed as an upgrade to the Location History Tracker for accounts with Location Insights enabled. It provides detailed visibility into each user’s:
- Check-in/check-out status for the current day
- Distance travelled and route map
- Working, travelling and halt hours
- Pending tasks and time spent on tasks for the current day
- Device details including the make, model, operating system and the installed version of the LeadSquared app
2. Prerequisites
- Users must have the LeadSquared Mobile app installed on their devices, and location permission access must be enabled. To know more, please refer to Location Tracking on LeadSquared Mobile.
- Admins must enable location tracking permissions for their users:
- Navigate to Settings>Mobile App>Permissions.
- Under Location Tracking, enable all the permissions.
- Enable user check-in in your account for location tracking and distance calculation:
- Navigate to Settings>Users and Permissions>User Check-in.
- Enable the Show check-in widget to web users setting.
- All mobile users must Check-In/Check-Out daily for the system to effectively track their location and calculate the distance travelled during the day. Distance calculation will not be initiated for the day if the mobile user has not checked in.
- To get data with highest location accuracy, refer to
3. User Roles & Access
Field Force Insights access is determined by the user’s role in your LeadSquared account. The table below outlines the level of access each role has, including visibility into users, teams, and sales groups.
| User Role | Access |
| Admins | All users, teams and sales groups |
| Sales Managers | All users, teams and sales groups |
| Sales Group Managers / Reporting Managers | Sales Groups / Reportees they are managers of |
| Sales Users | Only their own data |
4. How It Works
- Enable Location Insights on your LeadSquared account.
- Once it’s enabled, you’ll get insights about your users individually, including their location, distance travelled, activity status and working hours from Field Force Insights.
5. Feature Index
- User Listing Page – View all your sales reps at a glance.
- Single User Location History Page – Access detailed information about a particular rep.
- Export Location Data – Download the location history data of your reps.
- Settings – Customize how Field Force Insights works
- Field Force Insights on Mobile – Configure and use the feature on LeadSquared Mobile App
6. How To Access Field Force Insights on the Web App
You can access Field Force Insights from the following areas on the Web App
- Apps>Location Insights
- Apps>Field Sales Territories
- Apps>Journeys
- Reports>Reports Home
To access Field Force Insights –
- Navigate to Apps>Location Insights.
- Select Field Force Insights.
Or,
- Navigate to Apps>Field Sales Territories.
- Select Reports from the left menu and click Field Force Insights.
Else,
- Navigate to Apps>Journeys.
- Select Reports from the left menu and click Field Force Insights.

Alternatively,
- Navigate to Reports>Reports Home.
- Select Field Sales Tracking and click Location History Tracker. You will be directed to the Field Force Insights page.
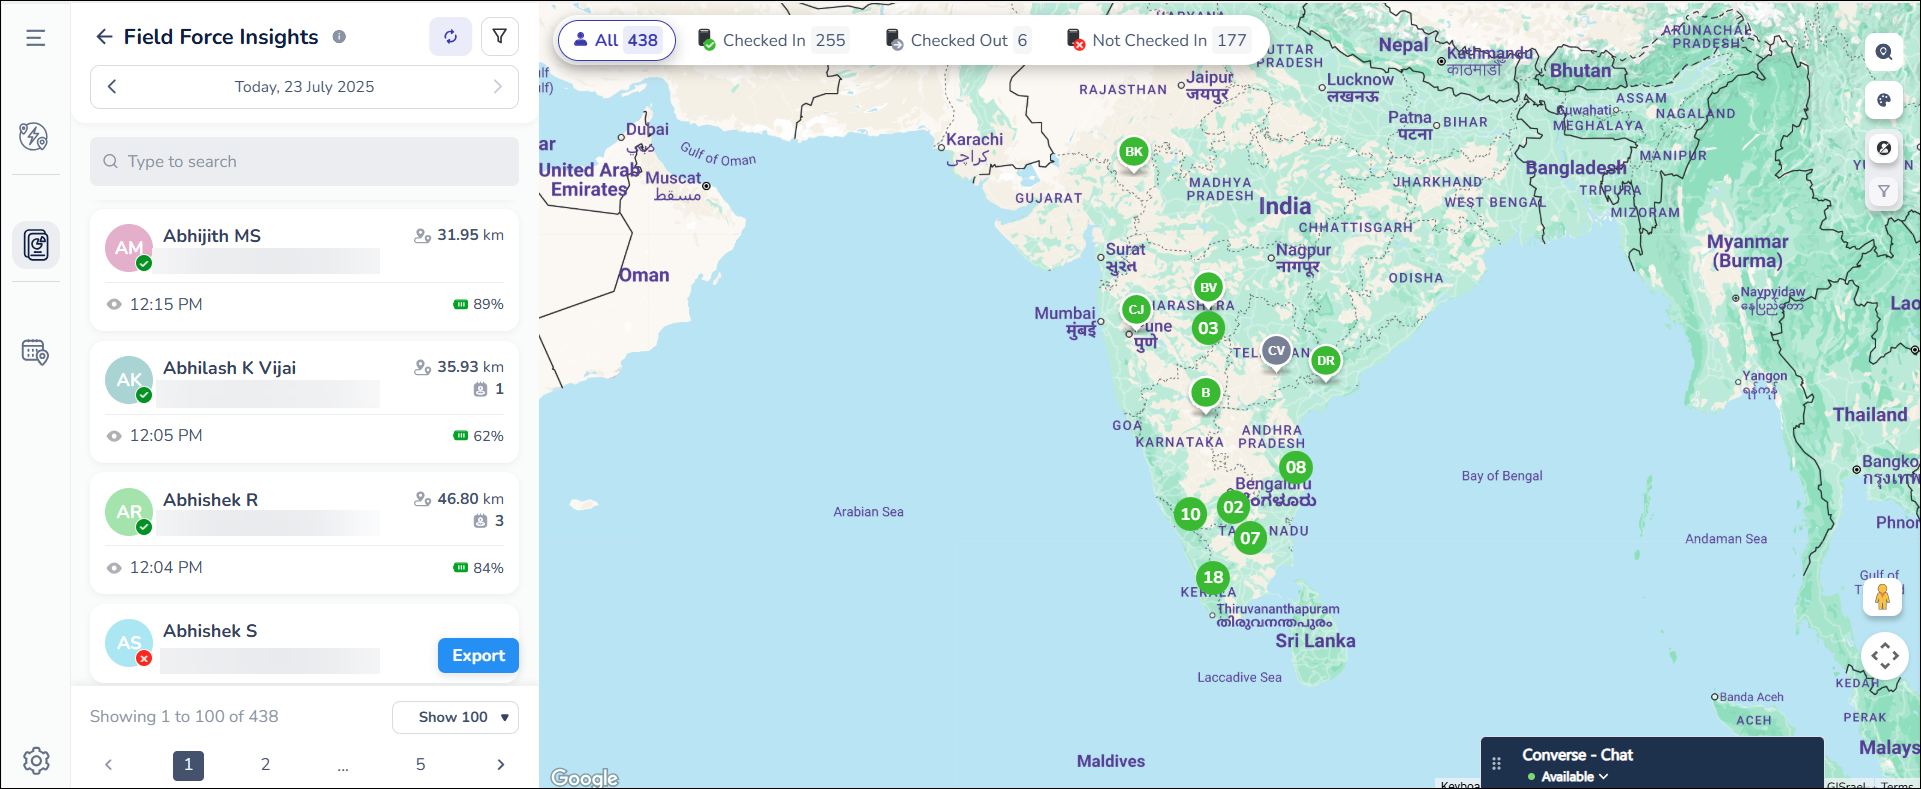
7. User Listing Page
The user listing page in Field Force Insights directly opens with all the users accessible to you, without having to pre-select the Teams or Groups. If necessary, you can apply filters by Team or Group based on your role and access level. To view the recently synced user insights, click the Refresh button above the user list.
The User Listing Page displays –
- User Card
- Filters
- Check-In/Check-Out Status Counter
- Map Actions
7.1 What is a User Card
A user card displays:
- A unique profile icon for quick identification, the name, and email address of a user
- The user’s device battery percentage
- The user’s Last Seen timestamp
- The distance that the user has travelled.
- The user’s status in the form of a dot below the profile icon.
- If it is
 , the user has checked in
 - If it is
 , the user has checked out
 - If it is
 , the user has not checked in for the day
- If it is
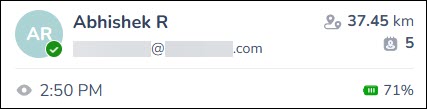
From the example given below, we can infer that:
- The user’s battery percentage is 71
- The user was last seen active at 2:50PM
- The user has travelled 37.45 kms
- The user is checked in
- The count of Geotagged Activities is 5
7.2 How to use the Filter Options
To help you quickly access the most relevant data, Field Force Insights offers filtering options. You can filter users based on Teams or Groups you have permission to view, or narrow down insights by specific dates to track daily activities. These filters ensure that each user can focus on the data most relevant to their role and responsibilities.
7.2.1 Filter by Teams and Groups
The filter ![]() option on top of the user list allows you to narrow down and view only the most relevant users, based on the Teams or Groups you have access to. The admins can view and filter users based on teams and groups, while the sales group managers can only filter based on groups they manage.
option on top of the user list allows you to narrow down and view only the most relevant users, based on the Teams or Groups you have access to. The admins can view and filter users based on teams and groups, while the sales group managers can only filter based on groups they manage.

7.2.2 Filter by Day
You can view the user activities based on the date selected from the date bar (Today / Yesterday / Custom) on top of the user list. The current day is selected by default. If you want to view user activities for a different date –
- You can use the left or right arrows to switch dates.
- Or, you can click on the date, select Custom Date. Choose the relevant date from the popup calendar.
This allows you to view your team’s daily activities for a past date.
7.3 Real-Time Check-In/Out Status Counter (Today Only)
Get an overview of your team’s status through the chips next to the All chip (which denotes all the users managed by you), on top of the map. They show the number of users who are checked in, checked out, and those who have not checked in for the current day on the mobile app. Click any chip to see the list of users in that category. From here, you can navigate to the each user and view their activity.

7.4 How to use the Map Actions
You can personalize the map view and perform the following actions using the icons displayed on the right side of the map –
7.4.1 Map Theme Selection
Personalize your experience by selecting a preferred map theme from within Location Insights, Territories, or Journeys. Click the ![]() Map Selection button and select the relevant theme. This will automatically apply across all Field Sales modules.
Map Selection button and select the relevant theme. This will automatically apply across all Field Sales modules.
7.4.2 View Territories on Map
The Field Sales Territories feature allows Admins and Sales Managers to create territories and automatically distribute leads to sales users based on proximity. Within Field Force Insights, you can monitor user movement within or across their assigned territories. Click the ![]() View Territories icon for a comprehensive view of each user’s commute. This helps you assess whether all territories are being adequately covered by your team.
View Territories icon for a comprehensive view of each user’s commute. This helps you assess whether all territories are being adequately covered by your team.
Note:
- The Field Sales Territories feature is not available by default. To get this enabled, reach out to support@leadsquared.com.
- You must be an Admin or Sales Manager to access Territories on the map. The admin can see all the territories whereas the Sales Managers can see only the territories owned by them.
7.4.3 View Leads on Map
Alongside your users, view the leads on the map by clicking the ![]() Show/Hide Leads button. The leads are displayed in clusters on the map. Click the relevant cluster to view leads individually. From here, you can click on a lead and to go to the Lead Details page.
Show/Hide Leads button. The leads are displayed in clusters on the map. Click the relevant cluster to view leads individually. From here, you can click on a lead and to go to the Lead Details page.
7.4.4 Filter Leads
To view specific leads quickly, filter and view leads on the map based on lead lists, stages, and date ranges.

8. Single User Location History Page
Clicking a user card opens the Location History page for that particular user. This page provides detailed information about the user’s daily movement and productivity. This section of the article describes the following features in the Single User Location History Page –
- Comprehensive Daily Summary
- Device Insights
- Duration Insights
- User’s Timeline Functions
- Path Animation
- Interactive Slider
- Pending Tasks for the day
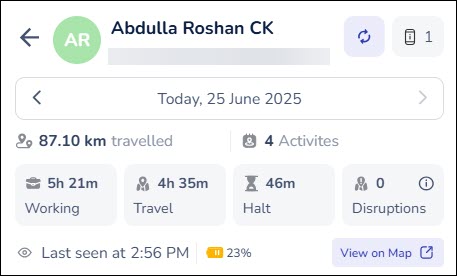
8.1 Comprehensive Daily Summary
In addition to metrics like Distance Travelled, Last Seen time and Device’s Battery Percentage, Field Force Insights also provides a full-day performance view including –
- Total Geotagged Activities: Count of activities where Track Location is enabled while configuring Custom Activity Types.
- Total Working Time: The sum of total travelling hours and time spent on activities, leads or opportunities
- Total Halt Duration: Time the user was stationary at a location for more than a configured threshold. By default, a halt is recorded if the user stays in one place for more than 15 minutes. Admins can adjust this threshold between 10 and 120 minutes.
- Total Travel Time: The total working time excluding the total halt duration.
- Count of Location Interruptions: The number of times the user’s location tracking is interrupted. This could be due to –
- Turning off GPS
- Force-closing the app
- Internet disconnection
From the example given below, we can infer that:
- The user has travelled a distance of 87.10 kms
- The total geotagged activities is 4
- The total working time is 5 hours 21 minutes
- The total halt time is 46 minutes
- The total travel time is 4 hours 35 minutes
- The number of interruptions is 0
- The user was last seen at 2:56 PM
- The user’s battery percentage is 23%
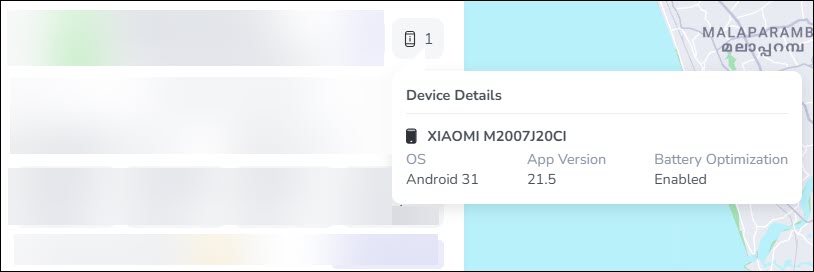
8.2 Device Insights
Click the ![]() icon on the user card to gain visibility of the field sales user’s Device Make & Model, Operating System, the version of the LeadSquared App installed, and whether Battery Optimization has been enabled. This is useful for ensuring the app runs on supported configurations.
icon on the user card to gain visibility of the field sales user’s Device Make & Model, Operating System, the version of the LeadSquared App installed, and whether Battery Optimization has been enabled. This is useful for ensuring the app runs on supported configurations.
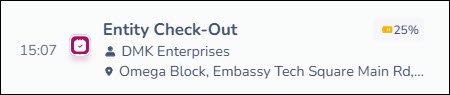
8.3 Duration Insights for Tasks and Entity-Level Check-In/Check-Out
You can accurately monitor the time spent by the user with the:
- Task Timer – captures the time actively spent on tasks
- Lead and Opportunity Level Check-In/Check-Out – captures the time actively spent on a lead or opportunity
8.4 User’s Timeline Functions
8.4.1 Show All Locations Toggle
The user’s Location History primarily displays key timeline events such as Check-In, Activities, and Check-Out. To view all captured location points during the check-in period, enable the Show All Locations toggle. This reveals additional coordinates marked as Seen At or Reconnected At, which may appear if there were any location disruptions.
8.4.2 Display in Ascending / Descending Order
Clicking the ![]() icon lets you toggle the user’s timeline between ascending and descending order. To view the latest location and activity updates, select descending order; to view the earliest updates, select ascending order.
icon lets you toggle the user’s timeline between ascending and descending order. To view the latest location and activity updates, select descending order; to view the earliest updates, select ascending order.
8.4.3 Timeline Filter
Click the dynamic filter to narrow down and view the user’s history by Check In, Check Out and relevant Activities. The filter options keep changing depending on the user’s daily activities. This lets you view only the relevant information for the day.
8.5 Path Animation on Load
When you open a specific field sales user’s Location History, an animated route automatically plays, visually tracing the path taken throughout the day. This helps you quickly understand the movement pattern without manual review.
8.6 Interactive Timeline Slider
Use the timeline slider at the bottom of the screen to scroll through different time points throughout the day and instantly view the user’s location at any specific moment. This tool makes it easy to verify presence at a location during key hours.
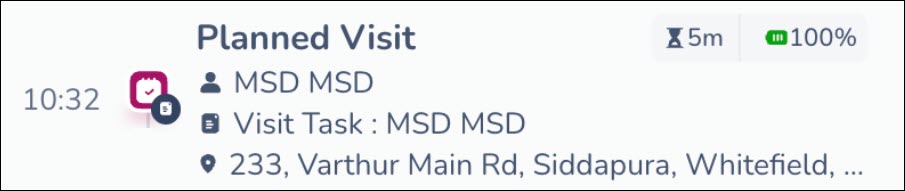
8.7 Pending Tasks for Today
Click the ![]() Show/Hide Tasks icon on the right side of the screen to view the user’s pending tasks for the current day. This helps you get real-time insights and make sure that the tasks are closed by the end of the day.
Show/Hide Tasks icon on the right side of the screen to view the user’s pending tasks for the current day. This helps you get real-time insights and make sure that the tasks are closed by the end of the day.

9. Export Location Data
9.1 How to Export Location Data of multiple users
Admins can export detailed location history for multiple users within a selected date range. Go to the Field Force Insights page and click Export.
In the Export Field Force Data popup (Step 1):
- Filter users by Teams or Groups, or view All Users.
- From the Choose dropdown, select the users whose data you want to export. Click Apply.
- Select the Date Range for which you want to export location data.

In the next screen of the popup (Step 2):
- Select the Fields you want to include in the export. The number of selected fields will be displayed.
- Use the Search Fields tab to quickly find specific fields.
- Once you’ve selected the desired fields, click Export.
- On the Export Request Queued popup, click Okay. Alternatively, select click here to view the status of your request. You will be redirected to the Request History page, from where can download the data.

Once an export request has been created and queued, admins can view and download the report from the Request History page –
- Navigate to Settings within Field Force Insights.
- Select Request History.
- From the Choose popup, select the relevant option and click Apply.
- In Queue – The export request has been received and is waiting to be processed.
- Processing – The export is currently being generated.
- Successful – The export has been completed, and the file is ready for download.
- Failed – The export could not be completed due to an error.
- You can view the requests and click the
 Download Report icon to get the full data.
9.2 How to Export Location data of a single user
Admins can export detailed location history for any individual user for a selected date. Navigate to the timeline view on the single user’s Location History page and click the Export button at the bottom.
The exported file includes key data points such as:
- Time-stamped location coordinates
- Check-In/Check-Out events
- Activities performed
- Device insights (if available)
10. Settings
Admins can configure Location Insights settings to fine-tune how field activity is tracked and displayed.
10.1 Set Minimum Halt Duration
Admins can specify a minimum time that a user must remain in one location for it to be considered as a halt.
- Default: 15 minutes
- Configurable Range: Any duration between 10 and 120 minutes
- Navigate to Apps>Location Insights>Settings>Advanced.
- Enter the required duration under Set Minimum Halt Duration.

10.2 Select User Property to Display
Admins can configure a specific user field like Email, Phone Number, City, etc., to be displayed on the user card under the user’s name. This helps in identifying the user better.
- Navigate to Apps>Location Insights>Settings>Advanced.
- From the dropdown under Select User Property To Display, select the relevant field.

11. Field Force Insights on Mobile
If Location Insights is enabled on your account, you can access Field Force Insights from the LeadSquared Mobile App. It is labeled as Location History Tracker Report and can be accessed through Reports, Casa-configured widgets or the My Teams feature.
11.1 Configure Field Force Insights using Casa
You can make Field Force Insights easily accessible in the Mobile App by configuring it using Casa. Add it to any of the following:
- Menus: Homepage, Bottom Menu, Side Menu
- Widgets: Launcher, Banner, Image Tiles, Distance Travelled
To configure Field Force Insights via Casa on the Web App:
- Go to Apps>Casa and choose the widget or menu location where you want to place Field Force Insights. The example shows configuration in the Launcher widget.
- Set the icon and label as desired.
- Under Navigate To, select Field Sales Reports.
- Under Launch, choose Location History Tracker Report.
11.2 Accessing Field Force Insights in Mobile
From your mobile app homepage, navigate to Reports and search for Location History Tracker.

Alternatively, you can access Field Force Insights from the Homepage, Side or Bottom Menus, or any Casa Widget wherever it’s configured. Here, the feature is configured in the Launcher widget.

Additionally, if you are a Sales Group Manager or Reporting Manager with My Teams enabled in your account, you can navigate to specific users’ Field Force Insights from here as well.
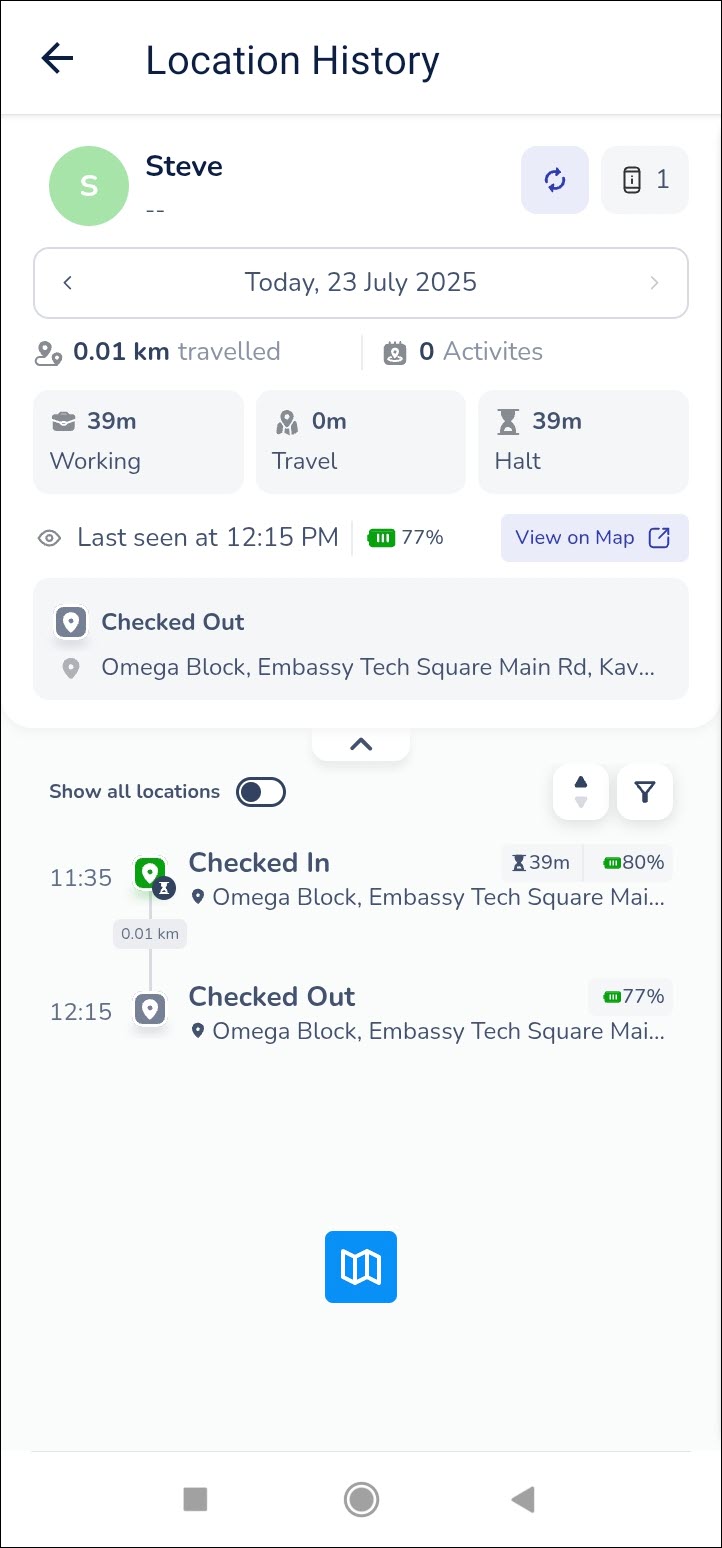
11.3 Using Field Force Insights in Mobile
In the Mobile App, Field Force Insights shows the same key metrics as the web version, including:
- Route and distance travelled
- Working, travelling and halt hours
- Device details including the make, model, operating system and the installed version of the LeadSquared app
Inside Field Force Insights:
- Tap the Map icon to view user locations and routes.
- Tap the List icon to see all user cards in a list format.
Any Questions?
We’d love to answer your questions or hear your own unique use cases. Feel free to share your experiences in the comments section below.