The Account Details page is where you’ll find all information related to a specific account. You can perform actions on the account, see all associated leads, create tasks, add activities and lots more…
If you’re new to the accounts feature, these articles will help –
Account Vcard and Properties
The account Vcard shows you the account stage and contact information. To edit the Vcard hover your cursor over it and clicking the edit![]() icon.
icon.
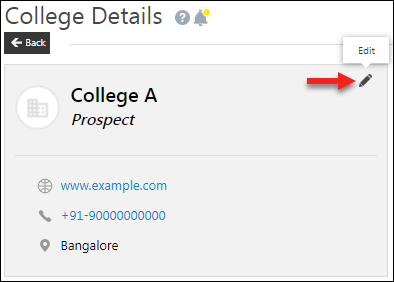
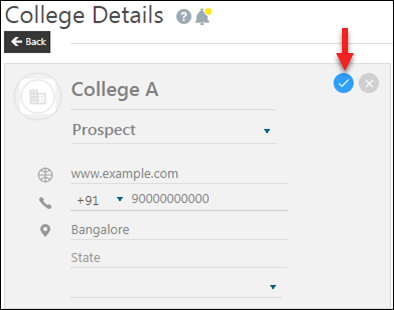
Note: If you’re using a telephony connector and have click2call enabled, you can just click the phone number on the Vcard to initiate a phone call.
You can also edit the Account Properties section shown below –
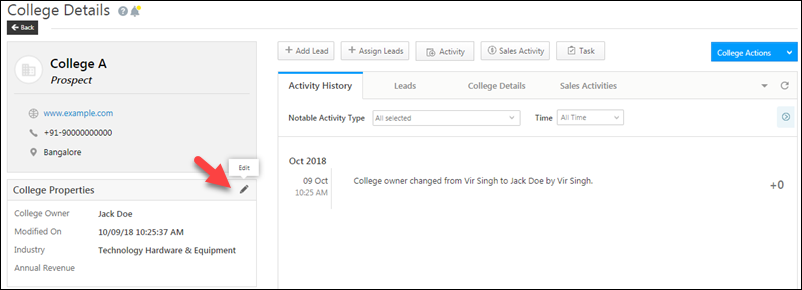
And configure the fields you want to see in the Account Properties tab. To do this –
- Navigate to My Account>Settings>Accounts Customization>Account Settings.
- Alongside the account type you want to configure, hover your cursor over the settings
 wheel, then click Edit.
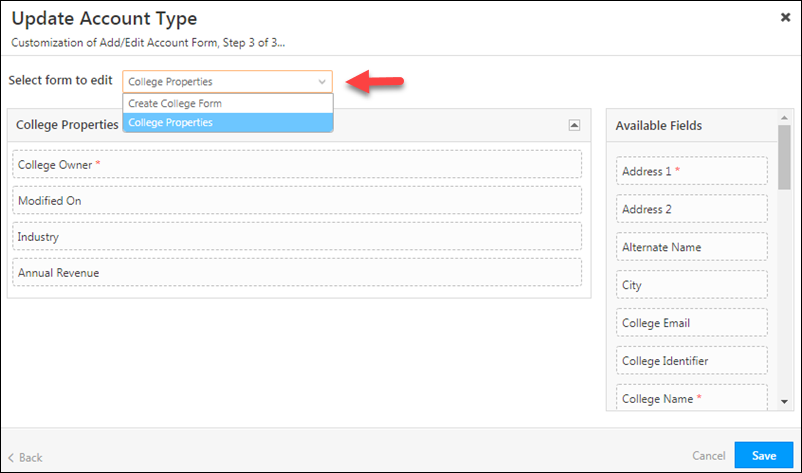
 - Click Next to navigate to step 3 of 3. Use the dropdown to select the Account Properties option.
- Drag and drop the fields you want from the available fields section to the account properties section.
- Click Save.
Account Actions
You can perform the following actions on an account –
- Change Owner
- Change Stage
- Edit
- Delete
Hover your cursor over the <Account Name> Actions menu, then choose the action.

You can also navigate to the <Account Name> Details tab and edit the account details from there.

Lead Actions
To perform actions on leads, hover your cursor over the settings![]() wheel alongside a lead and choose an action.
wheel alongside a lead and choose an action.
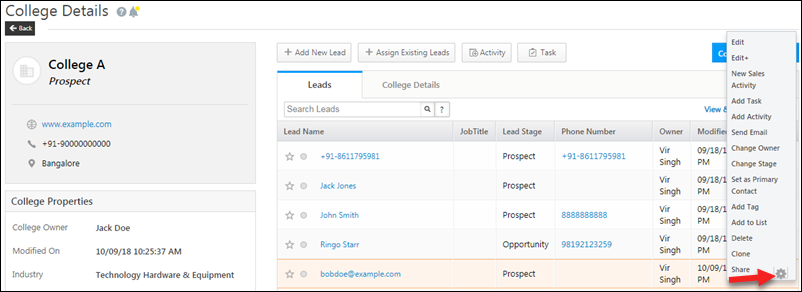
To add a new lead to the account, add an existing lead, post an activity on a lead or create a task, just click the corresponding quick add buttons.

If you want to perform bulk actions on all leads in an account, click the View & Manage All Leads link. This will direct you to the Manage Leads page where the account filters will be set to the current account by default. You can select leads in bulk, then choose an action.

Available Tabs
You can navigate between the different tabs on the account details page. Each tab gives you a specific category of information related to the account.
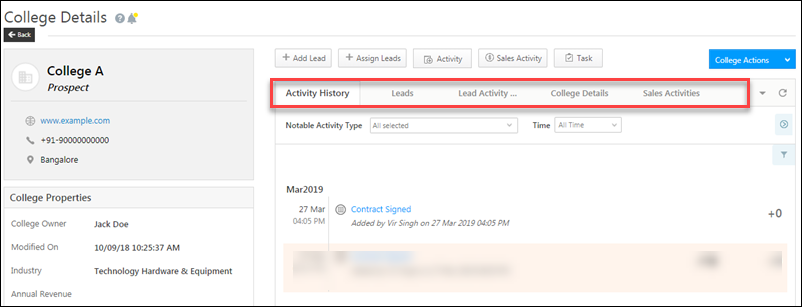
Activity History
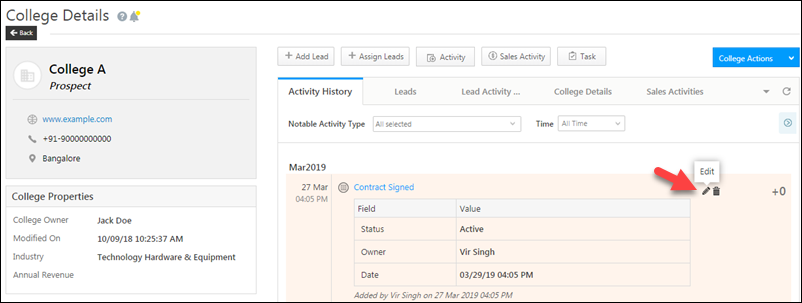
This tab displays the list of all activities posted on the account along with the corresponding account score. You can click on an activity to see more details. You can also click the pencil![]() icon that appears alongside an activity to edit it.
icon that appears alongside an activity to edit it.
Leads
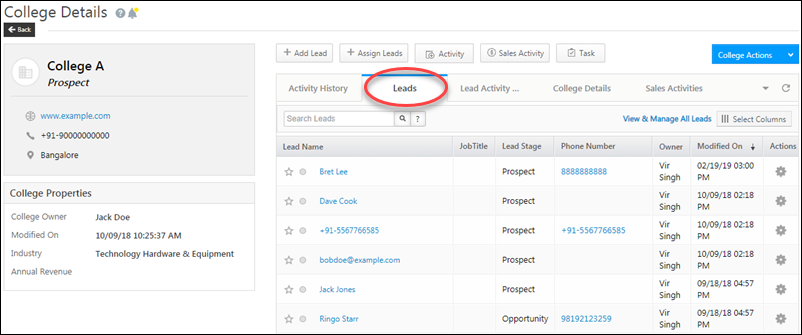
The leads tab shows you the list of leads in the account.
- Use the quick search box to quickly find a particular lead
- click the View and Manage Leads link to go to the Manage Leads page with the account filters applied
- Click on Select Columns to configure the columns you want to view
- Click on a particular lead’s name to go to the Lead Details page
- Click the gear
 icon under the Actions column to perform actions on a lead
Lead Activity History
Use this tab to view the activity history of a particular lead in the account. Select a lead from the dropdown and filter the lead’s activities by activity type and time.

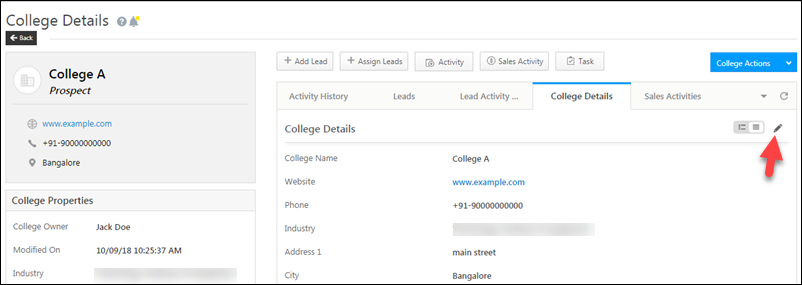
<Account Name> Details
You can edit all details of the account type here.
Sales Activities
View all the sales activities posted on leads in the account here.

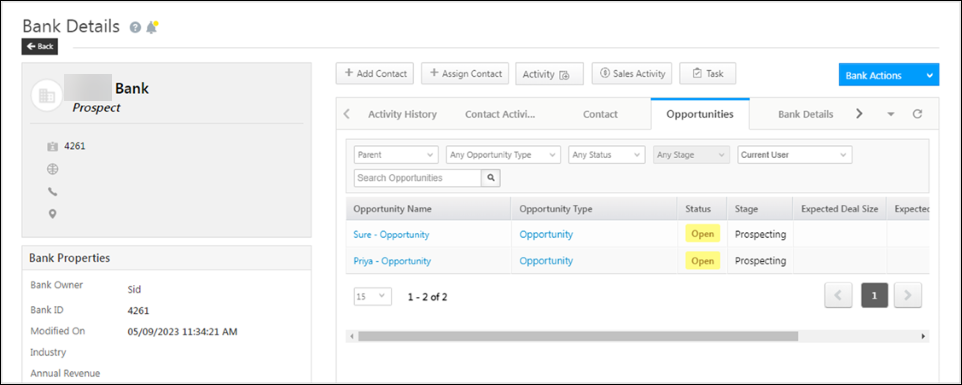
Opportunities
If you have enabled both Account and Opportunity management in your LeadSquared account, you will be able to view the opportunities associated with that account in the Opportunities tab. However, if you do not have access to a lead associated with that account, you will not be able to see the opportunities associated with that lead.
Any Questions?
If you have any questions related to this article or the accounts feature in general, don’t hesitate to type them in to the comments section below. We’re here to help!


Is there a way to create a list of employees that work for each Account? I have a facility (Account) wherein their are several employees who give us Leads. I’d like to track each employee under the account
Hi Kyle,
Yes, this can be done.
You can store both the employees and the leads as leads in your LeadSquared account.
Create a drop-down type custom lead field called ‘Entity Type’ or something similar, where you store two values – ’employee’ (or POC) and ‘lead’. This will help you differentiate which leads in your account are employees and which are the leads they’re giving you.
Next, create a custom field set (CFS). Within the custom field set, add a field of ‘lead’ data type. This allows you to associate one lead with another. Now add the CFS to leads.
Going forward, for each lead (where the ‘Entity Type’ lead field = ‘lead’) store the associated employee using the CFS field (of lead data type). This will help you associate each lead with the employee that provided them.
I hope this helps. If you need more clarity, you can either reply here, contact your account manager or write to us at support@leadsquared.com.