GoToWebinar App Setup & Configuration
GoToWebinar Connector helps you integrate your GoToWebinar Account with your LeadSquared Account.
Benefits:
1. You can Accept Registrations for a Webinar using a webinar specific LeadSquared Landing page.
Connector sends registrants’ data to your Webinar account and adds Registrants to the webinar (automatically).
2. You can Get Attendance data from Completed Webinar Sessions and Sync it with your leadSquared account.
– For existing Leads who attended the webinar a new activity is posted with details of the webinar.
– Attendees who are not Leads yet in you LeadSquared account, will be added as New Leads.
Prerequisites:
You must be an Admin User of your LeadSquared Account.
Procedure to Install & Configure the App/Connector:
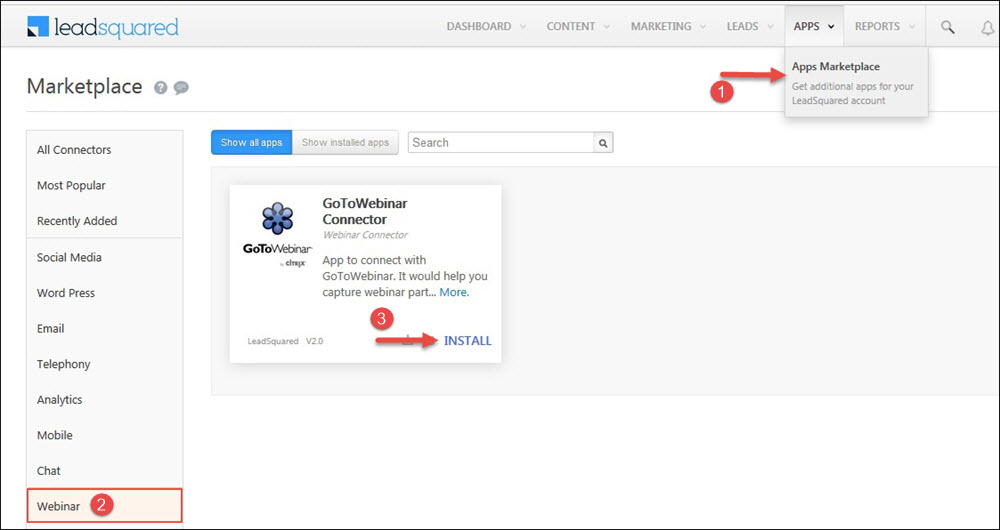
To Install : Navigate to Apps > Apps Marketplace, locate GoToWebinar Connector and click Install.
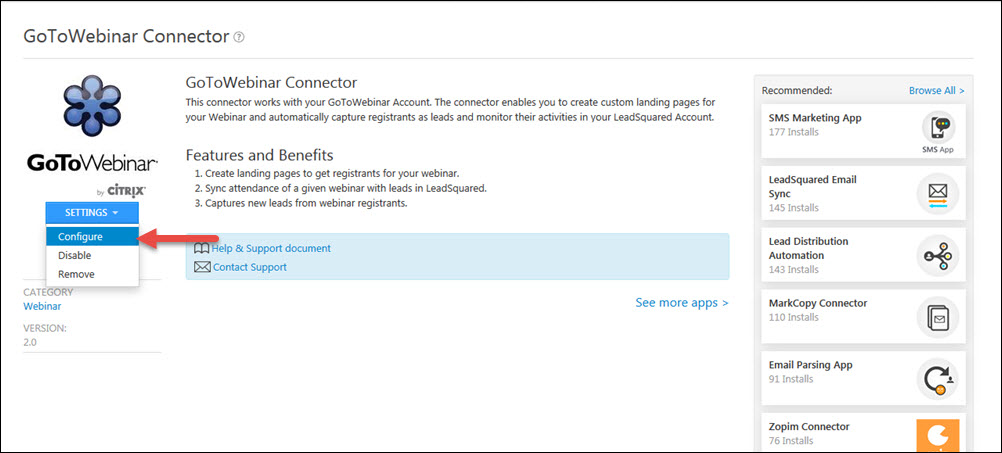
On installing Goto Webinar connector, click on Goto webinar connector where you will be redirected to Goto webinar connector details page. This is not yet ready to be used. You need do two simple configuration steps to make it functional.
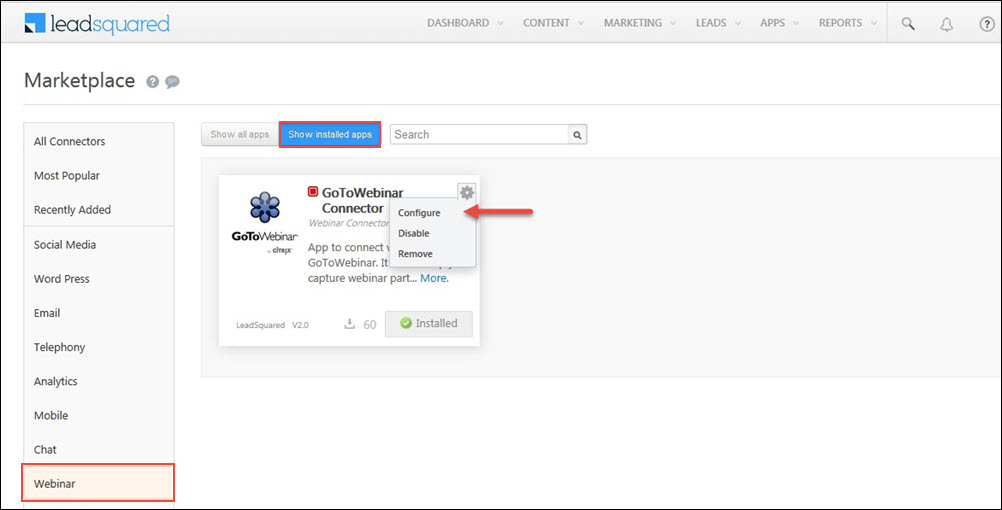
OR, on Installing the app, the Goto webinar connector can be seen under ‘Show in Installed Apps’ tab to configure the connector.
Configure Connector:
Now you will see GoToWebinar Connector listed in Show in Installed Apps tab where you can Configure the app.
Couple of Things-To-Do before Configuring the App:
1. Create a custom lead field called WebinarID.
– This field will be used when you create a landing page to accept registrations for a specific webinar.
2. Create a custom activity, say – Attended Webinar or Joined Webinar
– This activity will be added to Leads who attended a specific webinar. It will keep track of your webinar attendance.
To Configure the App/Connector : Navigate to Apps > Installed Apps.
Hover the mouse over Actions icon and click on Configure option.
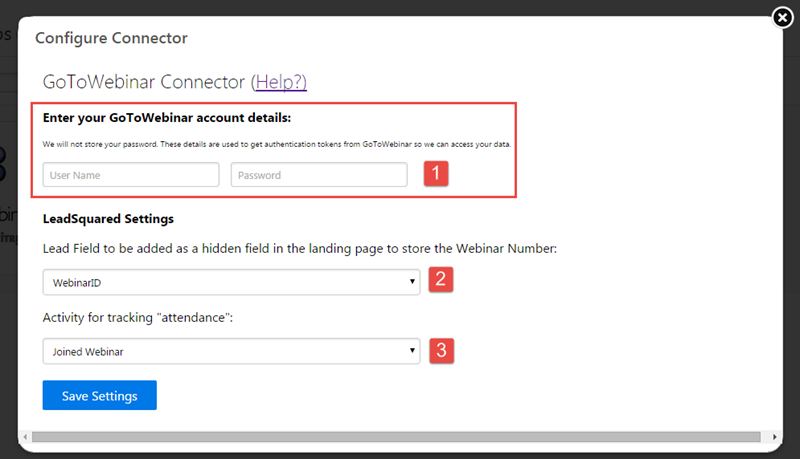
Configure Connector pop-up opens.
a. Provide GoToWebinar login details. Enter GoToWebinar User Name & Password
(Please note that the password will not be stored and these details are used only to get authentication tokens from GoToWebinar to be able to access data)
b. Select WebinarID created earlier as Lead Field to be added as a hidden field in the landing page to store the Webinar Number.
c. Select Webinar Attended or Joined Webinar as Activity for tracking “attendance”.
d. Click on Save Settings.
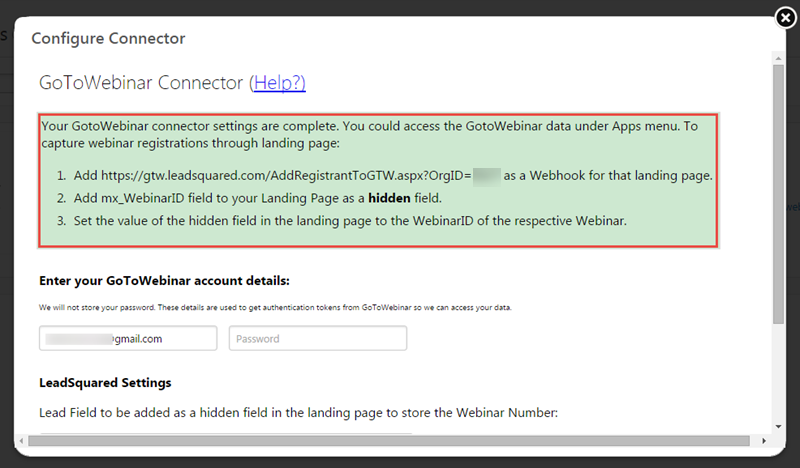
 Success notification stating GoToWebinar Settings are complete will be seen on the same popup.
You will also see the instructions to capture Webinar Registrations through LeadSquared Landing Page.
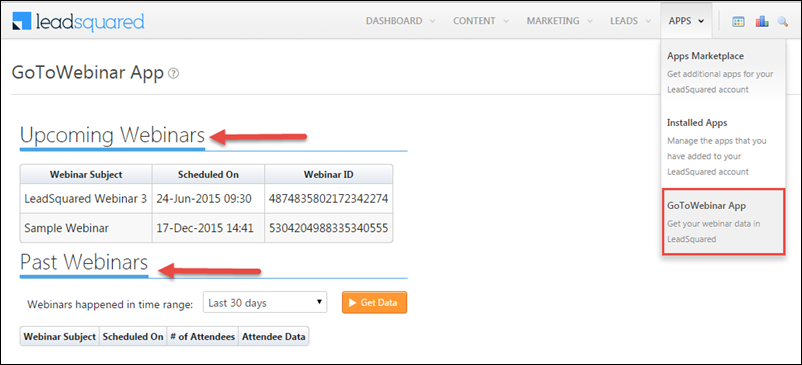
Once the App is configured, click GoToWebinar App under Apps Menu to see your Past & Upcoming Webinar details.
Now, How to Capture Webinar Registrations Using LeadSquared Landing pages?
Here are a Few of Things-To-Do to Capture Webinar Registrations using LeadSquared Landing Pages.
First Thing-To-Do: Add Webhook obtained from the confirmation popup.
This is To send Webinar Registrations captured using LeadSquared Landing page to your Webinar Account automatically.
Procedure to add webhook:
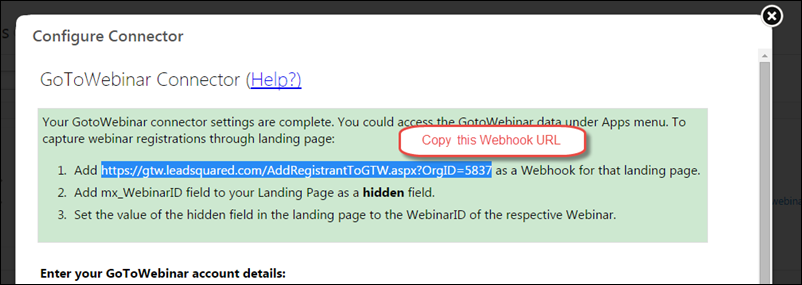
A. Copy the URL obtained after configuration.
B. Navigate to My Account > Settings > API and Webhooks > Webhooks. Then:
1. Click Create button seen to the right, to add Webhook.
2. Select Event as Landing Page Submission.
3. Paste earlier copied URL in Webhook URL field. The Webhook URL would be –
https://gtw.leadsquared.com/AddRegistrantToGTW.aspx?OrgID=<your_account_number>
4. Click Verify to see Success notification.
5. Give a Description; this is for yourself to identify the purpose or type of webhook. (Optional)
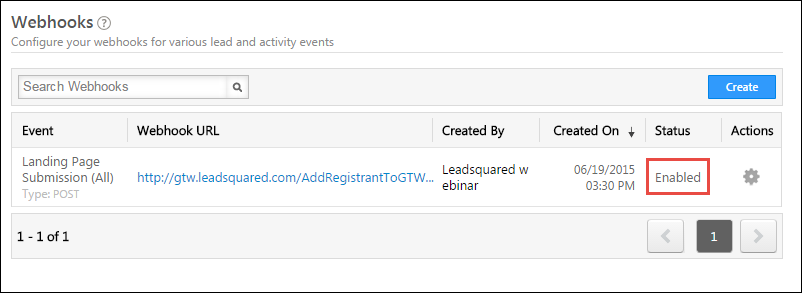
6. Click Save to see the webhook appear in the webhooks grid.

Please ensure the Webhook is Enabled.
Second Thing- To-Do is : Creating a Landing Page to capture Webinar Registrations.
1. Create a Webinar Specific Landing Page with at least First Name, Last Name & Email as Mandatory fields.
Note: Make sure to make these 3 fields as Mandatory in the form, failing which GoToWebinar would not accept registrations for the webinar.
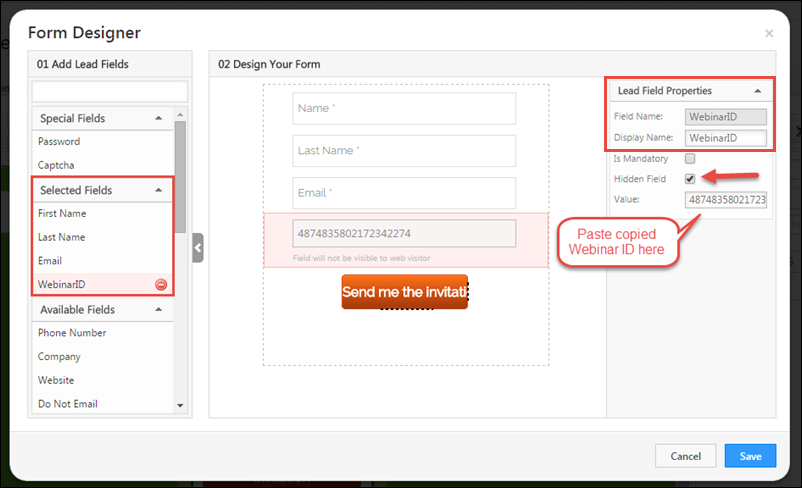
2. Add mx_WebinarID field as a hidden field.
3. Set the Value of the hidden field in the landing page to the WebinarID of the respective Webinar.
To get Webinar Id specific to the webinar, navigate to Apps > GoToWebinar App.
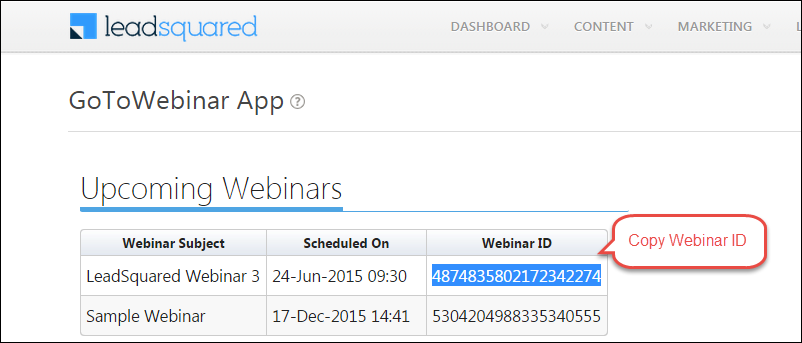
Copy the required Webinar ID and paste it as Value for the WebinarID field added to Form on Landing Page.
Save the Form and proceed further with the Steps until you Publish / Republish the Landing Page.
Now the Landing Page would be ready to be Used to accept registrations for the required Webinar.
Here is what happens:
The Webhook Configuration enables the connector to receive a signal whenever a landing page is submitted.
So, when a landing page form gets submitted -> webhook gets invoked -> & calls the GoToWebinar Connector -> Connector sends the lead information to GoToWebinar and adds the Registrant.
Please let us know if we can assist you with any of this. We’d love to hear from you on support@leadsquared.com
Get attendance data from GoToWebinar sessions
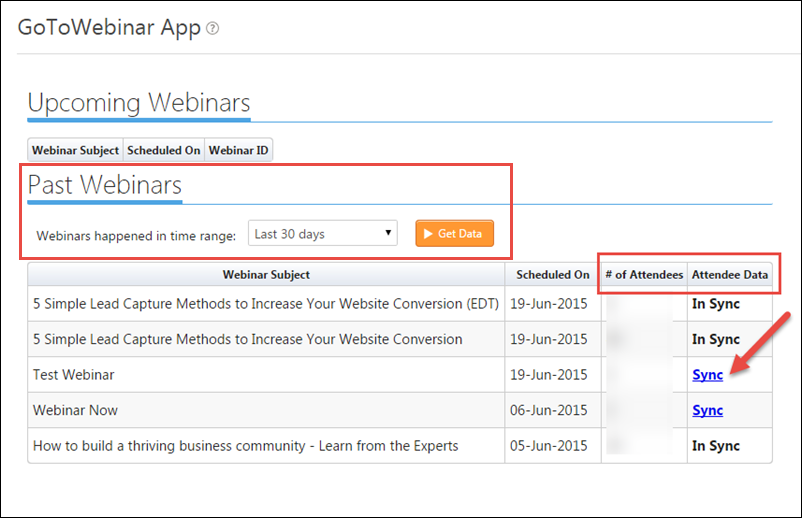
Once the Webinar is Complete/Done, you can Sync the Attendance/attendee information with your LeadSquared account.
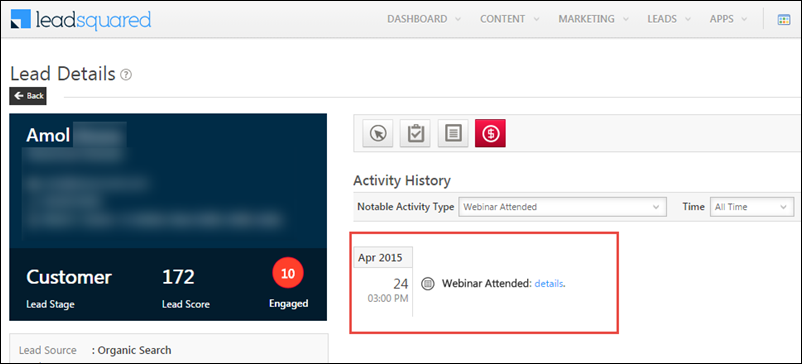
In GoToWebinar App page, under Past Webinars, you will see the Attendance data of the Webinars completed.
Click Sync to add the Attendance data to your LeadSquared account.
If any of the webinar participants/Attendees are not your Existing Leads in LeadSquared account, they will be added as New Leads.
Also for all the Leads that attended the Webinar a Custom Notable Activity stating Joined Webinar or Attended Webinar will be added in their Activity History.