1. Feature Overview
With user automation, you can automatically check-in and check-out your users. You can create tasks and alerts based on their availability and even send them automated messages on special occasions. If you’re new to the automation feature, visit the automation home page.
2. Quick Start
You can create an automation from scratch but the quickest way to get started is to select a ready-made template.
| Template | Description |
| Auto Check-In Users | Track work hours by automatically reminding and checking-in your users according to the workday templates you define. |
| Auto Check-Out Users | Automatically remind and checks-out your users according to the workday templates you define. |
| Work Anniversary Wishes | Works on the basis of the ‘Joining Date’ user field. Automatically wishes users on their work anniversaries. |
| Birthday Wishes | Works on the basis of the ‘Birthday’ user field. Automatically wishes users on their birthdays. |
Note – The default auto check-in and auto check-out templates are not configured for the mobile app. You need to use webhooks to display notifications and enable auto check-in/check-out on mobile. For more information, see Auto Check-In/Check-Out for Mobile.
To select a template –
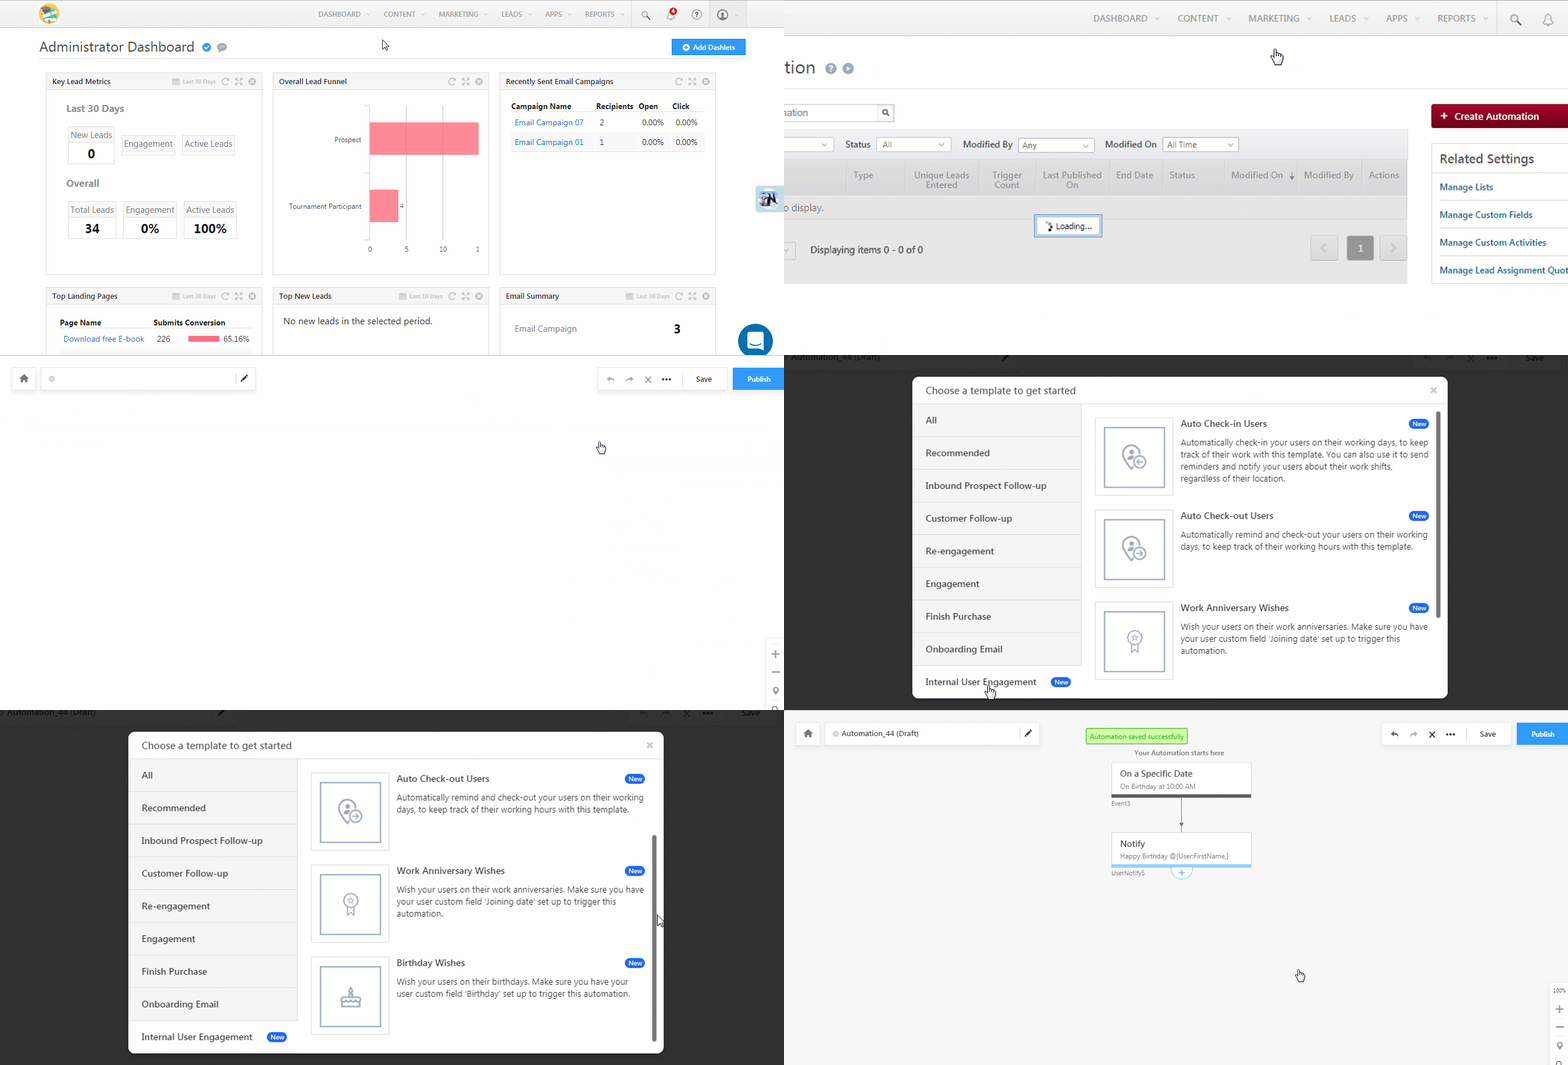
- From your Dashboard, navigate to Marketing>Automation and click Create Automation.
- On the Choose a Template pop-up, navigate to the Internal User Engagement section.
- Choose a template and edit it according to your needs.

3. Automation Basics
Like lead automation, user automation also operates on triggers, conditions and actions –
Any Questions?
Did you find this article helpful? Please let us know any feedback you may have in the comments section below. We’d love to hear from you and help you out!


