1. Feature Overview
Using this feature, you can enable users without access to email inboxes to log in to your LeadSquared account.
Let’s say you have vendors, delivery partners, or third-party service providers that don’t have access to email inboxes. You can first create users for them in LeadSquared using dummy email addresses (example.vendor1@gmail.com, example.vendor2@gmail.com, etc.). Once the users are created, instead of receiving a link in their inbox, they can simply log in with the dummy email address, enter their phone number and OTP, and then proceed to set their passwords.
2. Prerequisites
- You must be an Administrator of your LeadSquared account.
- You must create users in your account.
- Users must be running the latest version of the LeadSquared mobile app
3. How it Works
There are 3 configuration steps involved –
- Create a user field (text or dropdown). This field will be used as a flag for each user you want the alternative log-in flow applied to.
- Populate the user field for the specified users with the input ‘Yes‘.
- on the Advanced Configuration page, configure the Configure Custom Fields for User On-Boarding in Mobile App setting.
- On the Configure custom fields for User on-boarding in Mobile App pop-up, select the custom user field you’ve created in the previous steps.
All users with the configured custom field populated with ‘Yes’ will now be able to log in without accessing their email inboxes.
4. Configure Custom User Field
First, create a custom user field. This custom user field can be named as per your convenience (e.g., “Custom 2”, “User Auto Sign Up”, etc.). To know how to create one, please refer to Manage User Custom Fields.
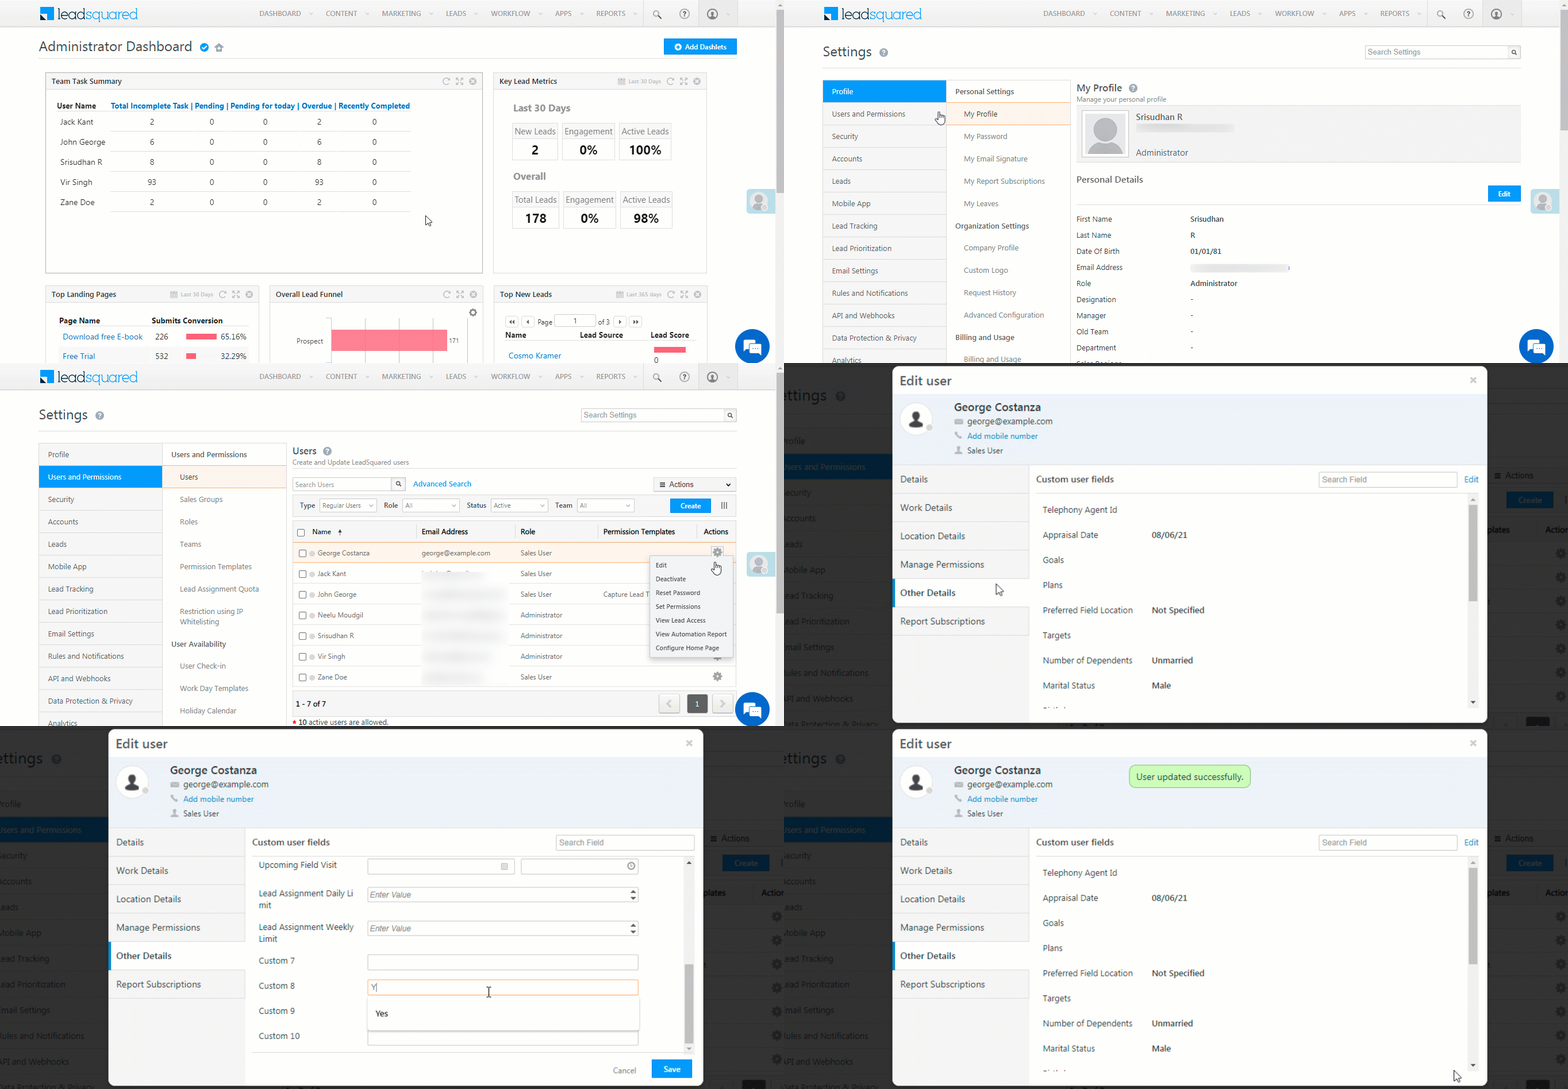
Once the custom user field is created, populate the field with the value ‘Yes‘ for the specific users you want the setting applied to –
- Navigate to My Profile>Settings>Users and Permissions>Users.
- Against an existing user, hover your cursor over the
 icon, and click Edit.
- To know how to create a user, please refer to Manage Users.
- On the Create User/Edit User pop-up, click Other Details.
- Click Edit, for the field value of the custom field you created, enter the word “Yes“.
- If you’ve created a dropdown field, then choose the dropdown value “Yes“.
- The custom field that’s used in the below GIF is named “Custom 8”.
- Once you’re done, click Save.

5. Configure Advanced Setting
Once you’ve created and configured the custom user field, enable the corresponding advanced setting. To do this –
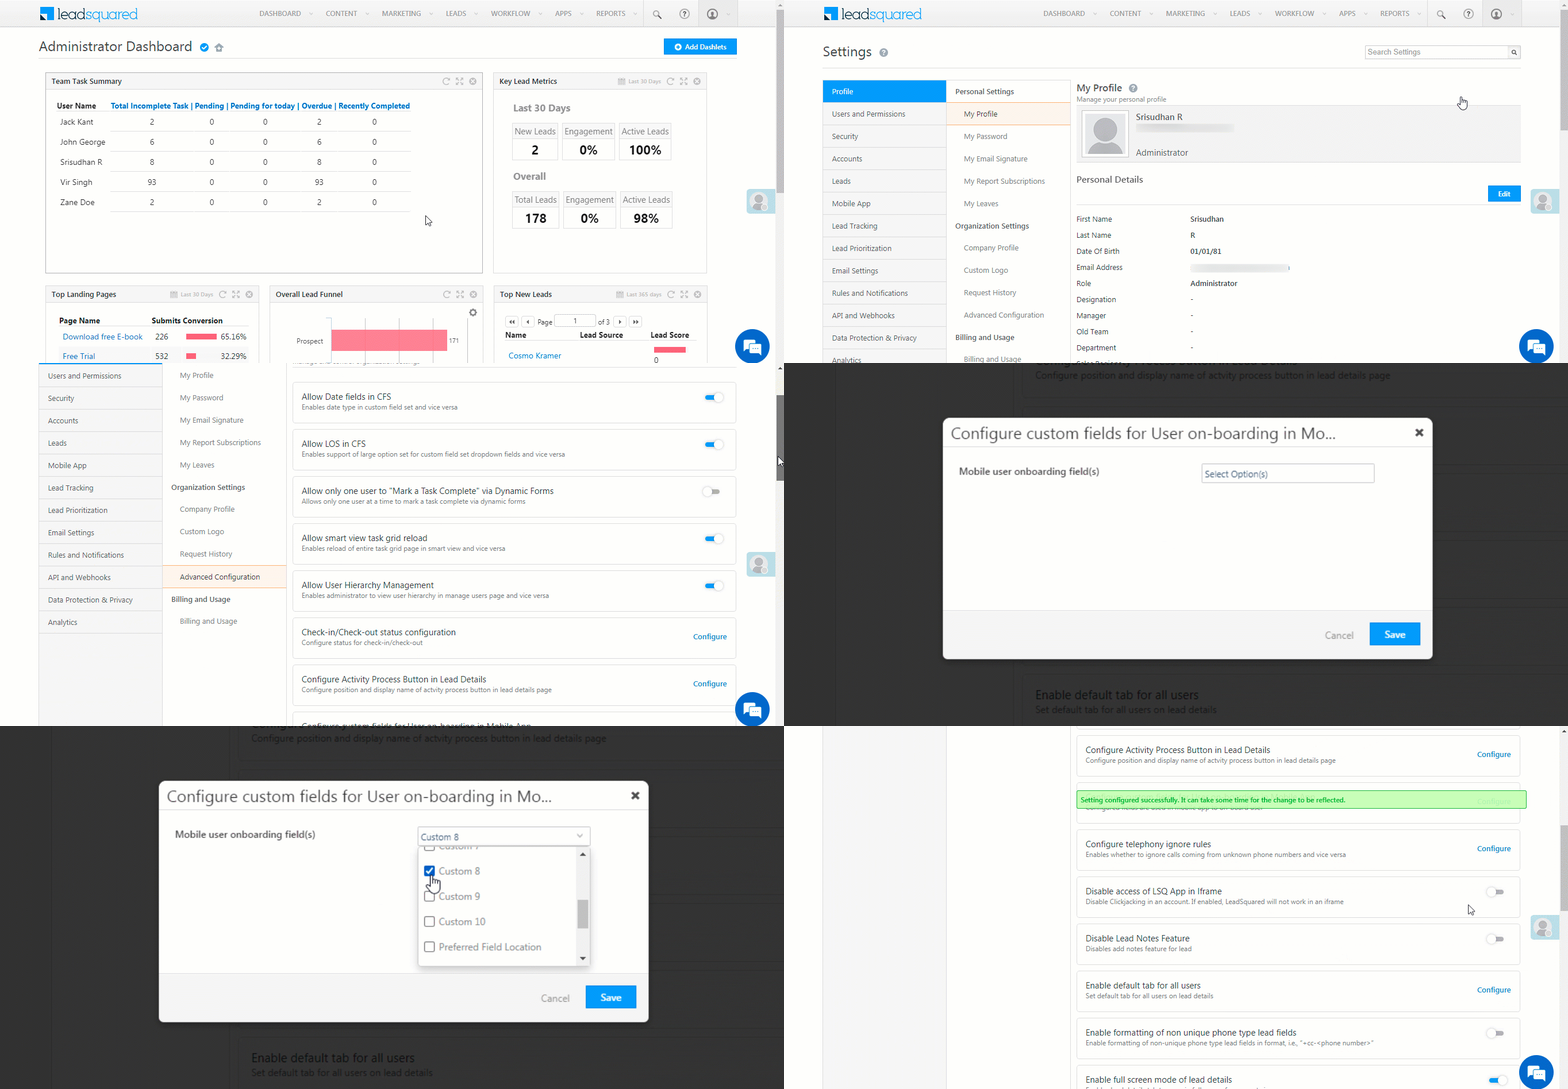
- Navigate to My Profile>Settings>Profile>Advanced Configuration.
- Against Configure custom fields for User on-boarding in Mobile App, click Configure.
- On the pop-up, from the Mobile user onboarding field(s) dropdown, select the custom user field that you created and configured.
- You can only select one custom user field.
- Once you’re done, click Save. Your users can now sign-up and configure their LeadSquared account on their own.

6. User Sign-In
Your users can log in to the LeadSquared mobile app with the email ID that’s been provided. After entering the email Id, they’ll be prompted to enter their phone number and OTP before configuring their account password.
- Open the app, and tap Login.
- Enter the user email ID with which the user was created, and tap Continue.
- Enter the user’s mobile number, and tap Send OTP.
- Enter the OTP you received on your mobile number, and tap Continue.
- Set a password, confirm the password, and then click the
 icon.
icon. - Your password and mobile number are saved, and your account is now successfully created.

Any Questions?
Did you find this article helpful? Please let us know any feedback you may have in the comments section below. We’d love to hear from you and help you out!


