


Get Started
Sales Suite
Field Ops
Marketing
Service CRM
Integrations & Apps
FloStack
AI Loan Proposal
1. Feature Overview
When evaluating a customer’s loan application, the credit manager must manually write executive and applicant summaries. This is tedious, and the credit manager must look up data related to the customer’s application across various regulatory sites.
To address this, we’ve introduced the AI Loan Proposal feature, which automates the generation of Executive and Applicant summaries with no manual effort. Once Admins configure this feature, it fetches customer demographic data from the credit bureau, including their CIBIL score and existing loan details. These details are generated as executive and applicant summaries during the AI Loan Proposal stage on the Opportunity Details page and are posted there as an activity. This reduces manual errors, improves user efficiency, and ensures faster loan disbursal.
2. Prerequisites
- Only Admin users can configure this feature.
- The Loan Origination Workflow (LOS) Workflow app must be enabled on your account. To do this, contact your account manager or write to support@leadsquared.com.
- Create an Opportunity Type to associate with an LOS workflow.
- The associated opportunity type must contain a custom field with the display name “Workflow Version”, the schema name “mx_Custom_100”, and the type “Number – Decimal”. This is mandatory.
- Create a custom activity that is posted on the opportunity when the workflow is executed.
3. How it Works
After fetching the loan applicant’s data from various regulatory sites, we use AI to summarise it and post it as a custom activity on the Opportunity Details page.
- First, create a LOS Workflow with a custom stage that will be displayed on the Opportunity Details page.
- Configure this stage by adding AI Loan Proposal as the workflow process, and associate it with the custom activity you’ve created.
- Select the data source from which you want to fetch the data.
- Then, review the custom AI prompt generated. This prompt summarises the fetched data, and you can update it if required.
- Publish the workflow.
- Your users can now navigate to the Opportunity Details page, and summarise the loan application.
4. Create a Workflow
- On your LeadSquared account, navigate to Apps>LOS Workflow.
- On the LOS Workflow screen, alongside Workflows, click the Add icon.
- On the Workflow Details screen, enter the following details –
- Workflow Name – An internal name that identifies the workflow.
- Opportunity Type – The LeadSquared opportunity type* you want to associate with the workflow.
- Applicant Activity Type – Select the custom activity you created.
- Applicant Name – Select the custom activity field that stores the lead’s name.
- Applicant Type – Select the applicant type dropdown field associated with the custom activity.
- Select Primary Applicant Identifier – From the dropdown options, select the primary applicant type. For example, if the options are Primary, Co-applicant, and Dependent, select Primary.
- Click Save & Next.
- On the Configure Stage screen, add a new stage using the Add Stage Tab button.
- This tab appears on the Opportunity Details page for the selected Opportunity Type.
- Enter the display name for the tab, and click Save.
Note:
- You can associate an Opportunity Type with only one LOS workflow.
- The associated opportunity type must contain a custom field with the display name “Workflow Version”, the schema name “mx_Custom_100”, and the type “Number – Decimal”. This is mandatory.
5. Configure a Sub-stage
On the Configure Stage screen, create a sub-stage and configure the AI prompt that generates the summaries.
5.1 Basic Details
First, enter and configure the basic details required to create the new activity type.
- Click the Sub-stage button, add a display name, and click Save.
- Click the Process button, and on the Create Process screen, configure the following Basic Details –
- Select Process to Map – Select AI Loan Proposal. This is the process your workflows follow to summarise the loan.
- Display Name – Enter a display name for the activity.
- Create Activity Type – Click the Create Activity Type button. This automatically creates the activity type in your account. This activity contains the summary data and it’s posted on the Opportunity Details page.
5.2 Prompt Configuration
Select the data source from where the summary data is fetched, and configure the AI prompt used to fetch it.
- From the list of Data Sources available by default in your account, select a relevant source. We select “AI Loan Proposal – Demo” since it fetches all demographic customer data.
- Review the system-generated prompts for AI Executive Summary (which generates the executive summary) and AI Applicant Summary (which generates the applicant summary). You can modify both prompts if required.
- Under Test Prompt, select the Opportunity Type you want to tag to this workflow, and click Run Test.
- This fetches dummy data based on the prompt and the opportunity type you’ve selected.
- Once you’ve reviewed the test summary, click Save.

5.3 Stage Submission Action
This section is optional.
- Enable the slider to configure the actions that occur when a lead submits this stage of the loan application.
- Click the pencil icon, and on the Submission Action pop-up, enter the following details –
- Submit Button Label – The display name for the submission button on the loan application form.
- Button onClick Event – The action performed when the button is clicked.
- Map Dynamic Form – Select the LeadSquared form where you want to capture this data.
- Once you’re done, click Save.
6. Publish the Workflow
Once it’s fully configured, click Save as Draft, and Publish the stage.
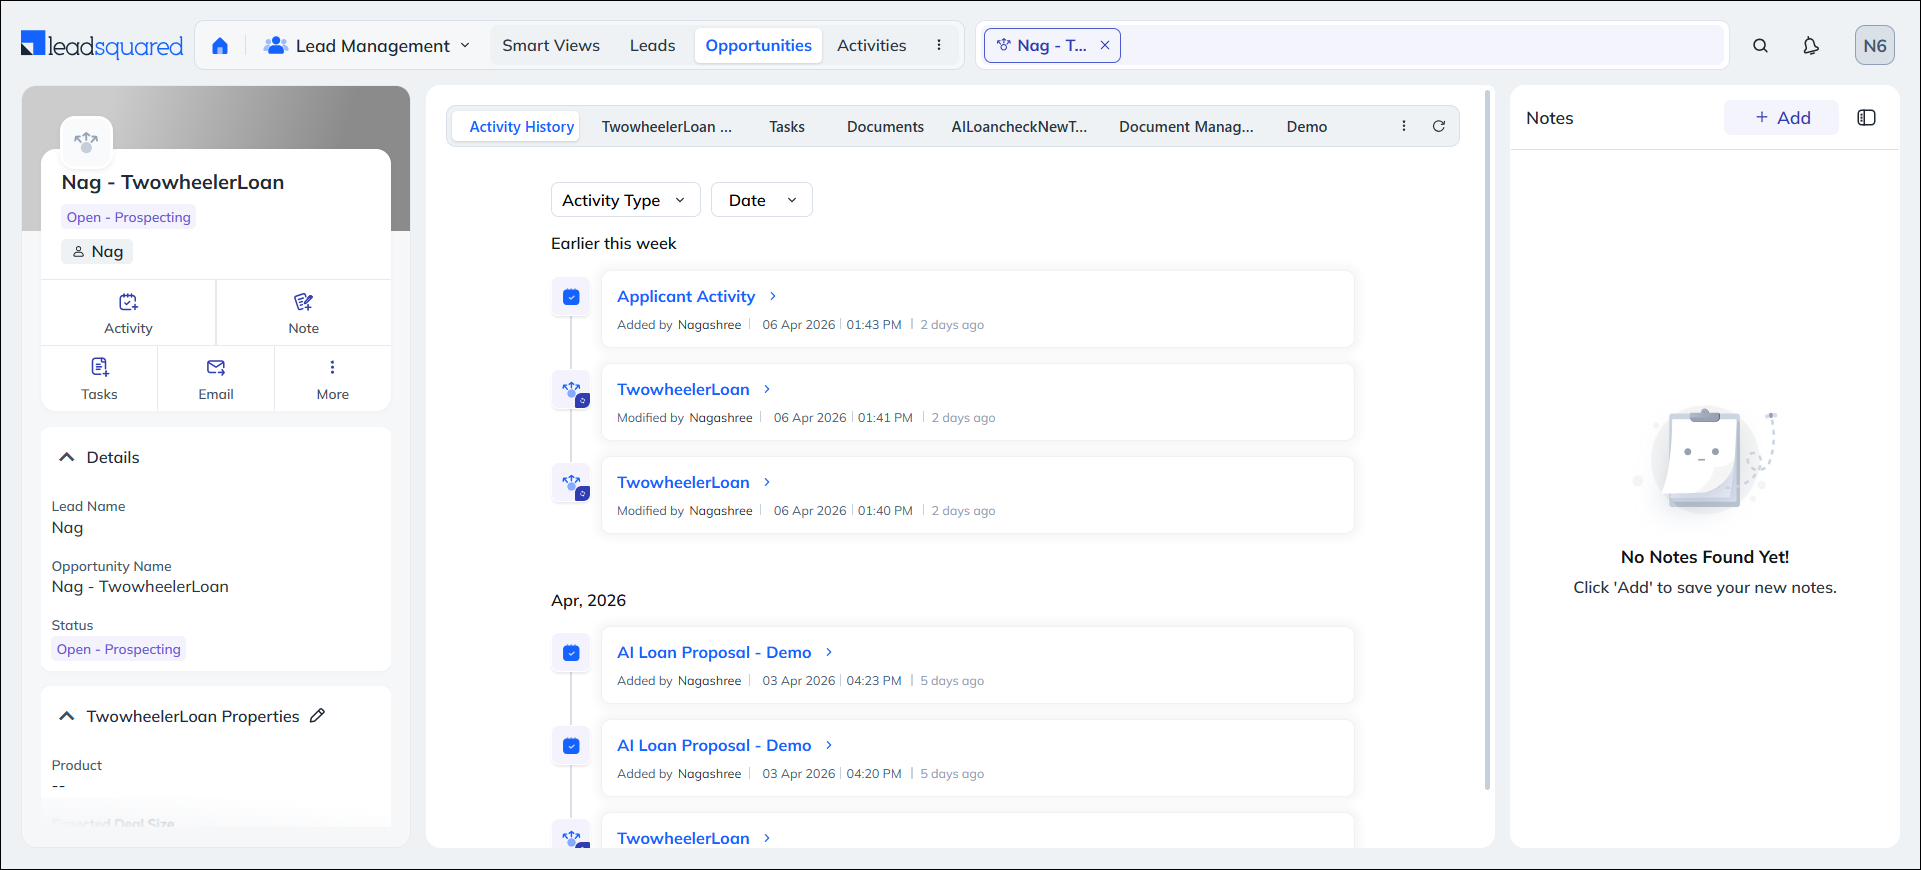
7. View the Summary
To view the summaries –
- Navigate to Lead Management>Opportunities>Opportunity Details.
- Open the Stage tab you created, and click Submit Recommendation.
- Alongside the summary you want, click Generate Summary. Here, you can view the executive and applicant summaries for your opportunities.
- You can also edit these summaries if required.
- Once both the summaries are generated, click Save & Close. The summary is now posted as the activity configured.
Note:
- It is mandatory to click Save & Close. Only then is the activity successfully posted.
- On an existing summary, if a user clicks Update Recommendation, the system posts a new activity with the latest summary on the opportunity.
- Rate each summary using the thumbs-up and thumbs-down icons. Your rating helps the AI system improve the summaries it generates.
Any Questions?
Did you find this article helpful? Please let us know any feedback you may have in the comments section below. We’d love to hear from you and help you out!