


Get Started

Sales Suite
Field Ops
Marketing
Service CRM
Integrations & Apps
FloStack
Approval via Email Templates

1. Feature Overview
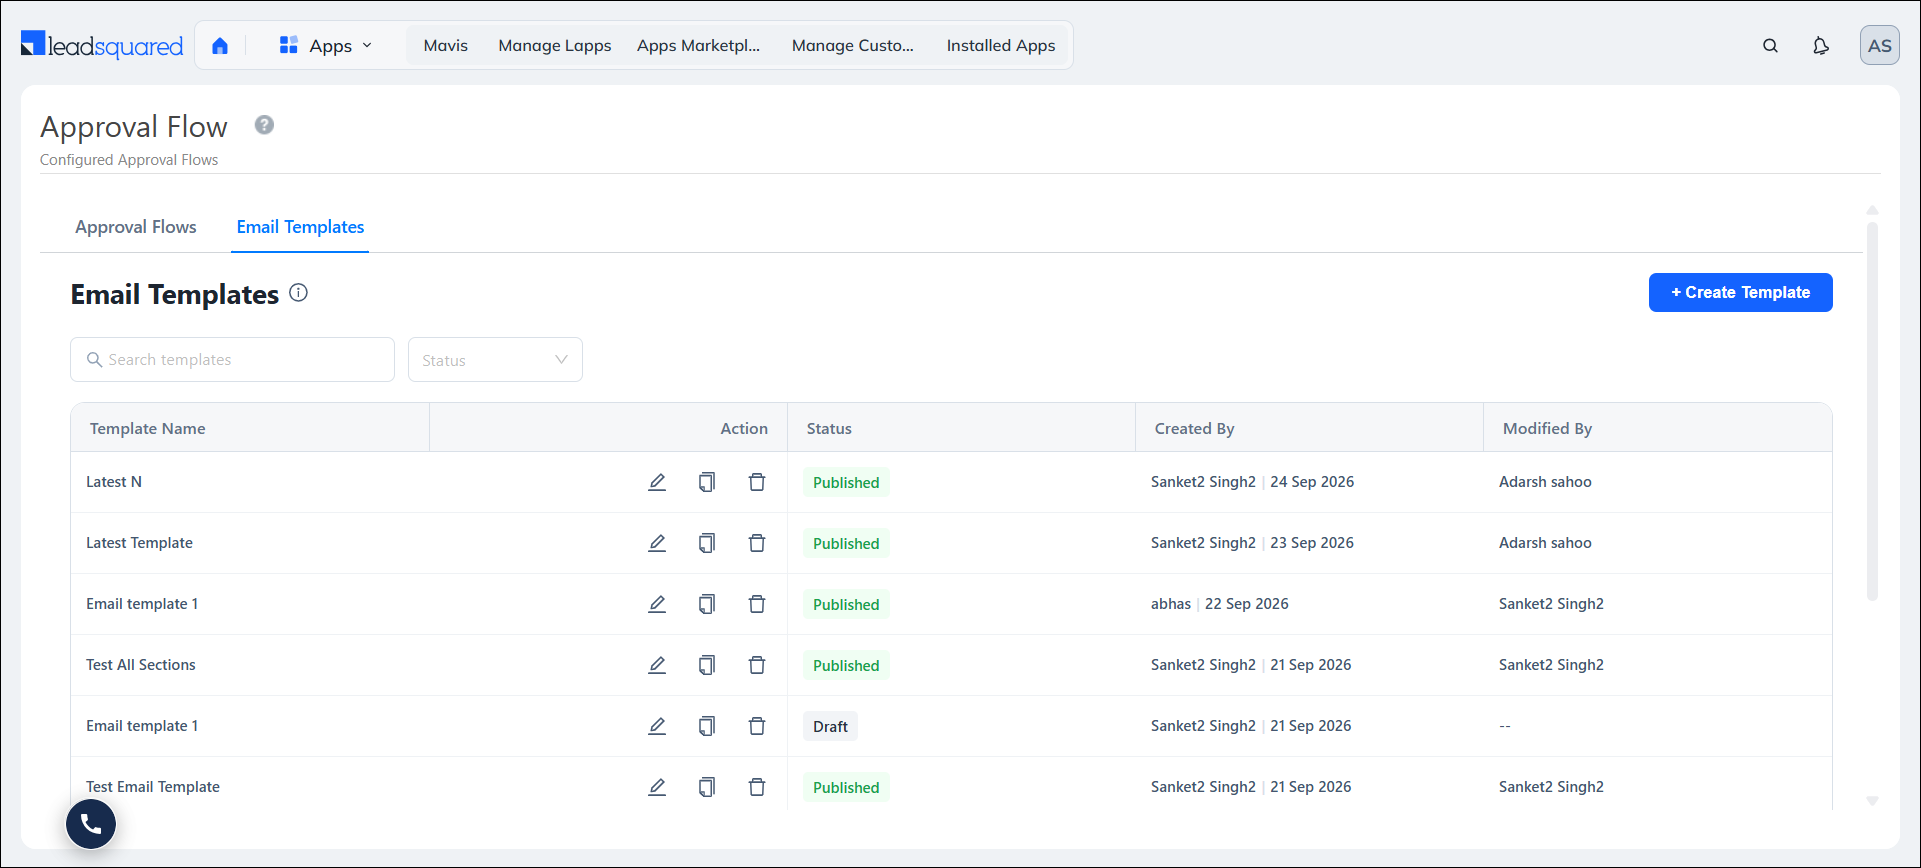
The Approvals Connector enables seamless approval workflows between users and the stakeholders who review their requests. Approval requests are sent by email. Approval Email Templates is a no-code feature that lets you create email templates you can use as part of approval flows, when sending approval request emails. You can include relevant activity, opportunity, and lead fields in each template and create multiple templates for different use cases. You can also set a default template for all approvals and assign custom templates where needed. This helps standardise approval request emails and ensures approvers receive the context they need to make informed decisions.
2. Prerequisites
- You must be an Admin user to create templates.
- The Approvals Connector must be installed and configured on your account.
3. How it Works
- Create an email template using the drag-and-drop builder, and add the text, images, and lead, opportunity, and activity fields approvers need to see.
- Publish the template.
- Associate this template with a new or existing approval flow.
- When an approval is triggered, the approver receives an email that contains the details configured in the template.
4. Create a Template
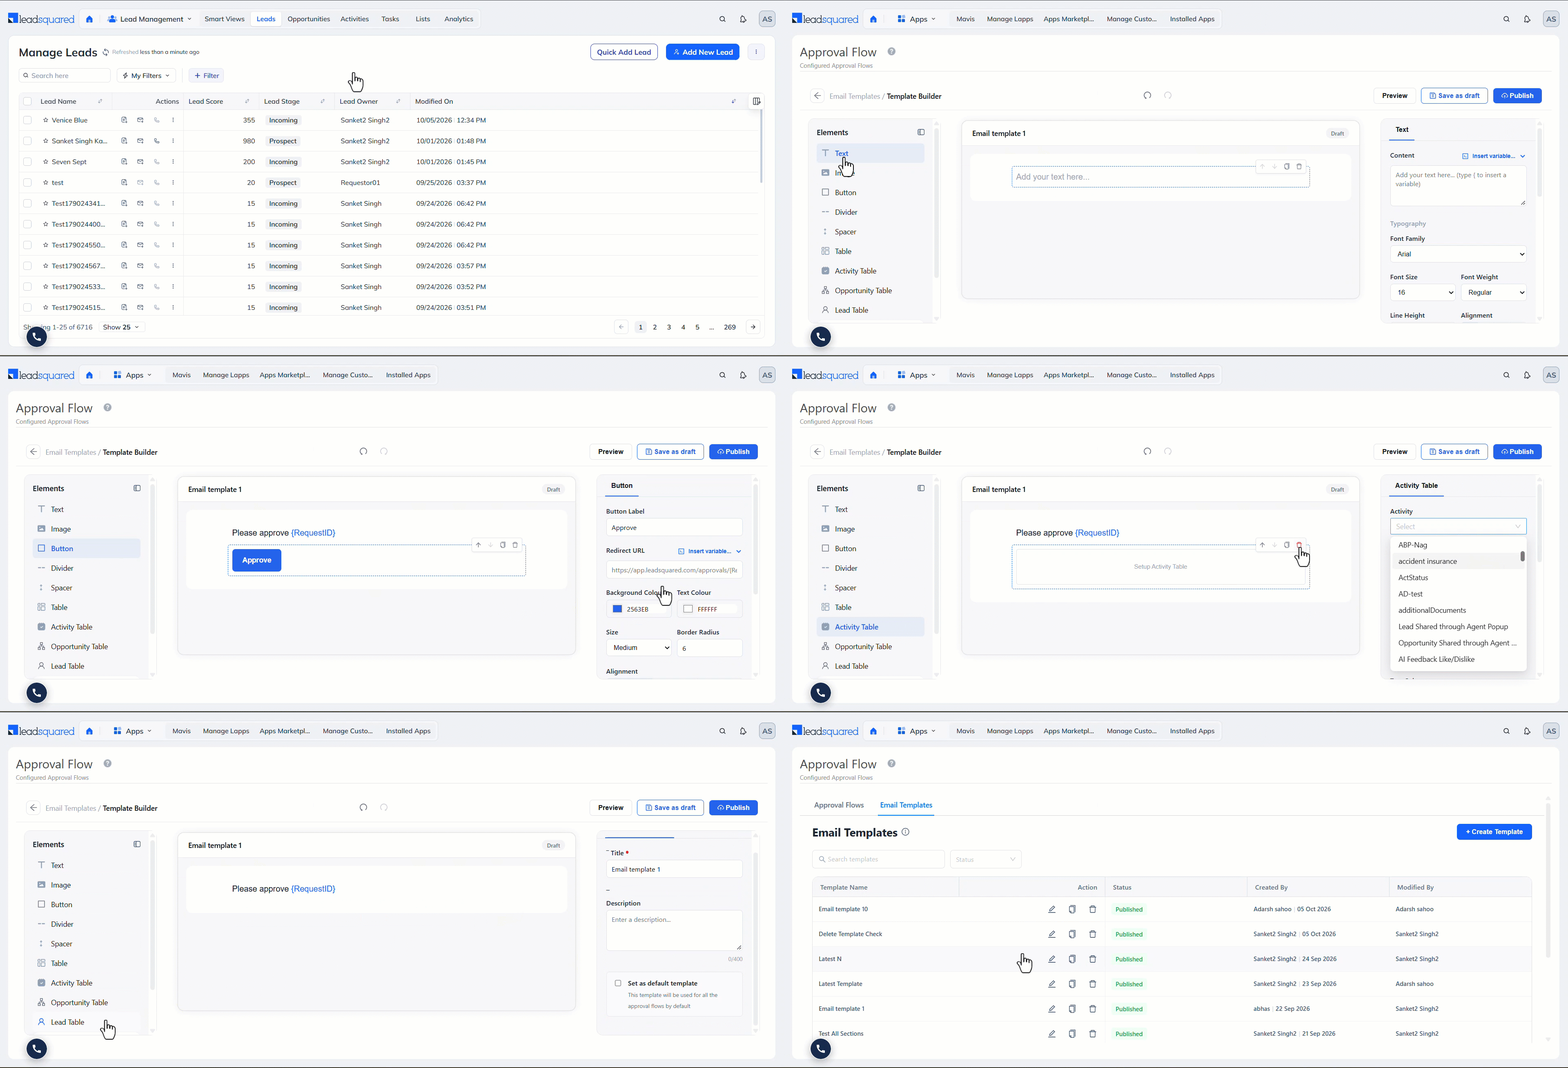
- Navigate to Apps>Approval Flows, open the Email Templates tab and click Create Template.
- On the Template Builder screen, you can add any of the following elements to the template –
- Text – Text content for the email. You can also customise the text’s font, colour, spacing, and more.
- Image – To display an image in the email, add an image URL.
- Button – Add a button and the redirect URL for it. You can also customise the button’s look.
- Divider – Divider between two elements.
- Spacer – Space between two elements.
- Table – A text table in the template.
- Activity Table – Lets you display activity fields inside a table.
- Opportunity Table – Lets you display opportunity fields inside a table.
- Lead Table – Lets you display lead fields inside a table.
- You can add multiple elements. After adding an element, use the up and down arrows to reorder it in the template and the copy icon to duplicate it.
- Set as Default Template – This template is used by default in all approval emails sent through the connector. This is optional.
- Once you add the elements, give the template a unique internal display name, and click Publish. These templates are now available for your users to use when sending approval emails.
5. Use a Template
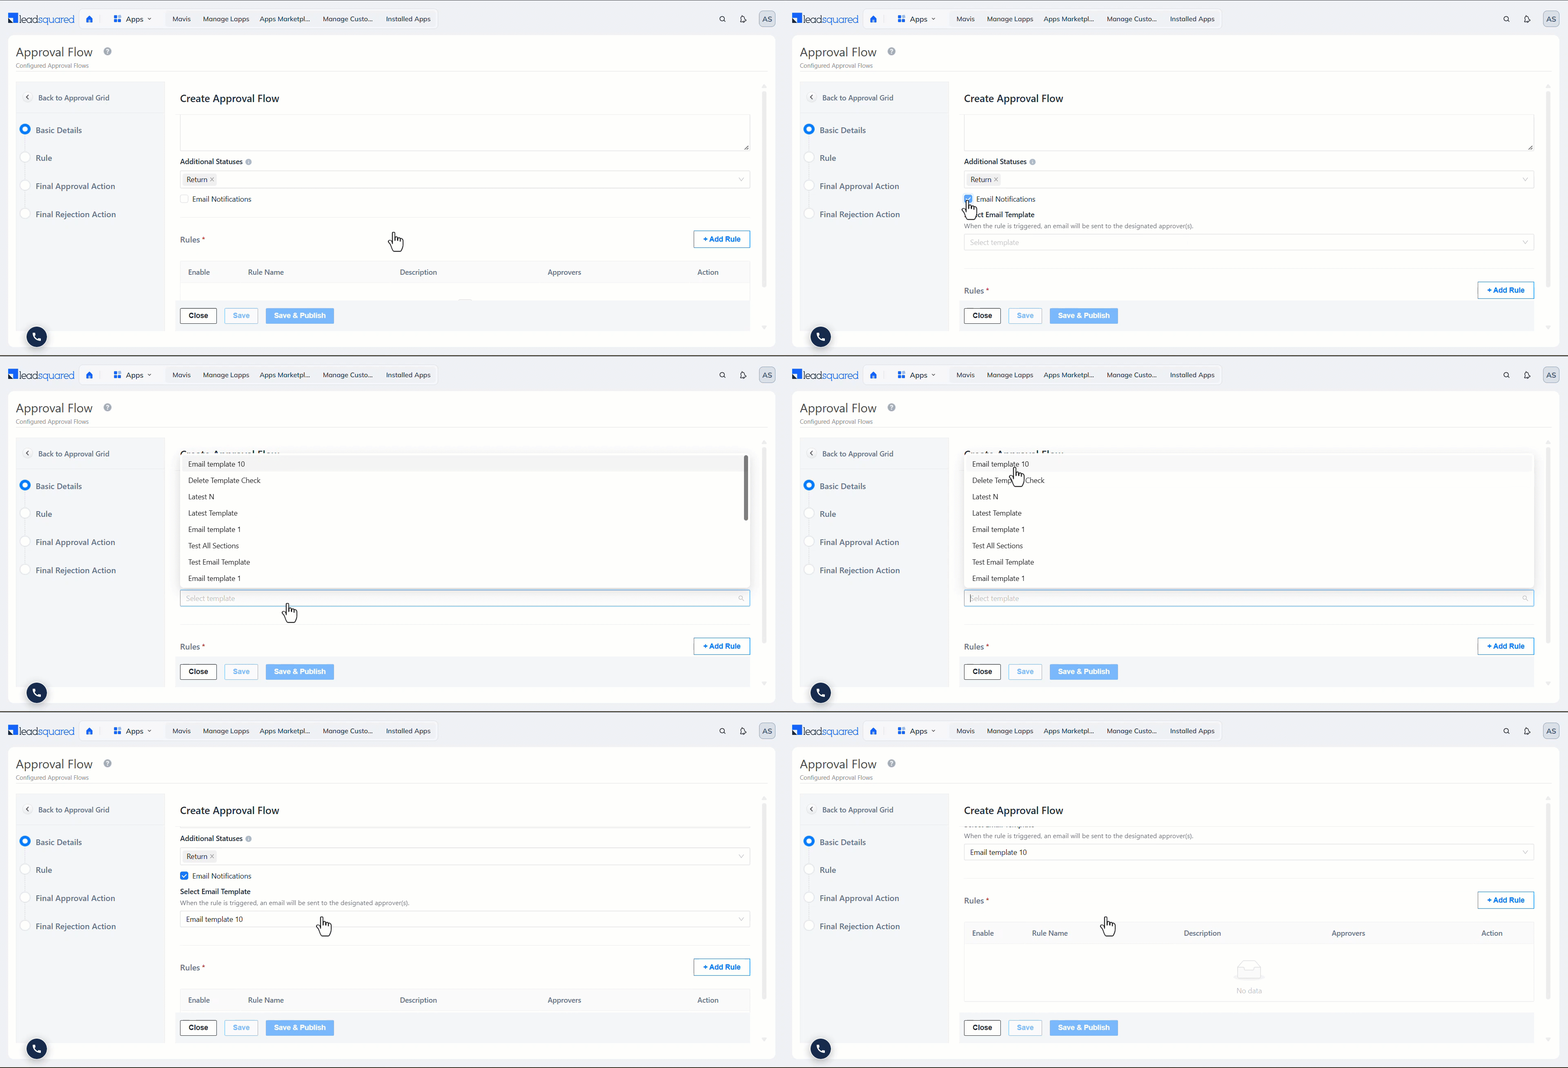
When creating approvals, on the Create Approval Flow screen, select the email template you want to use for this approval flow from the Select Email Template dropdown.
Any Questions?
Did you find this article helpful? Please let us know any feedback you may have in the comments section below. We’d love to hear from you and help you out!