1. Feature Overview
Sales Activity Management in LeadSquared lets you configure, capture, and manage revenue-related transactions against leads. Depending on your business, each sales activity records the information your organization needs to track a sale, such as the product sold, order value, sales owner, or transaction date.
Sales activities aggregate into total revenue figures, which can be tracked and analyzed using LeadSquared’s Analytics and LeadSquared’s Goals feature.
2. Prerequisites
- Only administrators can configure sales activity settings, add products, and customize the activity form.
- Once configured, all users (administrators, sales managers, and sales users) can log sales activities against leads.
3. How It Works
Sales Activity Management is built around three layers of admin configuration. Complete these in order before sales users begin logging transactions.
- Configure activity settings — Set a display name, default currency, and behavioral options such as allowing pre-dated entries or triggering automatic lead stage changes.
- Configure the activity form — Choose which fields appear when a user logs an activity. LeadSquared provides four default system fields and eleven configurable custom fields; only enabled fields appear on the form.
- Add products — Create the products users can select when recording a transaction. Products must exist in the system before they can be referenced in an activity.
Once all three steps are complete, sales users can log activities from the following locations:
4. Configure Sales Activity
Admin users can configure Sales Activity settings like the display name, default currency, etc.
- Navigate to Settings>Leads>Sales Activity Settings.
- Enter the Display Name for your sales activity (e.g., New Registration).
- Enable or disable the settings below based on your organization’s requirements.
- Click Save.
| Setting | Description |
| Log Activity Changes | When enabled, edits or changes to the sales activity will appear in the Activity History tab on the Lead Details page. To know more, see How to Log Activity Changes. |
| Allow Pre Dated Activities | When enabled, users can create activities for past dates. |
| Change lead stage of a lead to ‘X’ when sales activity is added | When enabled, adding a sales activity automatically moves the lead to the final lead stage configured in your account. |

5. Configure Sales Activity Form Fields
You can customize the Sales Activity form by configuring the fields that users will fill in while posting a sales activity. LeadSquared provides 4 default system fields and 11 configurable custom fields. To configure form –
- Navigate to Settings>Leads>Sales Activity Fields.
- Click Edit.
- Enter Display Names for the required fields.
- Click the Type dropdown and customize the activity field type.
- Select the checkbox alongside a field to include it in the form.
- Click Save.
6. Add Your Products
Products must be created so users can select them when recording a sales activity. You must be the Administrator of your account to add products.
- Navigate to Settings>Leads>Manage Products.
- Click Create.
- Enter the Product ID, Product Name, and Product Description.
- Click Save.

7. Capture Sales Activity for a Lead
Sales Activities can be added by Administrators, Sales Managers and Sales Users.
7.1 From Manage Leads Page
- Navigate to Lead Management>Leads.
- Hover over the Actions icon alongside the relevant lead and select New Sales Activity.
- Fill in the activity details in the pop-up. The fields displayed depend on how your administrator has configured the activity form. Default system fields include Status, Product, Order Value, Sales Date, and Sales Owner.
- To attach a file (for example, an invoice), click the Attachments tab, click Upload, and select the file.
- Click Save. Once saved, the activity appears in the Activity History panel on the Lead Details page.

7.2 From Lead Details page
- Navigate to Lead Management>Leads.
- Click the name of the relevant lead to open the Lead Details page.
- Click Sales Activity and enter the relevant details.
- Click Save.
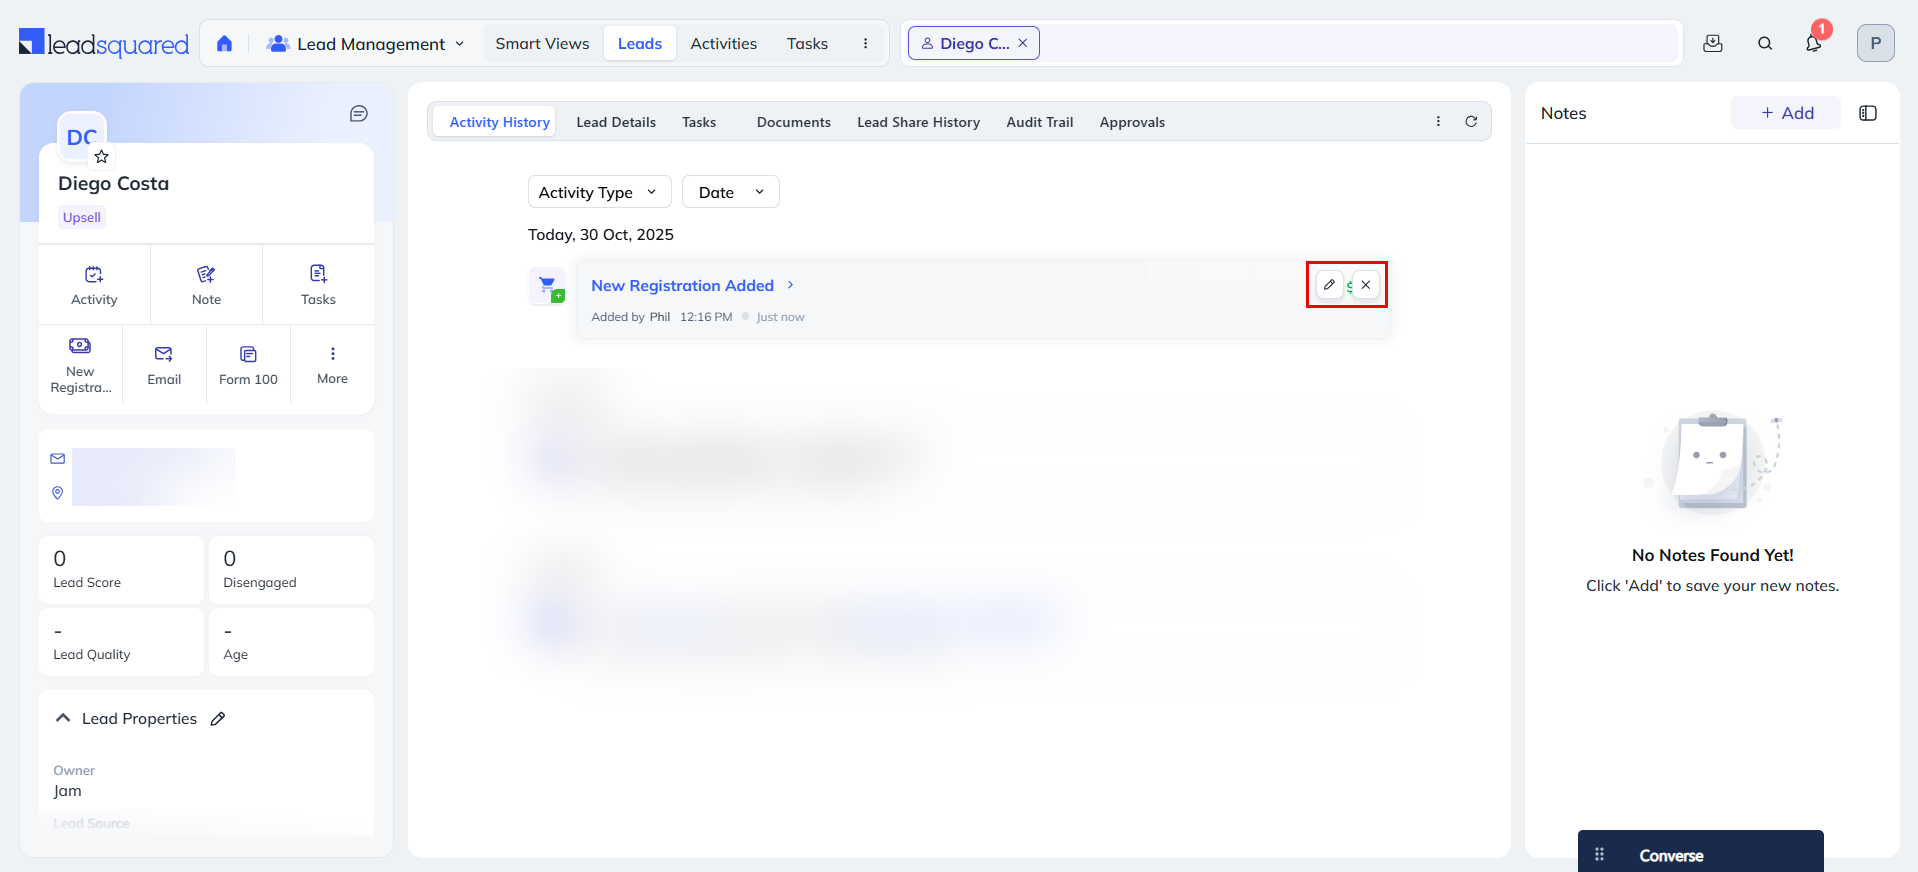
8. Edit or Cancel a Sales Activity
The sales activity of your leads will be displayed in the respective Lead Details pages. You can edit or cancel an existing sales activity here –
- Navigate to Lead Management>Leads.
- To view the Lead Details page, click the name of the relevant lead.
- To edit the details of the sales activity, click the Edit icon.
- To cancel the sales activity, click the Delete icon.
9. Search for Leads by Sales Activity
You can use Advanced Search to find leads based on data in sales activity fields.
- Go to Lead Management>Leads.
- Select Filter, and then select Advanced Filter.
- Enter your search criteria using the relevant activity and sales fields.
- Click + Add to apply each criterion.
- Click Show Results.
Any Questions?
Did you find this article helpful? Please let us know any feedback you may have in the comments section below. We’d love to hear from you and help you out!


