


Get Started
Sales Suite
Field Ops
Marketing
Service CRM
Integrations & Apps
FloStack
Create Custom Lead Fields
1. Feature overview
LeadSquared provides a set of default lead fields out of the box, but every business captures unique information about its leads. Custom lead fields let you extend the standard lead profile with fields specific to your industry or workflow, such as a credit score for financial services, a property budget for real estate, or a patient ID for healthcare.
Examples by industry:
| Industry | Example Custom Fields |
| Banking & Financial Services | Aadhaar Number, Social Security Number, or Credit Score |
| Education & Ed-Tech | 12th Grade Results, or Course Interest |
| Real Estate | Location Interest, Budget, or Property Type |
| Healthcare | Patient ID, Age, or Previous Diagnosis |
| General | Spouse’s Name, Permanent Address, Marital Status, or Gender |
Note:
- To display a number field in currency format, see How to Create a Currency Field.
- To control the values shown in one field based on the value selected in another, see Dependent Lead Fields.
2. Prerequisites
You must have Administrator access to create or modify lead fields.
3. System lead fields vs custom lead fields
LeadSquared accounts contain two types of lead fields.
- System lead fields are the default fields available in every account, such as First Name, Last Name, Email Address, Phone Number, Lead Source, and Lead Stage. They capture standard information common to most businesses. You cannot delete a system lead field, but you can rename its Display Name to suit your terminology.
- Custom lead fields are fields you create to capture information specific to your business that the system fields do not cover.
On the Lead Fields page, use the View filter to switch between All, System, and Custom to see each type.
4. How it works
Creating a custom lead field follows a set sequence:
- First, you choose the section the field belongs to. This controls where the field appears when a user adds or views a lead.
- Next, you select the data input type, such as text, number, or date. This controls how the field is rendered and what values it accepts.
- Then, you configure the field’s behavior, such as whether it is mandatory, searchable, or included in mail merge.
- Finally, once you save the field, it becomes available across your lead forms, imports, and views.
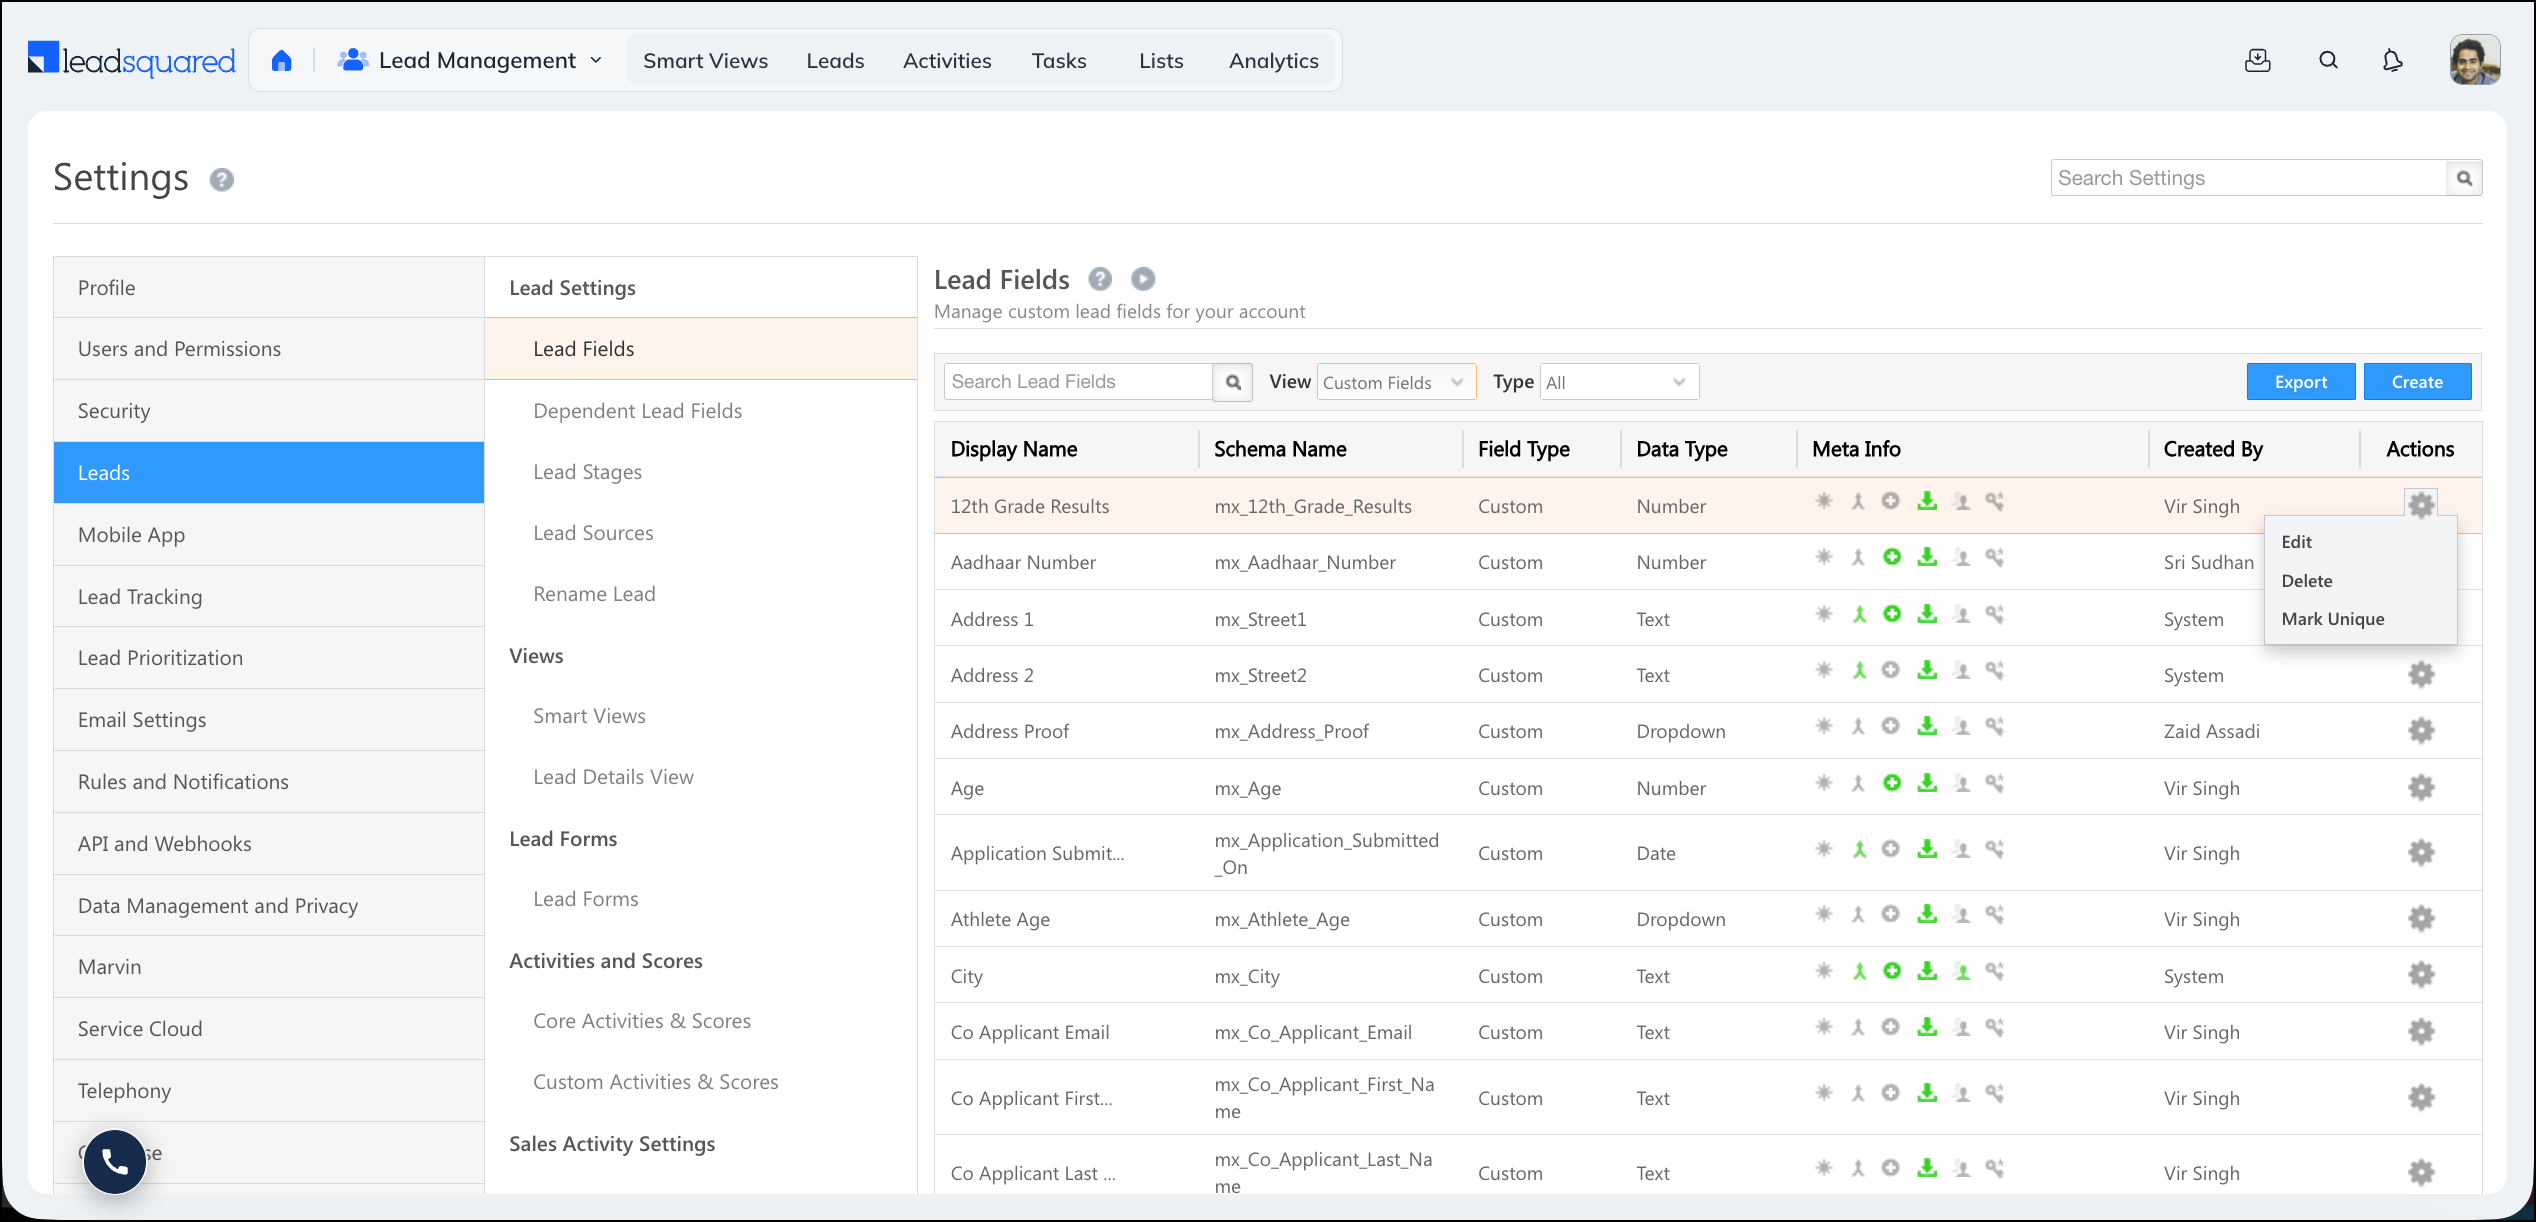
5. Create a custom lead field
To create a custom lead field:
- Go to My Profile>Settings>Leads>Lead Fields.
- Click the Create button.
- Fill in the field properties (described below).
- Click Save.
When you create a field, you configure the following properties.
5.1 Basic properties
- Display Name – The label shown to users on the lead form (for example, Alternate Mobile Number).
- Include Field in Section – The section of the lead profile where the field appears: Lead Details, Additional Details, or Hidden Fields.
- Mail Merge Default Value – A fallback value used in mail merge when a lead has no data in this field.
- Data Input Type – The field’s data type. It determines how the field is rendered and what values it accepts. See the data input types below.
5.2 Data input types
| Data Type | Rendered as | Example |
| Text (string) | Text box | Designation |
| Number | Text box (select Decimal or Integer) | Fax Number |
| Email input | Alternate Email Address | |
| Phone | Text box or Phone Controller | Secondary Phone Number |
| Website | URL input | Company Blog |
| Date | Date picker | Follow-up Date |
| Time | Time picker | Follow-up Time |
| Boolean | Radio button or checkbox | Valid Passport |
| Dropdown | Single-select dropdown | Country |
| Multi-Select Dropdown | Multi-select dropdown | Courses Opted For |
| Custom Field Set (CFS) | Configurable, supports file or image uploads | PAN Card |
5.3 Behavioral settings
- Include in Mail Merge – Lets this field’s value merge dynamically into email campaigns, automations, and integrations. File-type CFS fields cannot be included in mail merge.
- Is Mandatory – Stops users from saving a lead record until this field is filled in.
- Include in Quick Search – Makes this field searchable from the Quick Search bar on the Manage Leads page.
- Show in Quick Add – Displays this field when a user creates a lead through Quick Add.
- Lock After Create – Stops non-admin users from editing the field value after the lead is created. It does not restrict API-level updates.
- Use in Lead Clone – Auto-populates this field when a user clones an existing lead.
- Show in Import – Makes this field available for column mapping when importing leads.
6. Edit a custom lead field
After a field is created, its data input type cannot be changed. Everything else can be modified.
To edit a custom lead field:
- Go to My Profile>Settings>Leads>Lead Fields.
- Set the View filter to Custom.
- Against the field you want to edit, hover your cursor over the
 icon, then click Edit.
 - Update the available properties, then click Save.
7. Other actions on a custom lead field
From the Lead Fields page, you can perform the following actions on a custom field. Hover your cursor over the settings icon on a field to view the available icons.
- Mark a field unique – Make a custom field’s values unique across leads, with optional validation formats. See How to Make a Custom Field Unique.
- Delete a custom lead field – Remove a custom field you no longer need. System lead fields cannot be deleted. Before deleting a field, remove any Lead Lists or Quick Filters that use it.
Any Questions?
Did you find this article helpful? Please let us know any feedback you may have in the comments section below. We’d love to hear from you and help you out!
Hi, I want to add a custom Lead field that will be used in Leads and Opportunities and I want the value to be automatically updated based on the Audit of the Lead.
Example
Custom Field1 = Latest_Update
Custom Field 2 = is_Called
I want the logic in such a way that if during the journey of the lead, if the “Latest_Update” field is set to “Called” then the “is_Called” field should be set to “True” until then it should be “False”
Hi Allan,
You can achieve this using LeadSquared’s Automation feature.
First, create the Lead Fields:
Latest_Update – Tracks the latest action on the Lead.
Is_Called – Ensure this field has a default value of “False” by selecting the ‘False’ radio button option.
Set Up Automation:
Trigger Card: Create a trigger card of Lead Update when the “Latest_Update” field changes.
If/Else Card: Add the condition “Latest_Update = Called”
Action Card: Add a Lead Update action card with the condition “Is_Called = True”
This setup will ensure the “Is_Called” field updates automatically based on the specified condition. If you need further assistance, please send an email to support@leadsquared.com.
Can we create multiple lead fields at one time using any API?
Hi, Abhishek.
You cannot create multiple lead fields at one time using API. However, there’s an API that lets you create a single lead field.
I want once my sales users enter the data in the Lead Field they don’t have access to overright or change the data of that lead field. Let me know how can we achieve this.
Hello, Abhiskek.
You can create a permission template to allow your sales user to edit the lead field.
Hi Dharshana,
I have created the permission template and restricted the edit field but when the user is going to enter the data the first time it shows the restrictions on it.
Hello, Abhishek.
The edit field must not be restricted. You’ll need to enable permission for your users to edit the lead field.