1. Feature Overview
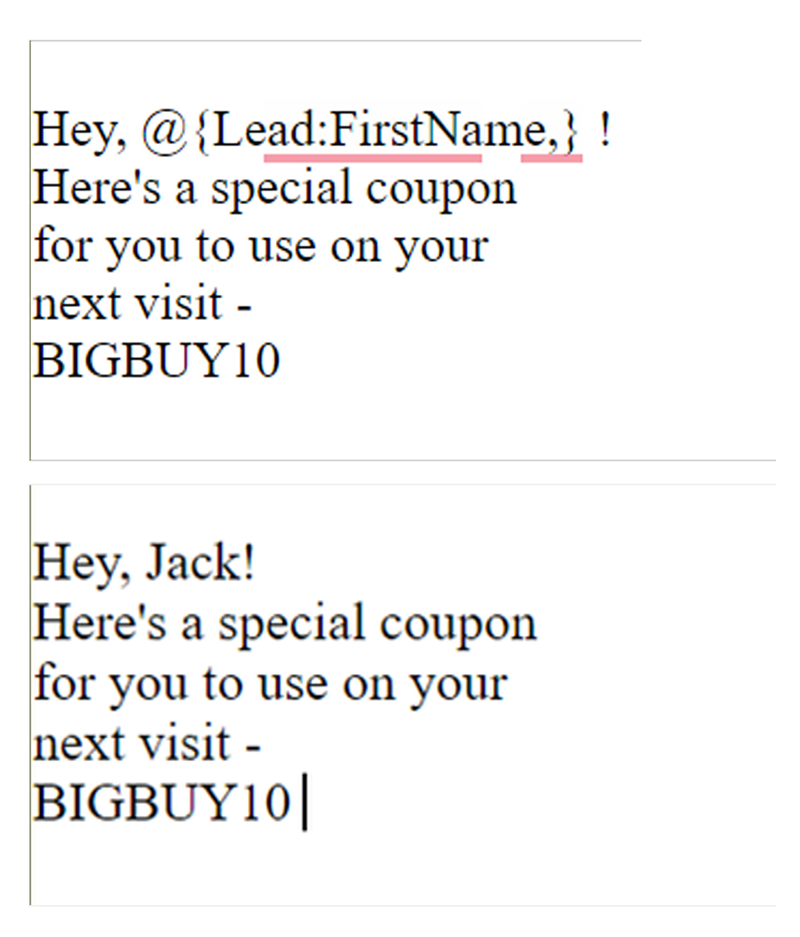
Personalise emails, SMS and WhatsApp communication with lead, account, and sender details using Mail Merge fields. For example, to include the lead’s name in your email’s body (e.g., Hi Richard), add the First Name tag. When the email is sent to a list of leads, it gets personalized based on the name of each lead. Mail merge tags can be added in the body and footer of the email.
In addition to using mail merge for email and message personalization, you can also use mail merge in –
- Automations
- To copy the value of one field into another across entities like lead, activity, task, opportunity, etc.
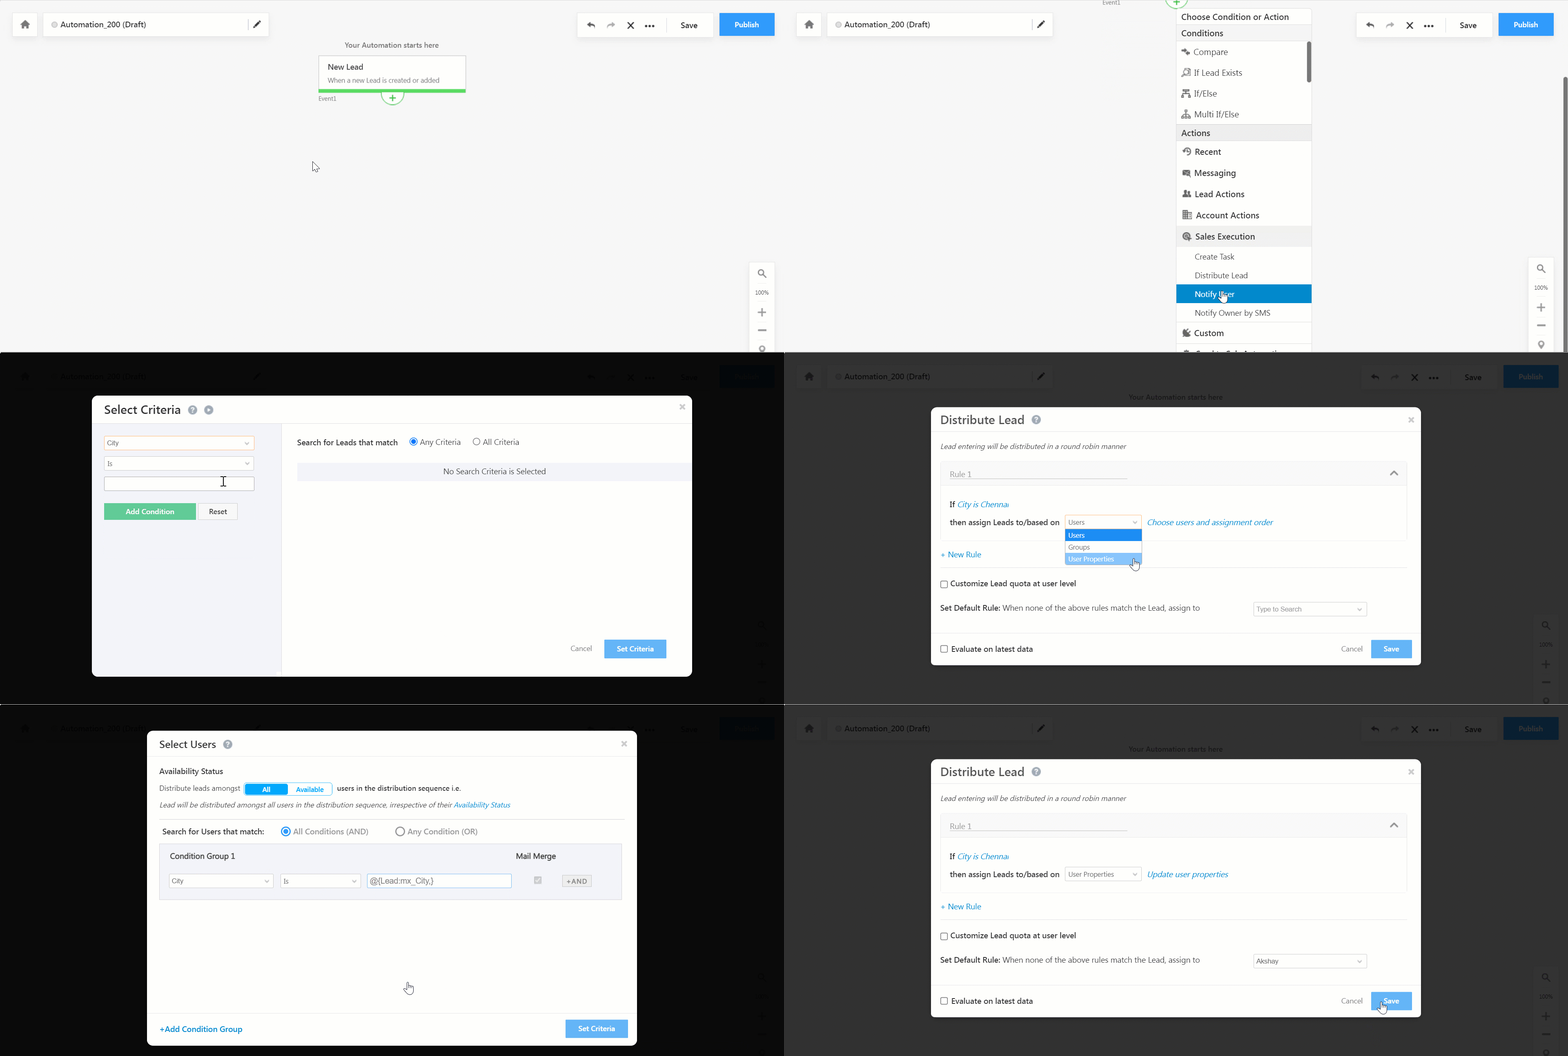
- To dynamically pick the value contained in a field at run time. For example, assign a lead to a user in the same city by matching the user’s and lead’s City field.
- Forms and Processes – In form rules, to perform various actions.
- Connectors and integrations – To push data to external systems.
You can mail merge fields for all LeadSquared entities (lead, opportunity, account, activity, task and user) in relevant features.
Even custom fields in your account can be used as Mail Merge Tags. If you need a tag that doesn’t exist in your account, create a custom field and include it in Mail Merge. To know more, see How To Create Custom Fields.
Note:
- You can add multiple Mail Merge fields in your email.
- To know more about creating email campaigns, see Create and Schedule Email Campaigns.
- To know more about sending one-to-one emails, see How to send Quick One-To-One Emails to Leads.
2. Prerequisite
You must be the Administrator or the Marketing User of your account.
3. Use Mail Merge in Emails
3.1 Insert Mail Merge Tags in Visual Designer
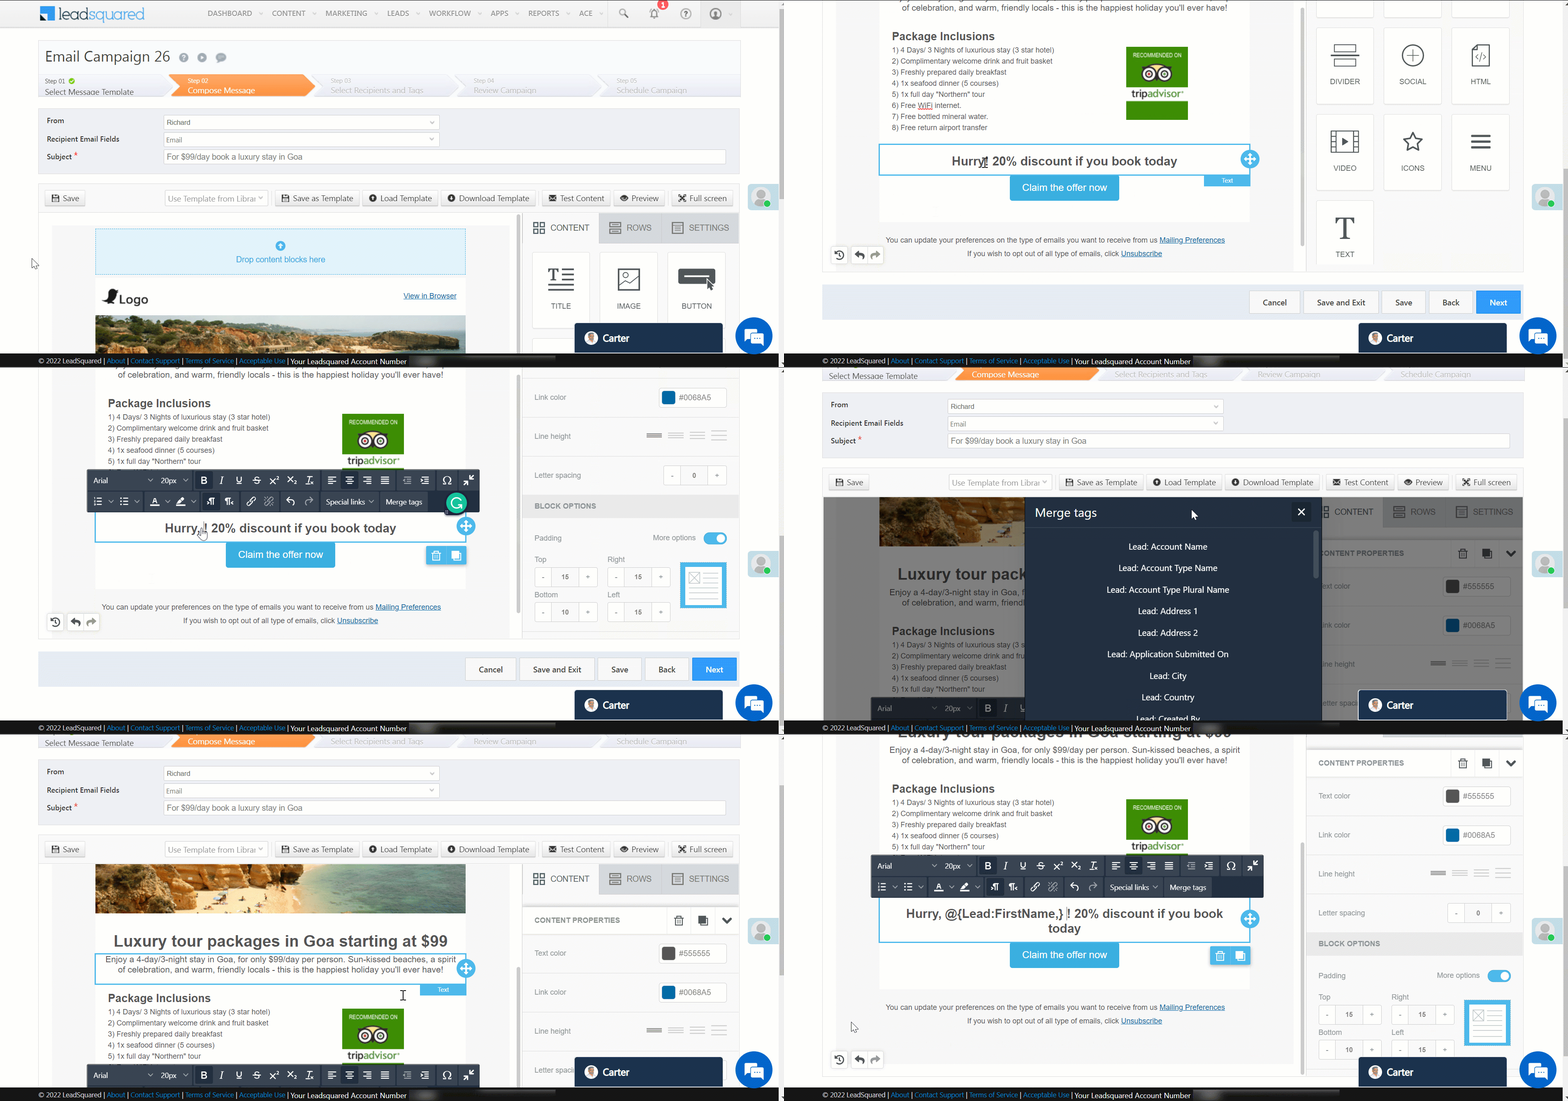
To insert mail merge tags in the body of your email –
- Click the text box where you need to insert a mail merge tag. Alternatively, type ‘@’ and select the required tag.
- On the toolbox, click Merge tags.
- Select the required mail merge tag.
3.2 Insert Mail Merge Tags in Rich Text, Plain Text, and HTML Editor
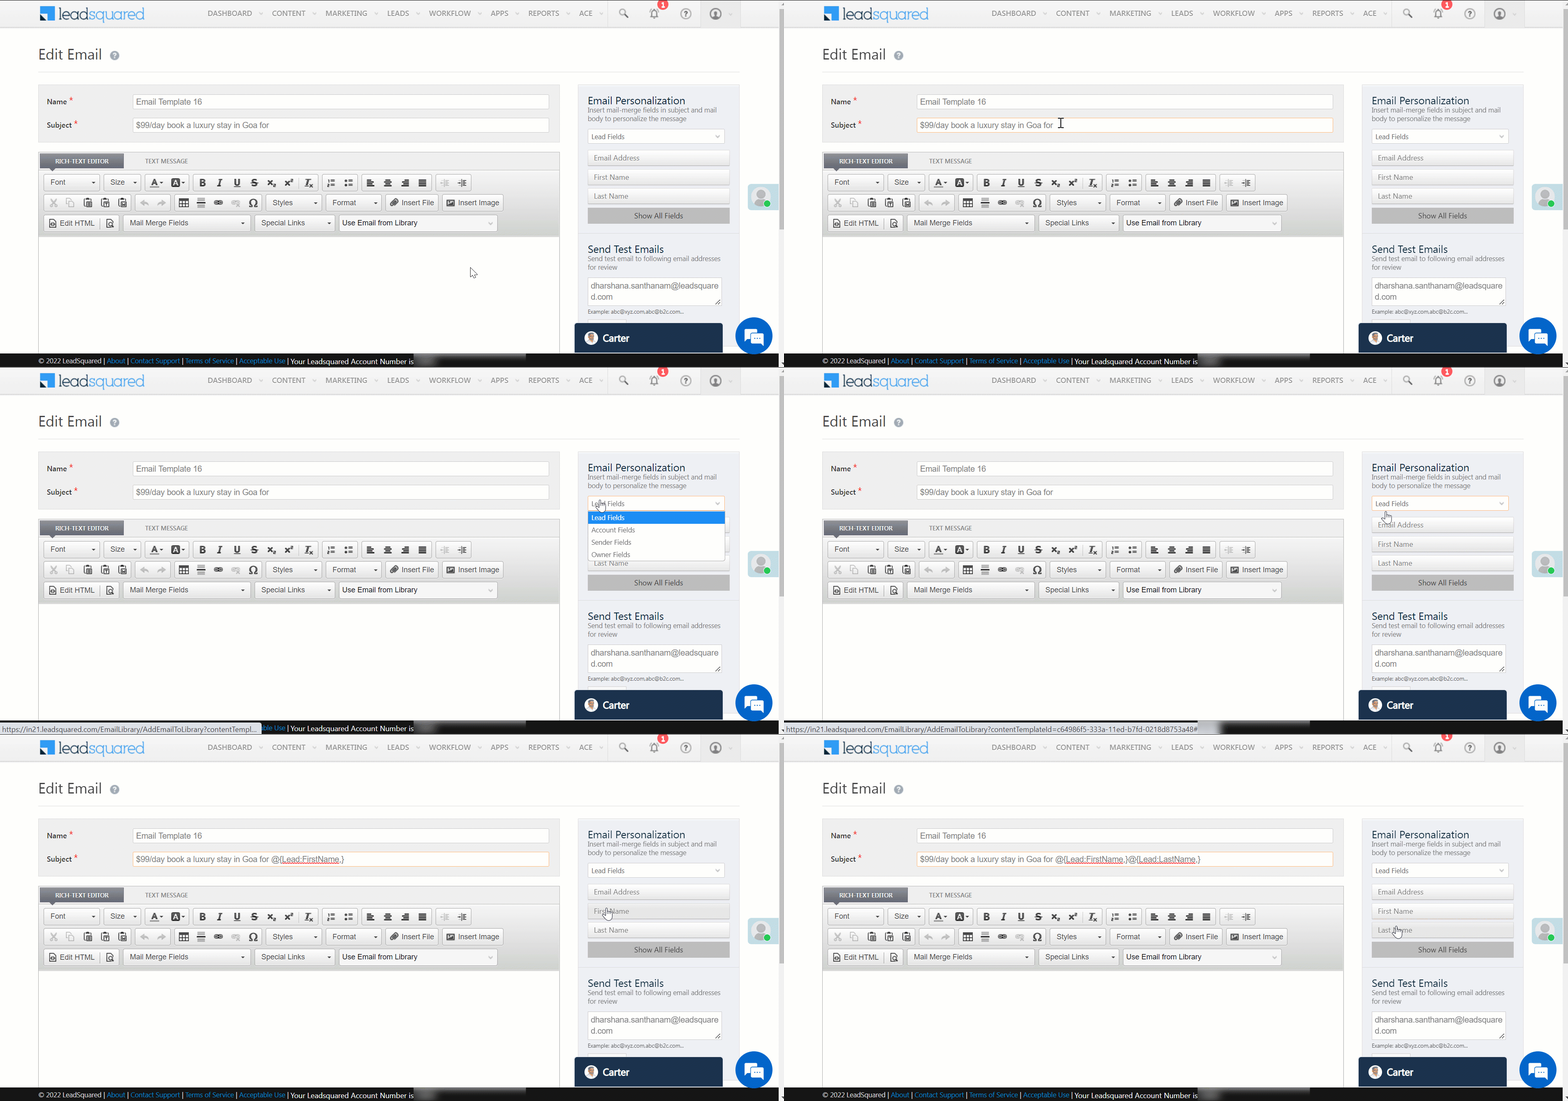
To insert mail merge tags in your email’s subject line and body –
- Navigate to the right-hand side of your editor.
- Under Email Personalization, select the required category of mail merge tags (For example – Lead Fields, Account Fields, etc.).
- Place your cursor on the required position (on the subject line or the body of the email) and click the mail merge field.
4. Use Mail Merge in WhatsApp and SMS
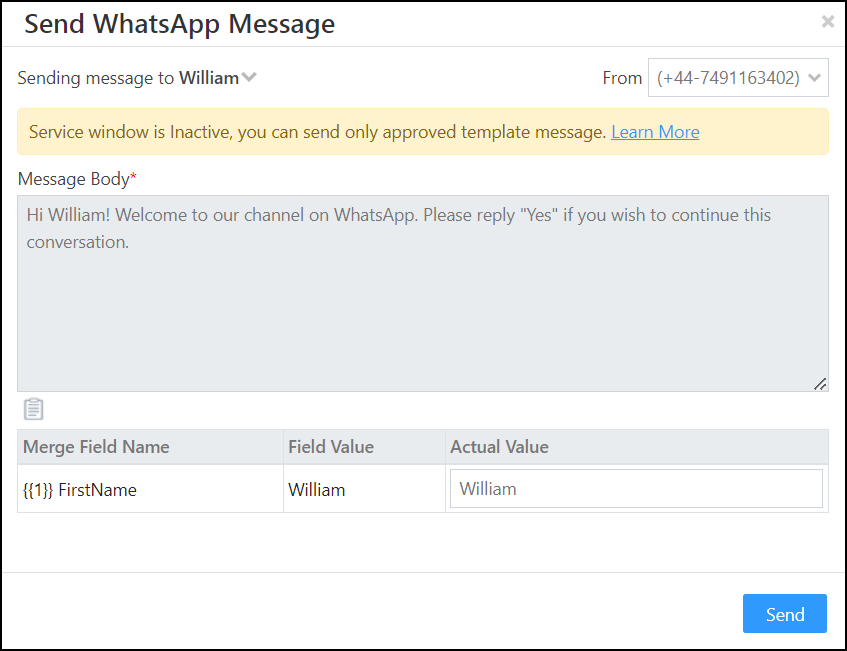
You can use Mail Merge fields when sending WhatsApp and SMS (one-to-one or templatized messages) to personalize communication with leads.
5. Use Mail Merge in Automations
You can use Mail Merge while creating automations to dynamically pick data from your account and perform automated actions. The GIF below is an example of using mail merge to distribute a lead to a user in the same city.
6. Use Mail Merge in Forms
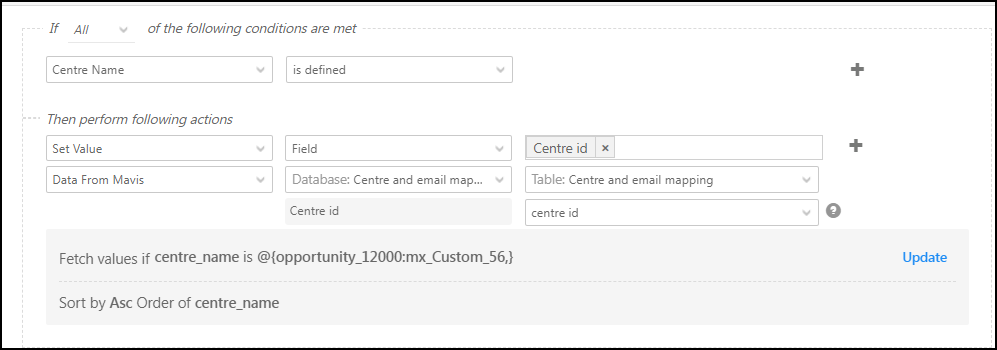
You can use Mail Merge while creating forms to define values of certain fields based on the data stored in your account. For example, populate the value of a field in the form with data from a Mavis Database table. In the example below, we’re populating the centre name and centre ID fields from data stored in Mavis for an education company.
7. FAQs
How to Mail Merge Date-Time Values in Automations?
In LeadSquared automations, you can mail merge Date-Time values using the following options depending on your requirements:
- Account Time Zone Mail Merge: Use
@{DateTime:Account_Current_DateTime,}- This provides the Date-Time in the user’s account time zone.
- UTC Time Zone Mail Merge: Use
@{DateTime:UTC_Current_DateTime,}- This provides the Date-Time in UTC format.
Any Questions?
We’d love to answer your questions or hear your unique use cases. Feel free to share your experiences in the comments section below.


How to create a new merge tag?
Hi, Swadesh. You cannot create a new merge tag. You can only work with existing ones available in your account.