1.Feature Overview
In LeadSquared, you can add leads manually or capture them automatically from external sources.
Manual lead creation is supported across multiple pages such as Manage Leads, Smart Views, List Details, Activities, and Opportunities. You can add leads using the following methods:
- Quick Add Lead – Add a lead instantly with minimal information.
- Add New Lead – Capture complete lead details, including documents and additional fields.
- Import Leads – Upload multiple leads in bulk using a CSV file.
Before adding leads manually, you must configure the Lead Forms used by the Quick Add Lead and Add New Lead options. These forms define which fields appear when users create a lead.
For advanced form creation and intelligent data capture, you can also use the Forms and Process Designer to build dynamic forms for leads, activities, and opportunities.
In addition to manual entry, LeadSquared can automatically capture leads from sources such as:
- Landing Pages
- Portals
- APIs
- Integrations and third-party systems, such as UDS.
For more information, see Lead Management – Feature Guide.
2. How It Works
Lead creation in LeadSquared follows this workflow:
- Configure Lead Forms
Configure the fields that appear in the Quick Add Lead and Add New Lead forms. - Choose a Lead Creation Method
Add leads manually using:- Quick Add Lead
- Add New Lead
- Import Leads
- Capture Leads Automatically (Optional)
Leads can also be captured automatically through integrations such as UDS, Landing Pages, Portals, or APIs. - Use Dynamic Forms (Optional)
Advanced forms created using the Forms and Process Designer can also be assigned to workflows for automated lead capture.
3. Configure Lead Forms
Before using Quick Add Lead or Add New Lead, configure the fields that should appear in the respective forms.
Both options use the Lead Forms configuration page, and the steps remain the same. The only difference is the form selected.
To configure a lead form
- Navigate to My Profile>Settings>Leads>Lead Forms.
- In the Select form to edit dropdown, choose one of the following:
- Create Quick Add Form – Used by the Quick Add Lead button.
- Create Lead Form – Used by the Add New Lead option.
- From the list of available lead fields, drag and drop the fields you want to include in the form.
- To know how to create a custom lead field, refer to How to Create Custom Lead Fields.
- To remove a field, drag it back to the available fields list.
- Click Save.
You will see the message “Form details updated successfully.”
4. Add Leads Manually
Once the forms are configured, you can add leads manually using either Quick Add Lead or Add New Lead.
- Quick Add Lead allows you to add leads quickly with minimal information. This is useful when capturing leads during phone calls, store visits, or events.
- Add New Lead allows you to capture detailed information, including documents and additional fields.
To add a lead from the Manage Leads page
- Navigate to Lead Management>Leads.
- Choose one of the following options:
- Click Quick Add Lead, or
- Click Add New Lead.
- Enter the required lead details.
- Click Save & Close.
If you selected Add New Lead, you can also use the following tabs:
- Lead Details – Enter personal or organizational details.
- Documents – Upload supporting documents (for example, PAN card or passport).
- Additional Details – Enter additional or custom lead information.
Note: You can also add leads from Smart Views, List Details, Activities, and Opportunities.
5. Import Leads
You can upload leads in bulk using a CSV file.
This option is useful when importing leads collected from:
- Offline campaigns
- Third-party platforms
- External databases
To import leads:
- Navigate to Lead Management>Leads.
- Select Import Leads from the three-dotted menu.
- Upload the CSV file containing lead data.
For detailed instructions, see How to Import Leads to LeadSquared.

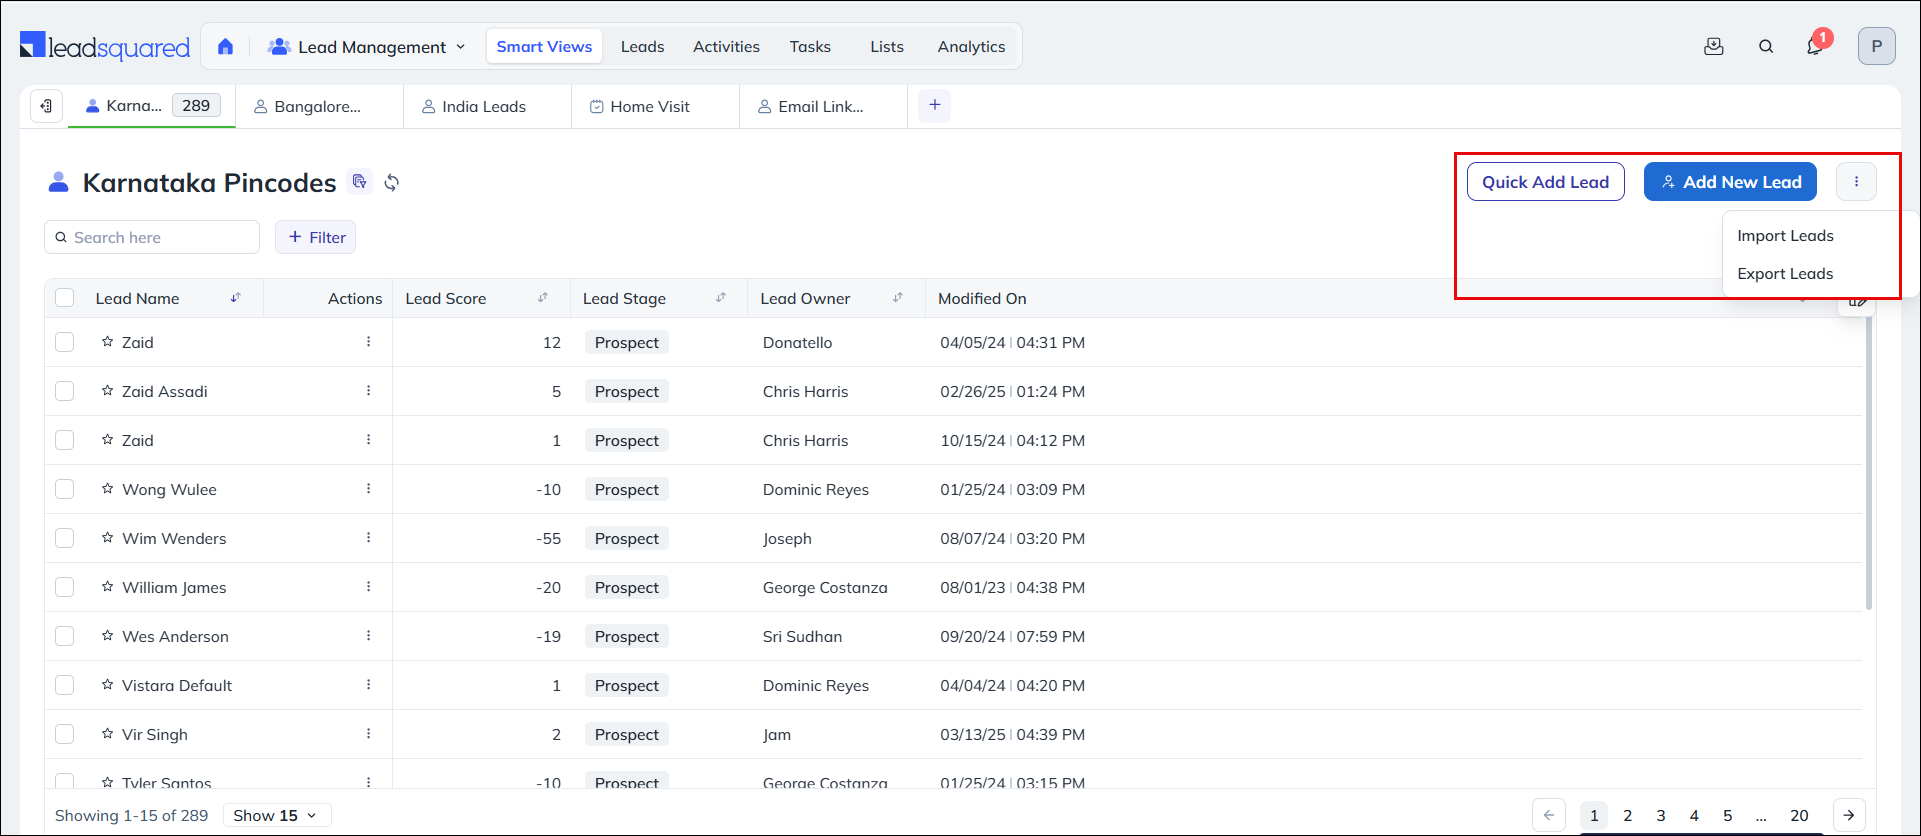
6. Add Leads from Smart Views
You can add leads directly within a Smart Views tab.
The following options are available:
- Quick Add Lead
- Add New Lead
- Import Leads
These options allow you to create or import leads while working within a specific filtered view.
7. Add Leads from the List Details Page
You can add leads directly to a list using:
- Quick Add Lead
- Add New Lead
This allows you to immediately associate the newly created lead with the selected list.

FAQs
1. Why is the Add New Lead or Quick Add Lead button not visible?
Ensure that these actions are enabled in the Actions Panel configuration.
- Navigate to Settings>Organization Settings>Advanced Configuration.
- Click Configure next to Actions Panel in Manage Leads/Activities/Opportunities/Smart Views Page.
- Ensure the following options are enabled:
- Quick Add Lead
- Add New Lead
For more information, see Configure Actions Panel.
2. Why is the lead’s email ID appearing in the Lead Name field?
If a lead is created without a Lead Name, LeadSquared automatically populates the Lead Name field using the lead’s:
- Email ID, or
- Phone number.
Any Questions?
Did you find this article helpful? Please let us know any feedback you may have in the comments section below. We’d love to hear from you and help you out!


