


Get Started
Sales Suite
Field Ops
Marketing
Service CRM
Integrations & Apps
FloStack
Ticket Creation Channel – Calls
1. Feature Overview
Service CRM’s Telephony feature lets you integrate your cloud telephony provider with LeadSquared to receive and make calls that address customer service requests or tickets.
When a customer places a call for a service request, it can be distributed in a round-robin manner by location, products, the language they speak, agent performance, availability, and much more.
Also, customer service representatives can effortlessly call customers by clicking on their phone numbers to resolve tickets.
LeadSquared provides a detailed analysis report on all the calls dialled and received by your customer service reps, including their respective call recordings. This way, you will never lose track of your conversations.

2. Prerequisites
- Service CRM is a paid offering, contact scsupport@leadsquared.com to know more.
- You must enable and install the Universal Telephony Connector.
- You must be an Admin user to configure the Service CRM Telephony feature.
3. How it Works
To enable Telephony on Service CRM, follow these steps –
- Configure an Instance on LeadSquared’s Universal Telephony Connector
- Create and configure a new instance on the Universal Telephony Connector and integrate your telephony provider with LeadSquared.
- Set up Telephony IVR Mapping
- Define IVR mappings within LeadSquared to route incoming calls to the appropriate departments or teams based on caller inputs.
- Configure Customer Identification and Verification for Calls
- Implement mechanisms to identify and verify customers when they call in, ensuring smooth handling of service requests.
- Add Additional Details for Service CRM Users
- Ensure that Service CRM users’ profiles in LeadSquared contain relevant information such as phone numbers and email addresses to facilitate communication with customers.
- These details must be similar to the ones configured with your telephony provider.
- Configure a Disposition Form
- Create a Disposition Form within LeadSquared to capture essential information related to each service call, such as the nature of the request, resolution status, follow-up actions, and any additional notes.
4. Configure UTC
You can integrate your telephony provider with LeadSquared by creating an instance on the Universal Telephony Connector (UTC). Read this article to learn how to configure the instance on UTC.
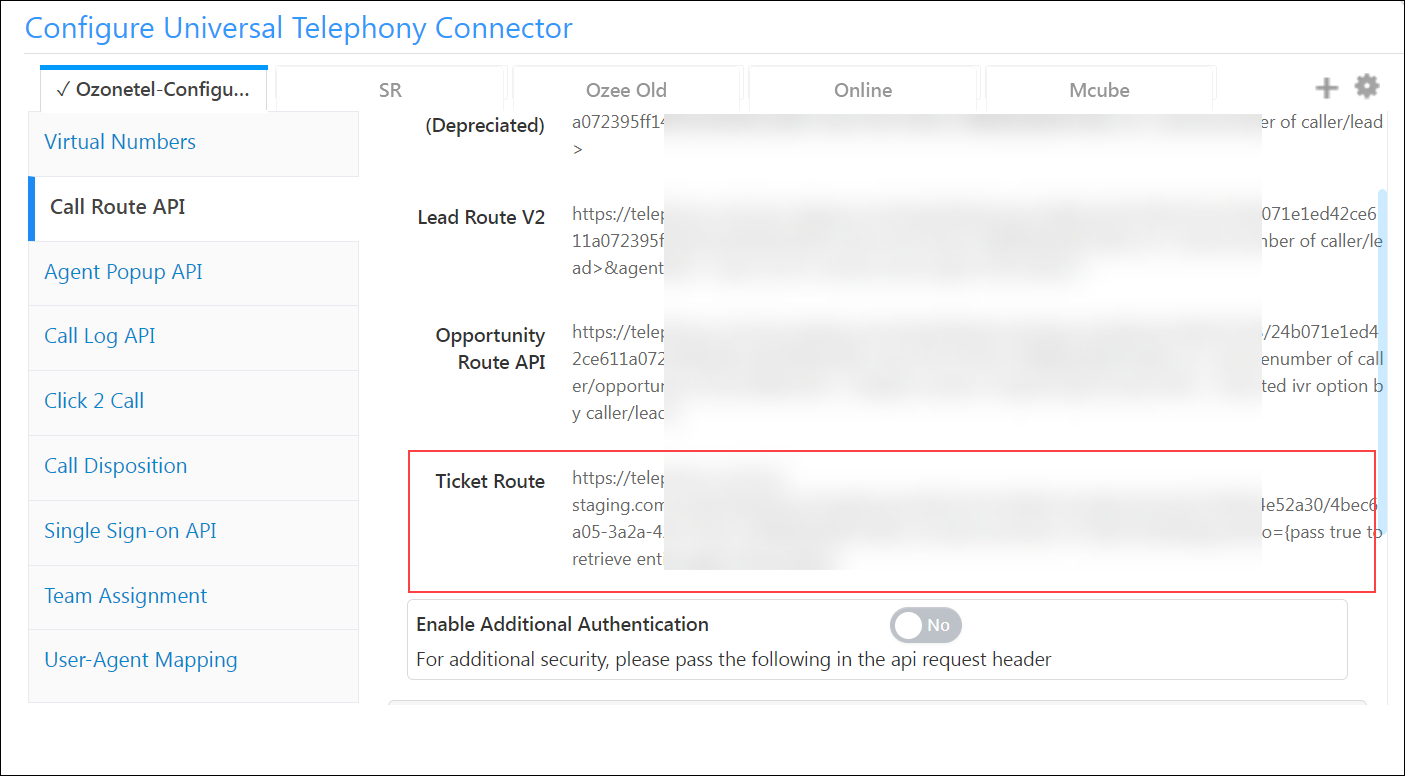
1. When configuring the Call Route API, you must configure the Ticket Route API in your cloud telephony account to route the call to Service CRM. The Ticket Route functionality enables the Sticky Agent feature, where the provider calls the API and attempts to route the customer’s call to the customer’s most recent ticket owner. If the owner is unavailable, the call is routed to the next available agent in a round-robin fashion.
2. In the Agent pop-up and the call log APIs, which is common for the instance, there’s a custom mapping available for the @entityId based on which it will be resolved to the TicketID when called.
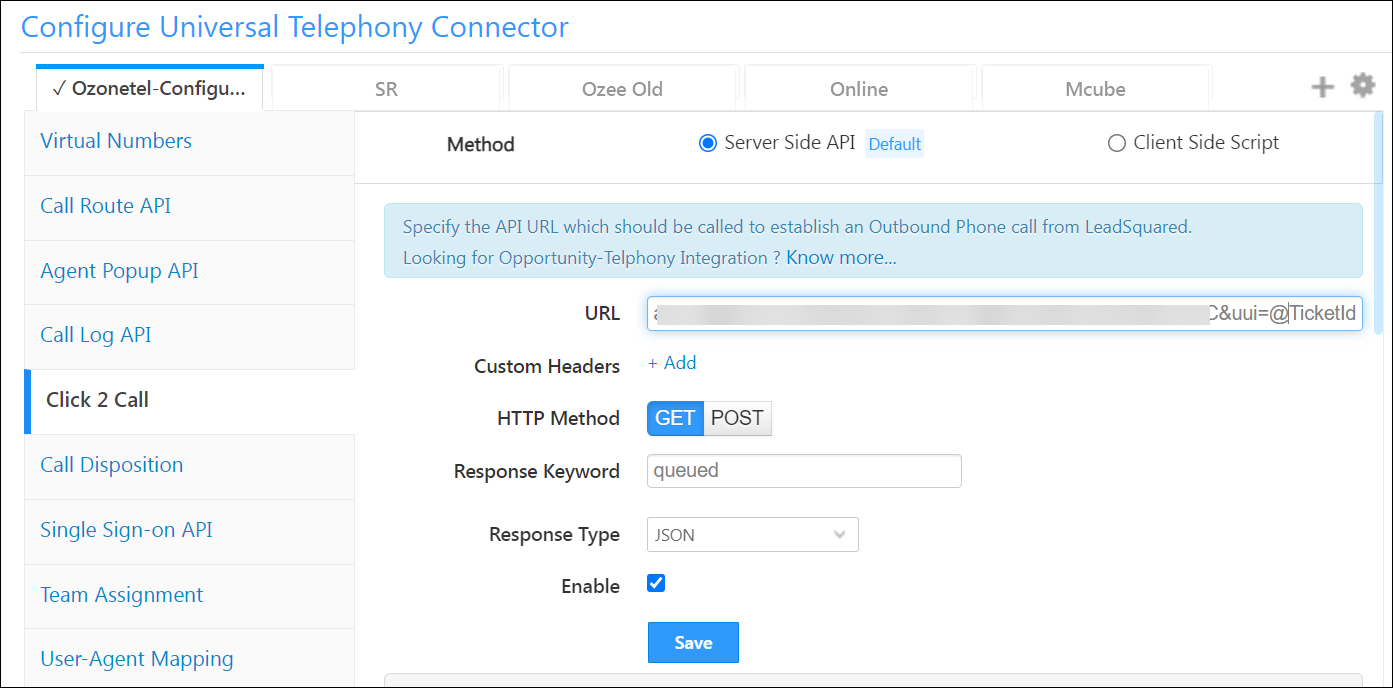
3. In the Click 2 Call URL you must include an additional parameter, @TicketId or @entityIdto share the respective ticket ID. Your telephony provider will need to pass this parameter back to LeadSquared in the call logs when a call is disposed of.
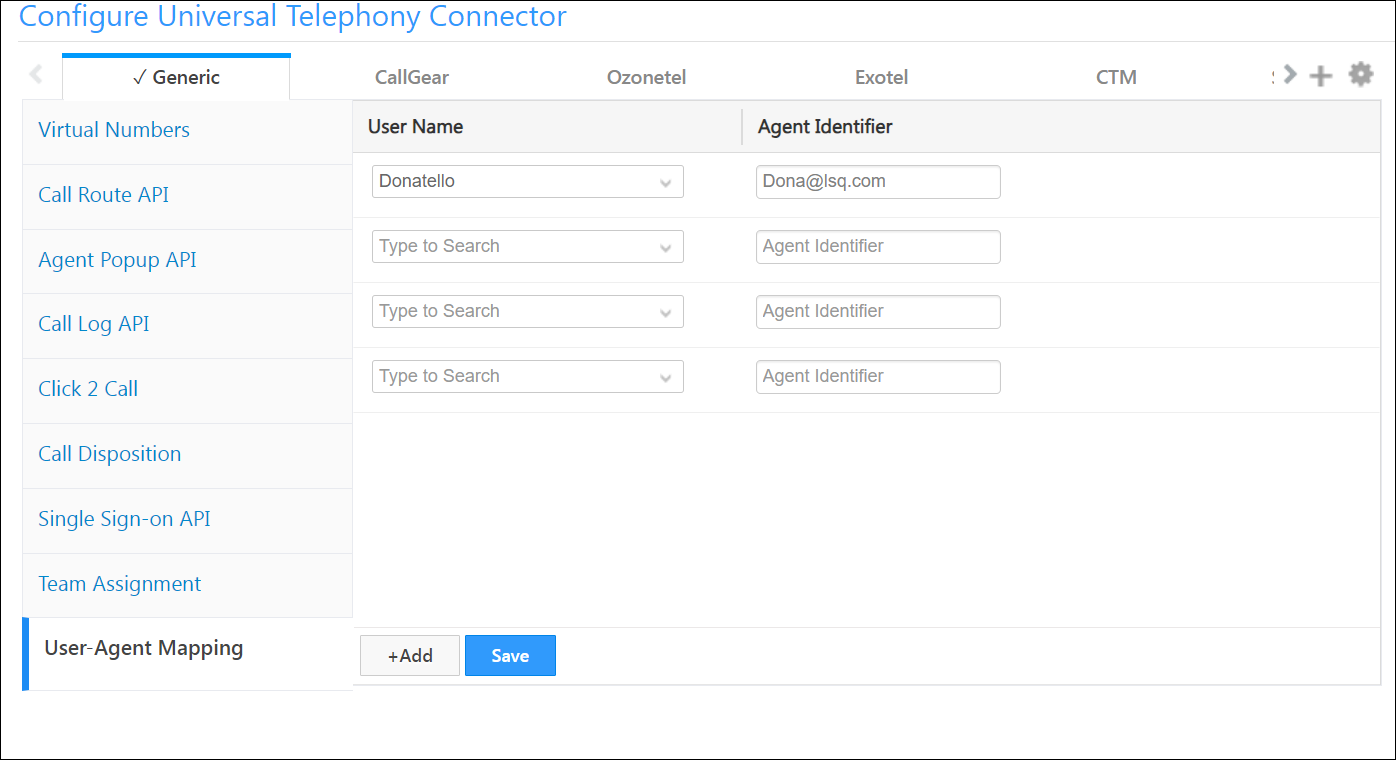
4. Each agent or user must be mapped to a unique identifier that aligns with your telephony provider’s configuration. You may enter any string/alphanumeric value such as employeeId, userId, email address, etc., for the Agent Identifier. This identifier will be used to correctly identify the agent when the ‘Agent’s Phone Number’ or ‘Source Number’ is not available or stored in LeadSquared.
5. Telephony IVR Mapping
After creating an instance on UTC, you need to set up routing rules on the number you’ve configured.
There are 2 scenarios when setting up the Telephony IVR mapping –
1. The number configured on the UTC instance is used only for Service CRM
If the number you’ve configured on UTC will only be used by the Service CRM then you can set up a single routing rule –
- Navigate to Settings>Telphony>Telephony IVR Mapping, and click the Create button.
- Enter the Virtual Number linked to the Service CRM instance on UTC.
- Select Ticket as the Entity Type.
- Select a Product Type to link to this IVR mapping.
- Click Save.

2. The number configured on the UTC instance is used for both Sales CRM and Service CRM.
If the number you’ve configured on UTC is being used both by your sales team and service team, then you can set up a routing rule that routes the customer based on their preference –
- Navigate to Settings>Telphony>Telephony IVR Mapping.
- Click the Create button.
- Enter the Virtual Number linked to the Service and Sales CRM instance on UTC.
- Select Opportunity as the Entity Type (Selecting Opportunity routes the call to Sales CRM).
- Select a Product Type to link to this IVR mapping.
- Under Advanced Configuration, enter 1 as an IVR option and click Save and Add New.
- In the second mapping, enter the same Virtual number from Step 2.
- Select Ticket as the Entity Type (Selecting Ticket routes the call to Service CRM).
- Select a Product Type to link to this IVR mapping.
- Enter 2 as an IVR option and click Save.
When a customer calls this number they will be asked to press either 1 or 2 on their dial pad to route the call to the respective representative. In this case, 1 will route to the Sales CRM, and pressing 2 will route to the Service CRM.
6. Admin Settings
Next, can you configure the Telephony admin settings on the Service CRM.
6.1 Call Flow Settings
Configure the Inbound and Outbound call settings in the Telephony Admin section of Service CRM.
6.1.1 Inbound Call Configuration
Navigate to Settings>Service Cloud>Call Flow Settings>Inbound Call to configure inbound call settings.
- Default Identification Fields: By default, the system displays Customer Name, Customer Number, and Customer Email for customer identification.
- Additional Identification Fields: You can add up to six identification fields (including the default ones) from the dropdown list.
- Customer Identification: If enabled, agents can select the correct customer when multiple records share the same number. If disabled, the system automatically picks the most recently created lead.
- Customer Verification Flow: When enabled, agents can verify customer details on the call (refer to section 6.2).
- Directly Open 360 After Customer Verification: This enables agents to access a comprehensive view of the customer’s history, including past interactions and tickets.
- Create Ticket for Every Incoming Call: Automatically generates a ticket once the customer is verified.
- Auto Ticket Creation on Missed Calls: Ensures that a ticket is automatically created for missed calls.
- Assign Ticket to the Agent Who Missed the Call: If enabled (along with Auto Ticket Creation on Missed Calls), the missed call ticket will be assigned to the agent who missed the call instead of being left Unassigned.
6.1.2 Outbound Call Configuration
Navigate to Settings>Service Cloud>Call Flow Settings>Outbound Call to configure outbound call settings.
Even if agents place calls through the telephony provider’s portal (instead of the Service CRM application), certain functionalities remain configurable:
- Directly Open 360 After Customer Verification: Allows agents to access a complete customer profile with past interactions and tickets on Service CRM when the call is placed and the customer is verified.
- Auto Ticket Creation for Successful Outbound Calls: Ensures a ticket is created in Service CRM if the agent does not manually create one after a successful call.
- Auto Ticket Creation for Missed Outbound Calls: Automatically creates a ticket for missed outbound calls if the agent does not manually log it.
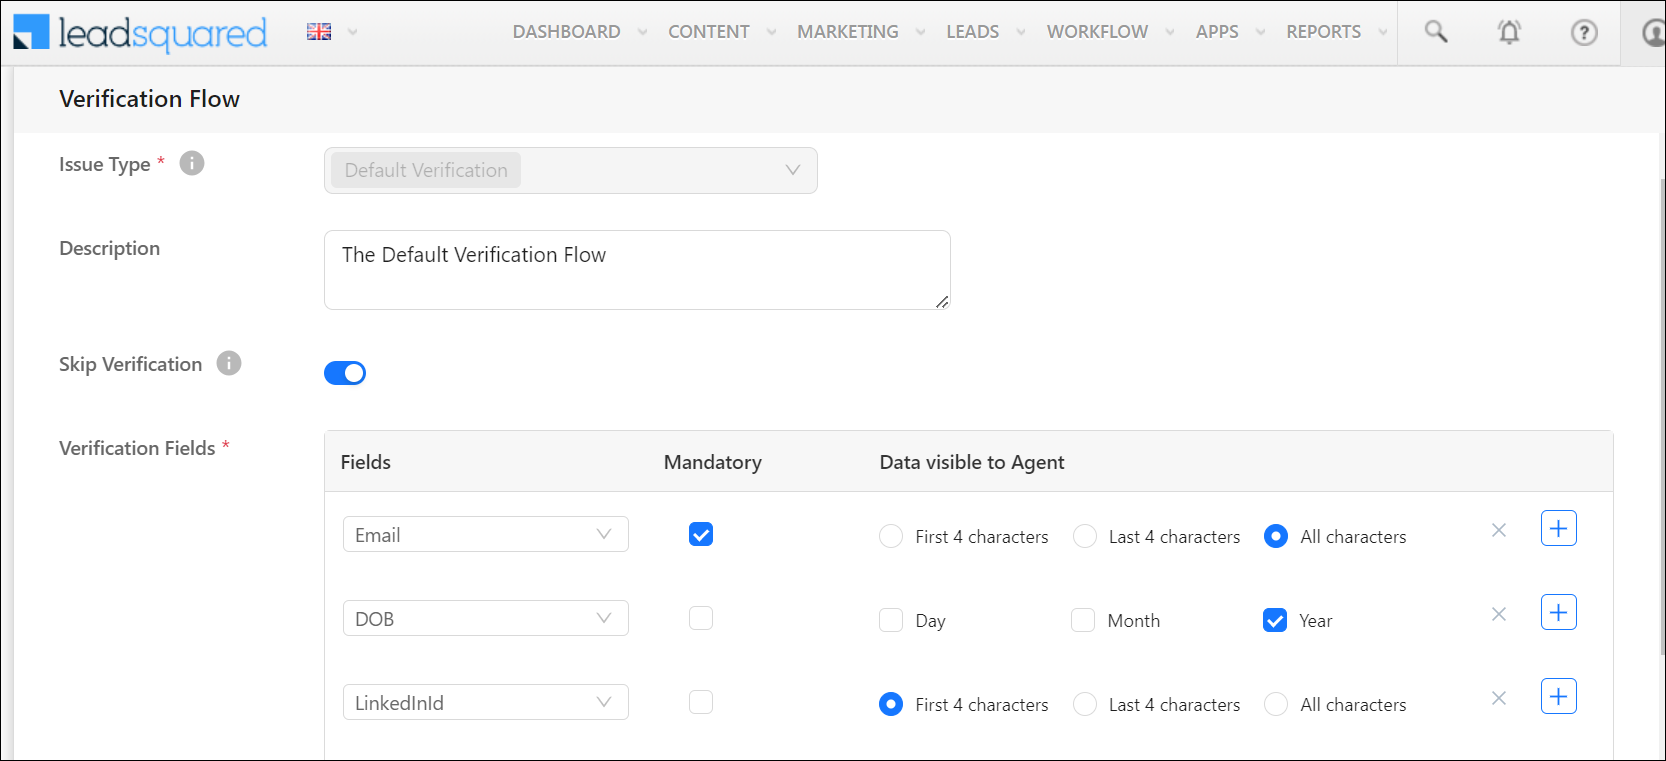
6.2 Customer Verification
The Customer Verification settings will let you configure the customer verification process. Read this article to configure the Customer Verification Process.
7. Agent Settings
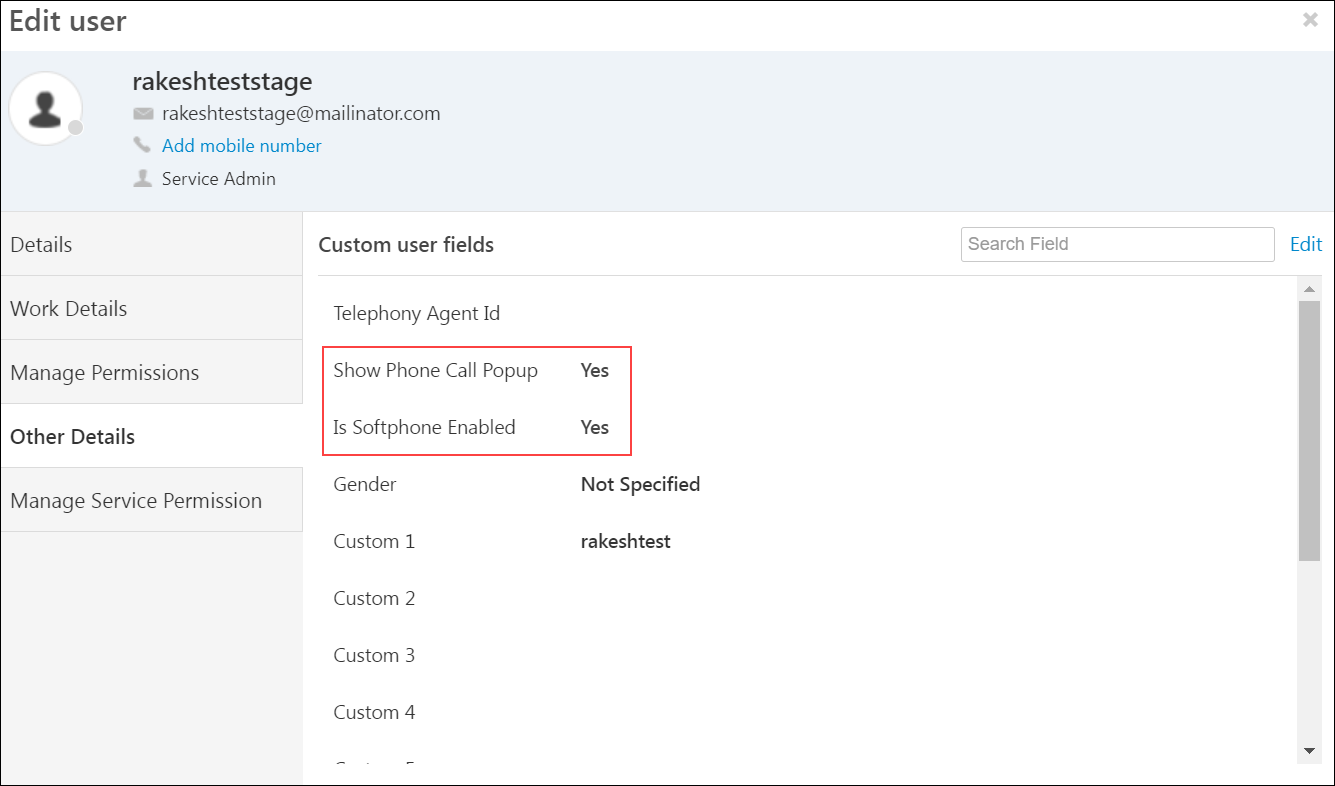
Next, if you haven’t already, you must create Users of Type Service Cloud on LeadSquared. Once you’ve created your user(s), you must add the following details that must be similar to their details configured with your telephony provider –
- Email Address
- Agent Phone Numbers

And, under Other Details, enable the Phone Call Popup and Softphone for the user(s).
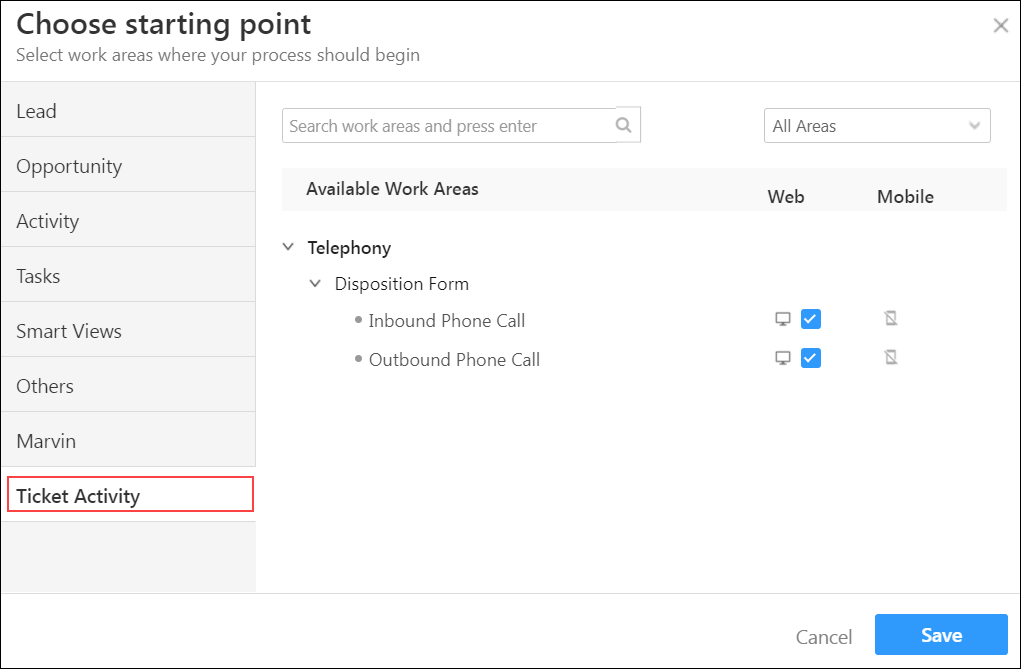
8. Disposition Form
You can end the call through disposition using a Dynamic Form. A Dynamic Form with the Disposition Ticket Activity will have the Associated Ticket and Notes field in the form.

After publishing the Dynamic Form, create a Process to launch it during inbound and/or outbound calls.
The customer rep can enter the details related to the call in these fields and end the call through Disposition. The Disposition details will be posted on the associated ticket when the call ends.
9. Call flow
Here’s an example flow of an incoming service call –
- Once the customer service rep receives a call, they can identify and verify a customer and specify the issue type.
- Next, if you’ve enabled Customer 360, the service rep can view all information on the customer including previous interactions, and tickets.
- Click the Ticket List button to create a ticket for the customer.
- You can either associate the call with a previous ticket or create a new ticket by clicking Create Ticket & Associate.

10. Call Logs
All events related to your telephony integration are logged and stored in the Telephony Logs section of your account settings.
You can filter based on –
- Events (Agent Popup, Click 2 Call, Call Log, Call Disposition, etc.)
- Status (Success, Failure, etc.)
- Caller (Universal Telephony Connector, Ozonetel, Mcube, etc.,)
- Date Range (Today, Yesterday, Last 7 Days, Custom Range – can be set to any 7 day period)

11. Reports
The SIERA Service Reports and Dashboards help Managers monitor metrics and agent productivity within their teams. Service users can use the report to track their total tickets (received tickets, unresolved tickets, resolved tickets, overdue tickets, etc.,). You can also listen to the call recordings through the report.

Any Questions?
Did you find this article helpful? Please let us know your feedback in the comments section below. We’d love to hear from you and help you out!