


Get Started
Sales Suite
Field Ops
Marketing
Service CRM
Integrations & Apps
FloStack
Email Campaign – Feature Guide
1. Feature Overview
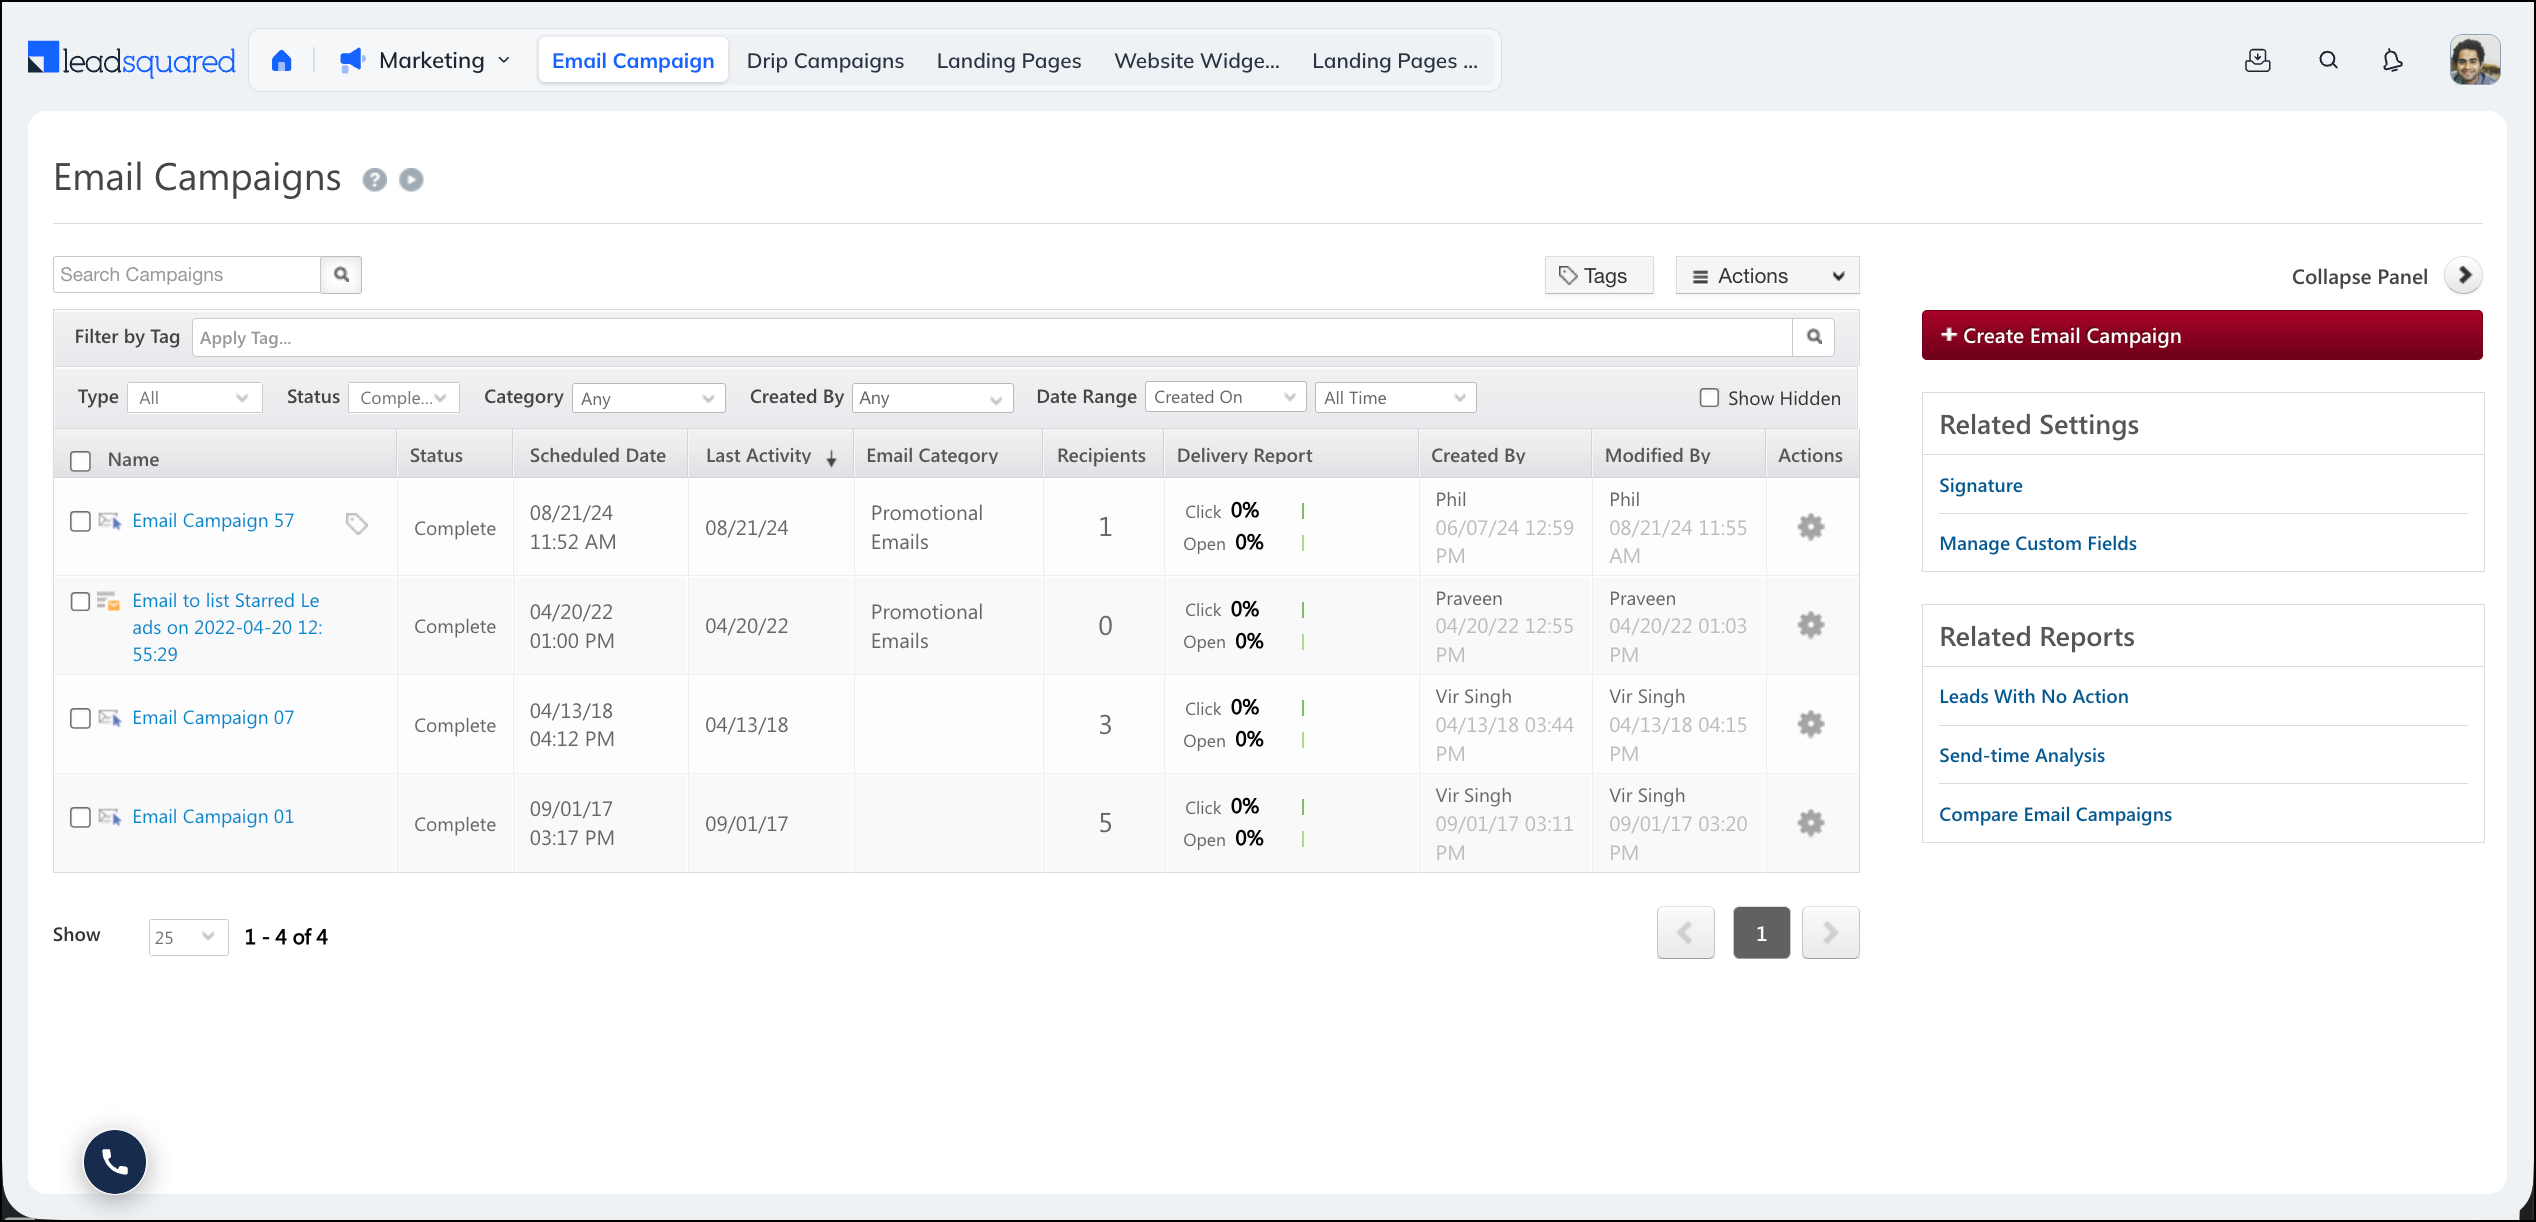
Email Campaigns let you design, personalize, send, and track marketing emails to your leads from a single place in LeadSquared. Instead of emailing leads one at a time, you build a campaign once, target it at one or more lead lists, and let the system handle delivery, tracking, and reporting. To get started, navigate to Marketing>Email Campaign on LeadSquared.
Use Email Campaigns to:
- Design responsive emails within minutes using a drag-and-drop editor, HTML, or plain text.
- Personalize content with mail merge fields, dynamic content, and AI-generated copy.
- Schedule emails to go out at a later date and time, or send them immediately.
- Nurture existing leads with updates, offers, greetings, and informational content.
- Trigger emails automatically based on lead behaviour using Automation.
- Track opens, clicks, bounces, unsubscribes, and spam reports for every recipient.
- Gain insights from Email Campaign reports and analytics, then act on them with follow-up campaigns.
Note:
- To configure subscriptions, sender restrictions, and recipient restrictions, see Email Settings – Feature Guide.
- To send a single email to one lead, see How to Send Quick One-to-One Emails to Leads.
2. Prerequisites
- You must be an Administrator or a Marketing user to create and send email campaigns.
- Your email sending settings (such as the From address and domain authentication) should be configured. For details, see Email Settings – Feature Guide.
3. How Email Campaigns Work
Every campaign moves through the same stages. This guide covers them in the same order, so you can read straight through or jump to the stage you need.
- Create and schedule – Set up the campaign, choose whether to build from a saved template, a blank canvas, or your own HTML, select recipient lists, then send immediately or schedule it for later.
- Design – Build the email using the BEE (visual) editor, the HTML editor, or the plain-text editor, and customize the footer.
- Personalize – Tailor each email with mail merge fields, dynamic content, embedded forms, social sharing buttons, and AI-generated copy.
- Add images and reuse templates – Insert images, documents, and attachments from the Content Library, and reuse saved templates from the Email Library.
- Track – Measure opens, clicks, bounces, unsubscribes, and spam reports, with bot-generated activity filtered out automatically.
- Follow up – Re-engage leads based on how they responded, such as resending to those who didn’t open the email.
Email sending controls, such as subscriptions and sender restrictions, are managed separately under Email Settings (see Section 12).
4. Create and Schedule Email Campaigns
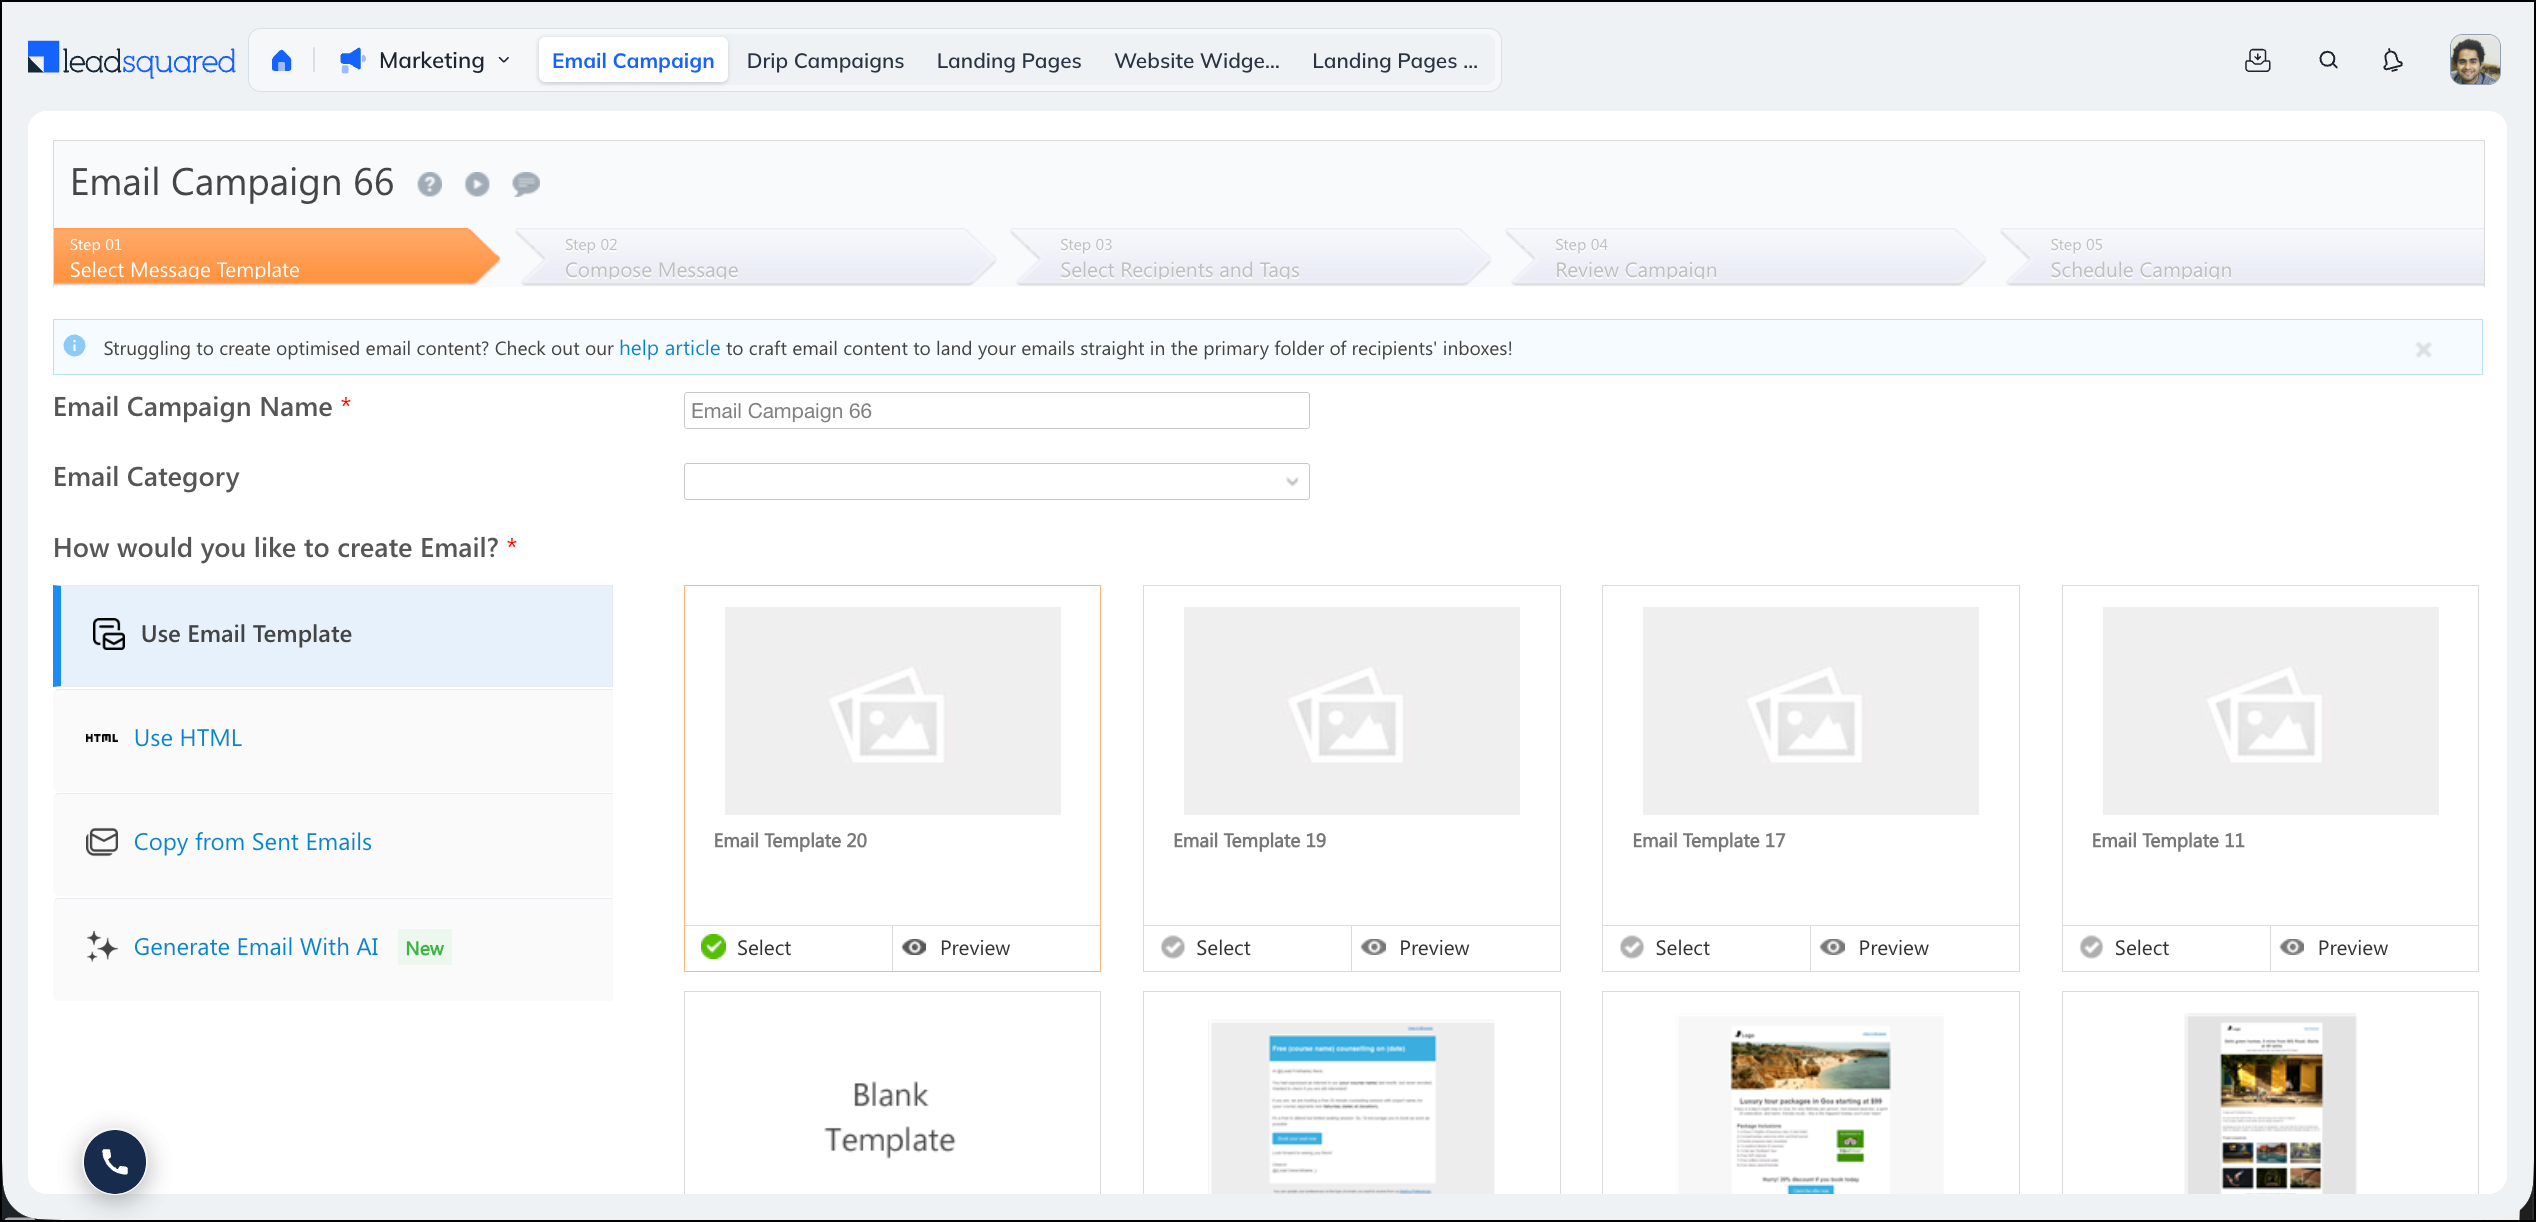
Creating a campaign follows a guided, five-step flow. You name the campaign and choose how to build the email (a saved template, your own HTML, or a copy of a previously sent email), compose and test the message, select the recipient lists and tags, review everything, and finally send the campaign immediately or schedule it for a later date and time.
- To create and schedule a new campaign, see Create and Schedule Email Campaigns.
- To follow design best practices that protect deliverability, see How to Prevent Emails from Ending up in the Spam Folder.
- To create and save email templates, see Email Library – Adding Templates to Email Library.
5. Design Your Email
LeadSquared gives you three ways to build an email, so you can match the tool to your skills and goals. The table below shows when to use each.
| Editor | Best for | What you get |
| BEE editor (visual) | Marketers who want polished, responsive emails without code | A drag-and-drop interface with rows, columns, images, buttons, and special links |
| HTML editor | Users comfortable with HTML who want full control | Build from scratch, paste your own HTML, or edit existing templates and drafts |
| Plain-text editor | High-deliverability, text-only messages | Lightweight emails that are spam-filter friendly and reach non-traditional inboxes |
You can also edit the default footer that appears on every campaign to match your branding and compliance requirements.
- To design emails with the visual editor, see Email Campaign Editor (BEE Editor).
- To build or edit emails using code, see Email Campaign HTML Editor.
- To send lightweight, spam-filter-friendly emails, see Plain Text Emails.
- To customize the footer message, see Customizing Email Footer Message.
6. Personalize and Enrich Your Emails
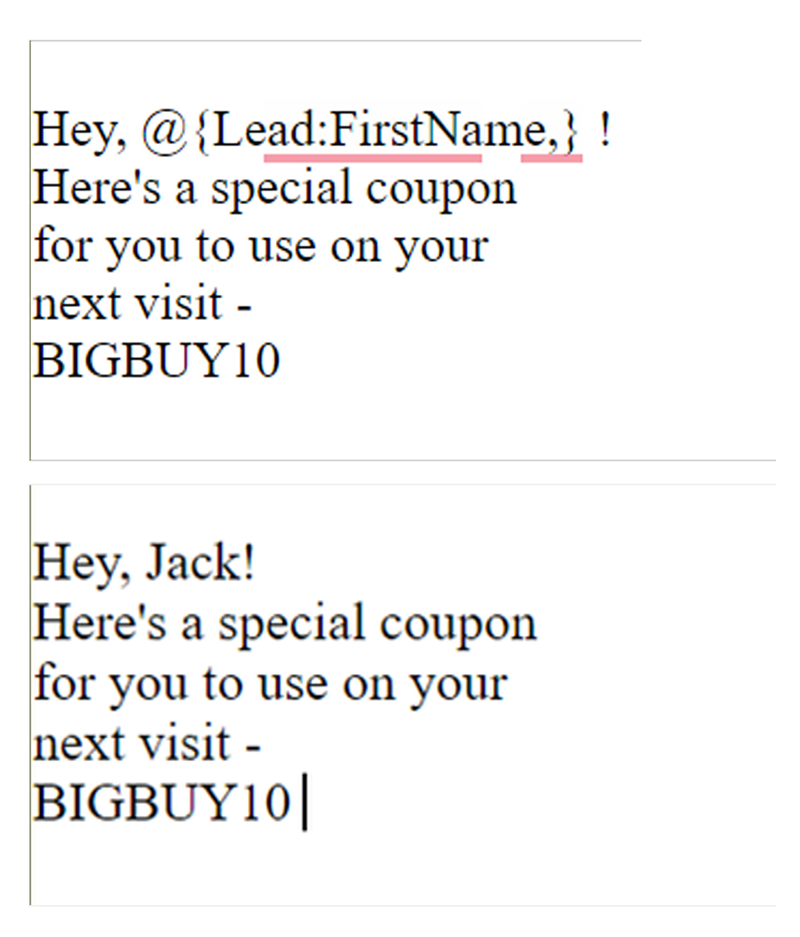
Personalized emails perform better than generic ones. You can address leads by name, swap in content based on their interests, capture new information directly inside the email, and make it easy for recipients to share your message.
- To insert lead, account, and sender details using mail merge fields, see Mail Merge.
- To send content that changes per recipient using webhook or Lapp responses, see Send Dynamic Content in Your Emails.
- To capture lead details from within the email, see Embed Lead Capture Form in Email.
- To let recipients share your email on social media, see How to Add Social Sharing Buttons to Your Email.
7. Create Email Content with GenAI
LeadSquared’s GenAI feature helps you draft subject lines and email content from a short prompt, reducing the time spent writing so you can focus on campaign goals. It is available in the Email Library, Email Campaigns, one-to-one emails, and emails to lists.
- To generate subject lines and email content with AI, see Using LeadSquared’s GenAI to Create Email Content & Subject Lines.
- To understand responsible use and the limitations of AI-generated content, see Guidelines for Using Generative AI in Email Campaigns.

8. Add Images, Documents, and Attachments
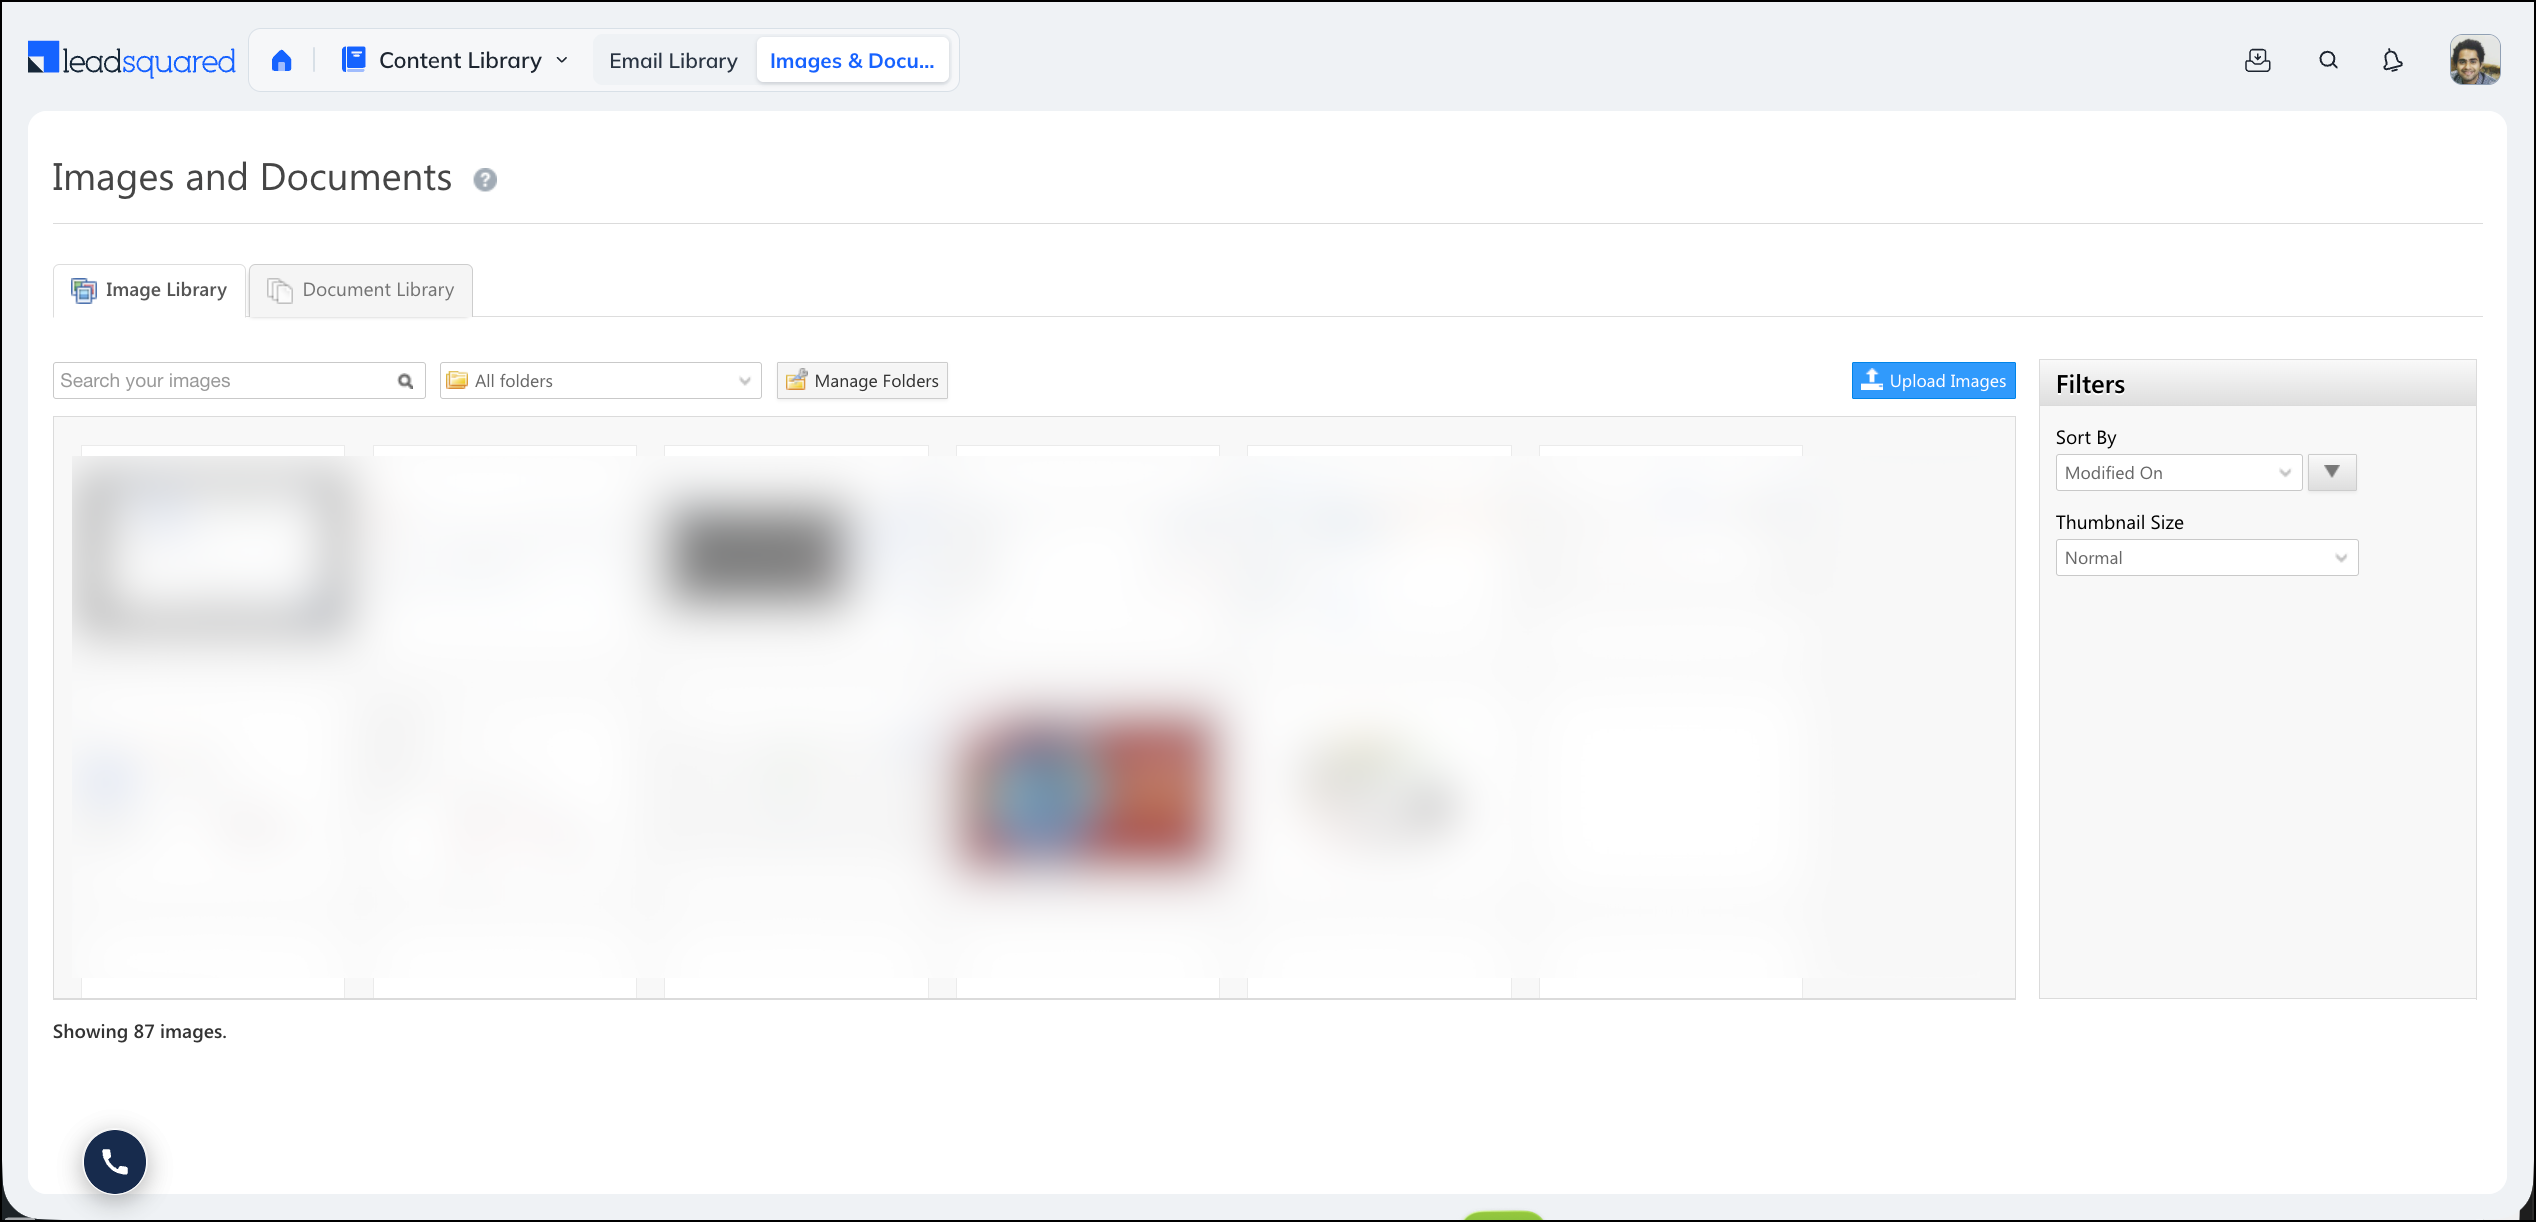
Manage the images and documents used across your emails and landing pages from the Content Library, then insert them into any campaign. You can also include file attachments where your campaign requires them.
- To upload and manage images and documents, see Image and File Manager.
- To learn how attachments work with email campaigns, see Can I Send Attachments with My Email Campaigns in LeadSquared?
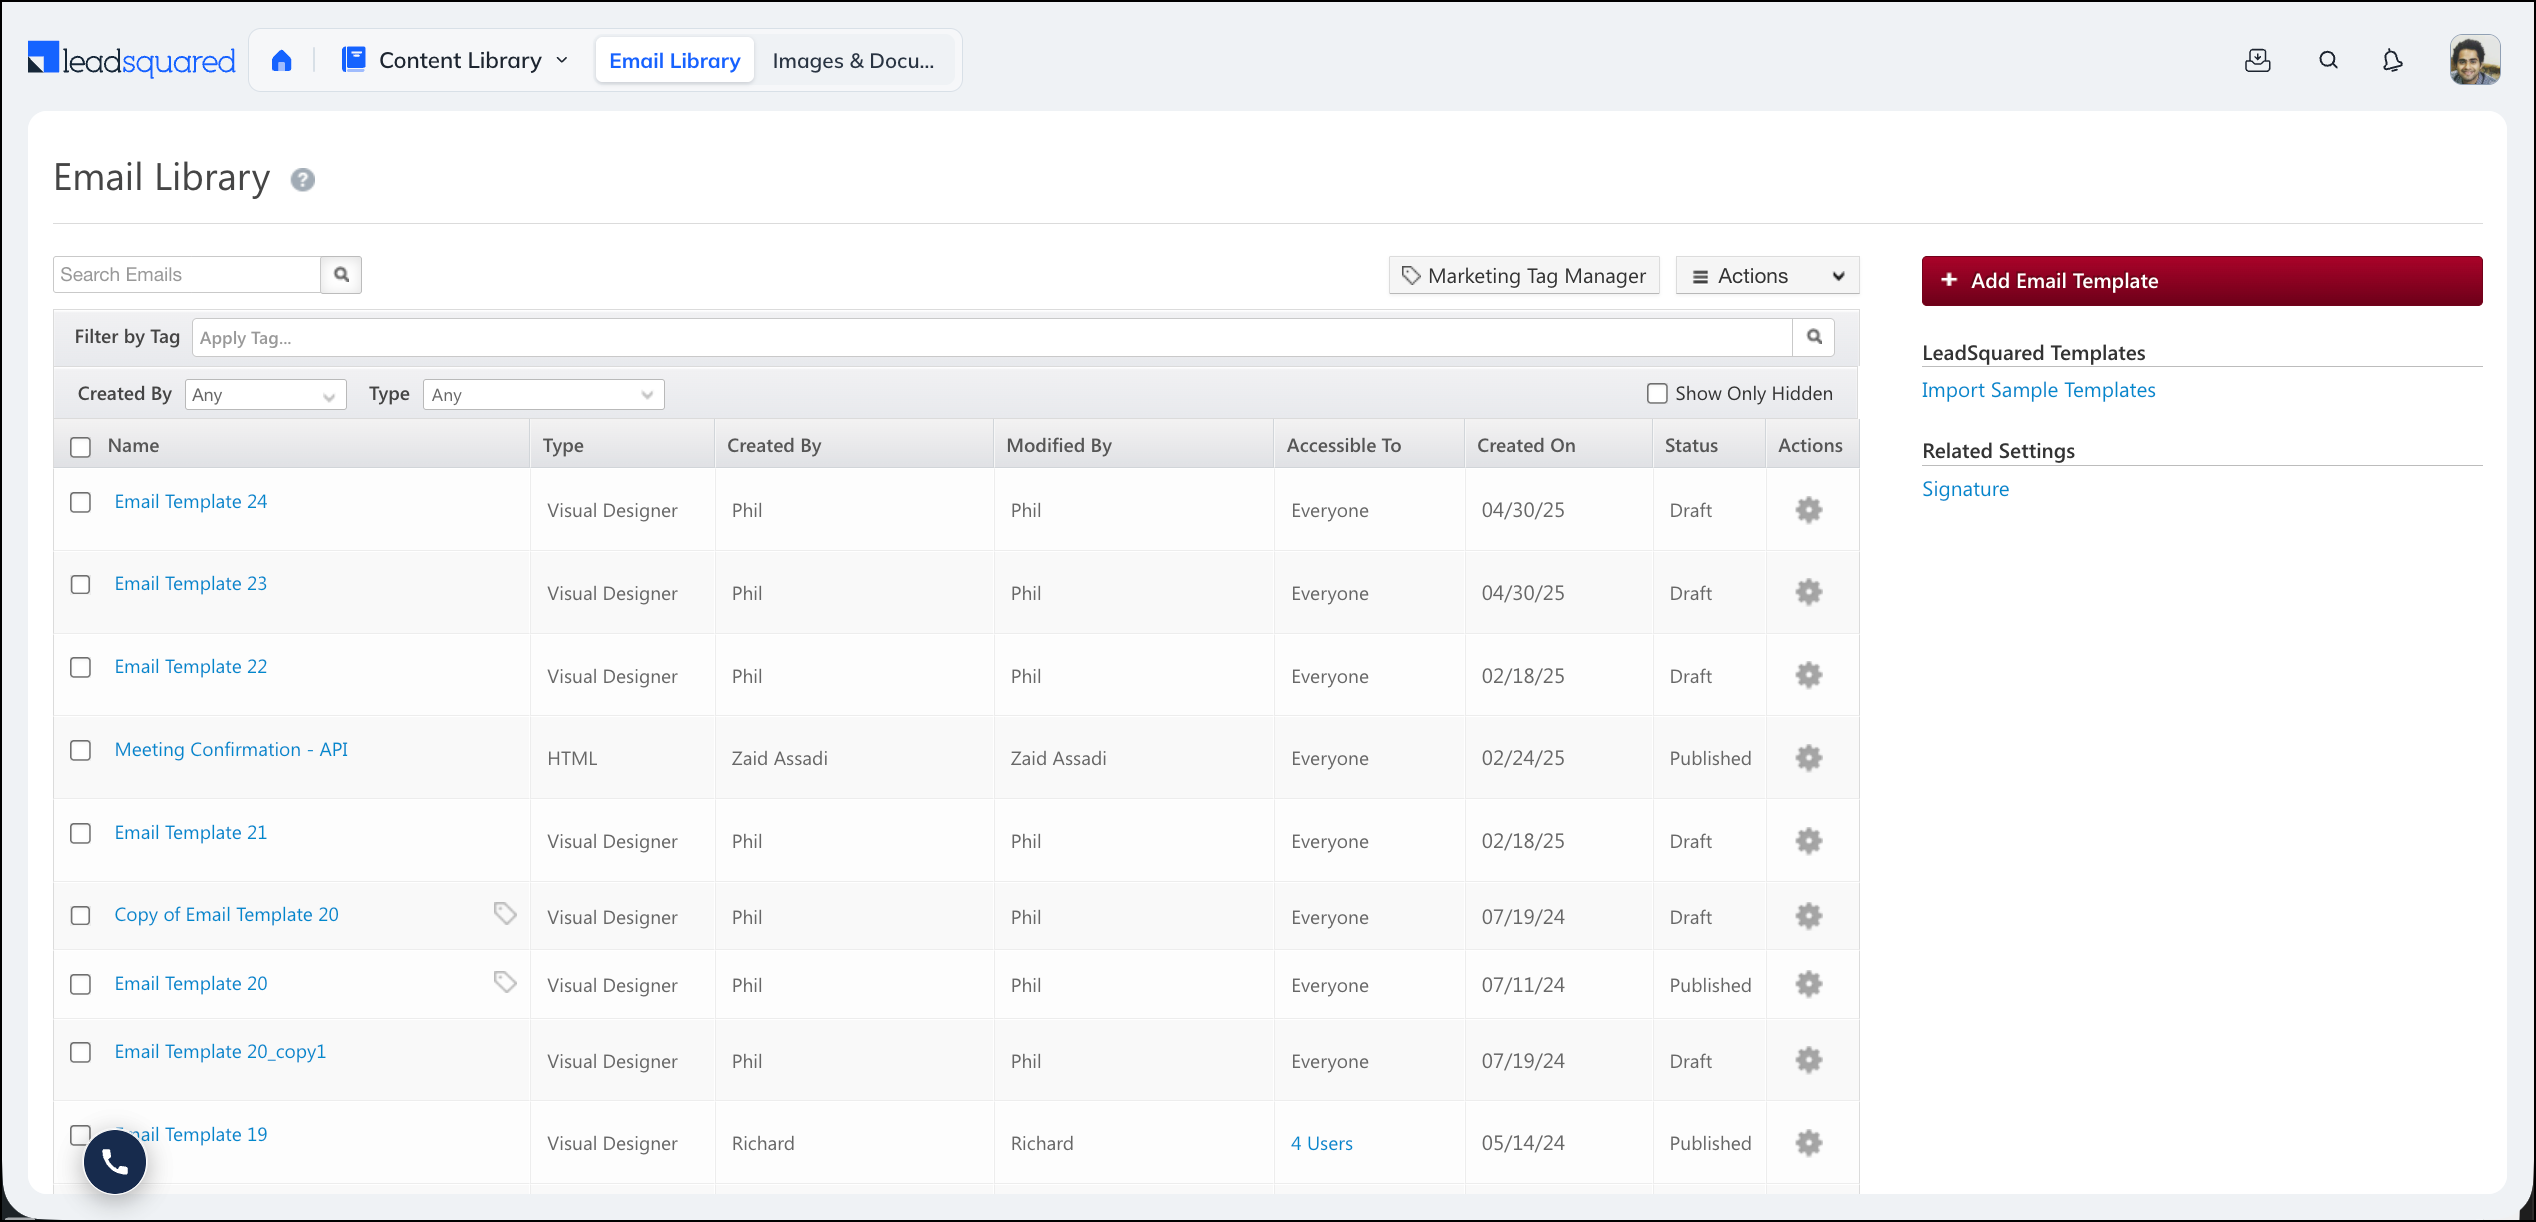
9. Reuse Templates with the Email Library
The Email Library lets you create reusable templates for both one-to-one emails and campaigns, so your team works from consistent, approved designs. Templates can also be used inside Automations, but note that edits made to a template in the Email Library do not sync automatically to the automations that use it.
- To create, edit, clone, and tag reusable templates, see Email Library – Adding Templates to Email Library.
- To locate and update the automations linked to a template, see Automations Associated with Email Templates in Email Library.
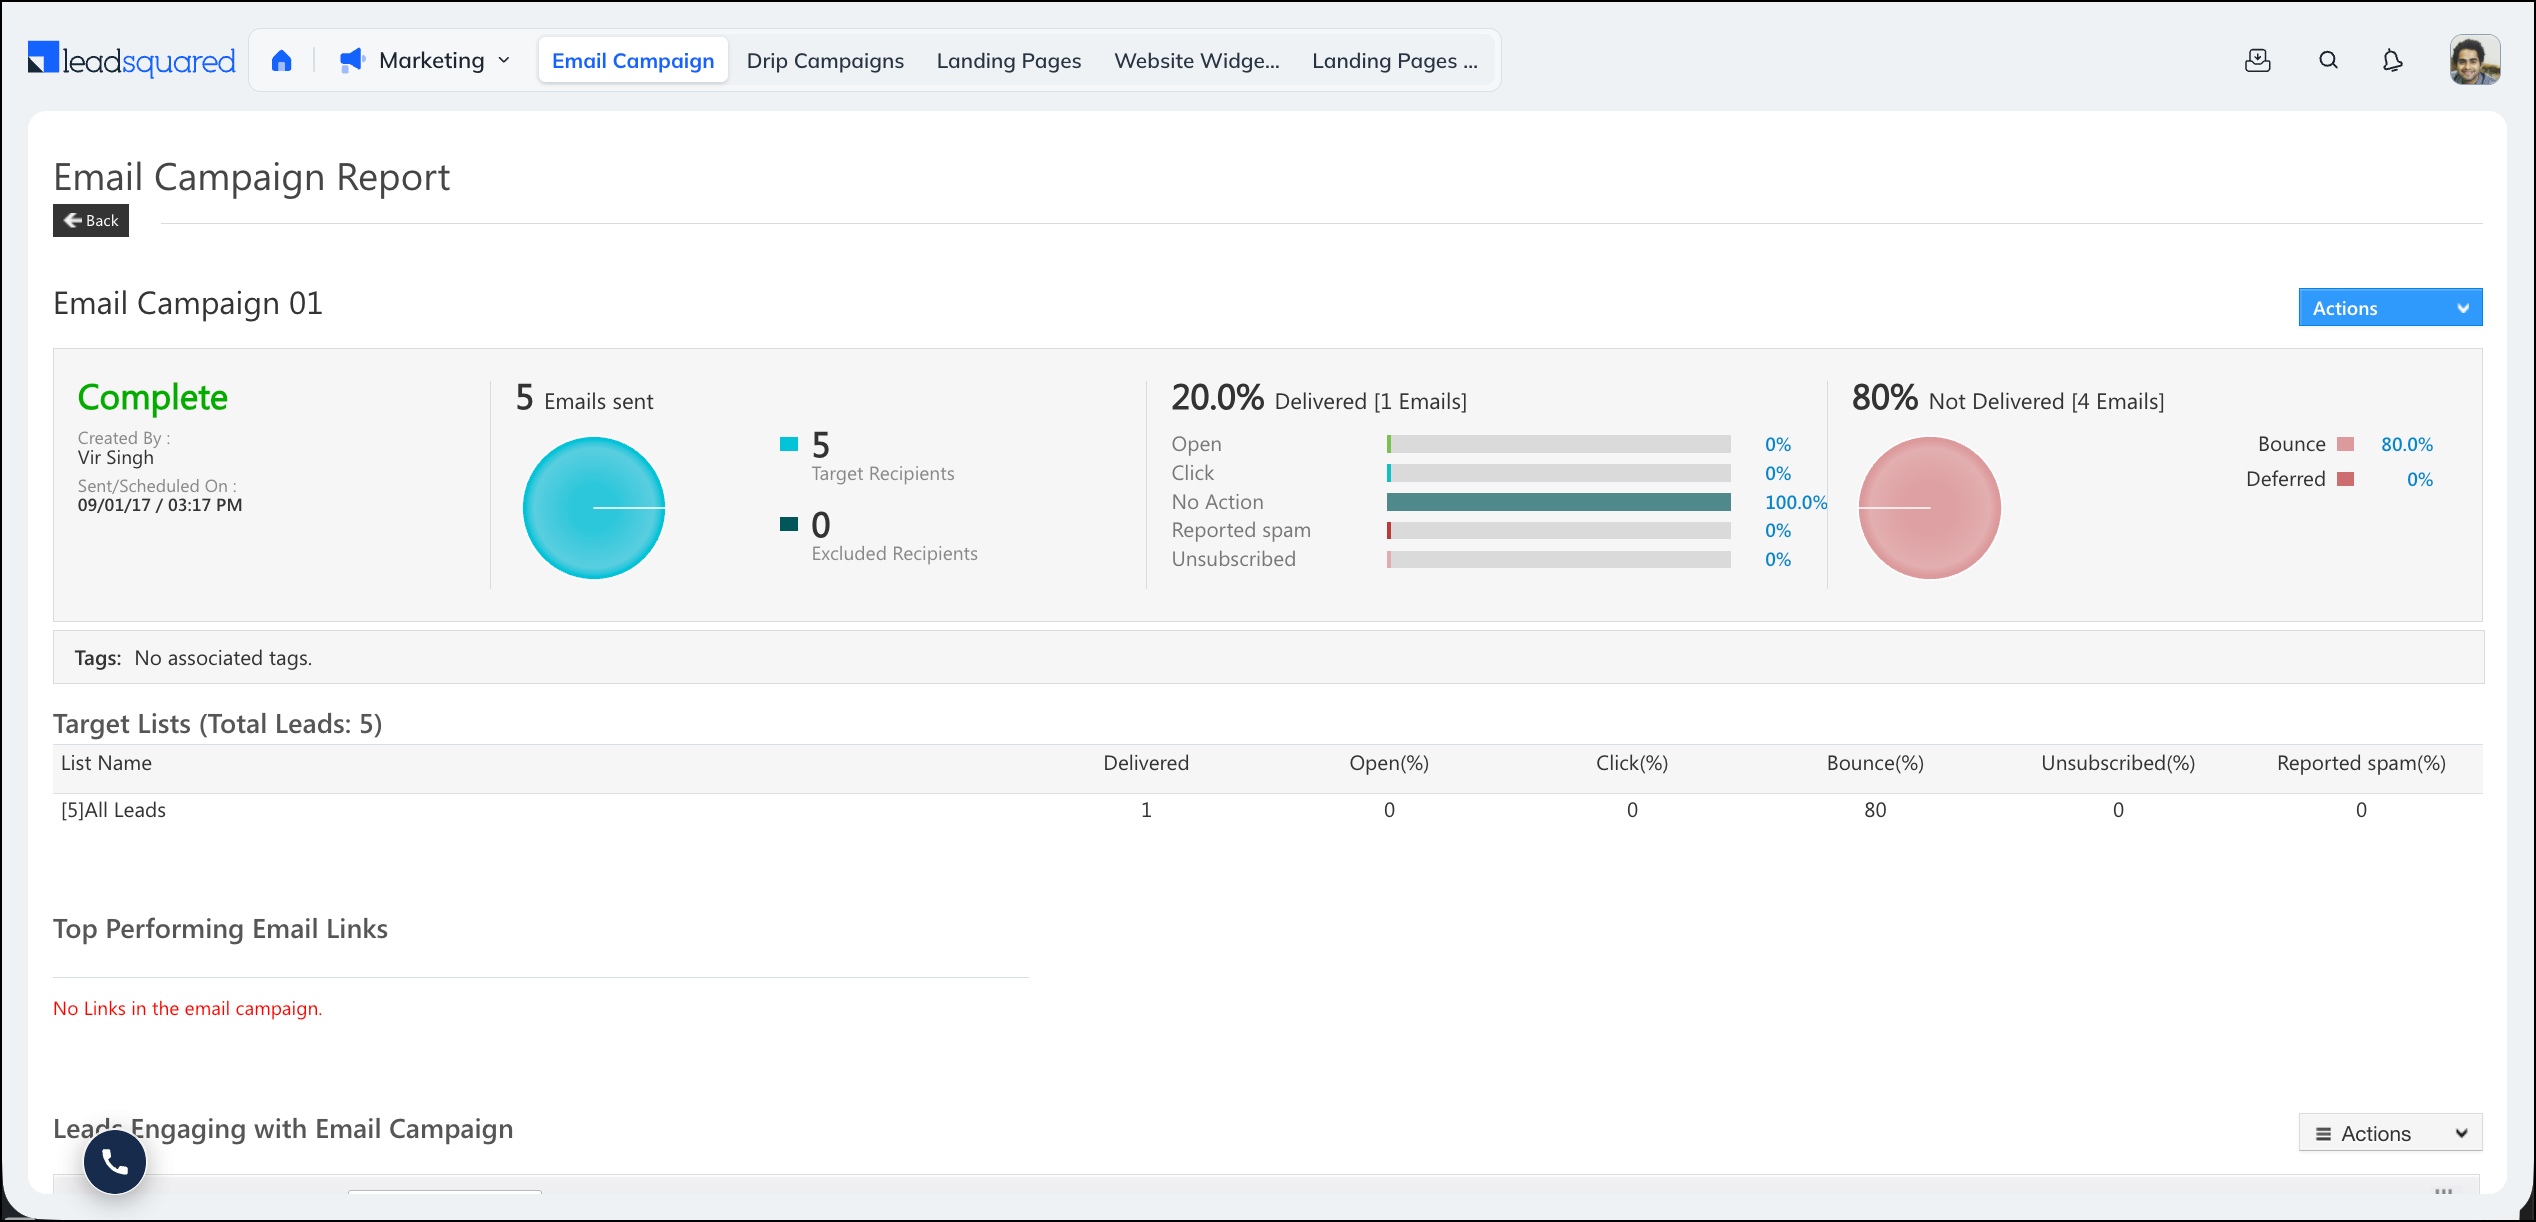
10. Track Campaign Performance
The Email Campaign report shows how your campaign performed, including delivery rate, and the percentage of leads who opened, clicked, did not respond, marked the email as spam, or unsubscribed. You can review performance by target list and by top-performing links, then export segments (such as leads who clicked or unsubscribed) into new lists for targeted follow-up. Bot Filtering automatically removes suspected automated opens and clicks, so your metrics reflect real recipient engagement.
- To read and act on campaign metrics, see How can I use the Email Campaign report?
- To understand how automated activity is excluded from your reports, see Bot Filtering of Email Engagement Activities.
11. Send Follow-up Emails to Leads
After a campaign goes out, you can re-engage leads based on how they responded. Resend the same email to leads who didn’t open it, or send a new campaign to leads who did, keeping the conversation going with the most engaged part of your audience.
To resend or follow up based on lead response, see How to Send Follow Up Emails to Leads?
12. Manage Email Settings
Email sending behaviour is controlled separately, under Email Settings. There you can manage subscription preferences, CC prospects, block specific email addresses or domains, and restrict which users and From addresses are allowed to send. These settings are documented in their own guide.
For all sending and recipient controls, see Email Settings – Feature Guide.
FAQs
1. Why is my email campaign sending 2 emails? / Email received twice from email campaign.
When you send a test email from the email campaign designer, the system sends two versions to the test recipients: a plain-text version (used for spam filter checks) and the actual email you designed. This happens only during the test phase. When the final campaign is sent to your leads, they receive only the designed email. The plain-text version is not sent to them.
2. Why can’t some leads access links in email campaigns?
This happens when leads are deleted from LeadSquared after the campaign has been sent. Because email links contain tracking scripts for URL forwarding, the links stop working once the lead is deleted. To restore access, recreate the deleted lead and resend the email.
3. Why can’t a sales user create an email campaign even after the Marketing permission is enabled via Permission Templates?
This is expected behaviour. To create an email campaign, the user must be assigned an Administrator or Marketing User role.
4. Why does the email campaign report show emails as delivered even when they weren’t?
One common cause is using a From address whose domain is not whitelisted. The emails won’t be delivered, but the report still shows them as delivered for all leads. You’ll see a discrepancy because those emails won’t appear under the open or clicked sections. When troubleshooting, ignore the delivered status in the report.
5. Why was the email campaign not triggered for a specific lead in my list?
One likely reason is that the lead was added to the list after the campaign had already been sent.
6. Why are mail merge values not reflecting in emails sent via Automation?
This can happen if changes to the email template were not saved. To fix this:
- Remove the mail merge field from the email template.
- Re-add the field using the mail merge drop-down.
- Save and publish the template.
- In Automation, remove the email template.
- Re-add the template, then save and publish the automation.
Any Questions?
We’d love to answer your questions or hear your own unique use cases. Feel free to share your experiences in the comments section below.
Is there any limitation for total emails to trigger..?
Hi Venkat,
This depends on the email credits available in your account. Your admin can check this from the Manage Subscriptions page on the LeadSquared Web App.