1. Feature Overview
LeadSquared’s Landing Pages Pro (LPP) enables you to create and publish compelling landing pages in minutes (for education/insurance/lending/medical applications, course registrations, etc.) to capture leads and opportunities.
Leverage the intuitive DIY, drag-and-drop designer to build pages from scratch or access ready-made industry-specific templates. Publish your landing pages on custom domains, or the default LeadSquared domains and get detailed performance reports and analytics for each live campaign.

2. Prerequisites
- This feature is specifically for Landing Pages Pro. Landing Pages Pro is a paid feature. To enable it, contact your account manager, or send an email to support@leadsquared.com.
- To capture Leads or Opportunities, you must first create the relevant forms using Dynamic Forms.
3. Create a Landing Page
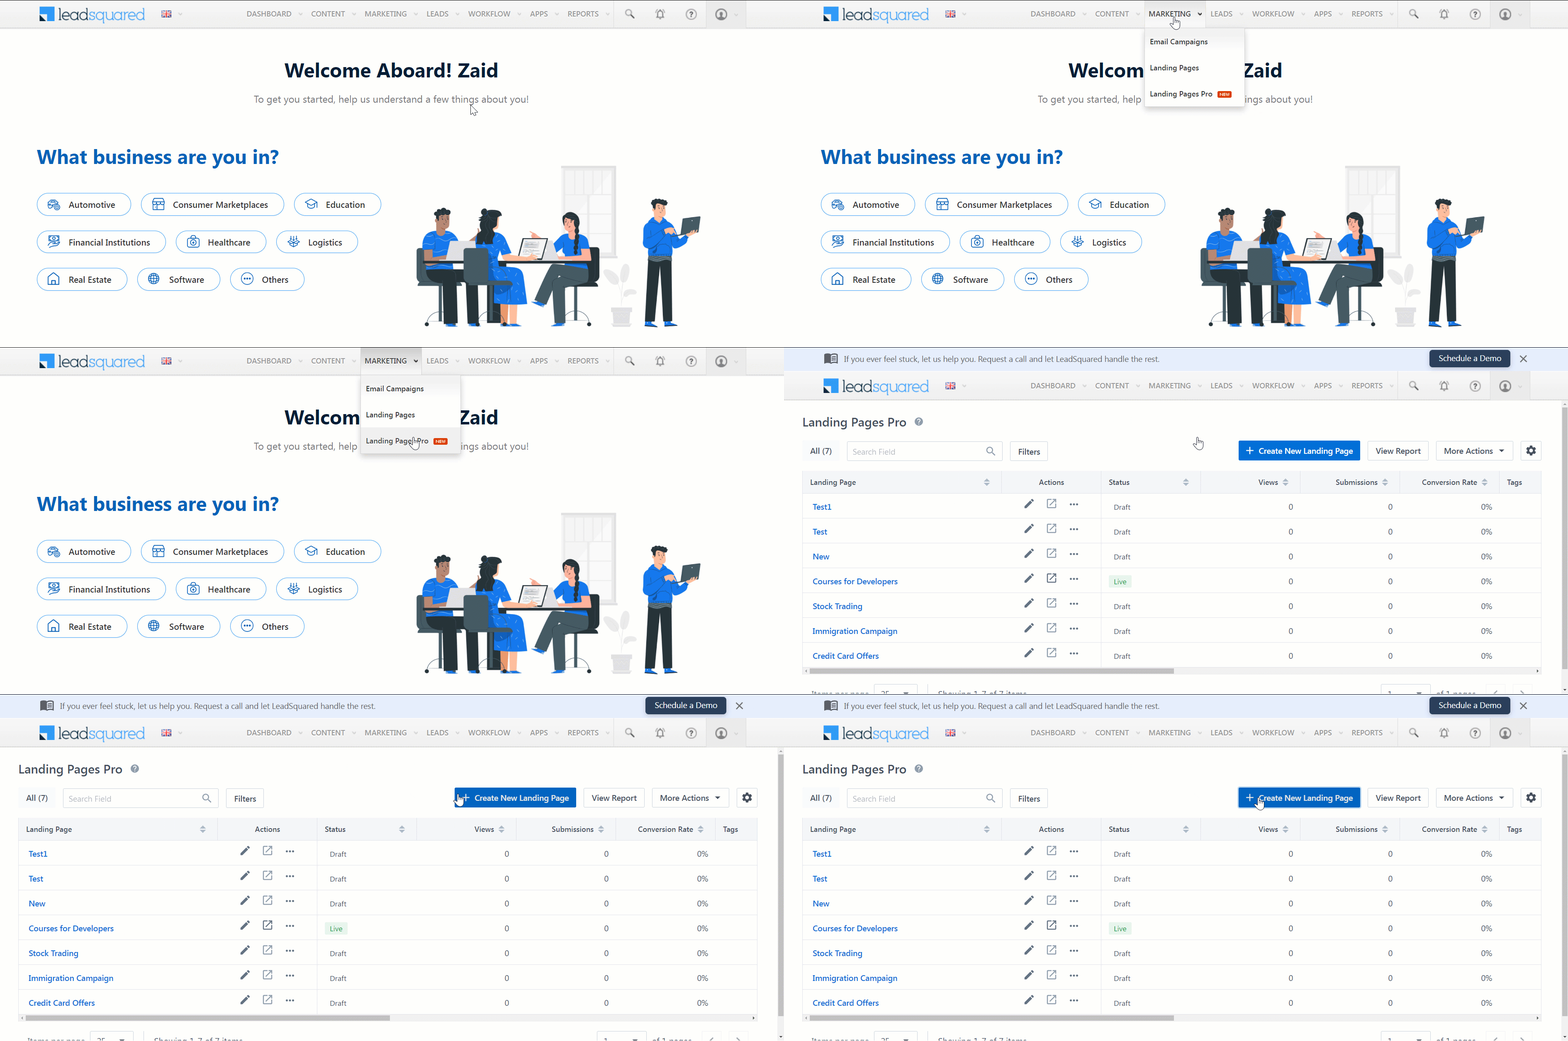
Navigate to Marketing>Landing Pages Pro and click the button ![]() .
.
4. Choose a Template
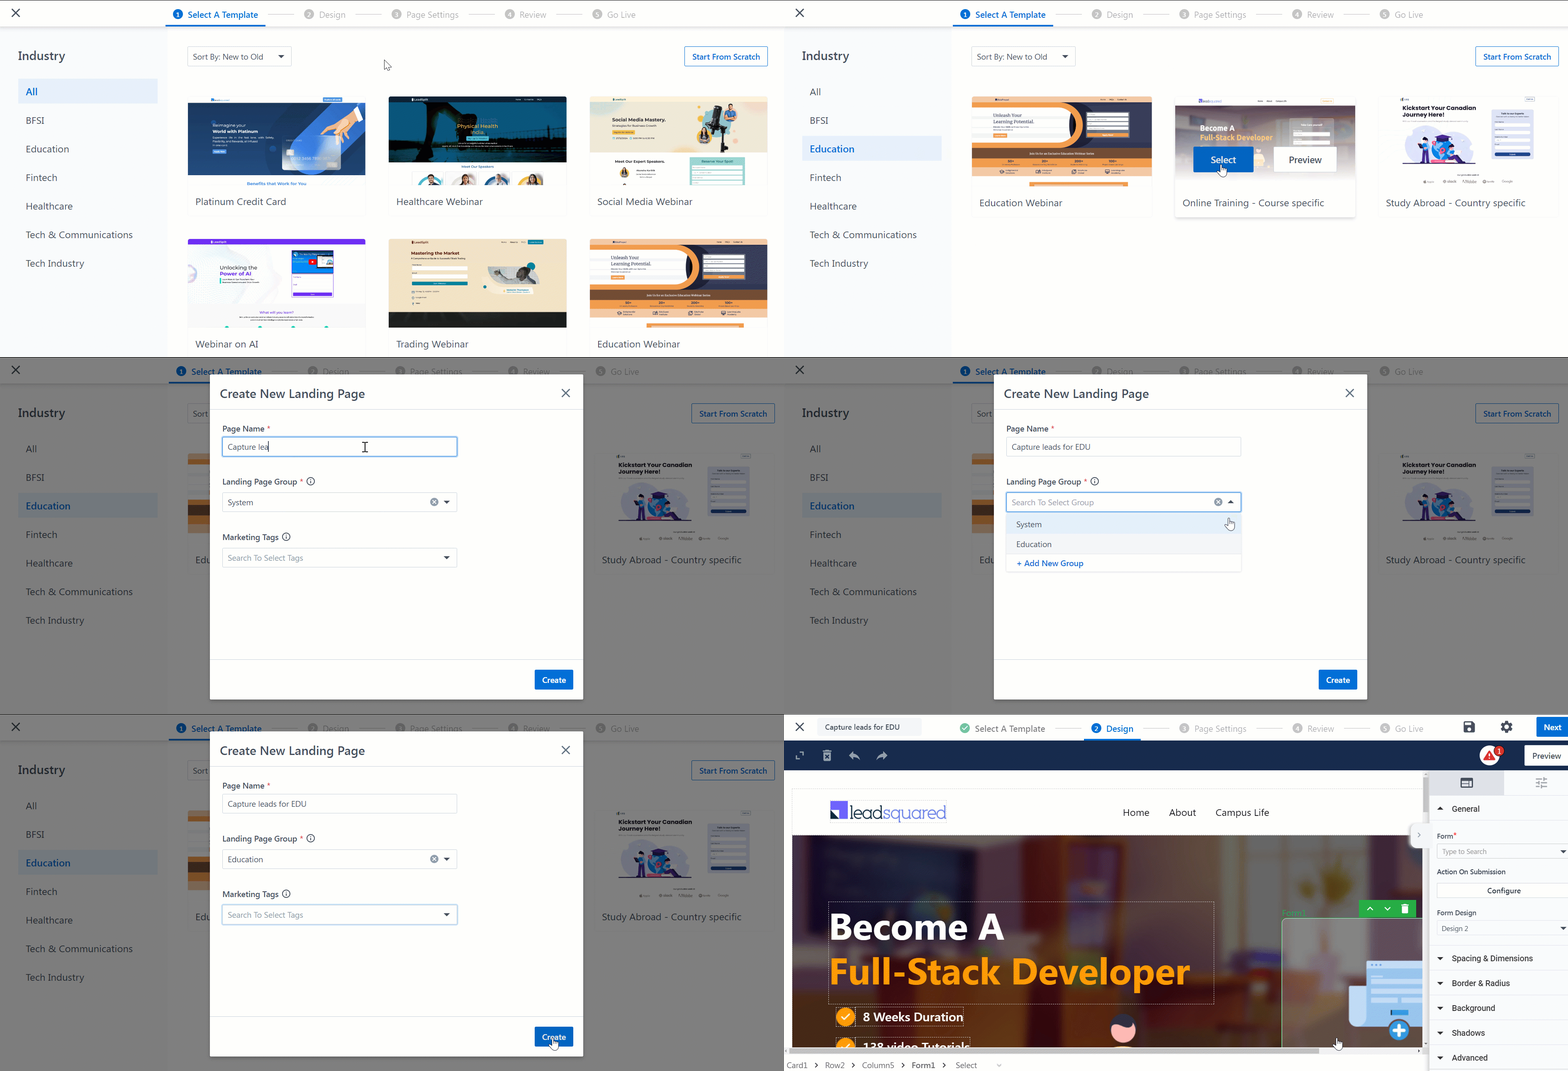
Landing Pages Pro offers pre-built templates for common use cases across industries –
- Select a relevant Industry from the options on the left panel.
- Preview a template by clicking the Preview button, and select a template by clicking the Select button.
- Enter a Page Name.
- Assign the landing page to a group.
- To add a new Landing Page Group, select +Add New Group from the dropdown. This option lets you categorize and group your landing pages.
- Optionally, you can add relevant Marketing Tags to the landing page.
- Click Create.
5. Design Your Landing Page
In this step, you can present your offerings in a clear and captivating way using advanced design features like sliders, overlay, parallax effects, and more.
Note:
- To learn more about designing a Landing Page, read Landing Page Pro Designer.
- Also, you can show multiple variations of the same landing page to different target audiences.
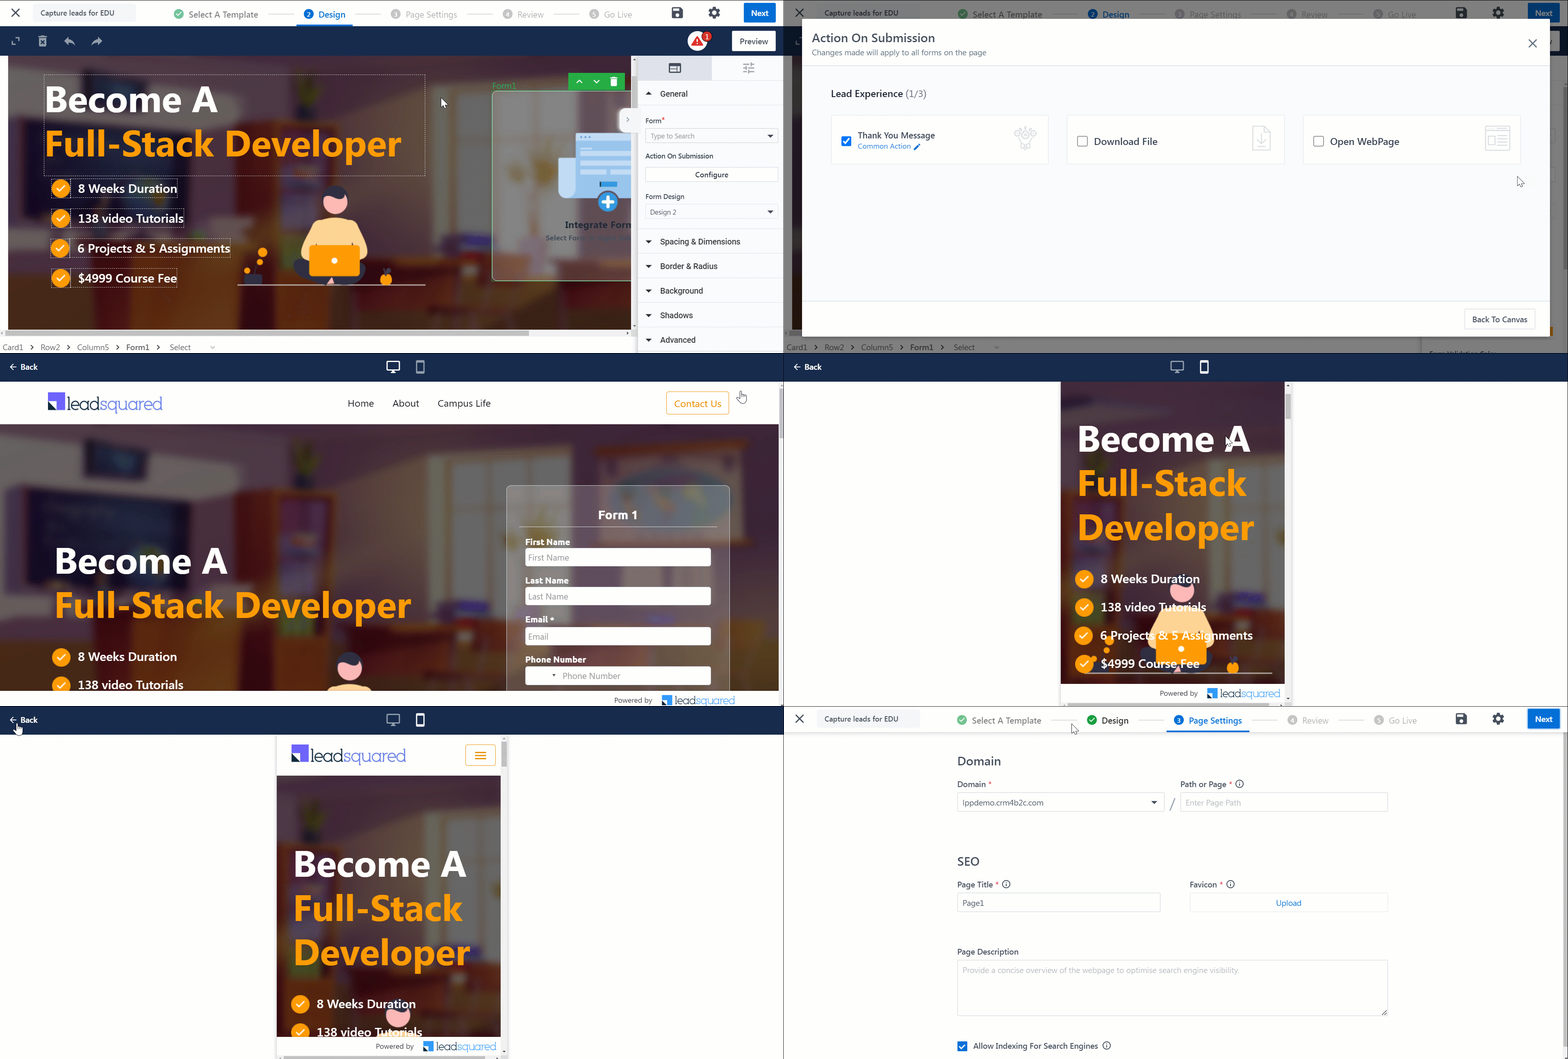
Once your design is in place, you can integrate your Dynamic Form into the landing page to capture leads and opportunities –
- Select the Form container.
- In the General tab, integrate your Dynamic Form through the Form field.
- Configure the Action on Submission to set up an action once a lead submits a Form – you can configure a Thank You Message, Download File, or Open WebPage.
- Click the Preview button to preview your entire landing page.
- Once satisfied, click the Next button on the Design page.
5.1 Settings
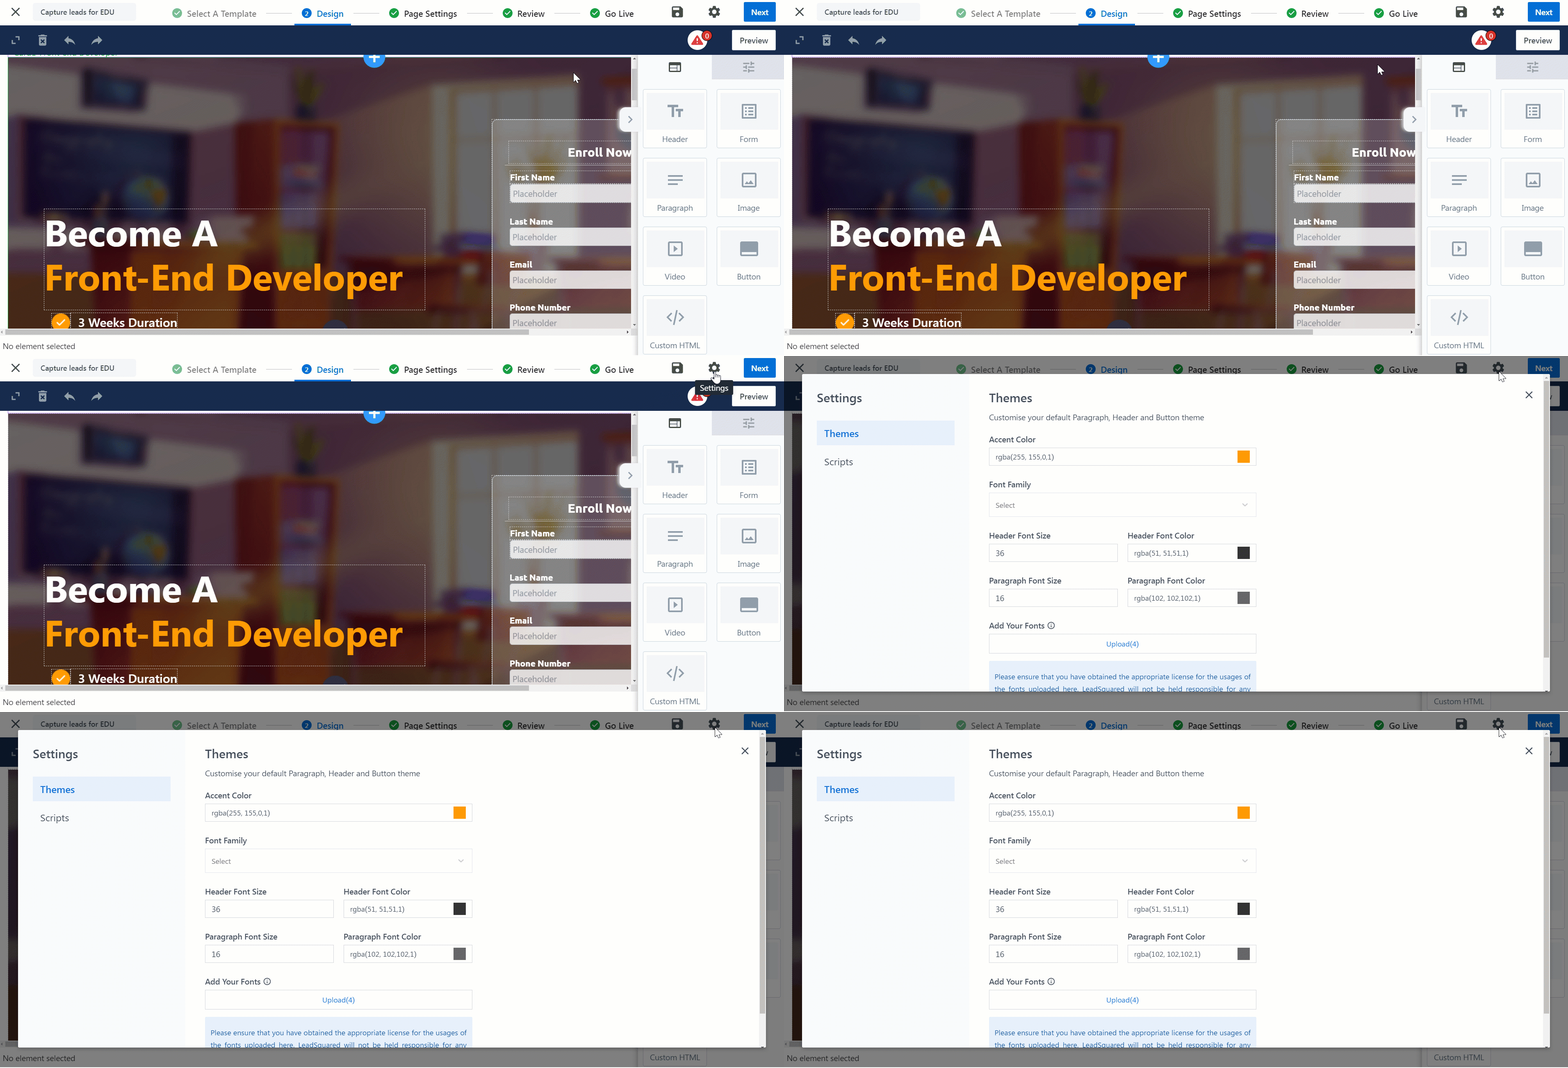
Click the ![]() icon (settings) to configure Themes and Scripts –
icon (settings) to configure Themes and Scripts –
- Theme – Customize your default Paragraph, Header, and Button theme.
- Scripts – Integrate analytics services to capture page views, engagement, and conversion events on your landing page. For more information, read this article.
6. Page Settings
6.1 Domain
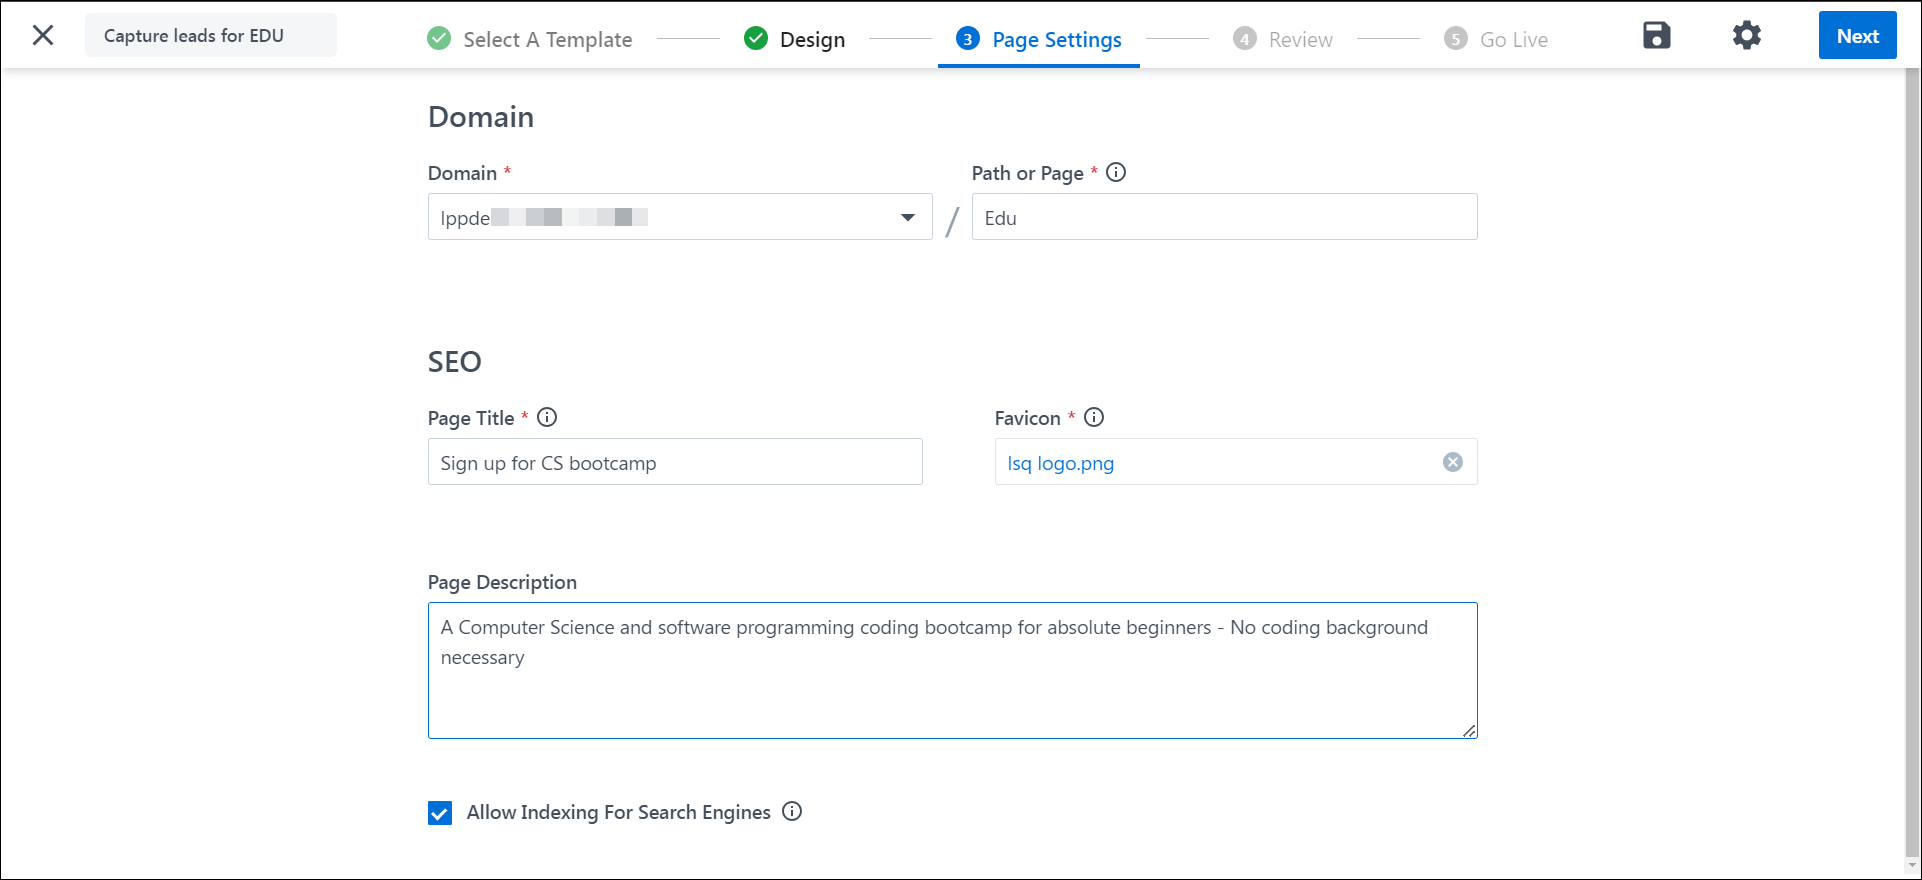
Configure the landing page’s domain and path –
- Domain – Select a hosting domain for your landing page from the drop-down menu, or create a new domain.
- Path or Page – Enter a path for the respective landing page.
6.2 SEO
Configure characteristics that help with Search Engine Optimization –
- Page Title – Enter a page title. This is the landing page’s name that will appear in the browser’s tab and search engine results.
- Favicon – Upload an image to be displayed as a small icon next to the page title in the browser’s tab.
- Page Description – Enter a page description that will show up in the search engine results.
- Allow Indexing For Search Engines – When enabled, search engines will index and display your landing page in search results.
Click Next when you’re done.
7. Landing Page Review
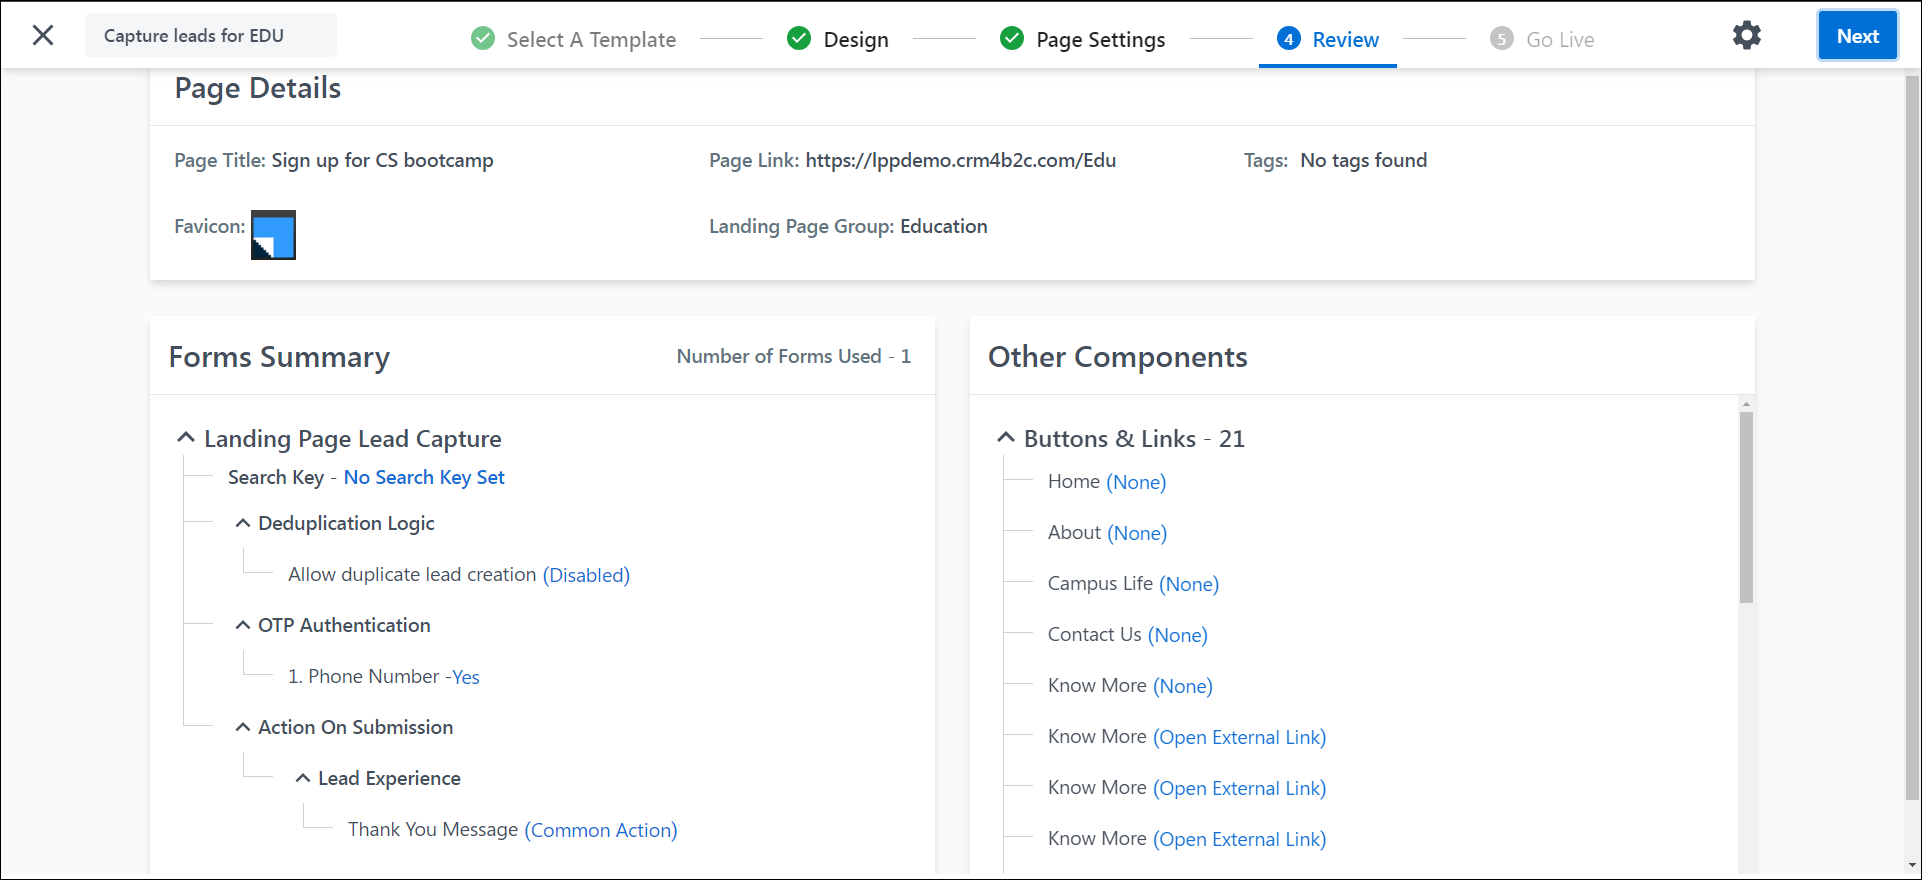
Review and verify the configuration of your landing page. This step will display information on your Page Details, Forms Summary, and Other Components.
Once done, click Next.
8. Go Live
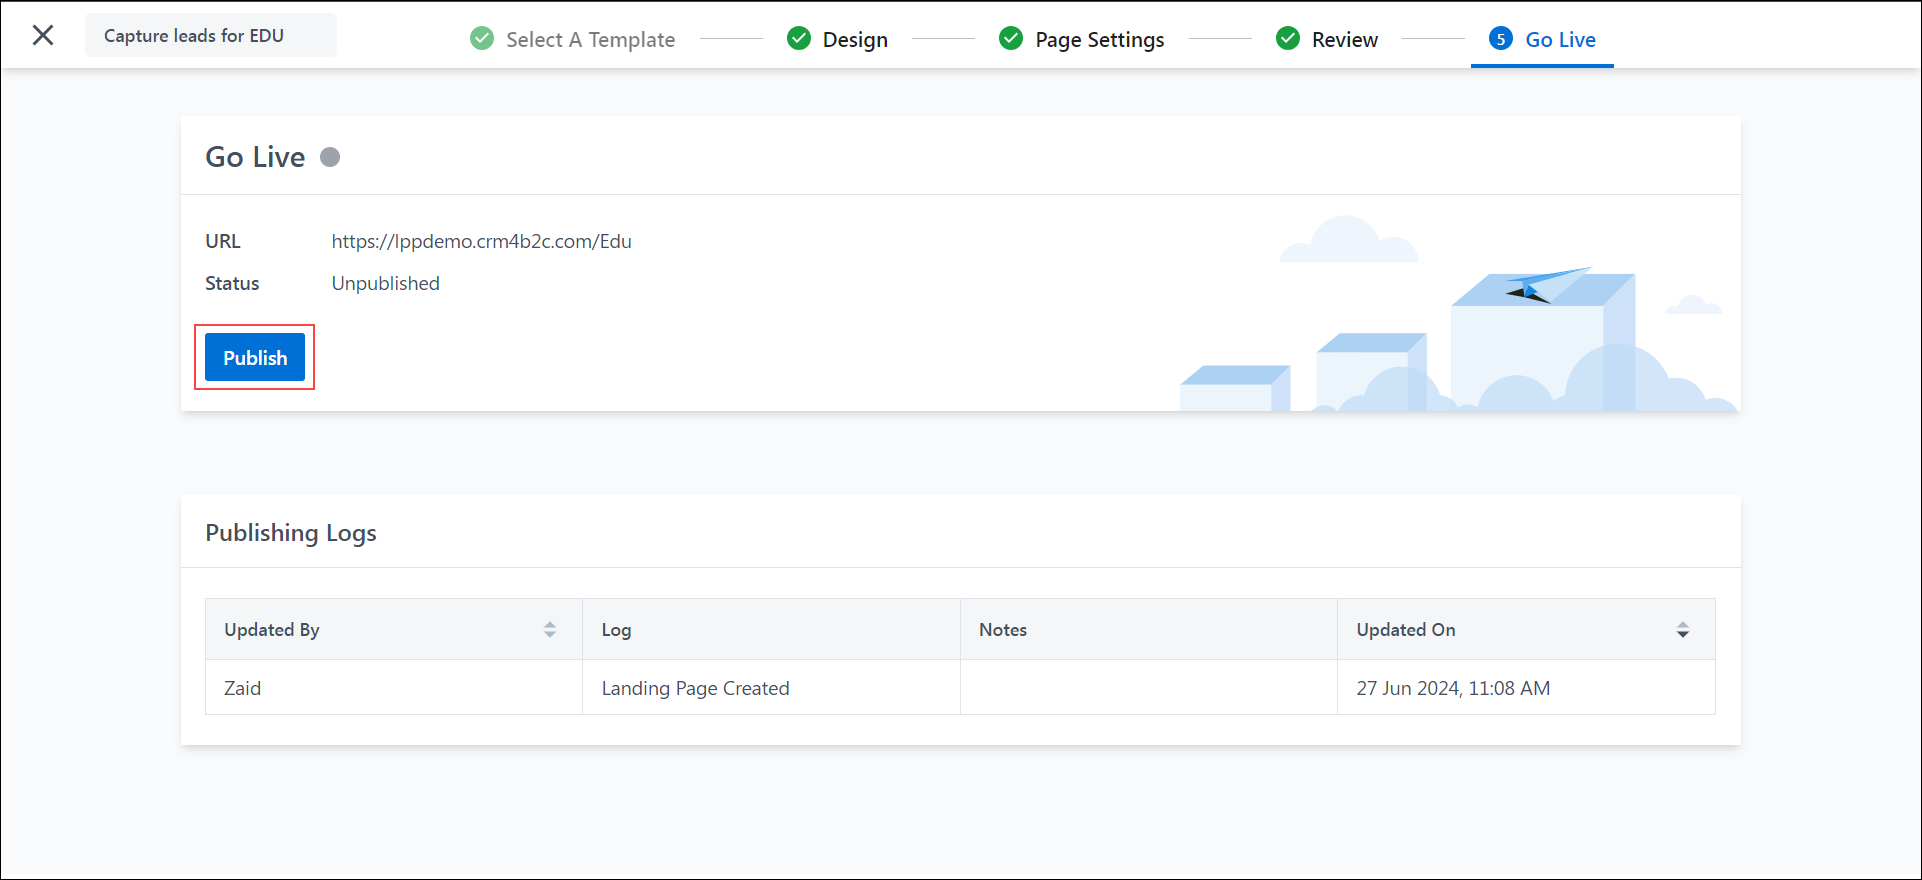
Lastly, click Publish to publish your landing page.
Here, you will also find the URL, Publish Status, and Publishing Logs.
Any Questions?
Did you find this article helpful? Please let us know any feedback you may have in the comments section below. We’d love to hear from you and help you out!


