1. Feature Overview
From the list of Appointment and To-do tasks configured by Admins, Sales Users can add relevant tasks directly to leads and opportunities. You can add tasks from several pages in LeadSquared, including the Manage Leads, Opportunity Details, Tasks, and Activities pages.
After users add the tasks, they work toward resolving them. This helps teams stay organised, prioritise work, and close tasks faster.
2. Prerequisite
Only LeadSquared users can create and update tasks.
3. How it Works
Users can add tasks to leads and opportunities from multiple pages, including Lead Details, Opportunity Details, Manage Leads, Manage Opportunities, Tasks, and Smart Views. After adding a task, users can track, update, and manage it from the Tasks tab on those pages, or the Tasks page, using individual or bulk actions as needed. Once users complete the task, they mark it as complete from any page where it appears, ensuring consistent follow-up and timely execution.
4. Add Tasks to Leads
For Leads, users can add a task from the Lead Details page and the Manage Leads page. You can also add tasks to opportunities from these pages –
4.1 Manage Leads Page
- Navigate to Lead Management>Leads.
- Alongside the lead to which you want to add the task, click the three-dots menu.
- On the Add Task form, select the Task Type, and enter the task details.
- Once you’re done, click Save & Close.
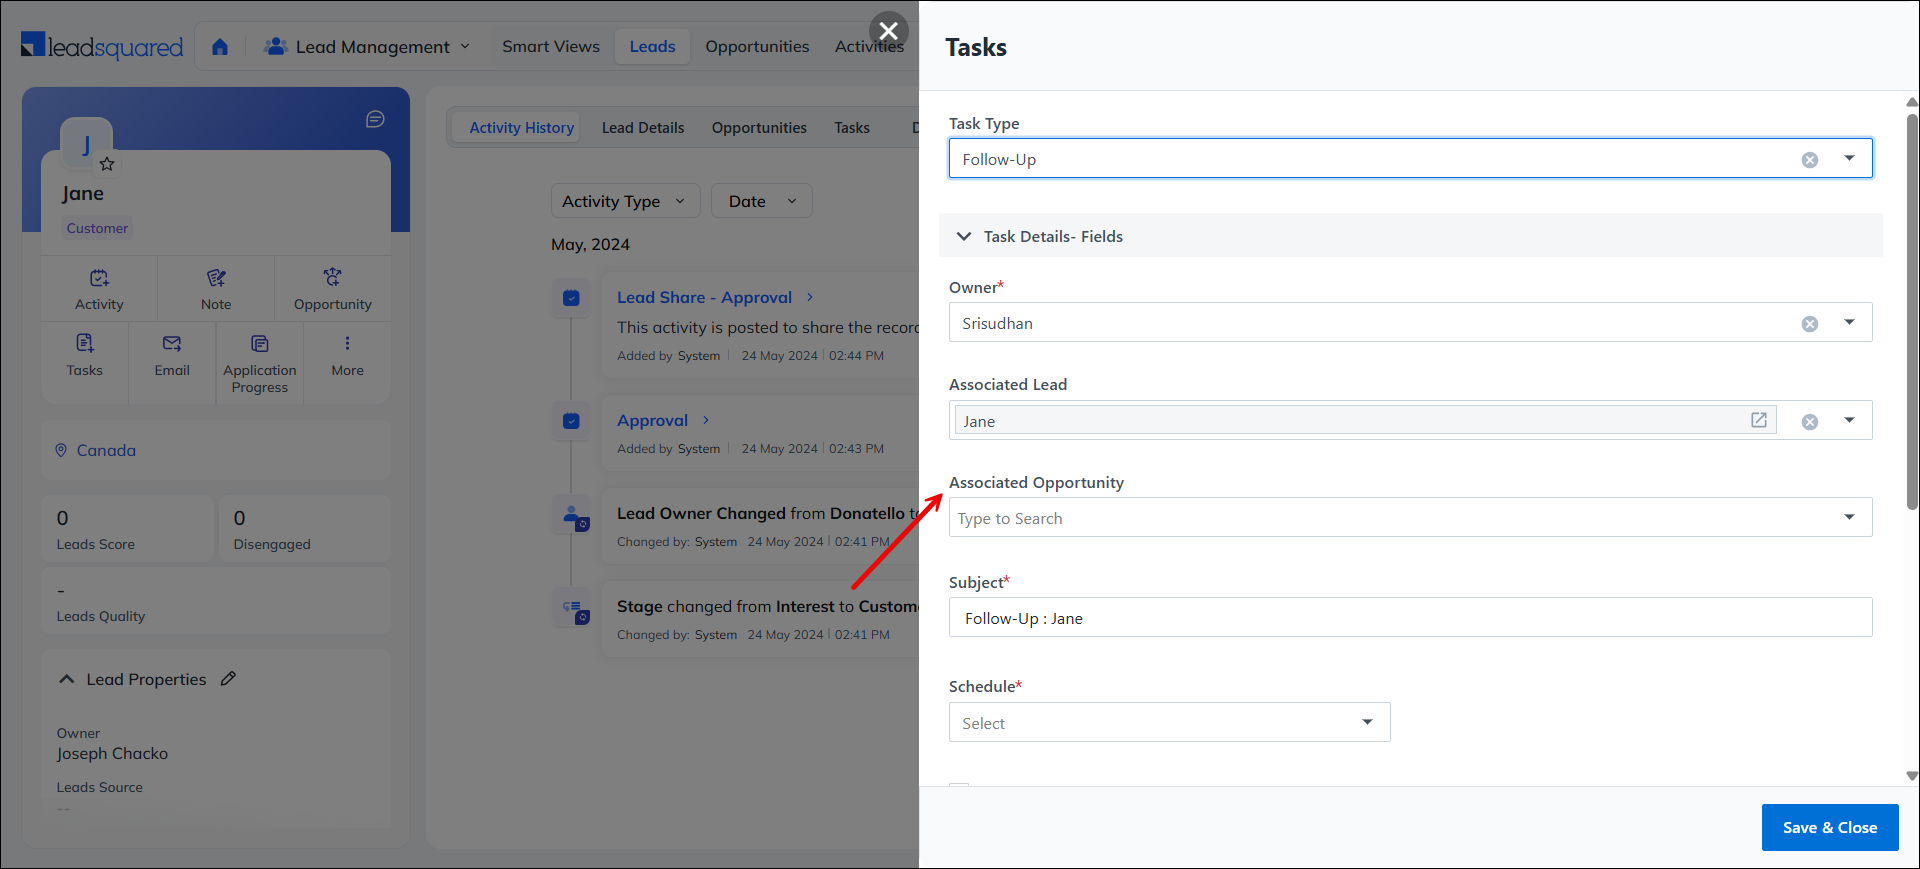
4.2 Lead Details Page
- Navigate to Lead Management>Leads, and open the lead to which you want to add the task.
- On the Lead Details page, click the Tasks icon and on the Tasks tab, enter the task details.
- Once you’re done, click Save & Close.
To add the task to an opportunity, use the Associated Opportunity option.
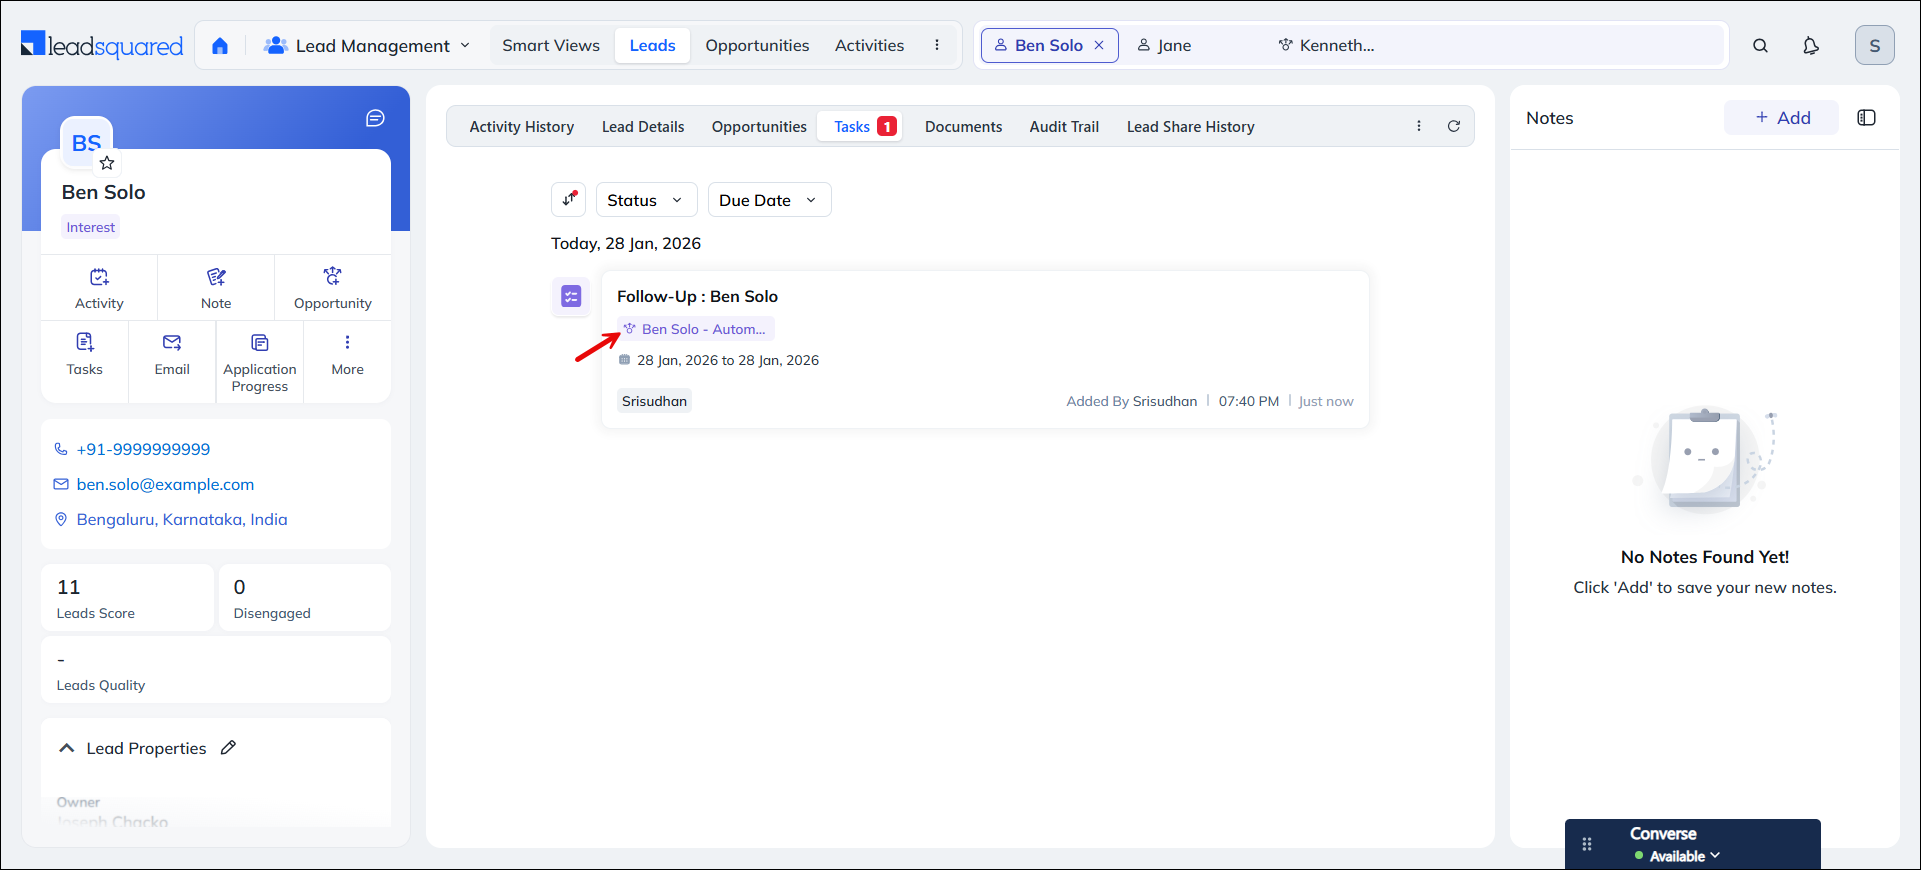
Tasks added to opportunities from the Lead Details page are denoted by the ![]() symbol.
symbol.
5. Add Tasks to Opportunities
For opportunities, users can add a task from the Opportunity Details page and the Manage Opportunities page. You can also add tasks to leads from these pages.
5.1 Manage Opportunities Page
- Navigate to Lead Management>Opportunities.
- Alongside the opportunity to which you want to add the task, click the three-dots menu.
- On the Add Task form, select the Task Type, and enter the task details.
- Once you’re done, click Save & Close.
5.2 Opportunity Details Page
- Navigate to Lead Management>Opportunities, and open the opportunity to which you want to add the task.
- On the Opportunity Details page, click the Tasks icon and on the Tasks tab, enter the task details.
- Once you’re done, click Save & Close.
6. Tasks Page
Users can add tasks to leads and opportunities directly from the Tasks page. You can also perform actions such as Mark Open or Delete on individual tasks and bulk tasks from this page. To access this page, navigate to Lead Management>Tasks.
6.1 Add Tasks
- On the Tasks page, click Add Tasks.
- From the Task Type dropdown, select a relevant task.
- Enter the mandatory task details, and associate it with the relevant lead.
- You can also associate it with an opportunity.
- Once you’re done, click Save & Close.

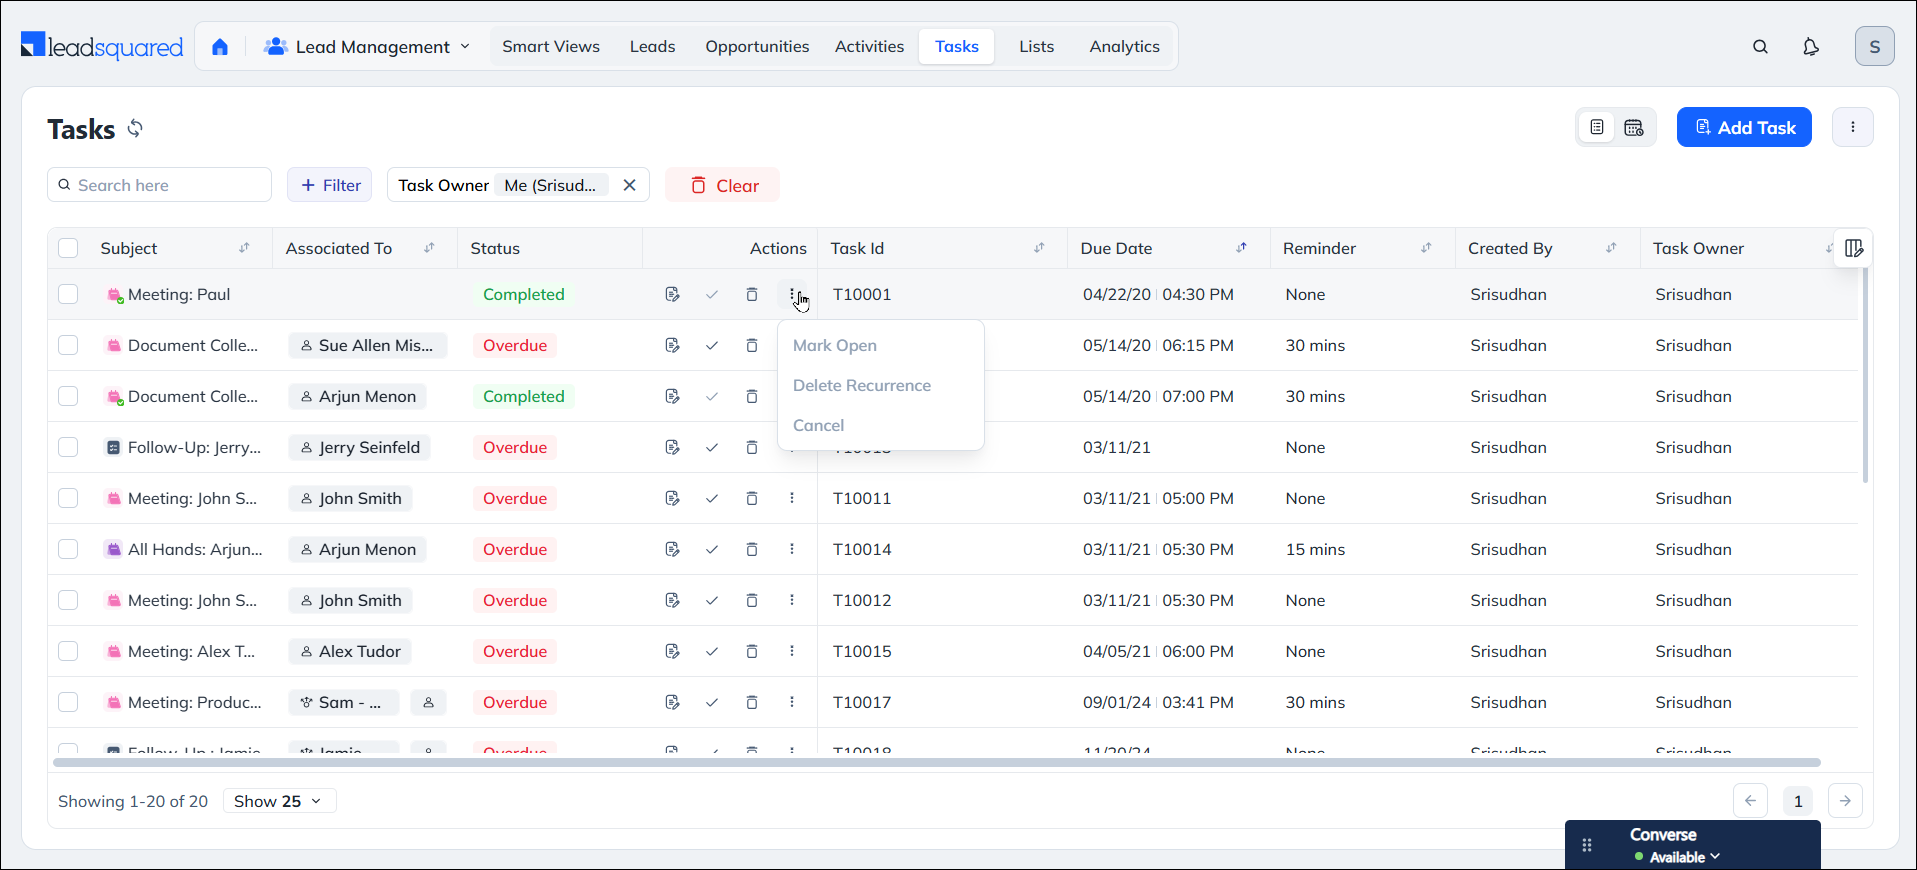
6.2 Individual Task Actions
You can perform the following actions on an individual ticket –
- Mark Open – Re-opens a completed task.
- Delete Recurrence – Deletes future occurrences of a recurring task.
- Cancel – Cancels an upcoming task.
Note:
- To view the complete list of actions available on the List view page, refer to List Actions.
- To view the complete list of actions available on the Calendar view page, refer to Calendar Actions.
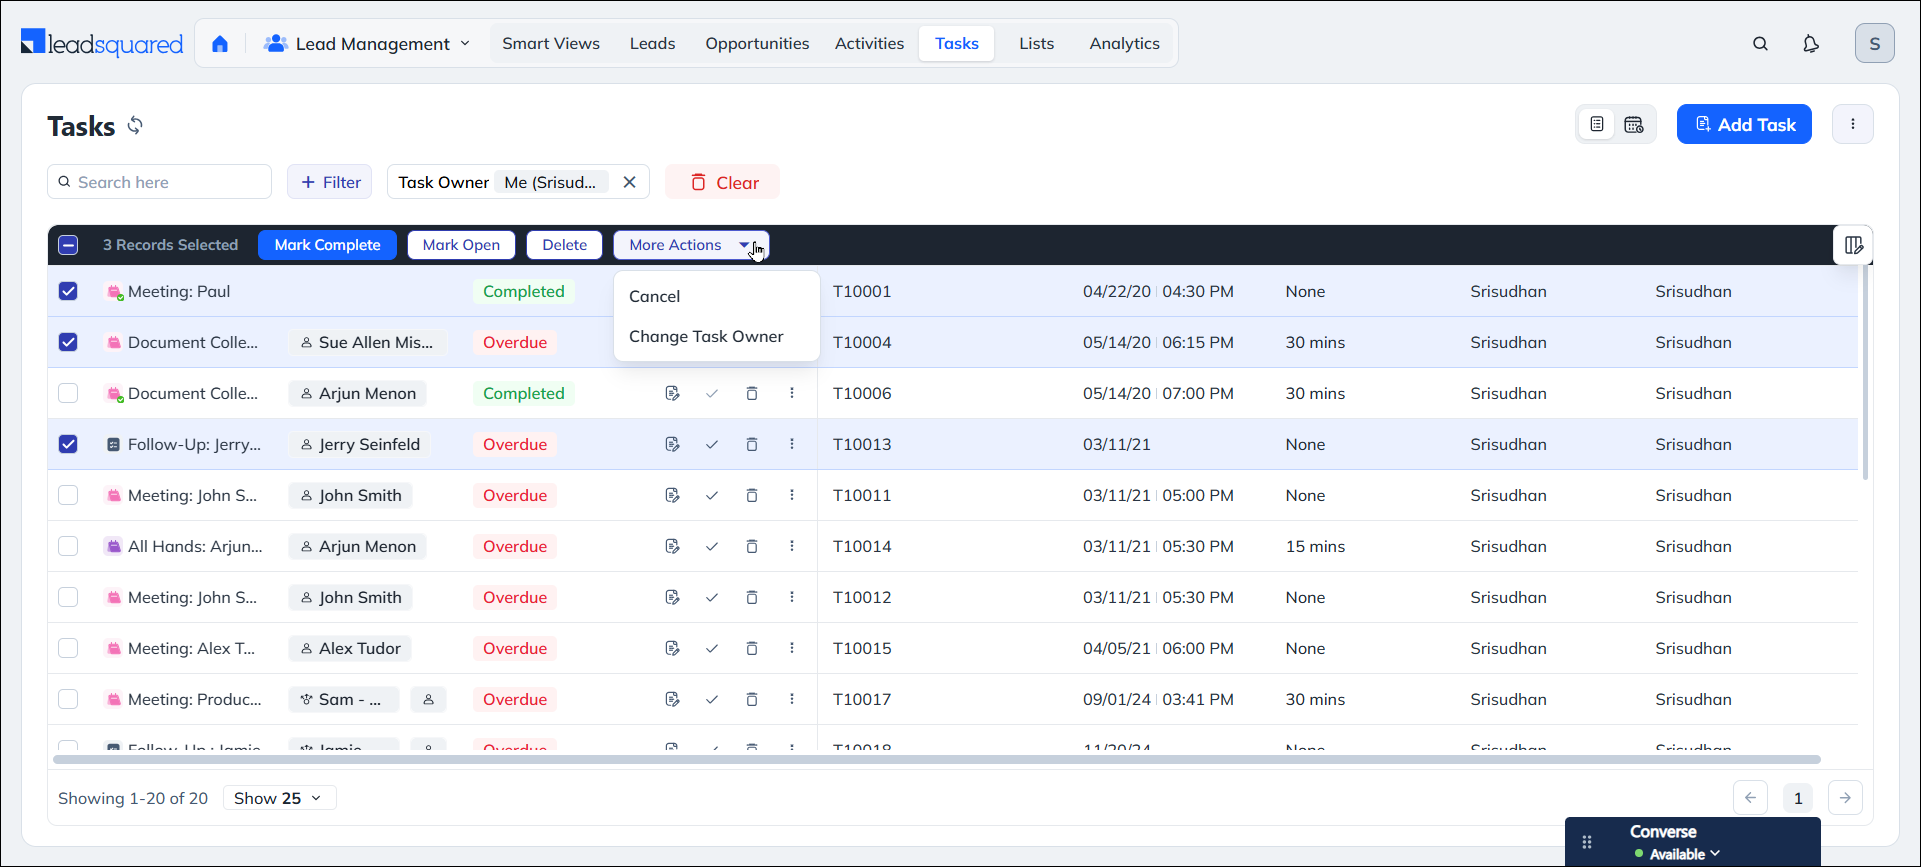
6.3 Bulk Actions
You can perform the following bulk actions on multiple tickets –
- Mark Complete – Mark multiple tasks as complete at once.
- Mark Open – Reopen multiple closed tasks at once.
- Delete – Delete multiple tasks at once.
- Cancel – Cancel multiple upcoming tasks at once.
- Change Task Owner – Update the task owner for multiple tasks.
7. Smart Views
Users can add tasks to leads and opportunities directly from any Smart Views page.
- Navigate to Lead Management>Smart Views.
- Alongside the lead or opportunity to which you want to add the task, hover over the three-dots menu and click Add Task.
- Enter the relevant details on the Add Task form, and once you’re done, click Save & Close.
8. Create a Recurring Task
A recurring task is a task type that is scheduled to occur automatically at regular intervals. For example, a monthly follow-up call with an active customer. You can configure this task type from the Leads, Opportunities, Tasks, or Smart Views pages.
- On the Add Task form, alongside the Schedule, click Make Recurring, and configure the following settings –
- Range of Recurrence – Select the start and end period during which the task repeats.
- Appointment Time – Select the start and end time during which the task repeats.
- Recurring Pattern –
- Preferred Period – Select whether the task repeats Daily or Weekly.
- Repeat –
- If you select Daily, choose whether the task repeats every N days, such as every 3 days, or every weekday.
- If you select Weekly, choose whether the task repeats every N weeks, such as every 2 weeks, and select the day of the week in which it occurs. You can choose more than one day of the week.
- Once you’re done, click Save, and continue setting up the task.

9. View Tasks
You can view existing tasks on the following pages –
9.1 Lead Details Page
On the Lead Details Page, view all the tasks tagged to the lead under the Tasks tab.
9.2 Opportunity Details Page
On the Opportunity Details page, view all the tasks tagged to this opportunity under the Tasks tab.
9.3 Tasks Page
All the tasks created on your account are visible on the Tasks page.

On this page, you can toggle between the List View and Calendar View.
10. Complete Tasks
Once you finish a task, you can mark it as complete from any page where the task is visible.
11. Related Articles
- If you’re a Sales user looking to customise this page, refer to Customise the Tasks Page.
- To export tasks, refer to Export Tasks out of LeadSquared.
- If you’re an Admin user looking to automate creating tasks, refer to LeadSquared Automations.
Any Questions?
Did you find this article helpful? Let us know your thoughts in the comments section below.


I noticed there’s calendar invite functionality while setting a meeting task, will this be linked with google calendar?
Hi, Vrindha. Yes, this is possible only if you’ve installed and configured the Google Calendar Sync Connector in your LeadSquared account.
If the account does not have email credits. Will the user still get the reminders over email?
Hey Aditya,
Yes, users will still get email reminders for tasks even when the account doesn’t have email credits.
Thanks for the great question!
Hi.. Im not getting my task reminders on my inbox
Hi, Thandi. Thank you for writing to us. Please check if you have –
i) Enabled the Reminder checkbox when creating the task type.
ii) Created your LeadSquared account with the same email Id on which you want to receive reminders.
If the issue still persists, please reply to this comment, and we’ll help you out. Thanks.
Hey, may i know if we can have prioritization of tasks created using automation? We want to set it up according to the lead Status
Hey Om,
This is definitely possible.
You need to create a custom field in the task (e.g., ‘Task Priority’ with drop-down values like ‘High’, ‘Medium’, ‘Low’, etc.). You can then set up an automation to update this task field based on the lead’s status –
Create an automation using a ‘New Task Created on Lead’ trigger. Follow that up with an If/Else condition (or a multi If/Else condition) where you choose the lead status. Under the ‘Yes’ path of the If/Else card, add the Update Task (under Sales Execution) action and select the updated value. Now whenever a new task is created, it’s priority will be updated based on the lead’s status.
If you still need help, don’t hesitate to write to us at support@leadsquared.com.