1. Feature Overview
Portals are functional self-service websites that help with lead application management, and are used to complete an application or registration process. LeadSquared’s Portal feature allows you to build your own online portals to capture leads and opportunities, through online forms, making the entire process paperless.
Portals also enable you to collect information on tasks and activities. This ensures all the information captured from a lead and opportunity is immediately available in your LeadSquared account. You can write your own HTML code, or use the drag and drop Portal Designer (no coding knowledge required) to build your portals.
By enabling portals on your account, you’ll be able to –
- Build an end-to-end application management portal. This includes loan applications, student admission applications, medical applications, insurance or other financial applications, etc.
- Reduce the turn-around-time and development effort that’s required in setting up a portal.
- Improve the post-release management of all the portals across your landing pages.
- Create customizable portals that can be improved upon and updated on the go.
2. Prerequisites
- You must be the administrator of your LeadSquared account.
- You must have access to the Portal’s license.
- Forms and Processes, along with portals, must be enabled on your LeadSquared account.
3. How It Works
In LeadSquared, you can either –
- Use the simple drag and drop Portal Designer to build a portal with zero developer effort.
- Or alternatively, create a portal using HTML (for the design) and use APIs (for the registration and login functionality).
Once your portal is built, you can deploy it on a test environment. When you’re ready to go live you can use a default LeadSquared domain or configure your own domain to host the portal. Version control features are also available to help you manage changes.
4. Create a Portal
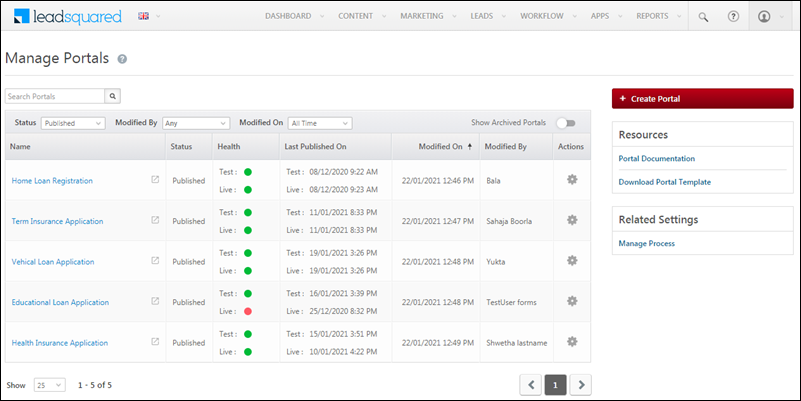
- From the LeadSquared dashboard, navigate to Workflow>Manage Portals.
- Click the Create Portal button.
- Provide a relevant name for the portal, and add a description if required. Once you are done, click Create.
- On the portals page, you can build the portal using –
- An existing HTML code. To know more, please refer to Build LeadSquared Portal Using HTML.
- The Portal Designer. To know more, please refer to LeadSquared Portal Designer.
5. Manage Portals
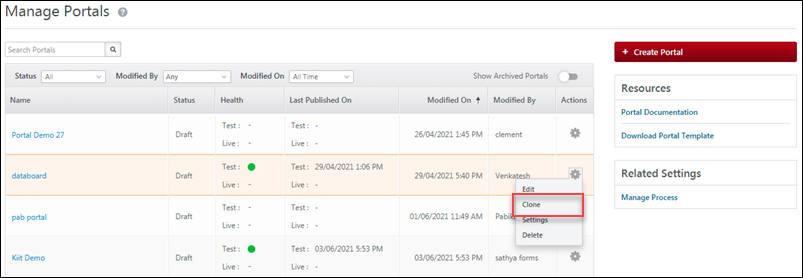
Existing and newly created portals will show up on the Manage Portals page. You can use filters to search for portals on the basis of various parameters, such as status, modified by and modified on. You can also edit, clone, and delete portals from this page.
You can clone both published and draft portals.
| What is cloned | What isn’t cloned |
| Portals built using the Portal Designer. | Portals built using HTML. |
| The portal design with images, content, logic cards, and button rules. | Subdomain name mapping. |
| The forms and activities selected in the Portal Designer (not the forms & activities themselves, they can be cloned separately if required). | Release history. |
| Email templates and email settings associated with the portal. | |
| All Portal versions and version history. |
To clone a portal,
- Under the Actions column, alongside the portal you want to clone, hover your cursor over the wheel
 icon, then click Clone.
 - Enter the name and description for the cloned portal, then click Save.
Once cloned, the new portal will appear in ‘Draft’ status.
6. Using Forms in Your Portal
The Forms feature is closely linked with portals. You can create forms or entire application processes to capture information in your portals. These include registration forms for sign-up/login as well as forms to capture leads, opportunities, tasks, and activities. To know more, please refer to LeadSquared Portal Designer – Create Sign Up Forms.
7. Adding Pages to Your Portal
Using the Portal Designer, you can add multiple pages (such as the ‘Home’ page, the ‘Contact Us’ page, the ‘Dashboard’, and so on). You can also secure certain pages by allowing access for only logged-in users.
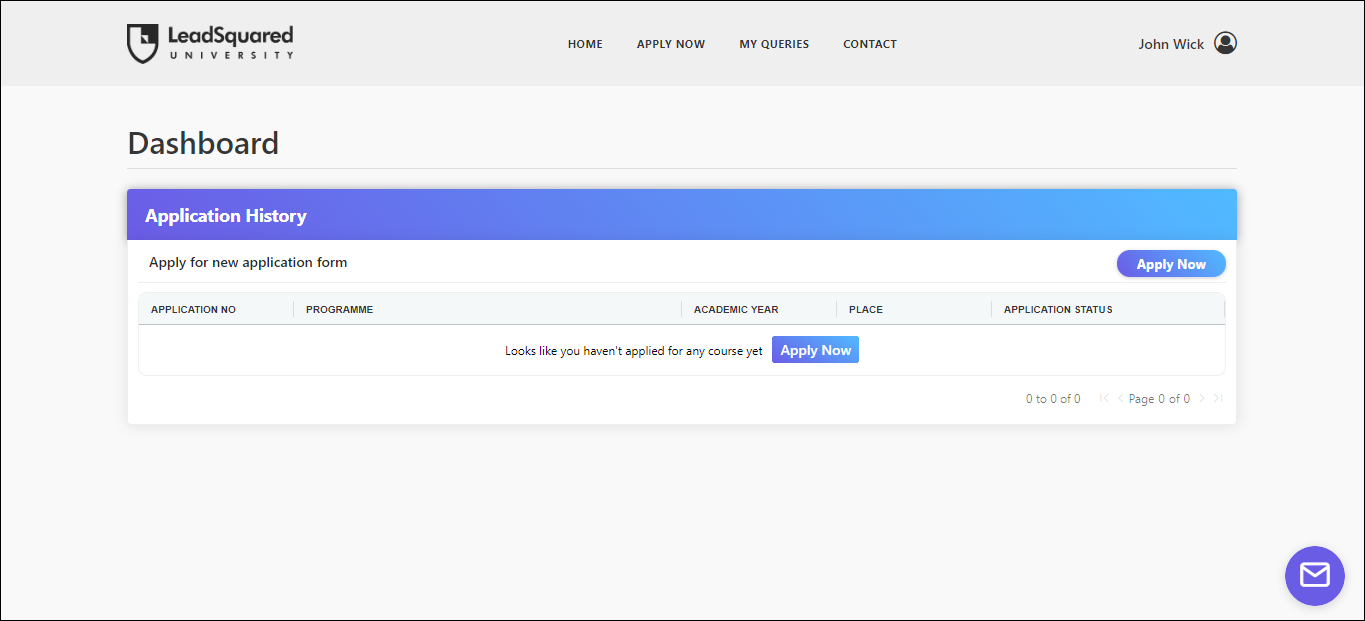
You can also create applications, using our Applications feature on the Portal Designer. This allows you to build application forms and an application dashboard from which all user applications can be handled. To know more, please refer to Create Portals with Multiple Web Pages.
Any Questions?
Did you find this article helpful? Please let us know any feedback you may have in the comments section below. We’d love to hear from you and help you out!


Hi, Manish. Please write an email to support@leadsquared.com regarding this. Someone from our team will get in touch with you ASAP.