1. Feature Overview
Set permissions for your LeadSquared iOS or Android mobile app, configure behaviour for offline leads, opportunities, activities, tasks, smart views and also set call, SMS and location tracking permissions for different user roles.
To learn about device permissions required by the mobile app, refer to Which device permissions does the LeadSquared Mobile App require?
2. Prerequisites
- You must be the Administrator of your LeadSquared account.
- Your users must have the LeadSquared mobile app installed on their mobile devices.
3. Set Permissions
The Mobile App Permissions page is available under My Account>Settings>Mobile App>Permissions. Click Edit to open the page in edit mode and set permissions for each feature.
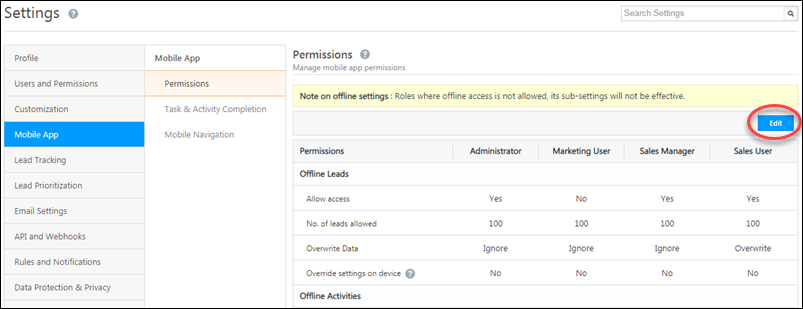
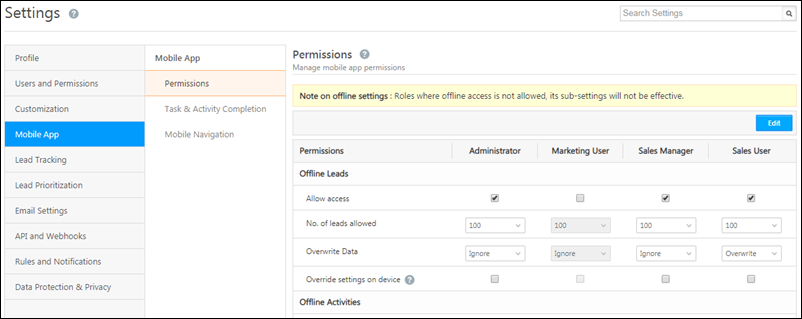
Here’s an explanation of each setting –
| Section(s) | Setting | Description |
| Offline Leads (only applicable to Android devices) | Allow Access | Allows the user role access to the offline leads feature. Users granted this permission can create and update leads without internet connectivity on the LeadSquared mobile app. |
| No. of leads allowed | The number of leads displayed to the user role while offline. Leads that have recently engaged/performed activities/been modified will be displayed. | |
| Overwrite Data | Allows a user role to Ignore or Overwrite information of leads created in offline mode. | |
| Override settings on device | Gives the user role permission to override these settings from the mobile app. | |
| Offline Activities, Offline Tasks (only applicable to Android devices) | Allow Access | Allows the user role access to the offline activities and offline tasks features. Users granted this permission can create and update activities and/or tasks without internet connectivity on the LeadSquared mobile app. |
| Date Range | The date range within which activities and/or tasks should be displayed while offline. | |
| Overwrite Data | Allows a user role to Ignore or Overwrite information of activities/tasks created in offline mode. | |
| Override settings on device | Gives the user role permission to override these settings from the mobile app. | |
| Offline Smart Views (only applicable to Android devices) | Allow Access | Allows the user role access to the offline smart views features. Users granted this permission can create and update smart view tabs without internet connectivity on the LeadSquared mobile app. |
| No. of records per tab | The number of lead/activity/task records to display per smart view tab while offline. | |
| Overwrite Data | Allows a user role to Ignore or Overwrite information of smart view tabs created in offline mode. | |
| Override settings on device | Gives the user role permission to override these settings from the mobile app. | |
| Calls and SMS (only applicable to Android devices) | Track Calls | Posts inbound and outbound phone calls to leads from the user’s device as activities in LeadSquared. |
| Record Calls | Allows you to record the inbound or outbound calls from/to leads. For more information, see How to Record Inbound/Outbound Calls for Leads in LeadSquared? | |
| Track SMS | Tracks SMS made to or received from leads as activities in LeadSquared. | |
| Override settings on device | Gives the user role permission to override these settings from the mobile app. | |
| Location Tracking (applicable to both Android and iOS devices) | Track real-time location | Enables real-time location tracking when a user checks-in/checks-out of the LeadSquared mobile app. For more information, see Check-in/Check-Out for Mobile. |
| Track location on lead update | Captures the location co-ordinates when a lead field is updated and posts an activity in LeadSquared. |
4. Task and Activity Completion
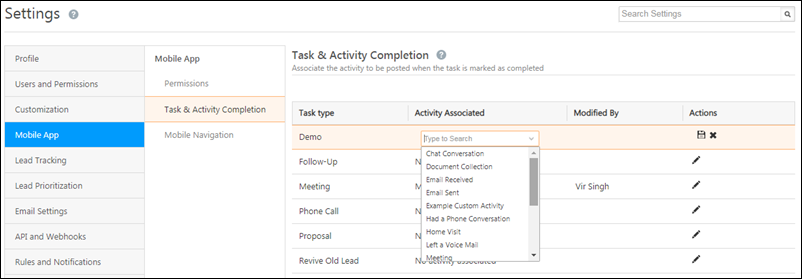
Automatically post activities every time a task is completed –
- Navigate to the Task & Activity Completion tab.
- Click the edit
 icon under the Actions column, alongside any task type.
 - Under the Activity Associated column, select the activity you want to post when the task type is completed.
- Alongside the Actions column, click the save
 icon.
icon.
5. Menu Customization
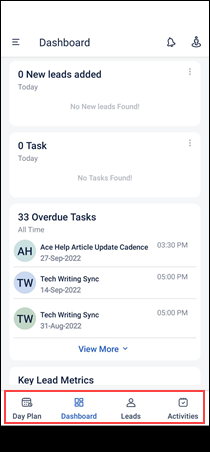
Admins can customize and choose what tabs they want to display on the bottom navbar
And the side menu options on the mobile app –
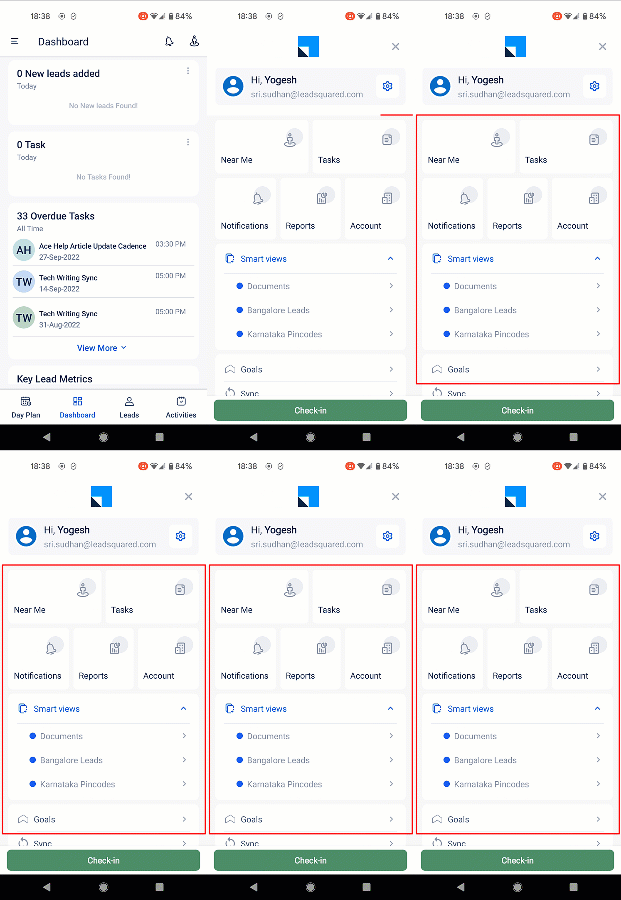
Note: Before you customize the nav bar and side options, note that –
- On the Mobile Navigation screen, the first (top) 4 tabs are displayed on the navbar, and the next 5 tabs are displayed as tiles in the side menu.
- From the 10th tab onwards, they are displayed as options on the side menu.
- Irrespective of which position they have on the Mobile Navigation list, Smart Views and Custom Apps will always be displayed as options on the side menu.
- Notifications will also only be displayed on the side menu, but depending on it’s position, it will be displayed as a tile or as an option.
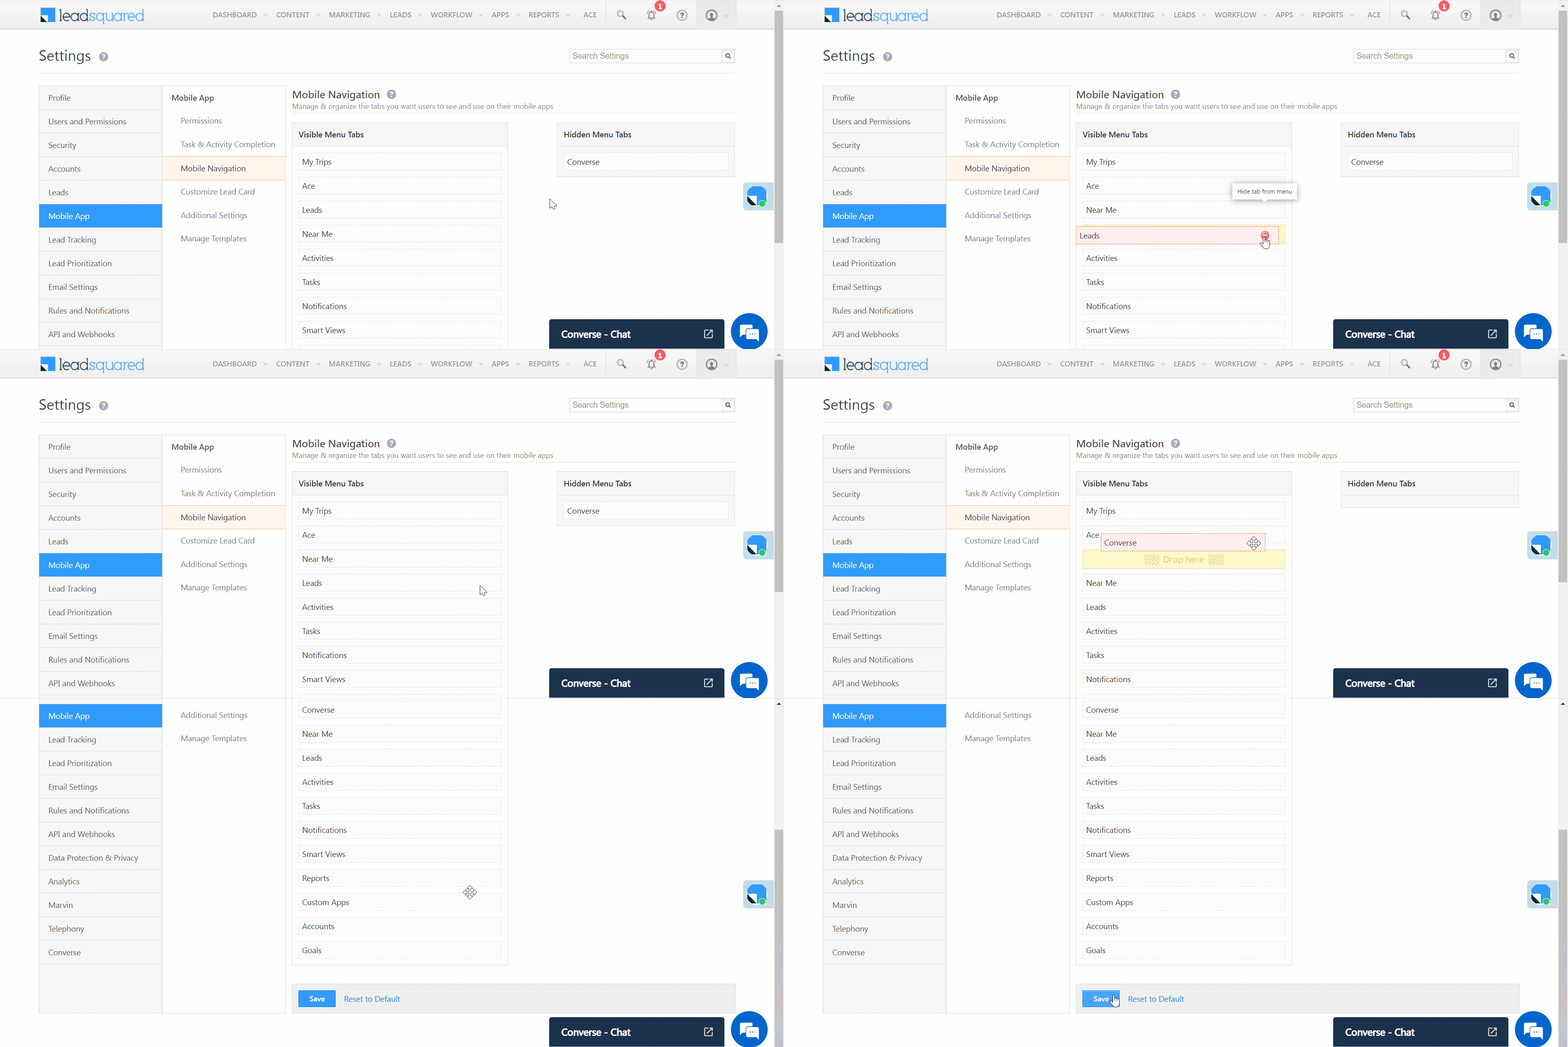
To customize the navbar and side menu –
- Navigate to My Account>Settings>Mobile App>Mobile Navigation.
- Drag and drop the options in order of where you want them to be displayed.
- If you have Converse enabled in your account, you can enable it in your mobile app as well. To do so, under Hidden Menu Tabs, drag the Converse option and drop it under Visible Menu Tabs.
- Once you’re done, click Save.
6. Details Customization
Based on each Team’s requirements, Admin users can customise the Tabs, Actions, and Contact Cards displayed on the mobile app’s Lead Details page. To know more, refer to Customise Lead Details View on Mobile.
7. Additional Settings
To configure Additional Settings for your mobile app, refer to Mobile App Additional Settings.
Any Questions?
If you have any questions related to mobile app permissions, please let us know in the comments section below. We’d love to hear from you!


