


Get Started
Sales Suite
Field Ops
Marketing
Service CRM
Integrations & Apps
FloStack
Process Builder
1. Feature Overview
The Process Designer automates ticket management by letting you create workflows through an intuitive, easy-to-use visual builder. When a ticket is created or updated, the process you’ve designed automatically updates its stage, sets the SLA for that stage, and assigns the ticket to a specific agent or an agent within a group – manually or through round-robin assignment. Set it up once, and let the system handle ticket updates and ticket assignments with minimal manual effort.
2. Prerequisites
- The Process Builder is a paid feature. To enable it, contact your account manager, or write to scsupport@leadsquared.com.
- You must be a Service CRM Admin to configure the designer.
3. How it Works
The Process Builder enables you to design complex workflows that automate what happens to a ticket once it is created and/or updated. Once the builder is enabled on your account –
- Configure a trigger – A trigger is an event (such as “Ticket Created”, “Ticket Updated”, etc.) that activates the process you’re building.
- You can add multiple conditions when configuring the trigger (such as “Ticket Created through the Email Channel”, “Ticket Updated to the Status Pending”, etc.)
- Add an outcome – An outcome (such as “Update the Ticket Stage”, etc.) is the action that takes place once the process is triggered and the conditions are met.
- You can add an SLA that gets triggered after the outcome is achieved, such as “Update the Ticket Stage to Critical and resolve the ticket within 1 hour.”
- You can also configure an escalation matrix to be triggered if this SLA is breached.
- You can add assignment rules that get triggered after the outcome is achieved, such as “Update the Ticket Stage to Critical and assign it to the Delhi Service Group”.
- You can set up a rule that assigns the ticket to a Service Group or an individual agent.
- You can also add additional conditions that need to be satisfied before the tickets are assigned to the selected group or user.
- You can add an SLA that gets triggered after the outcome is achieved, such as “Update the Ticket Stage to Critical and resolve the ticket within 1 hour.”
- You can add multiple outcomes to the same trigger.
- After you’ve added the necessary nodes, Save and Publish the process. This is now applied to all the tickets that satisfy your conditions.
4. Access the Builder
Once you log in to LeadSquared (https://login.leadsquared.com/) –
- Navigate to My Profile>Settings>Service Cloud.
- On the Service Cloud Settings page, under Workflows, click Process Builder.
- Click Create Process, and enter the following details –
- Process Name – Add an internal name for the process you’re designing. This is mandatory.
- Description – Add a description of the process you’re building.
- Once you’re done, click Save and Next.

5. Configure the Trigger
- On the Process Builder screen, click Start Process.
- On the Create Process pop-up, configure –
- Process Starts When – Choose if you want the process to be triggered when –
- A ticket is created
- A ticket is updated
You can select both options if required.
- Set Conditions – Click Add Conditions to configure the conditions based on which the process is triggered. We’ll set up an example rule to assign all tickets with the “Ticket Channel” is “Email”. On the Set Conditions pop-up –
- All Tickets – This is the “AND” operator. The process is triggered only for tickets that meet all the specified conditions. For example, if you set a rule for “Status” as “Open” and another for “Channel” as “Email,” the process runs only when both conditions are met – i.e. when a ticket is created or updated with these values.
- Any Tickets – This is the “OR” operator. The process is triggered for tickets that meet any of the specified conditions. For example, if you set a rule for “Status” as “Open” and another for “Channel” as “Email,” the process runs when either condition is met – i.e. when a ticket is created or updated with “Open” as the status or “Email” as the channel.
- Select – From this dropdown, select a ticket or lead field to trigger the process based on its stored value. You can choose from both system and custom ticket or lead (customer) fields. We’re selecting the “Channel” ticket field.
- Operator – Based on the field type you’ve selected, choose a relevant operator from the available options, such as “is,” “is not,” “contains,” “starts with,” “is defined”, and so on. We’re selecting “is.”
- Value – Based on the field type you’ve selected, enter or choose a value. You can add multiple values. Since the “Channel” ticket field has predefined values, we’ll select “Email” here.
- Add Rule – Click this to add multiple rules to the same group.
- Add Group – To add multiple conditions, click Add Group. After adding a new group, select “AND” to apply all conditions or “OR” to apply any one of them.
- Process Starts When – Choose if you want the process to be triggered when –
- Once you’re done, click Set, and then click Save.
- To redo the conditions, click Reset.
6. Add the Outcome
Once you’ve set up a trigger, configure the actions that should occur when the process is activated. This can include updating the ticket stage –
- Hover your cursor over
 , and click the outcome you want to configure.
- We’re selecting Stage, to update the ticket’s stage.
- On the Define Stage pop-up –
- Stage Name – Enter the stage name to which the ticket should be updated. This is mandatory.
- This step creates a new stage to which the ticket is updated. The stage you create here is not related to the stages configured in the Ticket Details View.
- SLA Policy – Enable the slider to set a custom SLA policy for this stage. This overrides the organization-wide SLA policies in your account.
- Set the SLA time frame in minutes, hours, or days, and specify the BusinessHours this policy should follow. For example, if the SLA is set to 4 hours and follows business hours (9 AM to 6 PM), a ticket created at 5 PM will have its SLA deadline set to 10 AM the next business day.
- If the SLA is breached, configure the escalation matrix under Escalate To. Define multiple escalation levels and set the timeline for each level.
- The ticket can be escalated by specifying a user role (e.g., Ticket Owner, L1 Manager) or selecting an individual user (e.g., Tim, David).
- You can escalate the ticket to multiple people at the same escalation level.
- Assignment Rule – Enable the slider to set a custom assignment rule for this stage. This overrides the organization-wide Assignment Rules in your account.
- Direct – Assigns the ticket to a Service Group or an individual user based on a predefined rule.
- Secondary Group – Select the group to which the ticket should be assigned.
- Round Robin – When selected, the system will sequentially assign tickets to each agent in the group. For instance, if three users are in the group – Tim, Gareth, and Keith – the system will assign the first ticket to Tim, the second to Gareth, the third to Keith, the fourth to Tim again, and so forth.
- Manual – When selected, the Group Manager must manually distribute tickets to the agents in the group.
- Both options above apply only to Service Groups and cannot be used if the ticket is assigned to an individual agent.
- Secondary Agent – Select the individual agent to assign the ticket to.
- Secondary Group – Select the group to which the ticket should be assigned.
- Conditional – Assigns tickets only if the criteria configured here are met. The steps to configure these conditions are similar to Set Conditions in the previous section.
- Direct – Assigns the ticket to a Service Group or an individual user based on a predefined rule.
- Stage Name – Enter the stage name to which the ticket should be updated. This is mandatory.
- Once you’re done, click Save.
- Hover your cursor over , and click Add Node to add multiple nodes following the steps listed above.
- Hover your cursor over
- After you’re done adding all the outcomes, under the last card you’ve added, hover your cursor over , and click End Flow. This is mandatory.
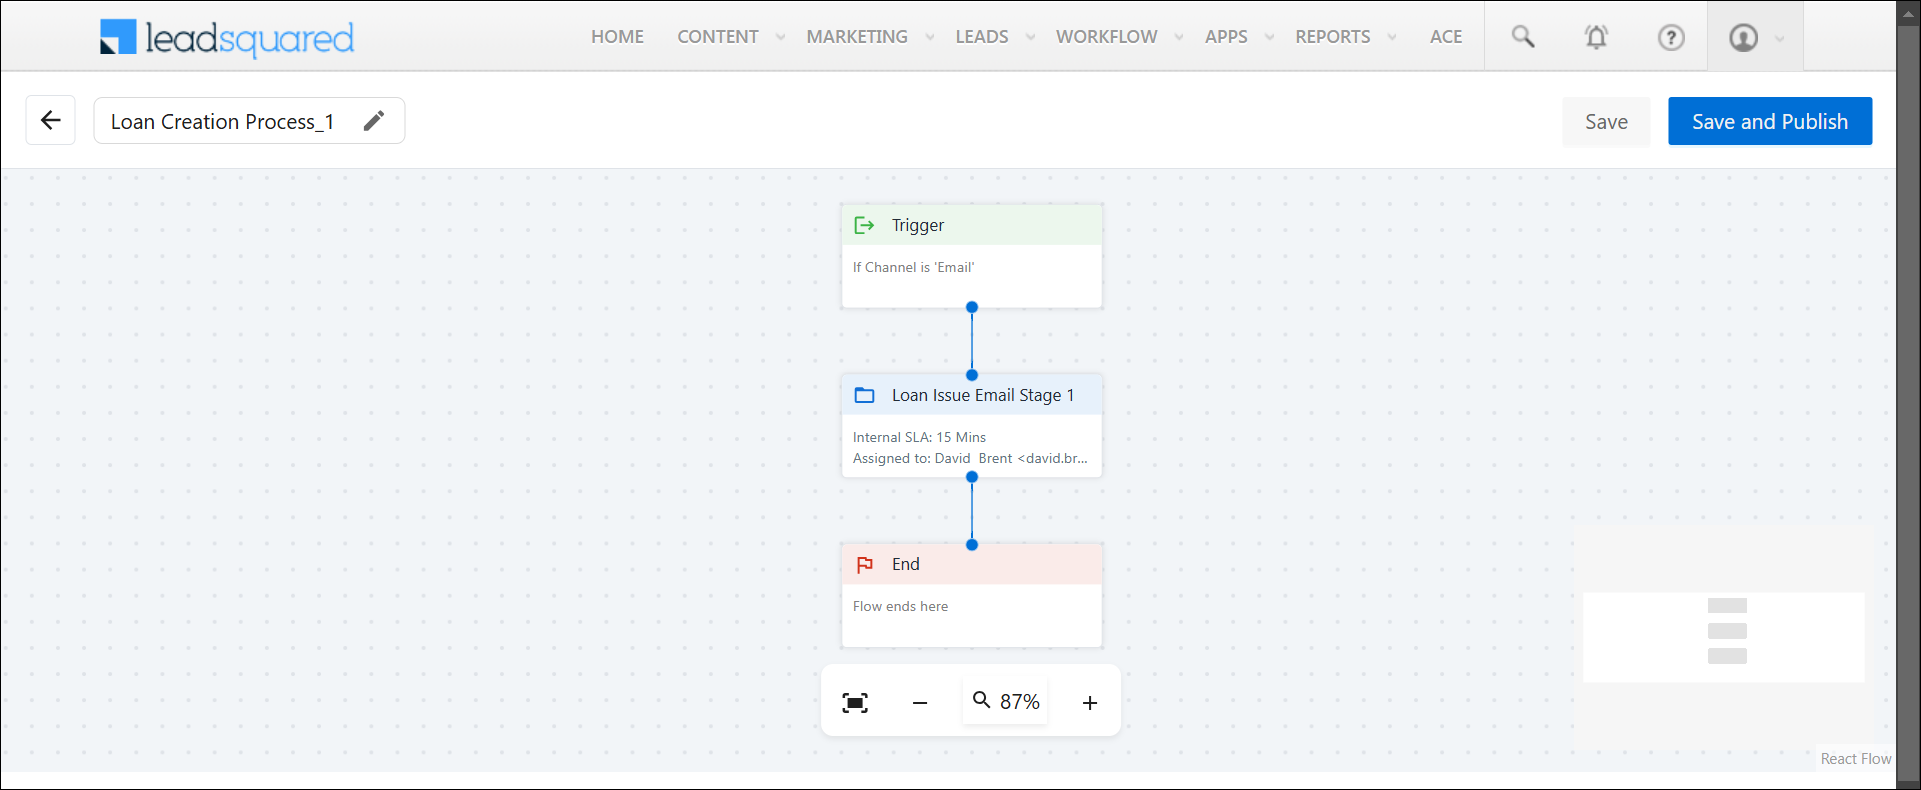
- Then, click Save and Publish. This process is now live.
7. Other Actions
7.1 On the Process Builder Page
Under Actions, click ![]() to –
to –
- Rename – Renames the process.
- Unpublish – Unpublishes a published process.
- Edit – Edit an unpublished process.
- Clone – Clone a published process.

7.2 On the Process Builder Designer
- Click the node to edit its configurations.
- Click the End Node to delete when the process ends.
- Click the process name to rename it.

7.3 Create a Stage Template
To save an existing stage as a template, click Save as Template. The saved template will show up under Existing Templates when you’re creating a new stage.
Any Questions?
Did you find this article helpful? Please let us know your feedback in the comments section below. We’d love to hear from you and help you out!