


Get Started

Sales Suite
Field Ops
Marketing
Service CRM
Integrations & Apps
FloStack
View and Manage Phone Numbers in Invorto Voice Bot

1. Feature Overview
The Phone Numbers module on the Invorto Voice Bot is where you register the DID numbers your organization uses, set how each one routes calls, and copy the identifier you need when you call Invorto from another system.
How you set a number up depends on its direction.
| Direction | How the number is used |
| Outbound | Invorto dials your contacts from the number. |
| Inbound | A person dials the number and Invorto routes the call to a bot. |
Note:
- An outbound number does not need a bot assigned to it. Outbound calls are driven by campaigns, and the campaign decides which bot runs the conversation. Assign a bot only to a number that receives inbound calls.
- Invorto does not sell phone numbers, and you cannot buy one from this page. You buy the number from your telephony provider, then add it here so Invorto can route calls on it. Some organizations instead have a shared number provisioned for them by a platform admin. Either way, the number reaches Invorto from outside this module.
2. Prerequisites
- An active Invorto Voice Bot account with admin rights.
- A DID number you have already bought from your telephony provider, along with the SIP details that provider gave you.
- For inbound routing, you need a published bot.
3. Open the Phone Numbers Module
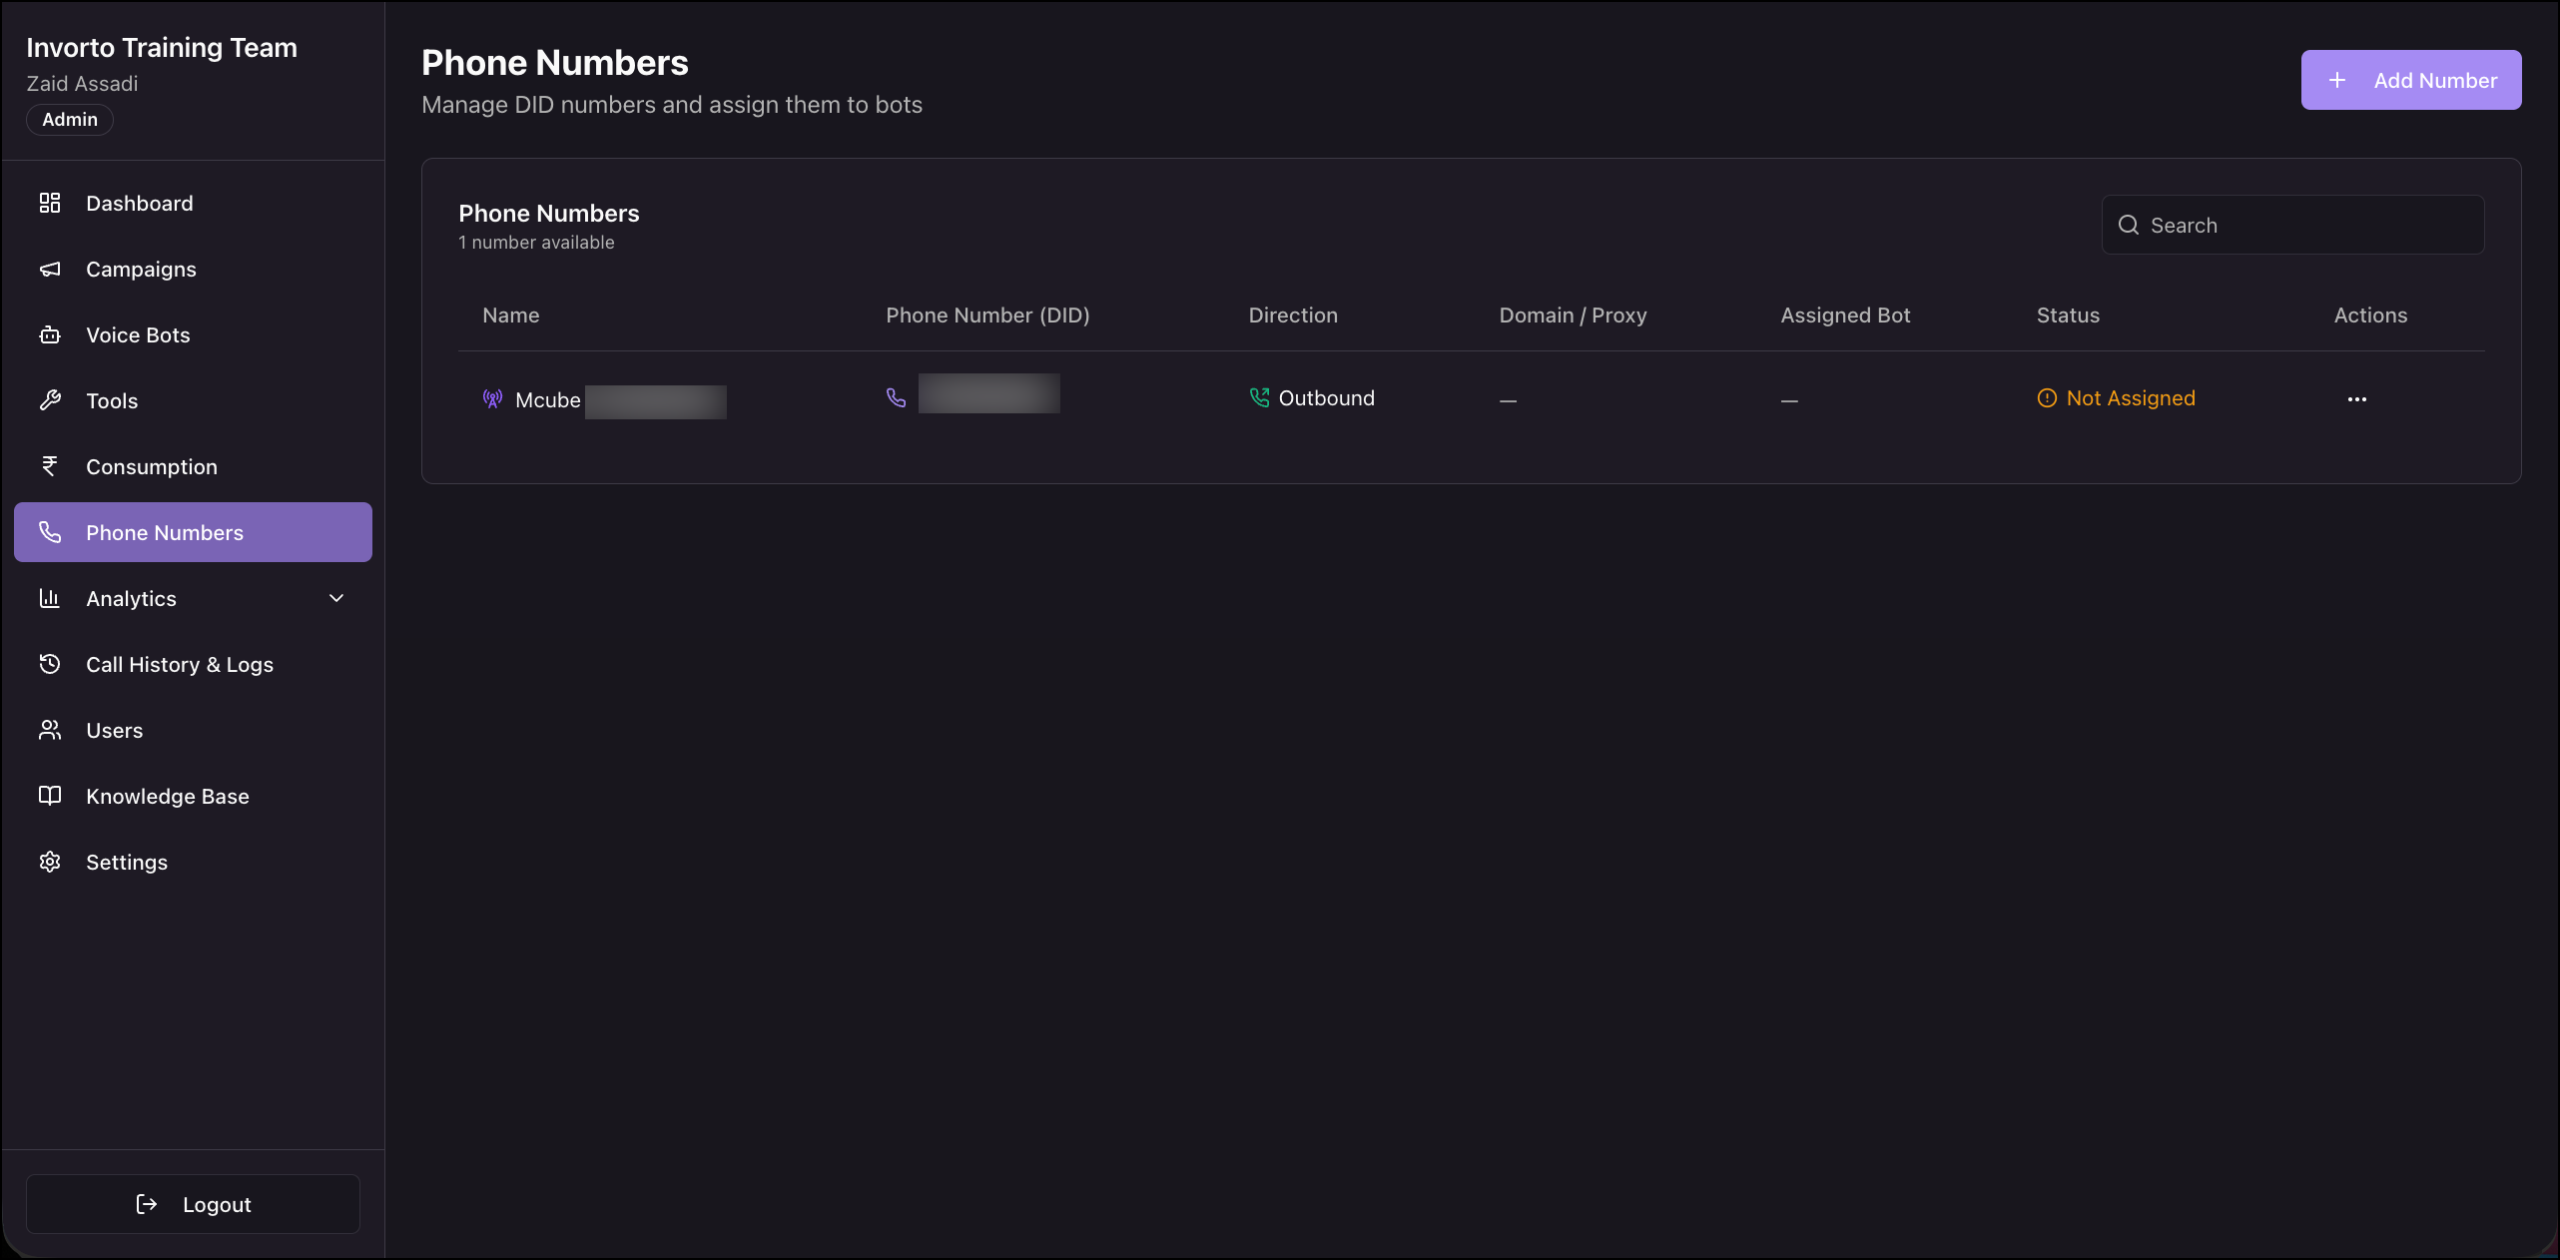
In the left navigation, click Phone Numbers. The card header shows how many numbers are available to your organization. Use the Search box at the top right of the card to find a number in a long list.
3.1 Phone Numbers Table
| Column | What it shows |
| Name | The friendly name for the number. |
| Phone Number (DID) | The number itself. |
| Direction | Whether the number places calls or receives them –
|
| Domain / Proxy | The SIP domain or proxy configured for the number. A dash means none is set. |
| Assigned Bot | The bot that answers inbound calls on this number. A dash means no bot is assigned. |
| Status | Whether a bot is assigned to the number –
|
| Actions | The row actions menu. |
3.2 Row Actions
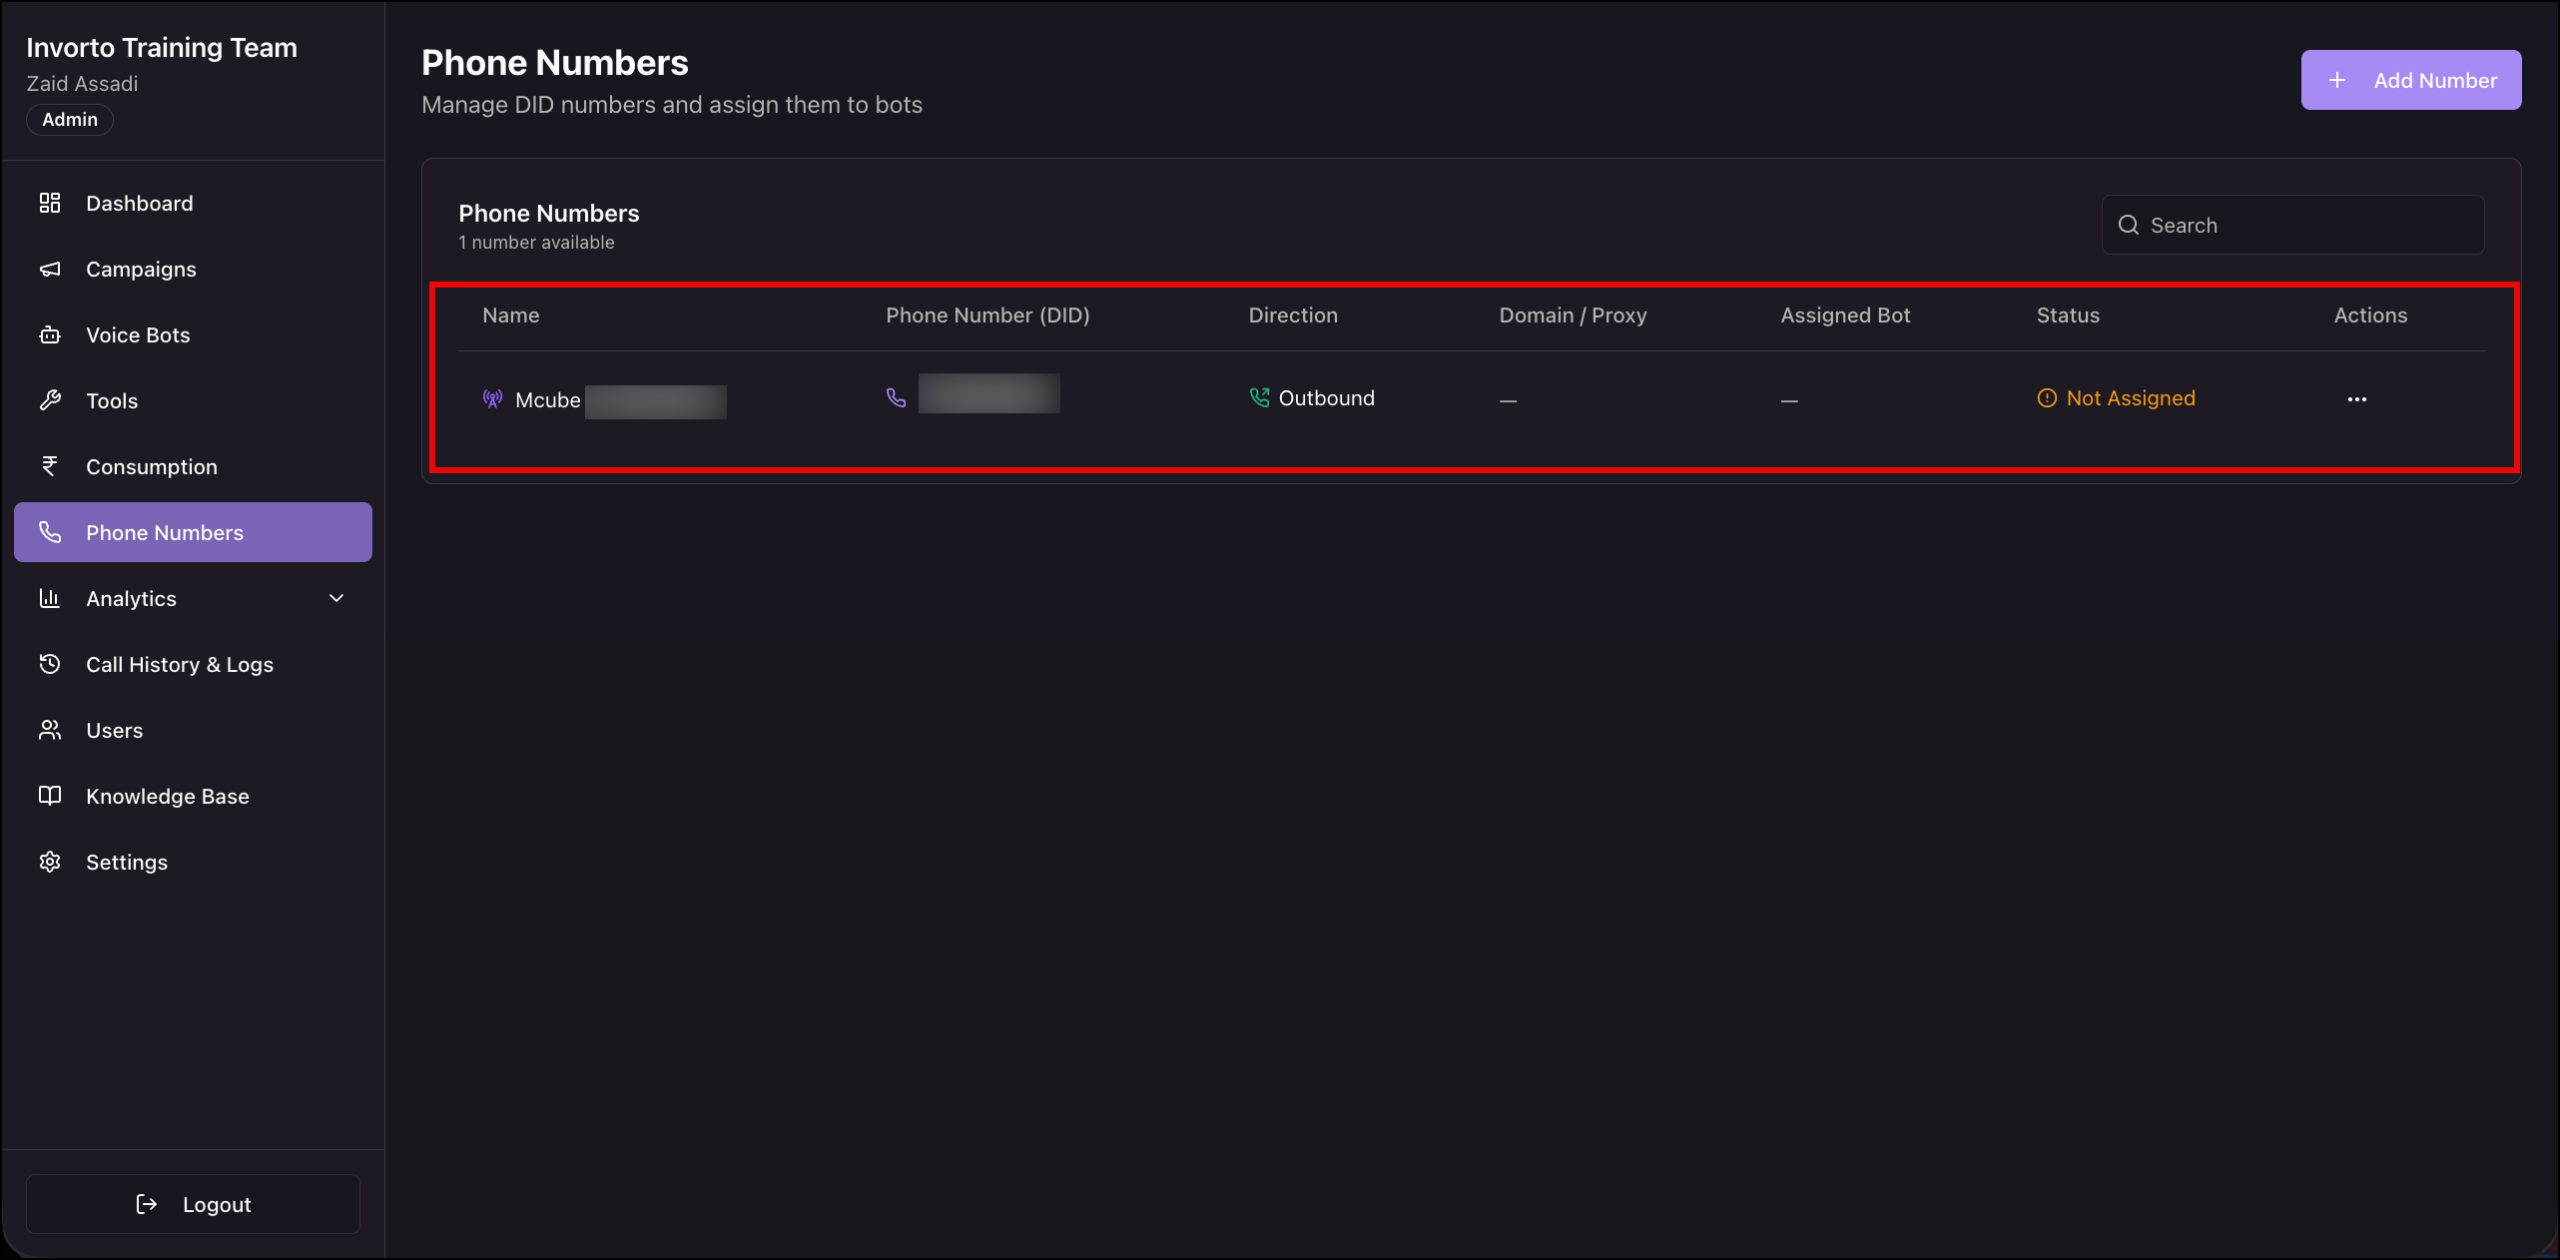
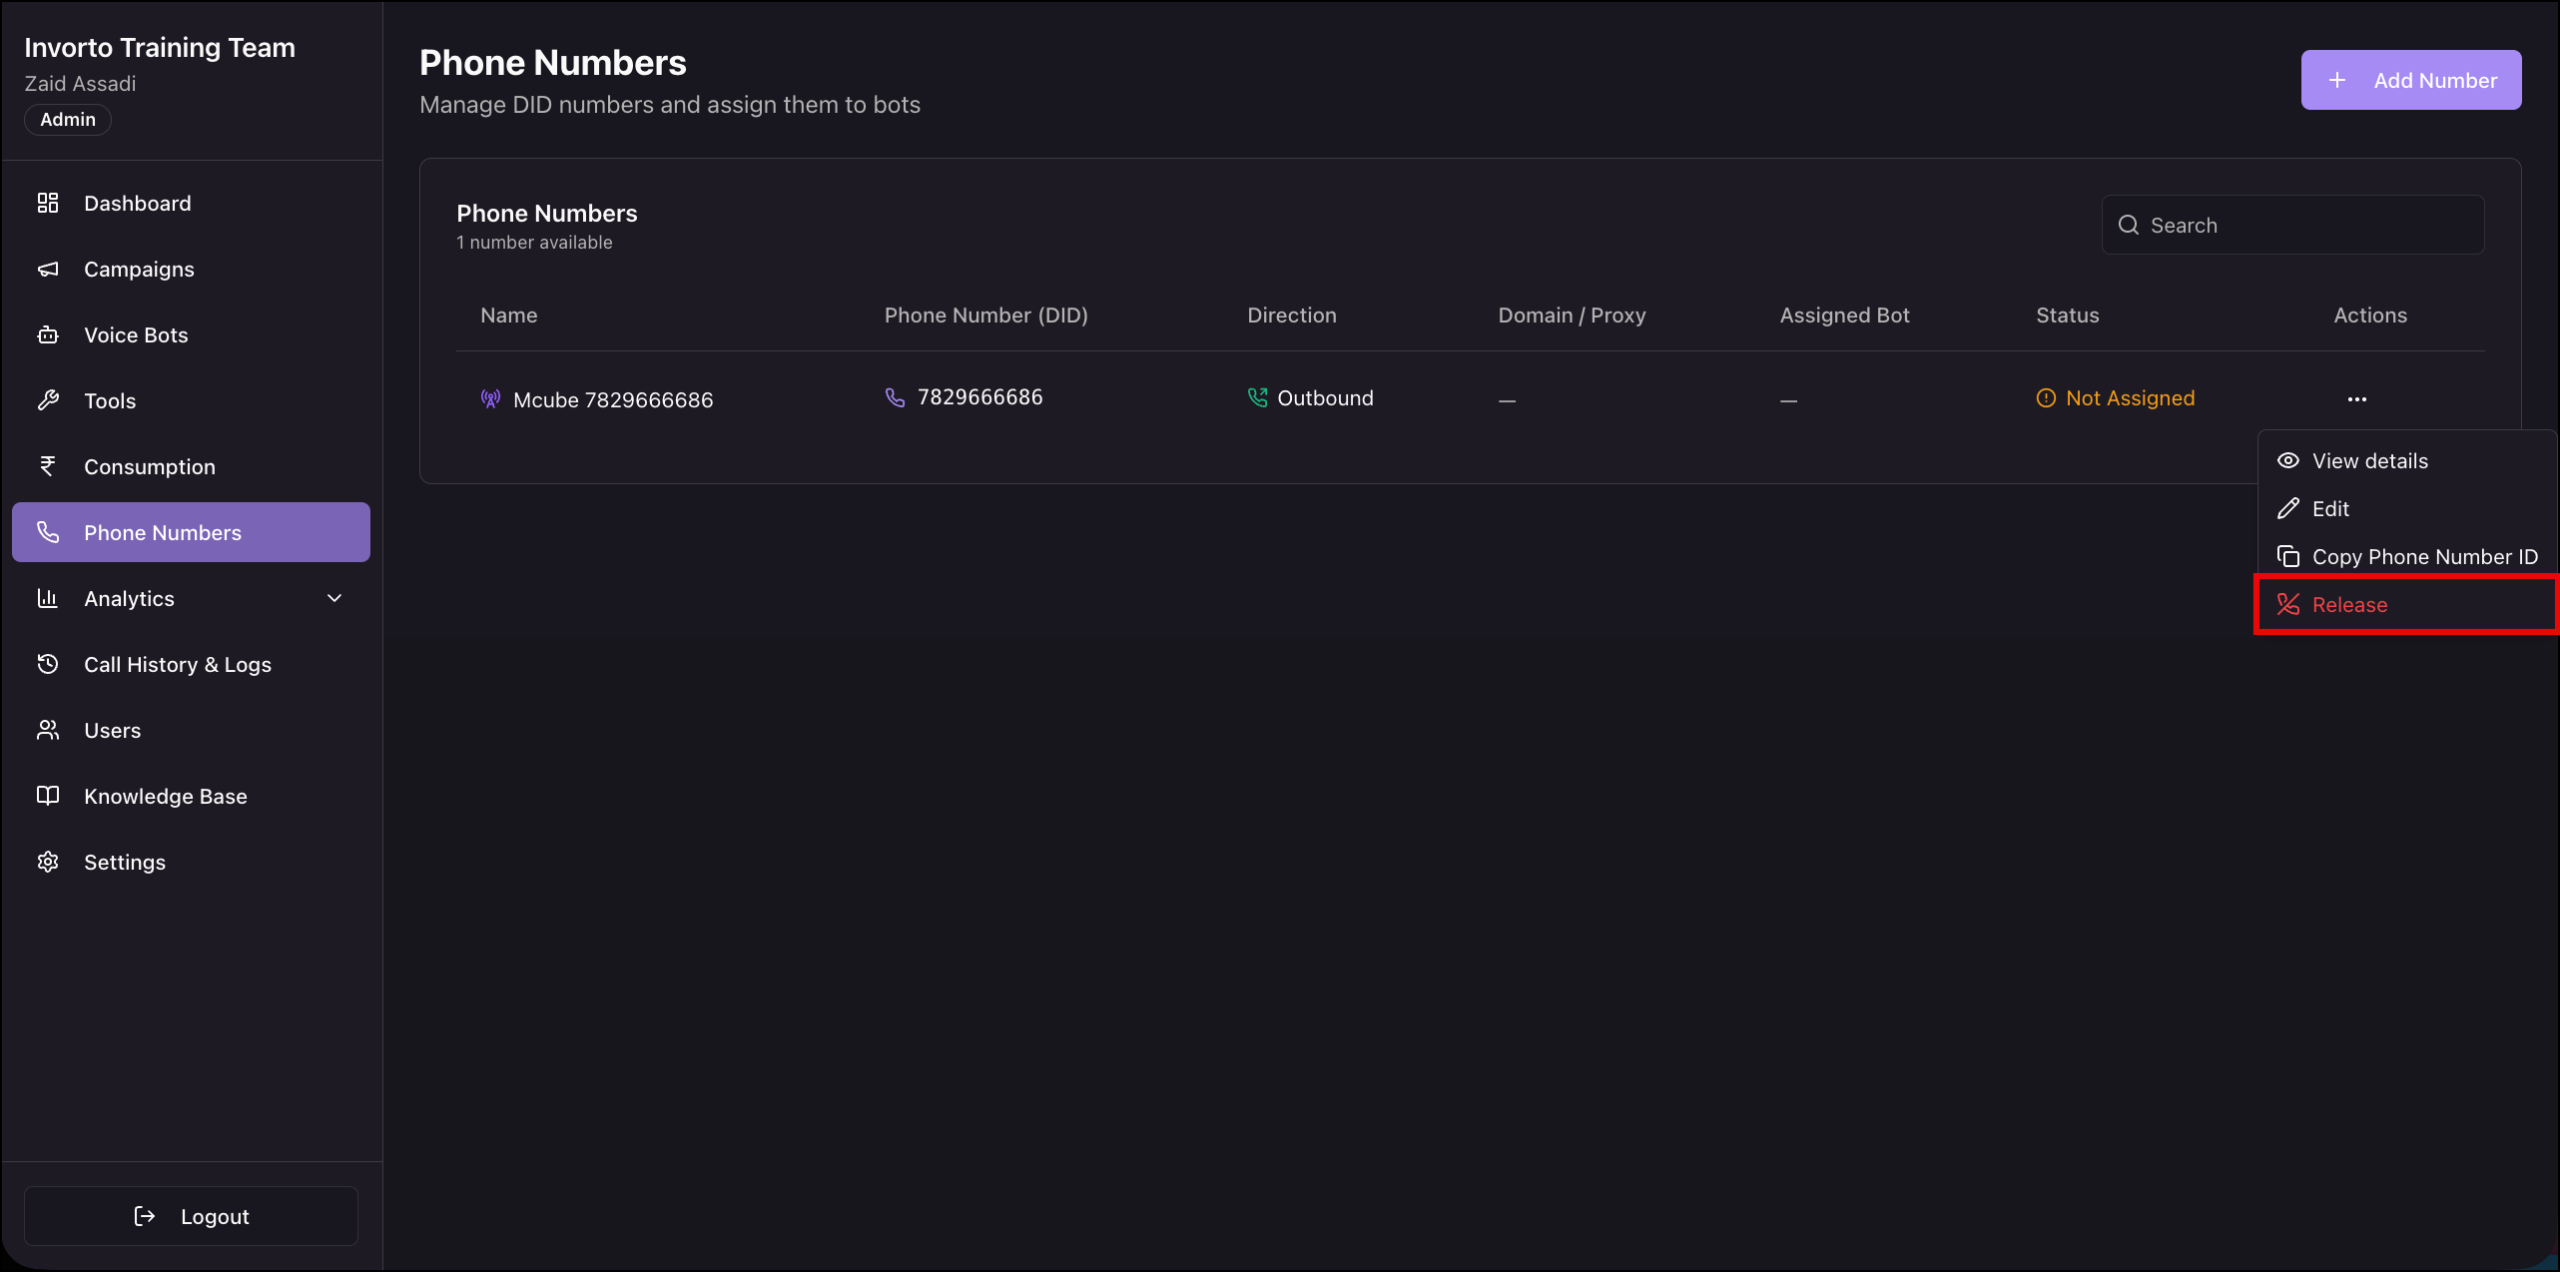
Click the row actions menu in the Actions column to open the available actions.
| Action | What it does |
| View details | Opens a read-only panel with the number’s full configuration. |
| Edit | Opens a panel where you can update the number’s settings. |
| Manage Overflow | Sets what happens to an inbound call when the assigned bot is unavailable. This action appears on inbound numbers only. |
| Copy Phone Number ID | Copies the number’s identifier to your clipboard. |
| Release | Returns the number to the platform pool. |
4. Add a Phone Number and Assign a Direction
Adding a number registers a DID you have already bought from your telephony provider. This panel does not buy a number for you. It tells Invorto how to route calls on a number you already own.
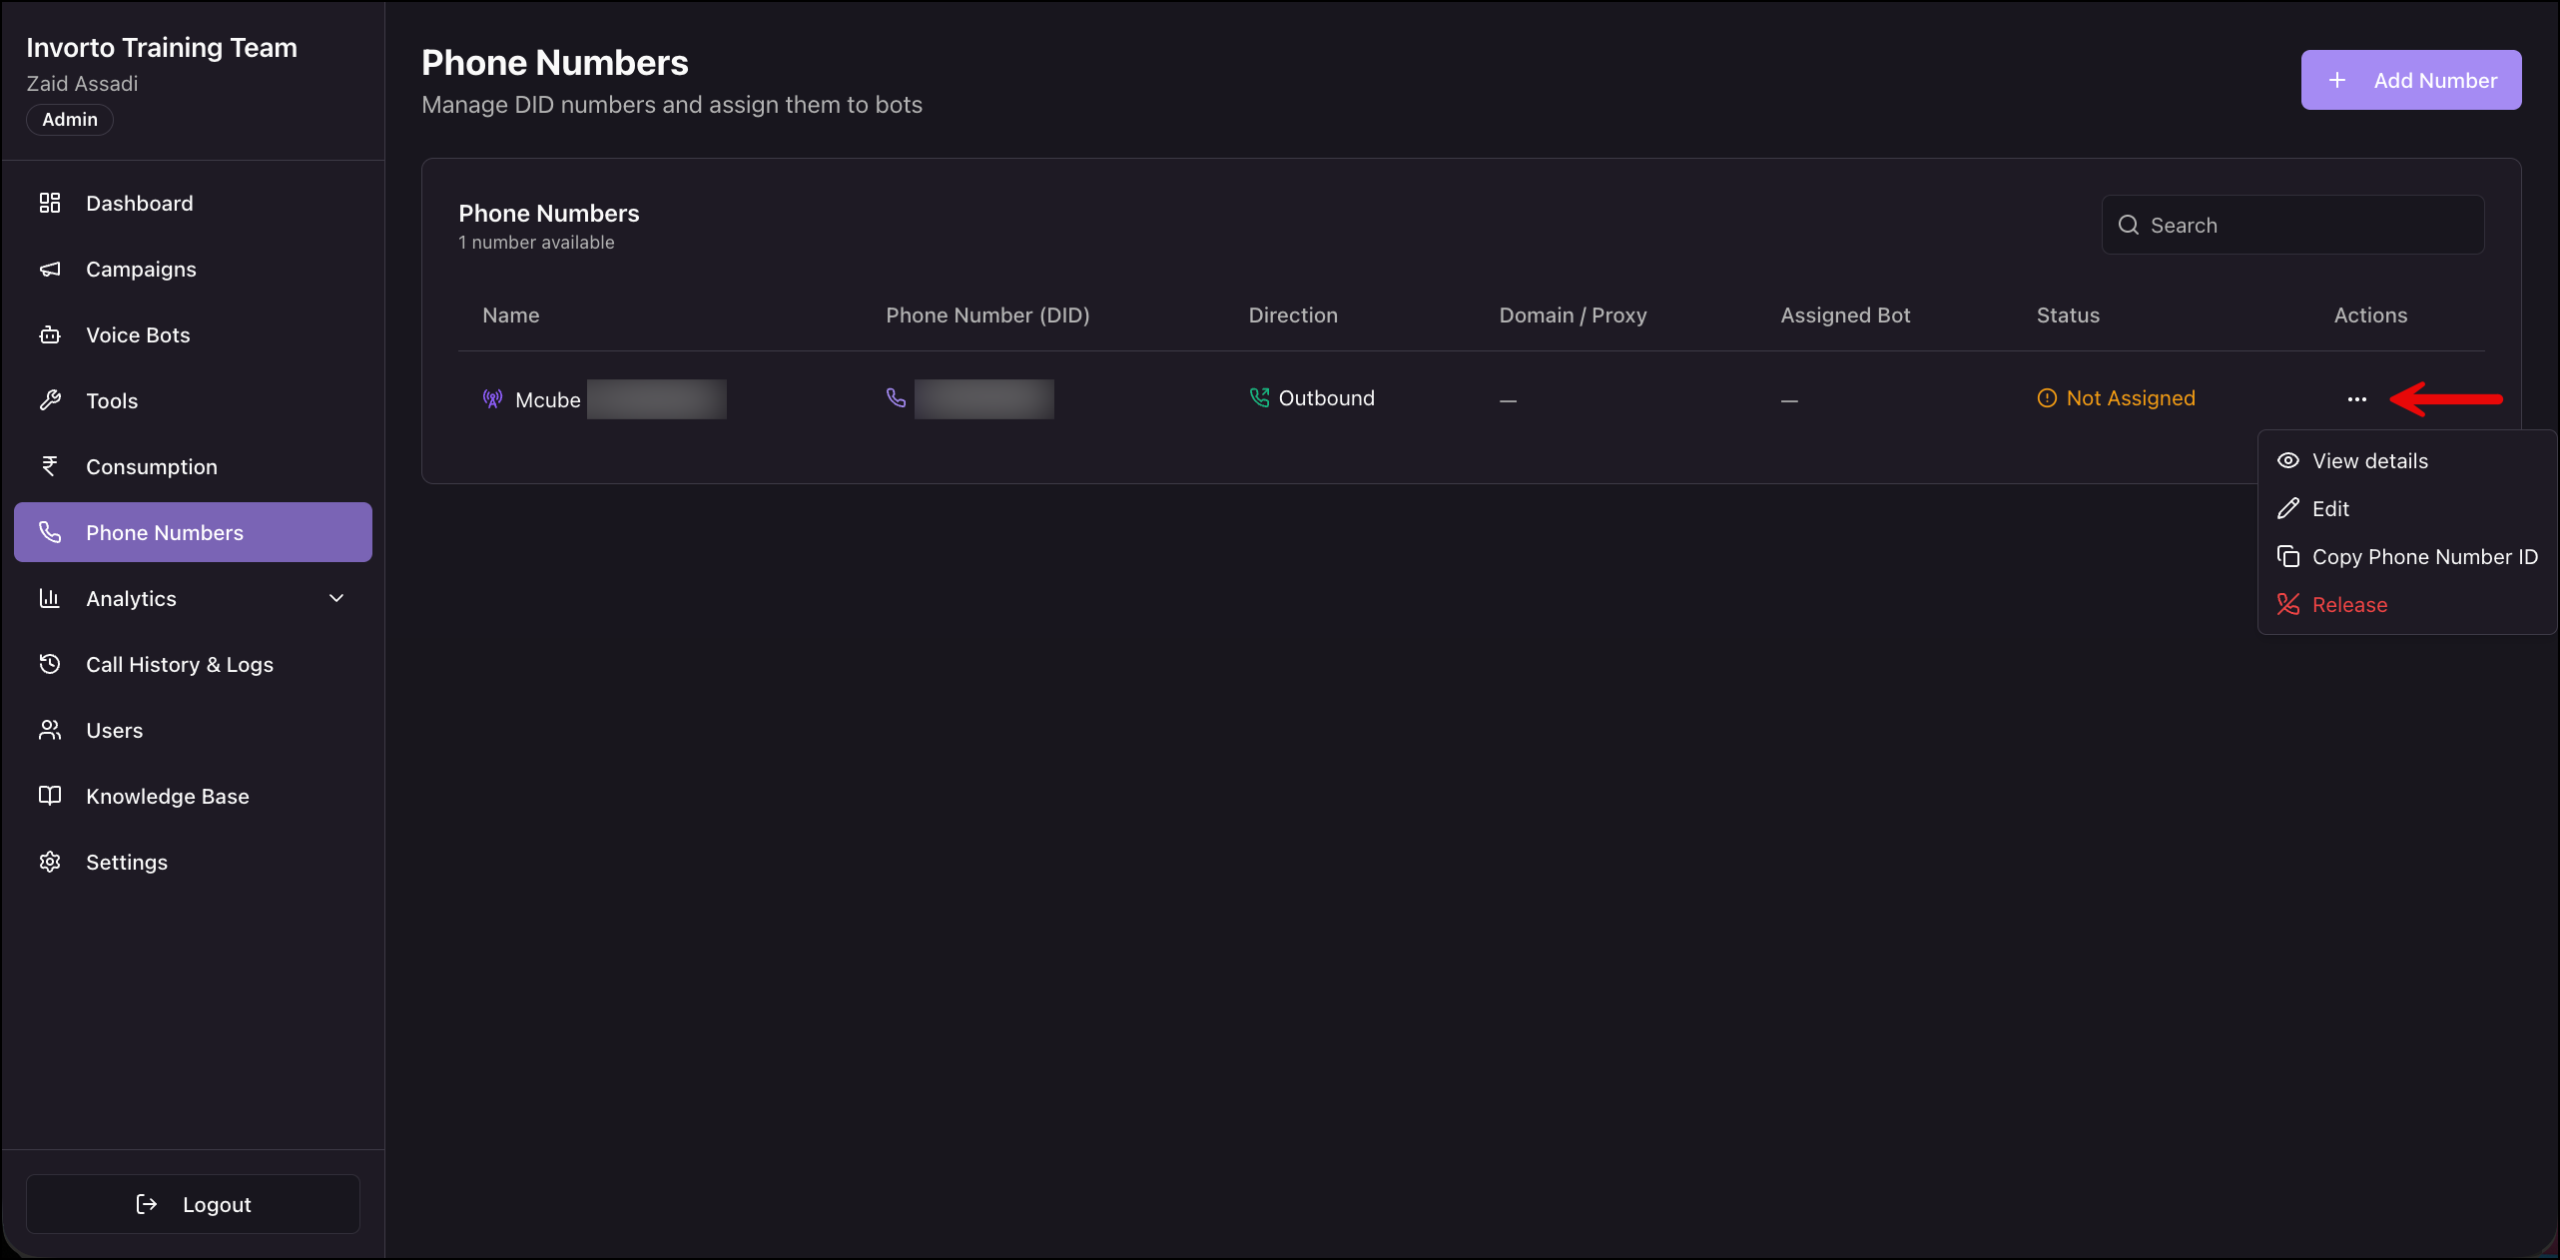
Click + Add Number in the top right an follow the tables below, these fields appear in whichever direction you choose (fields marked * are required) –
| Field | What it controls |
| Friendly Name* | The name shown in the Name column. Use a name that says what the number is for, such as a support line. |
| Phone Number* | The DID in the format your carrier expects. It cannot be changed later. |
| Carrier* | The telephony provider that supplies the number. Only the providers listed here are supported. |
| Direction* | Whether the number places calls or receives them. |
| Username | The SIP username, under Optional Settings. |
| Password | The SIP password, under Optional Settings. |
4.1 Fields for an Outbound Number
| Field | What it controls |
| Domain / Proxy* | The SIP domain or proxy Invorto sends calls to. |
| Transport | The SIP transport protocol. The portal shows the default beneath the field. |
| Outbound Caller ID | The number shown to the person you call. |
4.2 Fields for an Inbound Number
| Field | What it controls |
| Inbound Bot* | The bot that answers calls on this number. |
| Allowed IP Addresses | The source addresses permitted to send calls to this number. |
4.3 Restrict Inbound Access with Allowed IP Addresses
Allowed IP Addresses controls which sources can send calls to an inbound number. Each entry is an IP address with a network mask, and you can add more than one. If you add no addresses, Invorto accepts calls to this number from any source.
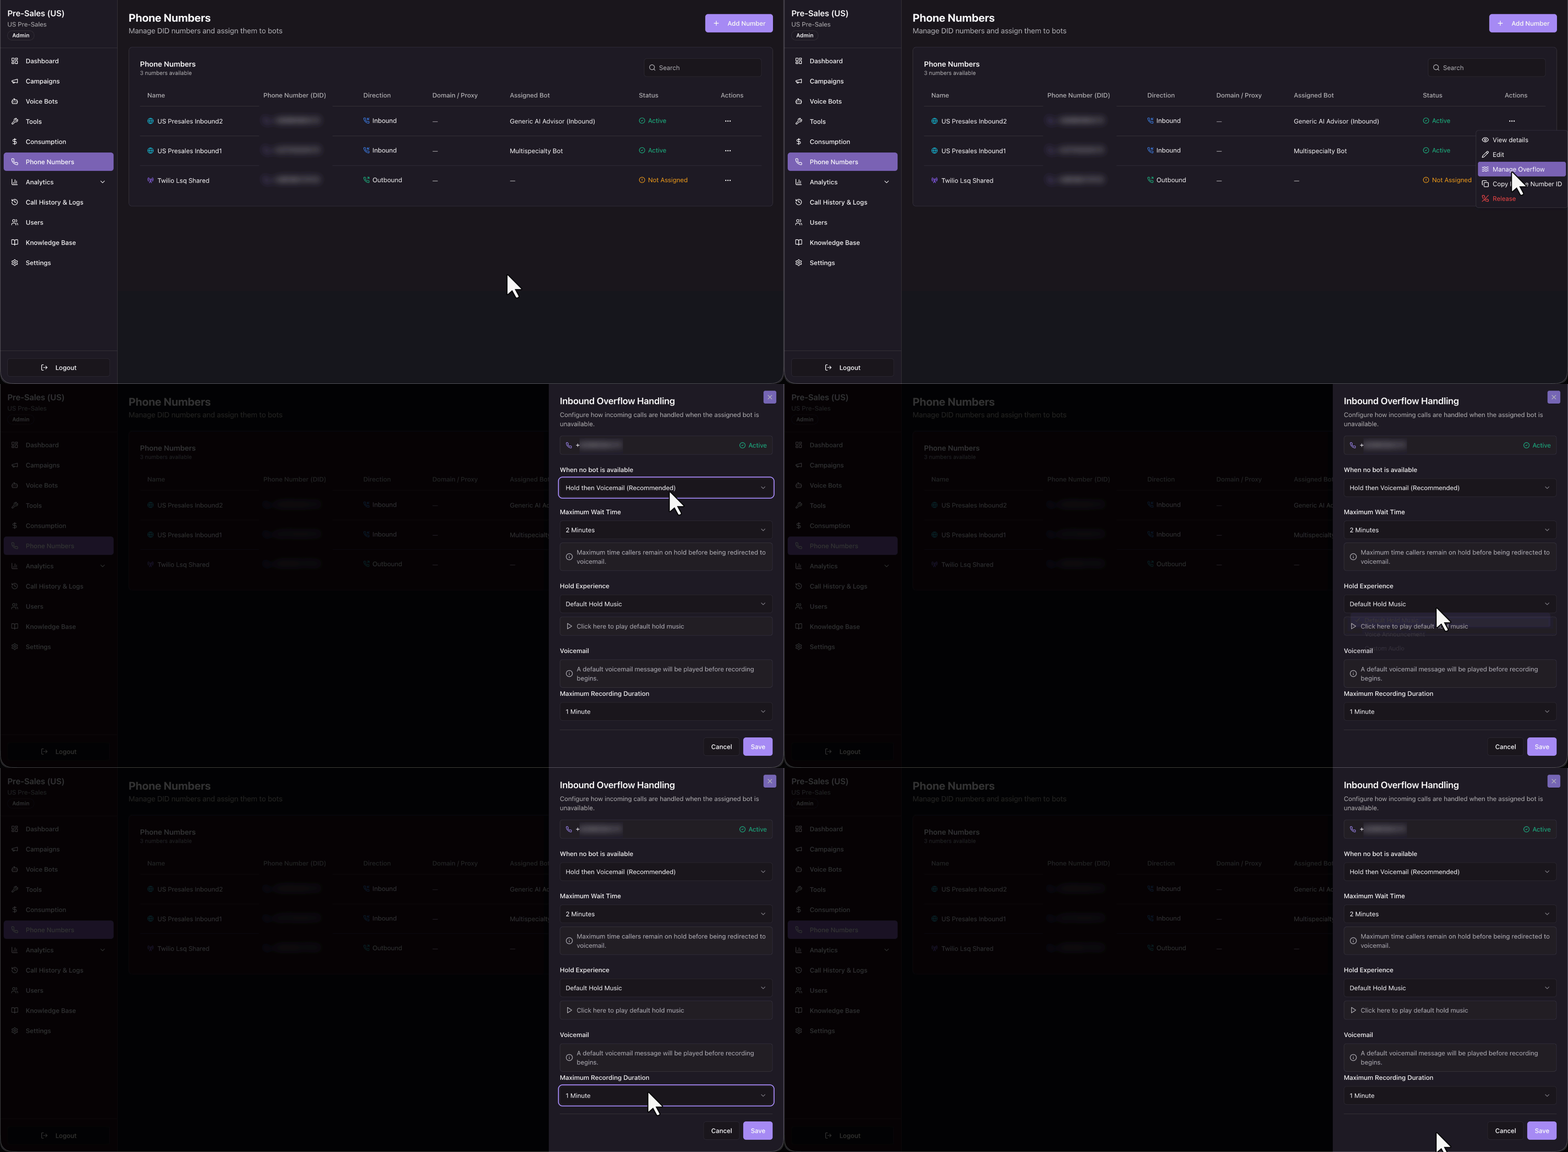
5. Configure Inbound Overflow Handling
An inbound call can arrive when the assigned bot has no free channel. Overflow handling decides what the caller hears instead of an unanswered line.
- Find the inbound number’s row.
- Click the row actions menu in the Actions
- Click Manage Overflow.
- Select an option under When no bot is available –
-
- Hold the Voicemail – The caller is placed on hold. If no bot becomes free within the wait time, Invorto sends the caller to voicemail.
- Maximum Wait Time – How long callers stay on hold before Invorto redirects them to voicemail.
- Hold Experience – What the caller hears while on hold.
- Default Hold Music – Plays the built-in hold music. Click the play control below the field to hear it before you save.
- Voice Announcement – Reads out a message you type. Set a Repeat Interval to control how often the message repeats.
- Custom Audio – Plays an audio file you supply.
- Maximum Recording Duration – How long a voicemail recording can run.
- Disconnect Call – The call ends. Enter a message that’s played.
- Hold the Voicemail – The caller is placed on hold. If no bot becomes free within the wait time, Invorto sends the caller to voicemail.
-
- Click Save.
6. Select an Outbound Number for a Campaign
Outbound numbers are chosen on the campaign, not on this page. Refer to this article for more information: <link>
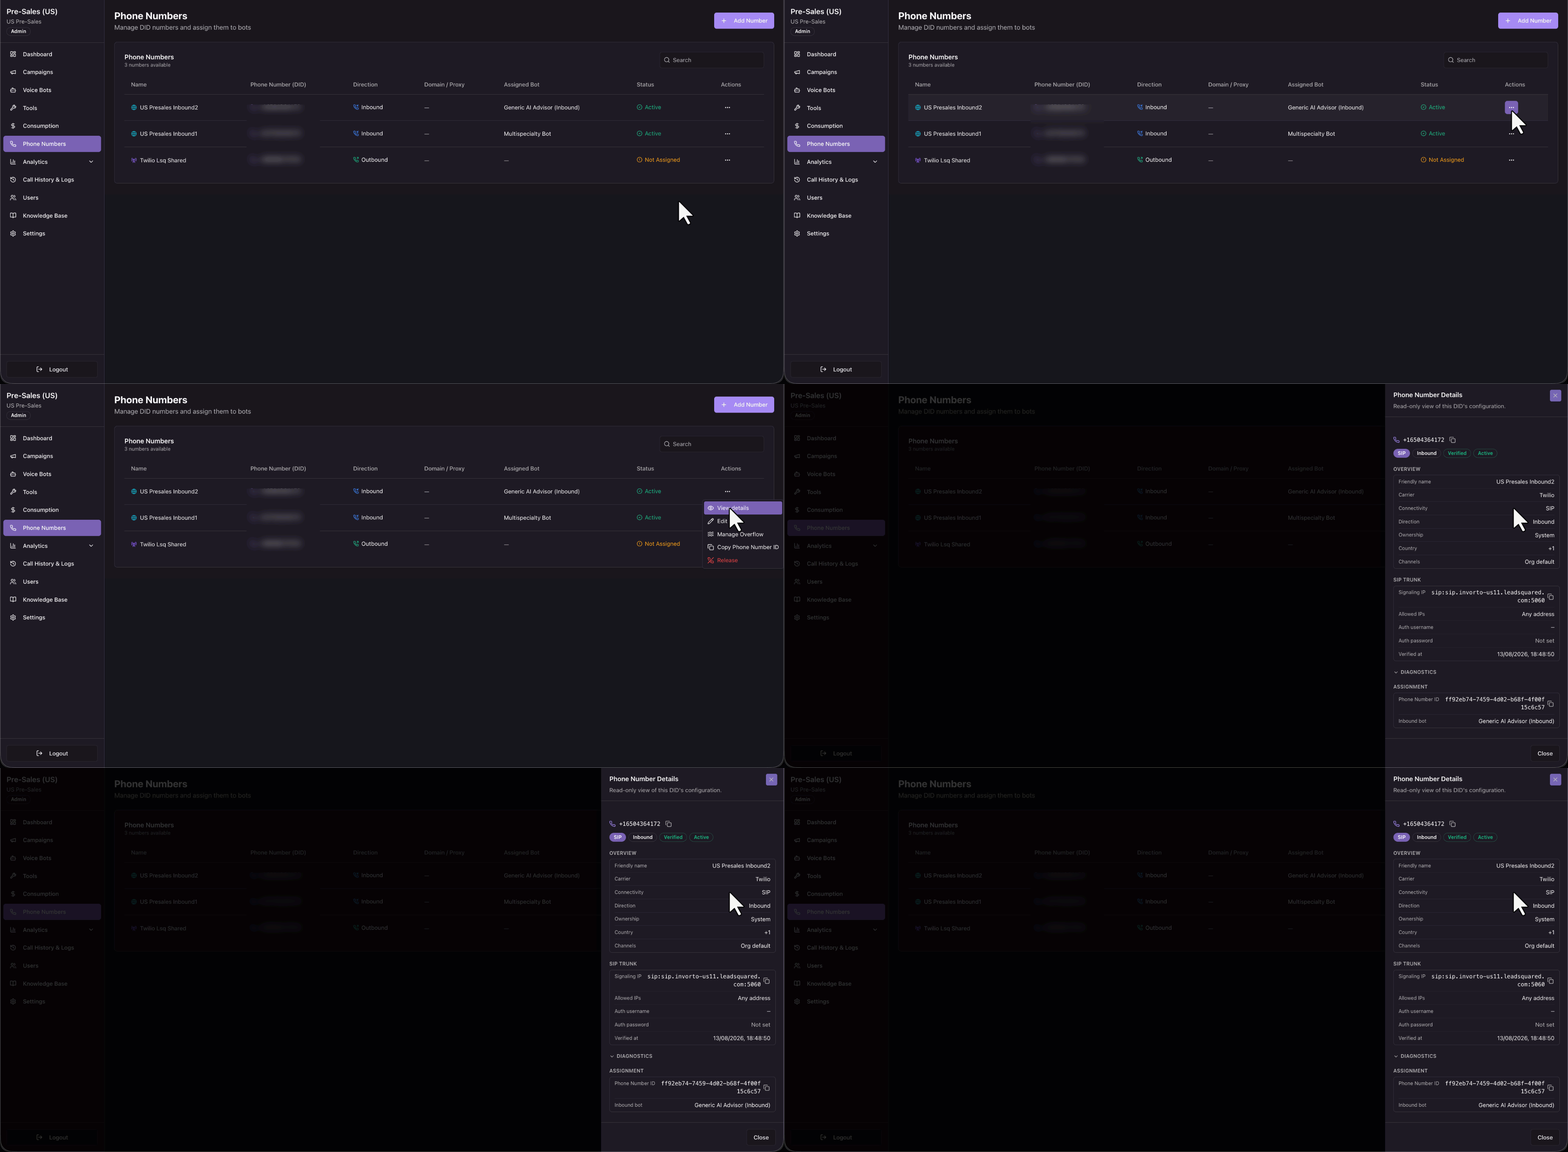
7. View a Number’s Configuration
The details panel is the quickest way to check how a number is set up without risking a change.
- Find the number’s row.
- Click the row actions menu in the Actions
- Click View details.
- Click Close when you are done.
Chips below the number summarize it at a glance: how the number connects, its direction, whether it has been verified, and whether it is active.
7.1 Overview
The Overview section appears for every number.
| Field | What it shows |
| Friendly name | The name shown in the Name column. |
| Carrier | The telephony provider that supplies the number. |
| Connectivity | How the number connects to Invorto. |
| Direction | Whether the number places calls or receives them. |
| Ownership | Who provisioned the number. A value of system means a platform admin provisioned it for you. |
| Country | The country code for the number. |
| Channels | The concurrency limit that applies to this number. |
7.2 Connectivity and the Section Beneath It
Connectivity tells you how calls reach Invorto, and it decides which section the panel shows next.
| Connectivity | What it means | Section shown |
| Carrier | The number connects through the carrier’s own network. | Carrier |
| SIP | The number connects over a SIP trunk. | SIP Trunk |
The Carrier section holds one field, Number type, which tells you whether the number is shared or held for your organization alone.
7.3 SIP Trunk
This section holds the routing and security details for the trunk.
| Field | What it shows |
| Signaling IP | The address your carrier sends calls to. Click the copy icon to copy it into your carrier’s configuration. |
| Allowed IPs | The source addresses permitted to send calls to this number. |
| Auth username | The SIP username, if one is set. |
| Auth password | Whether a SIP password is set. |
| Verified at | When Invorto last confirmed the trunk was working. |
Note:
- An Allowed IPs value of any address means Invorto accepts calls to this number from any source. Add your carrier’s addresses so only your carrier can send calls to the number. See section 5.3.
- A Verified chip and a Verified at timestamp mean Invorto has confirmed the trunk is reachable. Quote the timestamp when you raise a support ticket about inbound calls that are not arriving.
7.4 Diagnostics
Diagnostics holds the identifiers Invorto uses to route calls on this number. The section is collapsed by default. Click Diagnostics to expand it.
| Field | What it shows |
| Inbound trunk | The identifier for the trunk that carries inbound calls on this number. |
| Outbound trunk | The identifier for the trunk that carries outbound calls on this number. |
| Dispatch rule | The identifier for the rule that routes calls on this number to the assigned bot. |
A dash means no value is set for that field. Which trunk is populated depends on the number’s direction.
7.5 Assignment
The Assignment section appears for every number.
| Field | What it shows |
| Phone Number ID | The identifier you use in the call initiation API. Click the copy icon to copy it. |
| Assigned bot | The bot that answers calls on this number. On an inbound number this is labeled Inbound bot. |
8. Copy a Phone Number ID for an Integration
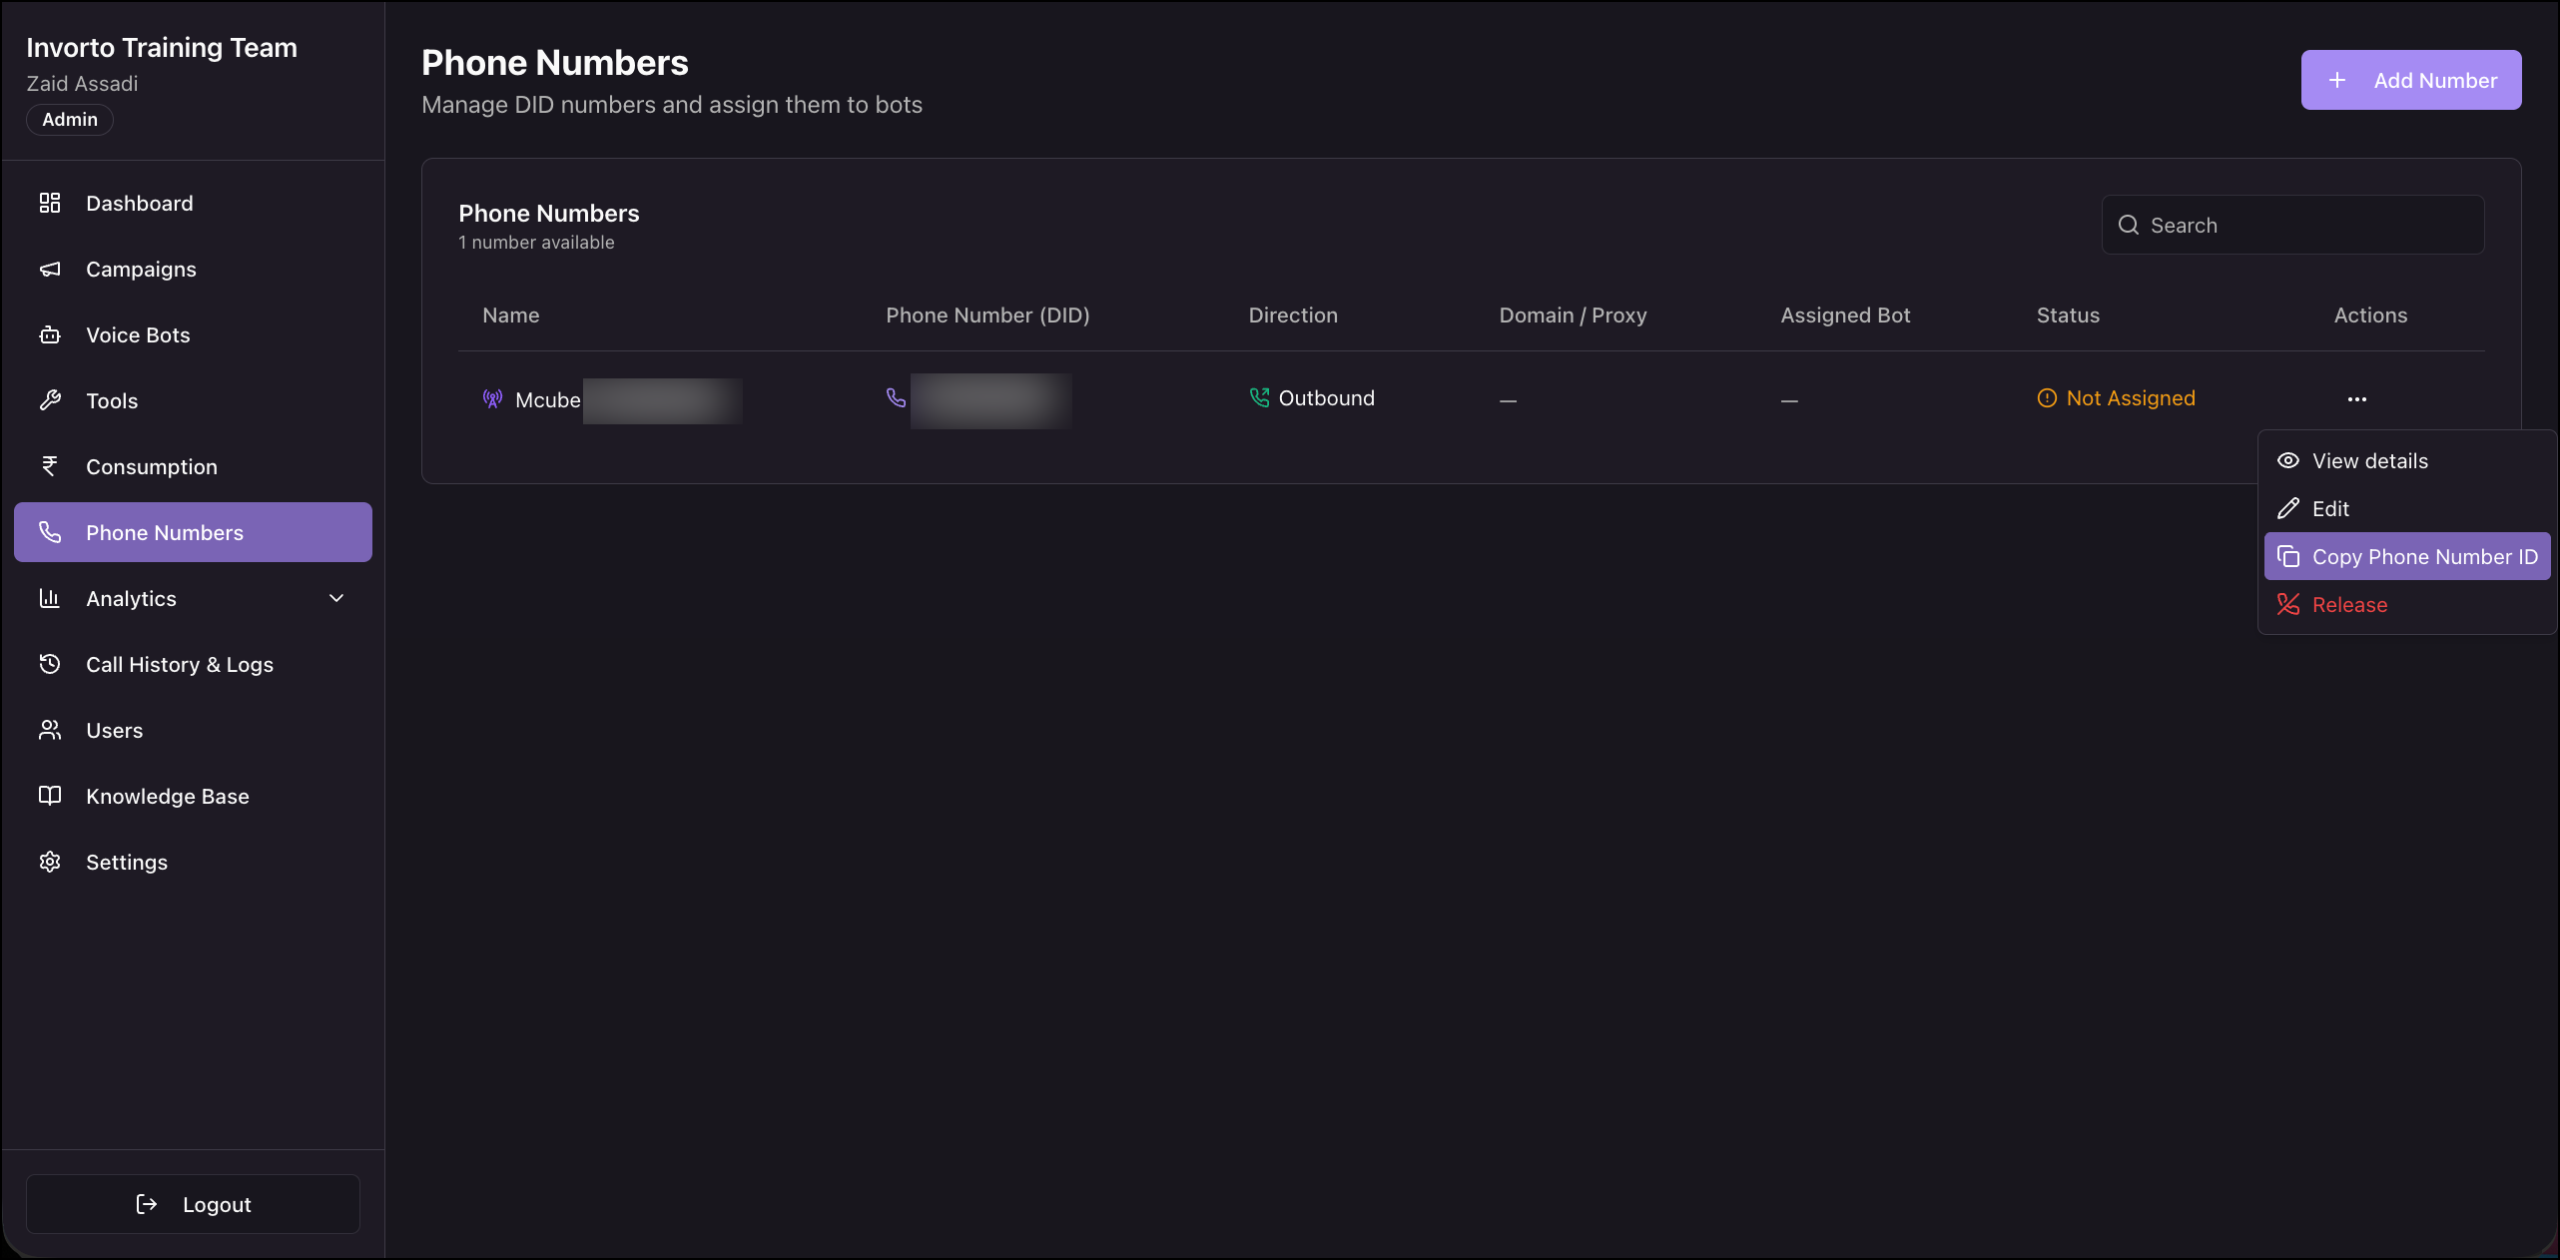
The call initiation API identifies the outbound number by its Phone Number ID, not by the number itself.
- Find the number you want to dial from.
- Click the row actions menu in the Actions
- Click Copy Phone Number ID.
- Paste the value into the phone number field of your API request.
9. Edit a Phone Number
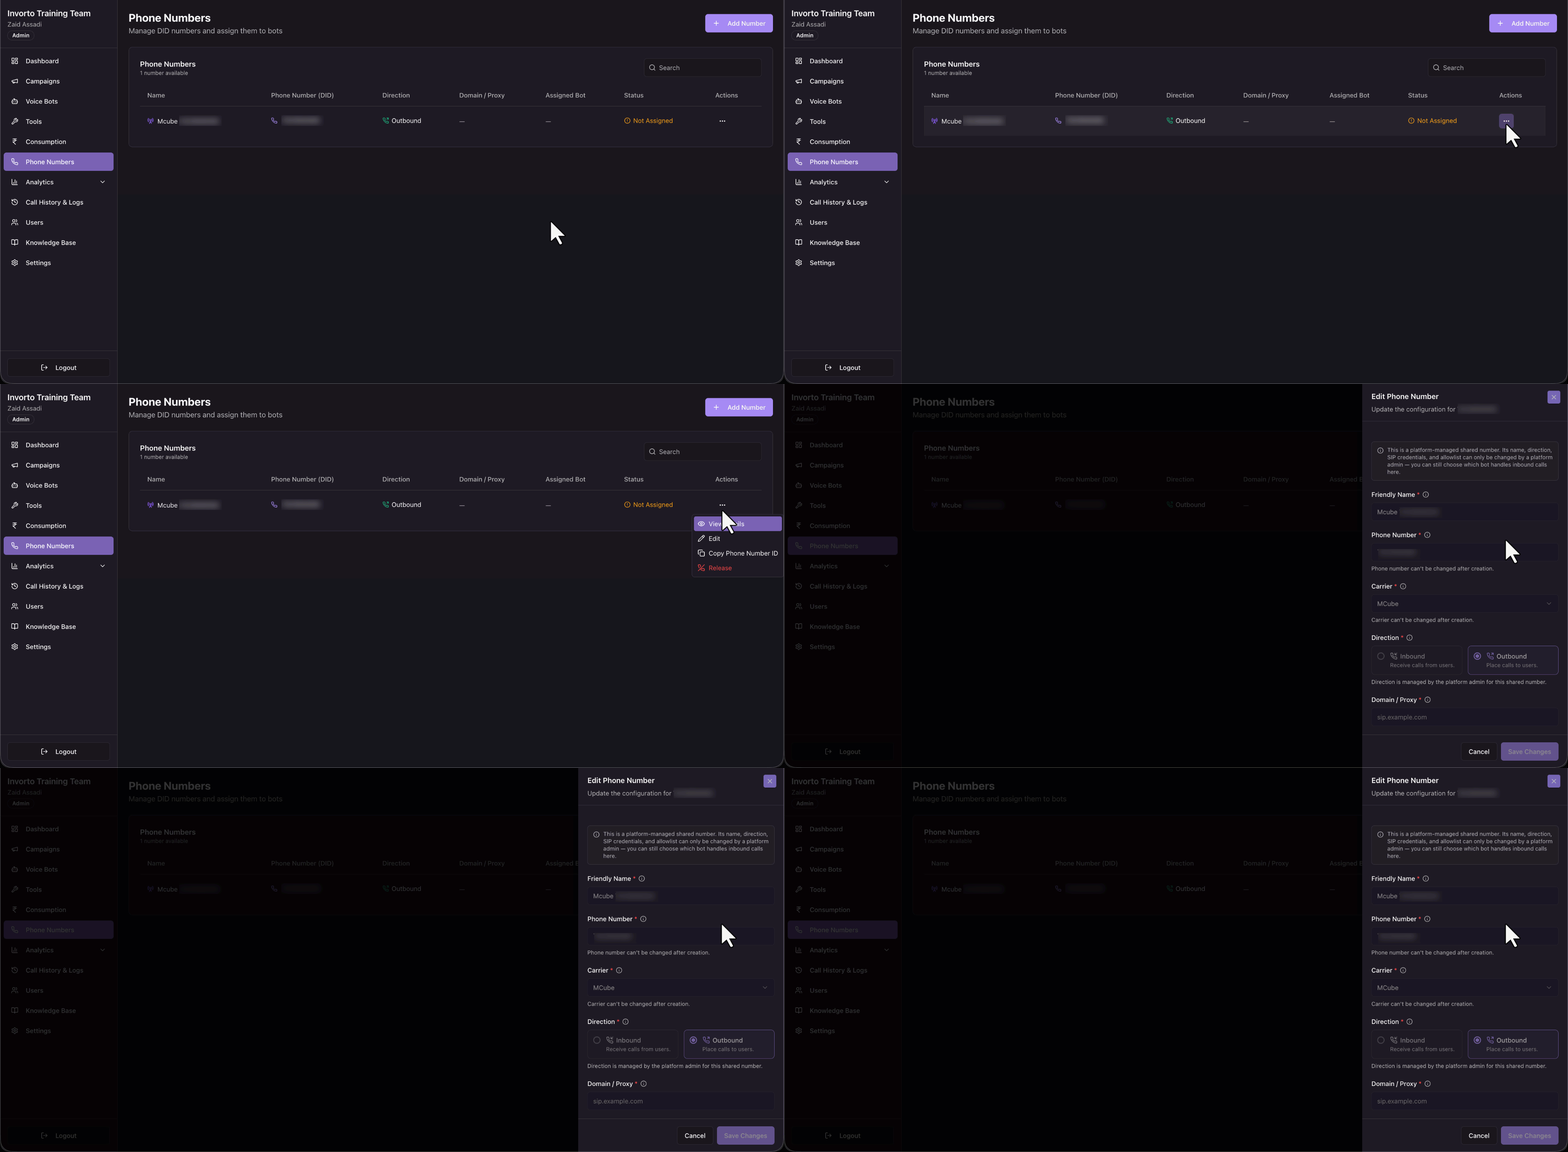
- Find the number’s row.
- Click the row actions menu in the Actions
- Click Edit.
- Update the fields you need to change.
- Click Save Changes.
The edit panel shows the same fields as the add panel, described in section 4. The phone number and the carrier are fixed once the number exists.
9.1 Platform-Managed Shared Numbers
Some numbers are provisioned for you as shared numbers and are managed by a platform admin. A banner at the top of the panel tells you when this applies.
On a platform-managed shared number, the name, direction, SIP credentials, and allowlist can only be changed by a platform admin. You can still choose which bot handles inbound calls on the number.
10. Release a Number
Releasing a number returns it to the platform pool. The number stays provisioned and can be assigned back later.
- Find the number’s row.
- Click the row actions menu in the Actions
- Click Release.
- On the Release Number? pop-up, check the phone number and assigned bot shown.
- Click Release.
Any Questions?
Did you find this article helpful? Please let us know any feedback you may have in the comments section below. We’d love to hear from you and help you out!