Cutomize Your Lead Details Page, LeadSquared Login Passwords for Your Users, and more…
Lead Management
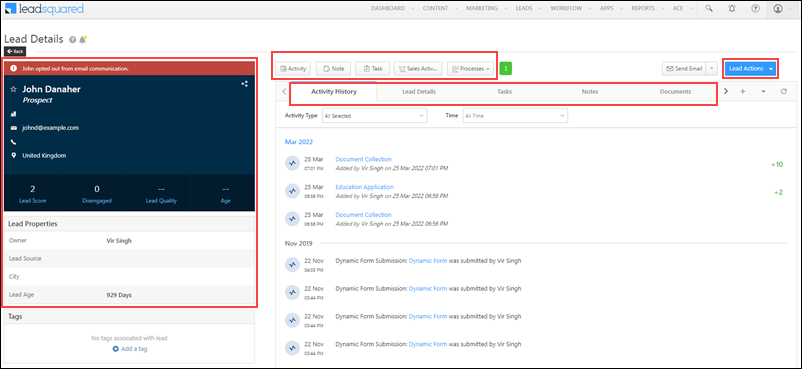
Admin users can now customize the Tabs, Actions, Buttons and Lead vCard on the Lead Details page to suit each Team’s requirements. To know more, refer to Lead Details Customization. To enable this on your account, contact your account manager, or write to support@leadsquared.com.
Security Settings
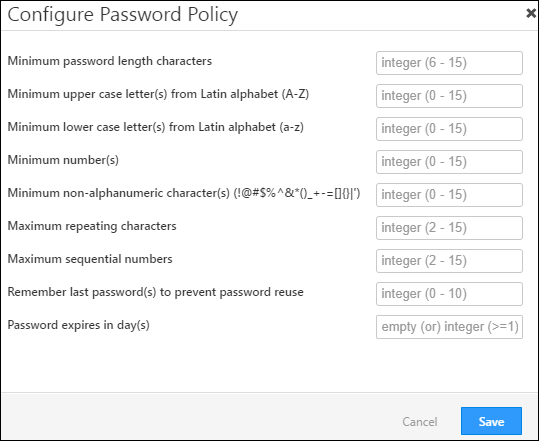
You can now customise the Password Policies (e.g., minimum password length allowed, minimum special characters allowed, etc.) for your account. To enable this setting, contact your account manager or write to support@leadsquared.com.
Opportunity Management
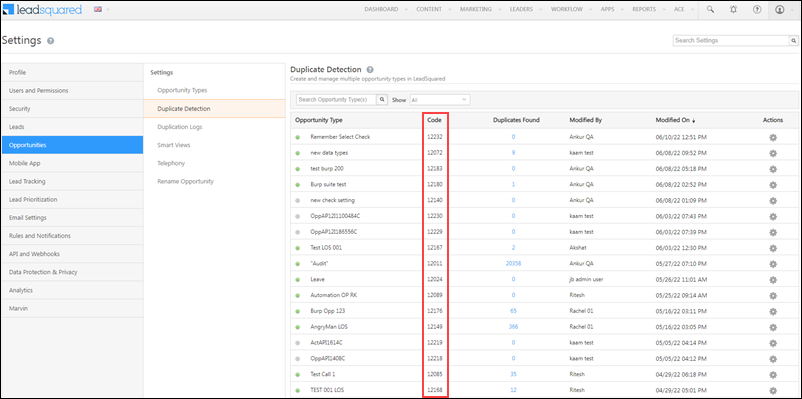
- On the Opportunity Duplicate Detection page, you can now view the Event Code for all the opportunity types in your account. Additionally, you can also sort the grid in ascending or descending order on the Duplicate Detection page.
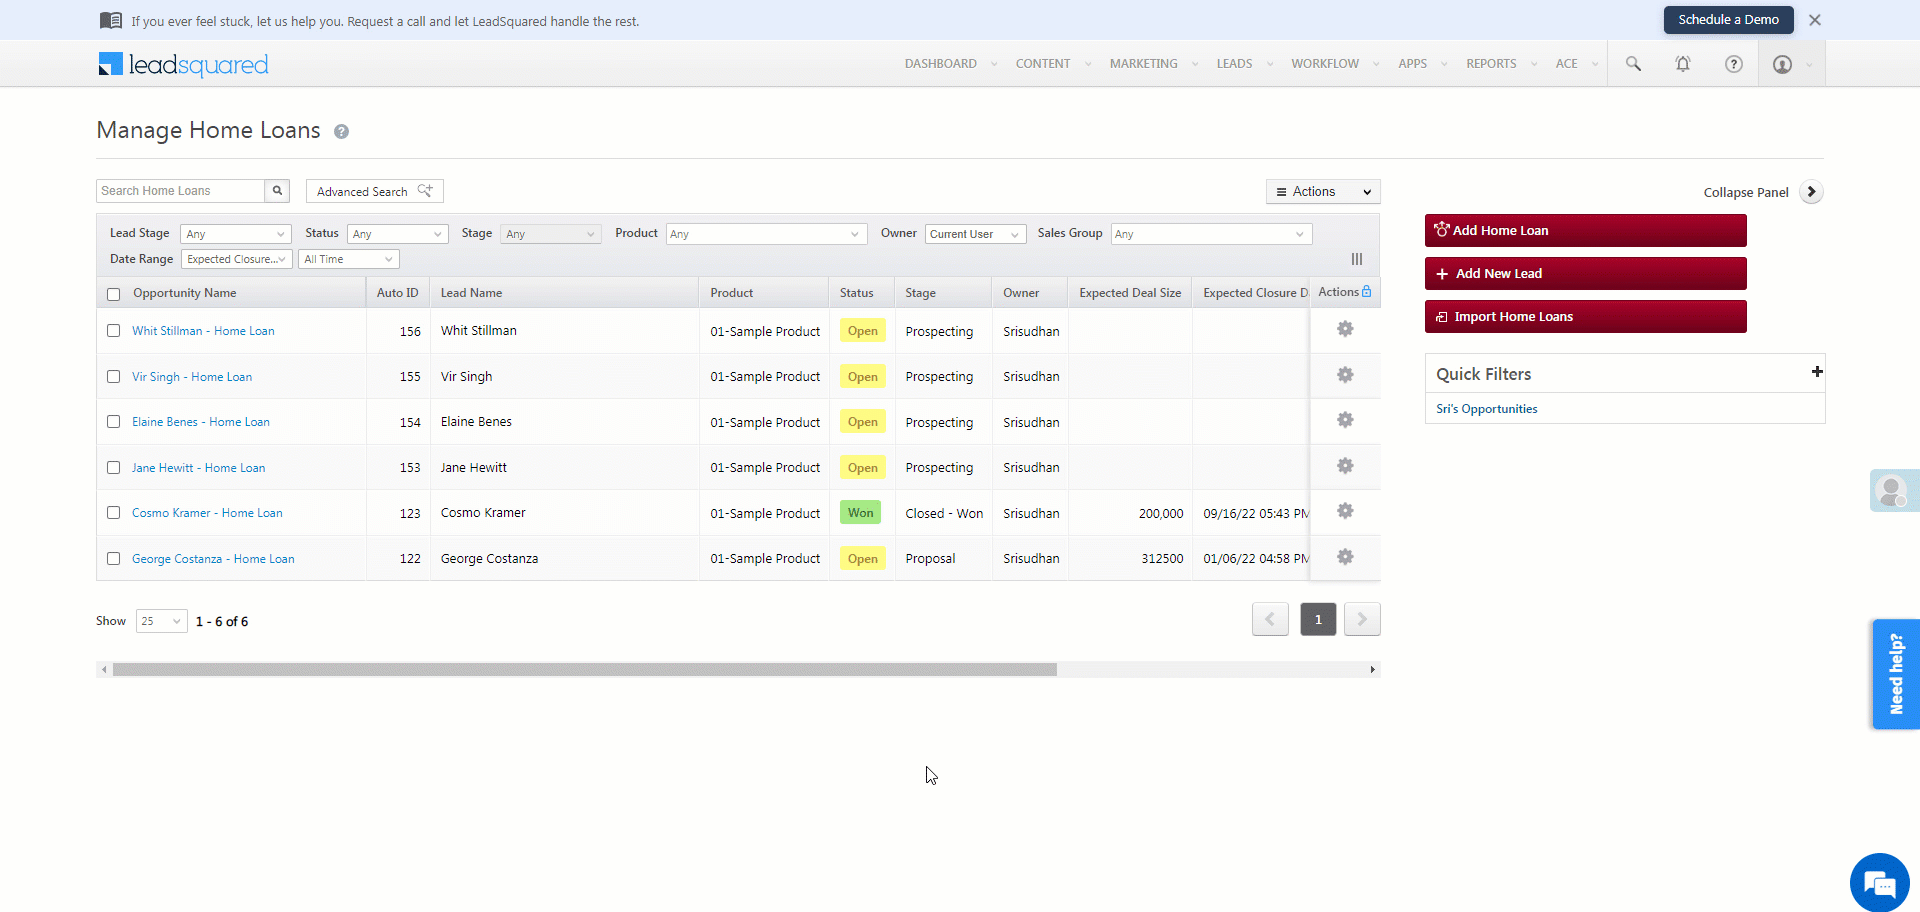
- On the Manage Opportunities page, in the Quick Search box, you can now enter the Opportunity Auto ID number to find the corresponding opportunity.
- You can now use the Add Opportunities in Bulk API to overwrite duplicate opportunities with the following parameters –
- OverwriteFields
- UpdateEmptyFields
- DoNotPostDuplicateActivity
- doNotChangeOwner
Automations
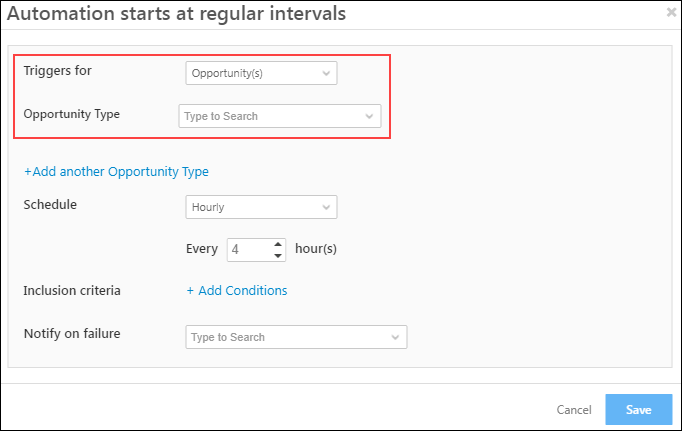
- You can now configure the At Regular Intervals automation triggers for Opportunities.
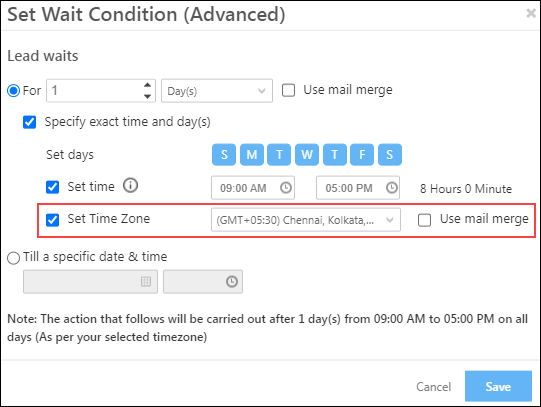
- We’ve released a new Set Wait Condition (Advanced), which allows you to select timezones on your Wait Condition card. This is useful for customers with leads in different timezones.
- In the lead-level automation report, for the Call Lapp action, you can now see the data posted on each CFS sub-field. This is helpful for debugging errors.
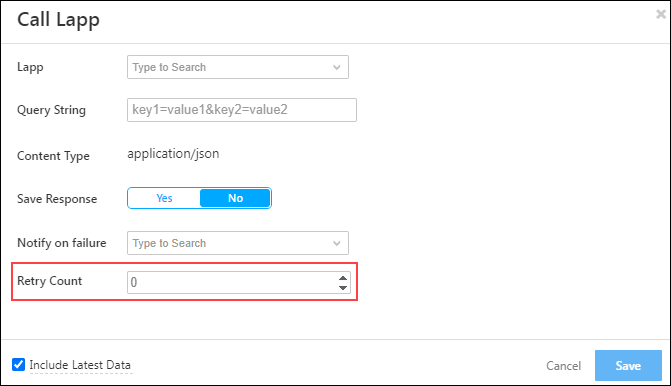
- On the Call Lap automation card, you can now set the Retry Count to zero (0). This is useful to avoid issues related to payment activities handled through Lapps.
Forms
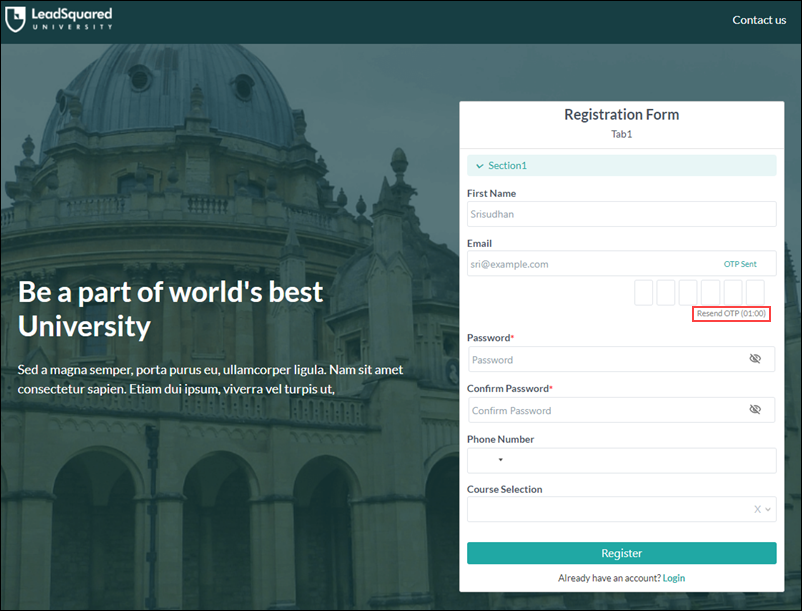
- On forms that require OTP verification, we’ve added a timer (with a wait time of 60-seconds) to resend the OTP. Leads will be able to request a new OTP only after the timer is completed. To change the wait time duration of the timer, contact your account manager or write to support@leadsquared.com.
- Now configure LeadSquared-generated webhooks in your payment provider’s account to capture payment events (made through dynamic form) more reliably in your LeadSquared account. This feature is currently available for the following payment providers –
- RazorPay
- PayUBiz
- PayUMoney
- EaseBuzz
- Paytm
For more information, see How to Add a Payment Gateway to a Form.
Telephony
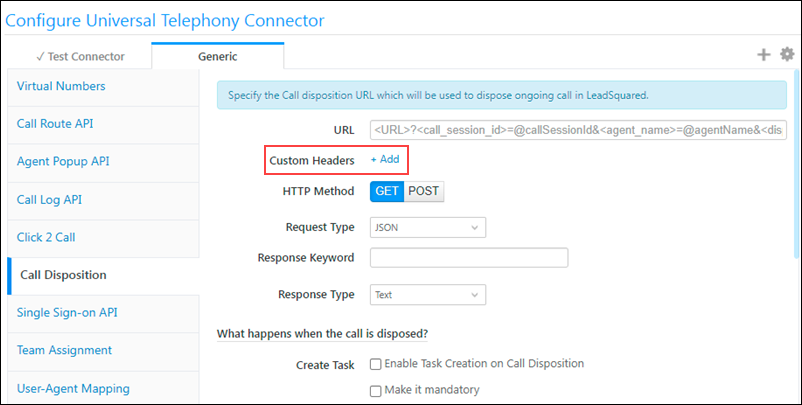
- In the Universal Telephony Connector (UTC) and LeadSquared Generic Telephony Connector (LGTC), you can now pass custom headers to the telephony provider’s call disposition API. Note that standard headers are not supported.
- You can now configure the Agent Pop-up to –
-
- Display the screen pop-up for incoming and outgoing calls. This is the default behavior.
- Re-direct to the lead details page (if the lead doesn’t exist in your account, it directs to the ‘Add New Lead’ form). This can be configured via the Advanced Configuration Setting – (My Profile>Settings>Profile>Organization Settings>Advanced Configuration, search for ‘Redirect to lead details page’).
- Both, display the screen pop-up, and direct to the lead details page. To enable both options, contact your account manager or write to support@leadsquared.com.
Advanced Configurations
We’ve added the following Organization Settings to give you more control over account level configurations –
- Enable Email Notification on Automation Failure
You can now select the list of users who’ll receive an automation failure email notification. To know more, refer to Enable Email Notification on Automation Failure.
- Enable Permission Templates for Account Management
Once enabled, you can now set Permission Templates to restrict your users from Viewing, Creating, Editing, Deleting, Exporting and Importing individual Accounts.
Custom Menus
Previously, you could only add and configure up to five custom menus using the Custom Menus for Web App connector. You can now configure as many custom menus as required. Contact your account manager or write to support@leadsquared.com to increase the limit.
Marketing
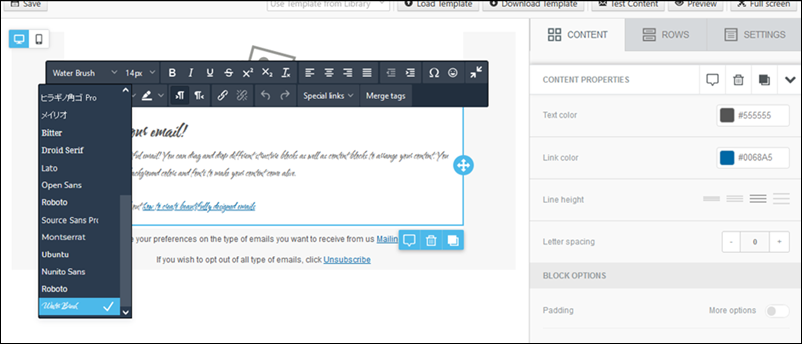
When creating emails using the Rich Text Editor on the Email Library and Email Campaigns pages, you can now add custom Google fonts to your emails. To enable this on your account, contact your account manager or write to support@leadsquared.com.