


Get Started

Sales Suite
Field Ops
Marketing
Service CRM
Integrations & Apps
FloStack
Invorto Voice Bot Organization Settings

1. Feature Overview
The Settings module on the Invorto Voice Bot holds the details that apply to your whole Invorto Voice Bot organization. Use it to check your plan, control how much of the organization’s activity members can see, manage API keys for integrations, and review what has happened to those keys.
The page has four sections: Organization Info, Member Visibility, API Keys, and the API key audit log.
2. Prerequisites
- An active Invorto Voice Bot account with admin rights. Creating API keys and changing member visibility are admin actions.
3. Open Settings
In the left navigation, click Settings.
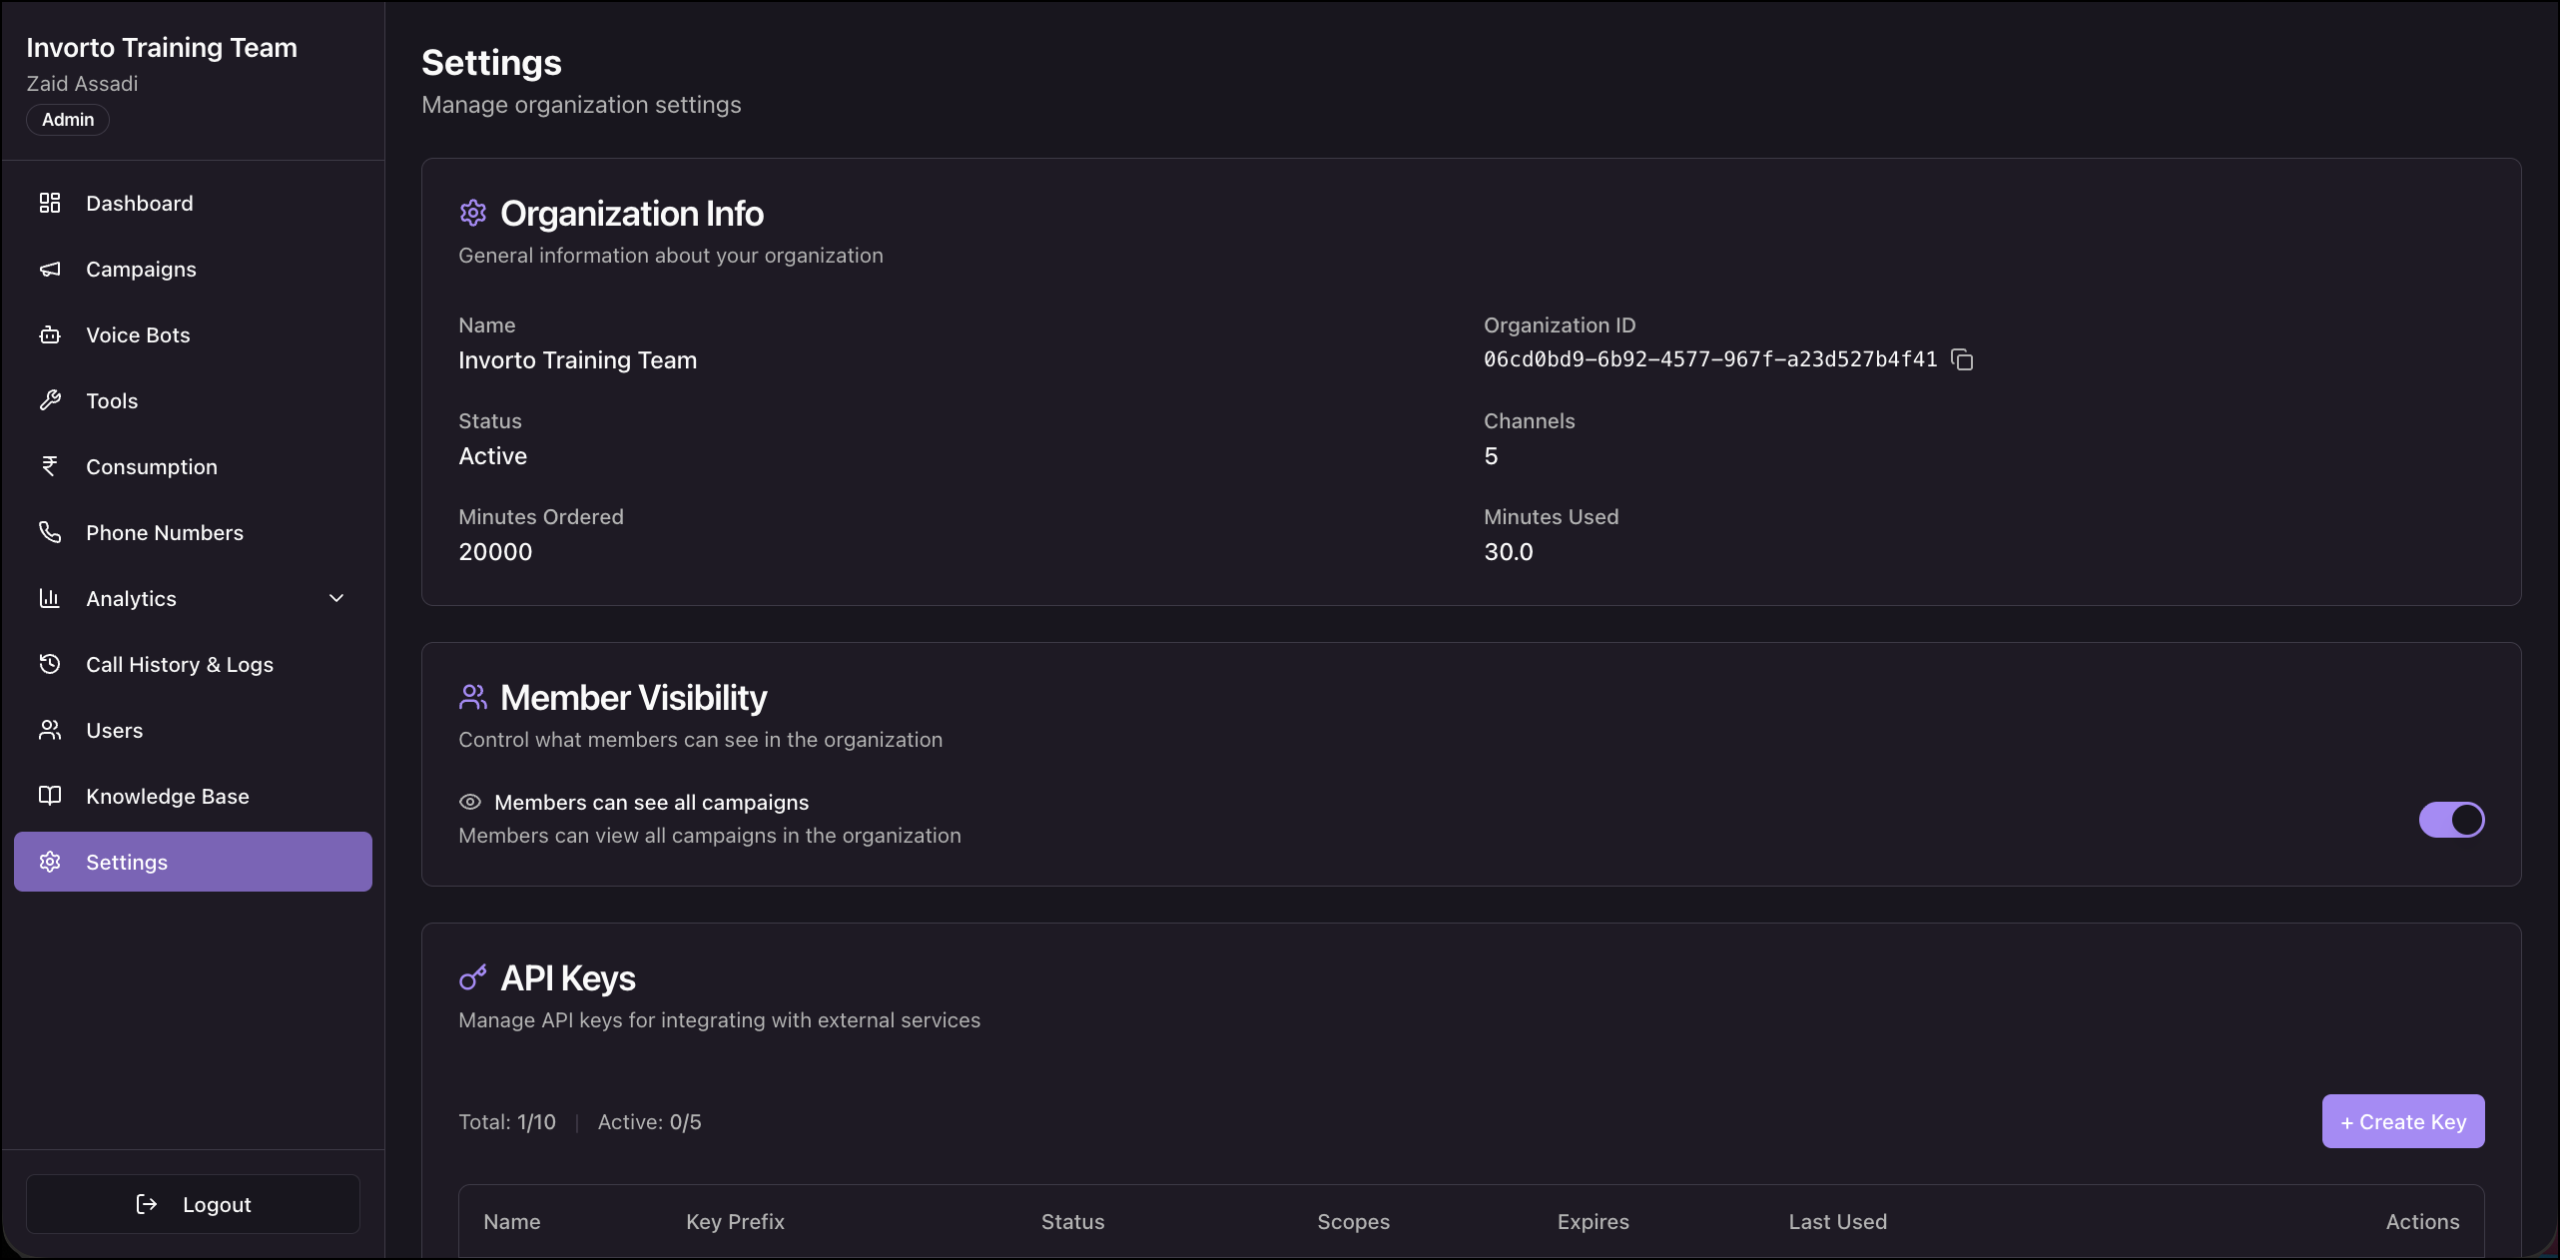
The Organization Info section is a read-only snapshot of your organization and your plan –
| Field | What it shows |
| Name | Your organization name. |
| Status | Whether the organization is active. |
| Minutes Ordered | The total talk minutes in your plan. |
| Minutes Used | The talk minutes consumed so far. |
| Organization ID | The unique identifier for your organization. Click the copy icon to copy it. |
| Channels | The number of calls that can run at the same time. |
4. Control Member Visibility
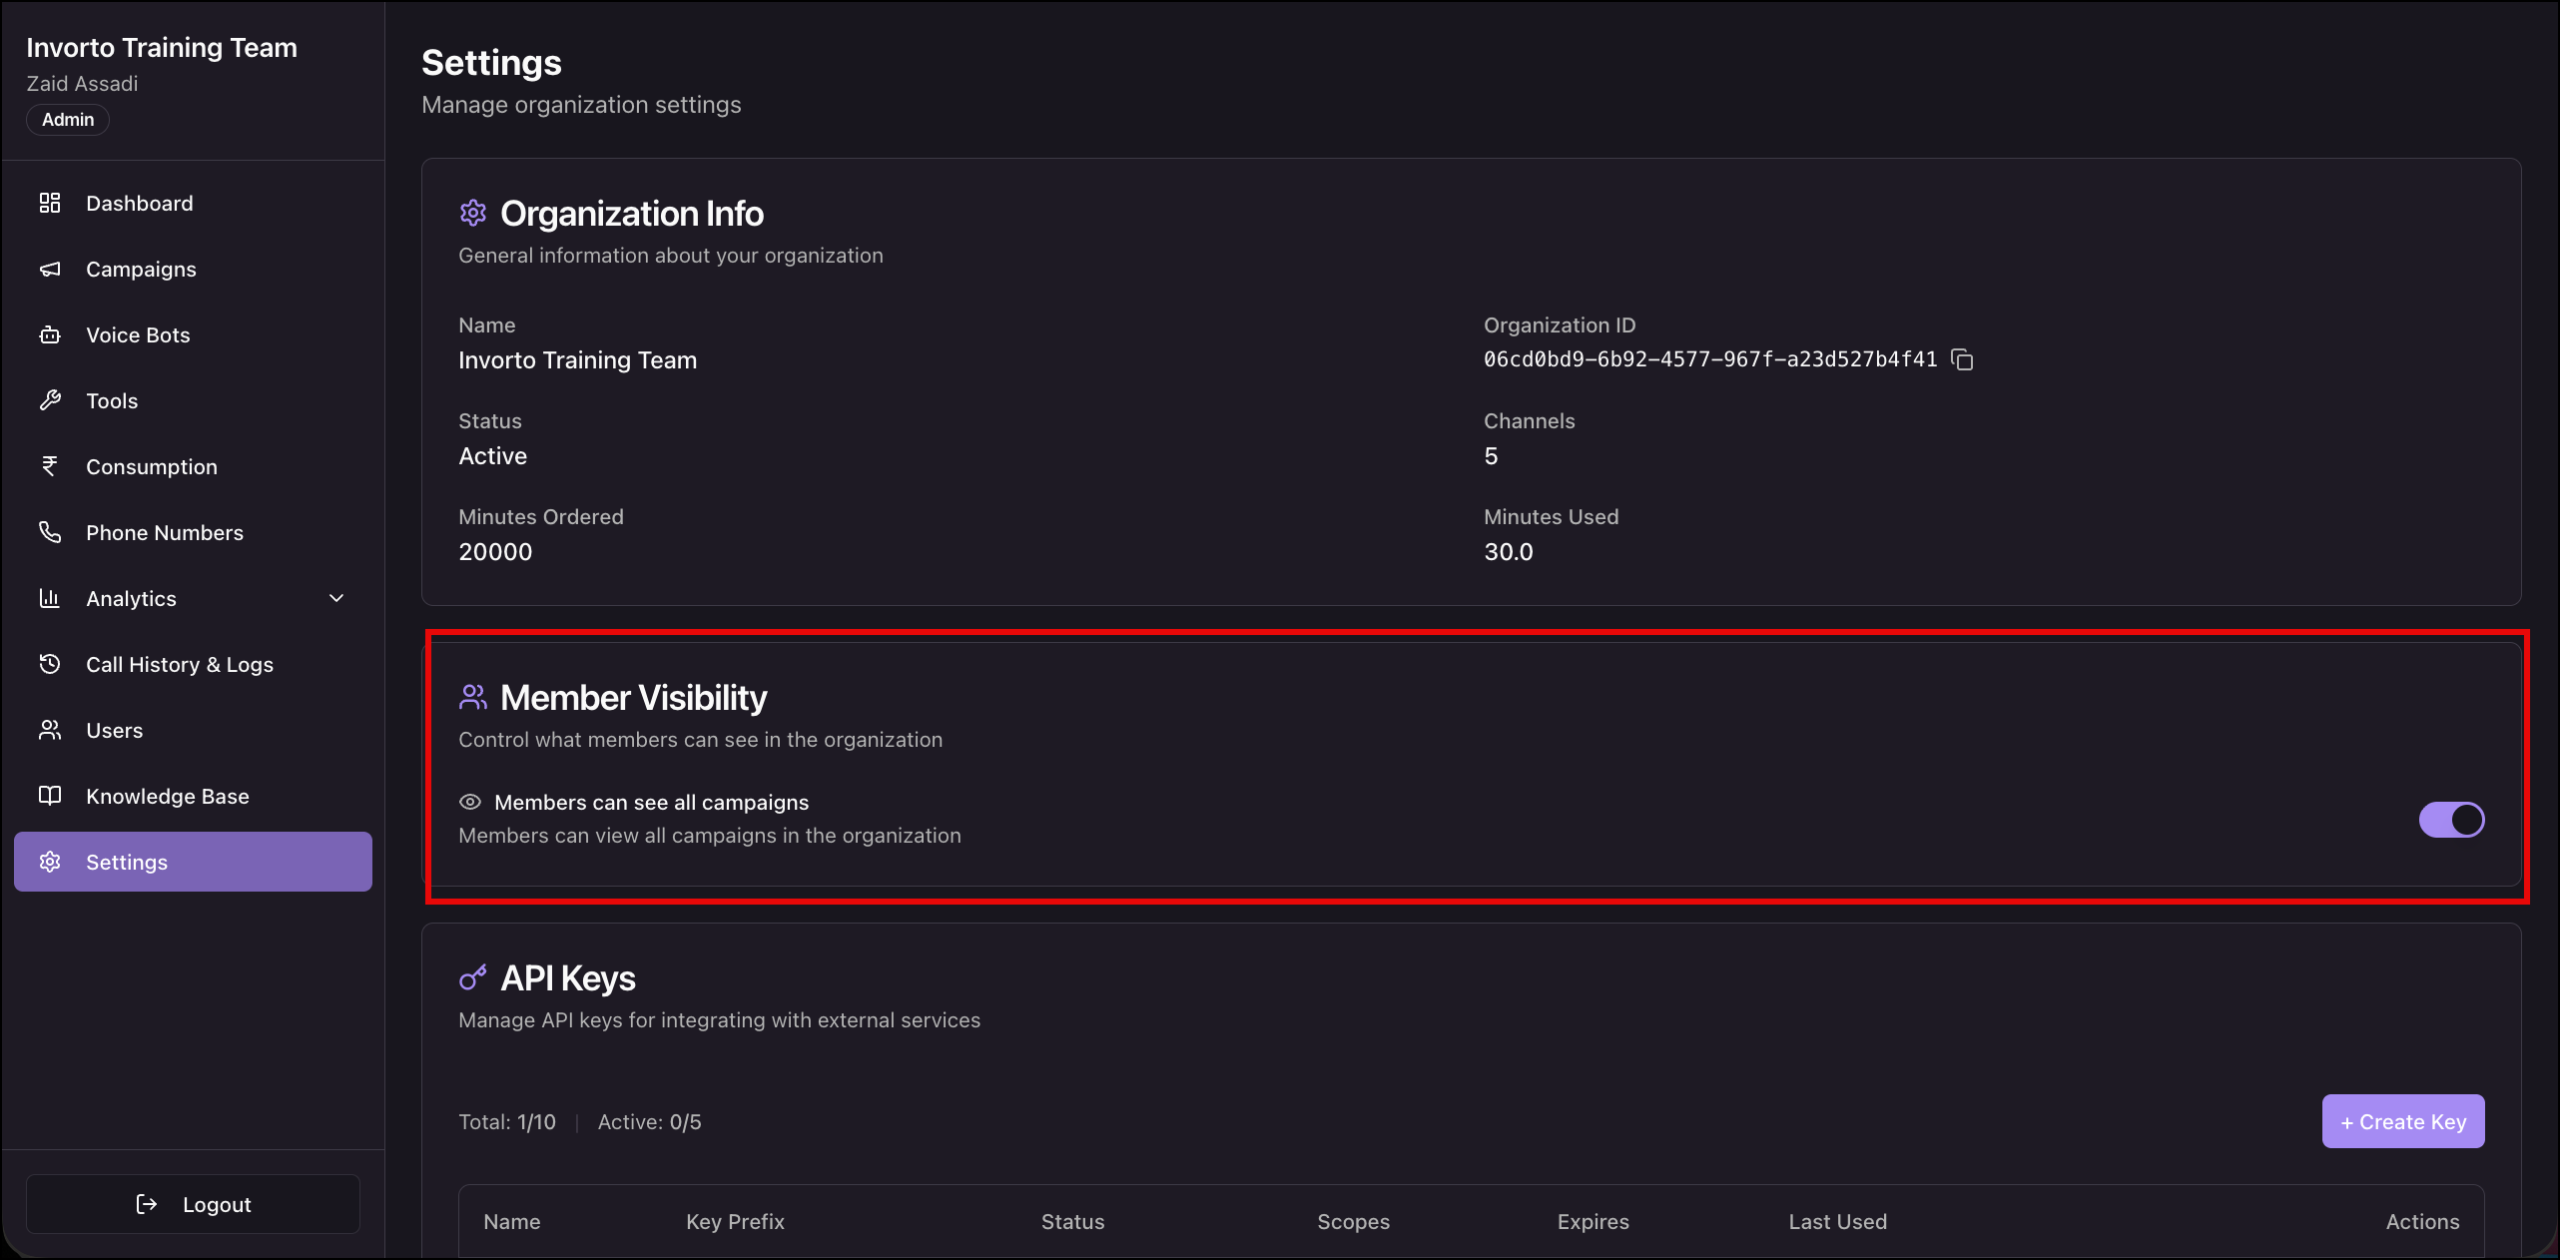
The Member Visibility section controls how much of the organization’s campaign activity each member can see.
Turn Members can see all campaigns on so every member can view all campaigns in the organization. Turn it off so members see only the campaigns they created.
5. Create an API Key
API keys let external systems talk to Invorto. You need a key when you integrate LeadSquared with Invorto, or when you call the Invorto APIs directly.
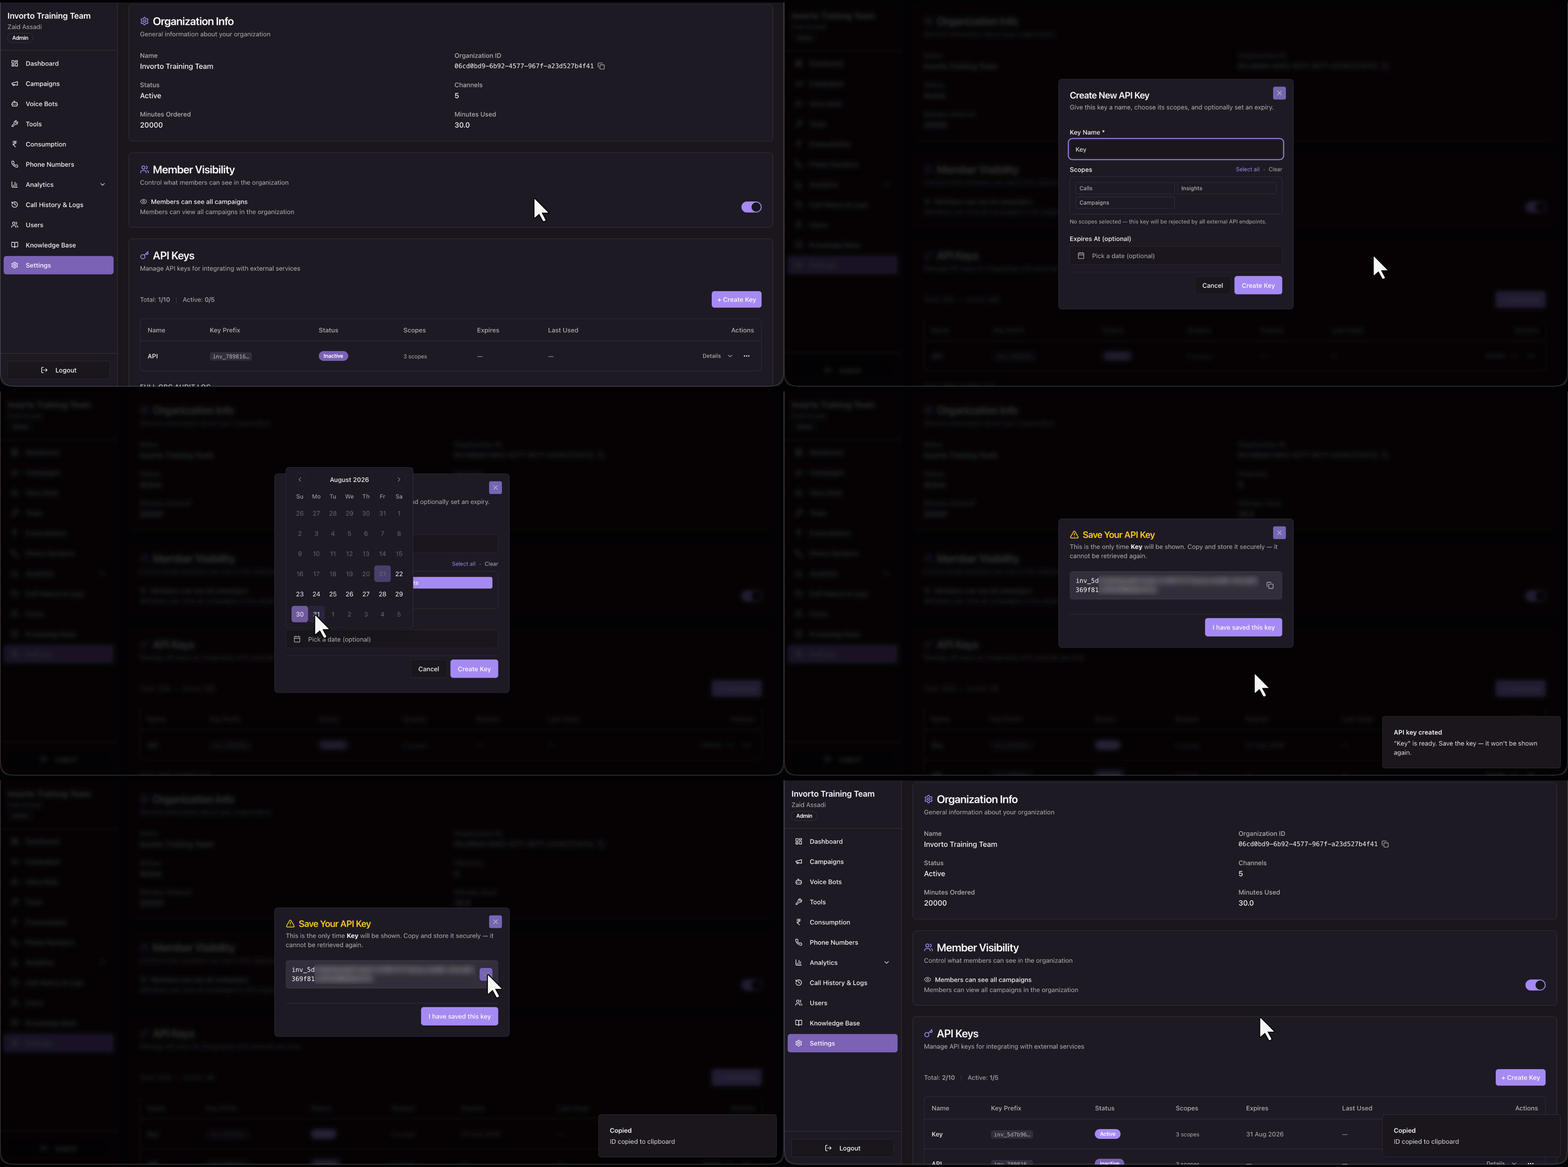
- Click + Create Key.
- On the Create New API Key pop-up, enter a Key Name.
- Select Which parts of the Invorto API the key can reach. Click Select all to select every scope, or Clear to start again.
- Set Expires At if you want the key to stop working on a date, then click Create Key.
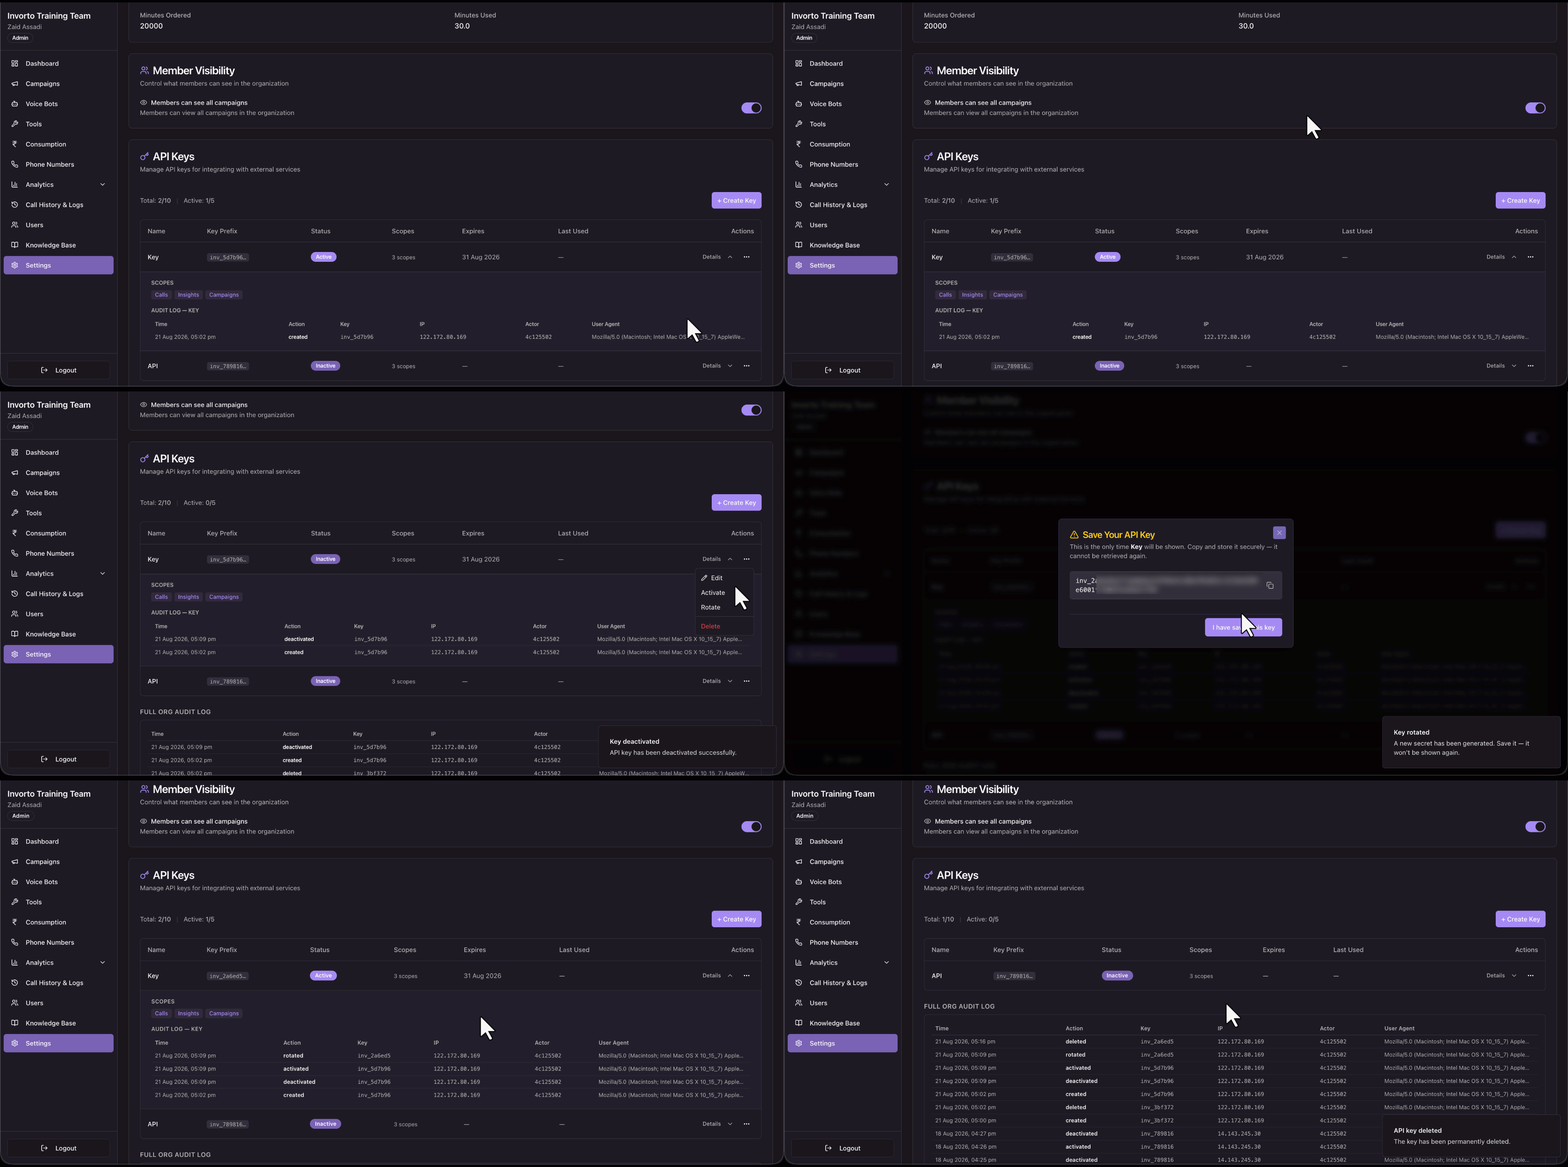
- On the Save Your API Key pop-up, copy the key, then click I have saved this key.
Note:
- A key with no scopes selected is rejected by every external API endpoint. Select at least one scope, and select only the scopes the integration actually needs.
- This is the only time Invorto shows the full key. It cannot be retrieved again. If you close the pop-up without copying the key, you will have to rotate it or create a new one.
- The counters above the table show how many keys you have created and how many are currently active, each against a limit. If + Create Key does not produce a new key, you have reached a limit. Deactivate or delete a key you no longer need first.
- An expired or inactive key stops counting against the active limit, but it still counts against your total. If you are near the total, delete the expired keys you no longer need.
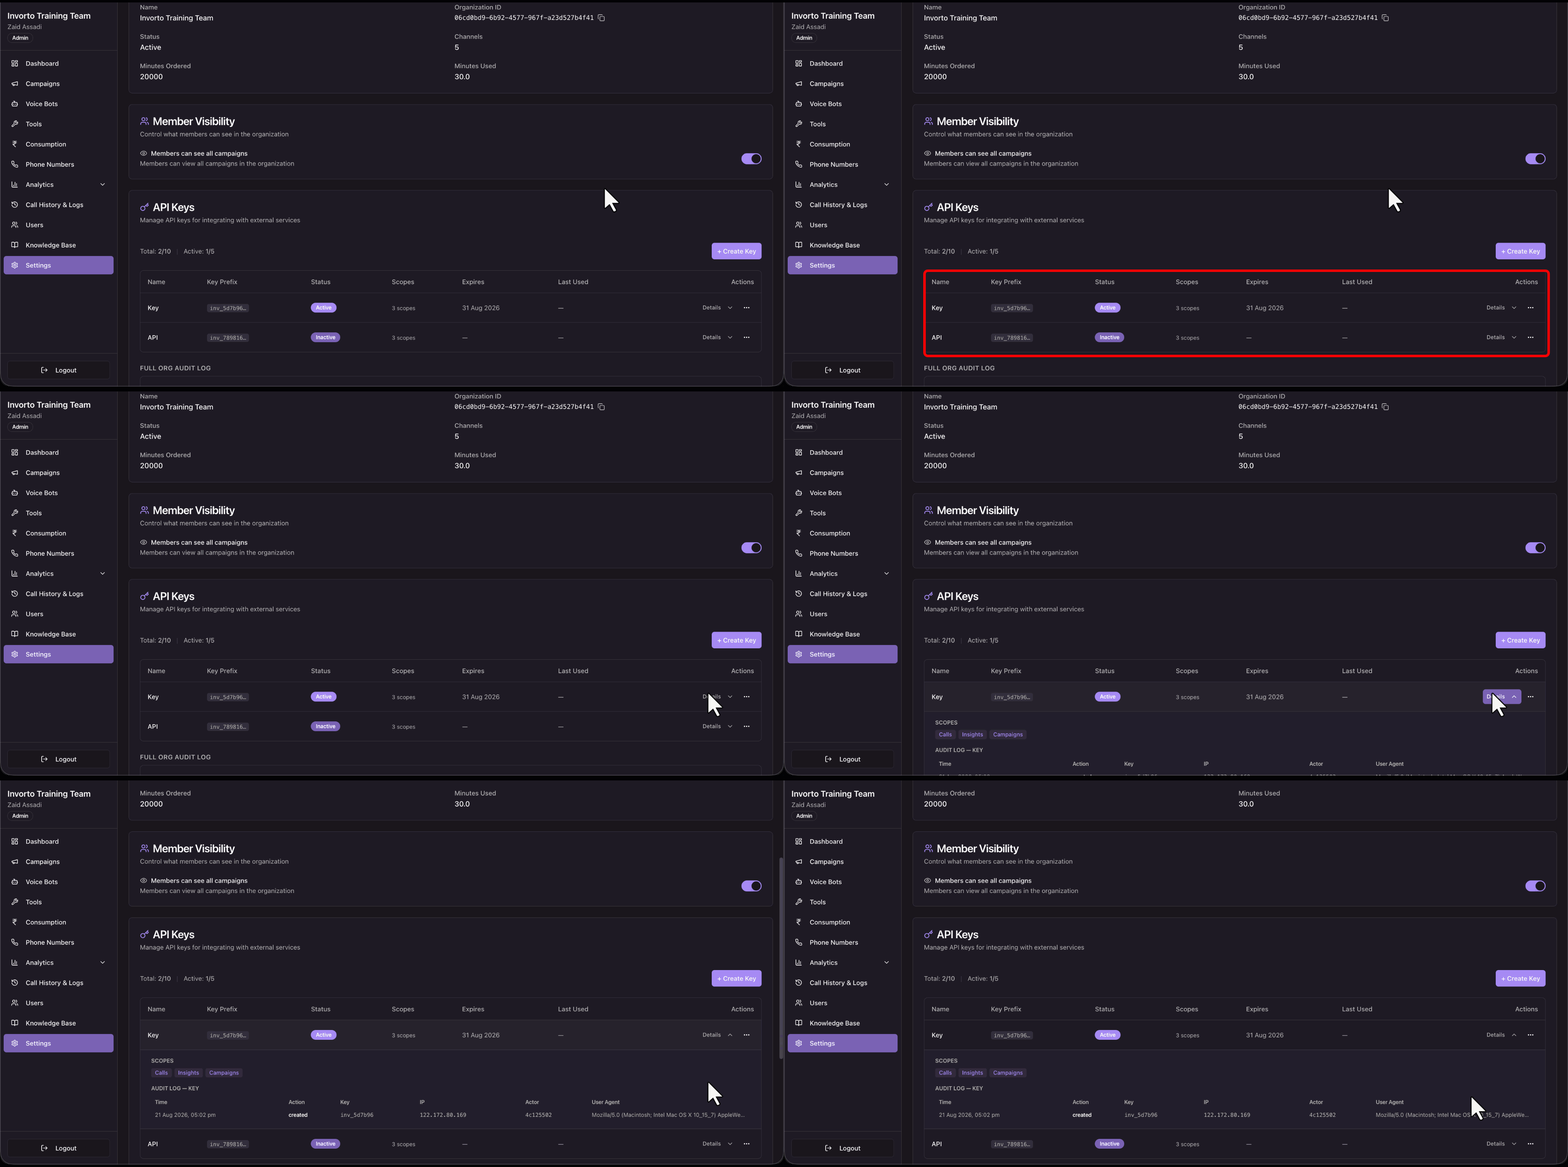
5.1 Read the API Keys Table
| Column | What it shows |
| Name | The name you gave the key. |
| Key Prefix | The opening characters of the key, so you can identify it without seeing the full value. |
| Status | Whether the key is currently usable. |
| Scopes | How many scopes the key is permitted to use. |
| Expires | The date the key stops working. |
| Last Used | When the key last made a request. A dash means it has never been used. |
| Actions | Details, which expands the row, and the row actions menu. |
5.2 View a Key’s Scopes and Audit Log
The Scopes column shows a count. To see which scopes the key holds, expand the row by clicking Details.
The row expands to show two things –
- Scopes lists each scope the key holds as a chip, such as calls, campaigns, or insights.
- Audit log lists the actions taken on this key alone.
Click Details again to collapse the row.
6. Manage an Existing API Key
- Find the key’s row in the API Keys
- Click the row actions menu in the Actions
- Select the action you want –
- Edit – Changes the key’s name, scopes, and expiry. The key’s value stays the same.
- Deactivate – Stops the key working, but keeps it in the table. You can turn it back on later.
- Rotate – Replaces the key’s value with a new one.
- Delete – Removes the key.
Note:
- Deactivating a key frees an active slot but keeps it against your total. Deleting it frees both.
- Deactivating is reversible, so use it when you want to stop an integration for a while without losing the key. Deleting is not reversible, and it also removes the key’s own audit log under Details.
7. Review the API Key Audit Log
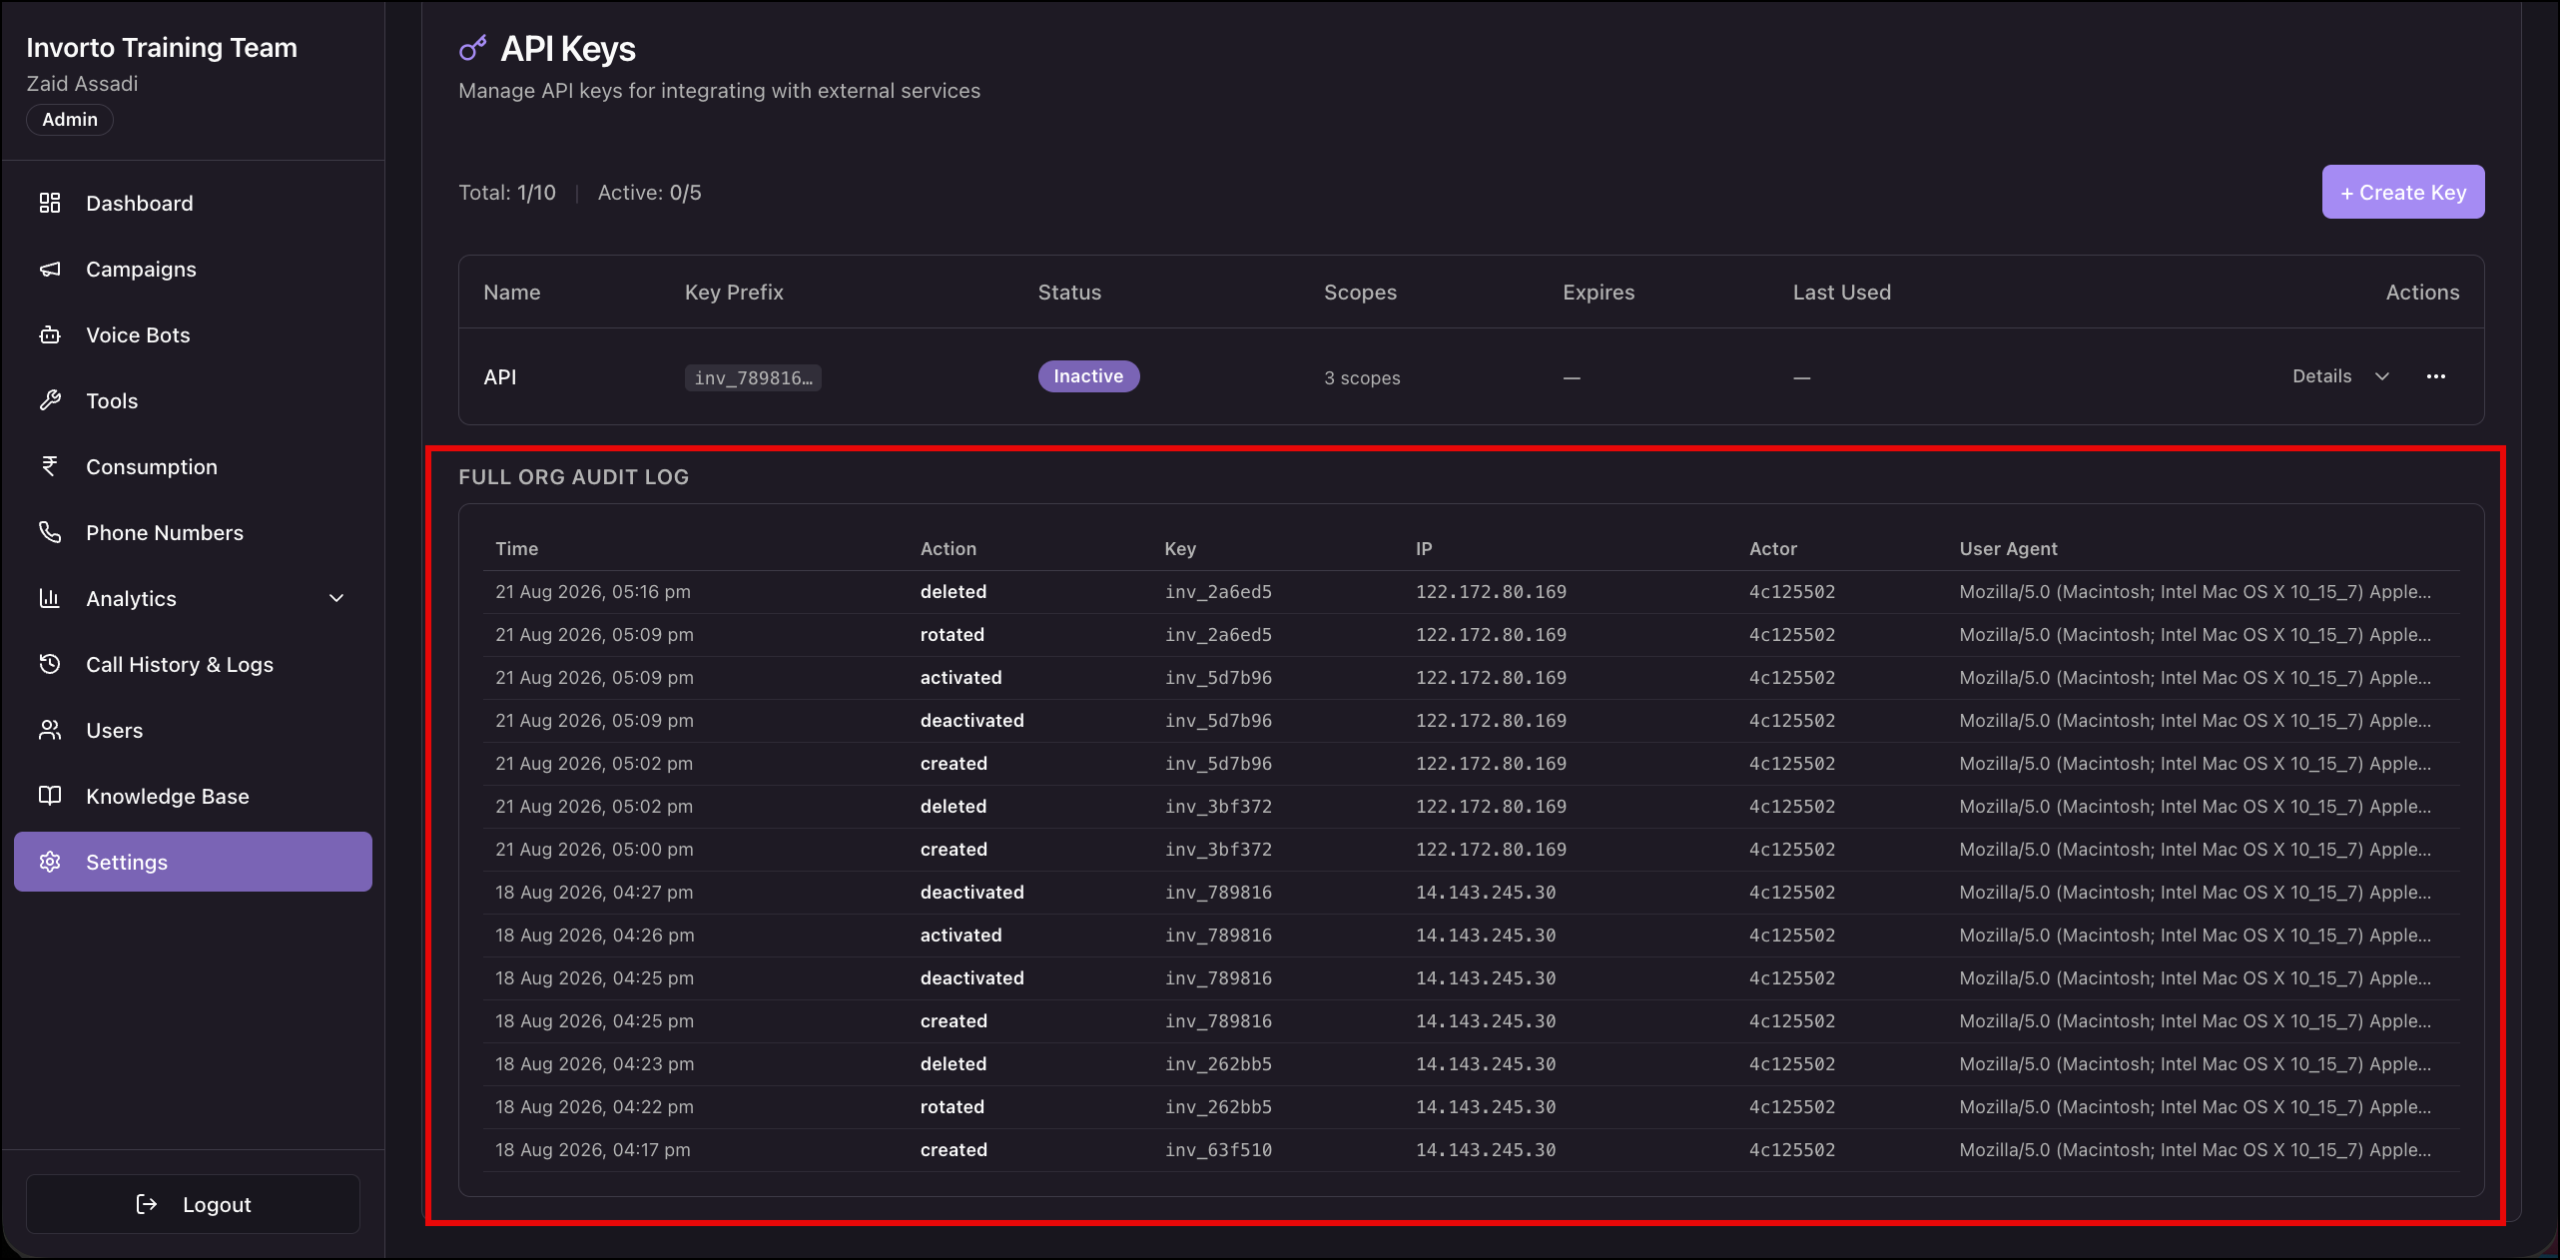
The audit log records what has happened to your organization’s API keys. Use it to answer questions such as who created a key, or when a key was rotated before an integration started failing.
There are two views of the same log.
- The audit log inside a key’s Details panel shows actions on that key only.
- Full org audit log at the bottom of the page shows key actions across the organization.
| Column | What it shows |
| Time | When the action happened. |
| Action | What was done, for example a key being created. |
| Key | The key the action applied to. |
| IP | The IP address the action came from. |
| Actor | The user who performed the action, shown as their user ID. |
| User Agent | The browser and operating system used. |
Any Questions?
Did you find this article helpful? Please let us know any feedback you may have in the comments section below. We’d love to hear from you and help you out!