


Get Started
Sales Suite
Field Ops
Marketing
Service CRM
Integrations & Apps
FloStack
Marvin – Feature Guide
1. Feature Overview
Marvin is LeadSquared’s new Inside Sales Application that features significant improvements in the user experience across the platform. Marvin is designed specifically to increase the productivity of Sales Users and Sales Managers but retains similarities to the existing platform to ensure effortless adoption.
With Marvin, your sales team can –
- Load Smart Views 60% faster.
- Open and Save forms 50% faster.
- Instantly add leads, activities, opportunities, and tasks at the click of a button.
- View more leads and tasks with the improved layout.
- Update lead search filters based on their requirements.
- Switch between leads on the same browser tab to access multiple lead details at once.
- Automatically view the relevant lead details when they receive an incoming call from the lead.
Note:
- Once enabled, your Sales Users and Sales Managers can directly log into https://marvin.leadsquared.com.
- The language displayed in Marvin can be changed from English to any of these available options –
- Hindi.
- Indonesian.
- Portuguese Brazilian.
- Spanish Latin America.
- Vietnamese.
- Arabic.
- To know more about how to change language on Marvin, see Languages Available in LeadSquared.
2. Prerequisite
To enable Marvin in your account, contact your account manager, or write to support@leadsquared.com.
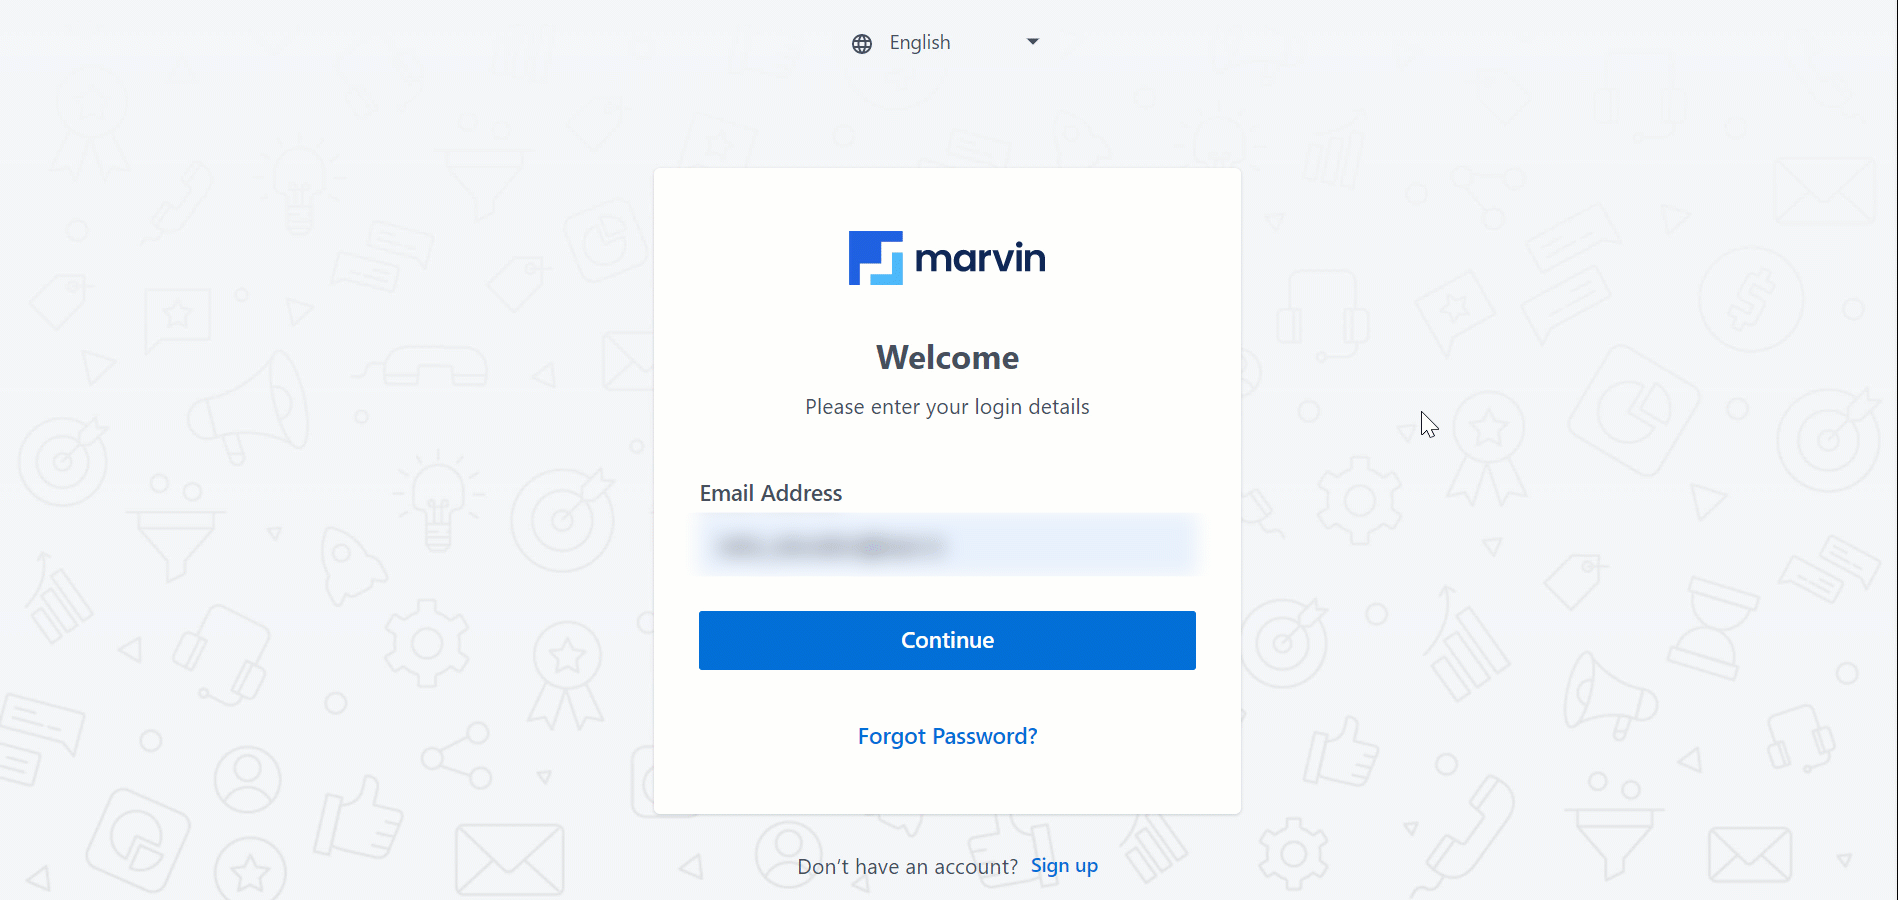
3. Login
You can log into Marvin using your LeadSquared account credentials. Once logged in, users can check-in through the pop-up window displayed in the gif below. After checking in, the user’s availability is set to ‘Online’ by default. Users can manually mark their availability as ‘Away’.
On the bottom left of your screen, click My Profile –
- To change your availability status, hover your cursor over your status. Then select the relevant status.
- To check-out of Marvin, click Check-Out.
- To sign out of Marvin, click Sign Out.
4. Settings
View your profile, request history and personalise your account on the Settings page.
- On the bottom left of your screen, click My Profile.
- Click Settings.
- To view your profile, click My Profile.
- To view your request history, click Request History.
- Under Personalisation tab,
- To change the language used in Marvin, click the dropdown under Language and select the relevant option.
- To change the theme, click the dropdown under Theme and select the relevant option.
- To enable the usage of keyboard shortcuts, slide the button next to Enable Shortcuts.
- The Email Signature tab lets you create your signature in HTML as well as Text formats.
- Under the Security tab,
- To change your password, click Reset Password.
- To enable Two Factor Authentication, click on the button alongside Enable Two Factor Authentication. From the popup box, choose the relevant Two Factor Authentication Provider to allow you to login with. The authentication provider can be edited anytime by clicking
 alongside Authentication Provider.
5. Admin Configurations
5.1 User Redirection
When a user with Marvin enabled in their account logs into the regular platform, you can immediately redirect them to Marvin by enabling the user redirection setting –
- Navigate to My Profile>Settings>Security>Authentication Profiles.
- Click Create.
- Click Login Settings.
- Enable Redirect To Marvin.
5.2 Customise Logos and Themes
Administrators can customise Marvin’s company logo and theme by navigating to Settings>Marvin>Logo & Theme.
- To change the logo displayed in your account, under Company Logo, click Update.
- To change your company’s icon on the main menu and browser tab, under Favicon, click Update.
- To change the colour of the buttons, links, and other UI elements in the application, under Primary Colour, click the dropdown and select a colour.
- To set the theme as dark mode for all the users in your organisation, click the checkbox next to Use Dark mode as default for all users.
5.3 Restriction Templates
Customise Marvin work areas and enable/disable features based on organisation workflow using Restriction Templates.
- Navigate to My Profile>Settings>Marvin>Restriction Templates.
- Click Create.
- Alongside the relevant feature group, click
 .
. - Alongside the relevant feature, click the circle to enable access.
- Click Save.
- To apply the template on users once you create it –
- Alongside the template, click
 ,and then click Apply Template.
 - Select the users you wish to apply the template on and click
 .
. - Click Save.
- Alongside the template, click

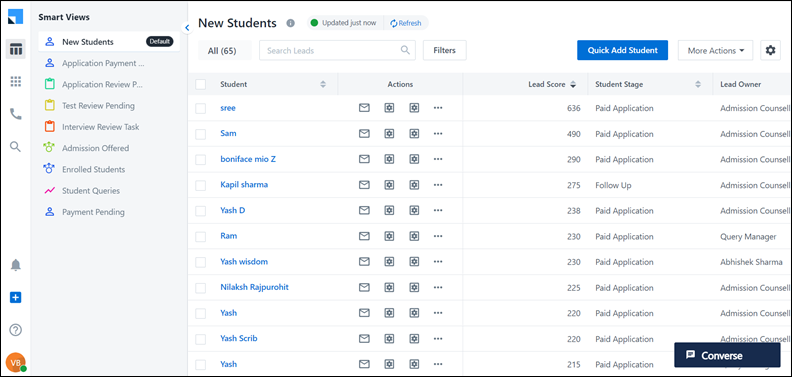
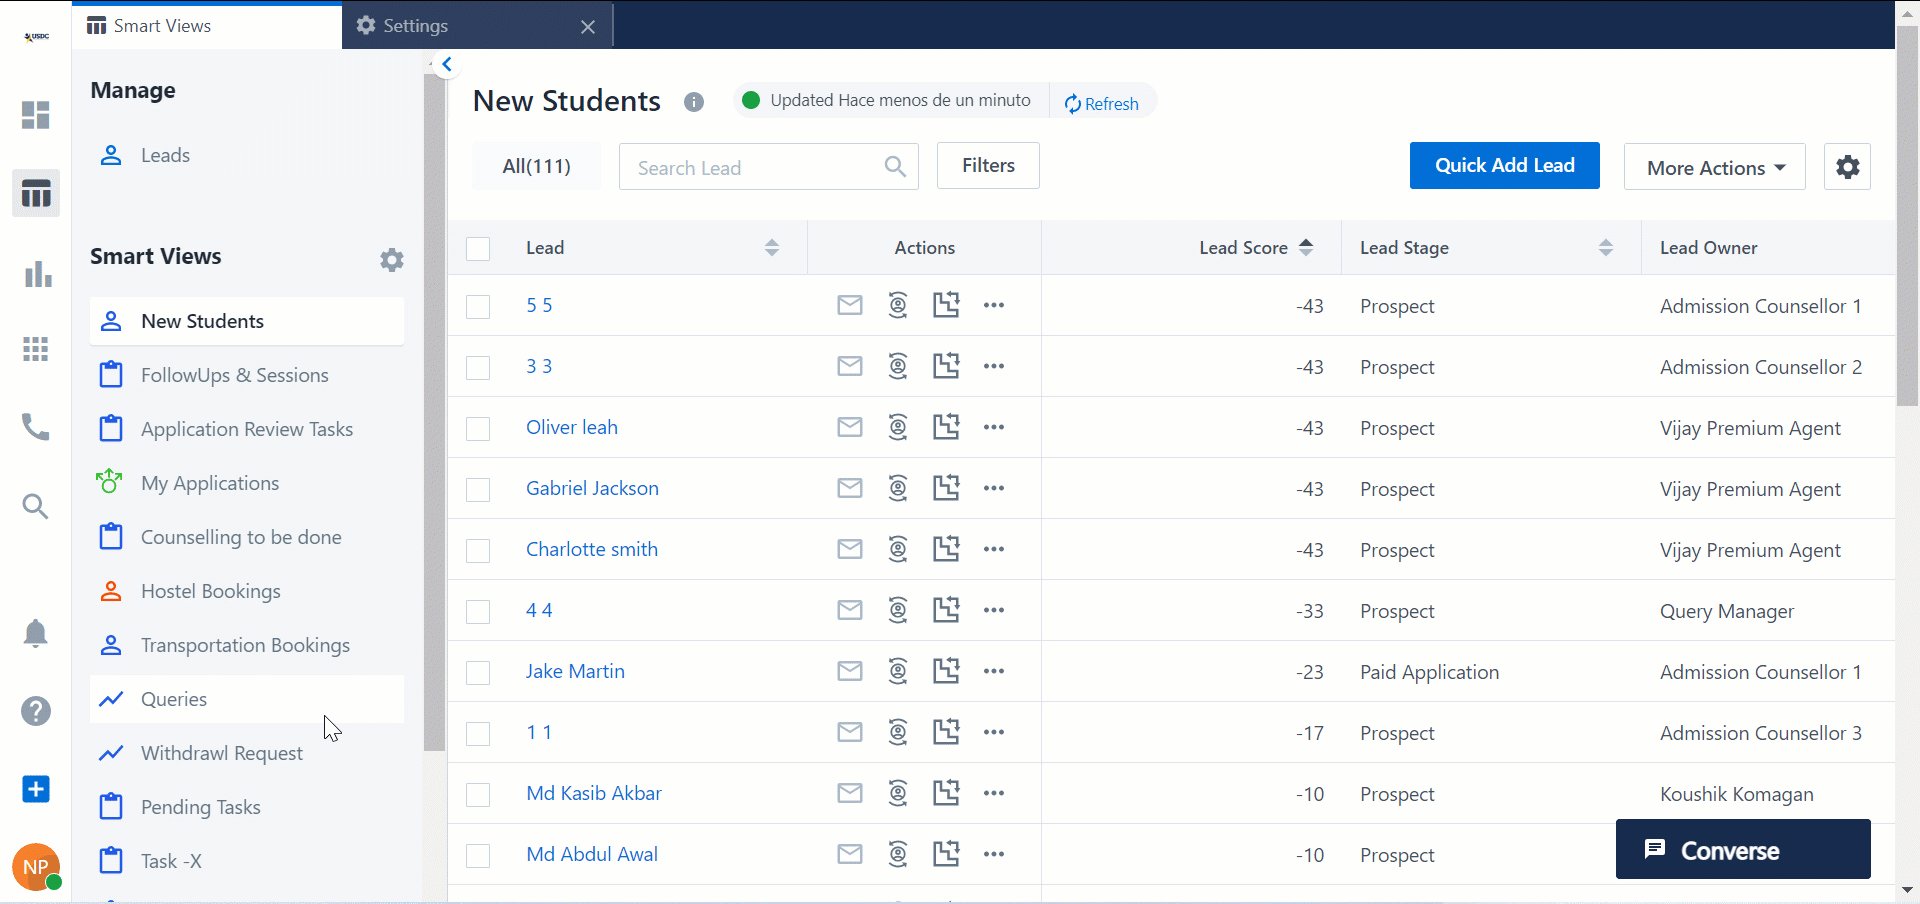
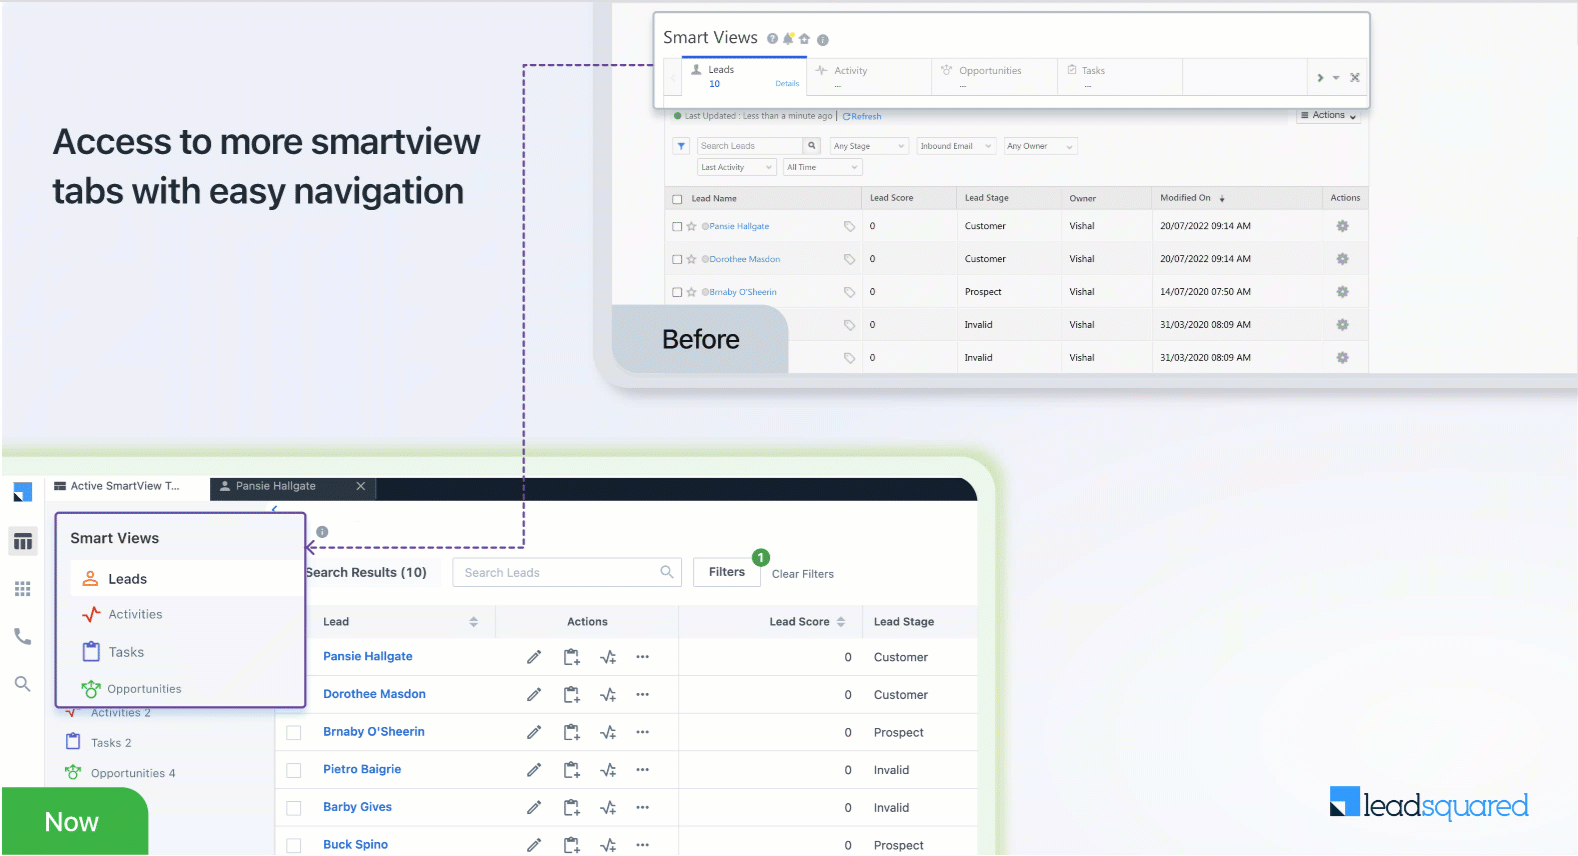
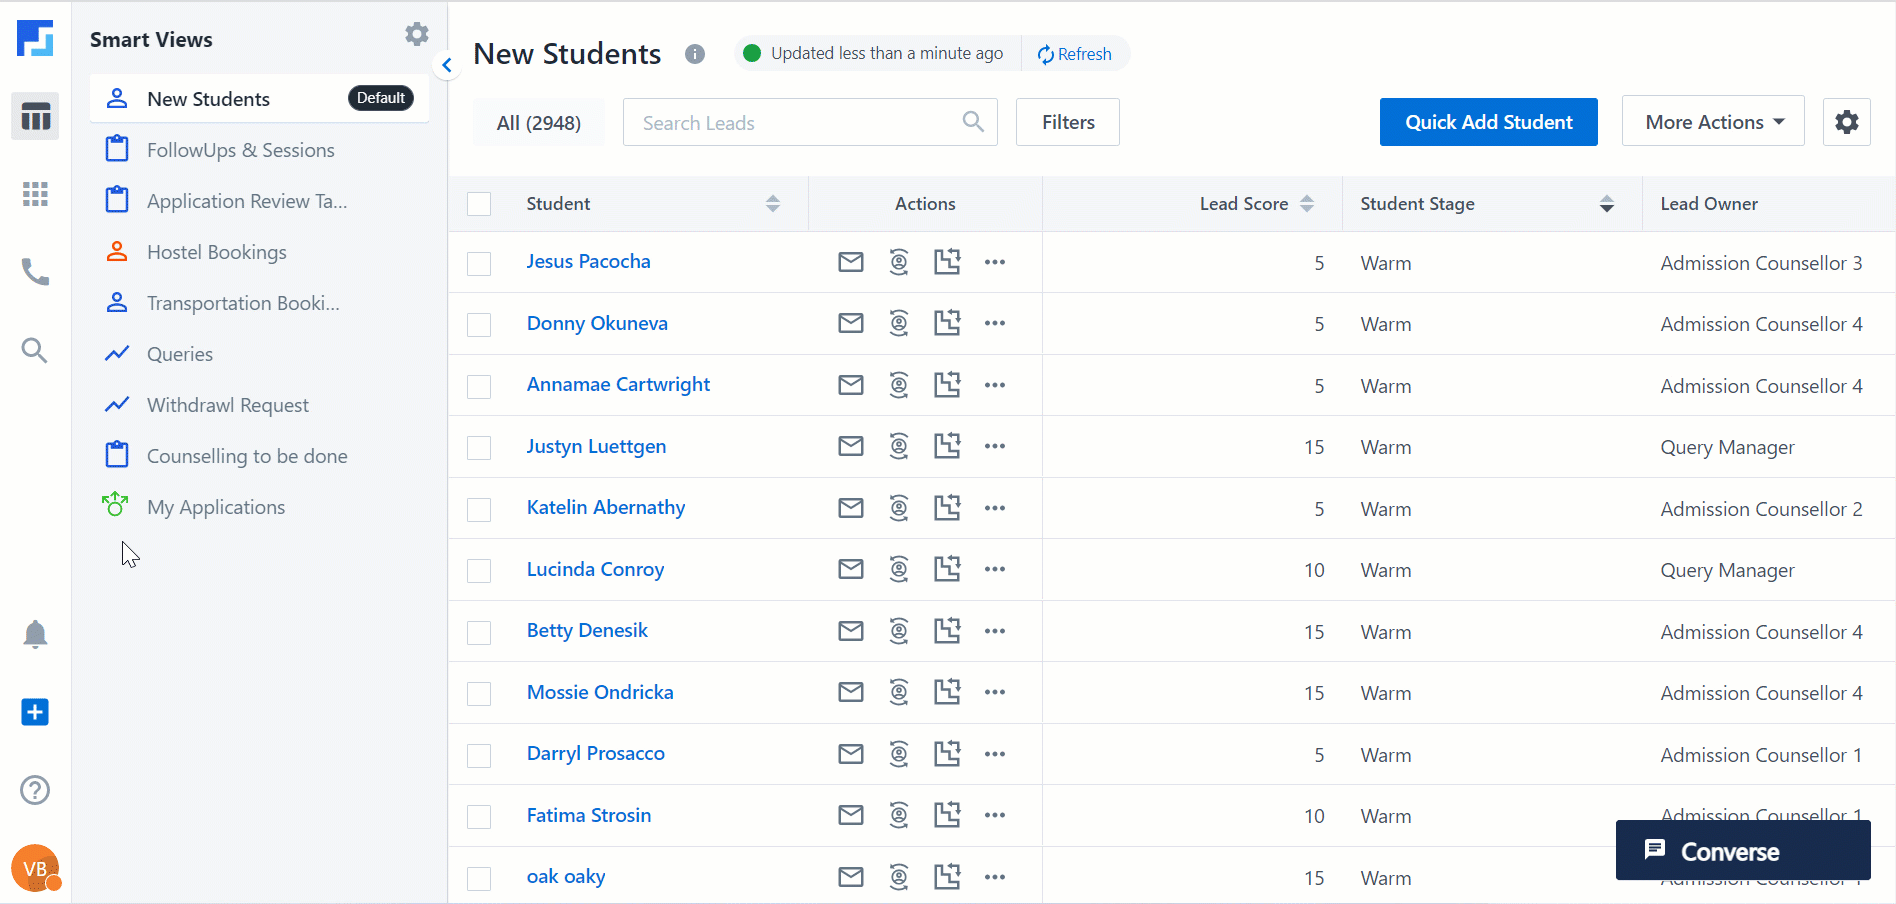
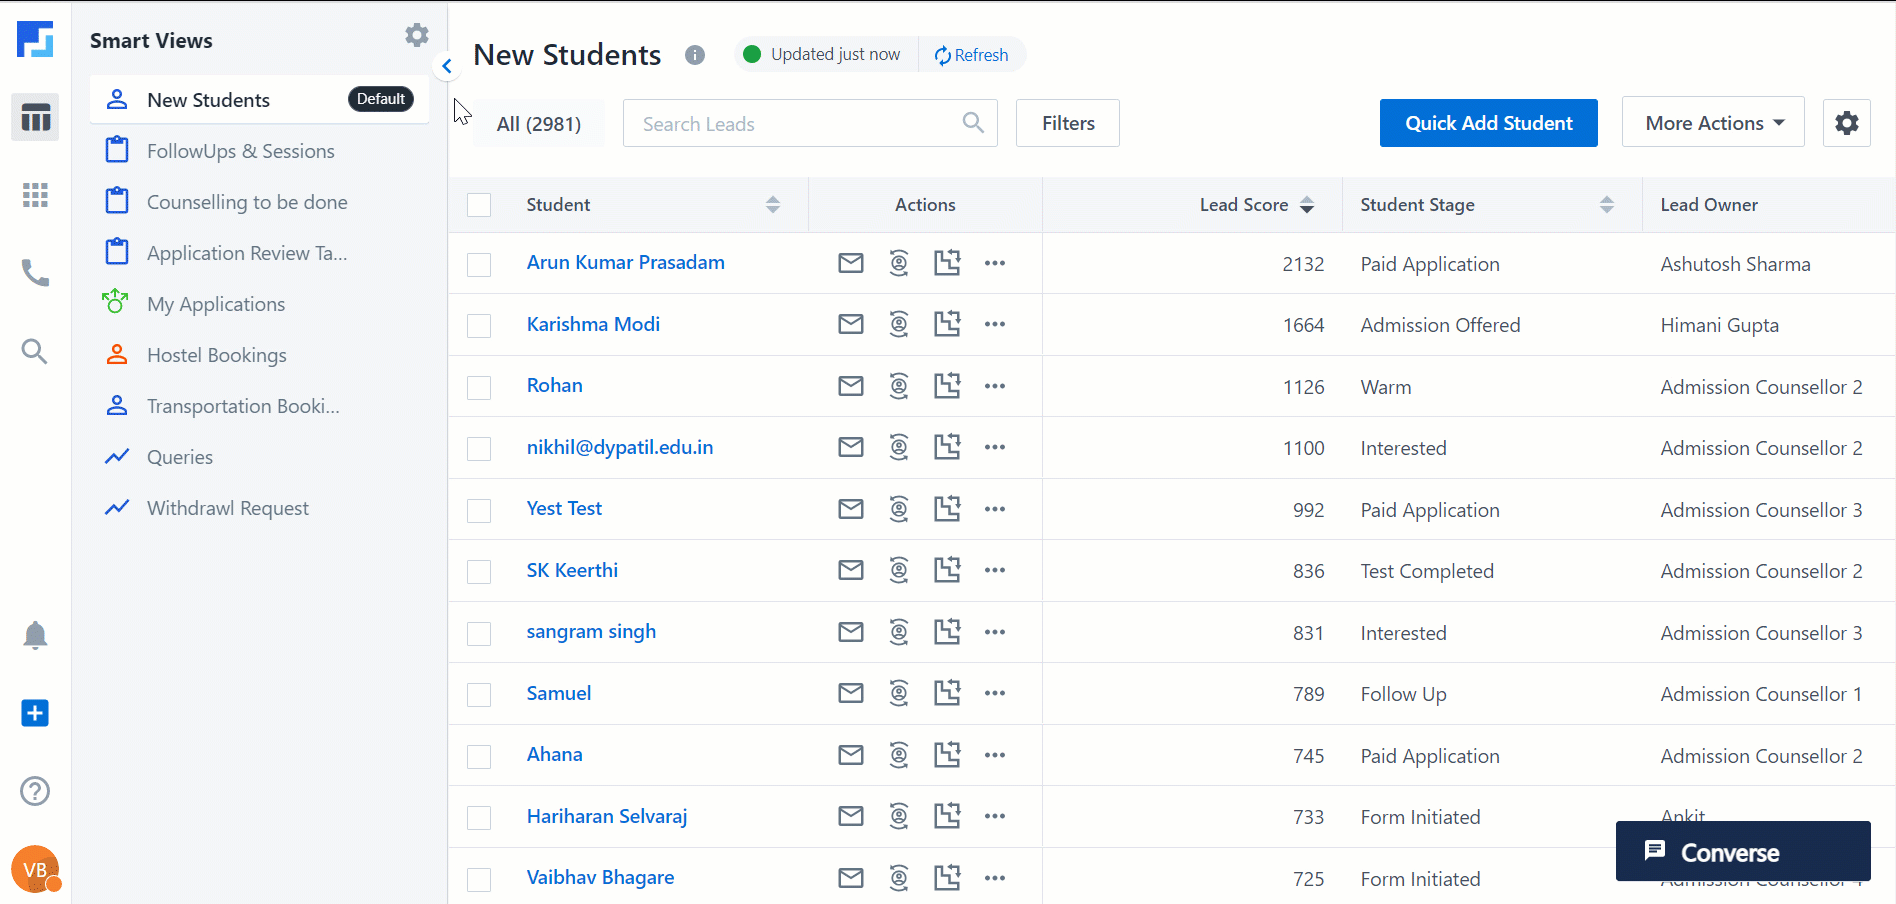
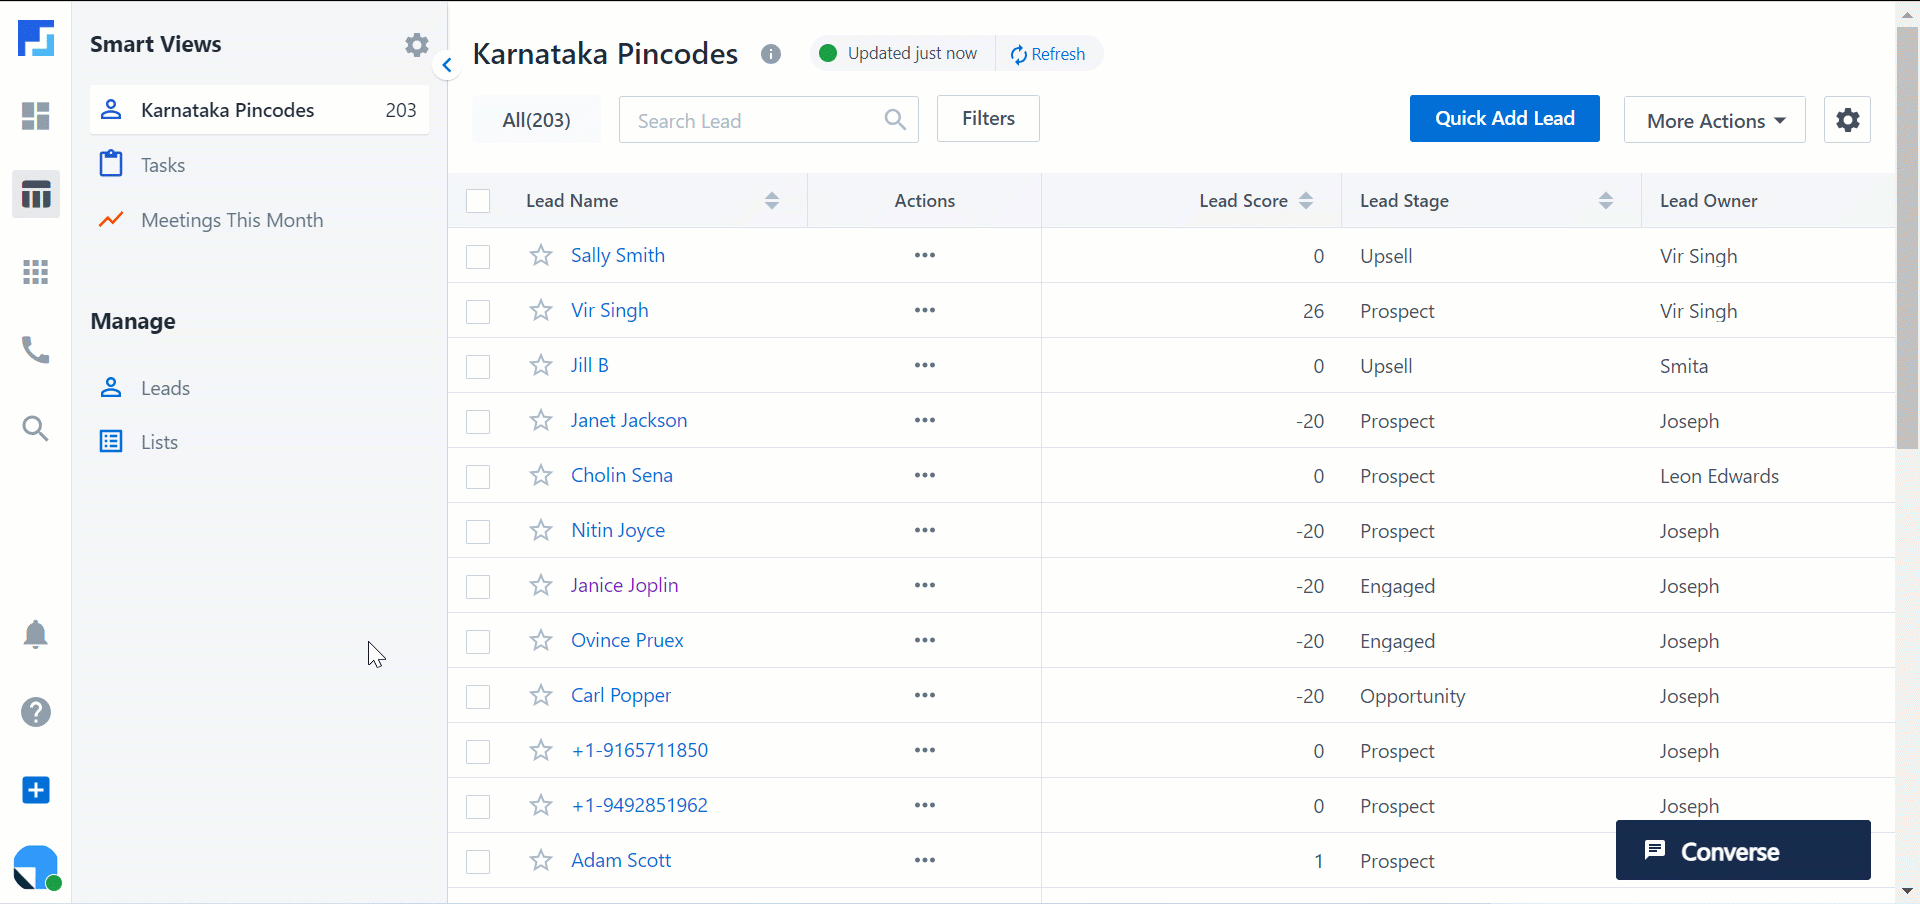
6. Smart Views
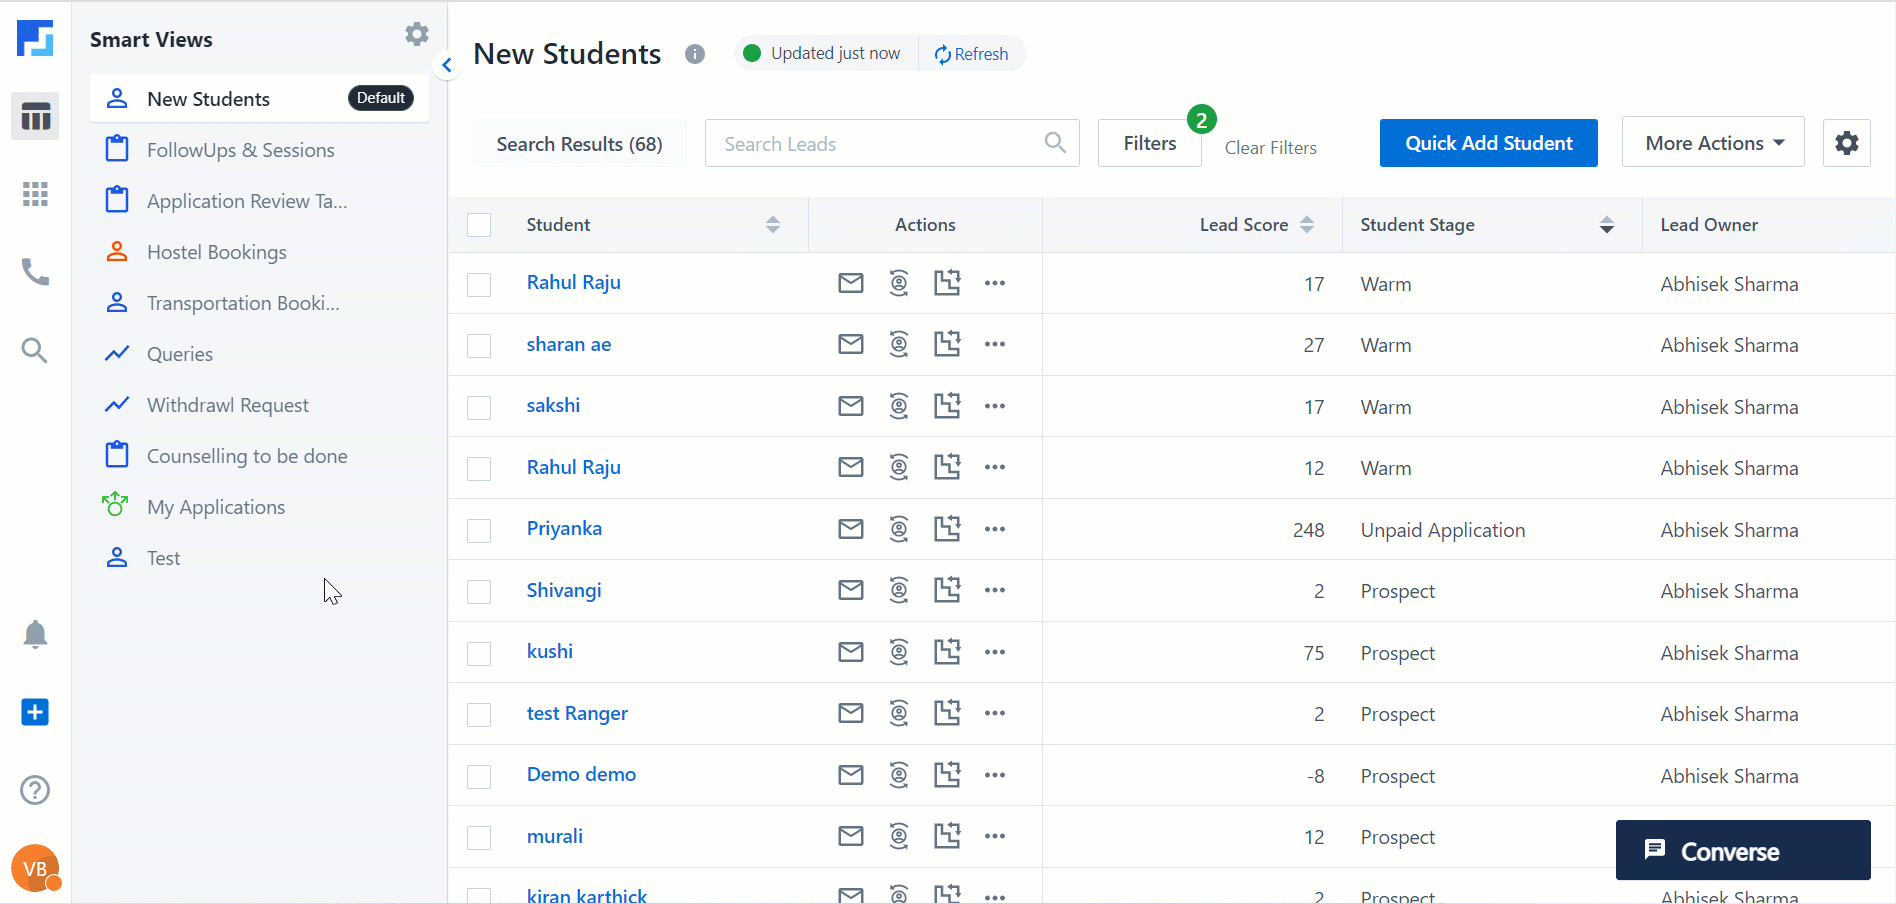
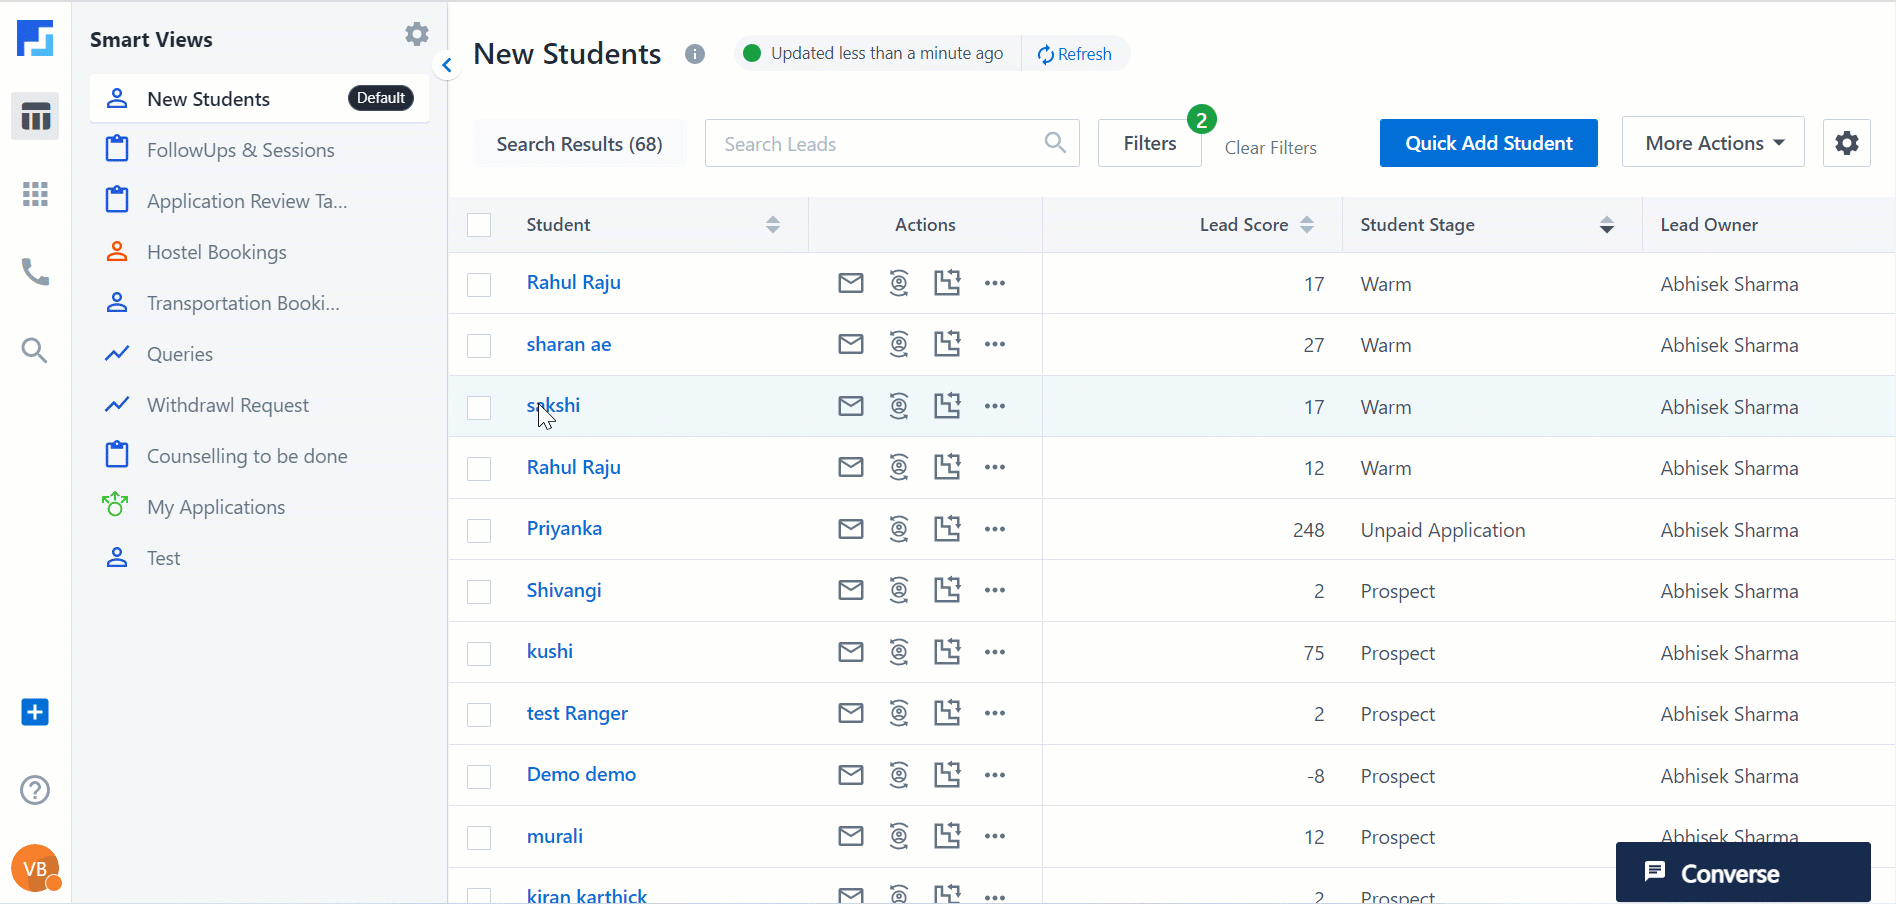
The Smart Views tab in Marvin has been designed to load 60% faster to improve the efficiency of sales users and managers. It has been redesigned to promote easier navigation within the platform and allows 40% more row visibility. Once you’ve worked on a lead and navigate back to the Smart Views page, the colour of the row with the lead changes. The user can then identify the leads they have worked on.
Once logged in, you can access Smart Views immediately on the default landing page. All Smart Views tabs are displayed vertically to make switching between tabs easier. With this feature, you can now –
- View your leads in any order (alphabetical, highest/lowest lead score, lead stage, etc.).
- Add and manage filters to be added on leads.
- Configure tabs in Smart Views.
- Change row height (small, medium, large, or extra large) for customised display of addresses, dates and other details.
- Navigate to a specific page of Smart View by entering the page number in the page search dropdown.
Note:
- You can also add multiple Smart Views tabs and manage them. You can create an Opportunities tab here to view and manage your opportunities.
- The Smart Views tabs added on Marvin will not be reflected on the regular platform. However, Smart Views tabs created on the regular platform will be reflected on Marvin as well.
- If you have Account type Smart View tabs created in your platform account, they will reflect in Marvin as well.
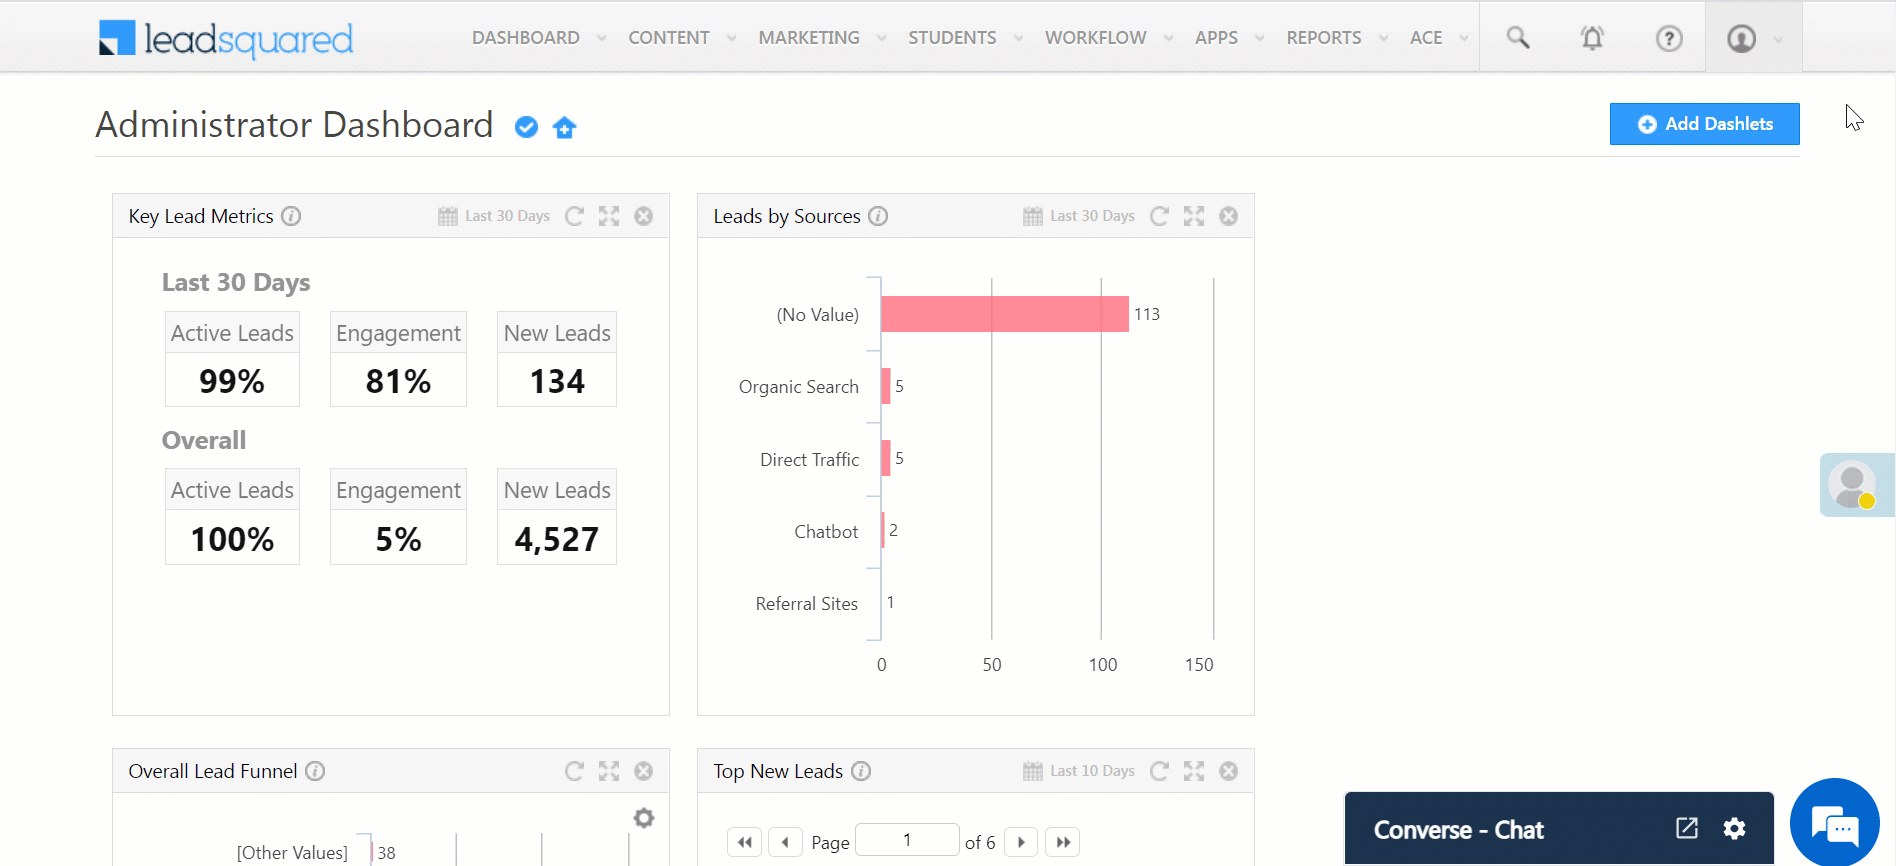
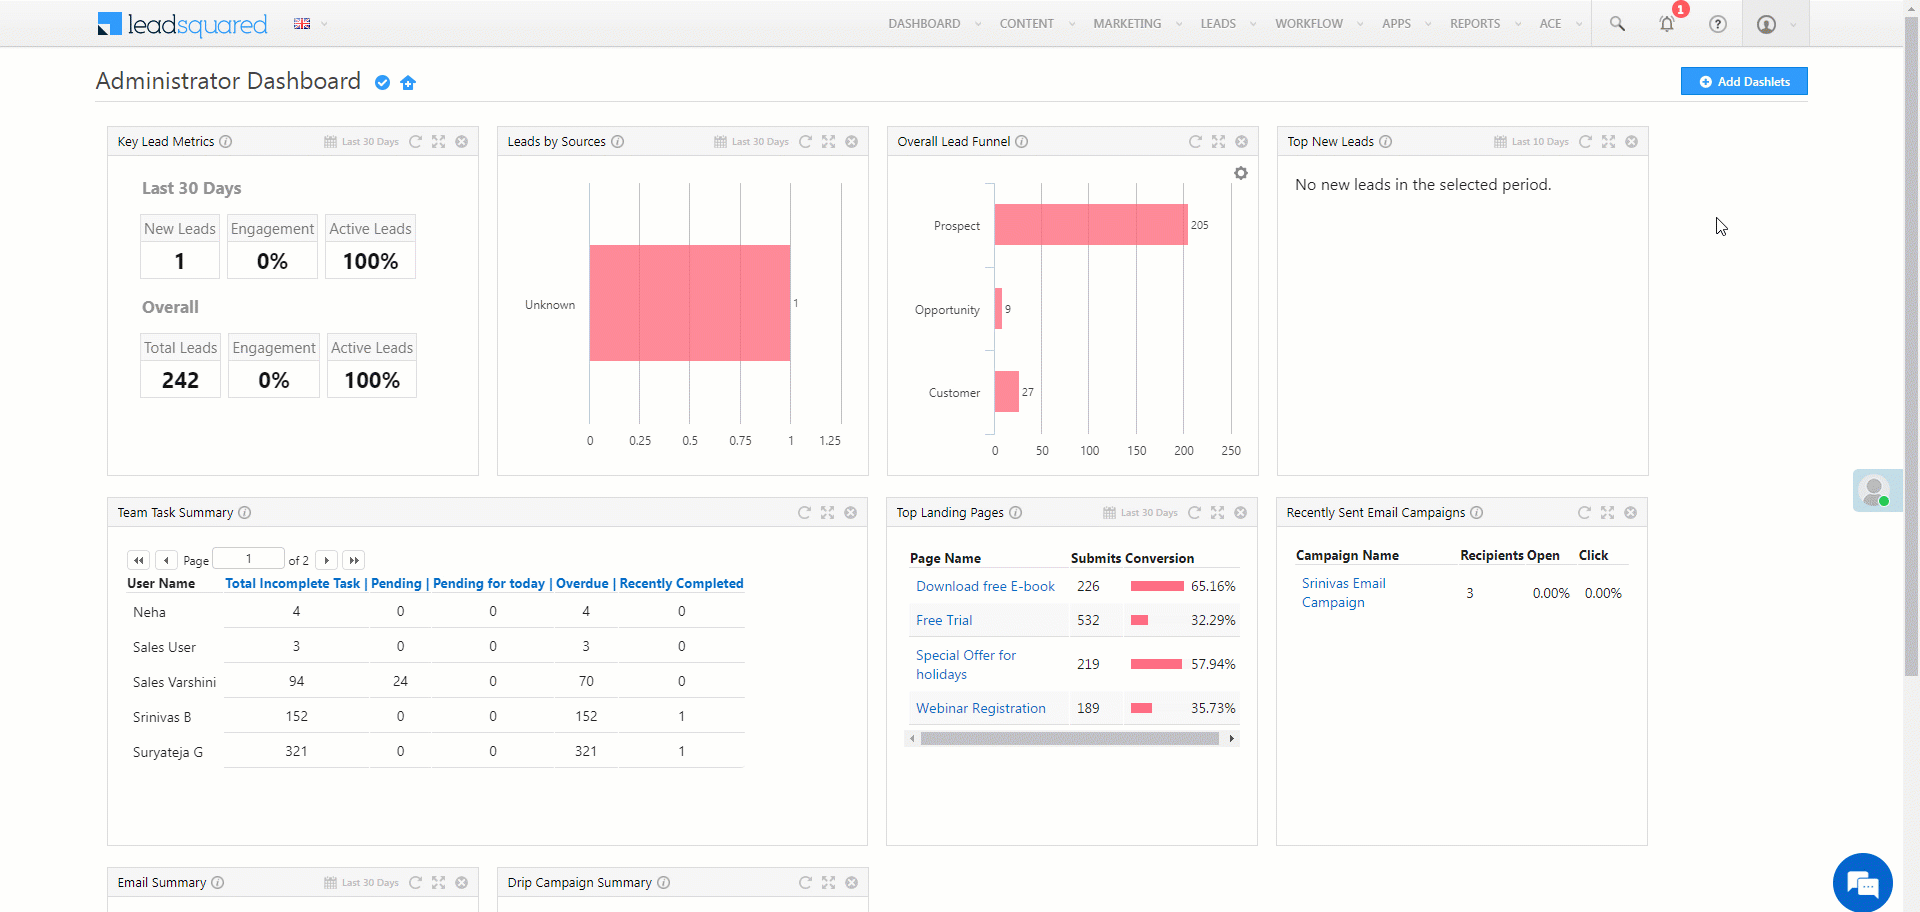
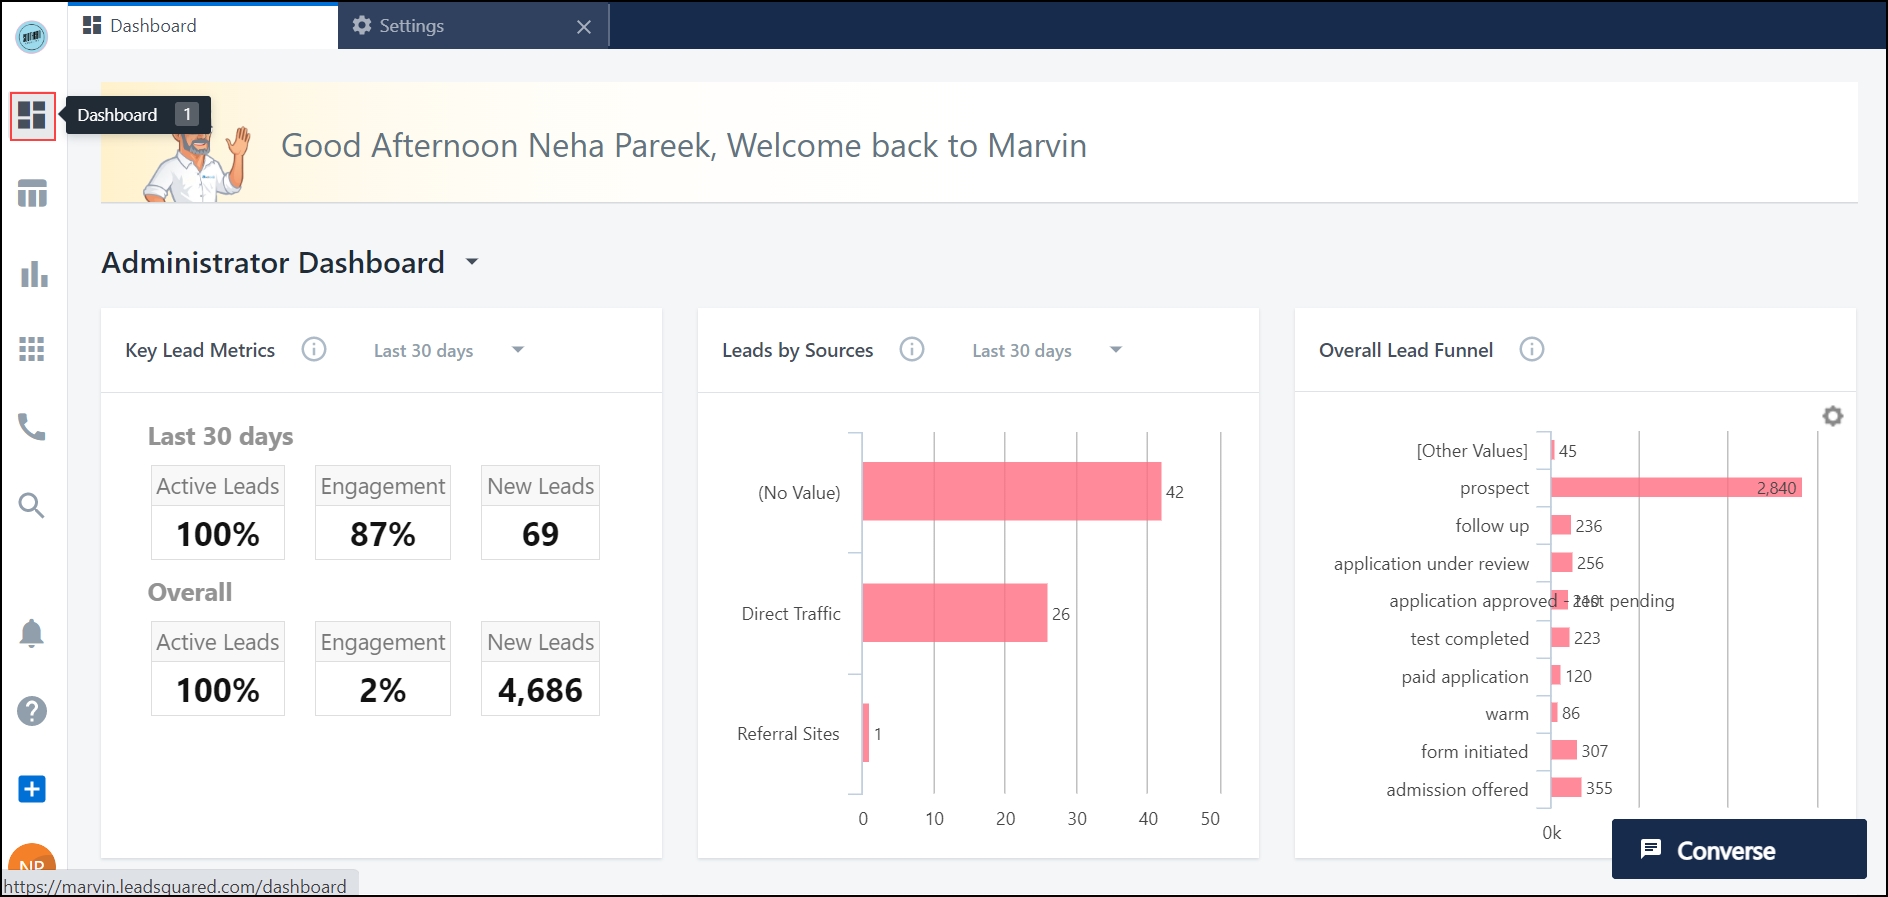
7. Dashboard
To view your shared dashboards, on the left side of the page, click
![]() . The structure of the dashlets here are similar to those in the regular platform.
. The structure of the dashlets here are similar to those in the regular platform.
8. SIERA
8.1 Reports
If you have SIERA enabled in your account, click to view your SIERA reports.
You can organize and find your Reports through Tags. Reports can be tagged and re-tagged by Administrators –
- Click on the icon.
- Select Edit Tag(s).
- Select your tag(s).
- Click Save.
8.2 Dashboard
SIERA’s Sales User Dashboard gives you analytics and insights into your entire sales pipeline. The dashboard will give you a bird-eye view of your Call Metrics, Activity Metrics, Lead Metrics, and Task Metrics.
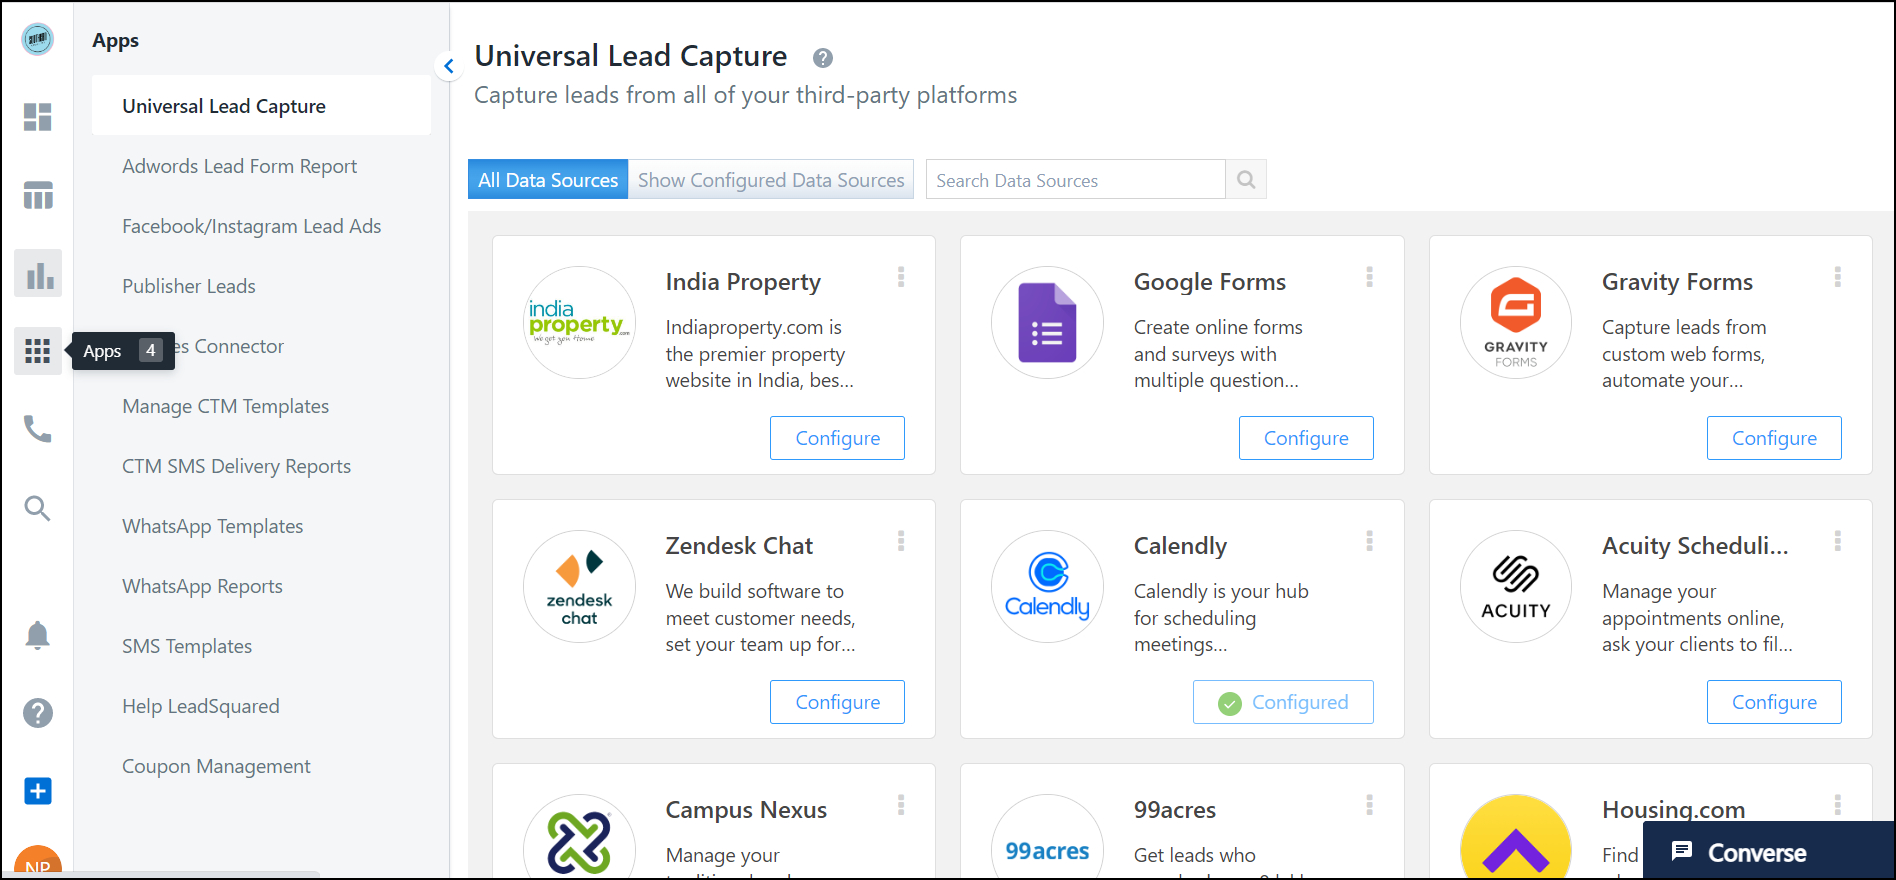
9. Apps and Integrations
To view all the apps enabled in your account, click
![]() . Admins can choose to restrict this feature for all sales users by configuring restriction templates on the regular platform.
. Admins can choose to restrict this feature for all sales users by configuring restriction templates on the regular platform.
10. Lead Search
Lead Search has now been simplified with the new Marvin user interface. You can access a lead’s details from multiple pages across the platform. You can also use keyboard shortcuts to trigger search action.
- To search for the leads in your account, on the left-most tab, click
 . Alternatively, press Ctrl/Cmd + k.
 - Once the search bar displays all results, hover over the relevant lead name and you can perform actions on the lead (call, quick add, or email) by clicking the relevant icons next to the lead name.
- To view the entire list of search results, press Enter on your keyboard or click View all results.
- You can change the arrangement of the leads displayed by –
- Alphabetical order.
- Highest/lowest lead score.
- Lead stage.
- Lead owner.
- Last modified record.
- Once you click on a lead, a new Lead Details tab will be created within the Marvin browser tab. Now, you can switch between different lead details tabs without exiting the current one.
11. Advanced Search
You can perform advanced search to filter and find all leads across your account based on multiple criteria. To perform advanced search –
- On the Smart Views tab, click
 .
. - Select Add New Tab.
- On the Types and Details page, enter the relevant details and click Next.
- On the Set Condition page, click Add Condition. You can now enter the criteria required for your lead search.
- Once you’re done, click Create Tab.
12. Lead Details
The familiar yet redesigned Lead Details page in Marvin allows you to open multiple lead details tabs on the same Marvin browser. This simplifies navigation between multiple leads without having to exit the current page. With the new Overview tab on this page, users can get insight on –
- Upcoming or overdue tasks.
- Recent conversations initiated with the lead.
- Activities posted on the lead.
To view the Lead Details page, double click a lead’s name on Smart Views or the Search page. On this page –
- To edit the lead v-card on this page, alongside the lead name, click
 .
. - To share the lead with another user, alongside the lead name, click
 .
. - You can perform the following actions on the lead by clicking the relevant button alongside the lead name –
- Add activities.
- Add tasks.
- Add notes.
- Add sales activities.
- Send email to lead.
- Create processes.
13. Add leads
To add new leads through your Marvin account –
- On the Smart Views page, click Quick Add Lead and fill the form with the lead’s details.
- On the left most tab, click
 , then select Lead. Fill the form with the lead’s details. You can also add Opportunities the same way.

14. Tasks
You can now add LeadSquared Appointments and To-do Tasks instantly on Marvin.
- To add new tasks –
- On the Smart Views tab, click My Tasks.
- Click Create and enter the relevant details for your task.
- Alternatively, on the left most tab, click . Then select Task. Fill the form with relevant details and save your task.
- On the My Tasks page, to view task details, click the empty area in each row with the task ID.
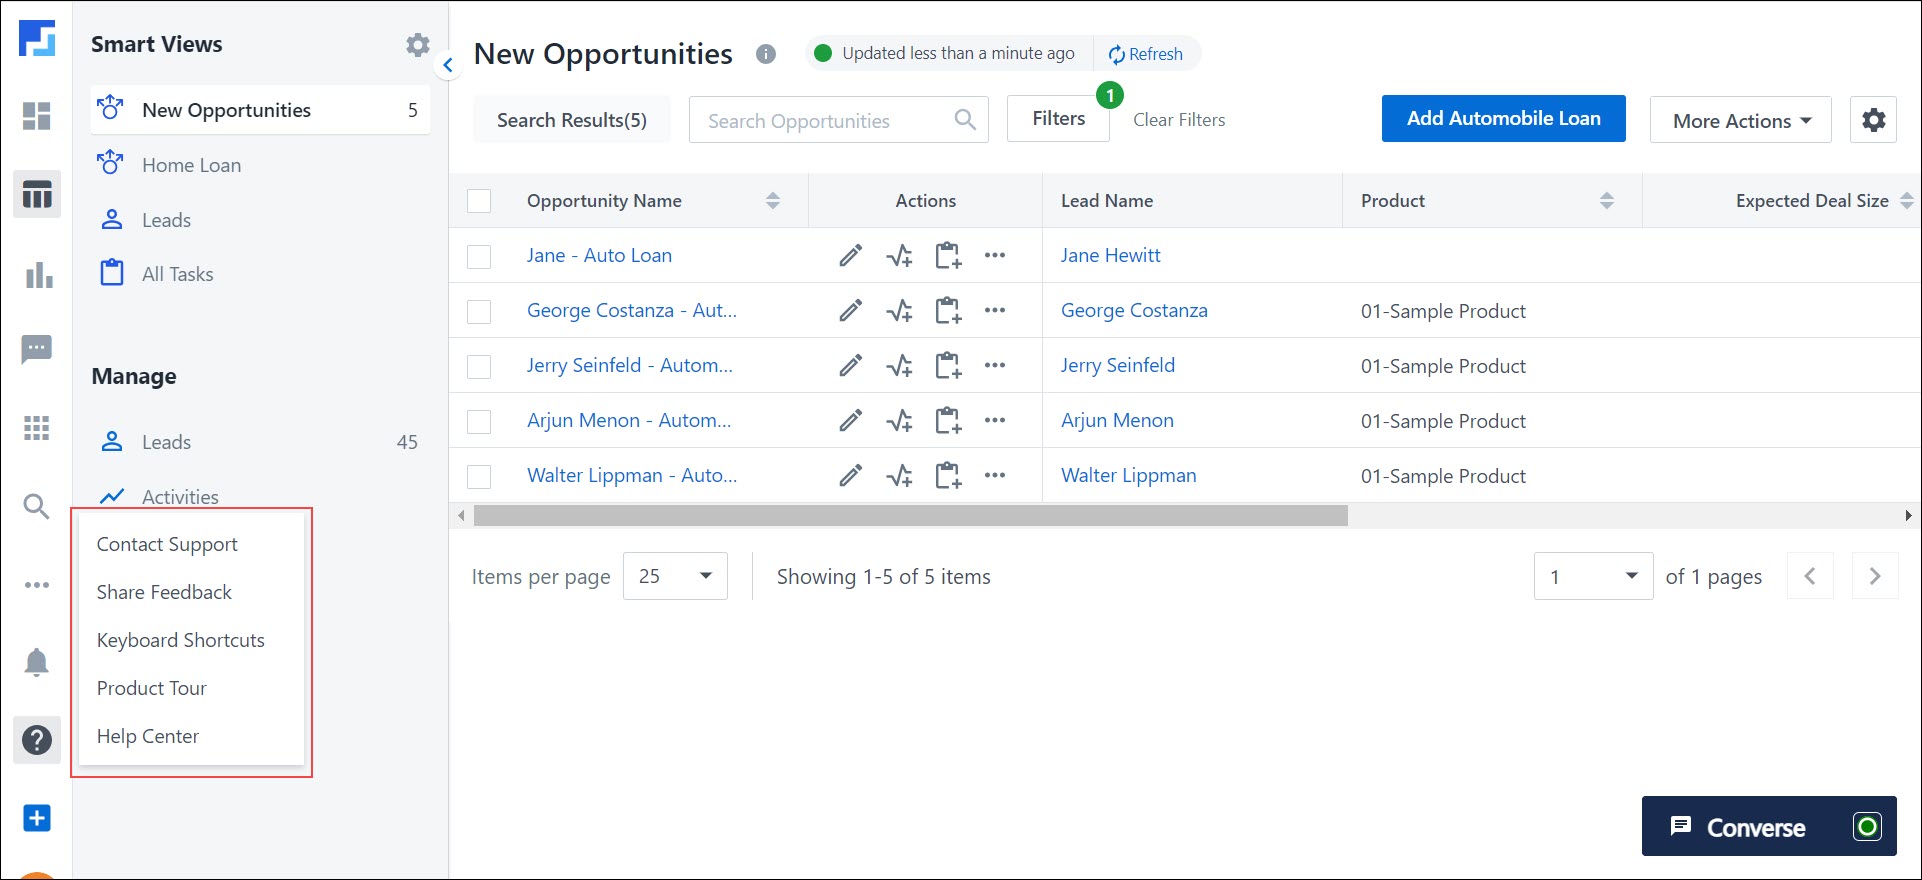
15. Help
For information on how to use Marvin, on the left side of the page, click
![]() .
.
- Contact Support – You will be redirected to the LeadSquared helpsite.
- Keyboard Shortcuts – View a list of all the keyboard shortcuts supported on Marvin here.
- Product Tour – A quick product tour will be displayed to acquaint you with Marvin’s features.
- Help Center – You will be redirected to the Marvin help article.
16. Make Calls
Marvin supports telephony integrations to allow sales users to seamlessly manage call centre actions. The telephony connectors supported in Marvin are –
To call a lead –
- On the Smart Views page, alongside the lead’s name, click . Then, click Call.
- On the Lead Details page, click the lead’s phone number.
- On the search bar, enter the lead name. Once you find the relevant lead, click
 .
.
The new non-intrusive call pop-up is now placed at the bottom of the screen. You can view the lead details and other information on Marvin while on a call with a lead.
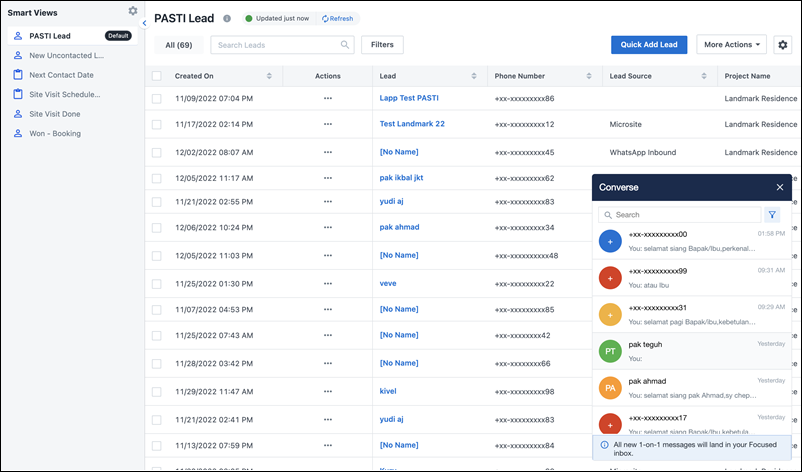
17. Converse
Converse lets you have real-time conversations with your leads through –
- SMS (currently available only in the United States).
- WhatsApp.
- Carter (LeadSquared’s internal reminder and notifications system).
You can send and receive images, view previous conversations and more using this feature.
Any Questions?
We’d love to answer your questions or hear your own unique use cases. Feel free to share your experiences in the comments section below.
Smart view not samsung a13
Hi Vishwas. We need more context on the issue. Please reach out to support@leadsquared.com with a detailed explanation of the problem you’re facing. We’ll get back to you ASAP.
how do I find my overdue task
Hi, Joy. Here’s what you can do to view your Overdue Tasks.
1. Navigate to Manage Tasks page and click Filter.
2. Select the Task Status filter, and click Overdue.
Alternatively,
You can also create a Smart View tab with the tab type as Task, and Task Status as Overdue to list all overdue tasks.
How do I get my disposition / default quick activity at the bottom of the screen fully there
Hi, Evelyn. Are you referring to the disposition of a phone call?
How do I turn off bell sound from notifications?
Hello, Steve.
You can disable the notification sound on the browser settings.
Can we have multipe logos on marvin login based on user or team.
Hi, Anil.
Currently, only one logo can be displayed on the login screen.