How to Create a Form
1. Feature Overview
The Forms (also called Dynamic Forms) and Process Designer features help your users create intelligent forms to capture lead and opportunity data that are relevant to their departments, products, or processes.
You can customize forms to behave in ways specific to your use cases, and prompt users to collect the right information based on a lead’s previous inputs.
- If you’re new to the forms and processes feature, see Forms and Processes – Feature Guide.
- Once you’ve created a form, the Process Designer helps you choose where, and to which users you want the form to appear. You can also use it to combine multiple forms into processes, see How to Create a Process.
2. Prerequisites
- You must be an administrator user to create and edit forms.
- To access opportunities, you must have the opportunities feature enabled on your account. To enable it, please write to support@leadsquared.com.
3. Manage Forms
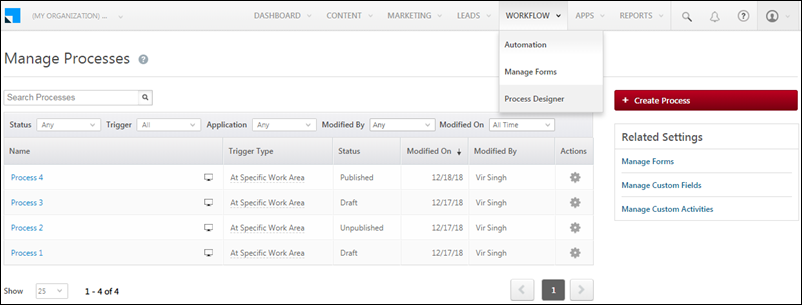
To access the Manage Forms page, navigate to Workflow>Manage Forms.
All forms you create will appear on the grid. You can search for a form, filter by tags, and even filter on the basis of status, type, modified by and modified on dates. The settings icon under the Actions column allows you to edit, delete, add tag, clone, rename or publish a form and test a published form.
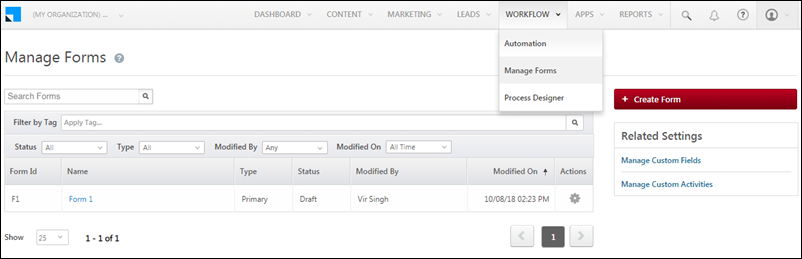
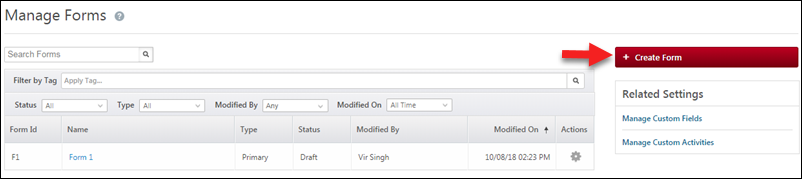
Click the Create Form button to create a new form.
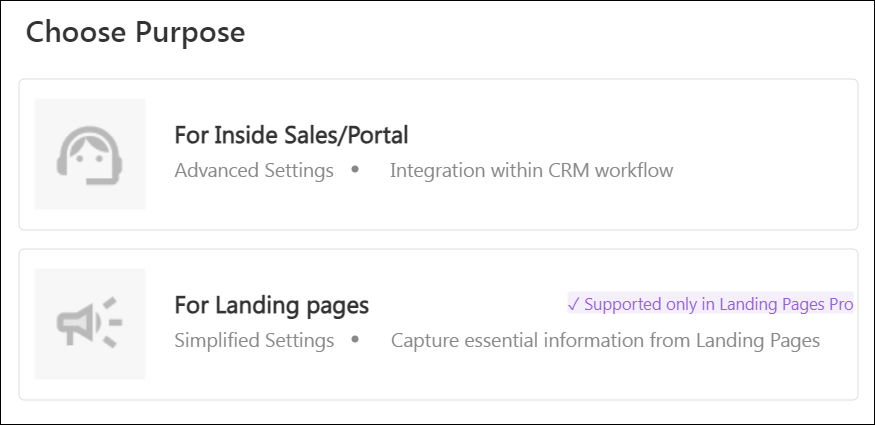
Select the form purpose –
- For Inside Sales/Portal – Select this option if you’re creating a general-purpose form and a form for LeadSquared Portals.
- For Landing Pages – Select this option only if you’re creating a form for Landing Pages Pro.
3.1 Form Settings
On the Create Form pop-up –
- First, give your form a name.
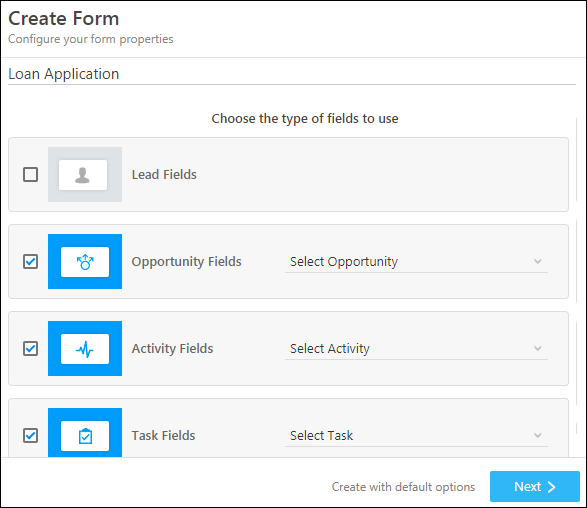
- Then choose whether you want the form to contain lead fields, opportunity fields, activity fields, and/or task fields. If you choose to include opportunity, activity and/or task fields, you must select an opportunity, activity and/or task type.
- Click Next.
Alternatively, you could click the Create with default options link at the bottom to create a form with only lead fields.
Note:
- If you choose to add opportunity/task/activity types to your forms, you must add at least one field from the opportunity/task/activity to your form.
- You can also use Custom Fields Sets to provide document upload functionality to your forms.
- Check user availability and schedule tasks on the go, see How to Add Tasks to a Form.
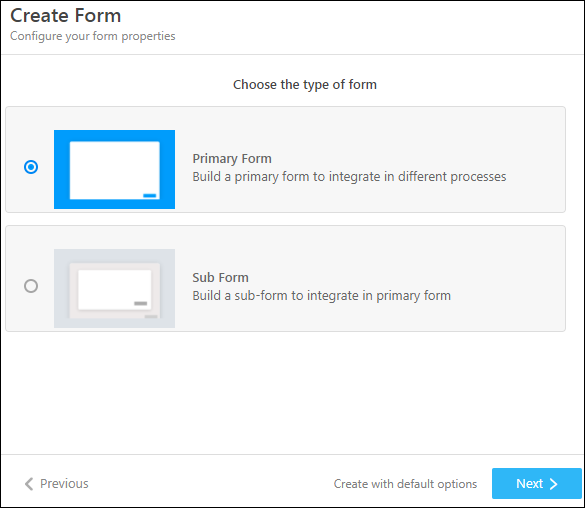
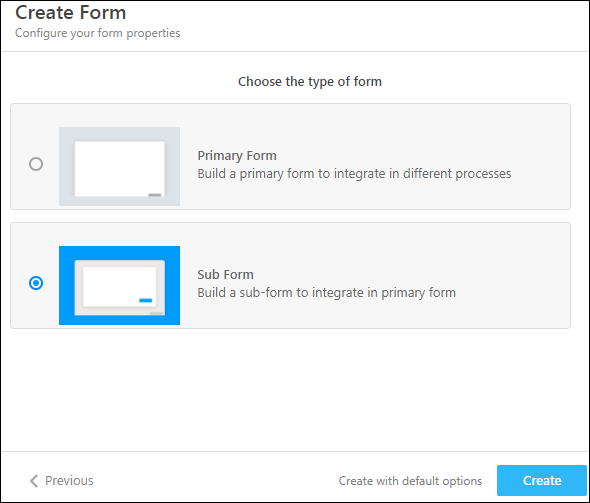
Now choose the type of form you want to create –
- Primary Form – This is the main form that will appear on the Manage Forms grid. You can use the Process Designer to combine primary forms into processes.
- Sub Form – A sub-form can be integrated into a primary form. It will show up on the Manage Forms grid.
Click Next, when you’re done.
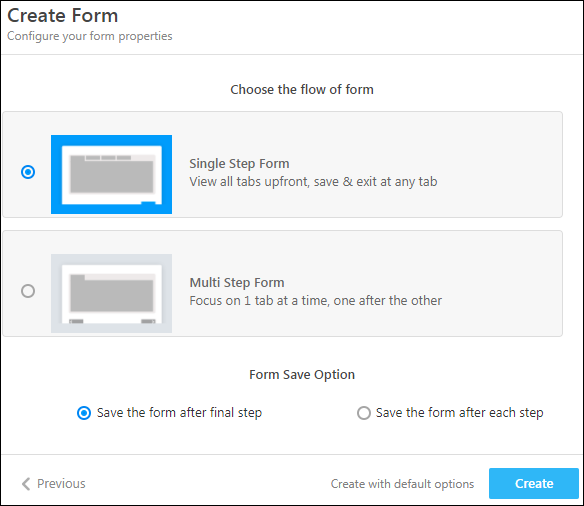
Now choose how you want your form to flow. Choose between –
- Single Step Form – All tabs will be visible upfront. You can switch between tabs, and save & exit while on any tab.
- Multi Step Form – Users will only see one tab at a time. You can only save and exit the form at the last step.
- Form Save Option – You can choose to save the form only after the final step, or save it after each step.
Then click Create.
3.2 Rename Your Form and Change the Settings
The form editor lets you design your form, configure properties, create rules, save and finally publish to live.
To change the form name, click the edit icon alongside the form name at the top of the form editor.

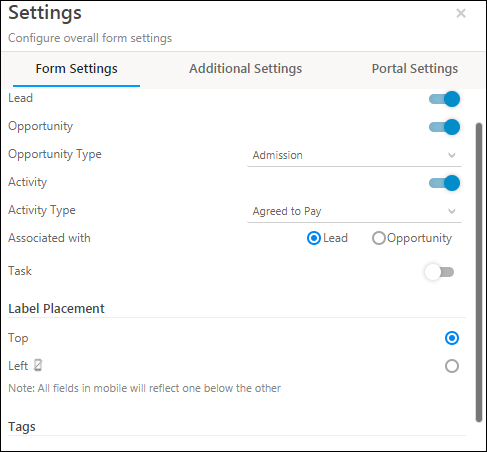
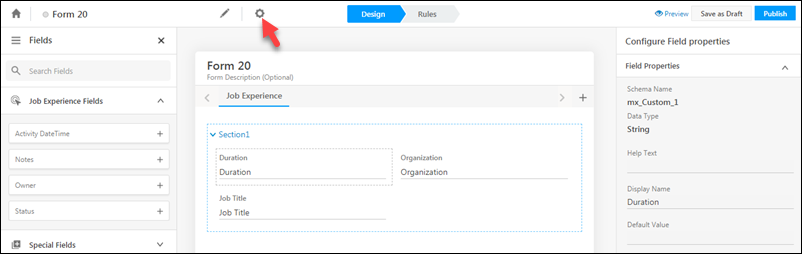
You can change some of the form properties you selected in the previous steps in the form settings menu. Click the wheelicon to open the settings menu.

Add/remove lead, opportunity, activity and task fields, change the activity or task type, determine if the activity and task are associtated with a lead or an opportunity, adjust the placement of the labels and add tags that you can later filter your forms by.
Click the Additional Settings tab for more options.
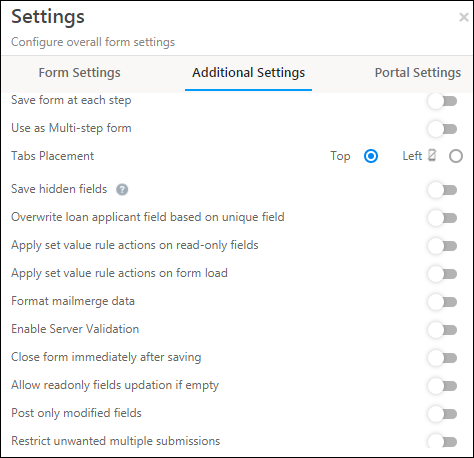
Set the form as single-step or multistep.
- Save form at each step – When enabled, for multi-step forms, the form is automatically saved at the end of each step.
- Enable Tab Progress Bars – Displays a visual progress bar across tabs in multi-step forms, indicating completion progress within the bar as you fill the fields within a single tab.
- Use as Multi-Step Form – When enabled, you can use the form as a multi-step form.
- Save Previous Tab Data – When enabled, the data stored in the current, as well as previous form tab, is automatically saved when a lead moves on to the next tab. This ensures that dependent fields (set up using form rules) in previous tabs of the form are saved, when values in the current tab are updated.
- Call Pre-Submission Event in Each Tab – Runs pre-submission events after each tab submission instead of only once at final form submission. Useful for validating data or triggering actions step-by-step.
- Tabs Placement – Choose whether you want to display the tabs on the top of your form or on the left side. If you choose to place them on the left side, they will still render at the top on mobile devices.
- Save hidden fields – When you set the value of a particular field and do not want leads to change it (for example, College Course = Bachelors of Technology), you can hide the field in your form. However, this value (e.g., Bachelors of Technology) will not get saved by default for the lead. Enabling the ‘Save hidden fields’ option will ensure that the field value is saved for every form submission.
- Allow Creation of Duplicate Leads in this Form – When enabled, the form bypasses duplicate validation and updates existing leads with matching unique identifiers. This is commonly used in portal forms and works only if the following portal form settings are configured:
- Search Key for Portal (Refer below for Portal Form settings)
- Avoid Creation of Duplicate Leads (Refer below for Portal Form settings)
- Also, dedup rule must not be configured/should be disabled on the respective Opportunity Type.
- Overwrite lead fields based on unique fields – When you enable this option and enter a phone number/email Id (or whichever field is marked unique in your account) of an existing lead, you will be prompted to auto-populate the lead’s details.
- Apply set value rule actions on read-only fields – It allows you to use the set value rule actions on read-only fields.
- Apply set value rule actions on form load – When a previously filled form is opened in ‘Edit’ mode, this setting allows you to refresh data for fields where you have configured the Set Value action. For eg, you may want to fetch the latest credit score of a lead, through API, every time the form is opened.
- Format mailmerge data – This setting is applicable when the Form needs to call a LeadSquared Lapp or an API and pass DateTime field values and Boolean field values. When the setting is enabled, irrespective of the Date Format setting in the User Profile (dd/mm/yy, mm/dd/yy, or dd/mm/yyyy), the Form will convert the date value from the setting format to a standard format which is, dd/mm/yyyy hh:mm:ss and send it to the API or Lapp. Similarly, it converts the boolean field value as either true or false.
- Server Validation – When enabled, field validation happens at the server-side as well.
- Close Form immediately after saving – Improves the performance of a form, and closes the form faster after it is saved.
- Allow readonly fields updation if empty – Allows existing rules to update readonly fields only if they are empty.
- Post only modified fields – Improves the performance of large forms, where only modified fields are posted in Edit mode.
- Enable Async Processing – Ensures that payment activities are posted to LeadSquared even if the end user is experiencing internet issues. For details, see Asnyc Payment Processing.
- Remove Close Button – Removes the close or exit button from the form interface to prevent users from exiting before completing the form.
- Ungroup CFS fields – Ungroups Custom field sets associated with leads/opportunities/activities in the form and allows you to re-arrange the CFS fields throughout the form. This setting cannot be undone once enabled.
- Quick Validation – Form fields are immediately validated (when the user switches focus to the next field). This can be used to validate critical form fields on the go (like PAN, Social Security, etc.).
- Error Message Duration – Sets the duration (in seconds) for which error messages remain visible on the form before disappearing.
- Allow Form Submission when Duplicate Opportunity is Detected – This will allow the Form to be submitted when a duplicate opportunity is detected while simultaneously updating the existing opportunity. For details, see Update Existing Opportunity through Forms when Duplicate Opportunity is Detected.
Click Portal Settings to use your form as a registration form for your portals. To know more, please refer to Portal Registration Forms.
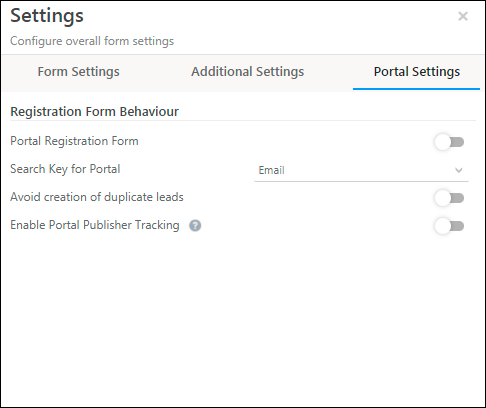
- Portal Registration Form – To use this form as a registration form on your LeadSquared Portal, enable this
 slider.
 - Search Key for Portal – Select a unique field (e.g., Email Id, Phone Number, etc.) to mark as the search key. You can also use custom fields that are unique. To know more, please refer to How to Make a Custom Field Unique.
- Avoid Creation of Duplicate Leads – To prevent duplicate leads from being created through your registration form, enable this slider.
- Enable Portal Publisher Tracking – Third-party lead providers (e.g., CollegeDunia, Sulekha, etc.) can track the status of the leads they’ve shared with you when this setting is enabled. This setting is a prerequisite to set up the Publisher Connector.
3.3 Design Your Form
This section details how to create and configure the tabs, sections, and fields in your form.
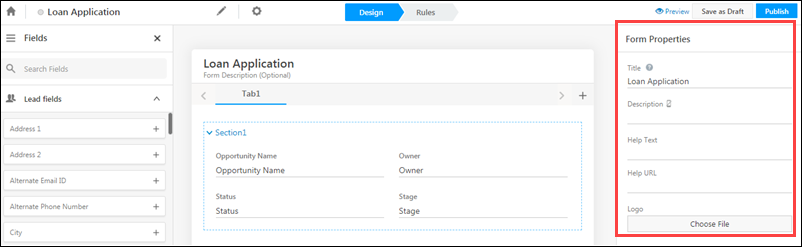
Adjust Form Properties
- Click the top section of your form.
- You can adjust the form properties on the right pane. These include the form title, form logo, description help text and even a help URL you can direct users to.
Change the Tab Name
Click on a tab to change the display name using the tab properties panel on the right side of the page.
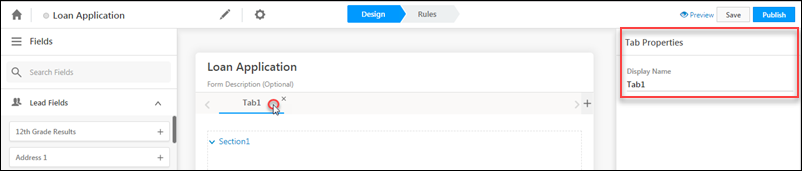
Click the Add button highlighted below to add a new tab to the form.

Adjust Section Properties and Add/Remove Sections
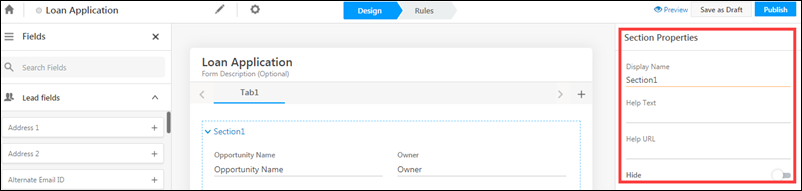
Click a section to edit the section properties using the pane on the right of your screen. You can edit the section’s display name, add help text and a help URL. You can also choose to hide the section if necessary. You can also add/remove and re-order sections using the buttons that appear.
Add Fields to a Section
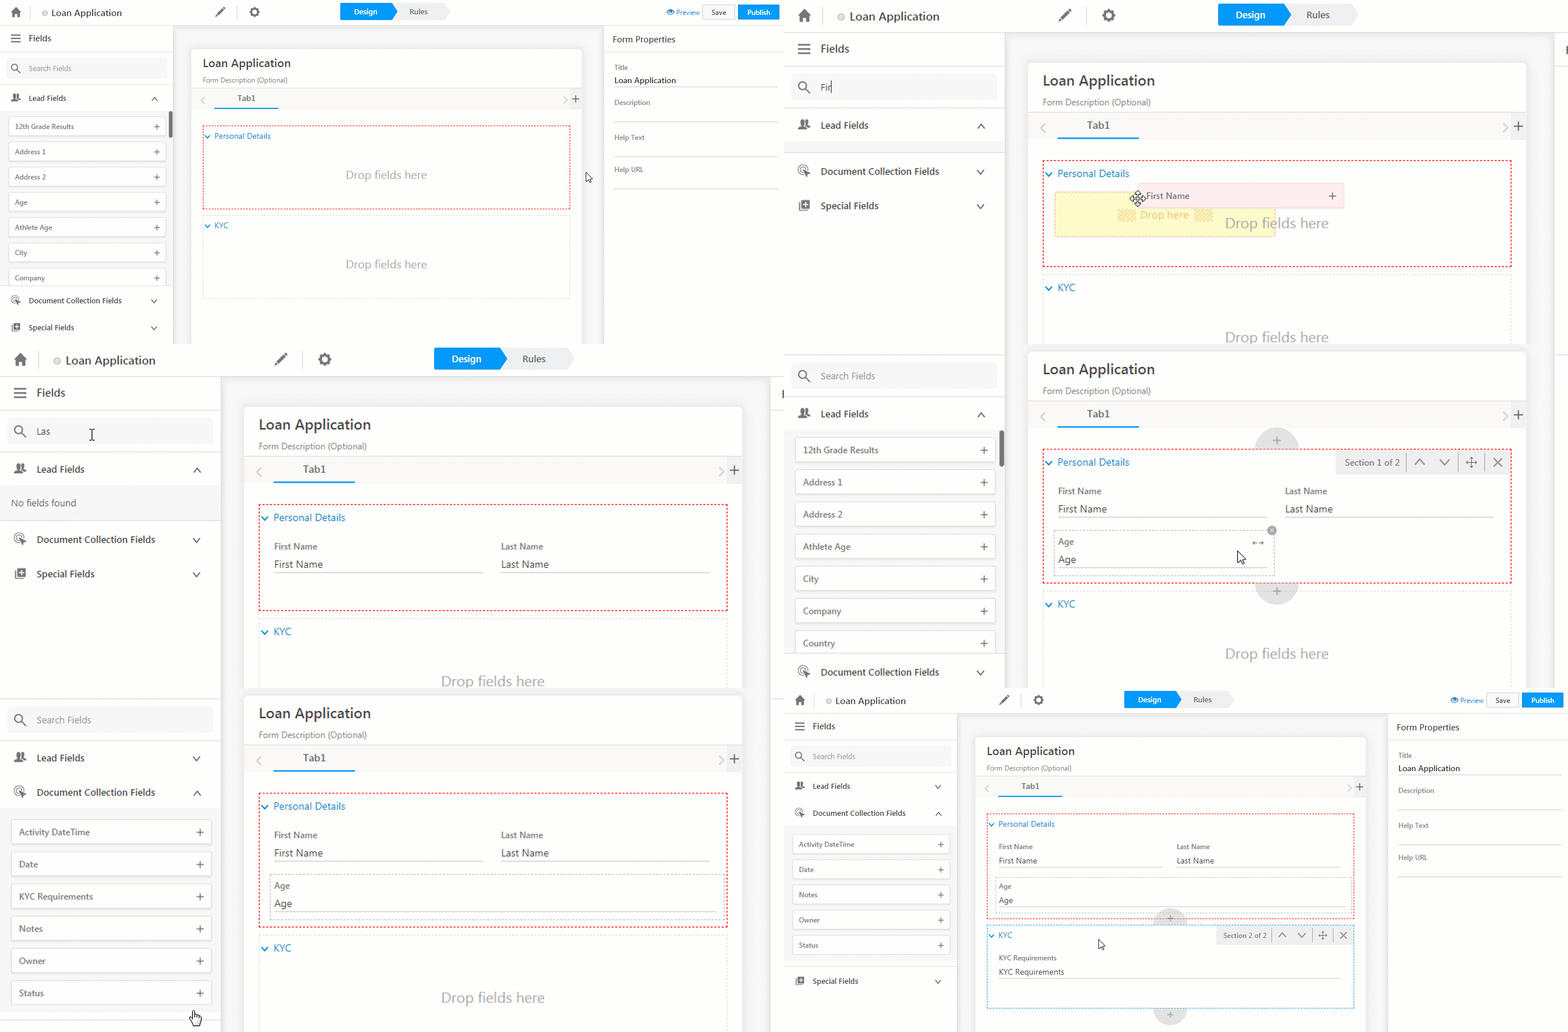
Lead, activity and special fields show up on the left pane. You can add fields to a section by simply dragging the field from the left pane and dropping it into a section. Alternatively, you can use the add button alongside each field. You can search for a particular field or simply scroll down to locate it.
Once you’ve added fields to a section, drag and drop them to re-order, expand or collapse. Click the cancel icon to remove a field from a section.
Special Fields
Using special fields you can add –
- Labels – Labels can be used for placeholder values or text.
- Horizontal Line – You can place a divider on your Form through a Horizontal Line.
- Sub-Forms – You can build a Sub-Form to integrate into your primary Form.
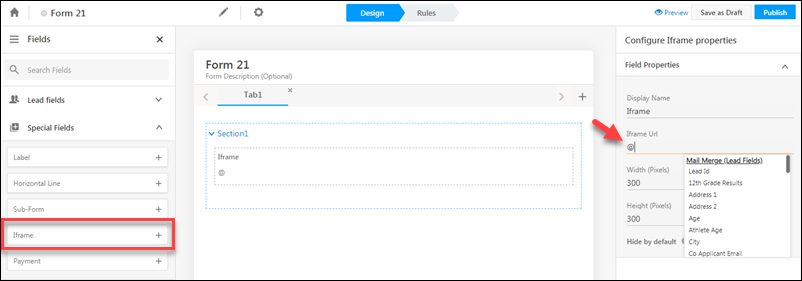
- Iframes – An Iframe can be used to load an HTML page within your Form.
- Payment – The Payment field can be used to add a Payment Gateway to collect payments on your Form. For more details, see How to Add a Payment Gateway to a Form.
- Preview – This field can be used to preview the information being entered before Form submission, and to download a PDF version of the Form. For more details, see Preview and Download Forms.
- Password & Captcha – Password and Captcha fields are used while creating Portal Registration Forms.
- Grid – The Grid field is only applicable while viewing the Form on a Mobile. Grids contain Tiles, that can be used to insert external links to websites, apps, and Sub-Forms.
- Button – Add button fields to your Form.
Drag and drop a special field into a section, then click on the field to configure its properties on the right pane.
In the example below, we’ve added an Iframe to render some URL on the form. Type @ in the Iframe URL field to mail merge lead and activity fields. For example, you can mail merge Lead Id and Activity Id fields to push data to a lead or activity.
Adjust Field Properties
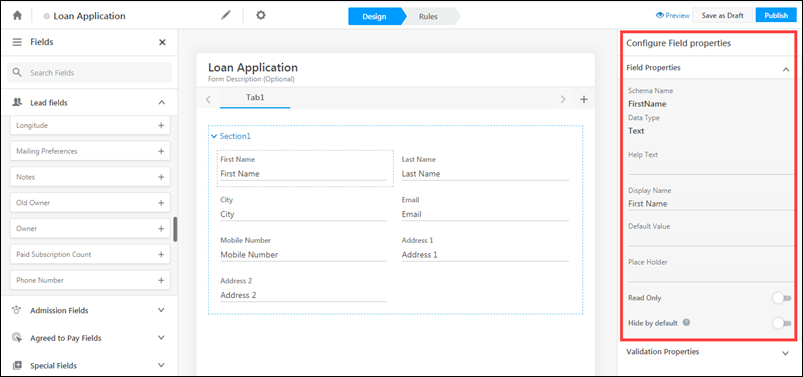
When you click on a field you’ve added to a section, the field properties will become editable on the right pane. There are 3 sets of properties you can edit – label, control and validation properties.
Label properties allow you to change the field’s display name, add help text, add a default value, a place holder value, make the form read-only if required, and hide/show the field label.
Validation Properties
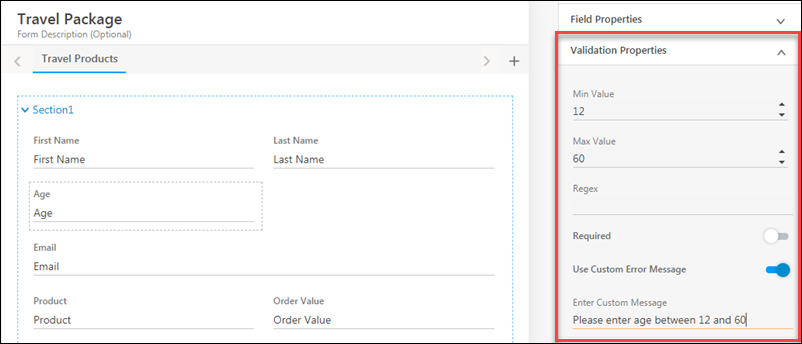
Click Validation Properties for field validation configurations like minimum and maximum length, regex, setting the field as required or mandatory and custom error messages.
OTP Validation
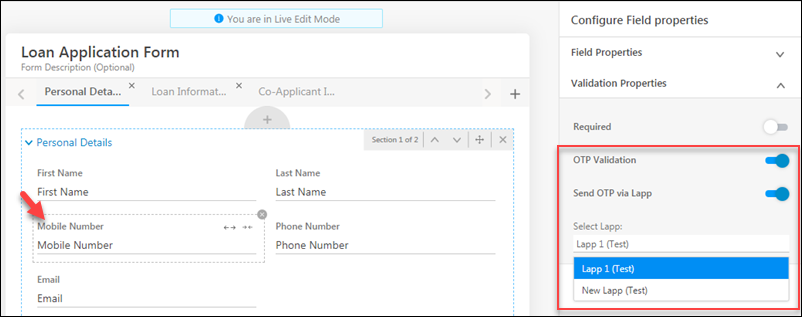
Phone and Email fields have an OTP validation option. When users are filling the form, they’ll have to enter an OTP to verify that the email or phone provided is valid –
- This can be done with the default LeadSquared service provider option by enabling the OTP validation option.
- Or it can be done through your own SMS service provider or domain, using Lapps. In which case you must also enable the Send OTP via Lapp option and then choose a Lapp.
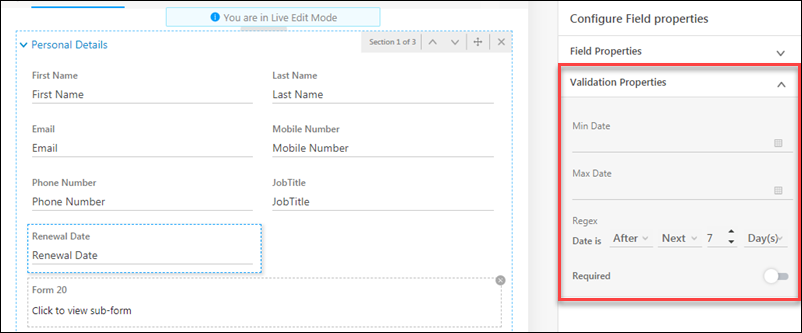
Date fields allow you to set different validations such as minimum/maximum dates and also dynamic date ranges (e.g, After next 7 days, etc.)
Preview the Form
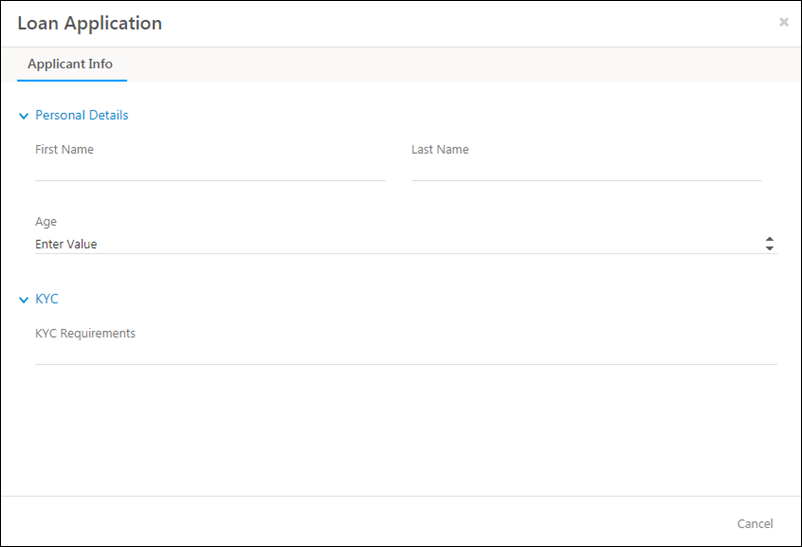
It’s always good practice to keep previewing your form as you build it. The preview option is available on the right side of the top menu of the page.

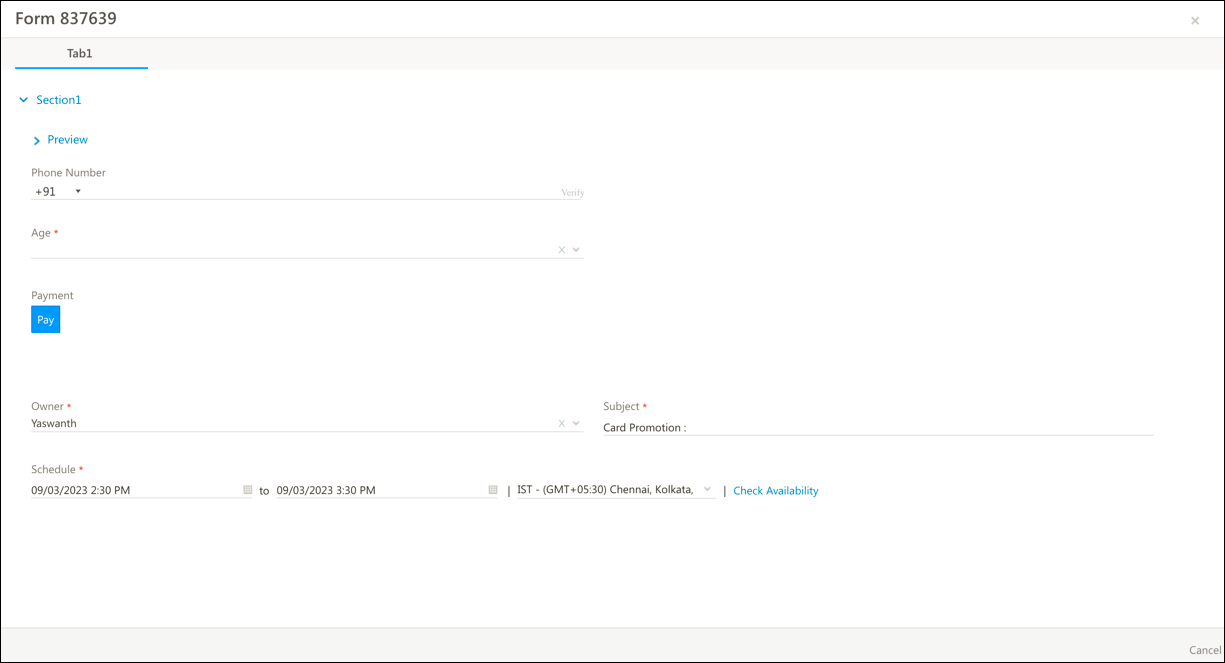
4. Create a Sub-Form
You can create a sub-form from the form creation wizard.
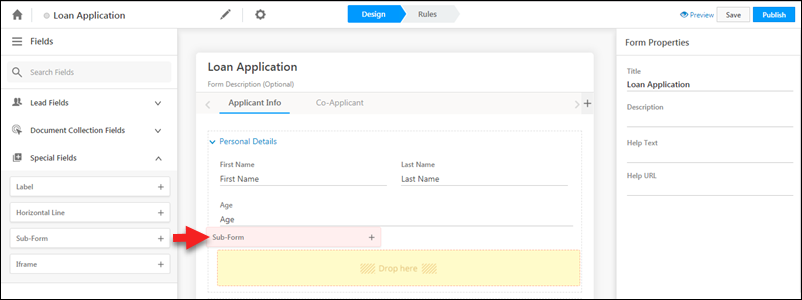
Or directly from the form editor.
- On the left pane, click Special Fields.
- Next, drag the Sub-Form special field into the appropriate section in your form.
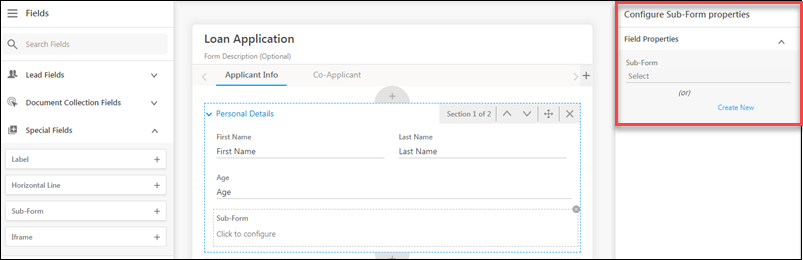
On the right pane, select an existing form from the drop-down or click Create New.
A sub-form editor will open in a new tab in your browser. Create the sub-form the same way you created your primary form. Click Publish when you’re done.
Add more of the same activity
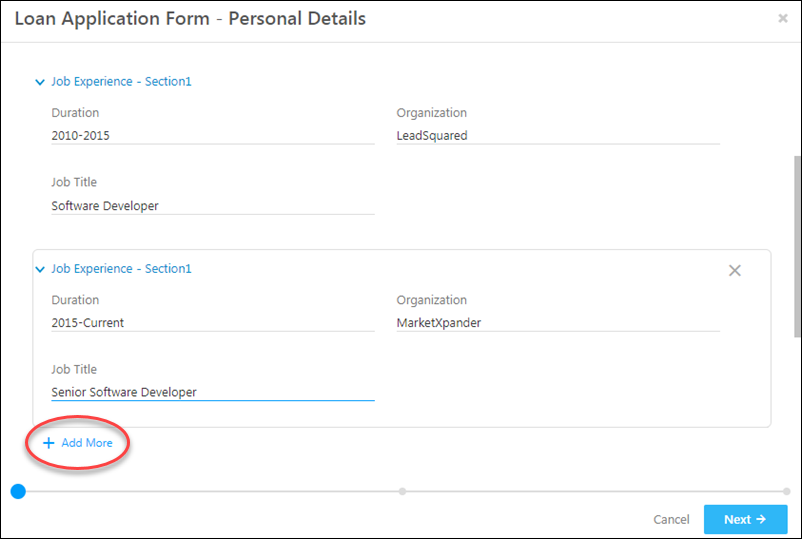
You can add multiple instances of the same activity type, each time with different fields. For example,
- Let’s say you have an activity type called ‘Job Experience’ with the fields ‘Duration’, ‘Organization’ and ‘Job Title’.
- You want this activity multiple times, each time with different fields to represent different phases of a candidate’s job experience.
- For example, each time the job experience ‘Duration’ field will vary (2010-2015, 2015-2017, 2017-2019), etc.
- Accordingly, the ‘Organization’ and ‘Job Title’ fields will also change.
To achieve this –
Create a sub-form with the required activity type (e.g. job experience, education experience, etc.), then click the settings icon.
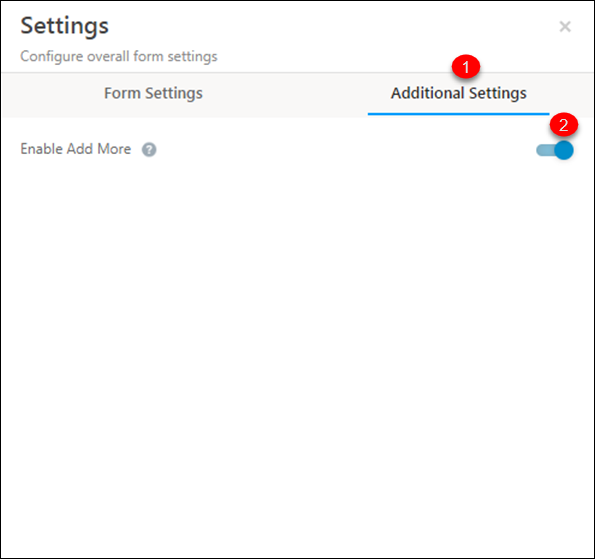
Click Additional Settings, then click the slider icon alongside the Enable Add More setting.
You can then add multiple instances of the same activity through the form. These activities will be posted against the associated lead and can be viewed on the lead details page.
5. Create Form Rules
Rules let you configure the behaviour of your form. You can show/hide and set values for fields based on certain conditions. You can also show/hide tabs, sections and sub-forms.
Here are some common use cases you can tackle using rules –
| Use Case | Solution |
| Capture Multiple Addresses |
|
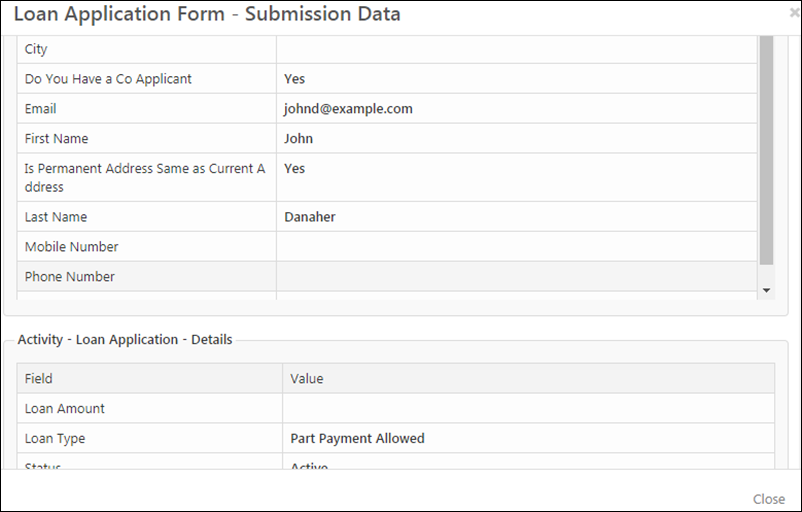
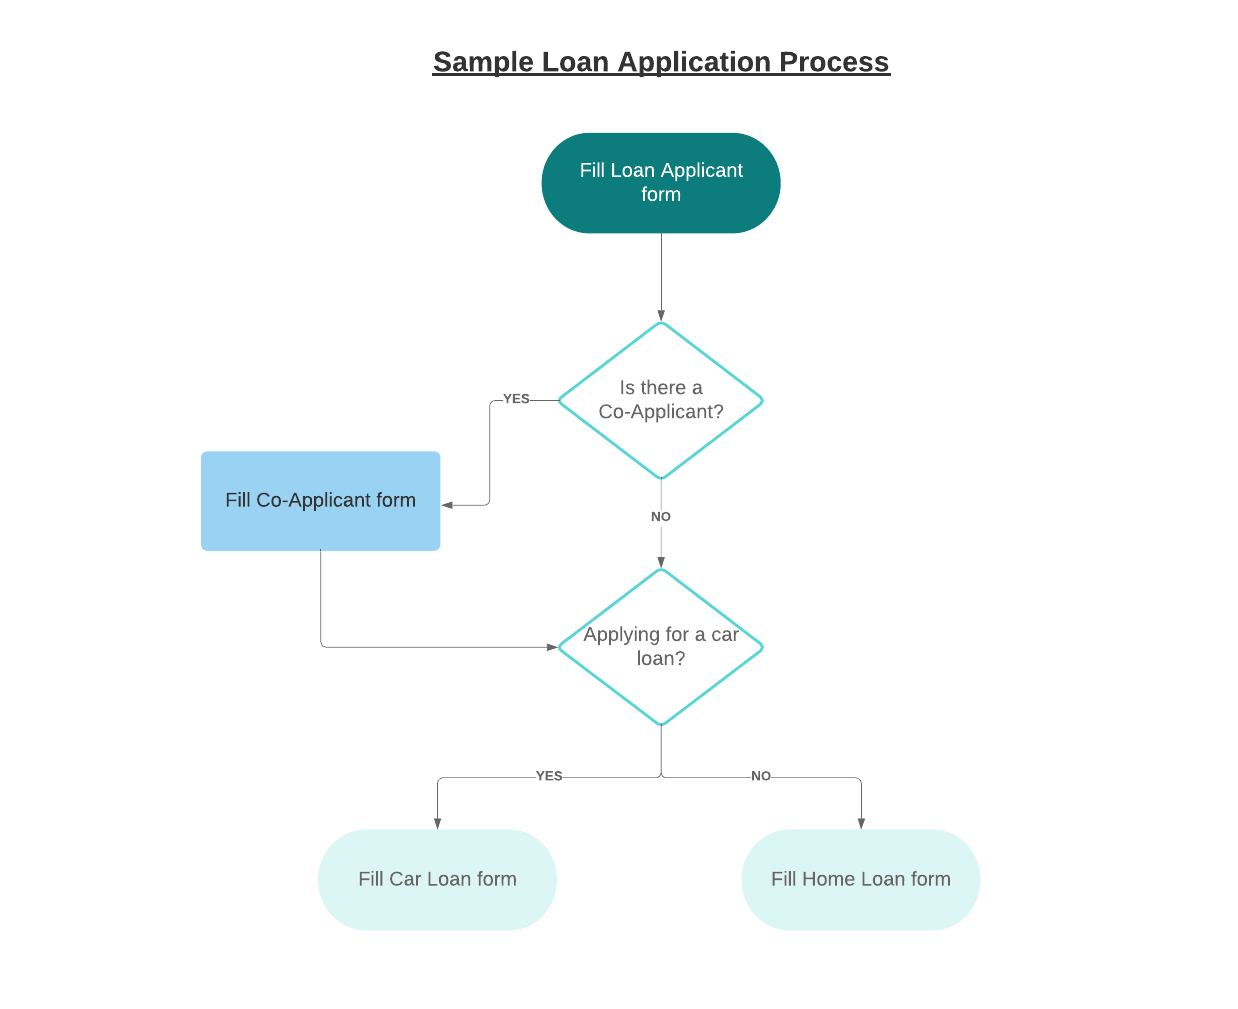
| Capture Co-Applicant information |
|
| Making fields Mandatory |
|
Note: You can also set conditions on multiple fields. For example, if ‘Gender’ is ‘Male’ and ‘Age Group’ is ‘Adult’ then show a ‘Men’s Clothing Preferences’ sub-form to capture clothing preferences.
To create a rule click the Rules tab on the top menu. Then click Add Rule.

You can set multiple conditions and multiple action per rule by clicking the add icon. You can add multiple rules as well by clicking the Add Rule button. Be sure to select if you want the action to proceed if all rules are met or if any 1 rule is met.
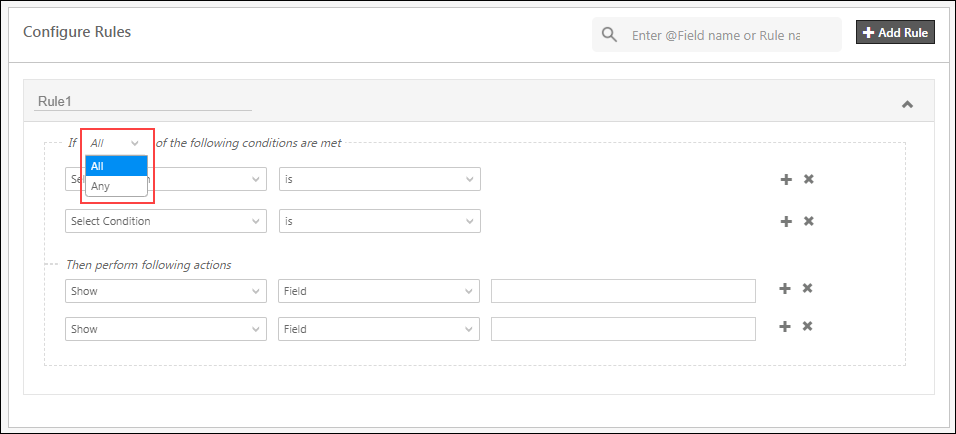
Use the fields provided to set up your conditions and actions.
- Conditions can either be set up on form load or fields. For fields, conditions will vary based on the data type of the field you’re setting conditions on. For example –
- Number fields will give you options like ‘Greater than equal to’, ‘Is Between’ etc.
- Drop-down fields will let you choose between pre-defined options.
- Text fields will give you options such as ‘Contains’, ‘Does Not Contain’ etc.
- You can also select form – on load condition for use cases such as configuring drop-down fields before the page is loaded.
- Actions will trigger when your condition(s) are met. You can trigger actions like –
- Show
- Hide
- Set Value*
- Make Read Only
- Make Mandatory
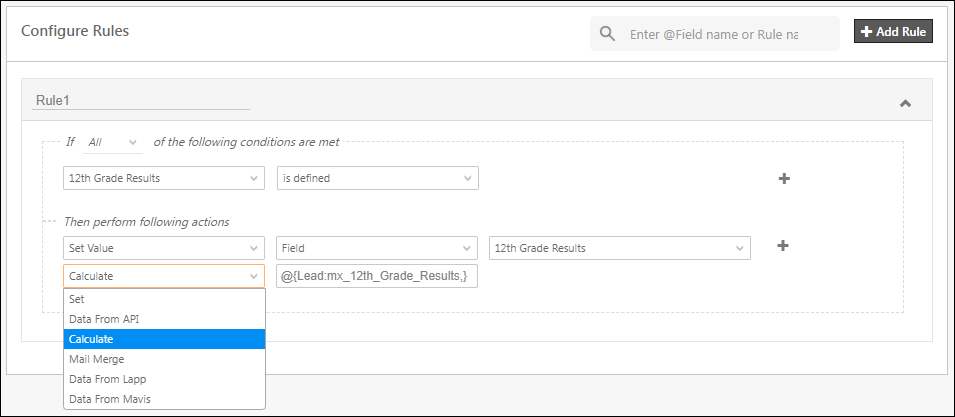
*If you’re using the action Set Value, you can set the value of a field –
- Through API data
- Mail Merge lead/activity fields
- Data from Lapps
- Perform calculations on numeric fields
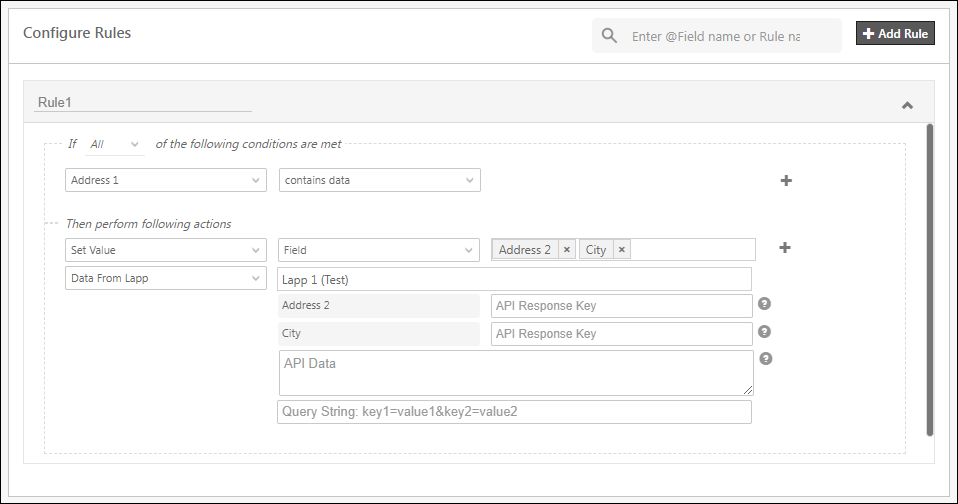
Note: You can set values for multiple fields through API and Lapps –
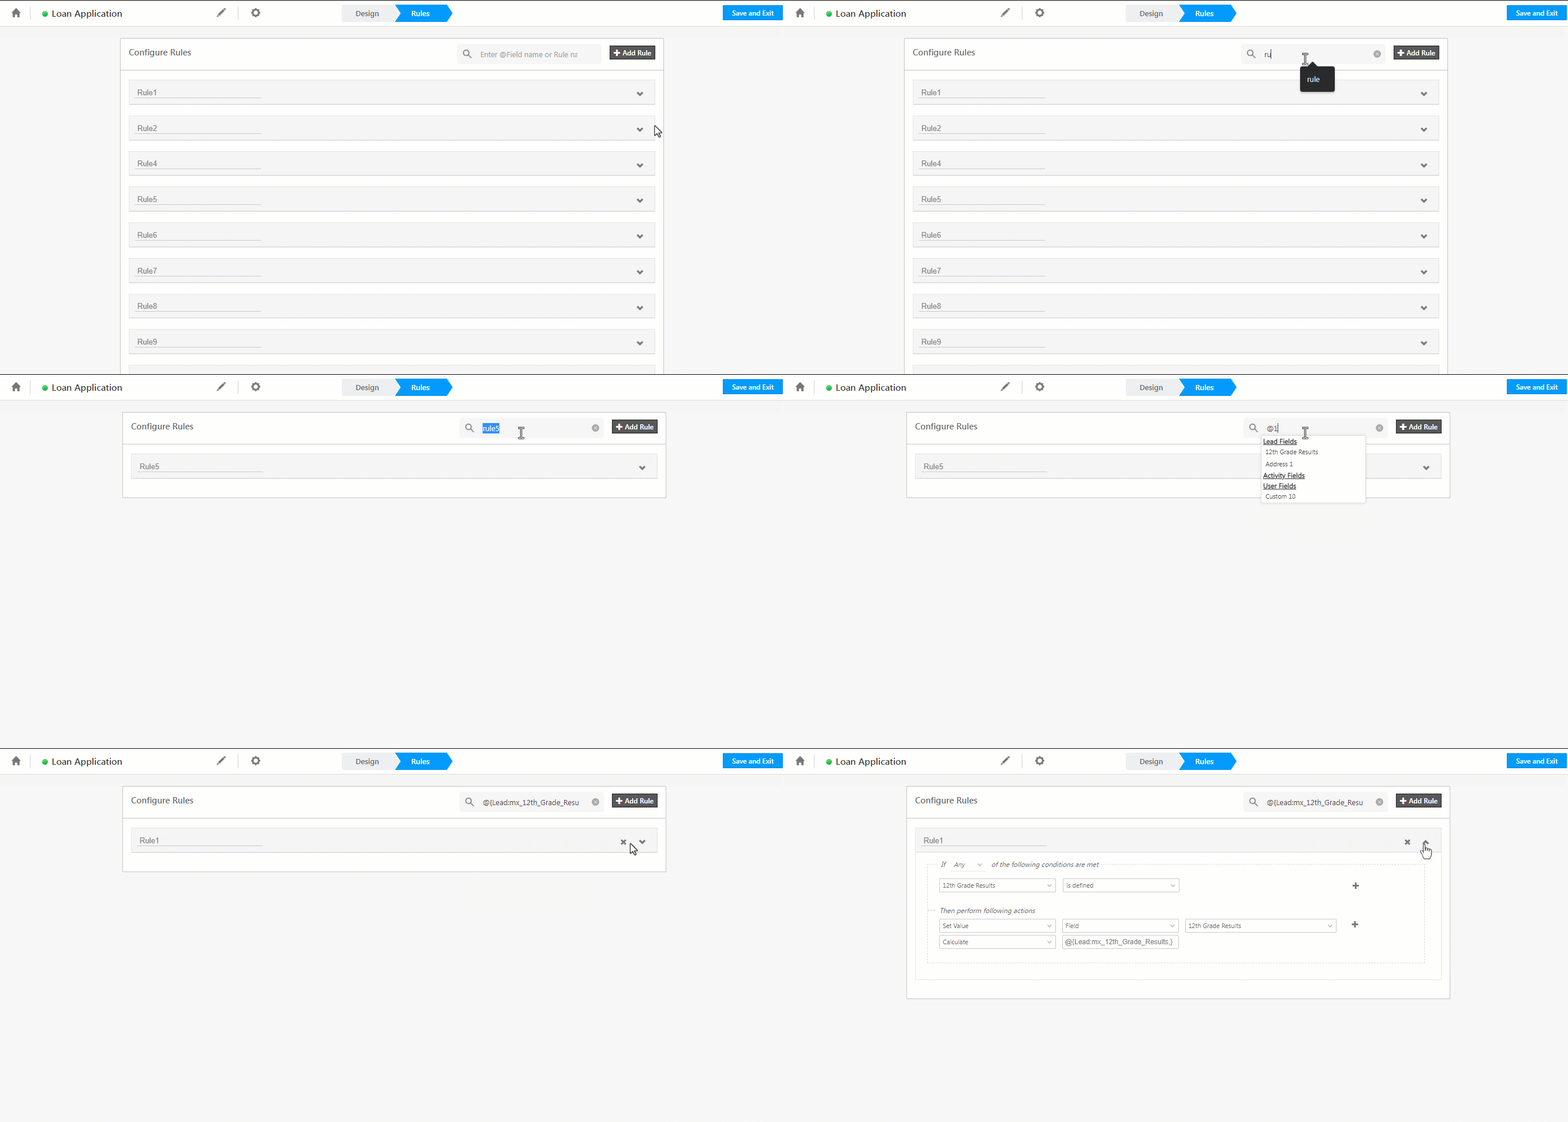
You can also search for Rules by entering the Rule name or Field name (format ex: @Phone Number) into the search box and access the Rule quickly.
6. Save and Publish
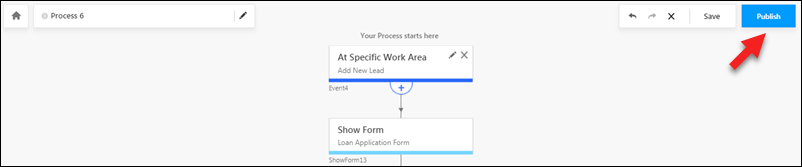
Your form auto-saves as you create it but you can also click Save manually. When you’re satisfied with the design and rules of your form, click Publish.

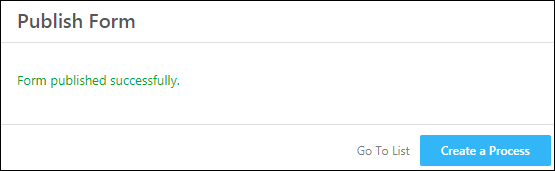
On publishing a form, you can either go back to list of forms on the Manage Forms page or directly to creating a process through the Process Designer.
7. Process Designer
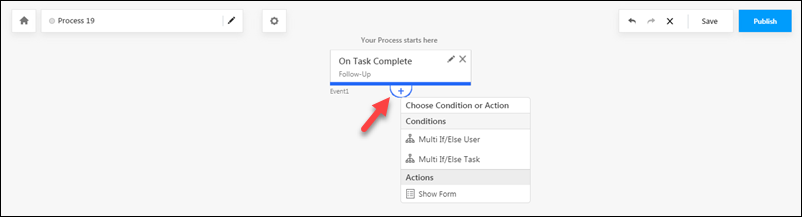
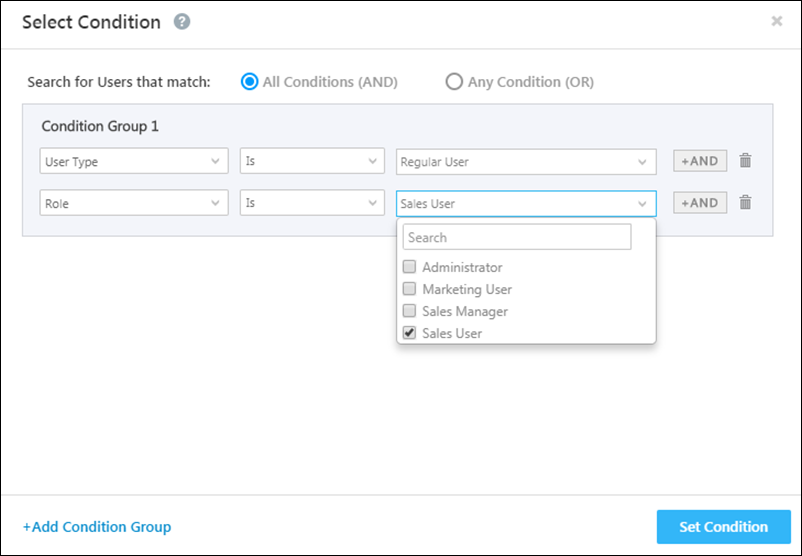
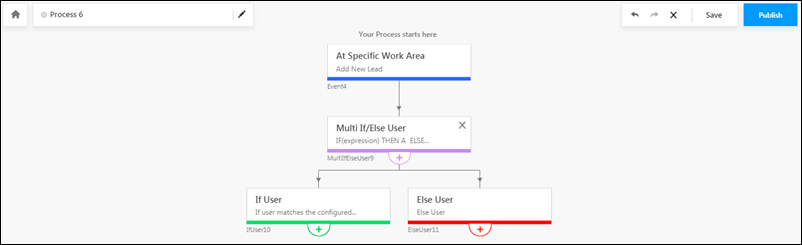
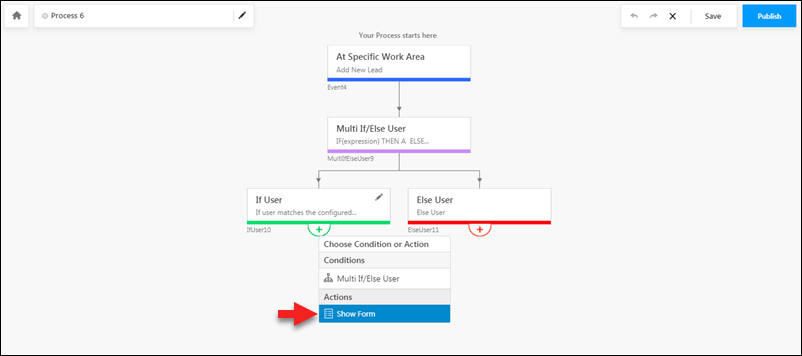
Once you’ve published your forms, the process designer will help you integrate them into your workflows, chain them together to create processes, show them to specific users and do lots more. See How to Create a Process.
8. FAQs
Can I test a Sub-form directly?
Sub-forms do not have a standalone test option. To test a sub-form, assign it to a primary form and test it through that primary form.
Why can’t I mark a field as mandatory in form rules?
- Issue: Unable to Mark a Field as Mandatory via Form Rules
- Explanation: If the field is not visible in the dropdown for the “Make Mandatory” action, it is likely a Unique Field.
- Solution: Unique Fields cannot be selected for Rule Actions. You must make the field mandatory – add it to the form, select the field and then under Validation Properties enable Required.
9. Troubleshooting
“Invalid OTP for Phone, Please Re-Verify” Error During Form Submission
- Issue: After entering and verifying the phone number with an OTP, an error appears during form submission: “Invalid OTP for Phone, Please Re-Verify.”
- Explanation: This error occurs when the OTP for the phone number is verified, but the form submission is delayed for more than 15 minutes. The OTP validation process happens twice: When the phone number is entered and verified with the OTP and when the form is submitted. Since the OTP is only valid for 15 minutes, if the form is not submitted within that time, it will prompt the error.
- Solution: To avoid this issue, ensure the form is submitted within 15 minutes of verifying the phone number with the OTP.
- Issue: Users who don’t have direct access to a lead receive the error “You are not authorized to update this record” when attempting to update lead records via a dynamic form on mobile.
- Root Cause: This occurs because users lack the necessary permissions to update or create records for leads they cannot directly access.
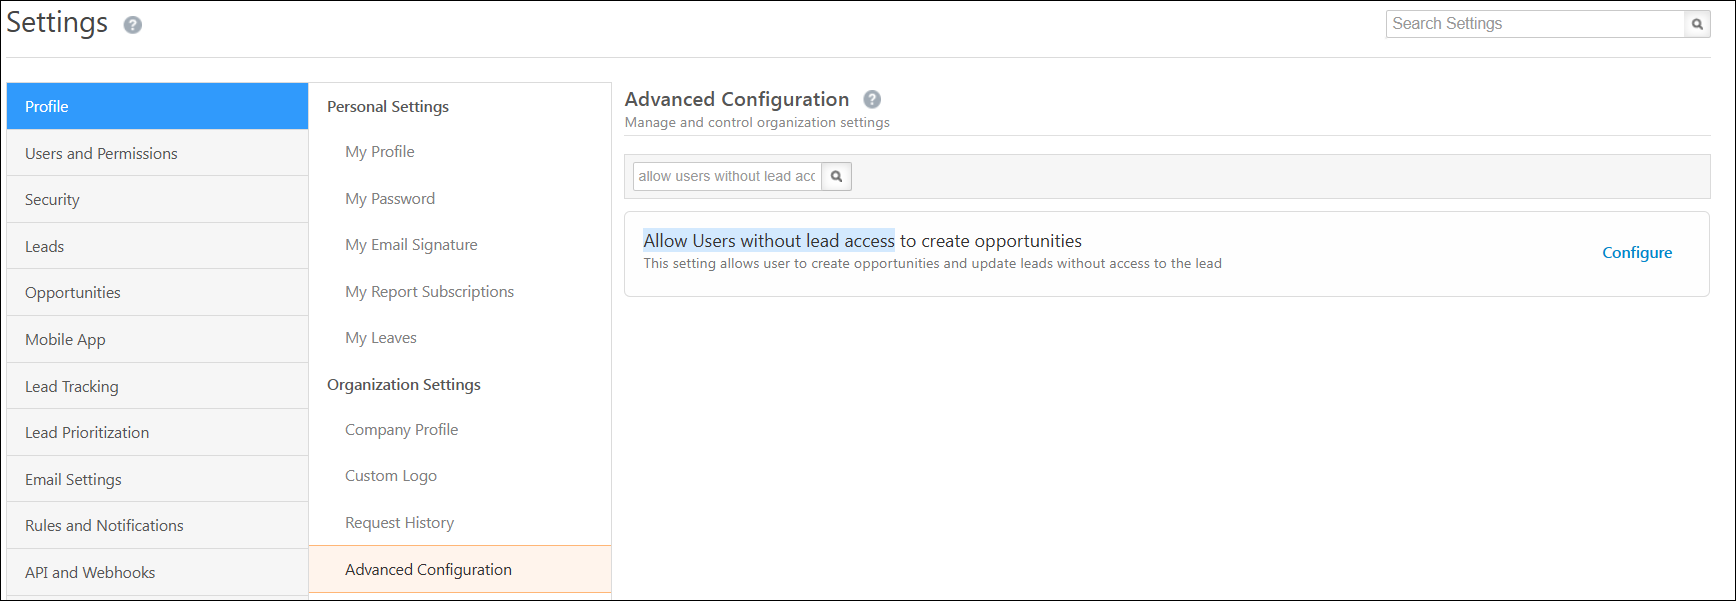
- Solution: Enable the “Allow Users without lead access to create opportunities” advanced configuration setting to allow users to update or create records for leads they do not have direct access to.
Form Rules Are Not Working for Read-Only Fields. The ‘On Form Load’ Rules Are Not Working.
- Explanation: This happens because specific settings required to enable these functionalities are not active in the form configuration.
- Solution: To resolve this, ensure the following settings are enabled from Form Settings>Additional Settings.
- Apply set value rule actions on read-only fields: Ensures that values for read-only fields are set based on the defined rules.
- Apply set value rule actions on form on load: Ensures that rules configured to run when the form loads are executed correctly.
- Key Issues Addressed:
- Read-only field rules not working on LeadSquared mobile app.
- “On Form Load” rules failing in LeadSquared forms.
- Troubleshooting form rules for mobile apps in LeadSquared.
- LeadSquared mobile app form rules issue.
- Enable rules for read-only fields in LeadSquared forms.
These steps should resolve the issue and ensure form rules work seamlessly on the mobile app.
“Form Submission Not Allowed” Error
- Issue: When submitting a form, the error “Form submission not allowed” appears.
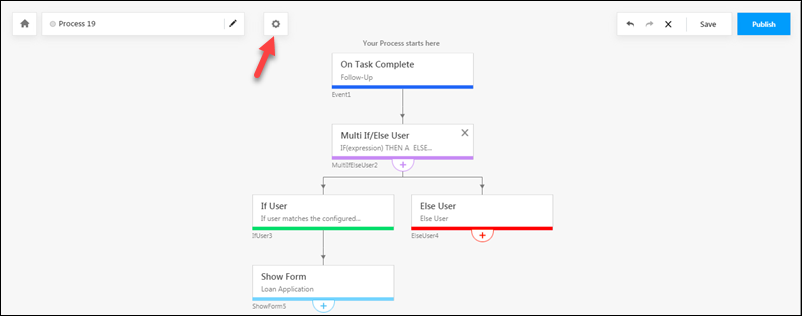
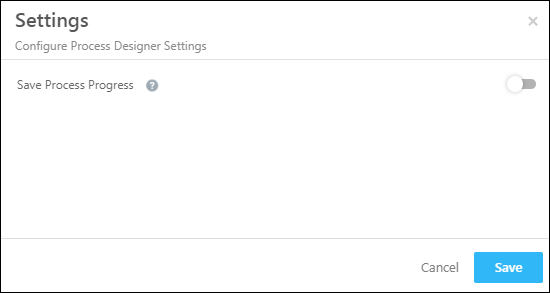
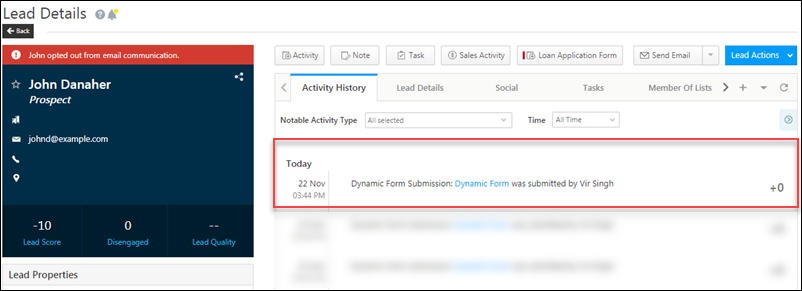
- Cause: This happens when the “Save process progress” setting in the Process Designer settings and the “Restrict unwanted multiple submissions” options are enabled in the From Designer settings. These settings prevent multiple submissions of the form for the same lead. If the form is reopened and submitted again for the same lead, the error is triggered.
- Solution: Check if these options are enabled in the Process Designer. If multiple submissions are required, disable the “Restrict unwanted multiple submissions” option.
“Associated Opportunity must be present in the Form” Error in Form Creation
- Issue: When publishing a form, the error “Associated Opportunity must be present in the Form” appears, even if:
- No opportunity-related field is explicitly added.
- An activity field is used, but no opportunity fields are manually selected.
- Cause: This occurs when the form contains a Sub-form where an Activity is selected and associated with an Opportunity. Unlike the primary form, the sub-form does not auto-populate the Opportunity field. If the Opportunity field is not manually added in either the Sub-form or the Primary form, the error is triggered.
- Solution: To fix this, add the Opportunity field in either the Sub-form or the Primary form. This ensures the system correctly maps the associated opportunity and allows the form to be published.
“Assigned section is missing” error while Creating a Form
- Issue: When attempting to publish a form, the following error appears: “Assigned section (section 1) is missing.” (The section number may vary).
- Cause: This happens when a section was used in form rules but was later removed from the form. Even though the section no longer exists, its reference remains in the form rules, causing the error during publishing.
- Solution: Remove the missing section from the form rules. Once the reference is removed, the form can be published successfully.
Read-Only Fields Not Updating in Forms
- Issue: Read-only fields in a form are not updating when a set-value rule is applied.
- Cause: By default, set-value rules do not update fields that are marked as read-only.
- Solution: Enable Apply set value rule actions on read-only fields in the Additional Settings of the form. Note that this issue is about updating a read-only field using a set-value rule.
Rule Trigger Field is Read-Only in Forms
- Issue: A form rule is not executed when its trigger field is set to read-only.
- Cause: If the trigger field is read-only, the rule will not execute. This is the expected product behaviour.
- Solution: To ensure the rule executes, the trigger field must be editable. Note that this issue is about a rule failing to execute because the trigger field is read-only.
Read-Only Fields Are Editable in the Form
- Issue: Even if a field is set as read-only from the properties panel, it remains editable in the form’s create mode.
- Solution: The Properties Panel setting makes the field read-only only in edit mode (not in create mode). A Form Rule can be used to make the field read-only in both create and edit modes.
Any Questions?
If you have any questions related to forms that weren’t answered here, please leave comments below. We’ll be happy to help!

 and mobile
  icons to view a screenshot of the work area where you’re placing the starting point of the process.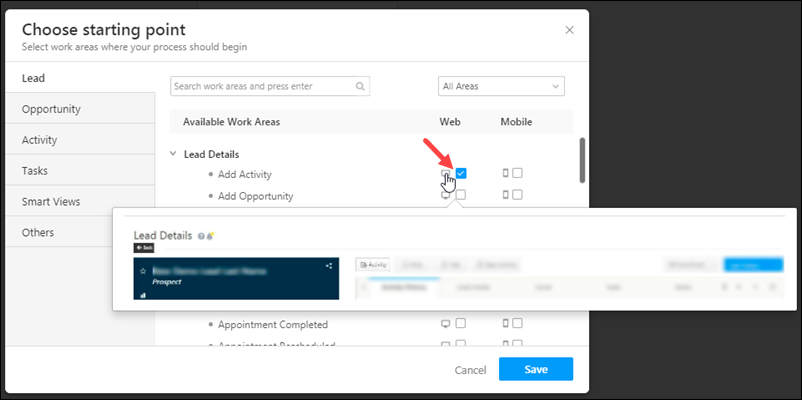
 icon to view the subsequent conditions and actions.