


Get Started

Sales Suite
Field Ops
Marketing
Service CRM
Integrations & Apps
FloStack
How to Add Buttons to a Dynamic Form

Updated
28 Sep 2026 | 04:27 PM
1. Feature Overview
This article will help you add Buttons to your Dynamic Form.
2. Prerequisites
- To create a Dynamic Form, refer to How to Create a Form.
- The Button Special Field can be rendered only in NextGen and LeadSquared Mobile Application.
3. Use Case
Buttons on a Dynamic Form can be used to validate OTP, PAN/Aadhar cards, apply coupon codes, make payments, etc.
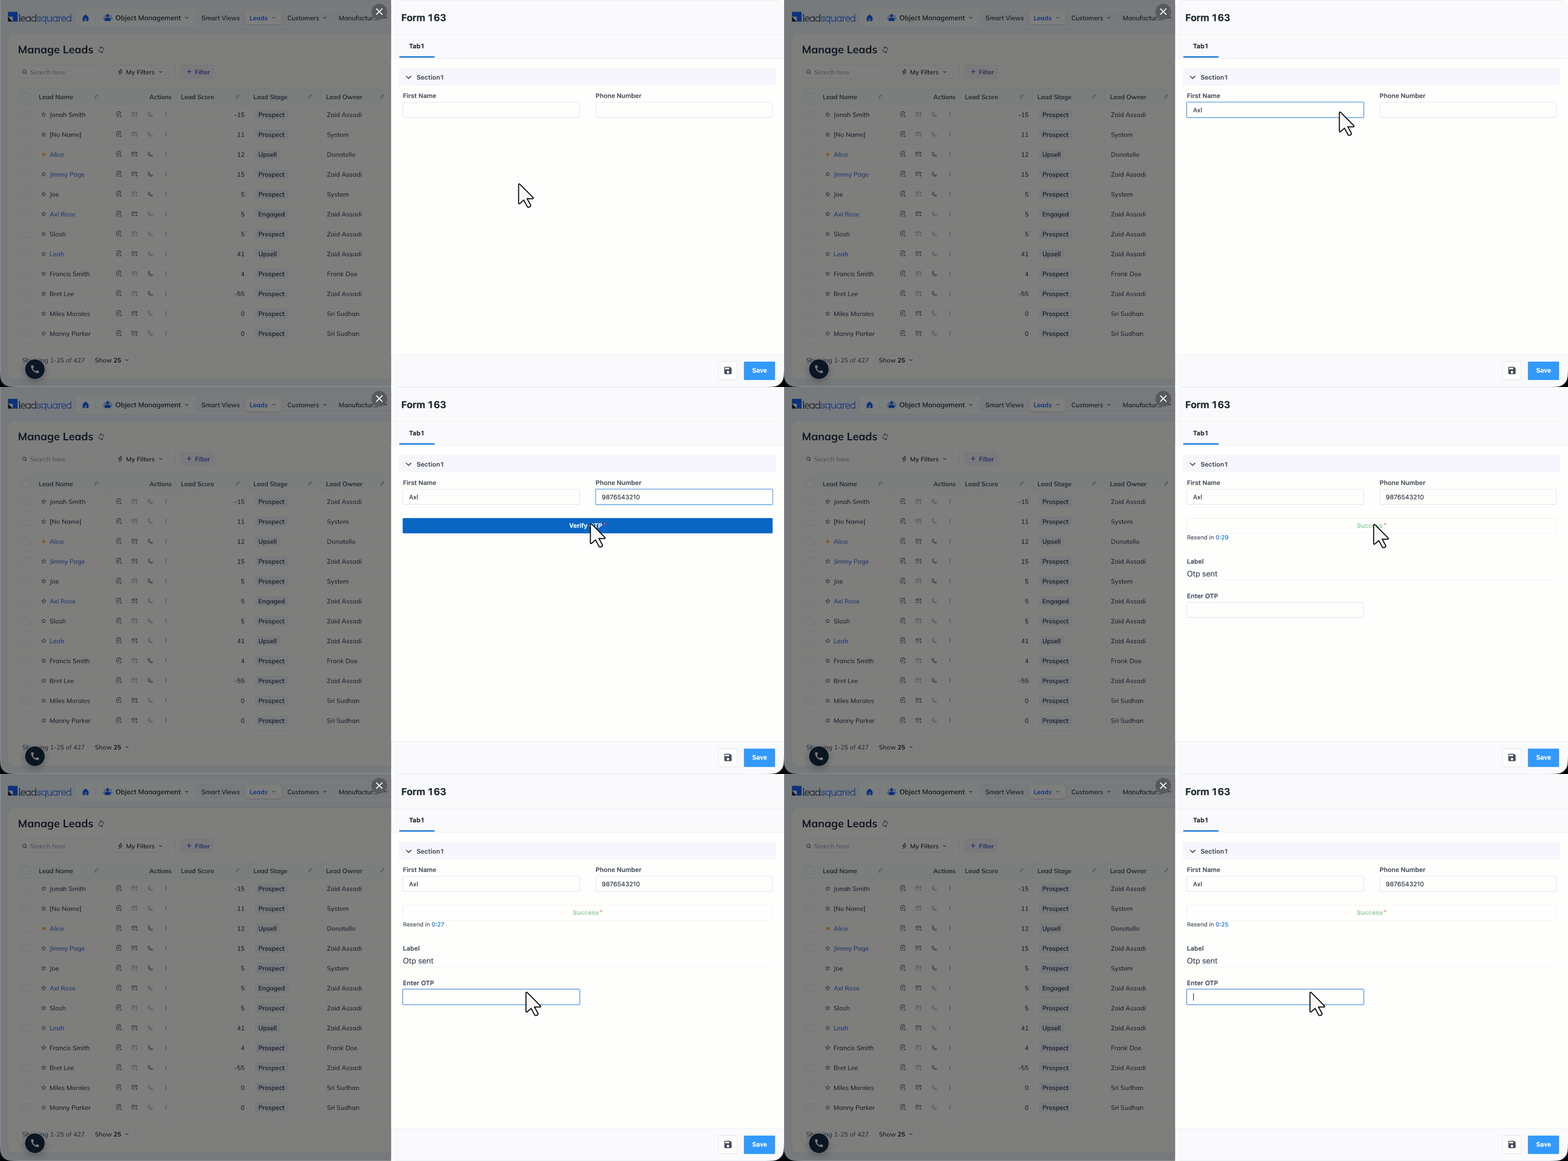
4. Add a Button Field
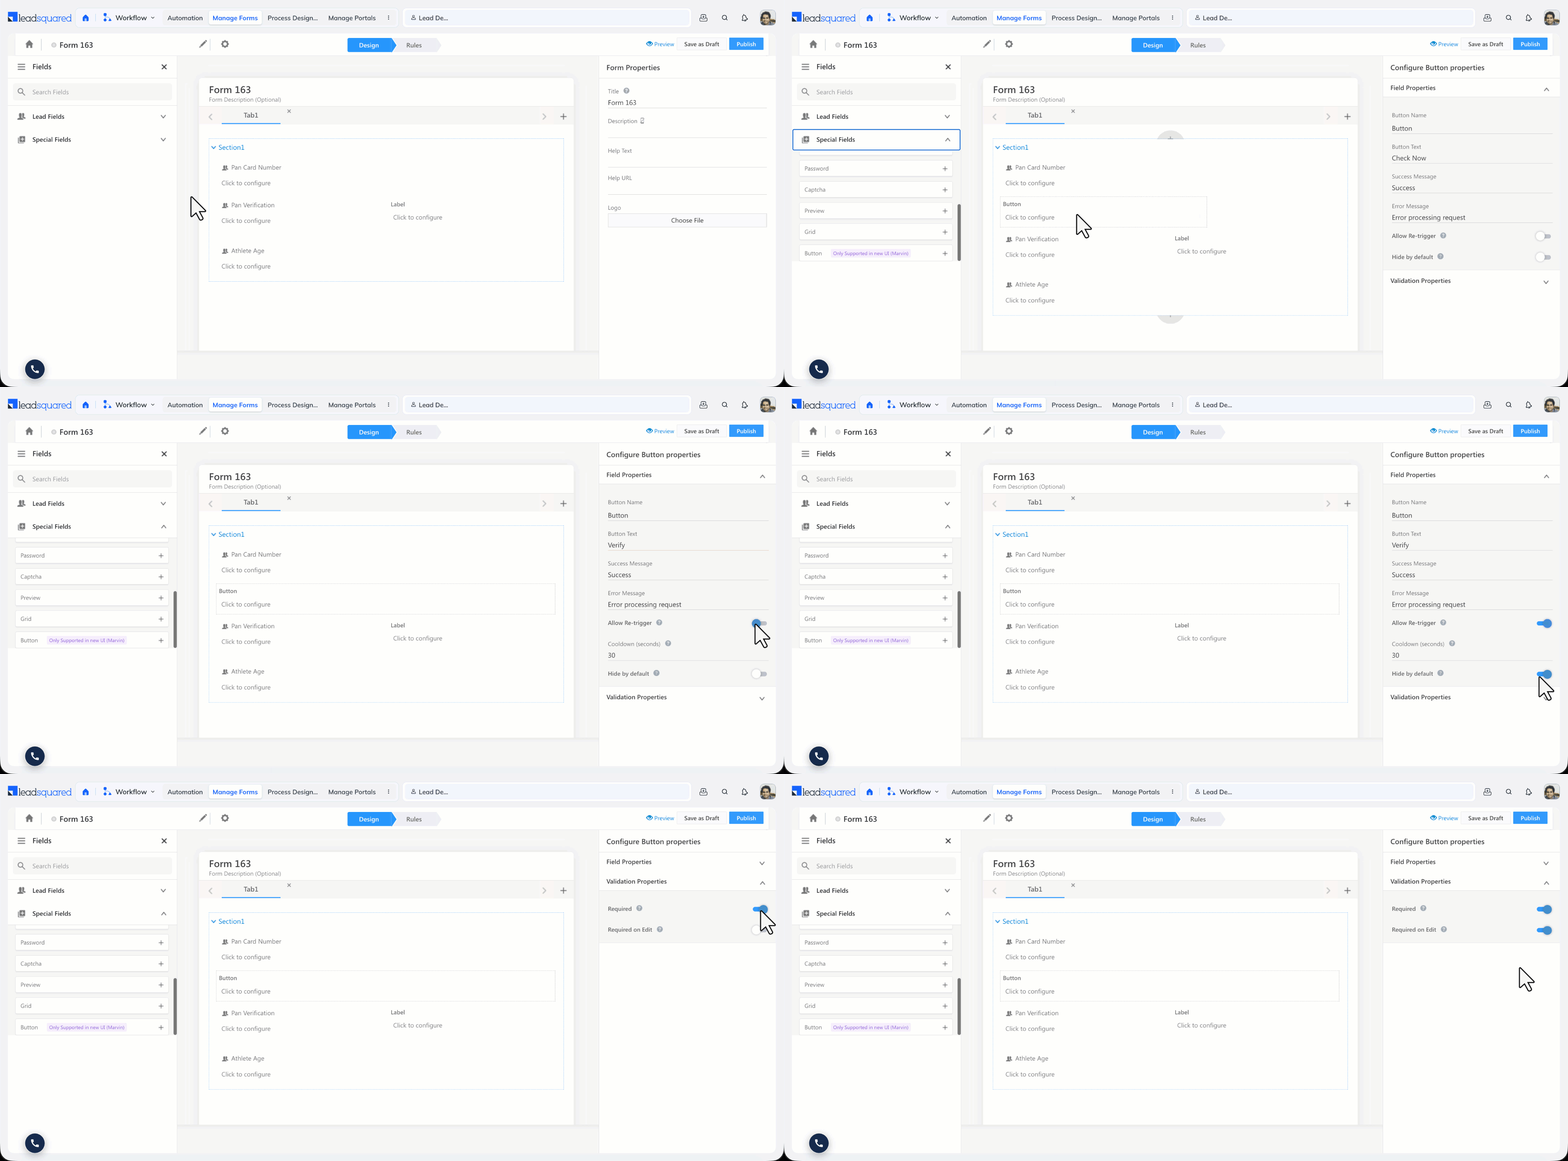
- On the Form Designer, click on the Special Fields drop-down and add a Button field to your form.
- Now, you can edit its Field Properties –
- Button Name – Enter the button’s field name.
- Button Text – Enter the display name for the button.
- Success Message – Enter a message to display on successful response.
- Error Message – Enter a message to display on failure.
- Allow Re-trigger – Enable this to let users click the button again after a successful response.
- Cooldown (seconds) – Set a cooldown duration between 30 and 300 seconds. The button is read-only during the cooldown, and becomes active again once it lapses. Users can re-trigger the button up to 3 times per session. For example, if the customer doesn’t receive the OTP, the rep can resend it after 60 seconds without reloading the form.
- Hide by default – You can choose to hide the button during form load and can be made visible again through form rules.
- Next, you can edit its Validation Properties –
- Required – Enable this to make the button mandatory. The form cannot be submitted until the button is clicked and its action returns a success response. This applies when the form is opened to create a new record. For example, on a new lead capture form, the rep must verify the customer’s PAN before the form can be saved.
- Required on Edit – Enable this to also make the button mandatory when the form is opened on a record that already has data. Use this when the action must be repeated on every update. For example, if a rep changes a customer’s phone number on an existing lead, the number must be re-verified through OTP before the form can be saved.
Note:
- A maximum of only 2 Buttons can be used per Form. To increase the number of buttons, reach out to support@leadsquared.com.
- Success and Error messages support personalization tags like
{{Lead.FirstName}}and can be up to 150 characters. - A button will remain in the Success state till the conditions (if any) associated with the ‘Button on Click’ condition are re-satisfied.
- A button will remain in a Failure state after 3 failure attempts.
- Save Button in Form will be disabled while the Actions in Button on Click Rule are executing.
- Every button click, including re-triggers, sends a fresh API, LAPP, or UDS call. Responses are not cached. This means a resent OTP is always a new one, not a repeat of the earlier response.
5. Configure Button Rules
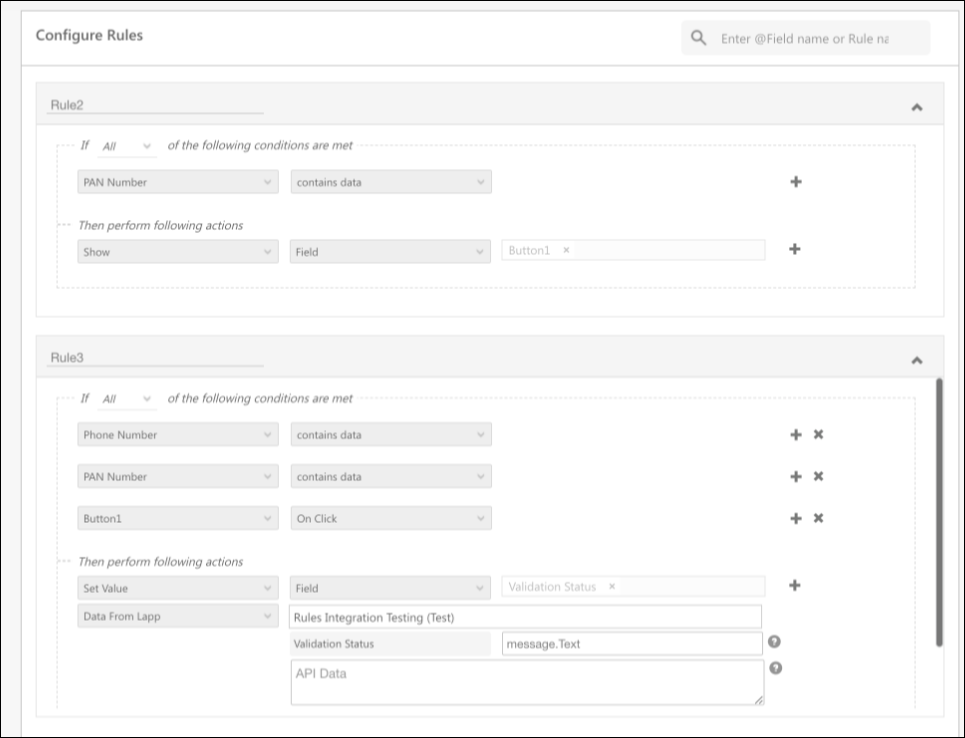
For example, the button field can be used to verify a customer’s PAN Number. Through Form rules, you can set up conditions to show the button when the PAN field has data, and on clicking the button, a Lapp is called to validate this data. The validation response can then be posted on a field in the form.
Any Questions?
We’d love to answer your questions or hear your own unique use cases. Feel free to share your experiences in the comments section below.
Subscribe
0 Comments
Newest