


Get Started
Sales Suite
Field Ops
Marketing
Service CRM
Integrations & Apps
FloStack
Manage Opportunities
1. Feature Overview
Opportunities in LeadSquared represent potential deals. Through opportunity management, you can track various aspects of deals in progress. This article will help you understand how to add opportunities to leads, and perform multiple actions on these opportunities such as bulk and grid updates, export opportunities and reset filters. To know how to create Opportunities, refer to Opportunity Configurations.
2. Prerequisite
You must be the Administrator of your LeadSquared account to configure opportunities.
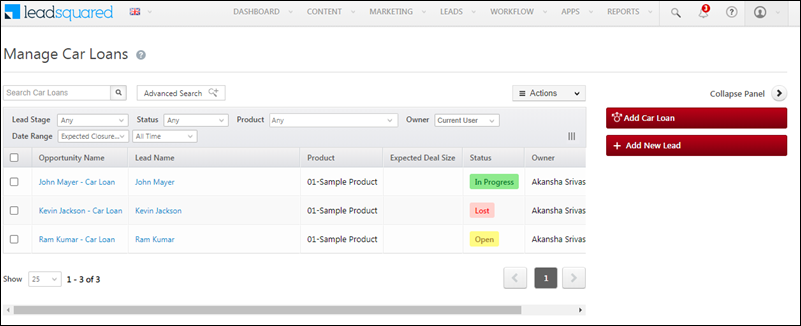
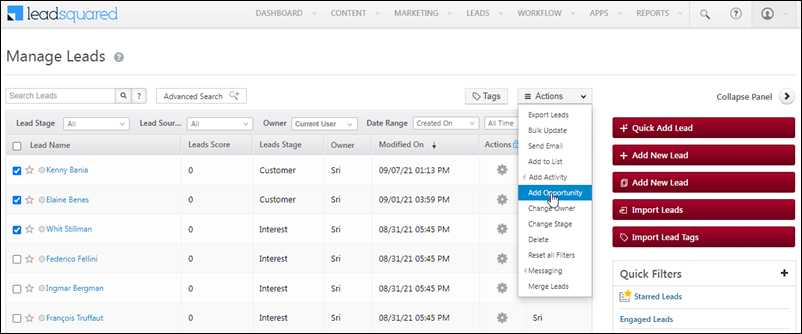
3. Add Opportunity
You can add opportunities on leads, who’ve shown interest in different products that your business offers. To add an opportunity –
- From the LeadSquared main menu, navigate to Leads>Manage Opportunities>Opportunity Type.
- Click the Add Opportunity button on the right side of the page.
- On the Add Opportunity pop-up, fill in the necessary fields.
- You can assign the opportunity to any user within your organization.
- Once you’re done, click Add.
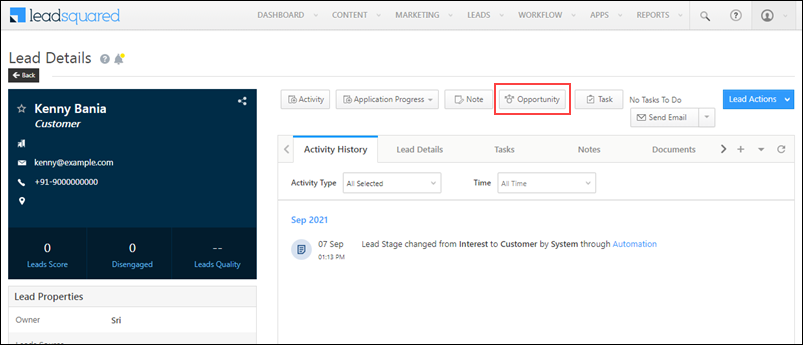
Alternatively, you can also add opportunities to a lead from the –
- Lead Details page
- Manage Leads page.
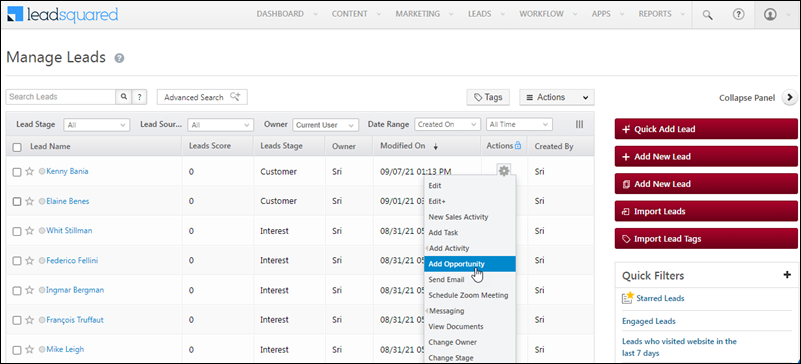
- You can also add opportunities in bulk from the Manage Leads page.
4. Actions
You can take multiple actions on existing opportunities, on the Manage Opportunities page. The types of available actions are –
4.1 Bulk Updates
You can update various lead fields across multiple leads through this action. To do so –
- From the main menu, navigate to Leads>Manage Opportunities>Opportunity Type.
- On the Manage Opportunities page, against the opportunities you want to update, click the
 checkbox.
 - Hover your cursor over
 , and select Bulk Update.
 - On the Bulk Update pop-up, from the opportunity field dropdown, choose the opportunity field you want to update.
- Under New Value, enter the update (in the textbox, if it’s a text update) or select the update (from a dropdown, if the option is available in one).
- Once you’re done, click Update.
- You’ll get a message stating “Opportunities Updated Successfully”.
4.2 Bulk Delete
You can delete multiple opportunities in bulk from the Manage Opportunity page. To do so –
- From the main menu, navigate to Leads>Manage Opportunities>Opportunity Type.
- On the Manage Opportunities page, against the opportunities you want to delete, click the checkbox.
- Hover your cursor over the button, and select Bulk Delete.
- Then, on the Bulk Delete pop-up, click Delete. The selected opportunities are successfully deleted.
You can also bulk delete up to 25,000 opportunities in one go, by applying relevant Advanced Search filters.
Note:
- For the Bulk Delete action to work, you must ensure that the Allow Delete setting is enabled during Opportunity Configuration.
- If you get an error notification while performing an Advanced Search with wildcard operators (Contains, Does not contain, Starts with, and Ends with), you might have exceeded the rate limit. To know more, refer to Wildcard Search Limitations.
4.3 Bulk Status Change
You can update/change the status of multiple opportunities in bulk. To do this –
- From the main menu, navigate to Leads>Manage Opportunities>Opportunity Type.
- On the Manage Opportunities page, against the opportunities for which you want to change the status, click the checkbox.
- Hover your cursor over the button, and select Change Status.
- On the Change Status pop-up, from the Status dropdown, select the new status. Then, from the Stage dropdown, select the new stage.
- Once you’re done, click Change. The status of all the selected opportunities is now updated.
4.4 Export Opportunity
You can export existing opportunities within LeadSquared. To do this –
- From the main menu, navigate to Leads>Manage Opportunities>Opportunity Type.
- From the Actions dropdown, select Export Opportunity.
- If you want to export all the opportunity fields, select “Export all fields”.
- If you want to export only selected opportunity fields, select “Export selected fields”.
- Click Choose fields.
- You can search for fields by using the Search Fields search box.
- You can choose fields by checking the checkbox
 against each opportunity field.
 - Once you’ve made the selection, click Export.
- If the export access is successful, you’ll receive an email with the file download link, to the email Id you’ve registered in your LeadSquared account.
Note:
- To add or delete fields in your opportunity form, refer to Opportunity Configurations.
- By default, you can export up to 100,000 opportunities per request. To increase the export limit upto 500,000, write to support@leadsquared.com.

4.5 Import Opportunities
To know how to import opportunities (through a CSV file), refer to Import Opportunities.
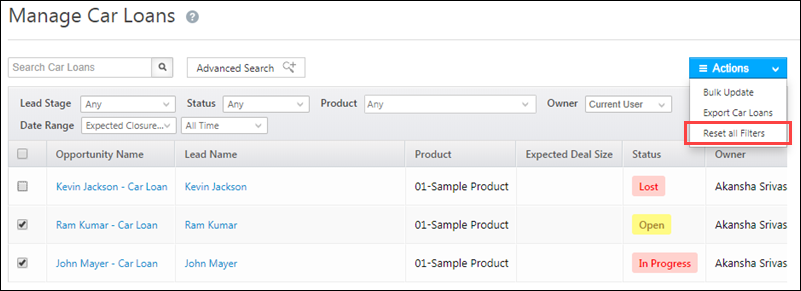
4.6 Reset All Filters
On the Manage Opportunities page, if you’ve used multiple filters to search for opportunities, you can reset them under Actions, by selecting the Reset All Filters option.
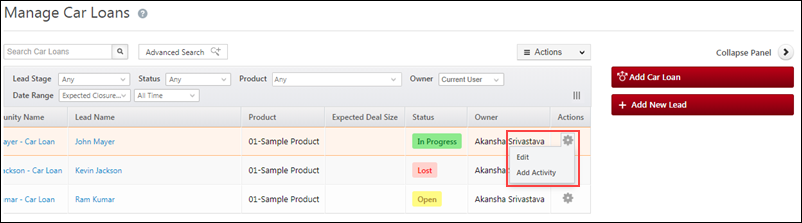
4.7 Grid Actions
This allows you to edit and add activities actions to an individual opportunity from the Manage Opportunities page. To do this –
-
-
- From the main menu, navigate to Leads>Manage Opportunities>Opportunity Type.
- Against an Opportunity Name, towards the right side of the page, under Actions, hover your cursor over the
 icon.
icon. - The Edit action will allow you to change opportunity details in the Update Opportunity Details pop-up. Once you’re done, click Save.
- The Add Activity action will allow you to add activities on the opportunity. Once you select an Activity Type, and enter other relevant details, click Add.
-
4.8 View Opportunities
On the Manage Opportunities page, you can change the fields that are displayed on the grid. To do this –
-
-
- One the right side of the grid, click the
 icon.
icon. - On the Select Fields to View in Grid pop-up, on the top right corner, change Show: Selected to Show: All.
- Select the fields that you want to view on the grid.
- Once you’re done, click Show Selected.
- You can also change the current view to default by clicking Restore Default.
- One the right side of the grid, click the
-
Expand View
On the Manage Opportunities page, you can view details of an opportunity, by clicking the blank space against on an opportunity.
When you click on an existing opportunity, the Opportunity Details page opens up. On this page, you can post activities, tasks and notes to the opportunity. To know more, refer to Opportunity Details.
5. FAQs
1. Why Is the Opportunity Owner Changing Automatically?
- Issue: The Opportunity Owner is being updated automatically, even though no automation or manual changes have been made.
- Cause: This occurs if the Enable Change of Opportunity Owner on Lead Owner change is enabled in Advanced Configurations. When this setting is active, the Opportunity Owner automatically changes to match the Lead Owner whenever the Lead Owner is updated.
- Solution:
- Navigate to Settings>Advanced Configuration in your LeadSquared account.
- Check if the Enable Change of Opportunity Owner on Lead Owner change setting is enabled.
- Disable the setting if you do not want the Opportunity Owner to change automatically when the Lead Owner changes.
2. Why Are Status and Stage Auto-Populating When Creating a New Opportunity?
- Issue: If the Status and Stage fields are automatically filled in when creating a new opportunity in LeadSquared, it could be due to specific settings enabled in your account. These settings allow you to configure default values for Status and Stage, simplifying opportunity creation.
- What to Check:
- Advanced Configuration: Navigate to the Advanced Configuration section of your LeadSquared account and verify if the Enable Default Status and Change is turned on.
- Opportunity Type Settings: Check the Opportunity Type configurations (navigate to the field level configurations for the status field) to confirm whether a default Status and Stage have been pre-configured for new opportunities.
Enabling these settings can save time by pre-populating these fields, ensuring consistency across opportunities. However, if this behaviour isn’t desired, you can disable the default values in the settings.
Any Questions?
Did you find this article helpful? Please let us know any feedback you may have in the comments section below. We’d love to hear from you and help you out!
i have an excel sheet in which lead ids assigned to particular agents, so is it possible that if i upload that sheet opportunities transferred to agents according to that sheet?
Hello, Keval.
Yes, when you import a CSV file with the opportunity owners mentioned in it, the opportunities will be assigned to the respective owners. To know more, refer to Import Opportunities.