

[17-Sep-19] New Releases in Automation, Forms & Processes, Smart Views and More…
We’re out with our latest release for the LeadSquared web platform. Here are some highlights –
- New automation conditions and actions
- Now run automation on static lists
- Processes can be embedded in custom portals
- You can process transactions through forms using payment gateways like Razorpay and PayUMoney
Automation
1. We’ve added new automation conditions and actions –
- Distribute Activity – You can now distribute custom activities to users through automation. For details, see the ‘Distribute Activities’ section of Lead Automation actions – Sales Execution.
- Call Lapp & Post Webhook – These actions are now available for account-based automation. For more details, see Account Automation Actions.
- If Lead Exists – Use this condition to check if a lead with certain attributes exists in your account. For more information, see Lead Automation Conditions – If Lead Exists.
- Merge Leads – Use this action in conjunction with the ‘If Lead Exists’ condition to avoid creating duplicate leads in your account. For the full article, see Lead Automation Actions – Merge Leads.
2. Now run automations on static lists – we’ve added a new feature to help you manually trigger automations from list actions. For details, see the ‘Lead Added to List’ section of Triggers in Lead Automation.
3. The Update Activity (for lead activities) automation trigger now supports Custom Field Sets.
Forms & Processes
1. You can now configure processes to appear in your custom portals. For details, see the ‘Embedding Processes’ section of Portal API.
2. Product fields (in sales activities) and multi-select dropdowns (in custom activities) are now available in lead + activity-based forms.
3. You can now process transactions through your forms using payment gateways like Razorpay and PayUMoney. See How to Add a Payment Gateway to a Form.
4. Lead and activity dropdown fields configured with large option sets can now be used in forms.
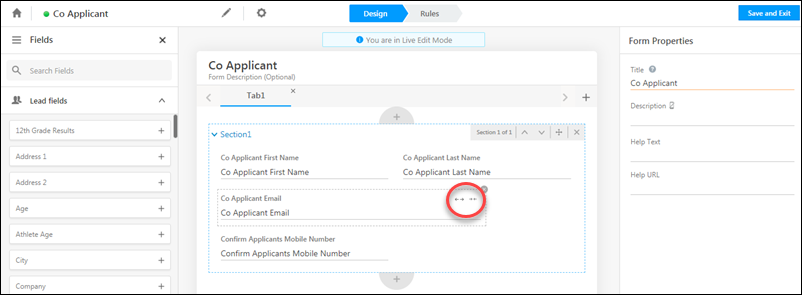
5. Forms now support 3-4 column layout. Use the expand/contract icons to modify the column width of a field.
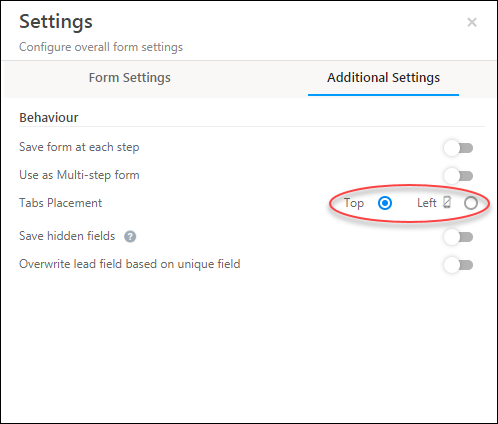
6. You can place tabs on the top of your form, horizontally, or on the left side in a vertical layout. For details, see the ‘Form Settings’ section of How to Create a Form.
7. You can now add multiple instances of the same activity type, each time with different fields. This will help you accommodate use cases like –
- Adding multiple instances of job experience with varying durations, organizations and job title
- Adding multiple instances of education experience with different institutions, degrees etc.
For details, see the ‘Create a Sub-form’ section of How to Create a Form.
8. Now save the progress a user makes on a process (with one or more forms), and allow them to resume the process from exactly where they left off. This is available as a process designer setting (See the ‘Process Settings’ section in How to Create a Process)
Smart Views
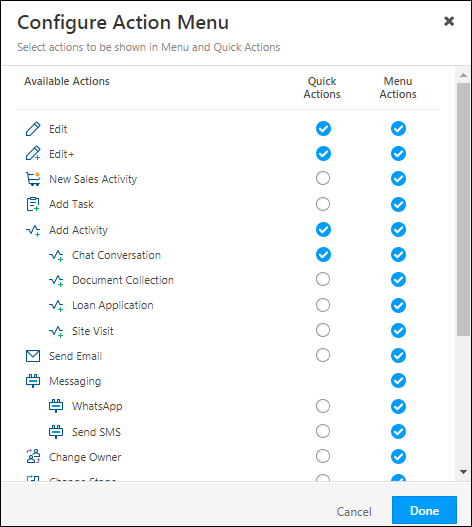
1. Now configure the actions you want under list actions and quick actions for lead tabs in smart views. For details, see Smart Views for Admins.
2. The last lead activity is available as a column on smart views task tabs.
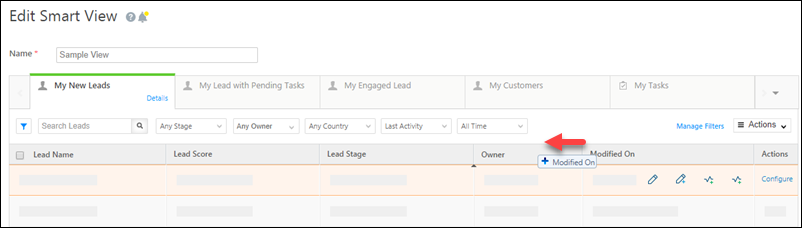
3. You can now re-order columns for all smart views tabs. For details, see Smart Views for Admins.
Custom Field Sets
- Lead import now supports importing Custom Field Sets
- For example, if you have a parent lead field called ‘Identification Documents’ and the associated custom field set has the child field – ‘Status’, then pass –
Identification Documents – Status
- For example, if you have a parent lead field called ‘Identification Documents’ and the associated custom field set has the child field – ‘Status’, then pass –
- Custom field sets associated with lead fields are now included in Agent Popup.
- Custom field sets associated with lead fields are available for mail merge throughout the platform (with the exception of Automation and Rules).
For more details, see Adding Custom Field Sets to Leads
