


Get Started

Sales Suite
Field Ops
Marketing
Service CRM
Integrations & Apps
FloStack
Opportunity Details View Customisation for the Web Application

1. Feature Overview
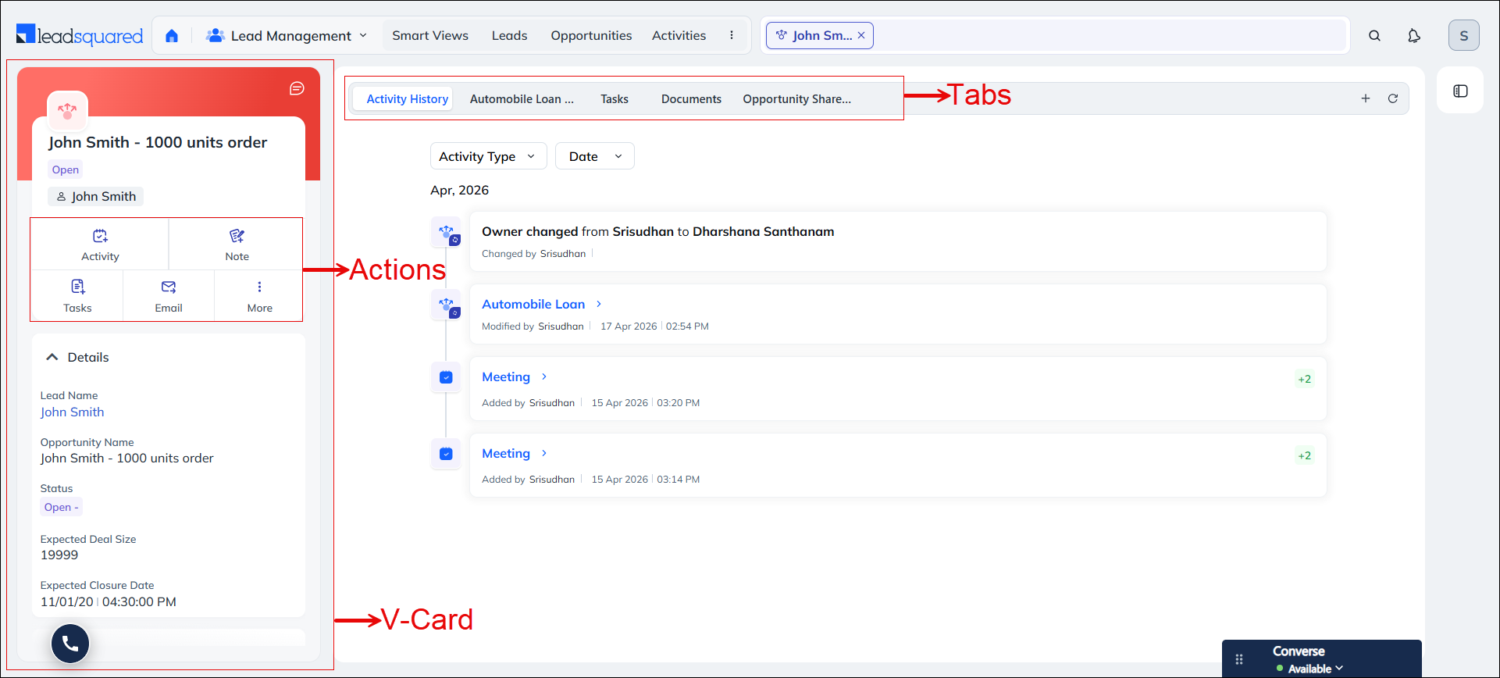
In addition to the default view on the Opportunity Details page, this feature lets you customise the page to reflect your team’s requirements accurately. Admins can customise the tabs, actions, buttons, and V-Card to help LeadSquared Teams access relevant information faster and streamline their workflow. Admins can customise the following elements on the Opportunity Details page –
- Opportunity V-Card – Select the Opportunity Fields and Lead Fields you want to display.
- Tabs – Select the system (Activity History, Tasks, etc.) and custom tabs (KYC Documents Collected, Support Tickets, etc.) you want to display.
- Actions – Select the actions your users can perform from the Quick Action Buttons and the Opportunity Actions dropdown.
Note: This article helps you customise the Opportunity Details view for the web application. To customise the Opportunity Details view for the mobile application, refer to Opportunity Details View Customisation for the Mobile Application.
2. Prerequisite
You must be the Administrator of your LeadSquared account to configure this feature.
3. Create an Opportunity Details View
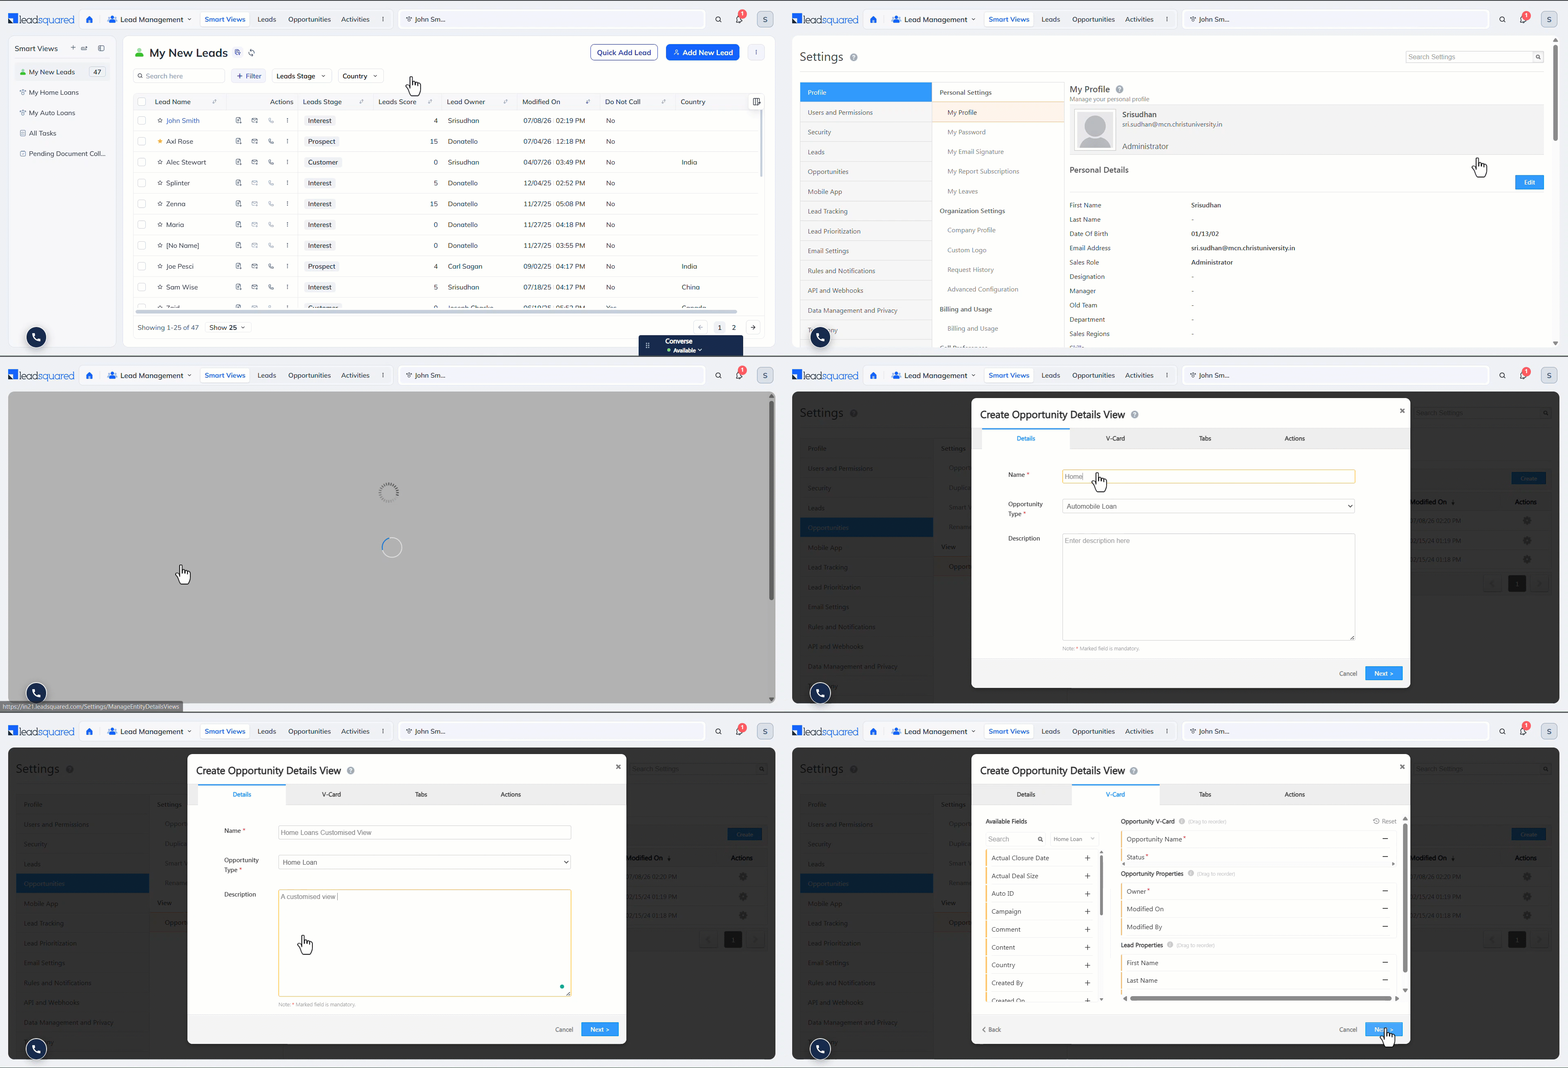
- Navigate to My Profile>Settings>Opportunities>Opportunity Details View, and click Create.
- On the Details tab, enter the following details –
- Name – A name for the custom view you’re creating.
- Opportunity Type – Select the opportunity type on which you want to display this custom view.
- Description – A description for the custom view. This is optional.
- Once you’re done, click Next.
4. Configure the V-Card
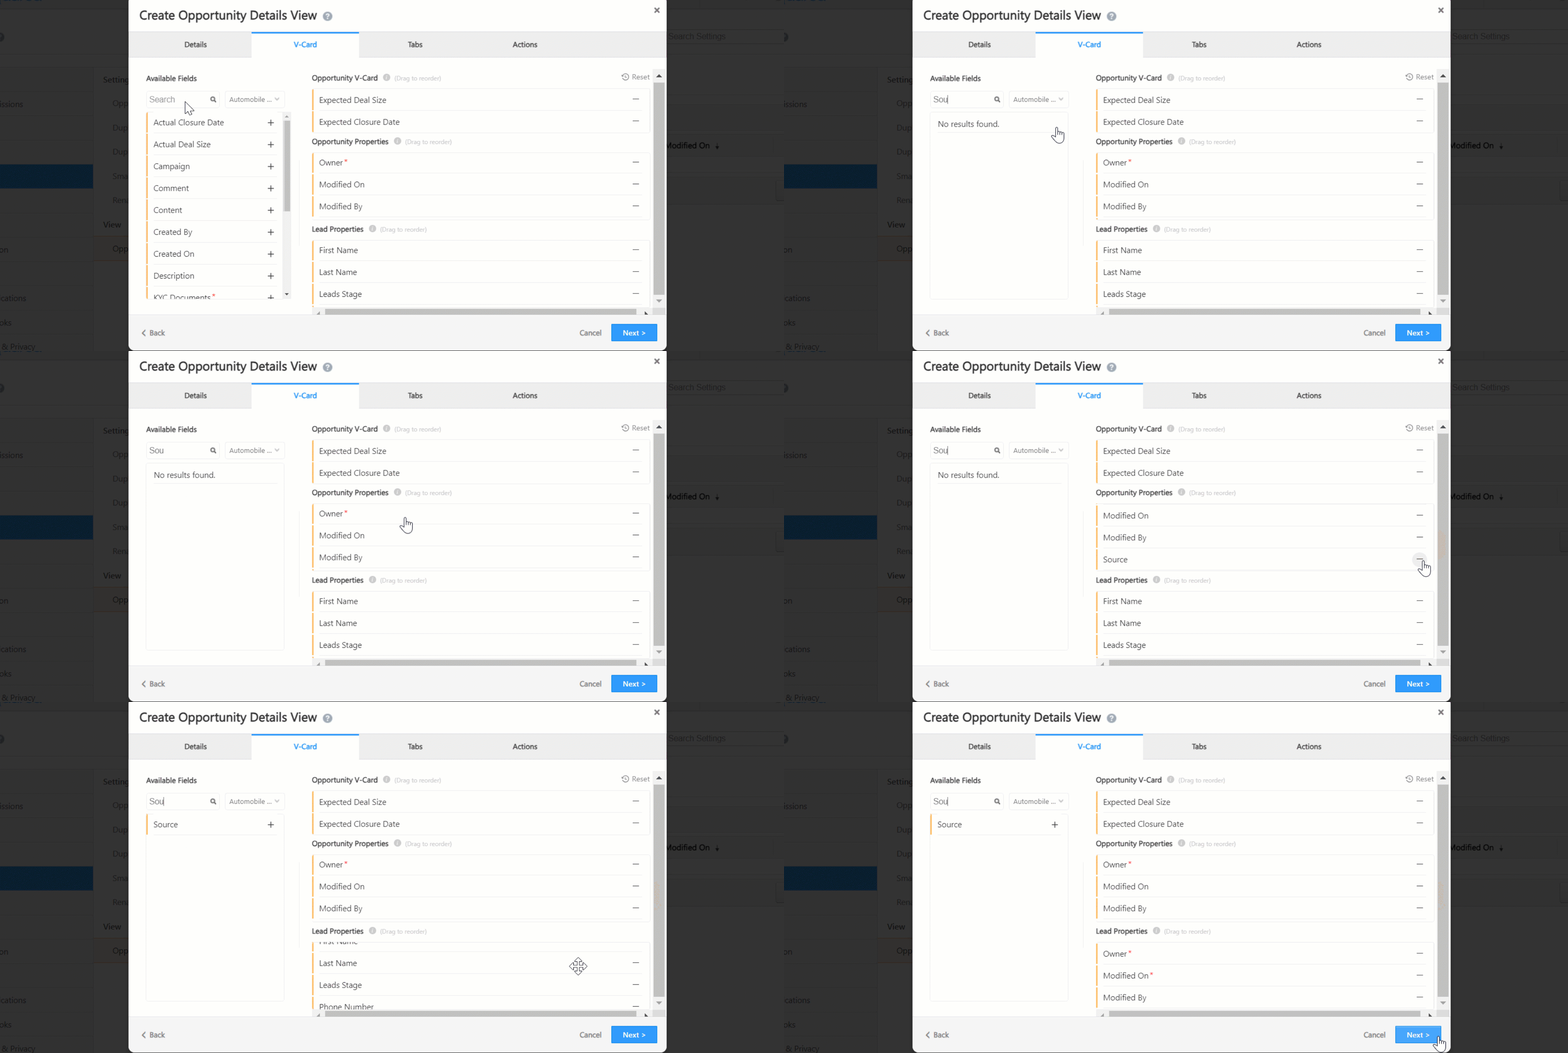
The V-Card is divided into three sections – Details (known as Opportunity V-Card on the settings page), Opportunity Properties and Associated Lead (known as Lead Properties on the settings page). From the list of Available Fields, drag and drop* opportunity and lead fields you want to display within each section.
- Opportunity V-Card – Add and arrange opportunity fields you want to display in the V-Card.
- Opportunity Properties – Add and arrange additional opportunity fields you want to display in this section.
- Lead Properties – Add and arrange lead fields you want to display in this section.
- Once you’re done, click Next.
Note:
- Opportunity fields cannot be added to Lead Properties, and lead fields cannot be added to Opportunity Properties.
- In addition to dragging and dropping fields, you can use the add/plus icon alongside a field to add it to a section.
- To remove a field from the V-Card, click the minus icon.
- To reorder a field, drag and drop it to the required position.
- Use the search bar to find specific fields.
5. Customise the Tabs
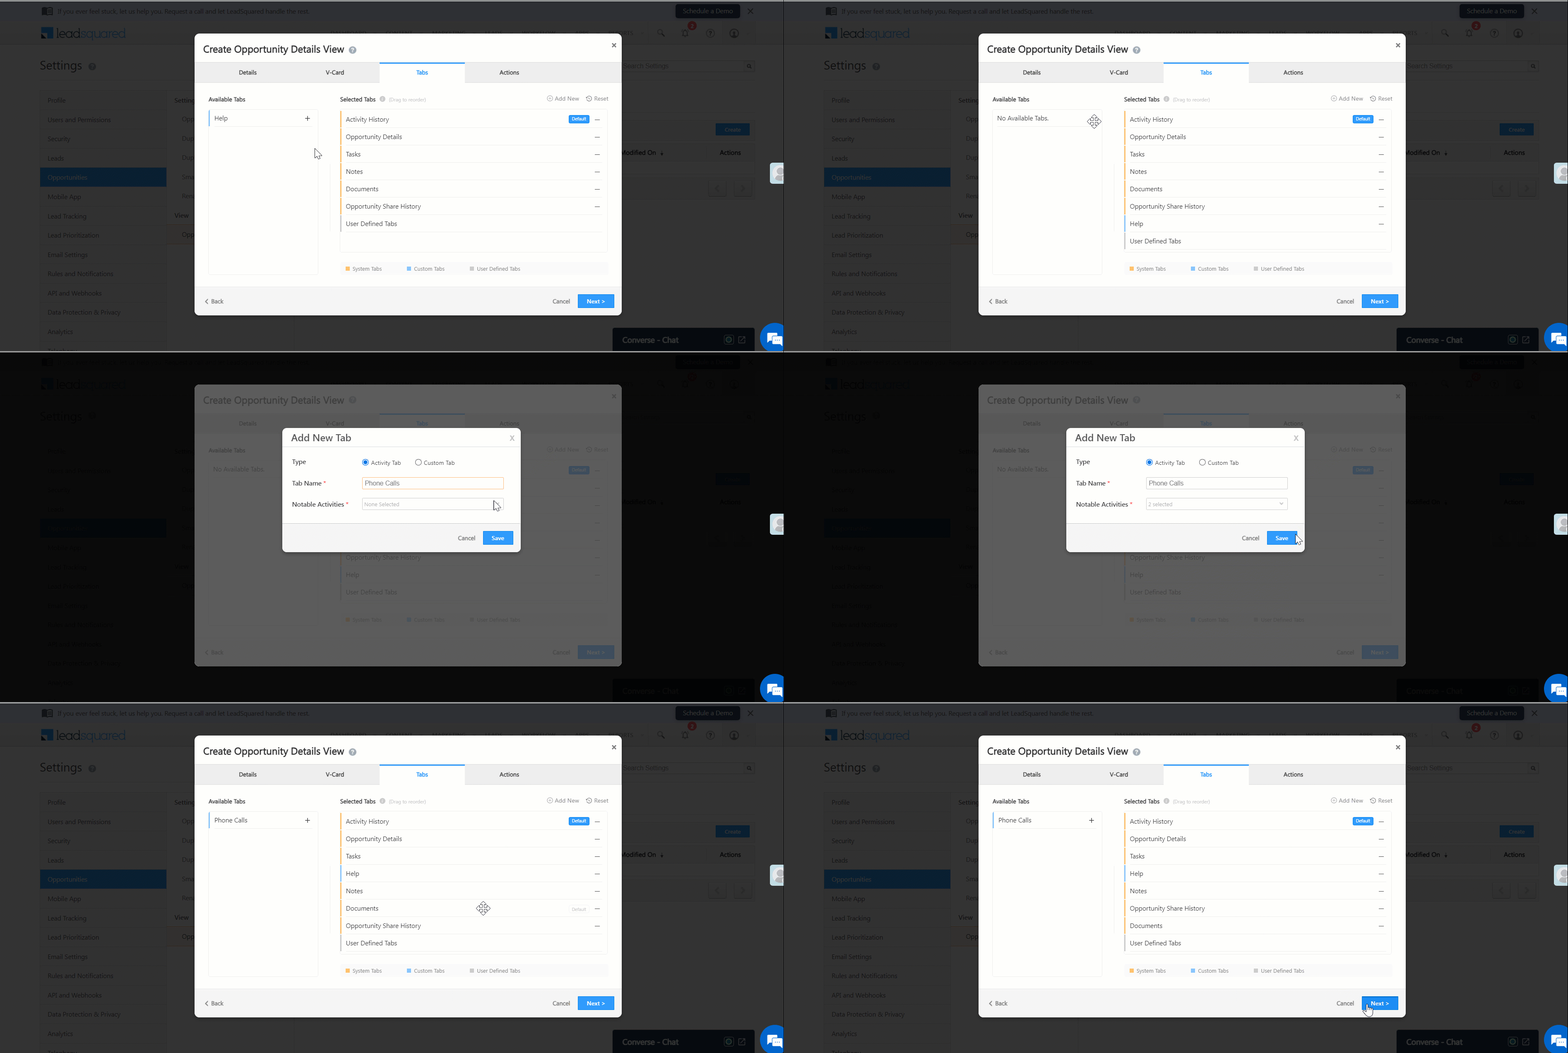
Select the system and custom opportunity tabs to display to users. System tabs are available by default in your account, and you can choose to display or remove them from the Opportunity Details page.
- To add a tab, drag and drop it from Available Tabs to Selected Tabs.
- Alternatively, click the add icon alongside the tab.
- To set the default tab that users see when they open the Opportunity Details page, click Default alongside the tab name.
- To reorder tabs, drag and drop a tab to the required position.
- To add a new custom tab, click Add New, and –
- Type – Select if it’s an Activity or a Custom tab.
- An activity tab displays activities.
- A custom tab displays an external page using a custom URL.
- Tab Name – Enter a relevant name for the tab.
- Notable Activities – If you select Activity, choose the activity types to display under the tab.
- URL – If you select Custom, paste the URL of the page you want to display in the tab.
- Once you’re done, click Save.
- Type – Select if it’s an Activity or a Custom tab.
- Once you’re done, click Next.
Note:
- All system tabs are denoted in orange.
- All custom tabs are denoted in blue.
- All user-created tabs are denoted in grey.
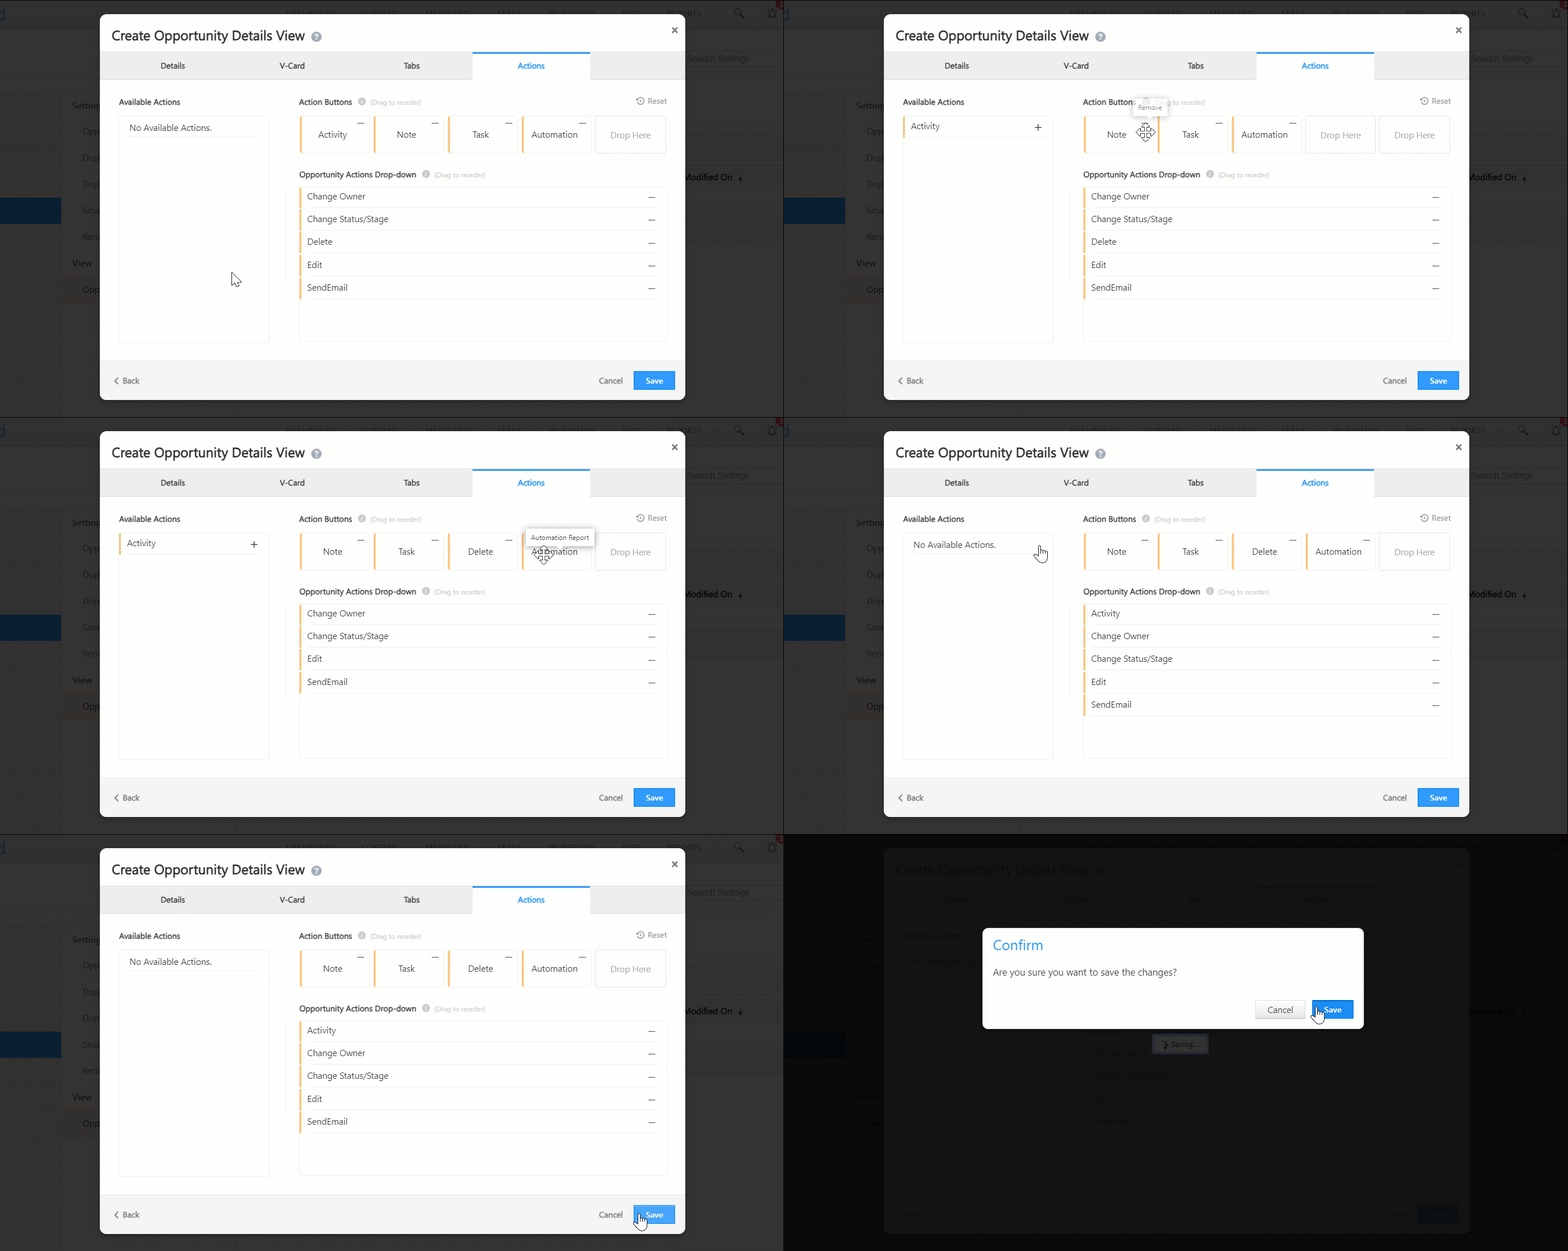
6. Select the Actions
From the Available Actions, drag and drop* the desired action to –
- Action Buttons – The button actions present on the Opportunity Details page. You can add up to five actions here.
- Opportunity Actions Drop-down – The actions users can perform through the Opportunity Actions dropdown.
Once you’re done, click Save, and on the Confirm pop-up, click Save.
Note:
- *Alternatively, to add an action, click
 .
. - To remove an action, click
 .
. - To reorder a field, drag and drop the field to the desired location.
- You can’t add the same action to both the Action Buttons section and the Opportunity Actions Drop-down.
- To reset the list of selected actions, click Reset.
7. Assign the Custom View to Teams
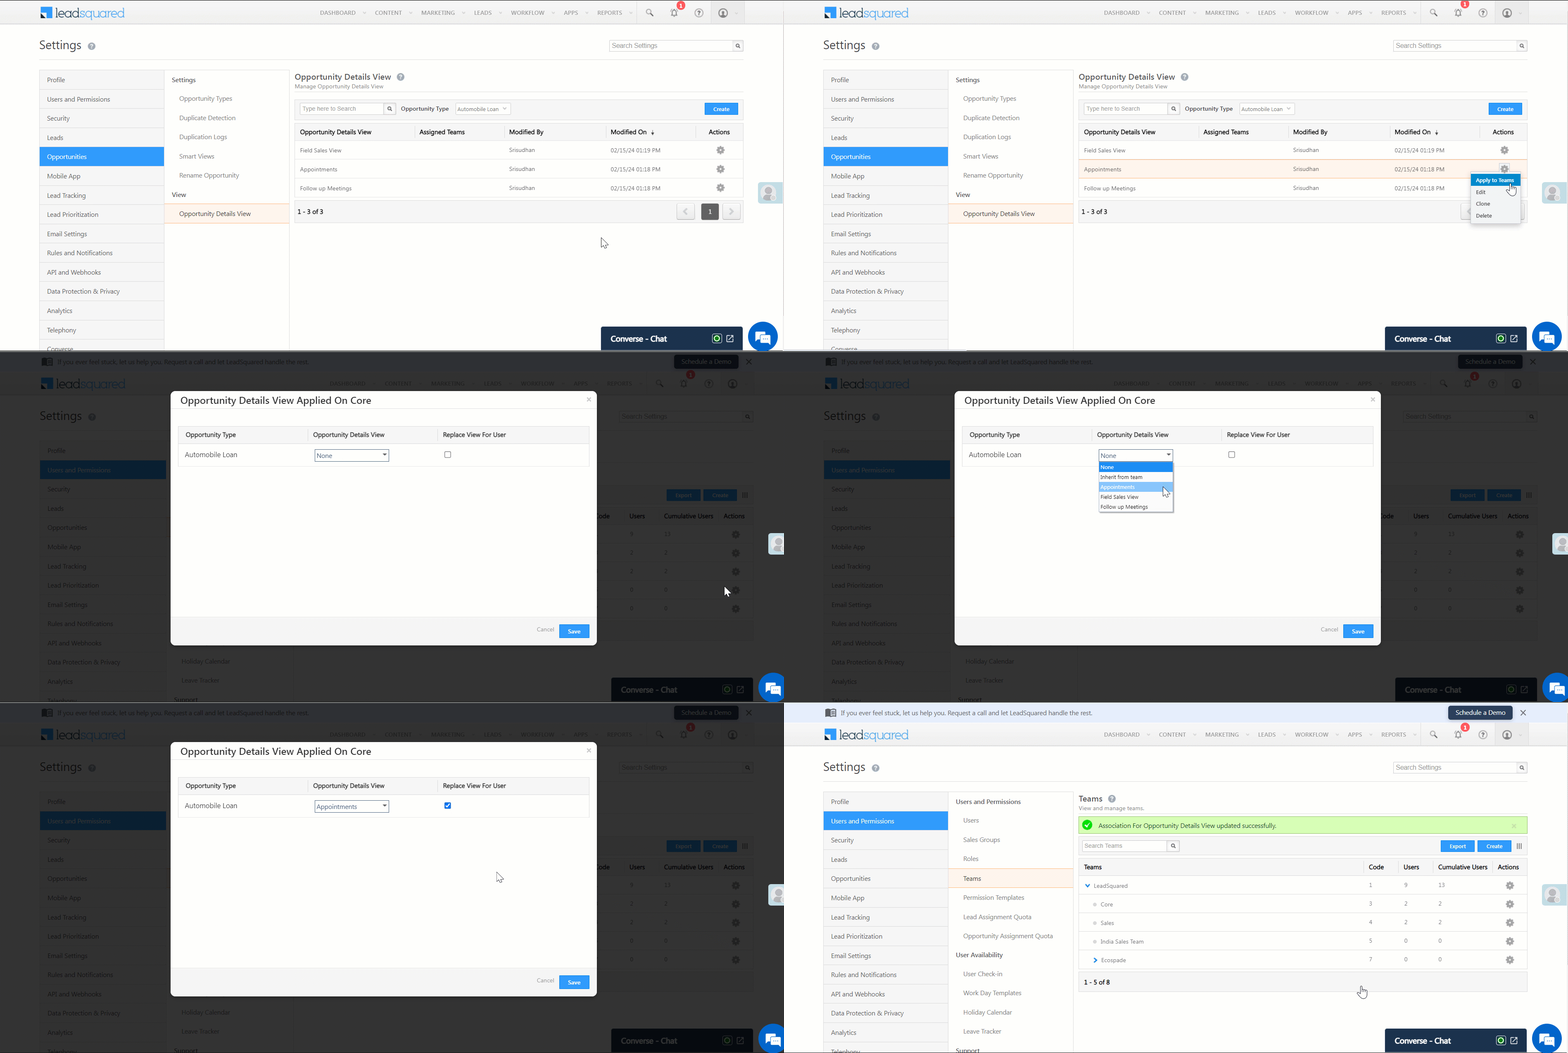
Once a view is created, to assign it to the relevant teams –
- Alongside the view you want to assign, hover your cursor over
 , and click Apply to Teams. You will be redirected to the Teams page.
 - On the Teams page, alongside the team for which you want to assign the view, hover your cursor over , and click Apply Opportunity Details View.
- On the Apply Opportunity Details View pop-up, from the Opportunity Details View dropdown, select the view you want to assign.
- If you want to replace your User View Tabs (tabs created by individual sales users) with the Opportunity Details View tab, alongside Replace Opportunity Details View, enable the checkbox.
- Once you’re done, click Save. Now, the customised Opportunity Details view will be displayed to the relevant teams.
Note:
- We recommend you enable the Teams V2 UI advanced configuration from Settings>Profile>Organization Settings>Advanced Configuration. This makes the Teams settings page more intuitive and it’s easier to assign your opportunity details view configurations to your teams.
- To know how to create a team, refer to Teams.
8. Other Actions
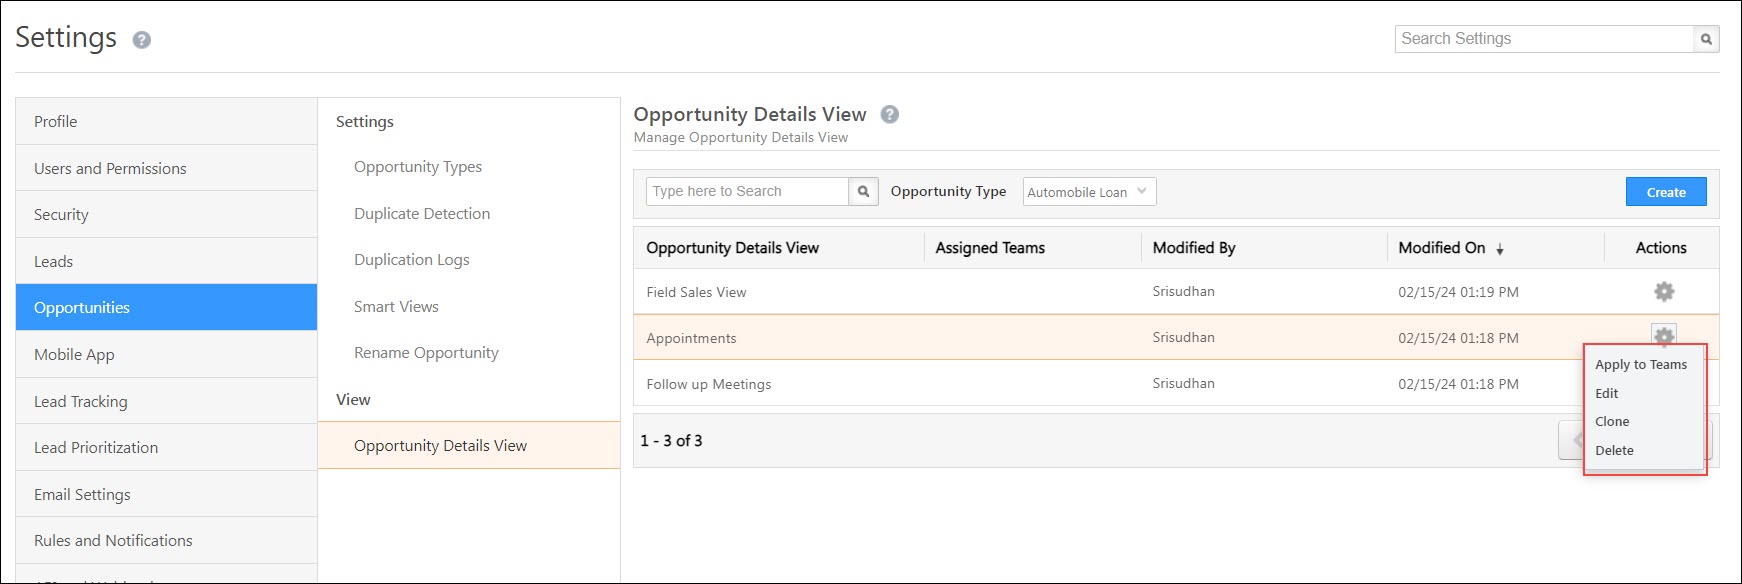
On the Opportunity Details View page, alongside a published view, hover your cursor over to perform the following actions –
- Edit – Edit the view.
- Clone – Click Clone to duplicate the view.
- Delete – Click Delete to delete the view.
Any Questions?
Do you have questions or issues with the content in this article? Let us know in the comments section below. We’ll get back to you asap!
ODVC is now supported only in Marvin?
If yes please update this information in the article.
Hello, Shailesh.
ODVC is supported on the web platform as well. To enable it, please reach out to your account manager, or write to support@leadsquared.com.