


Get Started
Sales Suite
Field Ops
Marketing
Service CRM
Integrations & Apps
FloStack
Custom Field Sets (CFS)
1. Feature Overview
A Custom Field Set (CFS) is a reusable group of fields that can be added as a field type within a lead, activity, or opportunity. Instead of adding individual fields one by one, you define the group once and attach it wherever needed.
Common examples include:
- KYC Documents — Passport, PAN Card, Aadhaar Card, Address Proof
- Education Qualifications — College, Degree, Year, Grade
- Business Address — House Number, Street, City, Zip, State, Country
This article covers how to create, configure, enable, and disable custom field sets. Once created, see the following articles to attach a CFS to your records:
- Adding Custom Field Sets to Activities
- Adding Custom Field Sets to Leads
- Adding Custom Field Sets to Opportunities
2. Prerequisites
You must be an administrator to create and configure custom field sets.
3. How It Works
You create a CFS by defining a name, selecting which record types it applies to (leads, activities, or opportunities), and configuring the fields it contains. Once saved, the CFS appears as a selectable field type when you add fields to a lead, activity, or opportunity form.
For example, a field sales team collecting KYC documents could use a CFS as follows:
- Create a CFS called “KYC Documents” with file-type fields for Passport, PAN Card, Aadhaar Card, and Address Proof.
- Create an activity called “KYC Document Collection”.
- Add a field to that activity and select the “KYC Documents” CFS as the field type.
Field agents can then upload documents directly within the activity each time they collect KYC from a lead.
4. Create a Custom Field Set
- Go to My Profile>Settings>Leads>Manage Custom Field Set and click Create.
- Enter a Name and an optional Description.
- Select the record types this CFS should be available for:
- Lead Integration — available as a lead field type.
- Activity Integration — available as an activity field type.
- Opportunity Integration — available as an opportunity field type.
- Click Next.
- Configure the fields for the CFS. For each field, select a Field Type from the dropdown. Supported types are Number, String, Date, DateTime, Dropdown, User, File, and Lead.
- To make a field mandatory, select the checkbox alongside it.
- For File or Dropdown type fields, click the settings icon to configure additional options (see Field Type Options below).
- To capture location data, add a Geolocation CFS field. This includes Address, City, State, Country, Pin, Latitude, and Longitude by default, and supports capturing the current location via the LeadSquared mobile app.
- Click Save.
- Design the layout of the CFS by dragging and dropping fields to reorder or hide them.
- Click Next to finish.
The CFS will now appear in the grid. To edit it later, click the settings icon alongside it and select Edit.
Notes:
- You can create a maximum of 30 fields per CFS.
- You can create dependent dropdown fields within a CFS. The process is the same as creating Dependent Activity Fields. When you associate the CFS with an activity or opportunity, you can overwrite the dropdown values defined here.
- Files uploaded through a CFS are private to the lead they are associated with. If a lead is deleted, all attached files are also deleted. Do not attach the same file to multiple leads without re-uploading it, as the file will become inaccessible if any associated lead is deleted.
Field Type Options
File fields
| Option | Description |
| Max File Size | Maximum file size in MB. |
| File Types | Images, Videos, PDF, Documents, Any Documents or Images, or Custom. |
| Max Number of Files | Up to 10 files per field. |
| Allow View on Mobile | When enabled, users can view the CFS on the mobile app. |
| Override ‘Restrict File Upload’ Setting | When enabled, users can upload files to this CFS even if file uploads are restricted elsewhere in the app. |
Supported file types by category:
| Catergory | Formats |
| Images | png, jpg, jpeg, bmp |
| Videos | mp4, webm |
| Documents | doc, docx |
| Any Documents or Images | png, jpg, jpeg, bmp, pdf, doc, docx |
| Custom | All formats permitted except: ade, adp, bat, chm, cmd, com, cpl, exe, hta, ins, isp, jse, lib, mde, msc, msp, mst, pif, scr, sct, shb, sys, vb, vbe, vbs, vxd, wsc, wsf, wsh |
Dropdown fields
Click the settings icon to configure the available dropdown values.
Note (accounts created after 17 June 2021): For CFS added to Activities and Opportunities, the following additional limits apply:
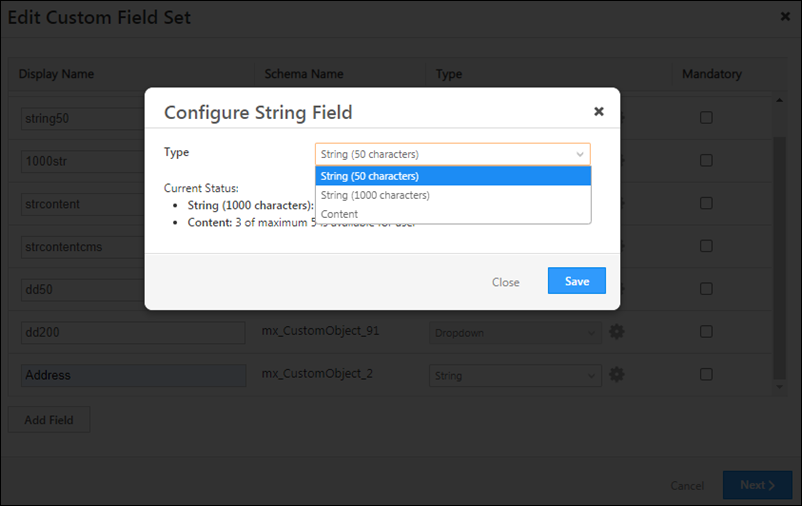
- String fields: configurable to a max of 50 or 1,000 characters. At the 1,000-character limit, up to 10 text area fields are supported.
- String-Content fields (rich-text editor with HTML support): up to 5 per CFS.
- Dropdown fields: configurable to a max of 50 or 200 characters. At the 200-character limit, up to 20 fields are supported.
- File-type fields: up to 10 per CFS.
5. Enable or Disable a Custom Field Set
- To disable a CFS: Click the settings icon alongside the CFS and select Disable.
- To enable a disabled CFS: Filter the grid to show Inactive field sets, then click Enable alongside the CFS.
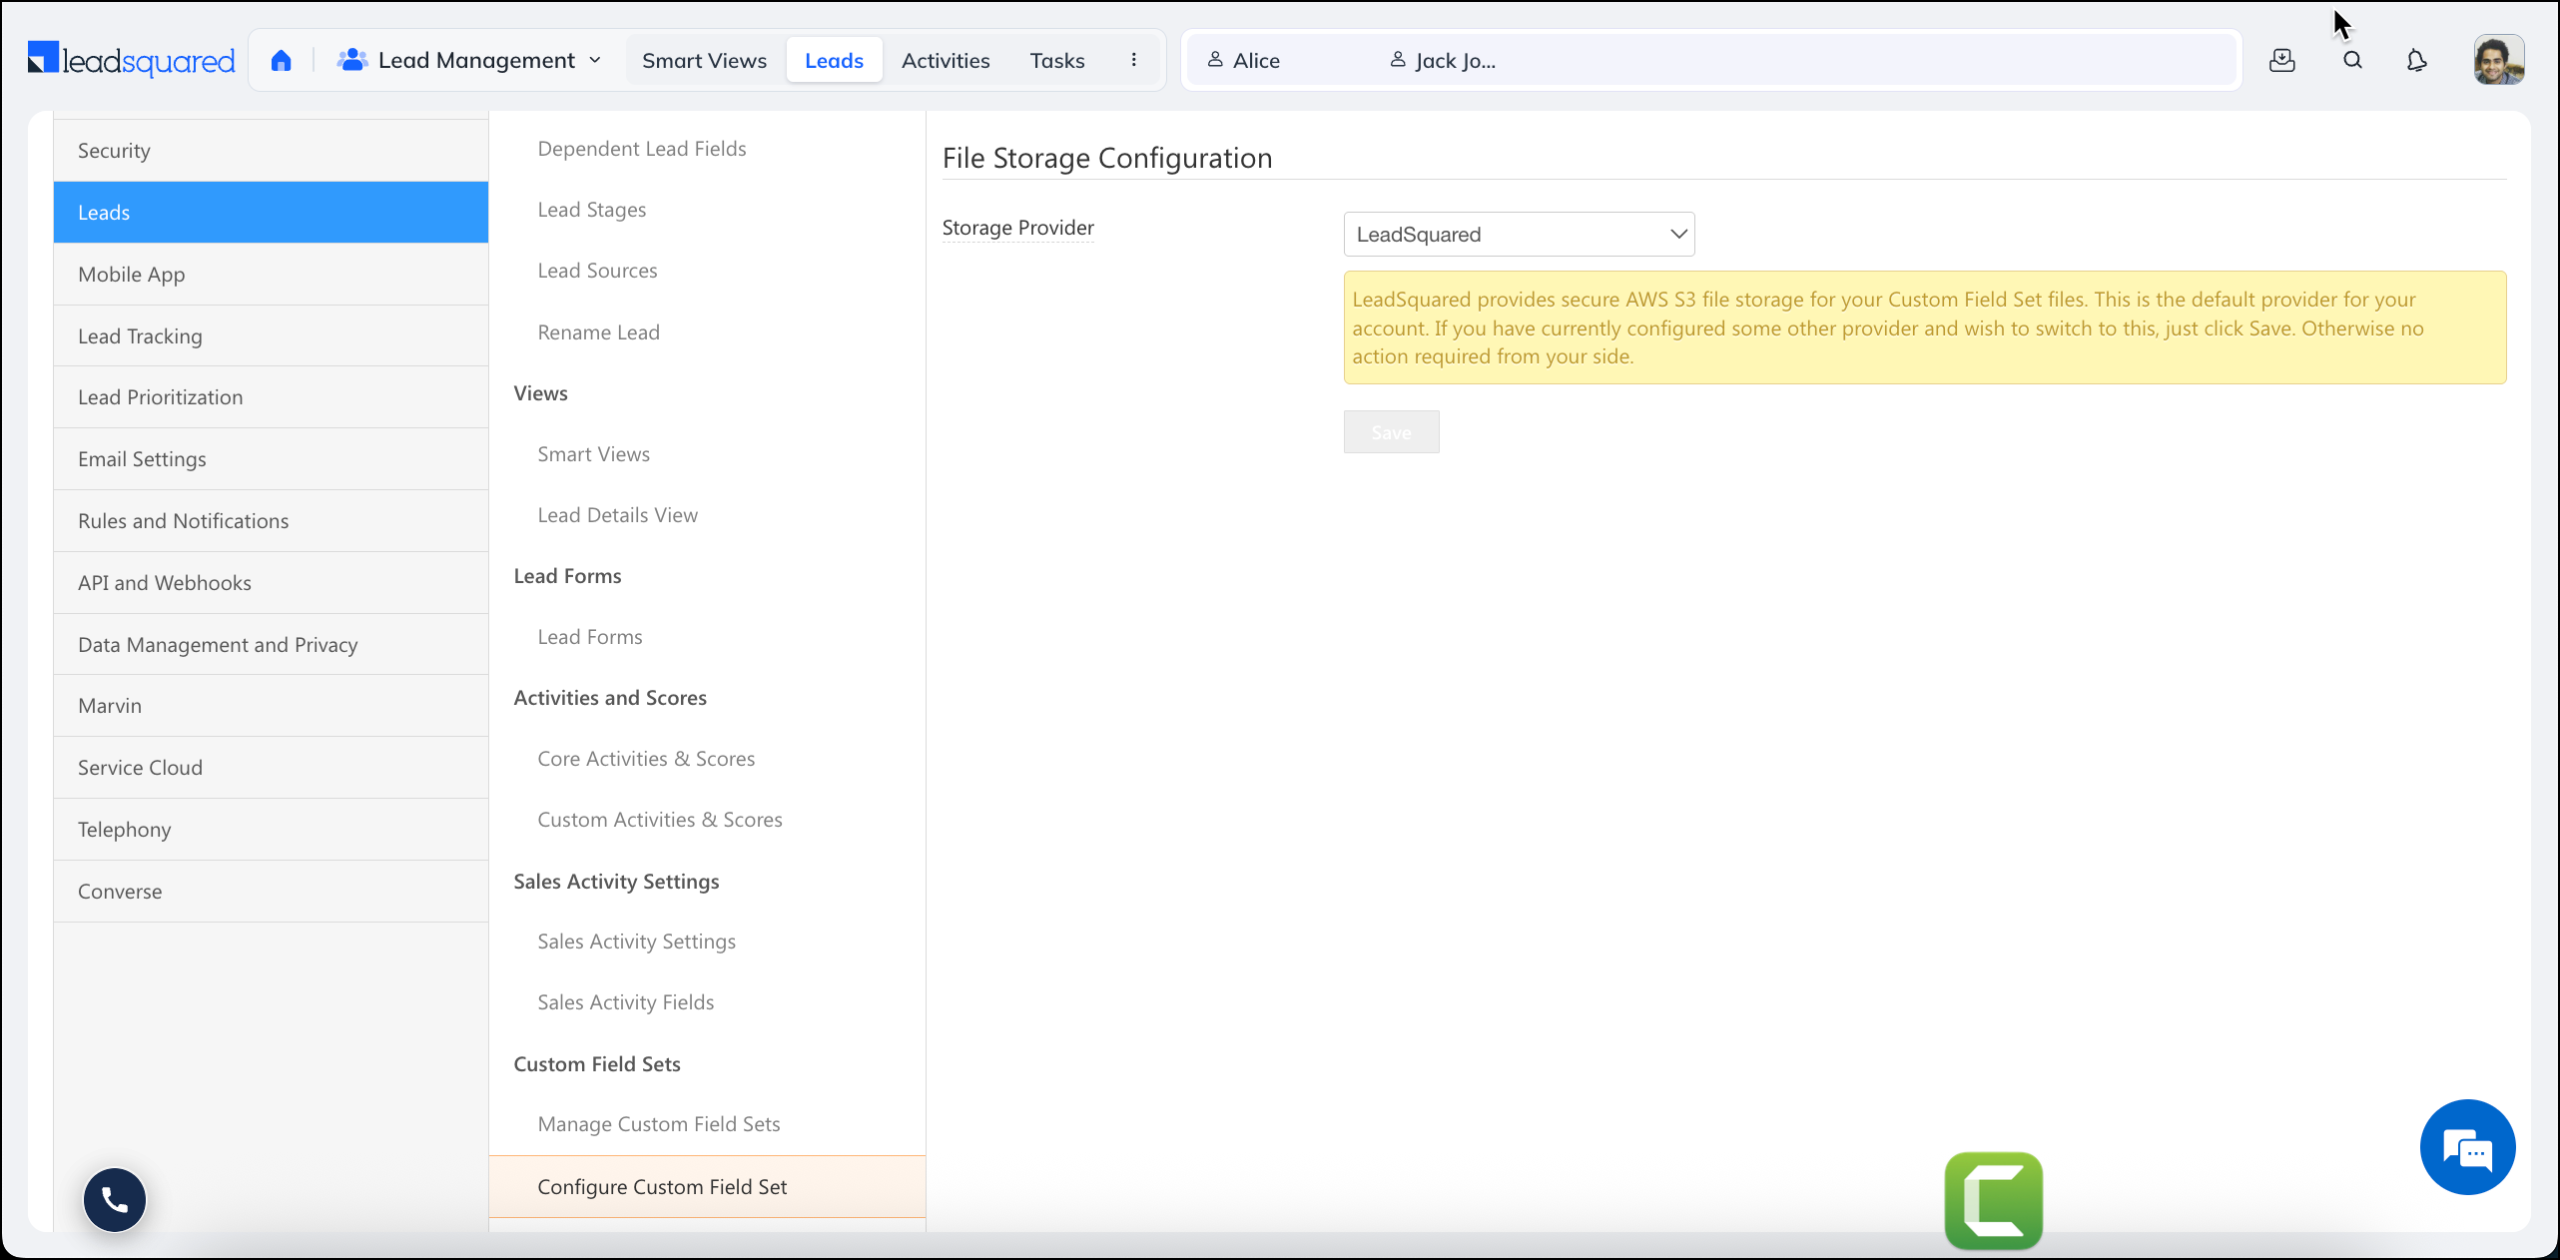
6. Configure File Storage
By default, files uploaded through a CFS are stored securely in LeadSquared’s Amazon S3 account and are not publicly accessible. If you want to store files in your own Amazon S3 or Alibaba Cloud OSS account, you can configure this separately.
- Go to My Profile>Settings>Leads>Configure Custom Field Sets.
- Use the dropdown to select where files should be stored.
To connect your AWS account, see How to Store CFS Files on Your Own S3 Bucket.
Any Questions?
Did you find this article helpful? Please let us know any feedback you may have in the comments section below. We’d love to hear from you and help you out!
In the automation whilst using notify user via email can add a custom lead field to whom i want to send an email to?
Hi, Gautham. Could you please contact support@leadsquared.com with this query? We’ll get back to you ASAP.
How do i download the entire dataset captured using the custom activity. Eg. If I have been generating admission letters using this technique. How can I download the entire data.
Hello, Rohit.
We need more context on this. Please reach out to support@leadsquared.com, and someone will reach out to you ASAP.
Hi , How to restrict someone so that he cannot download the image from leadsquared only view option should be there
Hello, Vipul.
Currently, it is not possible to restrict a user from just downloading the image.
Hi Dharshana
Is there anything in pipeline where LSQ might develop this in future.
Hi, Vipul.
It is not currently in the pipeline. However, you can raise a feature request by writing an email to support@leadsquared.com
The Default file size which can be uploaded is 10 MB. It can be increased to max 100 MB via configuration