1. Feature Overview
Admins can create Mavis Smart View tabs to display data stored in Mavis DB.
They can also configure permissions, to enable users to add, update and delete data from the Mavis Smart Views tabs.
For example, you can empower users to manage data on your inventories, properties, courses, etc., or, you can display any data that helps your users in their everyday operations.
If you’re new to the Smart Views feature, see LeadSquared Smart Views, and Smart Views for Admins.
2. Example Use Cases
- Grants users role-based access to add, update or delete data from Mavis DB tables.
- Give inventory teams CRUD access to manage inventory tables in Mavis DB.
- Sales managers and sales users can view/update inventory while making sales – e.g., available/blocked/booked properties within a date range, availability of doctors/rooms, inventory of courses, books, etc.
3. Prerequisites
- You must be an administrator user.
- You must have Mavis DB enabled on your account. For more details, contact your Account Manager or support@leadsquared.com.
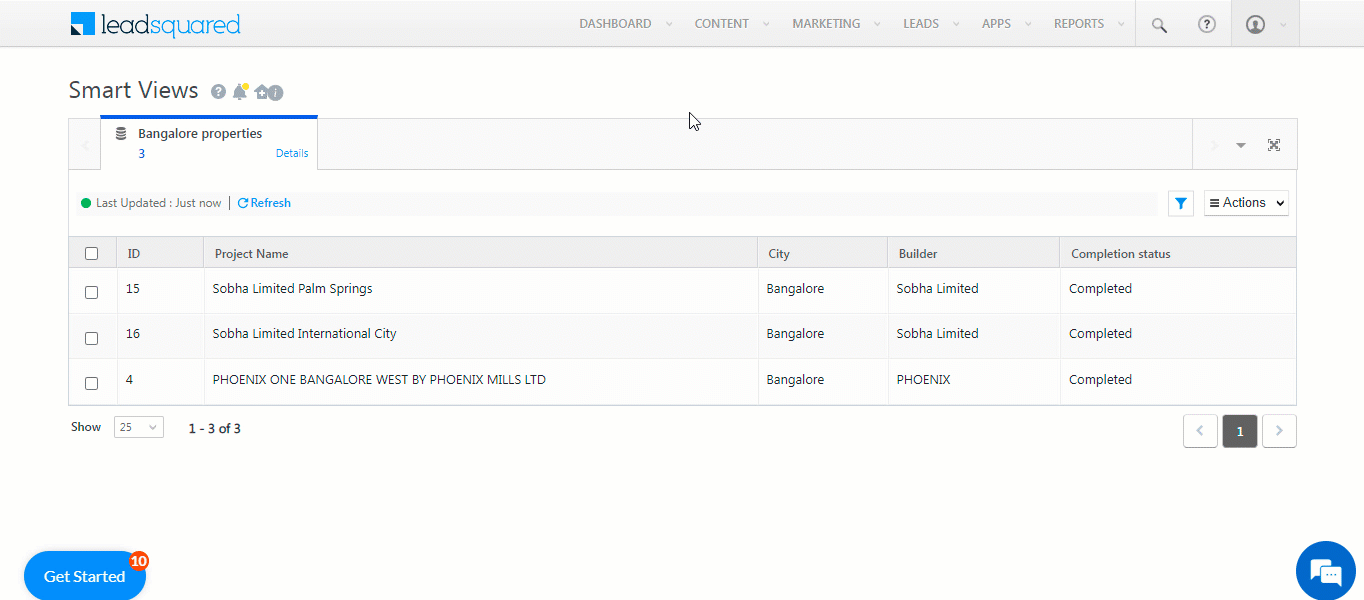
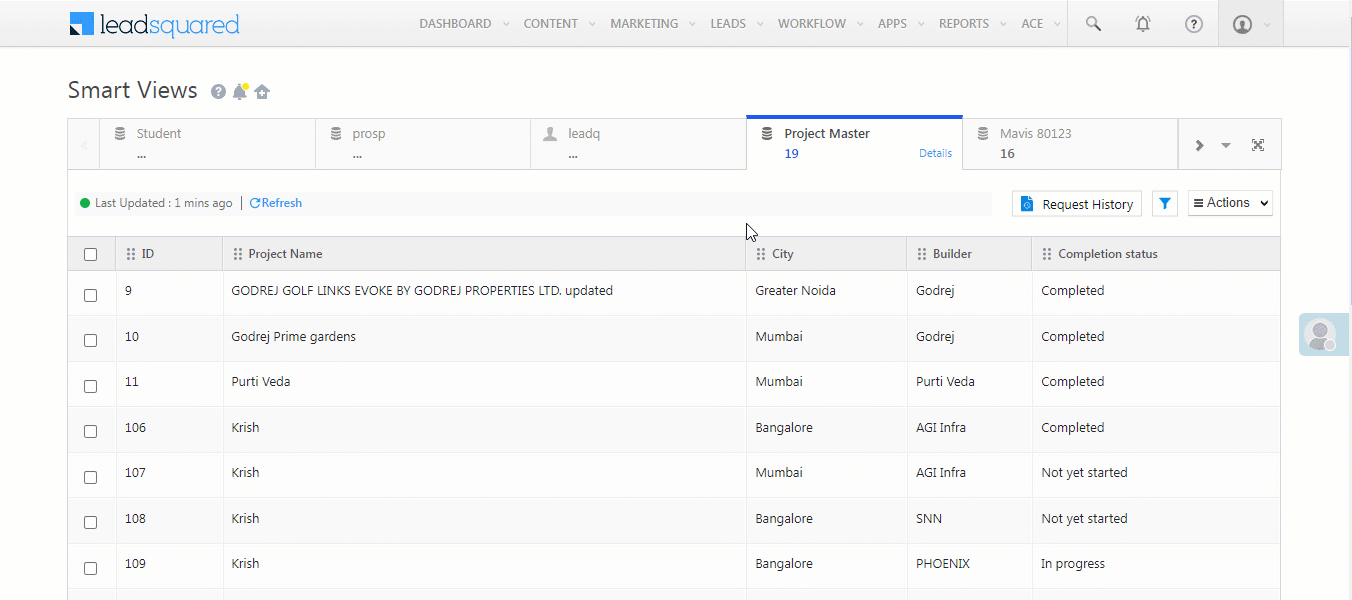
4. Create a Mavis Smart View Tab
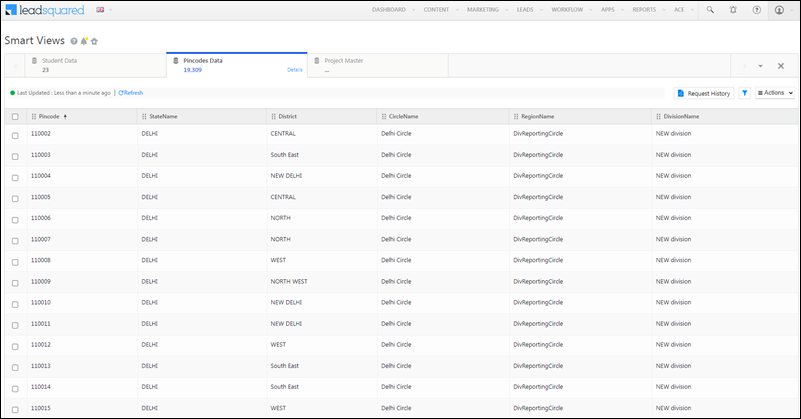
- Navigate to My Profile>Settings>Leads>Views>Smart Views.
- Click
 .
.

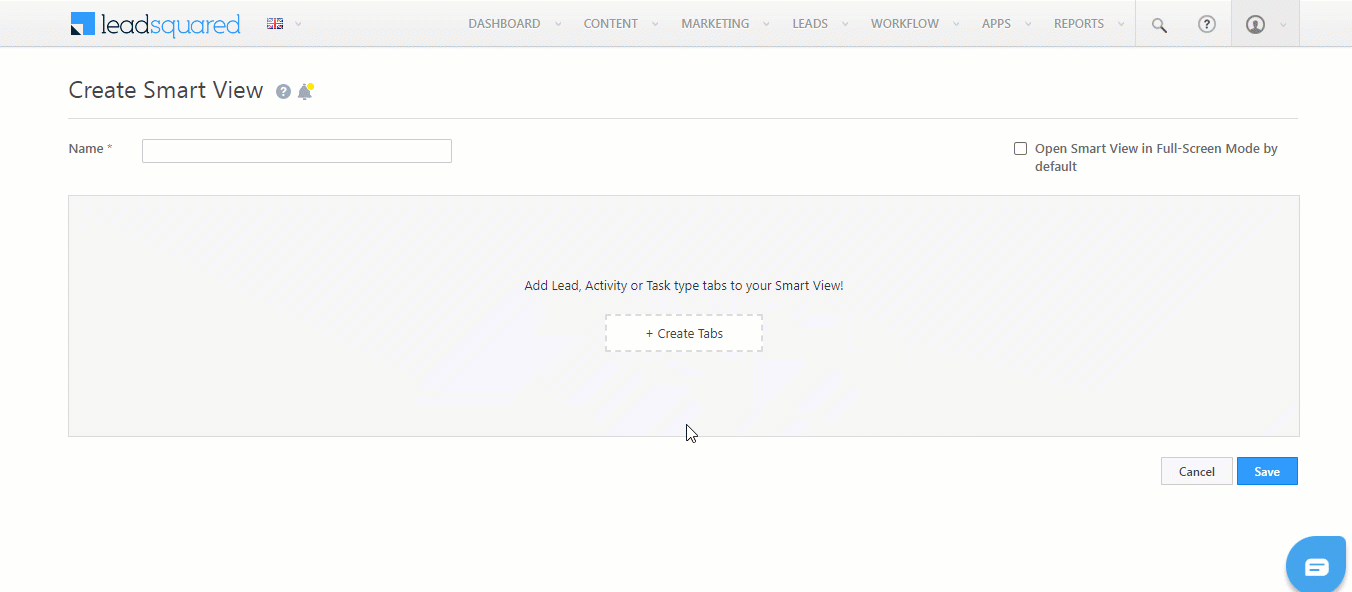
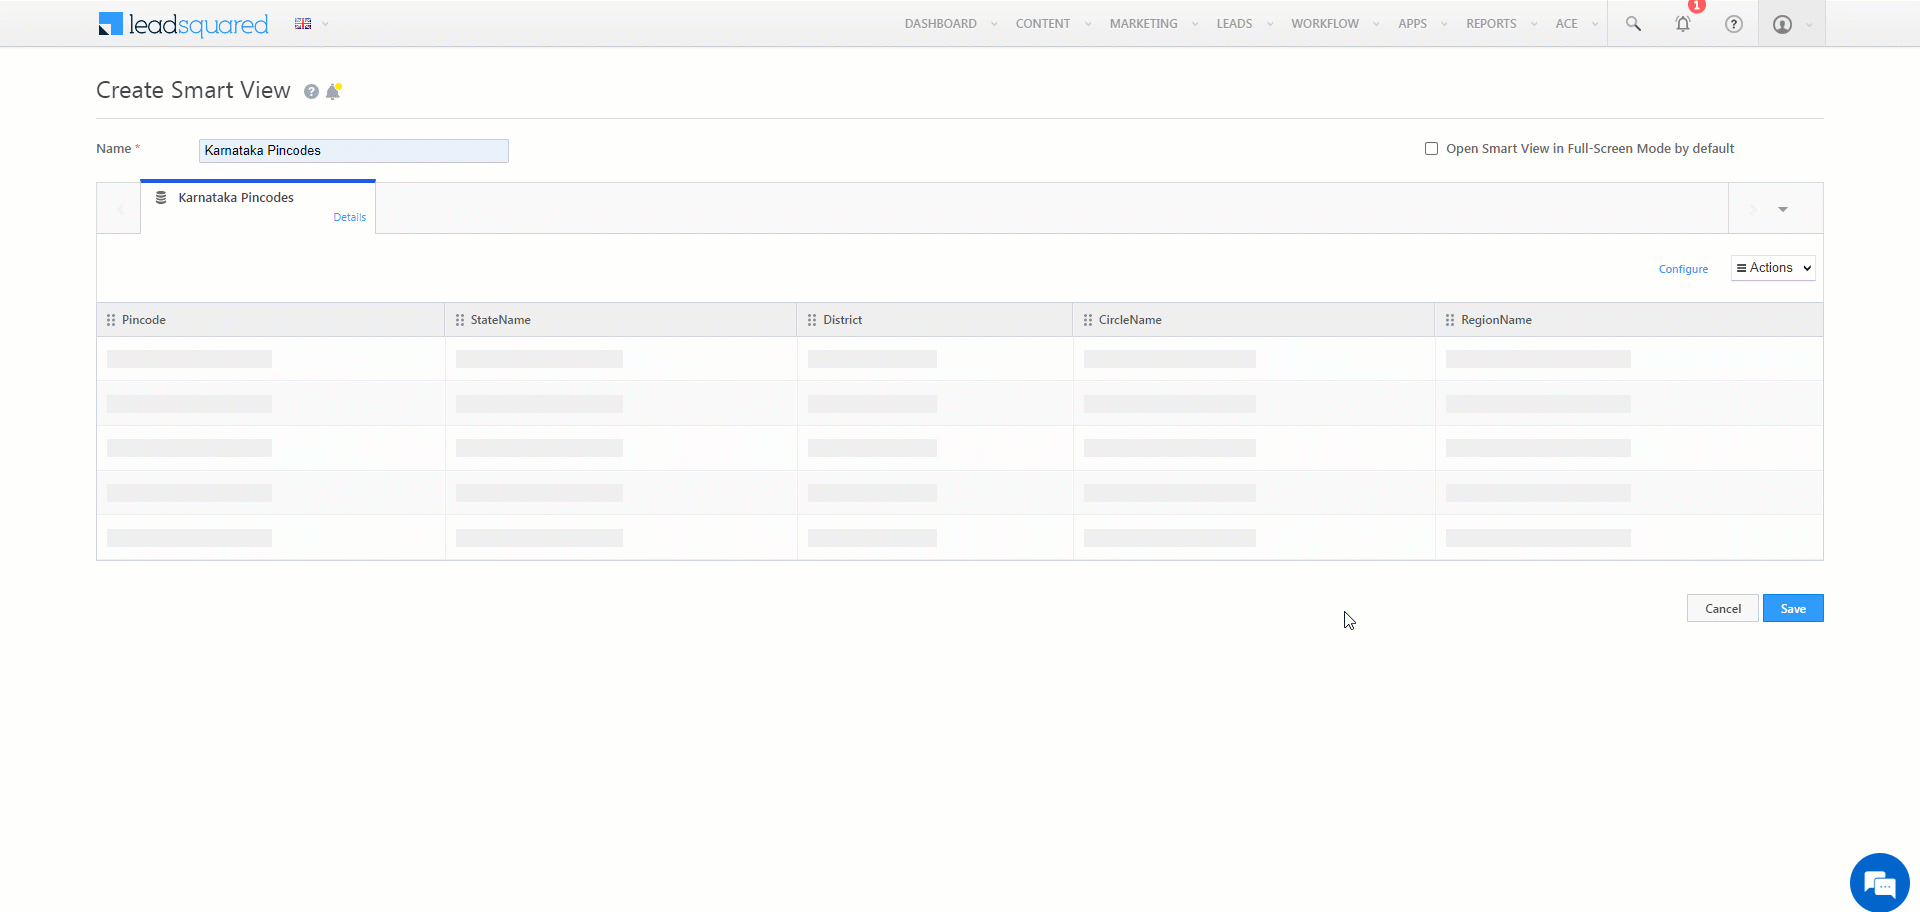
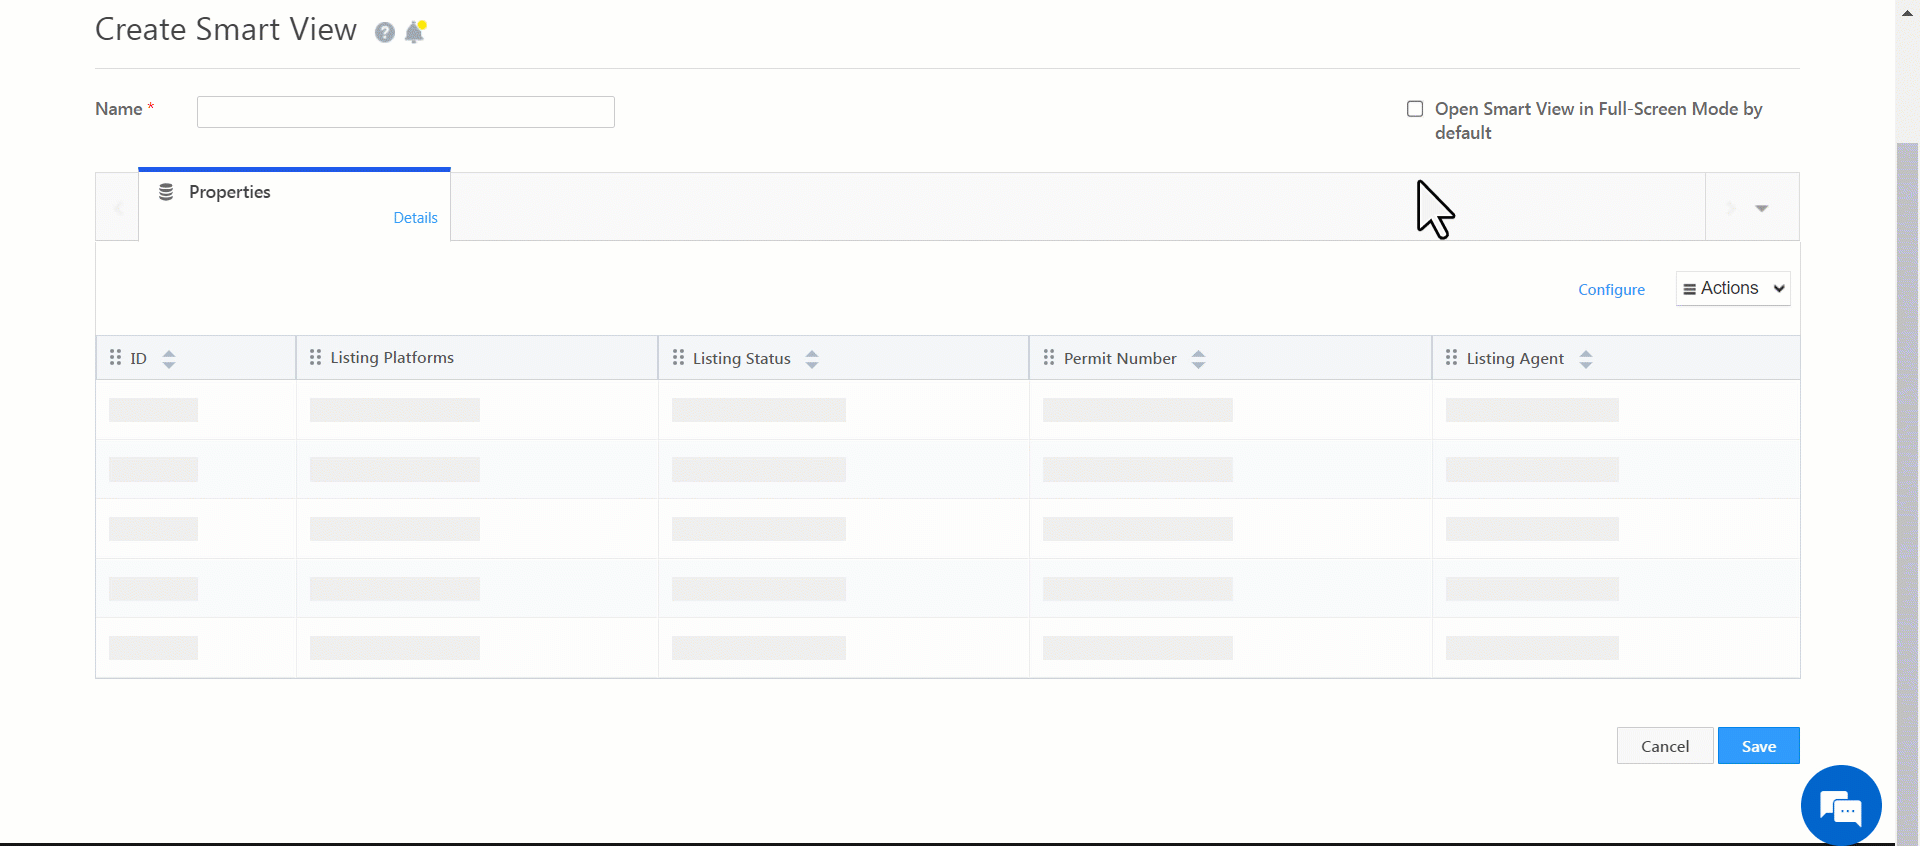
- Enter a name for the Smart View, then click Create Tabs.
- Choose Type as Mavis and enter a Name and Description.
- Click the Select Condition link.
- Select the database.
- Select the table name within the database.
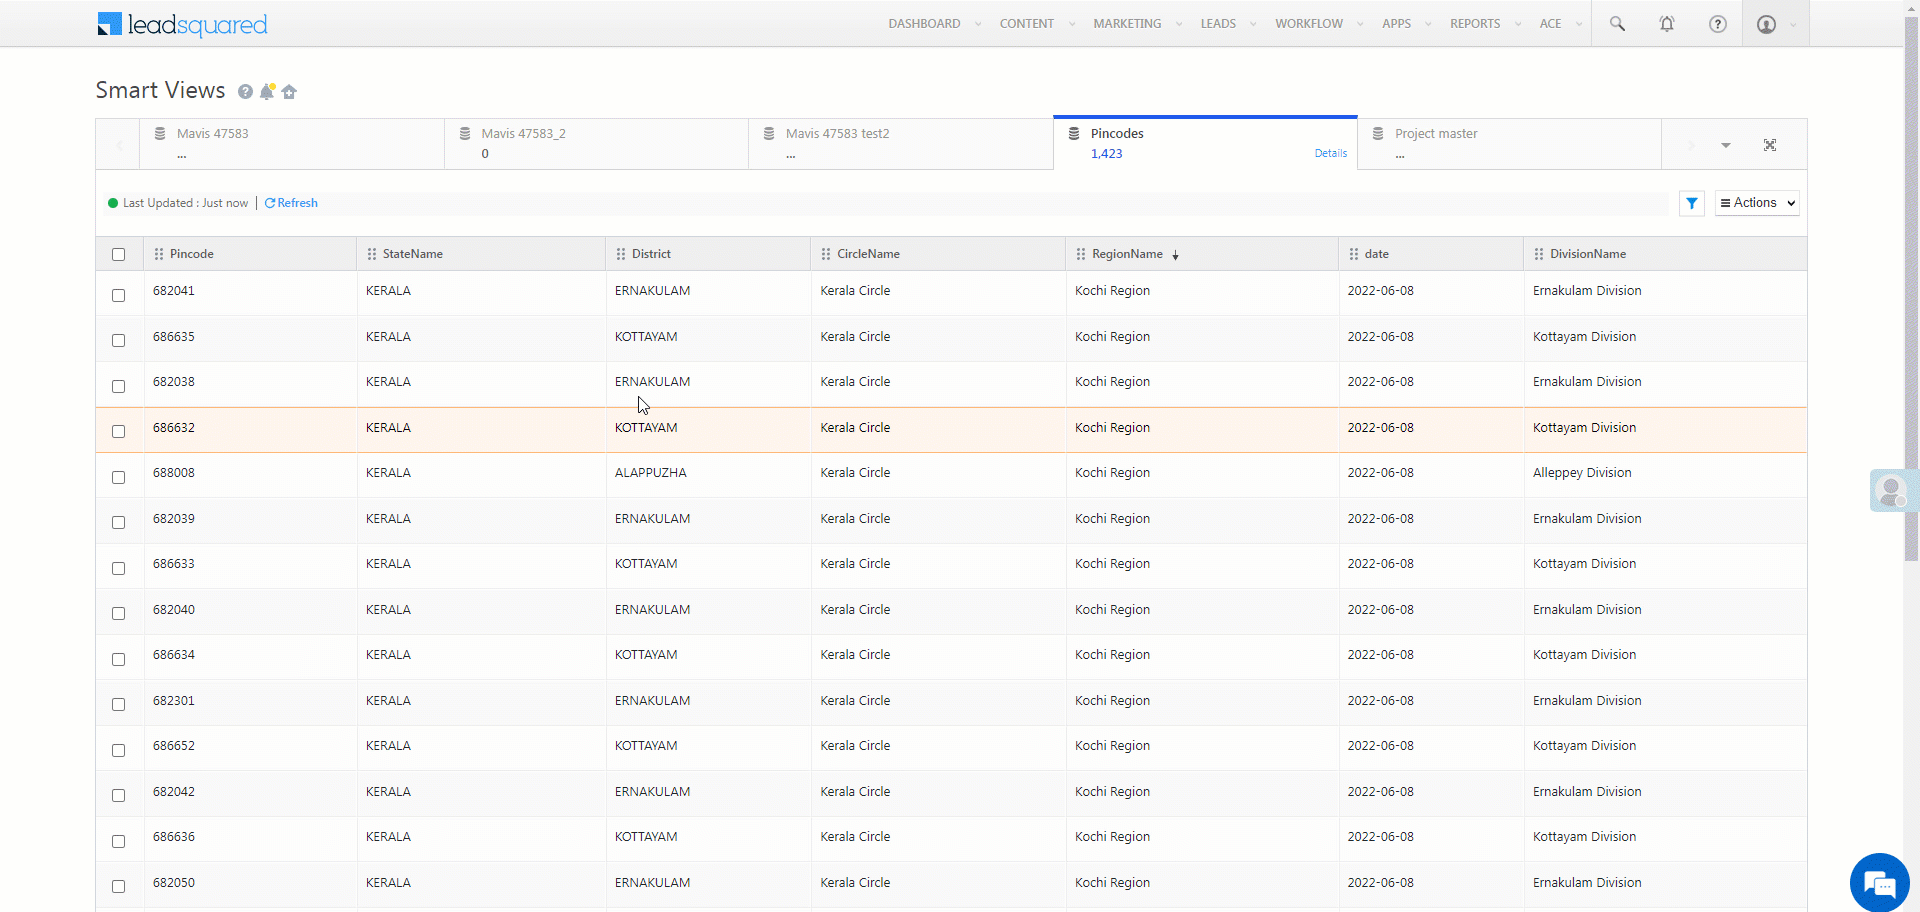
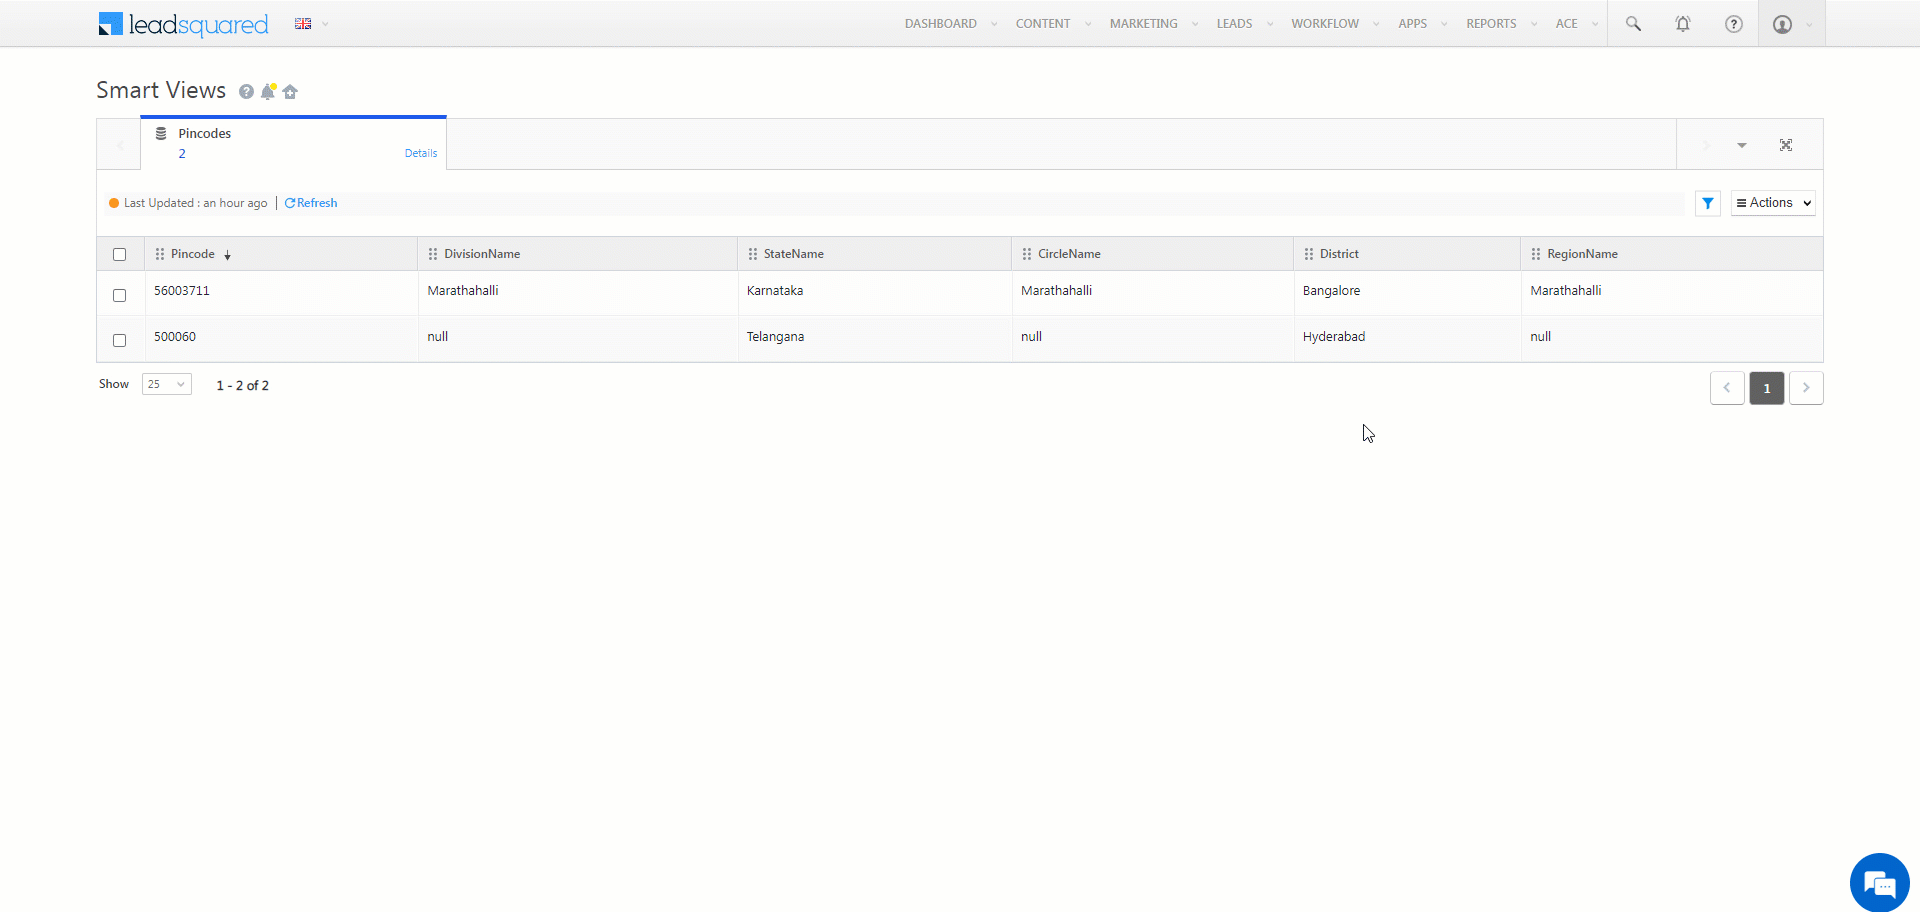
- Add filter conditions to filter the data from the table. For example, you can filter the ‘State’ field to display results within a particular state:
- Column Name – StateName| Operator – Equals | Value – Karnataka
- For more information on filter conditions, see filter conditions.
- Click Add to add more filter conditions. You can add up to 20 filter conditions by default. To increase this limit, reach out to your account manager or support@leadsquared.com.
- For multiple filter conditions, select whether you want All Criteria (and) or Any Criteria (or) to apply.
- Click Save.
- Verify the filter conditions, then click Save.
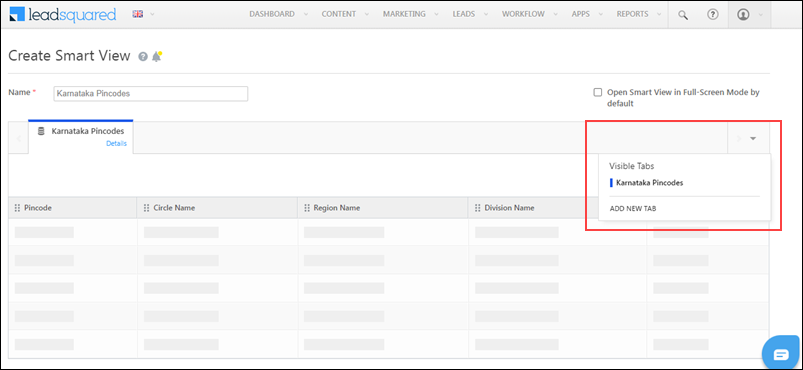
To create more tabs:
- Click the
 icon.
icon.
- Click Add New Tab.
Note:
- You can create tabs of different types (Lead, Activity, Mavis, etc.) in the same Smart View.
- You can re-order columns on the table by dragging and dropping them.
5. Configure Tab Permissions
Admins can configure the following permissions on the Mavis Smart View tab –
- Read Data (enabled by default)
- Add Row
- Update Row(s)
- Single Row Update
- Bulk Update
- Delete Rows
- Export Data
- Import via CSV
- Create New Record(s)
- Update record(s)
- Upsert record(s)
To configure permissions –
- Click the Configure link.
- On the Configure Actions Menu pop-up, enable the slider alongside the permissions you want to grant.
- Click Save.
6. Select Columns
Select the columns you want users to see when accessing the Smart View.
To restrict users from viewing certain columns, enable the Restrict Columns option. When enabled, only the selected columns will be available to the user when they’re personalising the smart view tab through column customization.
Note:
- Restricting columns in the Smart View is prohibited when any of the Add, Update, Delete, or Import actions are enabled.
- The column restriction is only applied only at the UI level, not the API level.
7. Assign Smart Views to Teams
Now that the Mavis Smart View tabs are created, assign them to your teams – Assign a Smart Views tab to a team.
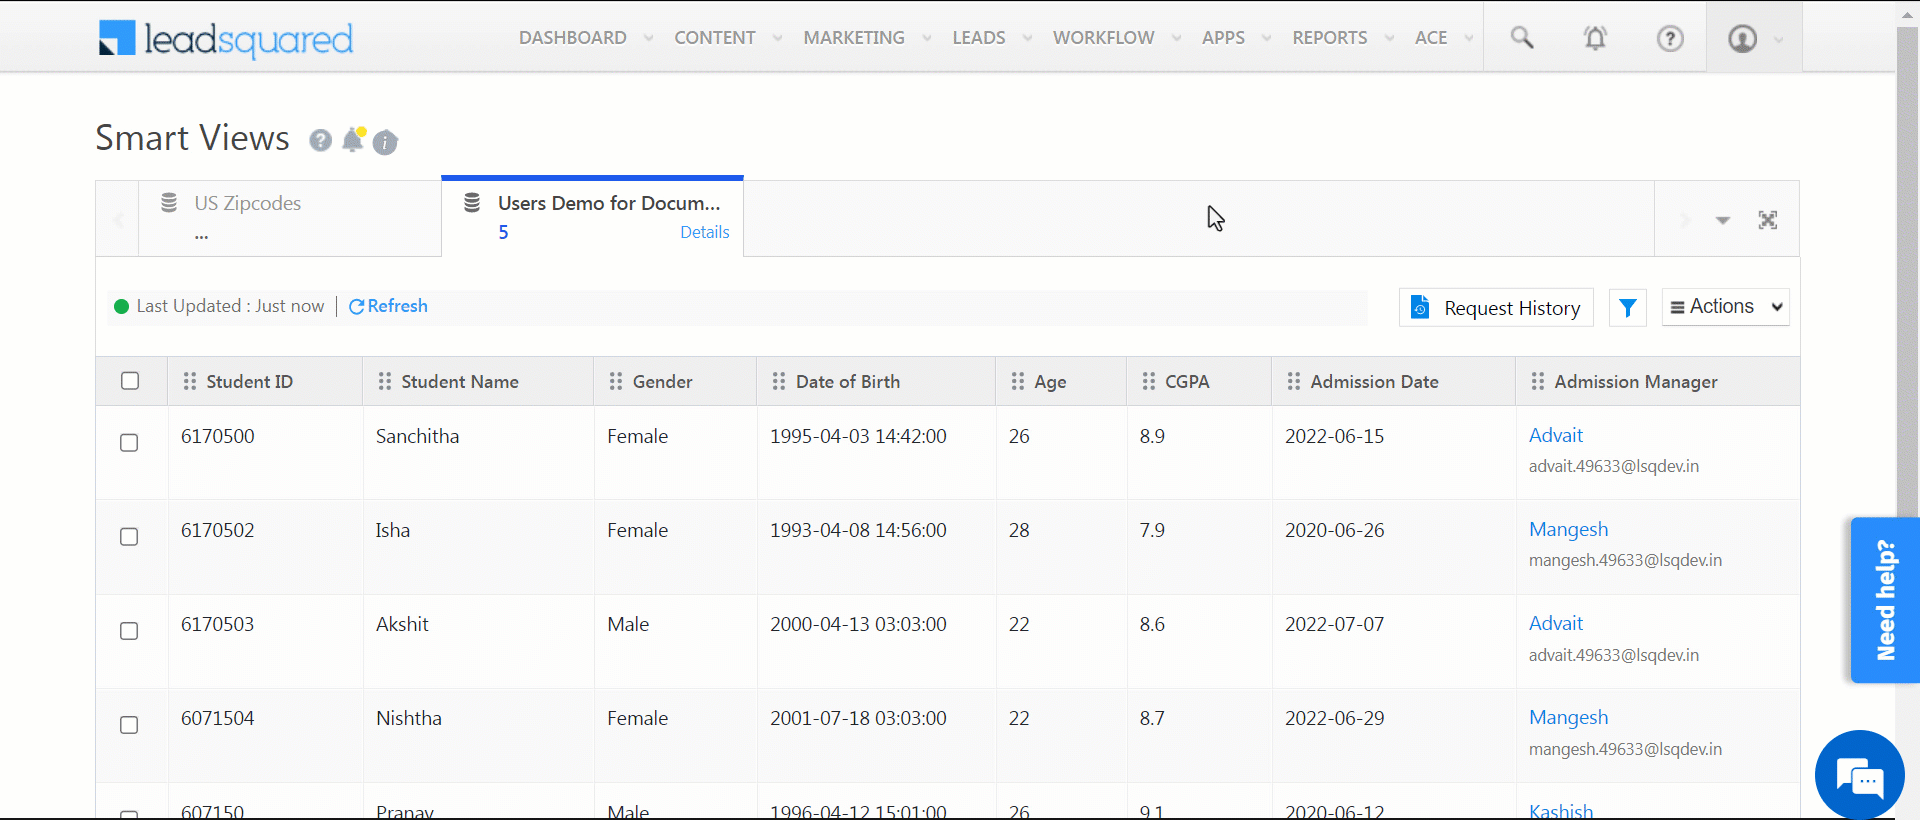
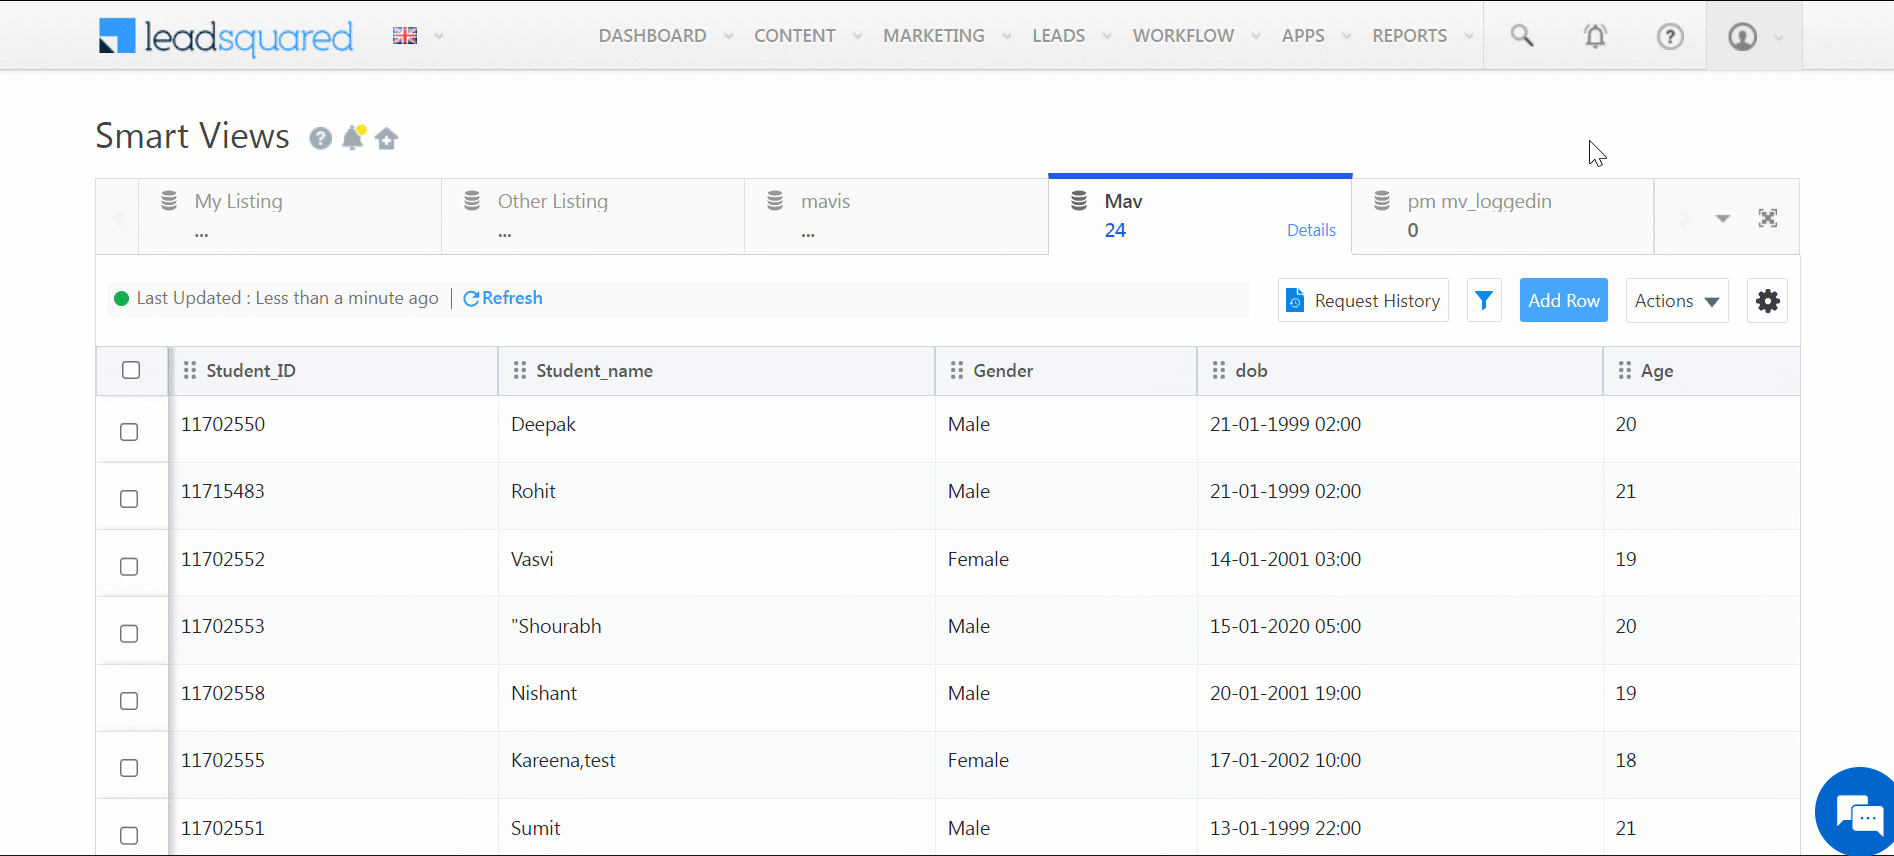
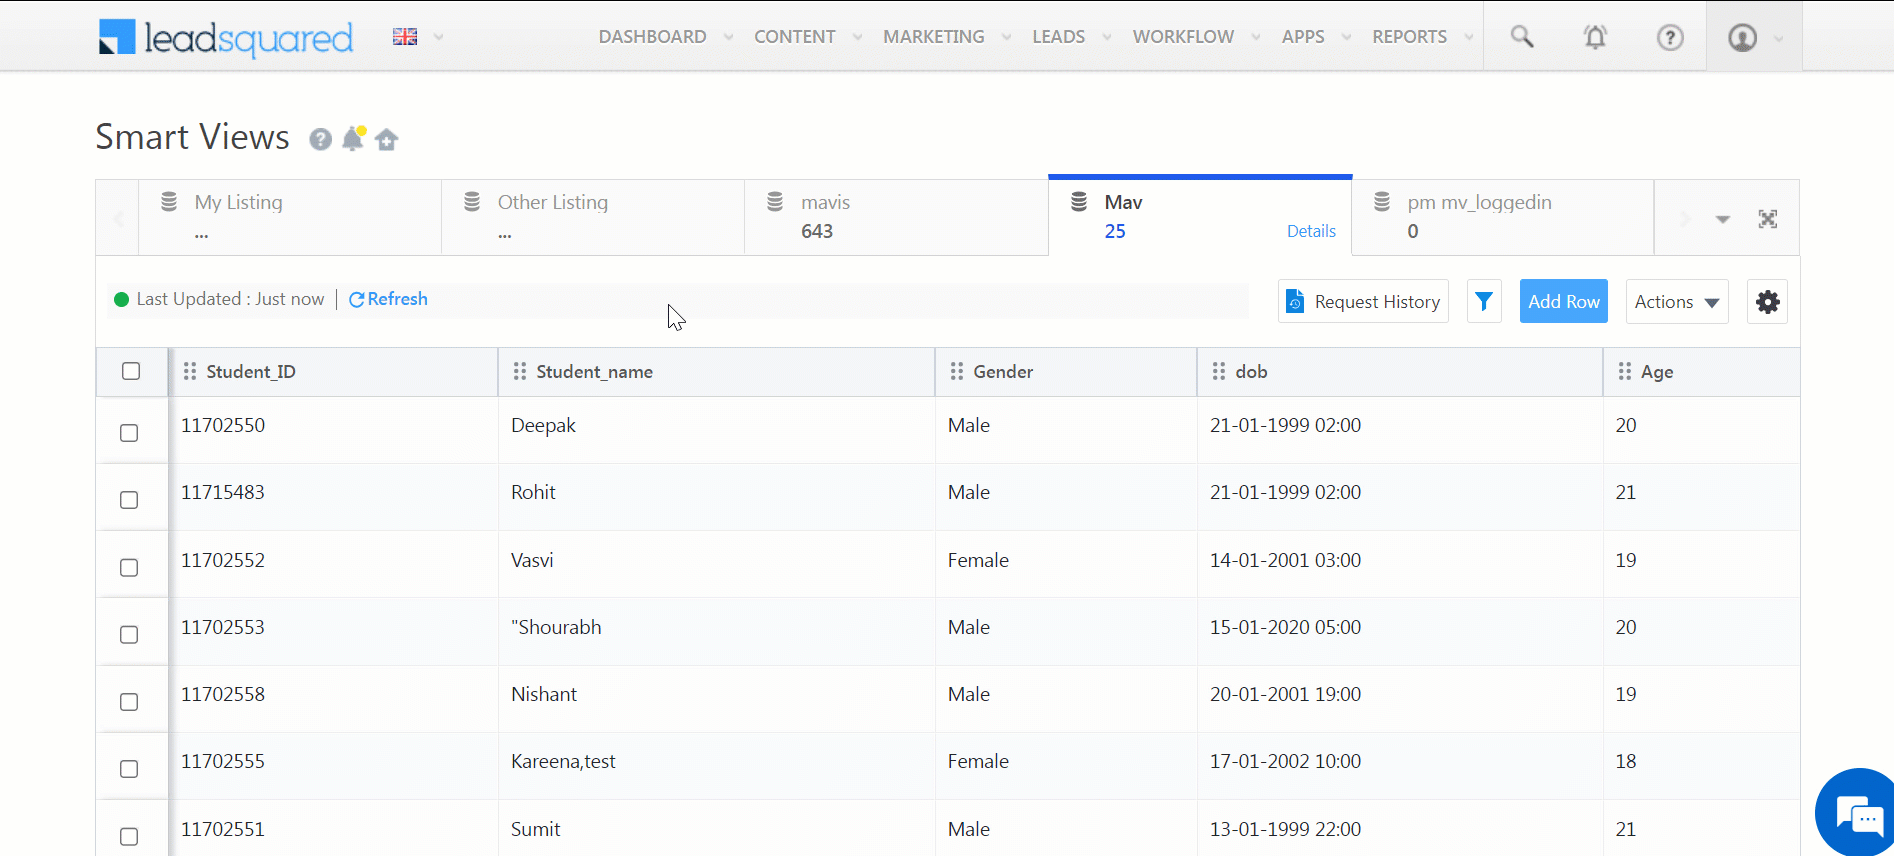
8. Using Mavis Smart Views Tabs
Users logging in (based on the team) will now be able to work on the Mavis Smart Views tabs, based on the team assignment configured in the previous step.
8.1 Column Customization
To configure the columns you want to see on the grid:
- Under Actions, click Select Columns.
- Select the columns you want to view.
- Click Show Selected.
Note: You can re-order columns on the table by dragging and dropping them.
8.2 Manage Filters
Users can add further filters to the existing filter conditions set by the admin:
- Click the
 icon.
icon.
- Add the new filter conditions.
- Click Save.
Adding User Filters
When searching for user data within a Mavis-type Smart View tab, you can search by User Id, Email Address, First Name, and Last Name fields.*
8.3 Add Row
- On the Smart Views page, above the table, click Add Row.
- Enter the row details, then click Add.
Note:
- The maximum table size allowed is 40GB.
- When you add a row, the data under system columns will be auto-populated.
8.4 Update Single Row
To update a single row in the table –
- Select the row you want to update.
- Hover your cursor over the Actions menu.
- Click Update Row.
- Enter the row details, then click Update.
Note: Users cannot update the data under system fields since they are auto-populated.
8.5 Update Multiple Rows
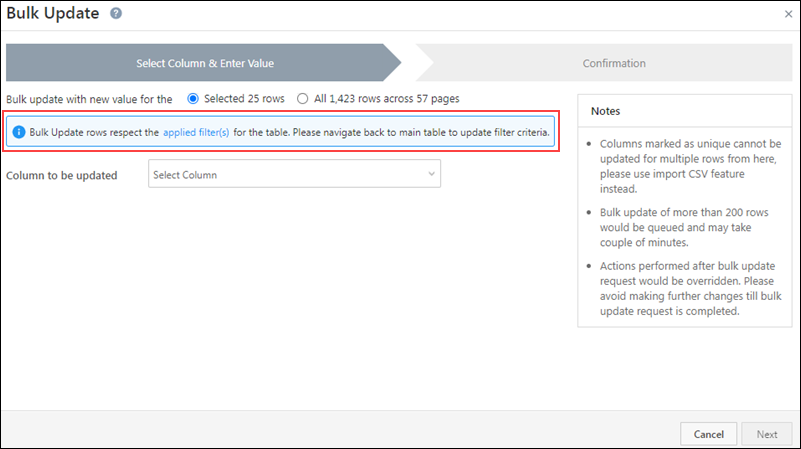
To update multiple rows in the table –
- Select the rows you want to update.
- To update all the rows present on the current view, on the column header, click
 .
.
- Hover your cursor over the Actions menu, and click Bulk Update.
- On the Bulk Update pop-up, on the Select Column & Enter Value tab, from the Column to be updated dropdown, select the column you want to update.
- If you’ve selected all the rows on the current page to be updated, alongside Bulk update with new value for the…, you’ll have the option to update rows only on the current page, or update all the rows across the entire table.
- The Bulk update with new value for the selected … row(s) will show up if you’ve manually selected only a few rows to be updated on the current page.
- In the New Value box, enter the new value of the selected column.
- Once you’re done, click Next.
- On the Confirmation tab, verify if all the details are correct, and click Update. You’ll get a confirmation message stating that the update is successful.
Note:
- Only non-unique columns can be bulk updated. To update unique columns, use the Import Rows feature.
- Bulk update requests for more than 200 rows may take a couple of minutes to execute.
If you’ve applied Filters, you’ll only be able to update rows selected based on the filters applied.
8.6 Delete Rows
- Select the rows you want to delete.
- Above the table, click Delete.
- To cancel deleting the rows, click Cancel.
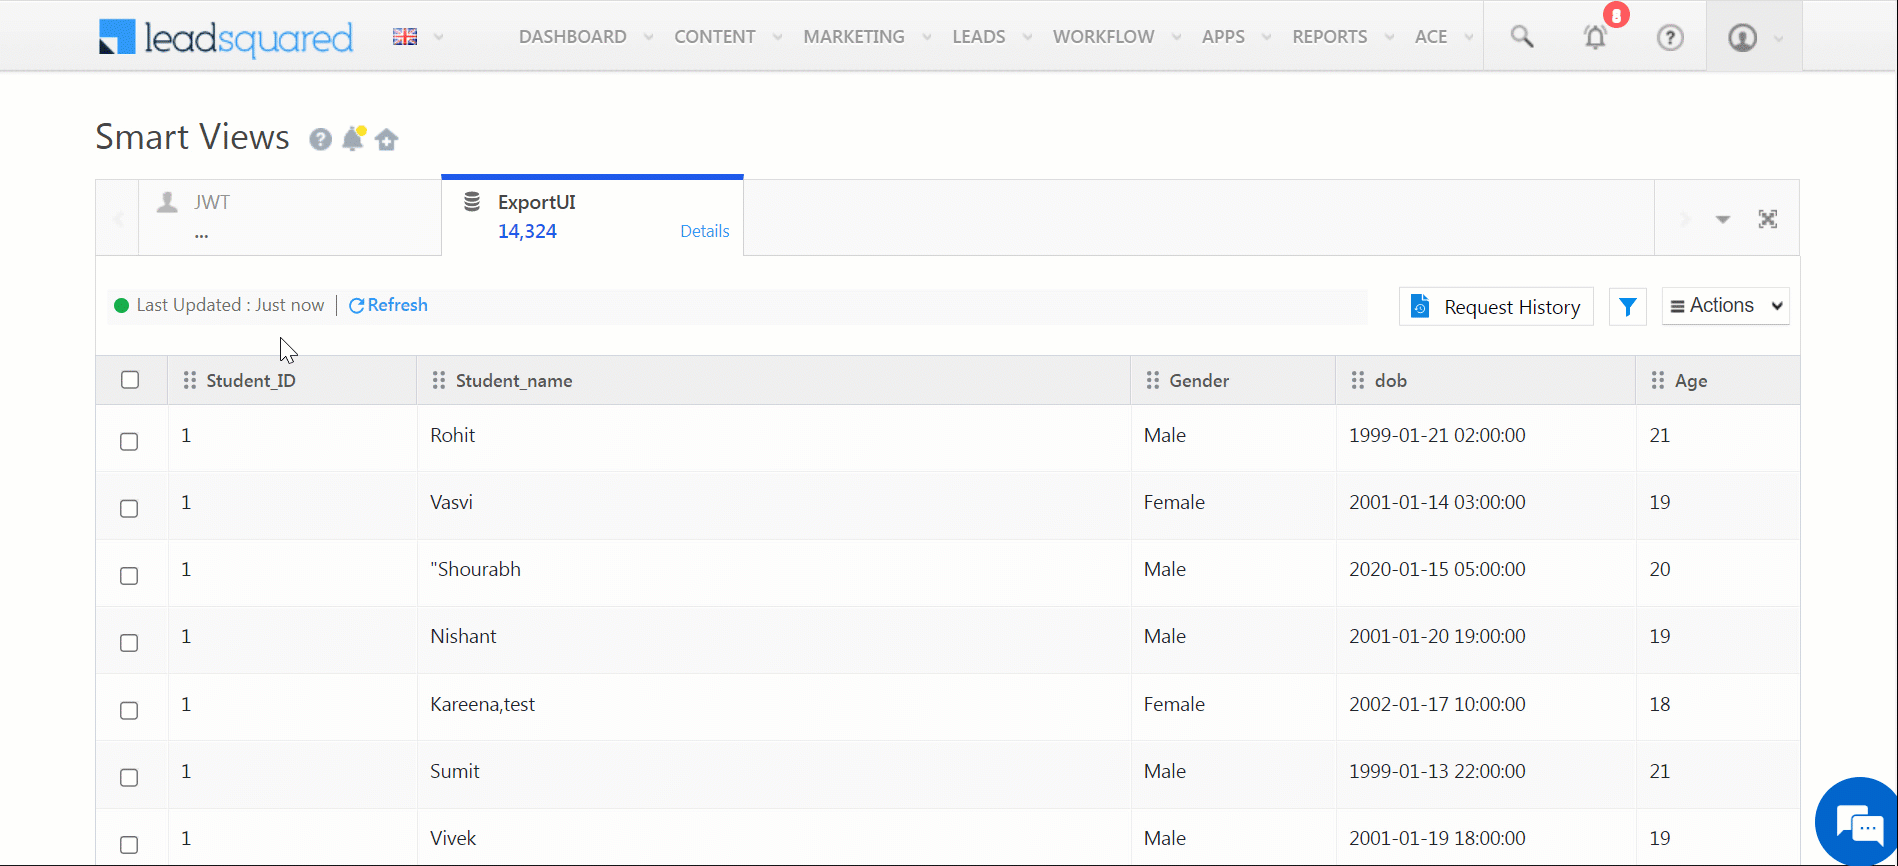
8.7 Export Data
- Select the rows you wish to export.
- To export specific rows, alongside the row, click
 .
.
- To export all rows in that page, alongside the table header, click .
- Hover your cursor over the Actions menu.
- On the Export Data pop-up –
- If you’ve selected specific rows in the table grid, a message with the number of rows being exported will be displayed. For example, if you’ve selected 4 rows, “Number of row(s) to export: 4” will be displayed.
- If you’ve selected all rows of the page in the table grid, you will get an option to export the selected rows or all rows across all pages.
- Once you’ve selected the rows to be exported, you can choose to Export All Columns or Export Selected columns.
- If you select Export Selected columns, you will be able to choose specific columns you wish to export. Alongside the columns you want to export, click .
- If you select Export All Columns, the data in all the Smart Views columns will be exported.
- If you want to export the Row ID, alongside Include Row ID in Export, click .
- Click Export.
Note:
- If you do not select specific rows while exporting data, all rows across all pages will be exported.
- You will only be able to export up to 5GB of data.
- When exporting data, the Row ID (
mv_RowId) is automatically selected and exported.
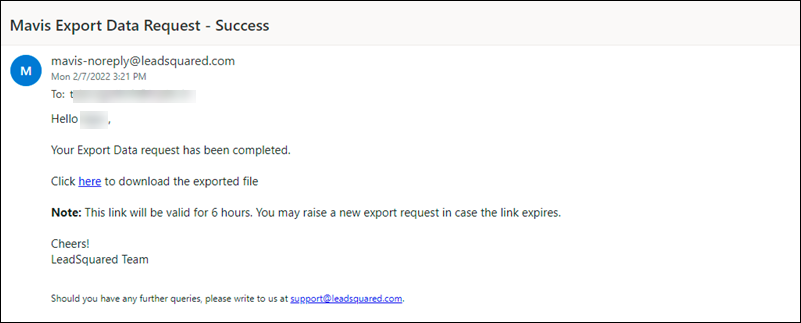
Note: Once the export request is successfully processed, you’ll receive an email with a link to the exported data file. This link is valid only for 6-hours.
8.8 Import Rows
To import data into your Mavis tab in Smart Views –
- First, you’ll have to upload the CSV source file.
- Map the columns in the CSV file to the corresponding column within the table.
- Then, validate the CSV file. The validations that might show up are Validation Success and Validation Failed.
- Once the status is Validation Success or Validation Failed (Partially), click the Import button.
Note:
- In a single Import action, you can import up to 1-lakh (100,000) rows.
- The only file format supported while importing is a “.csv” file in the UTF-8 format.
- Users cannot import data under system fields.
8.8.1 Create New Record(s)
To import and create new records in your Mavis table –
Note:
- The Create New Records option will be visible only after you enable the Import via CSV – Create New Record(s) setting.
- You cannot perform the Create New Record(s) action for columns containing the User data type.
- The maximum table size allowed is 40GB.
Source
- Navigate to the Smart Views screen, and on the right of your screen, hover your cursor over the Actions menu, and click Import Rows.
- On the Import via CSV screen, Select Import Behaviour –
- Create new record(s) only – Data present in the CSV file will get created as new records in the table. Existing rows in the Mavis table will not get updated.
- Then, click Download Sample. The sample file is generated dynamically and it contains the schema names of all the columns created in the Table Schema.
- On the sample CSV file, enter relevant data in the correct data type under each column, and save the file.
- If you are not using the sample CSV file, and are instead creating new a CSV file/uploading an existing CSV file to update the table, specify the header names (column names) in the first row, and add data across the subsequent rows.
- Click Upload, and add the relevant CSV file.
- Alternatively, you can drag-and-drop the CSV file.
- Once you’re done, click Next.
Note:
- The only file format supported is a “.csv” file.
- Column with the name ‘__LSQValidationMessage’ or ‘__LSQValidationStatus’ is not allowed in the CSV file.
- The maximum file size allowed is 10MB.
Column Mapping
Once you’ve imported the CSV file, you will have to map it against the corresponding column within the table.
- If the column names in the CSV file are the same as the column names in the table column, then the columns are automatically mapped.
- Else, from the CSV Column Name dropdowns, you must map the columns to the correct Column Name in Mavis.
- For Mandatory Fields, map the Column Name in Mavis on the left to the corresponding CSV Column Name on the right.
- All columns that are marked Unique or Non-Nullable are considered mandatory columns.
- Once you’re done, click Save.
- If there are no mandatory columns in the table, the Mandatory Fields option will be disabled, and you’ll not be able to expand or view it.
- Once you’ve mapped and saved the mandatory columns, for Non-Mandatory Fields, map the remaining non-mandatory CSV Column Name on the left to the corresponding Column Name in Mavis on the right. Note that the order of column mapping is reversed in this step (the CSV Column Name is on the left).
- All fields marked Is Nullable are considered as non-mandatory columns.
- The mandatory Mavis columns mapped in the previous step will not show up in the list of options in this step.
- This step is optional. If you choose to skip it, click Save and continue with the other steps.
- If there are no non-mandatory columns in the table, the Non-Mandatory Fields option will be disabled, and you’ll not be able to expand or view it.
- If all the columns under CSV Column Name are mapped, the Non-Mandatory Fields option will be disabled, and you’ll not be able to expand or view it.
- If DateTime columns are present in the Table Schema –
- From the Date/Time format in CSV section, select the same Date/Time/DateTime formats given in CSV File.
- If table schema contains either of Date/DateTime/Time columns, or its combinations, but not all three columns, then in Date/Time format in CSV section, you can choose only those available column formats. Other formats will be disabled.
- Below are the default formats –
- Date – yyyy-MM-dd
- DateTime – yyyy-MM-dd HH:mm:ss
- Time – HH:mm:ss
- If there are no Date/Time/DateTime fields in the table schema, then this section will remain greyed out and inaccessible.
- Once you’re done, click Next.
Note:
- CSV column names are case-sensitive.
- Different DateTime fields in the CSV file should follow one uniform format. You cannot upload different format DateTime fields in the same CSV file.
- For example, in your CSV file, you cannot have one column in the dd-MM-yyyy HH:mm:ss format, and another column in the MM/dd/yyyy HH:mm:ss format.
- Date, Time and DateTime fields will be stored in the default formats in the Mavis DB.

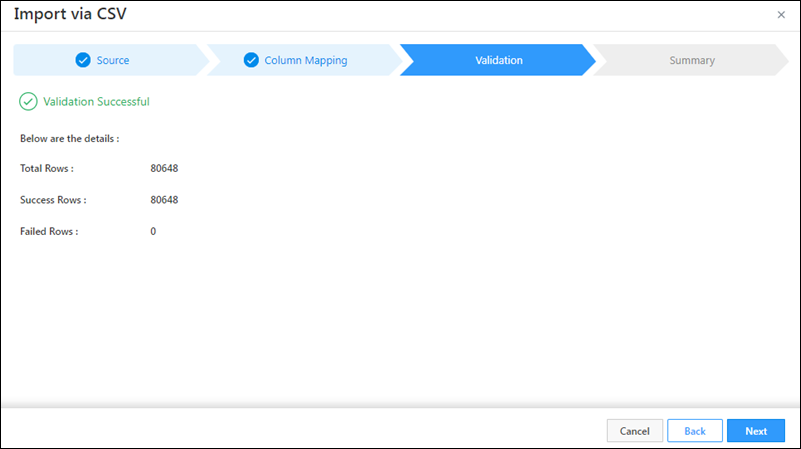
Validation
The data in the CSV file will be validated on this screen.
If Validation Success –
If all the row(s) have been successfully validated, you’ll get the Validation Success message. You can choose to continue the CSV file import process by clicking Next.
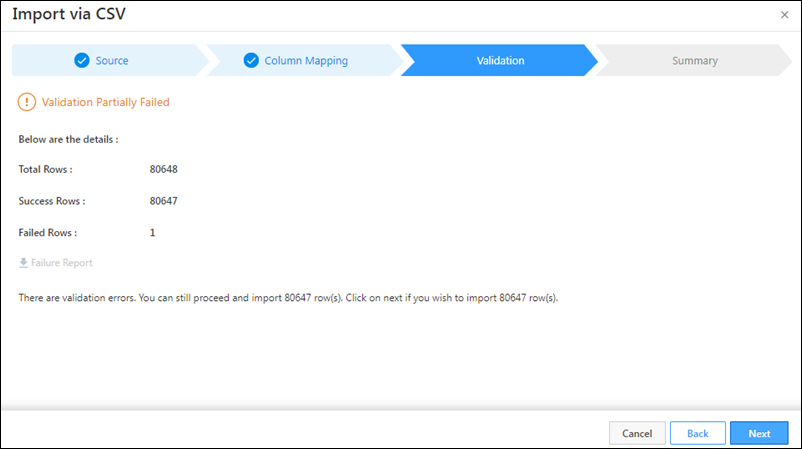
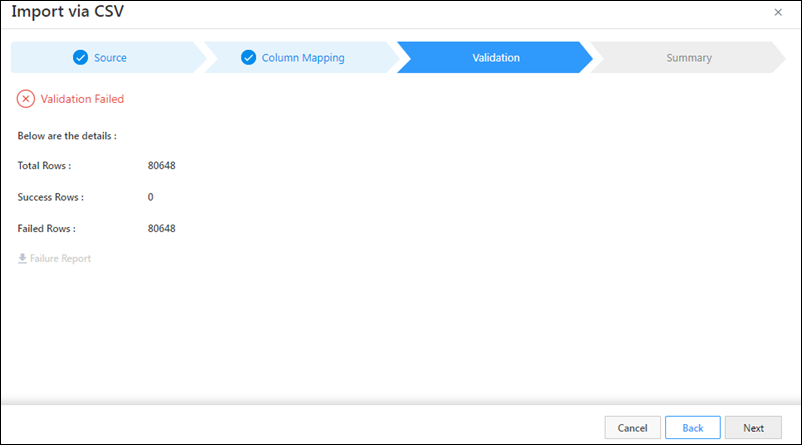
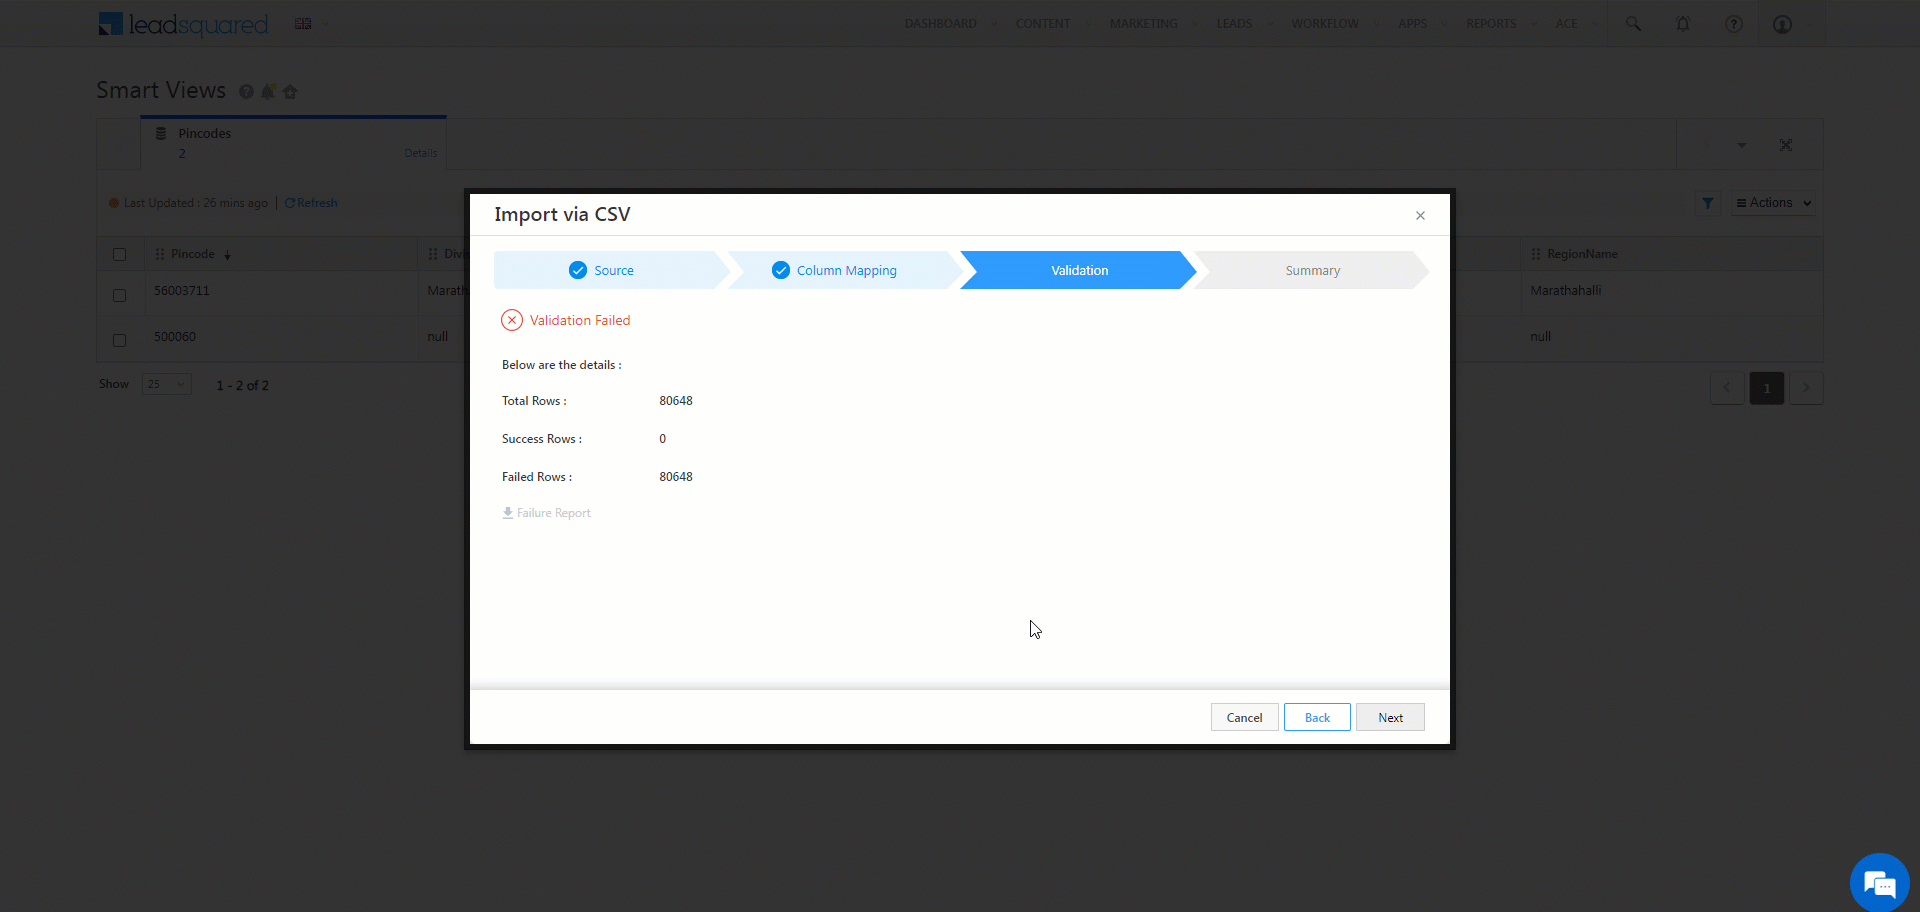
If Validation Failed –
If one or all the rows have not been successfully validated, you’ll get the Validation Failed message. There are two types of Validation Failed messages you might receive –
- Partially Failed – This means the validation for only a few rows in the CSV file failed, while the remaining rows’ validation was successful.
- Completely Failed – This means the validation for all the rows in the CSV file failed.
To rectify a failed validation –
- You’ll get the following details about the rows that were validated –
- Total Rows
- Success Rows
- Failed Rows
- Here, you can view the rows that failed during validation.
- If you want to ignore the Failed Rows error and proceed with only uploading the Success Rows in the file import process, you can do so by clicking Next.
- To download the failure report, click Failure Report.
- In the Failure Report file, you’ll see two new system-generated columns have been added – “__LSQValidationMessage” and “__LSQValidationStatus”
- The “__LSQValidationMessage” column will state the reason as to why the validation was unsuccessful for that particular row.
- The “__LSQValidationStatus” will display the validation status (“Success” or “Failed”) for that particular row.
- Once you’ve rectified the error in the original CSV file, save the file, and re-upload it from the Source screen.
- If all the rows have been successfully validated, you’ll get the Validation Success message. You can choose to continue the CSV file import process by clicking Next.
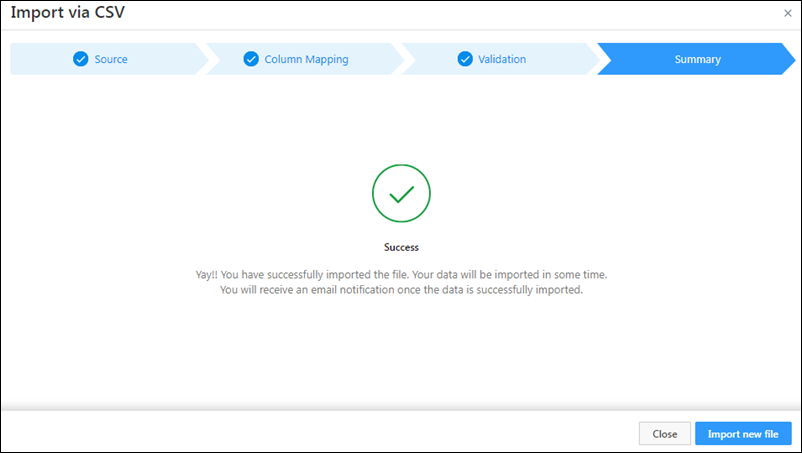
Summary
All CSV files that are imported are usually queued within our servers. It may take a few minutes for these files to be successfully imported.
In the Summary screen, you’ll get a message stating, “You have successfully imported the file.” This means your file is currently queued for import, and it will be completed within a few minutes. Once the import is successful, the user who performed the import action will receive an email confirmation about the same.
Note: If you cancel or close the Import request midway, the request will be cancelled.
8.8.2 Update Rows through CSV
You can bulk update multiple rows across multiple columns by uploading a CSV file.
Note:
- The Update Record(s) option will be visible only after you enable the Import via CSV – Update Record(s) setting.
- The CSV file must have at least two columns – one unique column must be set as the Search Key and the other containing the data to be updated.
- Only 1 unique column can be defined as the Search Key. Column mapping is mandatory for this column.
- To use the system field
mv_RowId as the Search Key, it must be present in the uploaded CSV file (mv_RowId can be obtained when exporting data).
- The
mv_RowId column name is case-sensitive. Ensure the syntax and case is correct.
- Column mapping is not required for the
mv_RowId.
- You cannot perform the Update Rows action for columns containing the User data type.
- Column mapping is required only for the columns where you want to import data.
To bulk update rows through CSV –
- Navigate to the Smart Views screen, and on the right of your screen, hover your cursor over the Actions menu, and click Import Rows.
- On the Import via CSV screen, Select Import Behaviour –
- Update existing row(s) only – Based on the Search Key defined, existing rows found in the CSV file will get updated in the corresponding table rows. For rows that don’t exist in both the CSV file as well as the table, no new records will be created in the table.
- Click Next to proceed to the column mapping tab.
- Map the fields in your CSV file to the fields in your Mavis table, then click Save.
- Select the unique column to define as the search key and click Save.
- Click Next to proceed to the validation tab. If there’s at least one successfully validated row, you can click next to complete the import. Otherwise, you can fix the errors and re-upload the file. For more details, see Import Rows -Validation.
- In the Summary screen, you’ll get a message stating, “You have successfully imported the file.” This means your file is currently queued for import, and it will be completed within a few minutes. Once the import is successful, the user who performed the import action will receive an email confirmation about the same.

8.8.3 Upsert Rows through CSV
This option allows you to update existing rows as well as add new rows to the table through the same CSV file upload action.
Note:
- The Upsert Record(s) option will be visible only after you enable the Import via CSV – Upsert Record(s) setting.
- The CSV file must have at least two columns – one unique column must be set as the Search Key and the other containing the data to be updated.
- Only 1 unique column can be defined as the Search Key. Column mapping is mandatory for this column.
- The maximum table size allowed is 40GB.
- To use the system field
mv_RowId as the Search Key, it must be present in the uploaded CSV file (mv_RowId can be obtained when exporting data).
- If your table doesn’t contain a unique column, then the
mv_RowId is used to identify if an existing row needs to be updated, or if a new record has to be created in the table.
- The
mv_RowId column name is case-sensitive. Ensure the syntax and case is correct.
- Column mapping is not required for the
mv_RowId.
- You cannot perform the Upsert Rows action for columns containing the User data type.
- Column mapping is required only for the columns where you want to import data.
To upsert rows through the CSV –
- Navigate to the Smart Views screen, and on the right of your screen, hover your cursor over the Actions menu, and click Import Rows.
- On the Import via CSV screen, Select Import Behaviour –
- Upsert (Create new record(s) & update existing) – Based on the Search Key defined, existing rows found in the CSV file will get updated in the corresponding table rows. If the Search Key is empty or if it’s not found, new records will get created in the table.
- Click Next to proceed to the column mapping tab.
- Map the fields in your CSV file to the fields in your Mavis table, then click Save.
- Select the unique column to define as the search key and click Save.
- Click Next to proceed to the validation tab. If there’s at least one successfully validated row, you can click next to complete the import. Otherwise, you can fix the errors and re-upload the file. For more details, see Import Rows -Validation.
- In the Summary screen, you’ll get a message stating, “You have successfully imported the file.” This means your file is currently queued for import, and it will be completed within a few minutes. Once the import is successful, the user who performed the import action will receive an email confirmation about the same.
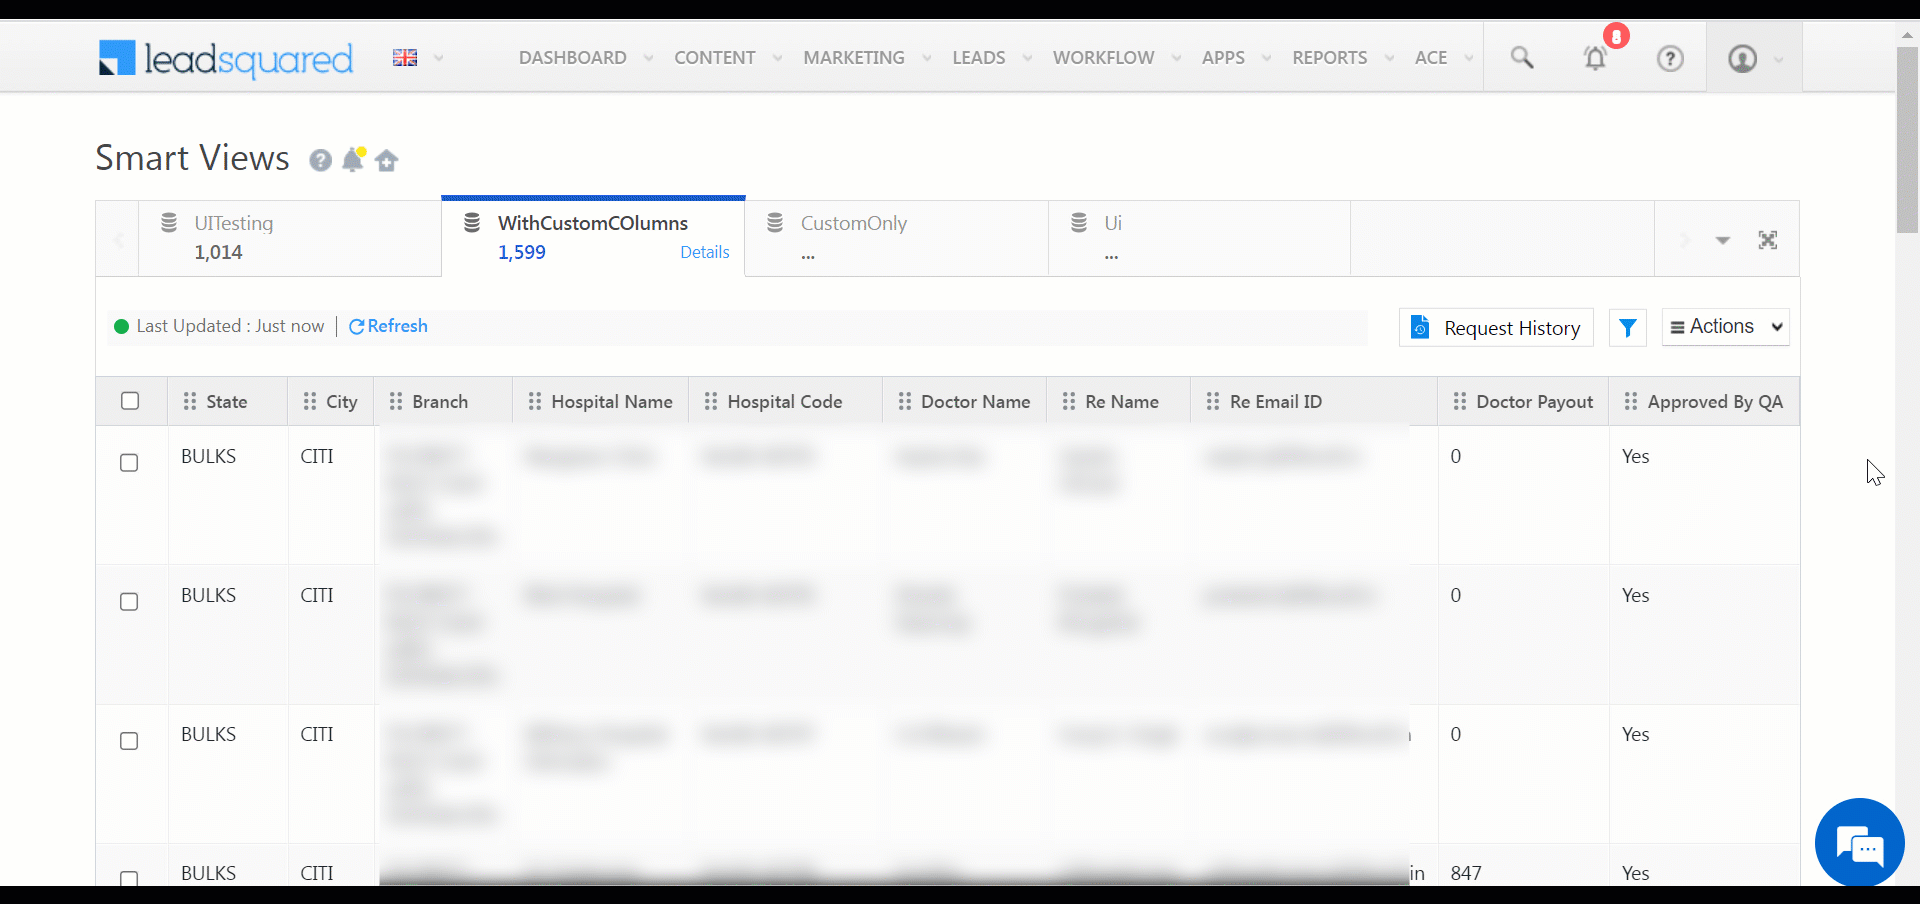
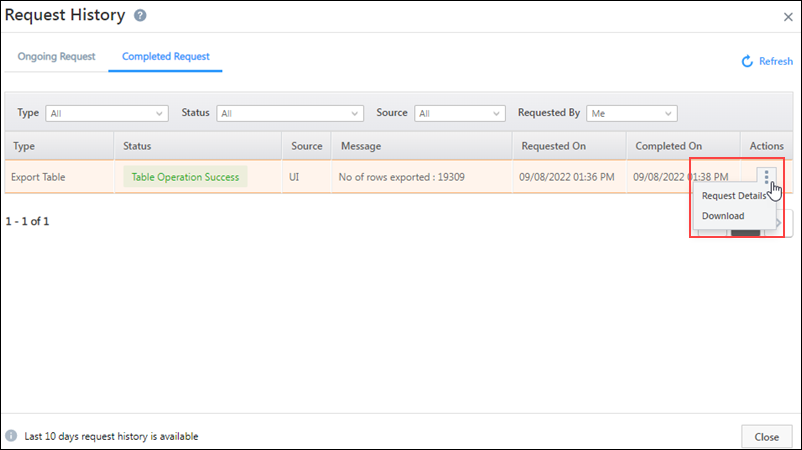
8.9 Request History
The Request History tab keeps track of the following Ongoing Requests and Completed Requests –
- Import Data
- Export Table
- Add Rows
- Update Rows
- Delete Rows
For Completed Requests, you can filter the requests by the following Statuses –
- Table Operation Success
- Table Operation Failed
- Cancelled
For Ongoing and Completed Requests, you can also apply the following filters –
- Request made by Sources –
- Smartview – Only the requests generated through the Smartview screen.
- UI – Only the requests generated through the Mavis screen.
- Requested By –
- All – Requests made by all users in the account.
- Me – Request made by the logged-in user.
For requests made by you (the logged-in user), click to  perform the following actions –
- Request Details – Click to view the Request Id.
- Cancel – Click to cancel an ongoing request.
- Download – Click to download the Export request file.
Note: Non-admin users will be able to download the imported file of the selected Mavis tab only if the Import via CSV permissions are enabled. For e.g., if a Mavis tab only has the Import via CSV – Upsert Records permission enabled, and if a user tries to download the imported file for a Create/Update Records action, the user will be restricted from downloading this file. The same will apply when a non-admin user tries to cancel an import request.
Any Questions?
Did you find this article helpful? Please let us know any feedback you may have in the comments section below. We’d love to hear from you and help you out!