1. Feature overview
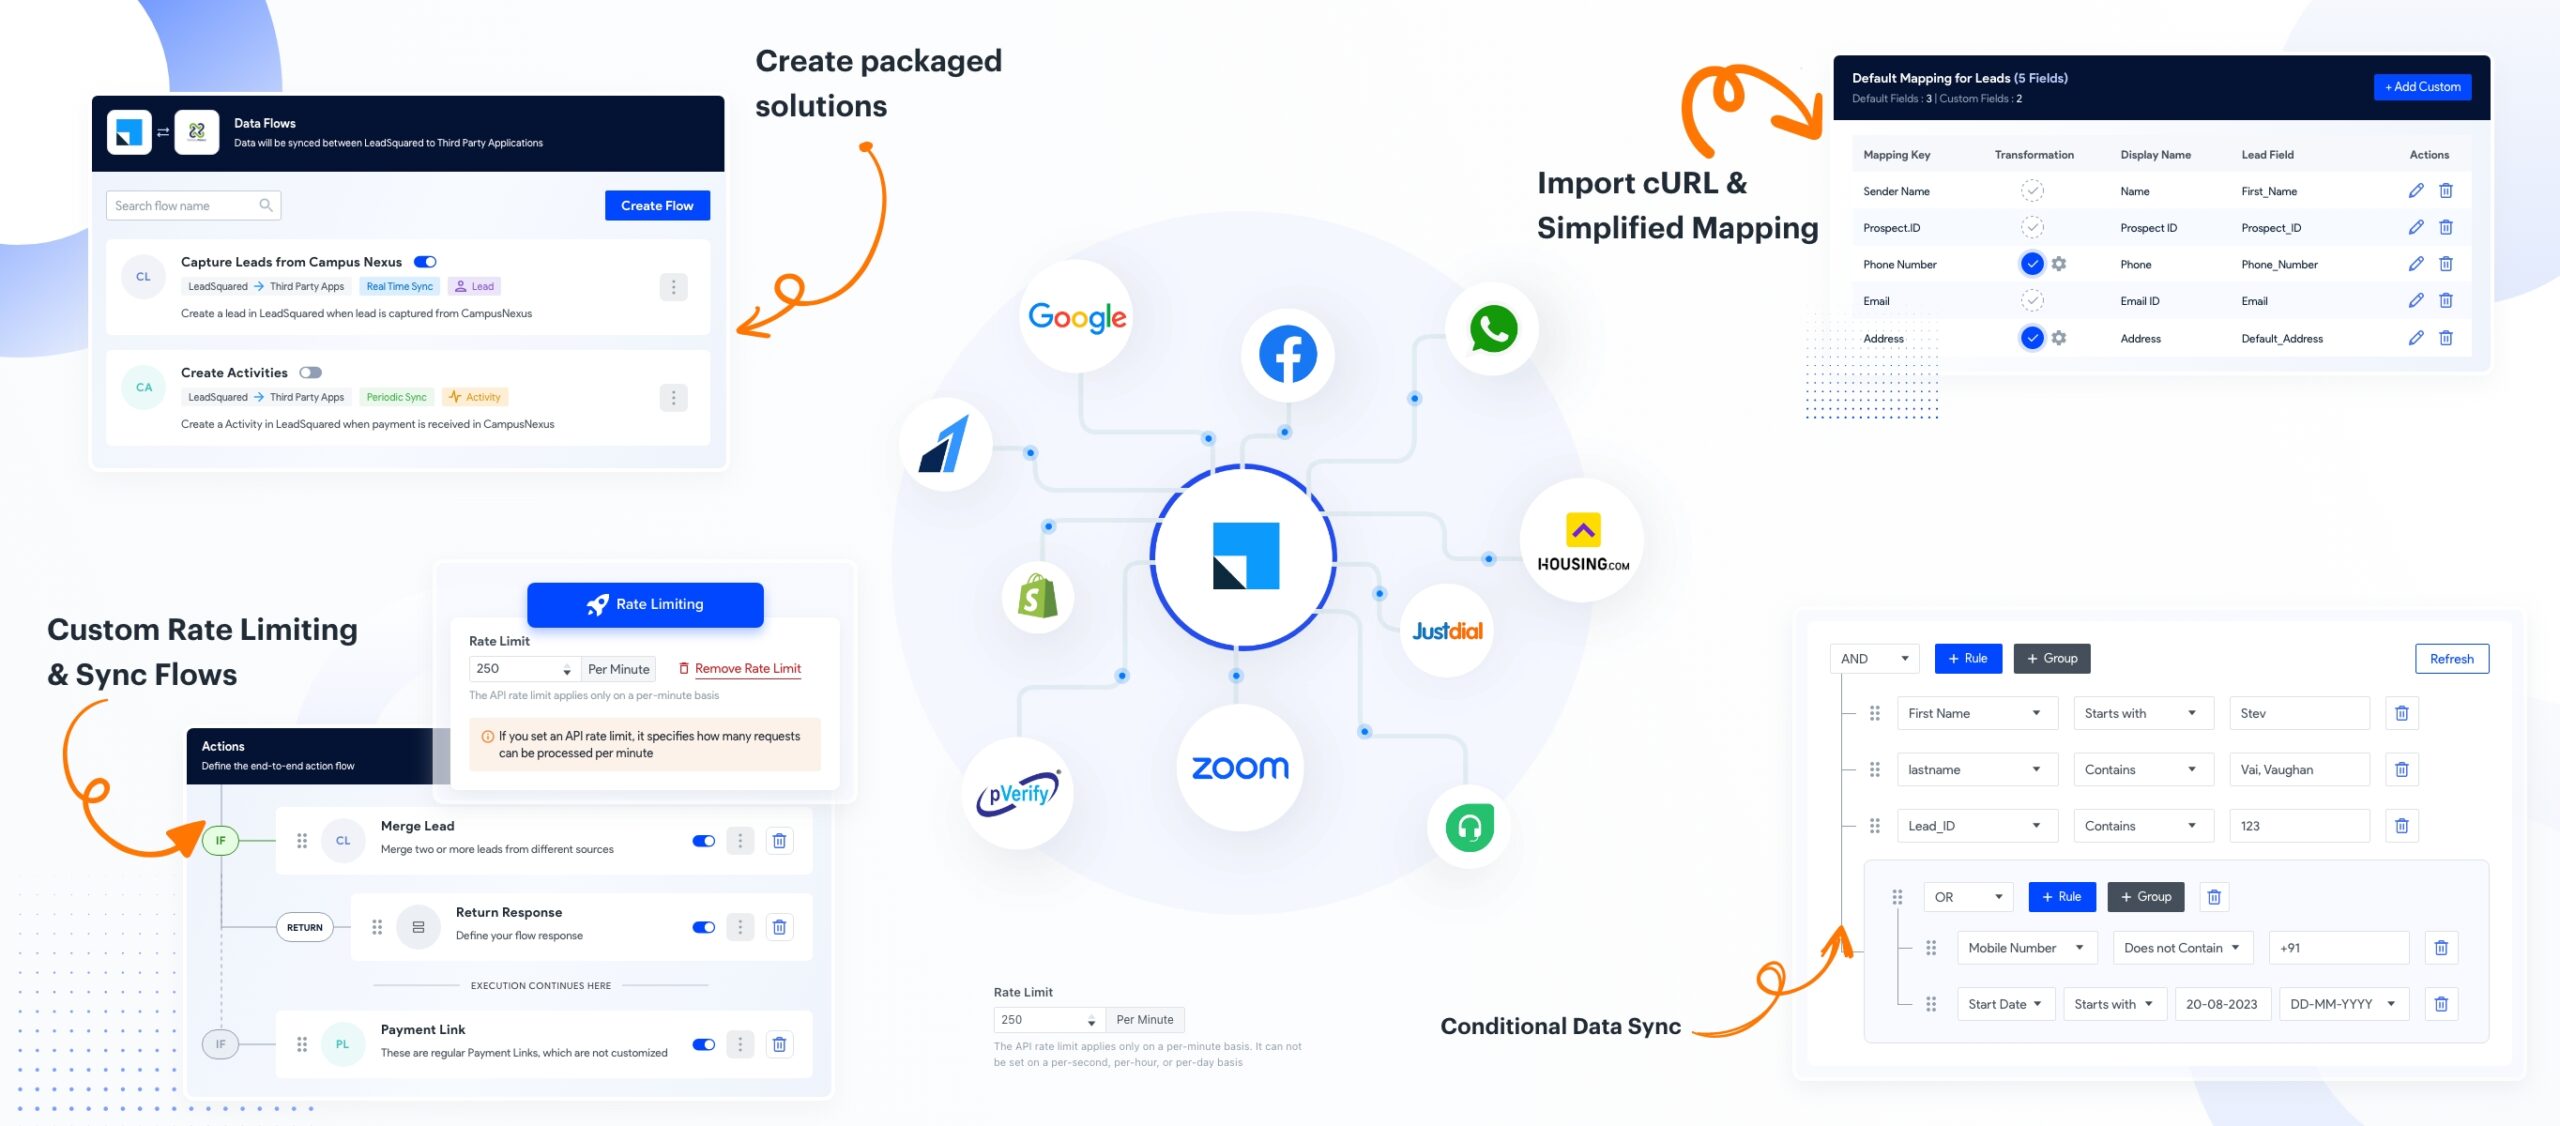
Distribution Engine is a simple, rules-based way to automatically assign Leads (Objects), Opportunities, and Tasks to the right users. It replaces complex automation-based assignment with an easy-to-manage setup that helps you distribute records fairly, reduce manual effort, and meet response SLAs.
You can use Distribute Engine to:
- Automatically assign new records as soon as they are created or updated.
- Distribute work evenly across users using predefined methods.
- Enforce SLAs on first response by reassigning records when the assigned user does not act in time
When should you use Distribute Engine?
Use this feature if you want to:
- Assign incoming leads from forms, imports, APIs, or integrations automatically.
- Avoid maintaining multiple automation rules for assignment logic.
- Distribute opportunities and tasks created in the system to the right user.
How Distribute Engine works (at a glance)
- A record (Objects, Opportunity, or Task) enters the Distribute Engine.
- The engine checks which assignment rules apply.
- An eligible user is selected based on your configuration.
2. Prerequisites
- This is a paid feature. To enable Distribution Engine, contact your account manager or email support@leadsquared.com.
- This feature is only available on NextGen.
3. Trigger Modes in Distribution Engine
Distribution Engine supports two trigger modes that control how records enter the engine for assignment.
3.1 Entity Trigger Mode (Default Behaviour)
In Entity Trigger Mode, records automatically enter the Distribute Engine based on the trigger conditions defined inside each assignment rule.
For example:
- When a Lead is created
- When a Lead is updated
- When Stage/Status changes
- When a Task is created
When the selected event occurs, the engine:
- Evaluates the rule criteria
- Checks for a match
- Assigns the record if matched
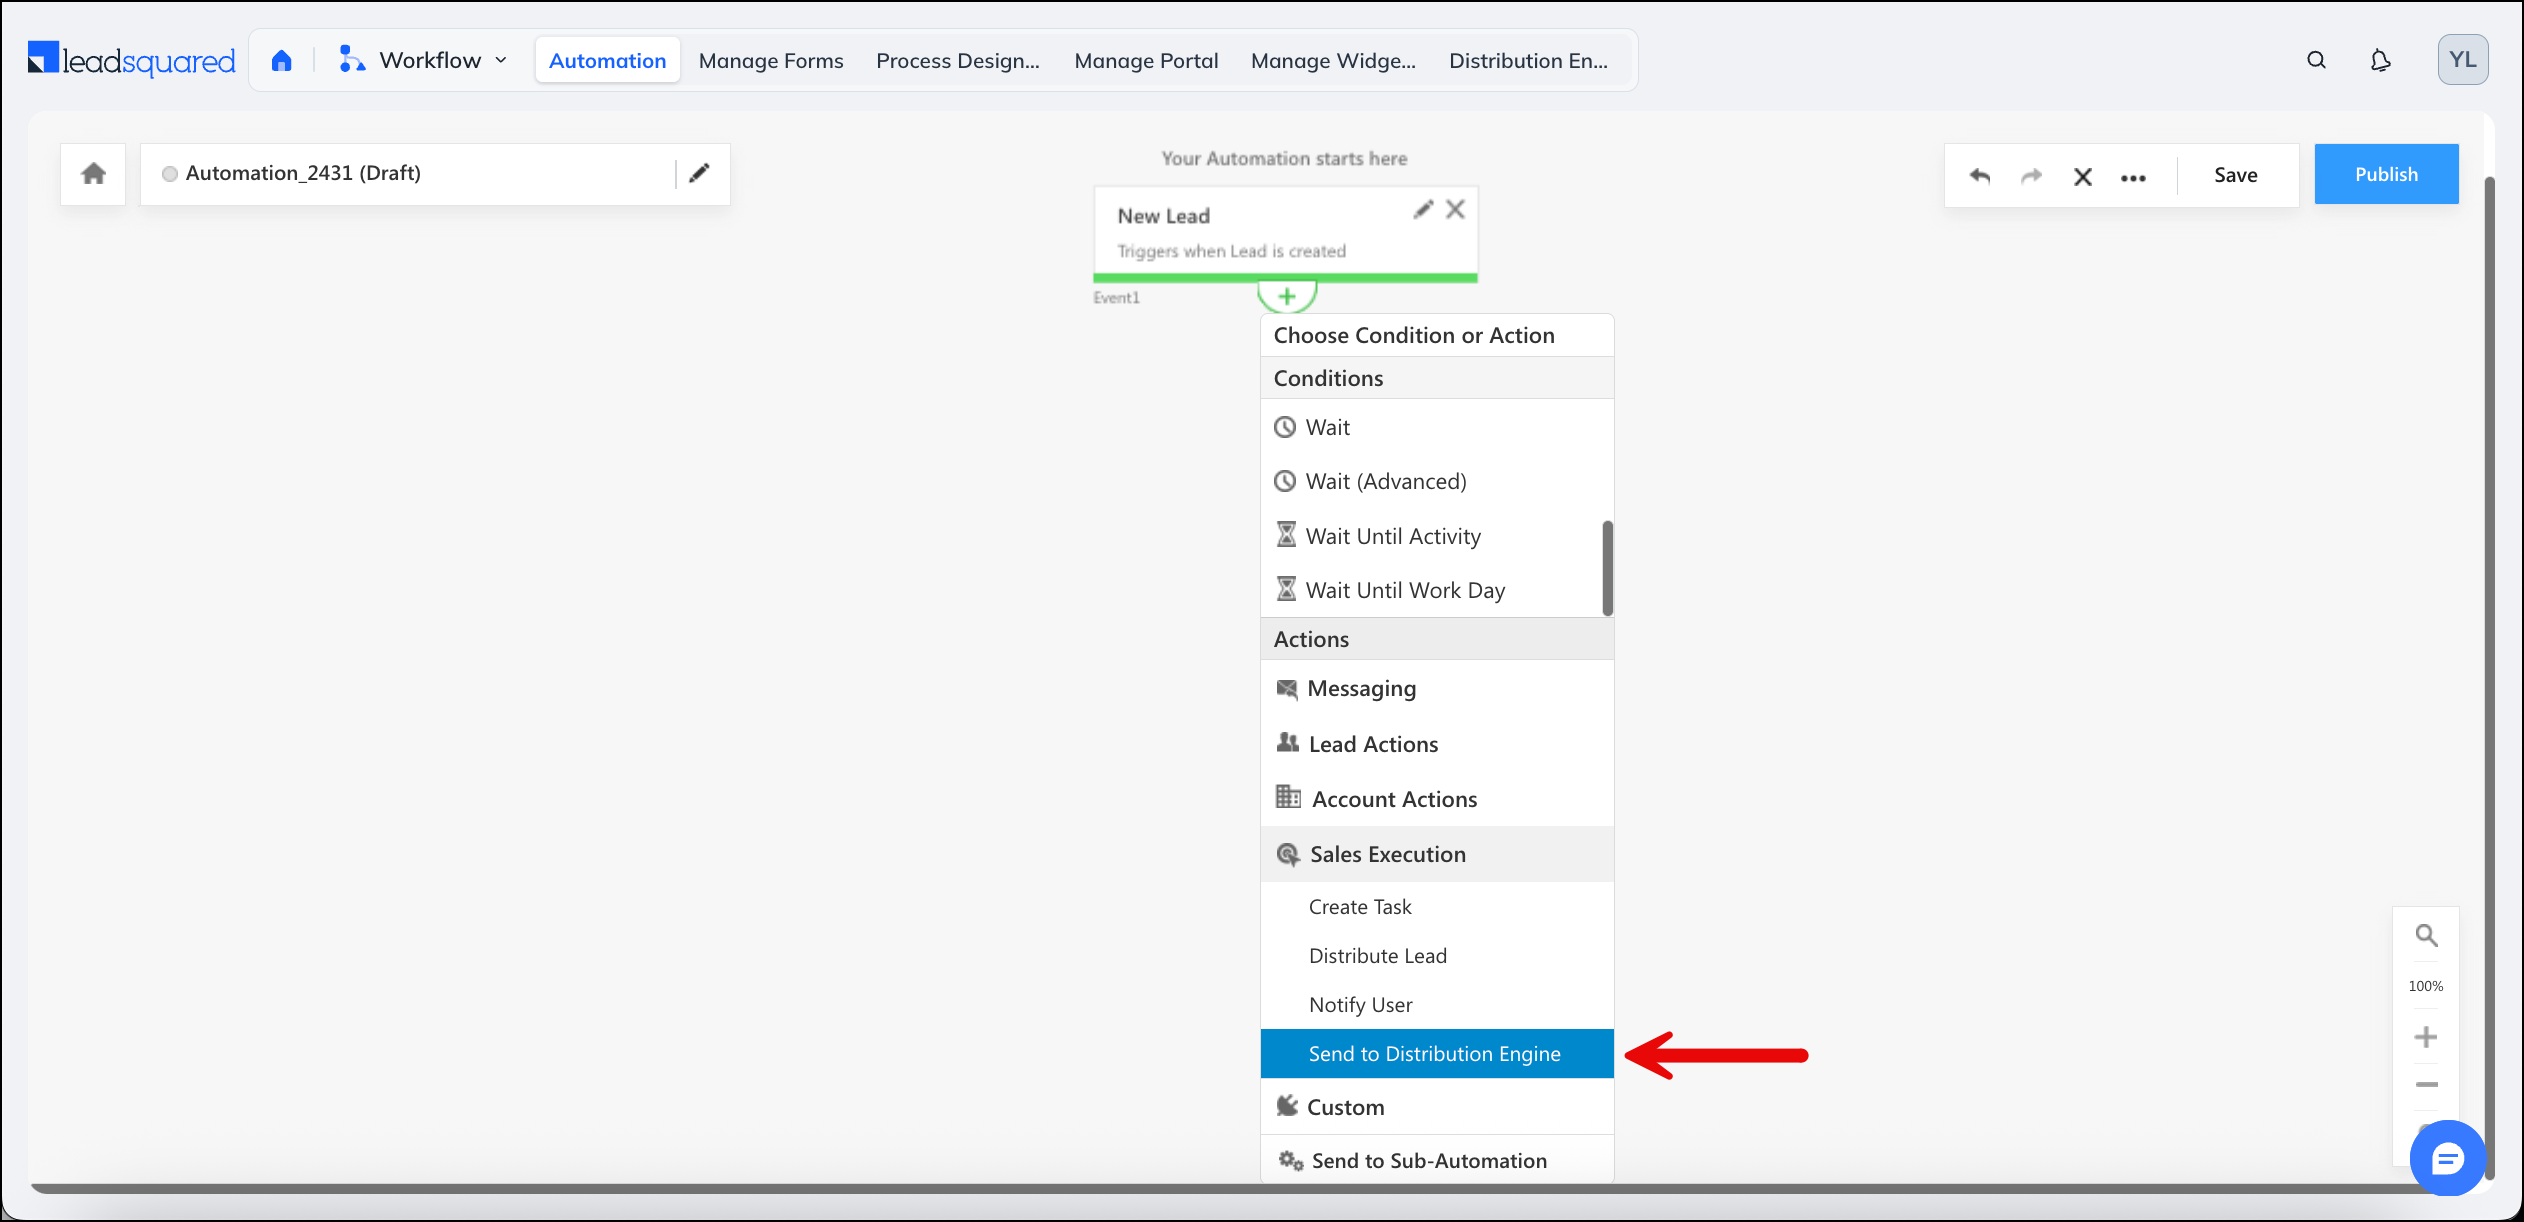
3.2 Automation Trigger Mode
In Automation Trigger Mode, records enter the Distribution Engine only when explicitly sent from an Automation workflow. An automation card called Send to Distribution Engine is available in the automation.
3.2.1 How it Works
- A record enters an automation flow.
- The flow reaches the Send to Distribution Engine card.
- The record is sent to the Distribute Engine for assignment.
- The engine assigns the record.
- The engine sends a callback to automation.
- The automation flow continues.
3.2.2 Timeout & Default User
If the Distribution Engine does not respond within 10 minutes, the automation card assigns the record to a default user defined inside the “send to distribution engine” card configuration.
3.2.3 Supported Automation Triggers
The Send to Distribution Engine card is available only for specific automation triggers:
For Leads:
- Lead Created
- Lead Updated
- Activity Posted on Lead
- Opportunity Created
- Task Created
For Opportunities:
- Opportunity Created
- Opportunity Updated
- Activity Posted
- Task Created
4. Create a Distribution Rule
This section explains how to create and manage assignment rules.
4.1 Choose the Entity Tab
Navigate to Distribution Engine>Distribution Rules. The page is organised into three tabs that group rules by the entity they apply to:
- Objects — Rules that apply to object-type records. After selecting this tab, you choose which specific object type the rule applies to (for example, Lead, Contact, etc.,).
- Opportunities — Rules that apply to Opportunities.
- Tasks — Rules that apply to Tasks.
The rule list on each tab is filtered to that entity. Switch tabs to view or create rules for a different entity.
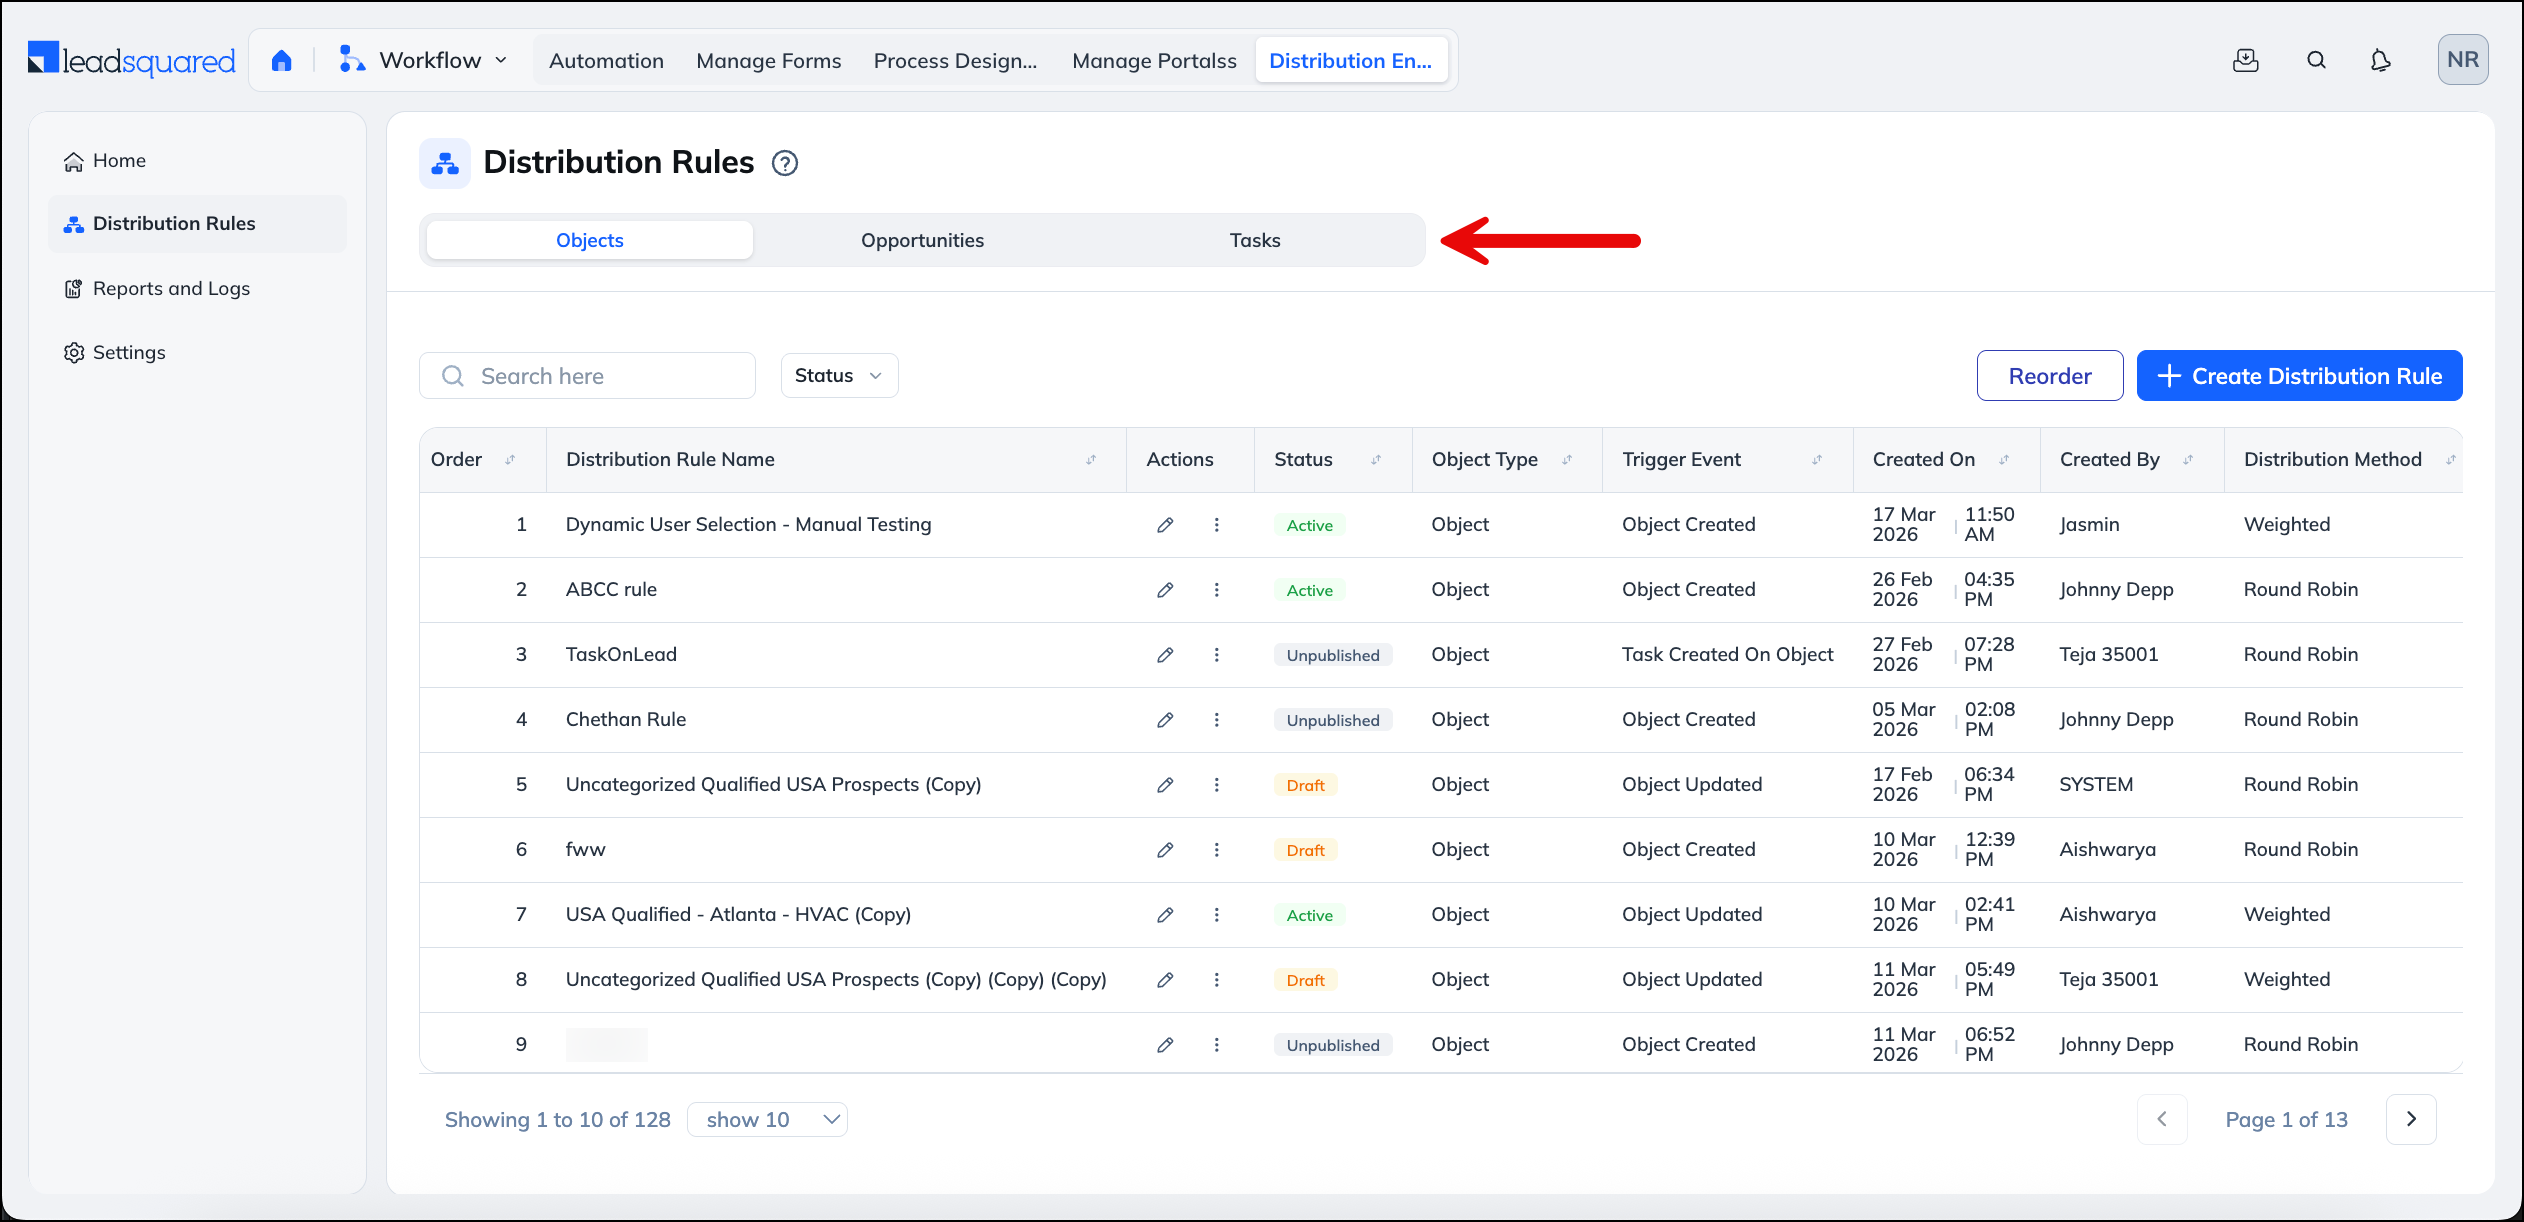
4.2 Creating a New Assignment Rule
On the relevant tab (Objects, Opportunities, or Tasks), click + Create Distribution Rule.
Enter basic information about the rule:
- Rule Name — This is required, must be unique.
- Description — This is optional.
- Rule Type — The rule type determines who can see and interact with the rule. For example, a sales manager with team-specific access will only see rules created for their team when they log in to the Distribution Engine. When creating a rule, select the rule type:
- Global — The rule applies across all teams. Any user in the account can be selected for assignment. Admins and users with global access can view and manage these rules.
- Team-Specific — The rule applies to a single team. When you select Team-Specific, you must choose the team the rule belongs to. User selection is restricted to members of that team, and only users assigned to that team (or admins) can view the rule.
Note: The rule type options available to you depend on the access level set in your Permission Template. Users with global access see both options. Users with team-specific access can only create rules for their own team. For details on configuring access levels and rule permissions, see the Permissions section below.
Rule creation is a 4-step guided process. You can save progress at any step.
Step 1: Rule Criteria
This step decides when the rule runs and which records qualify.
Select entity and event
The Entity is set automatically based on the tab you launched the rule from (Object, Opportunity, or Task) and is not editable inside the rule.
Depending on the entity, you also select a type from a dropdown:
- If the entity is Object: select the Object Type (for example, Lead, Contact, Parent, School, or any custom object type enabled in your account).
- If the entity is Opportunity: select the Opportunity Type (the list shows the opportunity types configured in your account).
- If the entity is Task: select the Task Type (the list shows the task types configured in your account, for example Appointment).
The rule will trigger only for records of the selected type.
Next, choose the Entry Event — the event that brings a record into the rule. The available events depend on the entity:
- Object — Object Created, Object Updated, Activity Created On Object, Opportunity Created On Object, and Task Created On Object.
- Opportunity — Opportunity Created, Opportunity Import, Opportunity Updated, Activity Created On Opportunity, and Task Created On Opportunity.
- Task — On Task Create and On Task Update.
Only records that match the selected entry event and conditions will enter the rule.
Define rule conditions (AND / OR logic)
Rule conditions help you narrow down exactly which records should be assigned.
| Condition |
When to use |
Example |
| AND |
Use AND when all conditions must be true. |
- Lead Source is Website
- AND Lead City is Delhi
- AND Lead Score is greater than or equal to 80
|
| OR |
Use OR when any one condition can be true. |
- Lead Source is Website
- OR Lead Source is Facebook Ads
|
| Combining AND and OR using groups |
Groups help you combine conditions without creating multiple rules. |
- (Lead Source is Website OR Facebook Ads)
- AND Lead Country is India
|
Note: For team-specific rules, the rule criteria step works the same way as global rules. The team restriction applies to user selection, not to which records enter the rule.
Step 2: Select Users
Choose who can receive records when this rule runs.
Step 2.1: User Selection Type
You can select one of the following (they cannot be combined in a single rule):
- Manual Selection — Pick individual users. For manual selection, you can choose between static and dynamic selection (see below).
- Teams — Assign to a team. Users within the team receive records via internal Round Robin.
- Sales Groups — Assign to a sales group.
At least one user or one group is required. You can also choose to Assign only if the User is available.
Note: For team-specific rules, the Sales Groups option is not available. The team is automatically locked to the team selected during rule creation, you cannot add additional teams, and only users from the selected team are considered.
User Availability Conditions
You can restrict assignments to users who meet availability criteria:
- Require User Check-In — Assign only to users who are checked in to their shift.
- Require ‘Available’ Status — Assign only when the user’s status is set to Available.
User Schedule Conditions
You can further restrict assignments based on the user’s schedule:
- Respect Workday Calendar — Assign only during the user’s scheduled work hours.
- Respect Holiday Calendar — Skip assignments on organisation holidays.
- Consider Leave Tracker — Use Leave Tracker to check user availability at the time of assignment.
These conditions are configured per rule in the Select Users step. The corresponding features (Check-in, Workday Templates, Holiday Calendar, Leave Tracker) must be enabled at the account level in Distribution Engine>Settings>Additional Settings for these options to take effect (see Section 9).
Step 2.2: Static User Selection
When you choose static selection under User Selection Type, you can manually select the users that need to be in the distribution.
Step 2.3: Dynamic User Selection
Dynamic selection automatically determines which users are eligible for assignment based on criteria you define — such as user properties like department or role. Instead of selecting users manually, you set the criteria, and the engine evaluates which users qualify at the time of assignment.
Step 2.4: Advanced User Filter
When using manual selection, you can use the Advanced User Filter to narrow down the user list. This filter supports multiple criteria such as user type, team, and other user properties. It replaces the previous single-filter option.
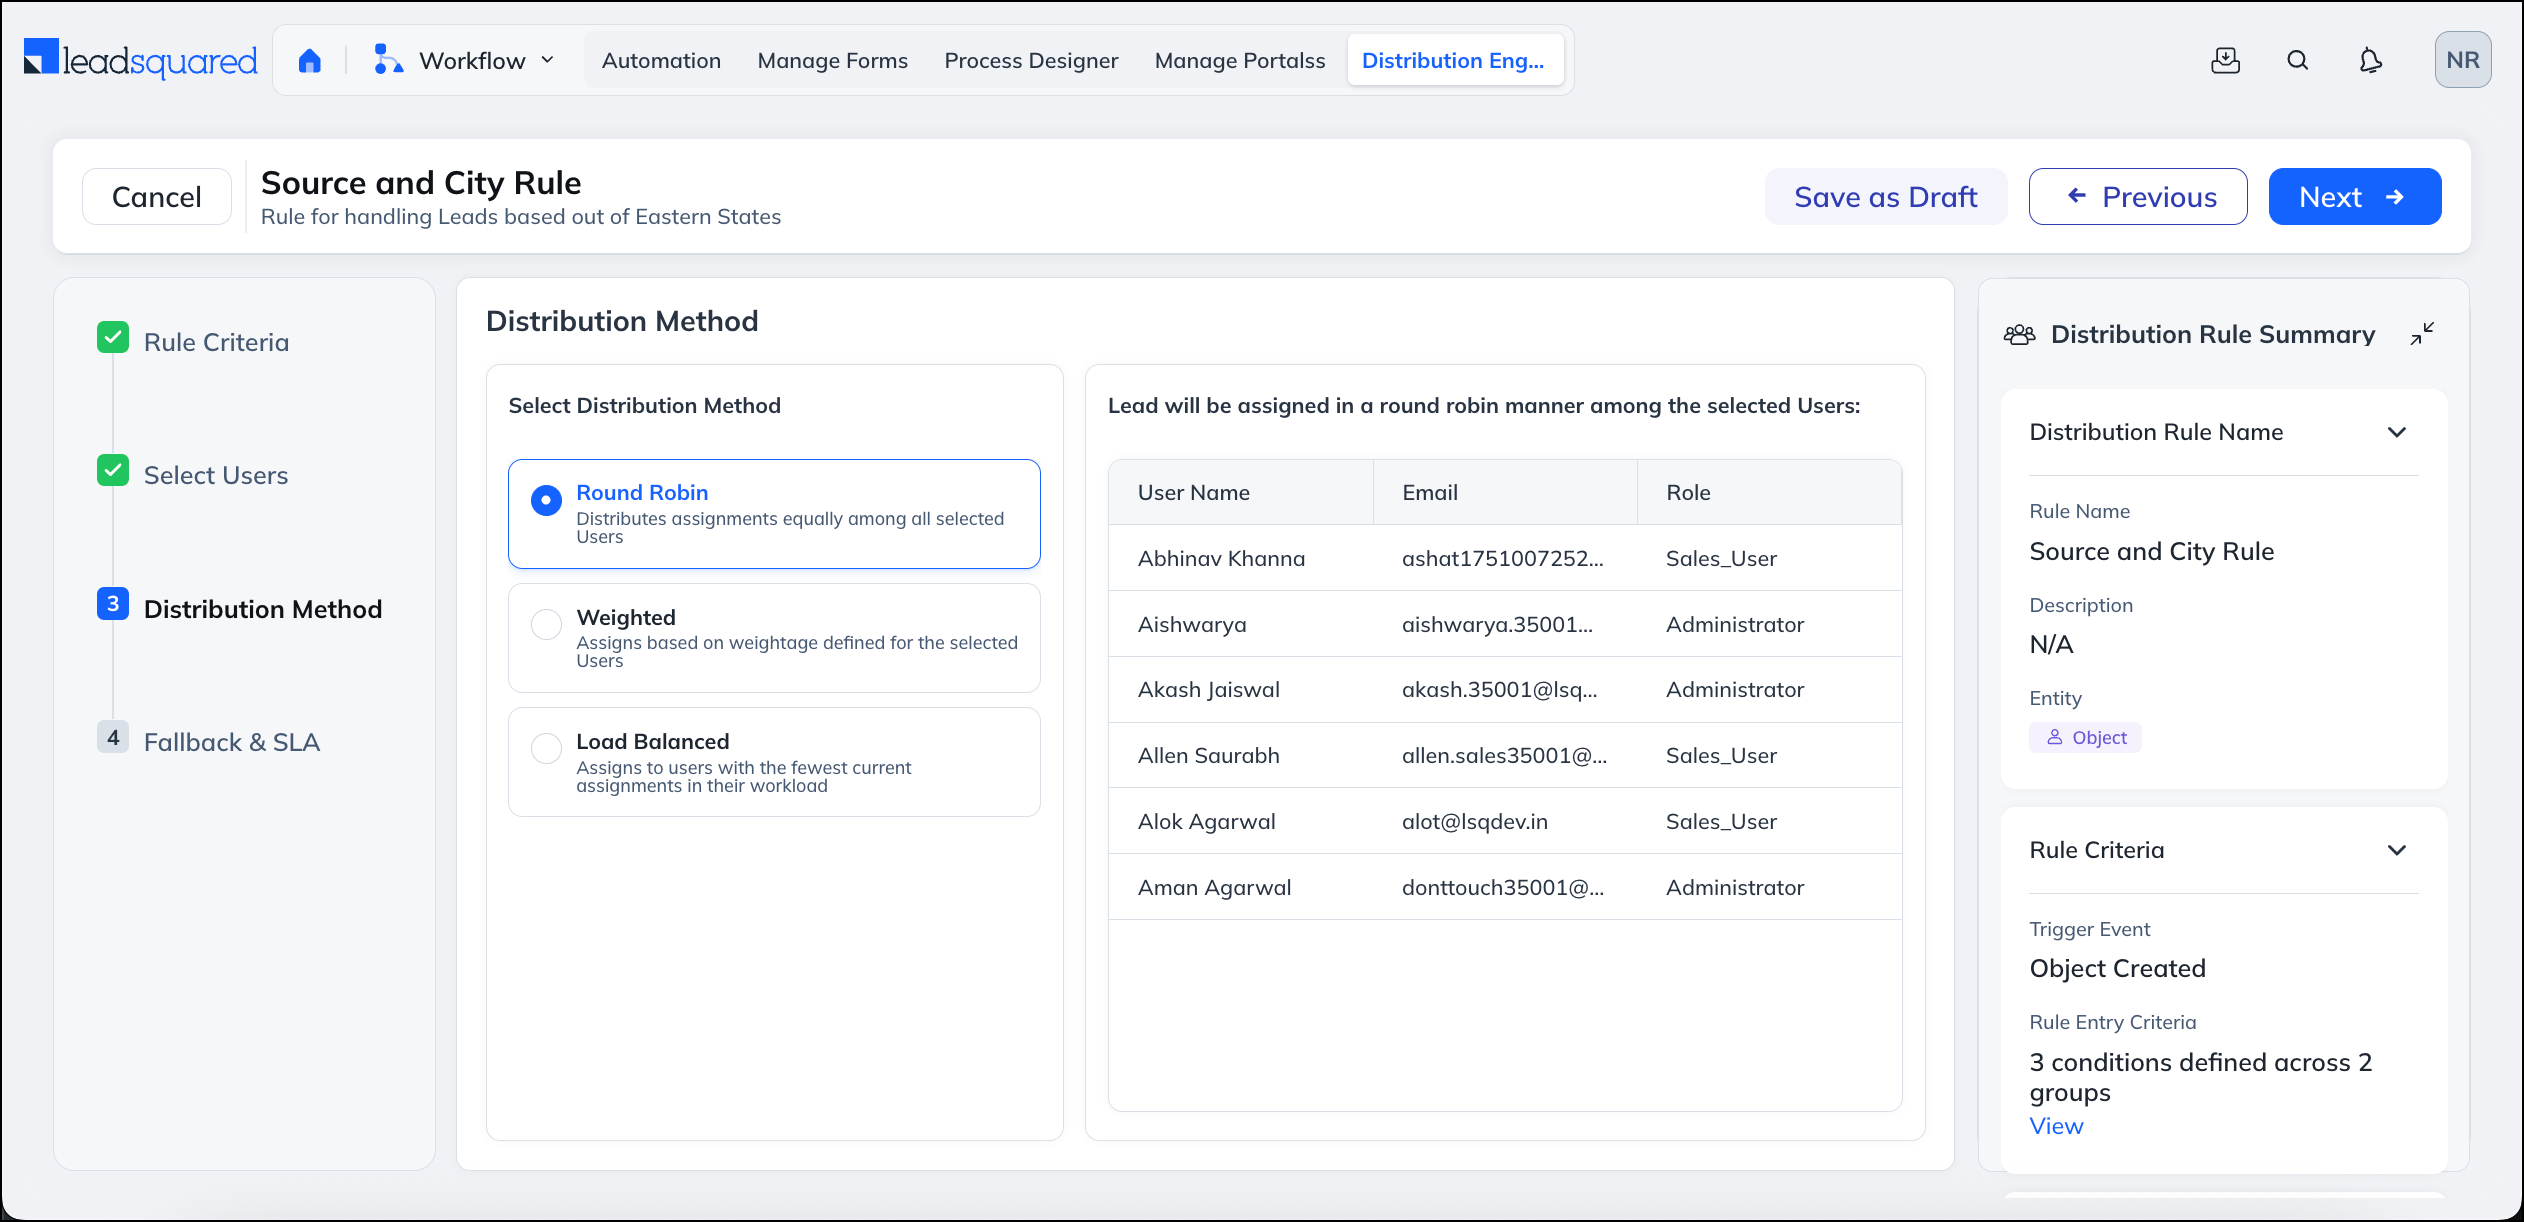
Step 3: Distribution Method
Select one assignment method.
1. Round Robin Distribution Method
Round Robin assigns records one by one in sequence.
Example with 3 users:
User A → User B → User C → User A → User B → User C → …
The sequence does not reset daily — the engine continues from where it last stopped to maintain a continuous cycle. If a user becomes unavailable, they are skipped. When the user becomes available again, they are added to the end of the cycle.
2. Weighted Distribution Method
Weighted distribution lets you control how many records each user, team, or sales group should receive compared to others.
Instead of assigning records equally, you define a weight. A higher weight means that entity receives more records in each distribution cycle. Records are always assigned one at a time, and distribution follows a Round Robin pattern.
How It Works
- You select either:
- Manual Users
- Teams
- Sales Groups.
- You assign a weight to each selected entity.
- The system distributes records in rotation, ensuring the total assignments in each cycle match the defined weights.
Example 1: Manual Users
You configure:
- User A = 3
- User B = 2
- User C = 1
Total weight = 6.
In every 6 assignments:
- A receives 3
- B receives 2
- C receives 1.
Distribution still follows Round Robin, not bulk allocation.
Example sequence:
A → B → C → A → B → A → (cycle complete). A received 3, B received 2, and C received 1.
Then the cycle repeats.

Example 2: Teams or Sales Groups
When you select more than 1 Team or Sales Groups, Round Robin is followed at two levels:
Level 1: Between Groups (Based on Weight)
For example:
- Sales Group East = 2
- Sales Group West = 1
Total weight = 3.
In every 3 assignments:
- 2 records go to East
- 1 goes to West.
The engine distributes between East and West using Round Robin while respecting the weight.
Example sequence:
East → West → East → (cycle complete). Then the cycle repeats.
Level 2: Inside the Group (Round Robin)
Once a record is assigned to a group:
- The system assigns it to users inside that group using Round Robin.
- Only eligible users are considered.
So the full flow looks like:
Record → Groups (Round Robin with weight) → User (Round Robin inside group)
The cycle does not reset daily. If a user is unavailable, they are skipped and rejoin the rotation when eligible again.

2.1 Weightage Type for Users
When using the Weighted distribution method on Users, you can choose how to assign weightage:
- User-Level Weightage — Assign a specific weight to each individual user. Use this when you want control over distribution ratios.
- Category-Based Weightage — Instead of setting weightage per user, select a dropdown-type custom user field (for example, a field called “Performance Grade” with values A, B, and C) and assign a weight to each value. All users who share the same field value automatically receive the same weightage. This is useful when you have a large number of users and want to control distribution by group characteristics rather than individually.
For example, if “Performance Grade” has values A, B, and C with weights of 50, 30, and 20 respectively, all users with grade A share the 50 weight equally among themselves, all users with grade B share 30, and so on.
Note: Category-based weightage only supports dropdown-type custom user fields.
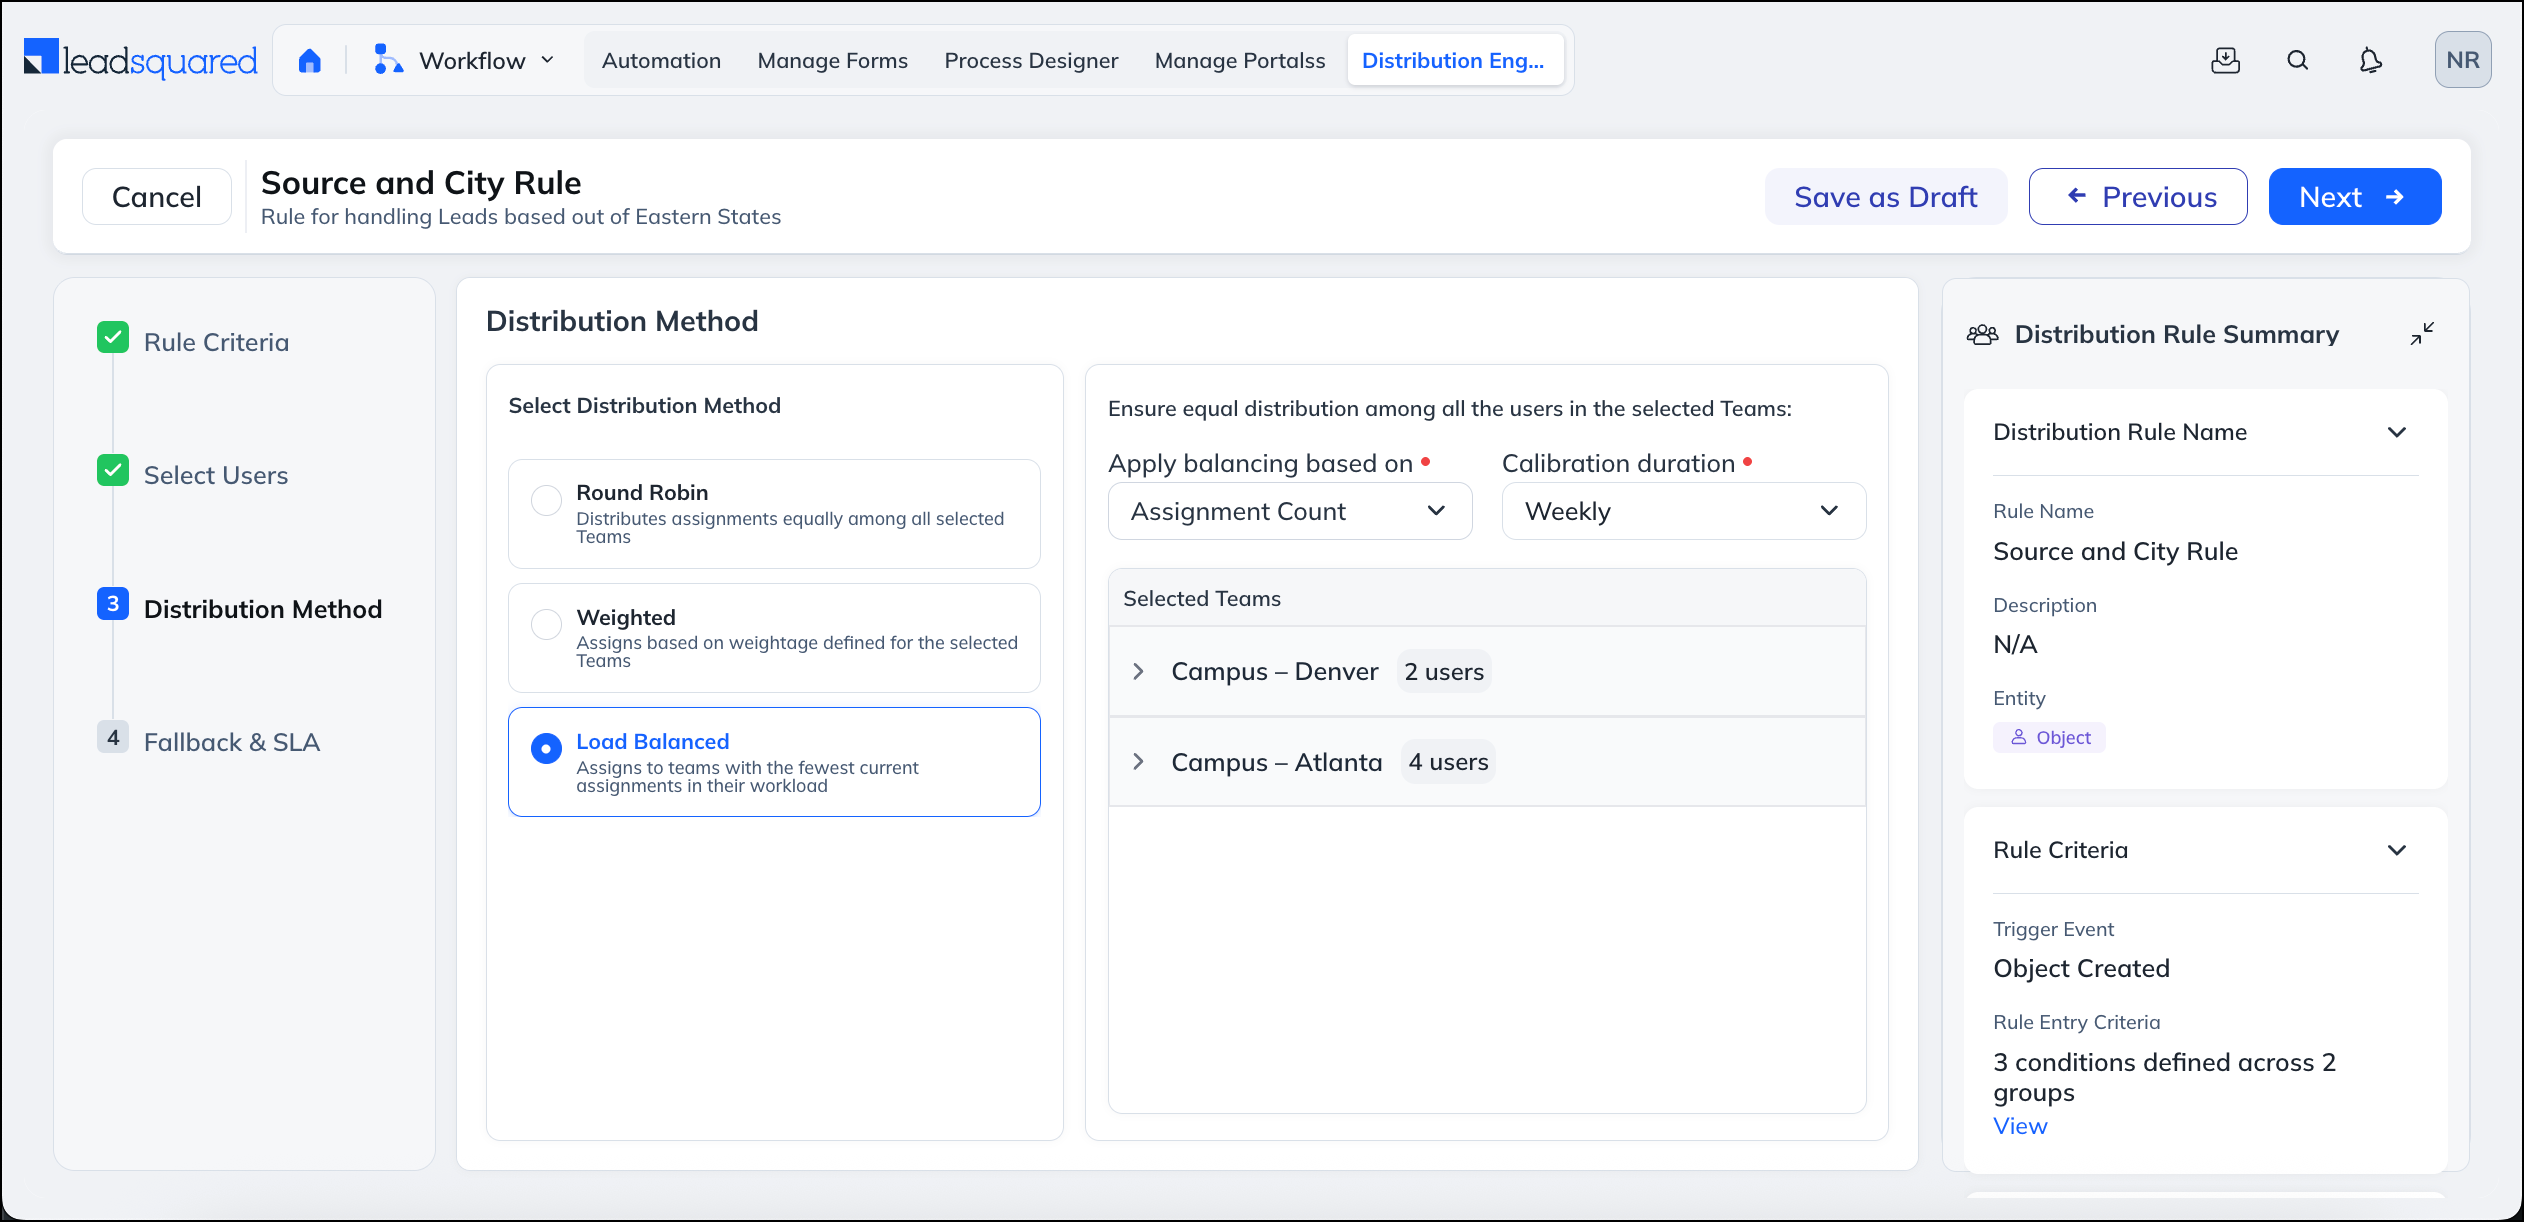
3. Load Balanced
Load Balanced distribution keeps assignments even across users based on how much work they are already carrying. Unlike Round Robin, which assigns strictly in sequence, Load Balanced looks at each user’s current count and gives the next record to whoever is behind.
At present, Load Balanced has one sub-method:
- Assignment Count — Balances based on the number of records assigned to each user over a defined period.
Assignment Count
With Assignment Count, the engine tracks how many records each user has received during the configured calibration period and assigns the next record to the user with the lowest count. Once all users are level, distribution continues in Round Robin among them.
How it works
- When a single user is available and others are not, that user continues to receive records until others come online.
- When additional users become available, the engine first catches them up to the same count as the existing user before resuming Round Robin.
- Whether a user is treated as “available” depends on the availability and schedule conditions selected in Step 2 (Check-in, Workday Template, Holiday Calendar, Leave Tracker).
Example
There are 3 users in the rule:
- User A logs in at 10:00 AM. Users B and C are not logged in.
- Between 10:00 AM and 11:00 AM, 10 records are assigned to User A.
- Users B and C log in at 11:00 AM.
The engine assigns the next records to B and C until they each reach 10. After that, distribution continues among A, B, and C in Round Robin.
Calibration duration
You define how the assignment count is calculated:
- Daily — Counter resets at the start of each day (00:00). The previous day’s counts are not carried forward.
- Weekly — Counter runs from Sunday 00:00 to Saturday 23:59 and resets at the start of the next week.
- Monthly — Counter runs from the first day of the month to the last day of the month, regardless of how many days the month has.
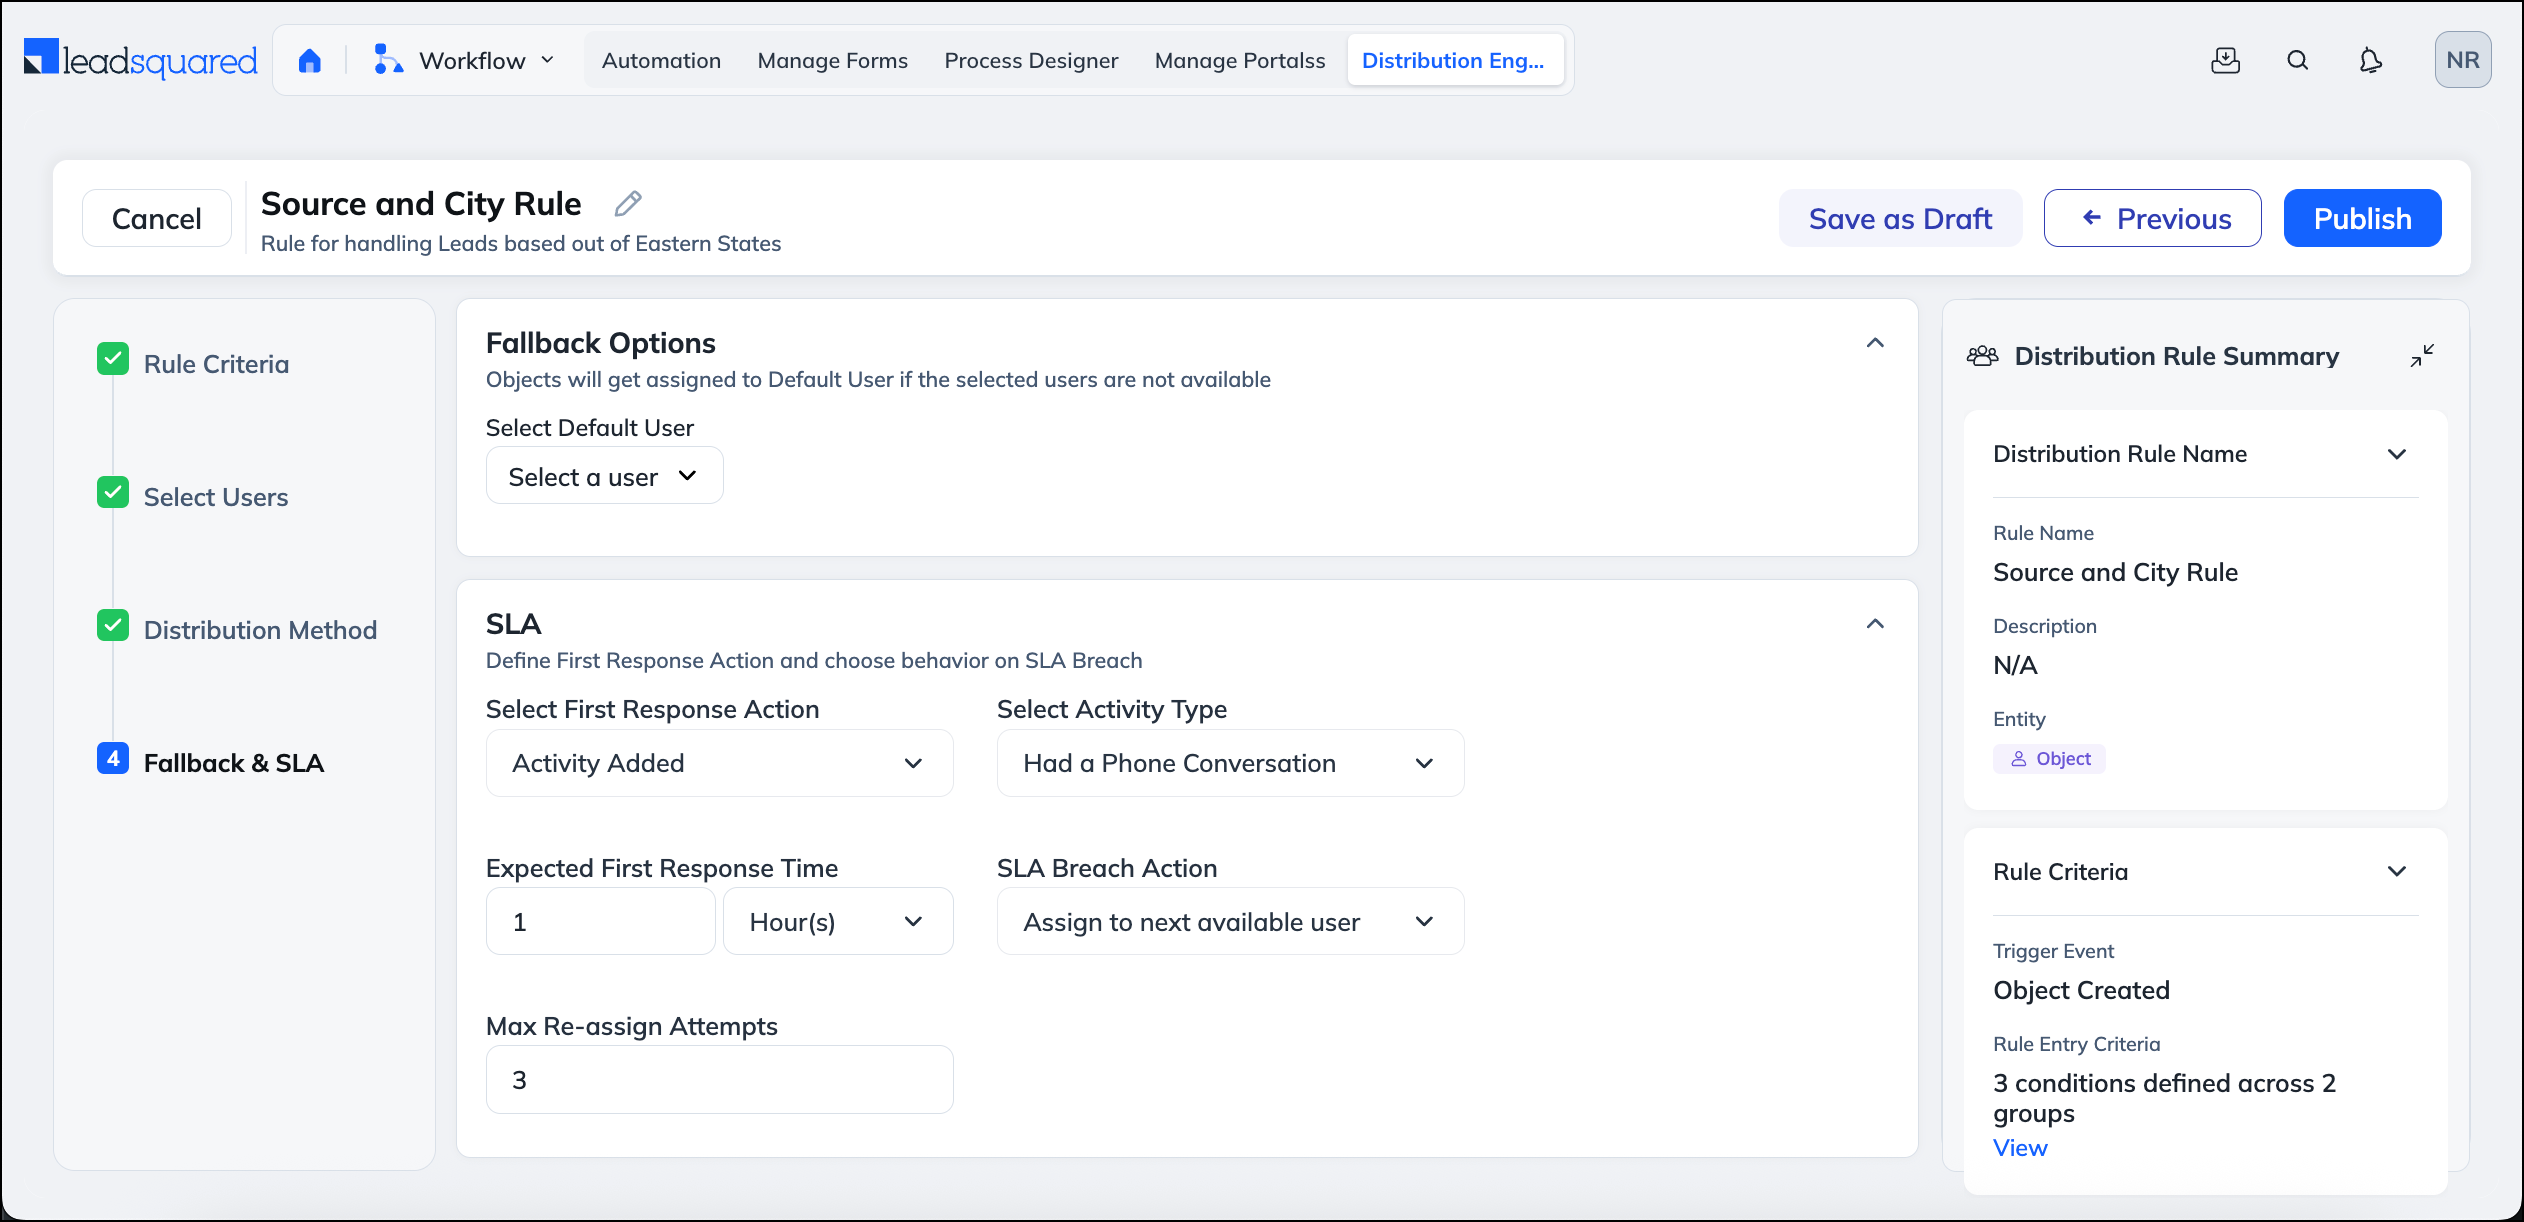
Step 4: Fallback & SLA
This step has two parts: Fallback Options (the default user if no eligible user is available) and SLA (an optional deadline that triggers reassignment if not met).
1. Fallback Options
If no eligible user is available, the record is assigned to the user you choose here.
- Select Default User — Pick the user to assign records to when the rule has no eligible recipient.
2. SLA
SLA lets you define a first response deadline on each assigned record. If the configured action is not performed within the time window, the record is reassigned automatically.
Note: SLA is optional. To skip it, leave Select First Response Action set to None.
Configure the following fields:
- Select First Response Action — The action the assigned user must perform to meet the SLA. Options:
- None — No SLA is enforced.
- Activity Added — The user must log a specific activity type on the record.
- Mark Task as Completed — The user must complete a specific task type.
- Stage Change — The record must move to a different stage.
- Field Change — A specific field on the record must be updated.
- Secondary selector — Appears based on the First Response Action you choose:
- For Activity Added, select the Activity Type that counts as a valid response.
- For Mark Task as Completed, select the Task Type that counts as a valid response.
- For Field Change, select the Field that must be updated.
- Stage Change does not require a secondary selector — any stage transition counts.
- Expected First Response Time — The time window within which the action must occur. Enter a number and choose a unit (Minutes, Hours, or Days).
- SLA Breach Action — What the engine does when the SLA timer expires. Options:
- Assign to next available user — The record is reassigned to the next eligible user in the rule. A fresh SLA timer starts for that user.
- Assign to default user — The record is sent directly to the Default User configured under Fallback Options.
- Max Re-assign Attempts — Only applies when SLA Breach Action is Assign to next available user. Sets how many times the engine will try the next eligible user before giving up and assigning to the Default User. Default is 3.
How SLA works
- When a record is assigned, the engine starts an SLA timer.
- If the First Response Action occurs before the timer expires, the SLA is met and no reassignment happens.
- If the timer expires:
- With Assign to next available user, the engine picks the next eligible user from the rule and starts a fresh timer. This repeats up to the Max Re-assign Attempts. If none of the attempted users meet the SLA, the record is assigned to the Default User.
- With Assign to default user, the record is sent straight to the Default User on the first breach.
Example
A lead is assigned to User A. The SLA is configured as:
- First Response Action: Activity Added → Had a phone conversation
- Expected First Response Time: 1 Hour
- SLA Breach Action: Assign to next available user
- Max Re-assign Attempts: 3
If User A logs a phone conversation activity on the lead within 1 hour, the SLA is met. If not, the lead is reassigned to User B with a fresh 1-hour timer. This continues for up to 3 attempts. If none of the 3 users log a phone conversation activity in time, the lead is assigned to the Default User selected under Fallback Options.
After completing all steps, you can:
- Save as Draft — Keeps the rule inactive.
- Publish — Makes the rule live and adds it to the priority order.
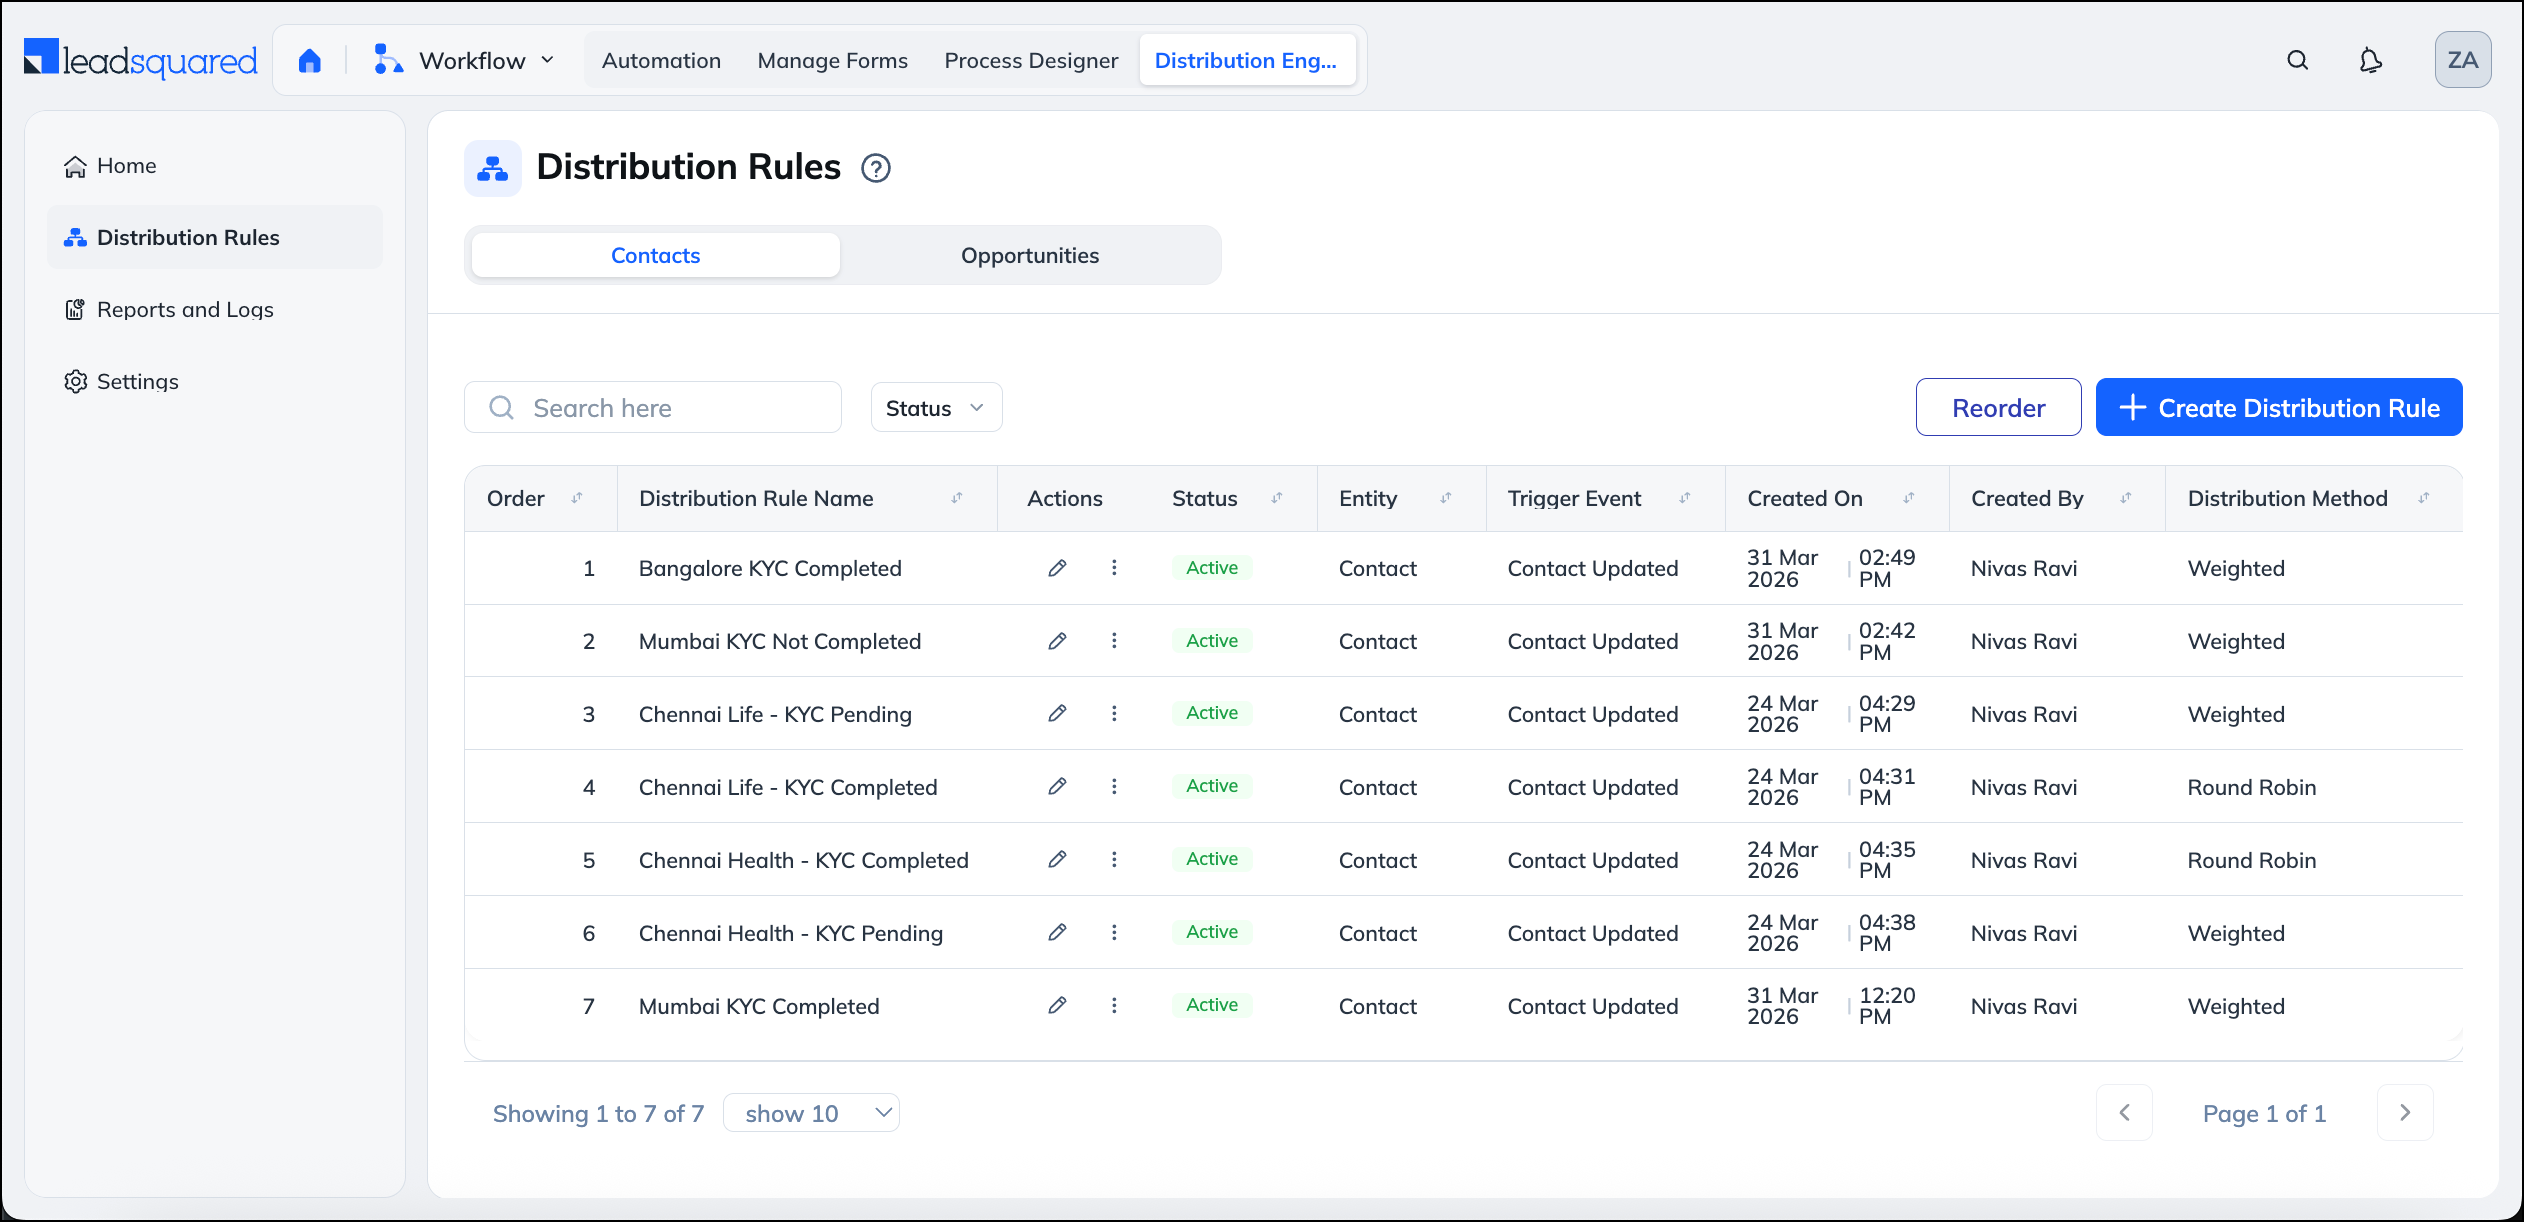
5. Managing Distribution Rules
Rule list includes:
- Order (priority)
- Rule name
- Action (entity)
- Status (Draft, Active, Inactive, Error)
- Created on
- Created by
You can:
- Click any rule to open its details
- Search rules by name or creator
- Filter rules by status, creator, or distribution method
Note: Users with team-specific access will only see rules that belong to their team. Admins and users with global access see all rules.
5.1 Reordering Rules
Rule order decides which rule gets applied first when a record enters the Distribute Engine.
When a Lead or Opportunity evaluated:
- The engine checks the first active rule in the list.
- If the record matches the rule’s entry criteria, the assignment is made.
- Once a record is assigned, no further rules are evaluated.
- If the record does not match, the engine moves to the next rule in the order.
Why rule order matters
If multiple rules can apply to the same record, only the highest‑priority rule will run.
Example:
- Rule 1: Assign All Website Leads to Team A
- Rule 2: Assign High‑Score Website Leads to Team B
If Rule 1 is above Rule 2, all website leads (including high‑score ones) will be assigned to Team A.
To ensure high‑score leads go to Team B, place Rule 2 above Rule 1.
Note:
- Only Active rules can be reordered
- Use drag and drop to change priority
6. Permissions
Distribution Engine access and permissions are managed through Permission Templates. Admins can control the following for each user or role:
- Access type — Global (see all rules) or Team-Specific (see only rules for the user’s assigned team).
- Feature visibility — Whether the user can access Reports, Logs, and Distribution Settings.
- Rule permissions — View, Create, Edit, and Delete. If View is restricted, all other permissions are restricted.
- Modify Permissions — Edit permissions can be further configured by section: Rule Entry Criteria, User Selection, Distribution Method, Fallback and SLA, and Publisher Rules.
This allows admins to extend Distribution Engine access beyond administrators. For example, a sales manager can be given team-specific access with permission to edit user selection and weightage, without being able to modify rule criteria or create new rules.
For the full setup procedure, see Permission Templates.
7. Viewing Assignments and Performance
Navigate to Distribution Engine>Home. The Home page gives you a quick distribution overview. Click the filter icon to filter the data by a date-range.
- Records Created: Total number of records that entered the Distribute Engine during the selected time period.
- Records Assigned: Number of records successfully assigned to users by the Distribute Engine.
- Assignment Success Rate: Percentage of created records that were successfully assigned to a user.
- Records Unassigned: Number of records that could not be assigned due to no matching rule or no eligible user.
- Rule Match Overview: Shows how many records matched each assignment rule.
- Assignment Method Split: Displays how records were distributed across different assignment methods.
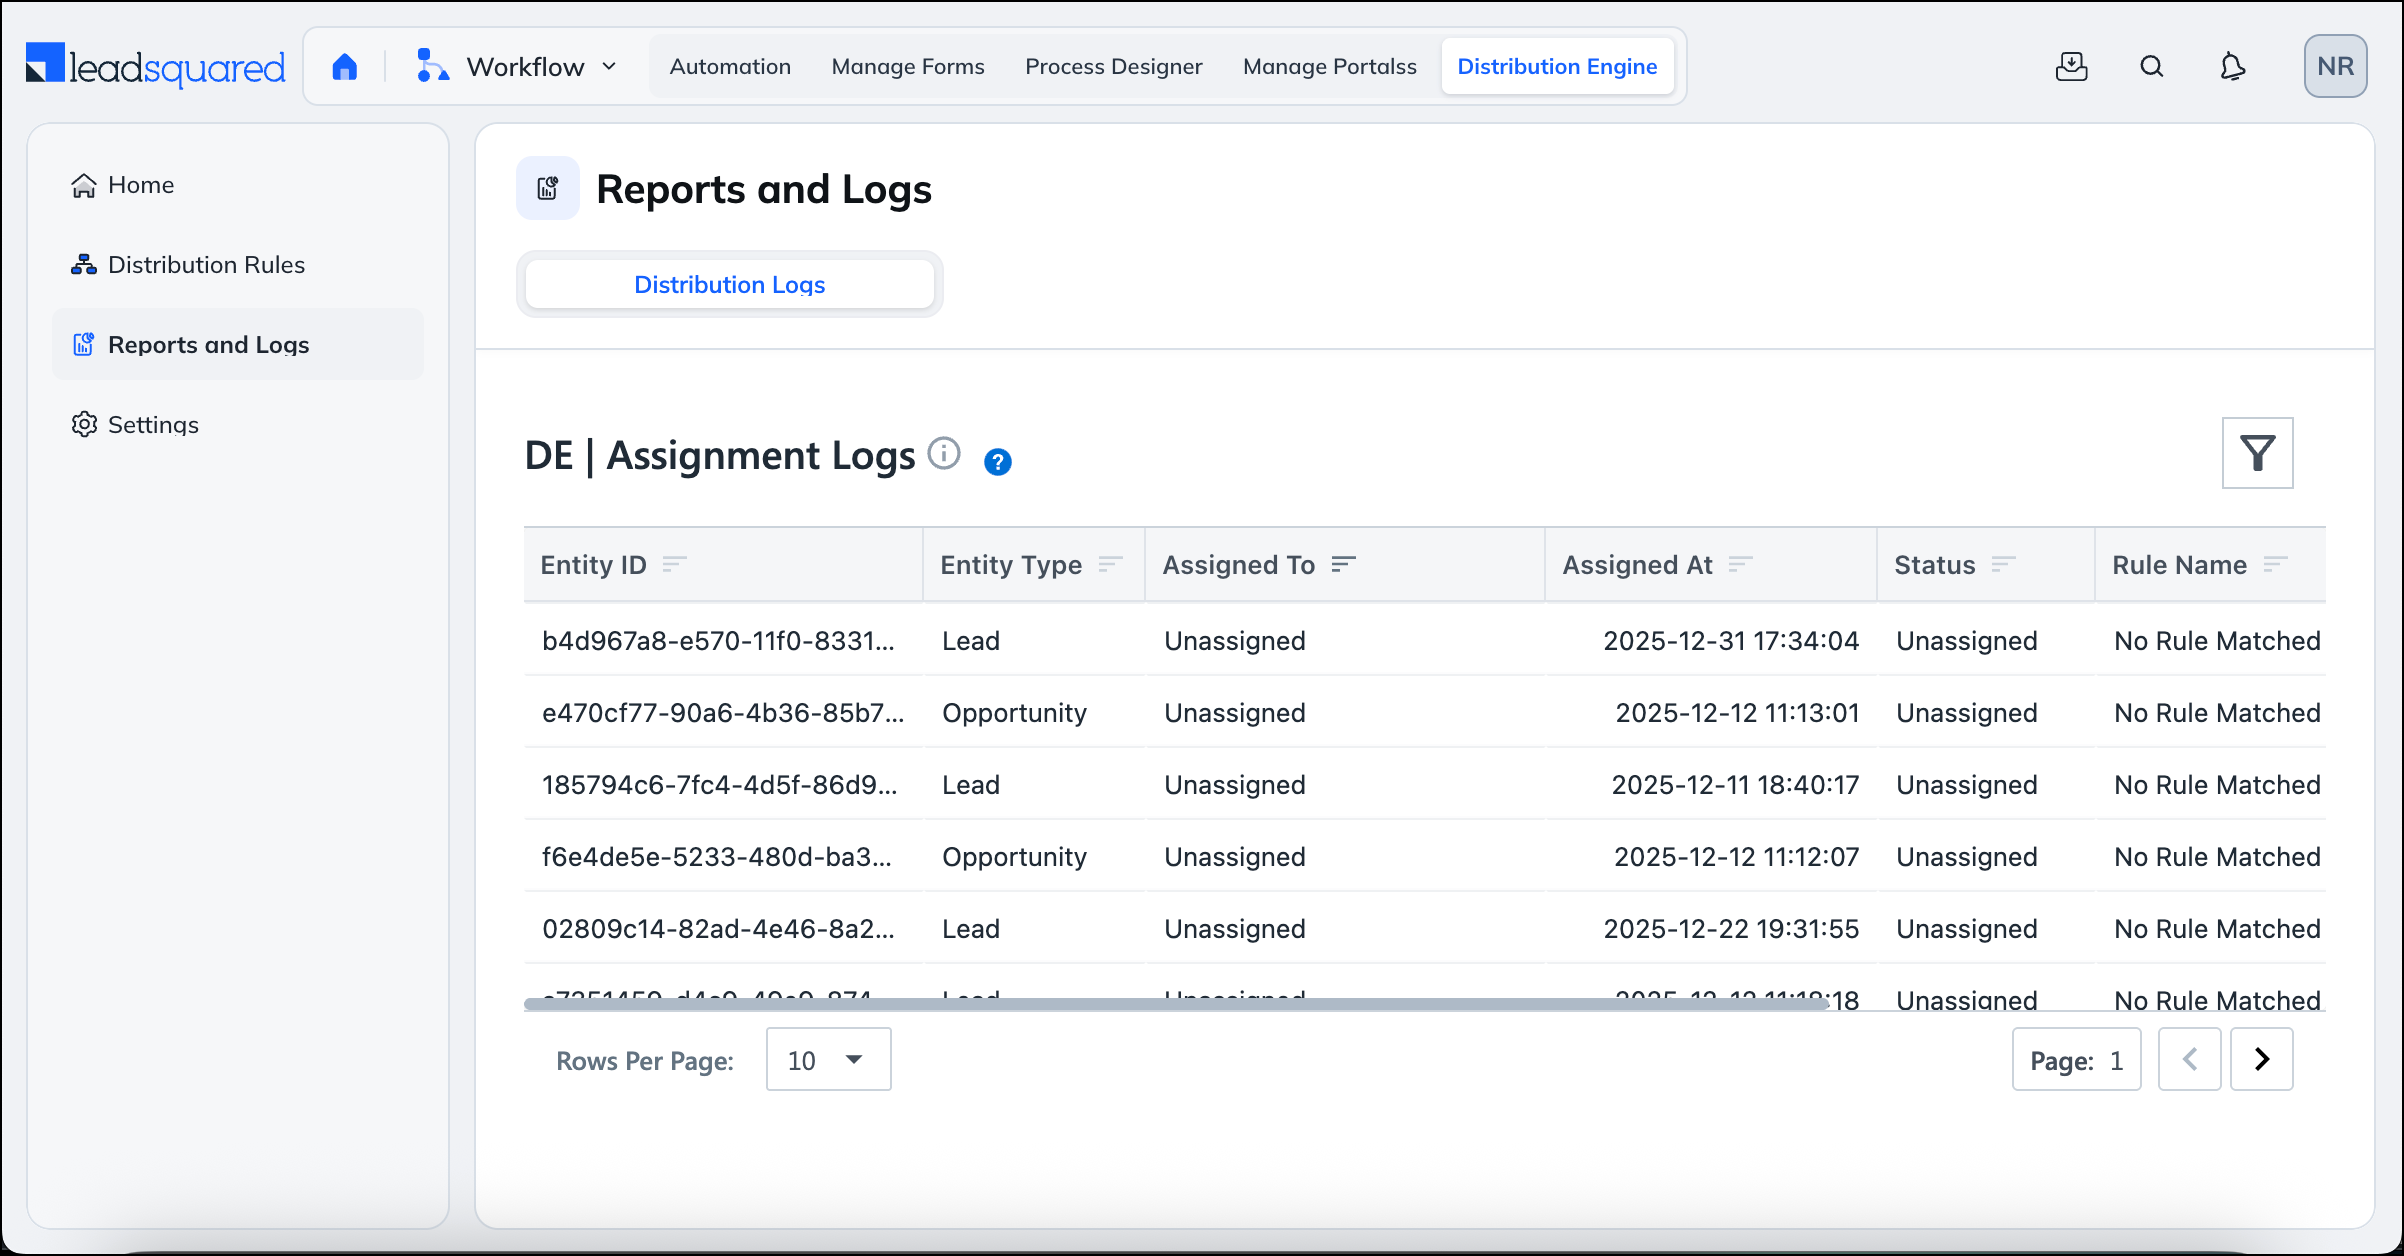
8. Logs and Reports
The Reports & Logs section helps you understand how records are being assigned and identify issues such as missed assignments.
You can use these reports to:
- View assignment history for each record
- See when and why fallback assignment was used
- Troubleshoot rule execution issues
All reports can be filtered by date range, sales group, assigned user, and entity type to quickly narrow down the data you need.
9. Assignment Settings
The Assignment Settings section defines the global controls used by the Distribution Engine. Navigate to Distribution Engine>Settings.
The Settings page has two tabs:
9.1 Assignment Quotas
Admins can map user fields to control how many records a user can receive on an hourly, daily, weekly, or monthly basis. If no limit is configured, the user is treated as having unlimited capacity.
9.2 Additional Settings
This tab lets you enable or disable the availability and schedule features that the Distribution Engine uses when evaluating user eligibility. Each setting has a toggle and a link to its configuration page:
- Enable User Check-in Status for Distribution — Use the user’s Check-in status to determine availability at the time of assignment.
- Consider Workday Templates for Distribution — Use the Workday Template assigned to the user to determine availability at the time of assignment.
- Consider Holiday Calendar for Distribution — Use the Holiday Calendar assigned to the user to determine availability at the time of assignment.
- Consider Leave Tracker for Distribution — Use Leave Tracker to determine user availability at the time of assignment.
When a setting is enabled here, the corresponding condition becomes available in the Select Users step of each distribution rule (see Section 4, Step 2).
FAQs
1. What happens if no user is available?
The record is assigned to the fallback user configured in the rule or settings.
2. Can I temporarily stop assignments to a user?
Yes. Mark the user unavailable, apply leave, or remove them from the rule.
3. Can I edit an active rule?
Yes. Changes take effect once you save and activate the rule again.
4. What is the difference between global and team-specific rules?
Global rules allow assignment to any user in the account and are visible to all users with Distribution Engine access. Team-specific rules restrict user selection and rule visibility to a single team.
5. Who can create or edit rules?
This depends on the permissions set in the user’s Permission Template. Admins have full access by default. Other users can be granted view, create, edit, or delete permissions as needed.
6. Can a sales manager create rules?
Yes, if their Permission Template grants create permission. With team-specific access, the sales manager can only create rules for their own team and select users from that team.