How can I add a Facebook Comments button on my Landing Page?

The Comments box lets people comment on content on your site using their Facebook profile and shows this activity to their friends in news feed. And if it is present on your landing page, it gives you further reach and better visibility.

Prerequisites

Procedure

Adding a Comments button to your landing page involves, first, getting the HTML code from Facebook, and second, pasting the code in the landing page editor.

Get the code from Facebook

1. Log in to your company’s Facebook account and go to Facebook Developer page to get the HTML code for the Comments button. You will be redirected to the Comments Button page.

Comments Page

2. URL to comment on: In the space provided, enter the URL of the Facebook page, for which the Comment button is to be enabled. This could be your company’s Facebook page.

URL

3. Width: This is the width of the plugin, visible on the landing page. The default width is 550 pixels. You can change it as per your requirement.

Width

4. Number of Posts: The number of comments to show by default. The minimum value is 1. The default value is 10.

Number of Posts

5. Color Scheme: The color scheme used by the plugin. It can either be light or dark. The default value is light.

Color

6. Preview Box: This box previews how the button would like, if you choose any option.

Preview

7. Get Code: Once you have made the required settings and changes, click on this button to get the HTML code. Copy these codes in a Notepad. you must paste the code in the landing page editor.

Get Code

Code

Paste the HTML code in the landing page editor

1. Navigate to the required landing page editor.

Landing Page editor

2. Add a HTML block to your landing page where you need the Facebook Like button. double click on the HTML block. Then click on “+” button, which expands the toolbar and displays the Source button.

Editor

3. Paste  the second HTML code in the space provided. Adjust the data-width and data-height, overall block properties as per your requirements.

HTML Code

4. Next, go to Step 3 (Actions) of that landing page and paste the first JavaScript to the script block at the bottom.

Javascript

5. Complete the other required steps of the landing page. Finally go ahead and Publish the landing page. You will now be able to see the like button.

Comment Button

How can I add a Facebook Like button on my Landing Page?

The Facebook Like button is the quickest way for people to like and share content with others. And if it is present on your landing page, it gives you further reach and better visibility.

Prerequisites

Procedure

Adding a Like button to your landing page involves, first, getting the HTML code from Facebook, and second, pasting the code in the landing page editor.

Get the code from Facebook

1. Log in to your company’s Facebook account and go to Facebook Developer page to get the HTML code for the like button. You will be redirected to the Like Button page.

Like Button page

2. URL to like: In the space provided, enter the URL of the Facebook page, for which the Like button is to be enabled. This could be your company’s Facebook page.

URL

3. Width: This is the width of the plugin, visible on the landing page. The default width is 450 pixels. You can change it as per your requirement.

Width

4. Layout: You can choose any of the 3 available options in the drop down. The layouts differ in their width and height of the Like button.

  • Standard Layout: Minimum width: 225 pixels, Default width: 450 pixels and Height: 35 pixels (without photos) or 80 pixels (with photos).
  • Box_count Layout: Minimum width: 55 pixels, Default width: 55 pixels, and Height: 65 pixels.
  • Button_count Layout: Minimum width: 90 pixels, Default width: 90 pixels, and Height: 20 pixels.

Layout

5. Action Type: You can choose to display either Like or Recommend on your landing page. Choose you option from the drop down.

Action Type

6. Preview Box: This box previews how the button would like, if you choose any option.

Preview

7. Get Code: Once you have made the required settings and changes, click on this button to get the HTML code. Copy these codes in a Notepad. you must paste the code in the landing page editor.

Get Code

Code

Paste the HTML code in the landing page editor

1. Navigate to the required landing page editor.

Landing Page editor

2. Add a HTML block to your landing page where you need the Facebook Like button. double click on the HTML block. Then click on “+” button, which expands the toolbar and displays the Source button.

Editor

3. Paste  the second HTML code in the space provided. Adjust the data-width and data-height, overall block properties as per your requirements.

HTML Code

4. Next, go to Step 3 (Actions) of that landing page and paste the first JavaScript to the script block at the bottom.

JavaScript

5. Complete the other required steps of the landing page. Finally go ahead and Publish the landing page. You will now be able to see the like button.

Like Button

How do I add a hidden field to a Landing Page form?

A hidden field in your landing page form will make the field invisible to the visitor. You can use this option to set a default value for a field. By doing so, you can create a list of leads, based on the default value.

For instance, If the hidden field is Source Campaign, and the default value is Facebook Ads, all the leads who submit on the particular form will have the source campaign as Facebook Ads, in their lead records. Thus, it becomes easier for you to create lists based on a particular criteria.

To add a hidden field in a form

1. Click on the Add Form Block button in the landing page editor.

Add Form Block

2. You have to double click on the block to add form fields. The form designer window opens up once you double click on the block.

Form Designer

3. Click on the field that you want to hide from the visitors. In the Lead Field Properties box, click on Hidden Field check box. Enter the required field value.

Lead Field Properties

4. The hidden field, as stated before, will not be visible to the visitors. But the value of the field will be present in the lead record.

The number of submissions and number of leads is different for a Landing Page. What could be the reason ?

Sometimes, you might see in the landing page report, that the number of leads submitted on the landing page and number of submissions may be different.

This is because a landing page visitor becomes a lead after submission. But if the same visitor submits again, it is counted as a submission and not another lead. For instance, 1 visitor submits on a landing page. The number of leads is 1. But if the visitor submits 4 times, then the number of submissions is 4.

In the below screen shot, a particular lead has submitted on a landing page twice. Although a lead is 1, submission will be counted as 2.

Submission

How to get HTTPS URL for my landing page?

LeadSquared allows you to get ‘ https’ URL for your landing page, which ensures a secure data transfer. The https: url enables an encrypted link between server and client so that information passed from your landing page to server can’t be intercepted.

The below steps illustrates the process of getting ‘https’ URL from your LeadSquared account.

Procedure

To get https URL for your landing page, navigate to Marketing > Landing Pages. Hover the mouse over Actions icon and click on Get landing page Url from the actions list.

url
Select the Url having viewpage.co as domain from Landing page Url popup window.

page urls
Copy the Url with https:// and can be used on your website.

https

Can I stop an Email Campaign after it is sent?

No. You will not be able to stop an email campaign once it is sent. But, if you have scheduled it for a later time, then you can cancel it, and the email campaign will not be sent.

If I delete a list, will the leads in the list be deleted from LeadSquared?

No. Only the list gets deleted. The leads present in the list will be present in the Manage Leads page. Note that a list which is associated with an email campaign cannot be deleted.

Can I use my own HTML code to create an Email Campaign?

Yes. You can use HTML code of an email campaign, if you have one. To create an email campaign in LeadSquared with your HTML code, navigate to the email composer. On the toolbar, click on Source button. You can paste your HTML code now. This way, you can use your email’s  HTML code in LeadSquared.

HTML of email

Identify Your Region from the Host URL

Your Host URL, Access Key and Secret Key enable you to use LeadSquared’s API. Note that these keys are confidential and should not be shared with anyone or exposed publicly.

How to find your Host URL, Access Key and Secret Key

  1. Navigate to My Profile>Settings> API and Webhooks>API Access Keys.
  2. You’ll see your Host URL and options to generate or view your Access Key and Secret Key.
Note: Keep your keys secure. Avoid sharing them in public forums, screenshots, or with unauthorized users.

How to Identify Your Region

Your API Host URL indicates the region where your LeadSquared account is hosted. Use the table below to determine your region

Singapore https://api.leadsquared.com/v2/
United States https://api-us11.leadsquared.com/v2/
India (Mumbai) https://api-in21.leadsquared.com/v2/
India (Hyderabad) https://api-in22.leadsquared.com/v2/
Ireland https://api-ir31.leadsquared.com/v2/
Canada https://api-ca12.leadsquared.com/v2

LeadSquared - LeadSquared Access key and Secret key.

Can I import a CSV file without email address into LeadSquared?

You can import records that do not have email addresses.  Please ensure that you have a column for Email Address in the csv. The data for some or all records may be blank in this column. Map it  to Email Address field of LeadSquared while importing and in “Step 03 Actions” uncheck “Import Only if Valid Email address exists in CSV”:

Import

How can I use the Email Campaign report?

1. Feature Overview

The Email Campaign Report provides various metrics (like the percentage of leads who have clicked, opened, or unsubscribed from the email) that help you study the impact of the campaign on your leads. You can also export these leads and create a list with those who have clicked on a link, unsubscribed, marked the email as spam etc. Modified and targeted email campaigns can be sent to the leads in these lists accordingly.

Note: To know how to create an email campaign, see Create and Schedule Email Campaigns.


2. Prerequisites

  • You must be an Admin or Marketing user to view the report.
  • You must first create and send an email campaign.


3. Email Campaign Report

Navigate to Marketing>Email Campaign and click on the relevant email campaign.

  • On the top of the page, you can view the status of the email campaign, number of recipients (target and excluded), and the email delivery rate.
  • You can also view the percentage of leads that have
    • Opened the email.
    • Clicked a link in the email.
    • Not responded to the email.
    • Marked the email as spam.
    • Unsubscribed from receiving further emails.
  • Under Target Lists, you can view the lists of leads you’ve sent emails to and their response (i.e., the click rate, bounce rate, spam rate, etc.). If a particular list has a low click rate, you can make changes to the email campaign based on the interests/requirements of the leads in that list.
  • Under Top Performing Email Links, you can view the different links in the email and their click numbers. If you observe that any of your links has low clicks, you can change the position of the link or replace the link with a new one.
  • Under Leads Engaging with Email Campaign, you can filter the leads based on whether they opened the email or clicked on the attached link. To do so, click the dropdown next to Filter Engaged Leads by.
  •  You can view the leads who unsubscribed from the email,  the leads from whom the email bounced and leads who have marked your email campaign as spam. These leads will automatically be added to the Do Not Email list in your account. If you want to send a follow-up email to these leads, you have to manually edit the lead details and un-check their Do Not Email field.
  • To export the leads in a list, click and select Export Leads.
Note: To view the reports of emails sent through automation, see Automation Reports.

LeadSquared - Email Campaign Report


4. Other Actions

To perform the actions shown in the gif, alongside the leads present in the list, click LeadSquared.

LeadSquared - Other Actions in Email Campaign Report


5. FAQs

How is the Click and Open Count Calculated in the Email Campaign Report?

  • Issue: There are discrepancies in the data count representation. Specifically, the No. of Opens appear differently in the summary section (chart) and the lead-wise grid (the count is lower here).
  • Resolution: 
    • Summary Section (Chart): The summary section shows the count of all activities for the lead but only takes the first activity instance for the activity type (Open/Click/Unsubscribe/Bounce/Spam).
    • Lead-Wise Section (Grid): In the grids (‘Lead Engaging with Email Campaign’, ‘Lead with Unsubscribes’), the record for a lead is removed when the activity moves from one stage to another (for instance, from Open → Click).
    • Advanced Search: To get the count of leads for each activity, you can use Advanced Search and search for the lead for each activity type (Open, Click, Unsubscribe). Here, the same lead will appear under all activity types.
  • Example:
    • Step 01 – Lead A opens the campaign:
      • Open count in summary = 1
      • Click count in summary = 0
      • Open count in grid = 1
      • Click count in grid = 0
    • Step 02 – Lead A clicks on the “View in Browser” link:
      • Open count in summary = 1
      • Click count in summary = 1
      • Open count in grid = 0
      • Click count in grid = 1
    • Step 03 – Lead A unsubscribes from the campaign:
      • Open count in summary = 1
      • Click count in summary = 1
      • Unsubscribe count in summary = 1
      • Open count in grid = 0
      • Click count in grid = 0
      • Unsubscribe count in grid = 1

Why do email unsubscriptions or unusual link clicks appear frequently in reports?
This may be caused by aggressive spam filters in email servers. When an email is received, the server may “click” links to scan for suspicious content before delivering it to the inbox, spam folder, or quarantine.


Any Questions?

We’d love to answer your questions or hear your own unique use cases. Feel free to share your experiences in the comments section below.

Help Video – How to create and publish a landing page in LeadSquared?

This video will help you to design, publish and analyze landing pages using LeadSquared:

How Can I Use Webhooks in Leadsquared?

1. Feature Overview

Webhooks are user-defined HTTP callbacks, which are triggered when a specific event occurs. Webhooks offer simple and efficient server to server communication, without having to depend on long-running connections. When an Event occurs in the source site, webhooks makes an HTTP request to the URL configured. You can use webhooks to integrate your applications with LeadSquared.
Some of the common use cases where you might find Webhooks useful include posting form data to another application, posting lead data to another application and so on.


2. Prerequisites

  • You must be an admin user.
  • You must have a webhook URL you want to send data to.


3. Create a Webhook

  1. Navigate to  My Account>Settings>API and Webhooks>Webhooks.
  2. Fill in the webhook details. The Event (triggers the HTTP callback request) and Webhook URL (In most cases HTTP is sufficient, but HTTPS can be useful if your data is sensitive) fields are mandatory.
  3. Click Save when you’re done.
Note: Information is sent as an HTTP POST request to the URL which you specify.

Create Webhook

Field Description
Type Select ‘Webhook’ to create a regular webhook. Select ‘Lapp’ to create a new Lapp (see Lapps).
Event The LeadSquared event you want to trigger the HTTP callback request on.
Use the checkbox to ‘Notify on failure’ for failed webhook executions. If checked, all administrator users in the LeadSquared account will be notified.
Webhook URL The URL you want to post data to once the event occurs.
Content Type The format you want to post the data in. Choose from ‘application/json’ to post data in JSON format, ‘application/x-www-form-urlencoded’ for simple text/ ASCII data or ‘text/plain’ for plain text.
Execution Delay You can set a delay (in seconds) between the time the event occurs and the data is posted.
Custom Headers Add a name-value pair as a custom header. You can use custom headers for authentication or security purposes. For example, you can enter a custom name-value pair and then reject all webhook calls where the header isn’t present.
Description Describe your webhook. For example, “New Lead Data”.


4. Enable Webhooks for Opportunities

To enable webhooks for opportunity events (e.g., opportunity create, opportunity delete, etc.) –

  1. Navigate to My Profile>Settings>Profile>Advanced Configurations.
  2. Alongside Enable Webhooks for Opportunity, slide the toggle.

To create a webhook for opportunities –

  1. Alongside Event, click the dropdown and select the relevant opportunity event.
  2. Alongside Opportunity Event, select the opportunity type and create your webhook.

LeadSquared - Configure Webhooks for Opportunities


5. All Webhook Events

  • Account Activity Create
  • Account Activity Update
  • Account Create
  • Account Delete
  • Account Update
  • Landing Page Submission
  • Lead Activity Creation
  • Lead Activity Update
  • Lead Creation
  • Lead Delete
  • Lead Field Value Change
  • Lead Merge
  • Lead Ownership Change
  • Lead Score Change
  • Lead Stage Change
  • Lead Update
  • Leave Create
  • Leave Delete
  • Leave Update
  • Opportunity Create
  • Opportunity Delete
  • Opportunity Field Value Change
  • Opportunity Stage/Status Change
  • Opportunity Update
  • Product Create
  • Product Delete
  • Product Update
  • Task Cancel
  • Task Complete
  • Task Create
  • Task Reminder
  • Task Update
  • User Activate/Deactivate
  • User Availability Status Change
  • User Create
  • User Update

Notes:

  • Activities are posted in bulk on the webhook. The activity data for activities happened in one minute is grouped and posted on the webhook. So you will need to check if you receive one activity ID or more than one.
  • To see data posted for each webhook event, see Data Posted by Webhooks.


6. Webhook History

You can view the webhook execution history. Hover your cursor over the Actions button and click on View History. You can see the transmission date, its status and data transmitted.

Histroy

  • You’ll see the status as Success if the URL entered returns the HTTP code 200.
  • You’ll see the status as Failure if the URL entered returns an HTTP code other than 200. We try 3 times before marking an attempt as a failure. In addition to this, you will see the status as In Queue if the data is not yet posted to the URL.

Note: You can debug a Failure status by doing a manual HTTP post with the input data to the webhook URL.

Click on Show to view the data that is transmitted. Webhook Data window opens up. Here, you can view the data sent and received.

Webhook data


FAQs and Troubleshooting

Why is my Activity Webhook trigger delayed?
Activity webhook triggers are processed in batches, not in real-time. There may be a delay as the system collects and posts multiple activity events together. This is expected behavior. If immediate webhook triggers are required, use an automation trigger for activity creation and set up a webhook as an automation action instead.

I’m receiving the following error – Webhook has been disabled due to continuous failures. Please verify the URL and enable. 

Webhooks are automatically disabled after ten (10) consecutive failures. You can re-enable the webhook, or create a new one.

LeadSquared Webhooks

Webhook Not Getting Verified in LeadSquared

  • Issue: Your webhook is not getting verified in LeadSquared, even though it returns a 200 OK response when tested via Postman.
  • Cause:LeadSquared verifies webhooks without sending a payload and instead supports headers for verification. If your webhook is designed to return a 200 OK response only when a payload is included, the verification will fail.
  • Solution: Ensure that your webhook URL returns 200 OK even when no payload is passed. If your webhook requires a payload to respond successfully, update its configuration to allow verification without one.


Any Questions

Still have questions? Leave us a comment below and we’ll get back to you ASAP.

Manage Subscription of Daily LeadSquared Reports

1. Feature Overview

The Daily LeadSquared Reports summarize details on leads, pending tasks, and activities. You can subscribe/unsubscribe from the daily reports directly from the website. These reports will be delivered to you by email.

Note: The reports that you subscribe to will have the company’s timezone (which is set up by the Admin) since these reports will capture activities and events across users.

LeadSquared - Daily email reports


2. Manage Subscription of Daily Reports

  1. Navigate to Settings>Profile>My Report Subscriptions.
  2. Select the reports you wish to subscribe to –
    • Daily User Tasks Report – User Tasks Report summarizing the pending tasks for the day.
    • Daily Report –  Lead Activity Report summarizing the new leads and most active leads on the previous day.
    • Daily Report For Owner – Lead Activity Report summarizing the lead owner’s (user’s) new leads and most active leads on the previous day.
    • Smart Views Summary – Daily Report summarizing the latest leads, activities and tasks added to your subscribed views.
  3. Click Select Columns next to Daily Report or Daily Report For Owner and select the lead fields you want to include in the report. Click Save Selected. To restore the default selection, click Restore Default.
  4. Click Select Views next to Smart Views Summary and select the Smart Views you want to include in the report. Click Save Selected. To restore the default selection, click Restore Default.

LeadSquared - Manage daily subscription


3. Disable Daily Report Subscriptions

To disable or stop users from receiving daily emails of LeadSquared reports –

  1. Navigate to Settings>Profile>Advanced Configurations.
  2. Search for and toggle the Disable Report Subscriptions setting.

LeadSquared Reports


Any Questions?

Did you find this article helpful? Please let us know any feedback you may have in the comments section below. We’d love to hear from you and help you out!

LeadSquared Getting Started Guide for Sales Users

Hello, Sales User! Welcome to LeadSquared.

This document provides instructions on setting up and using LeadSquared as a Sales User.

Note: As a sales user, you can use this guide to familiarise yourself with the features available in your LeadSquared accounts. The set up and configuration for most of these features is controlled by the Administrator user. To modify any configurations, please contact your LeadSquared Admin.


1. Log in to your LeadSquared Account

Once a user is created on LeadSquared, an email would be sent with your login credentials. Log on to LeadSquared using your username and password at login.leadsquared.com. You will be prompted to reset your password to use your account. If you do not have your login credentials, reach out to your administrator.


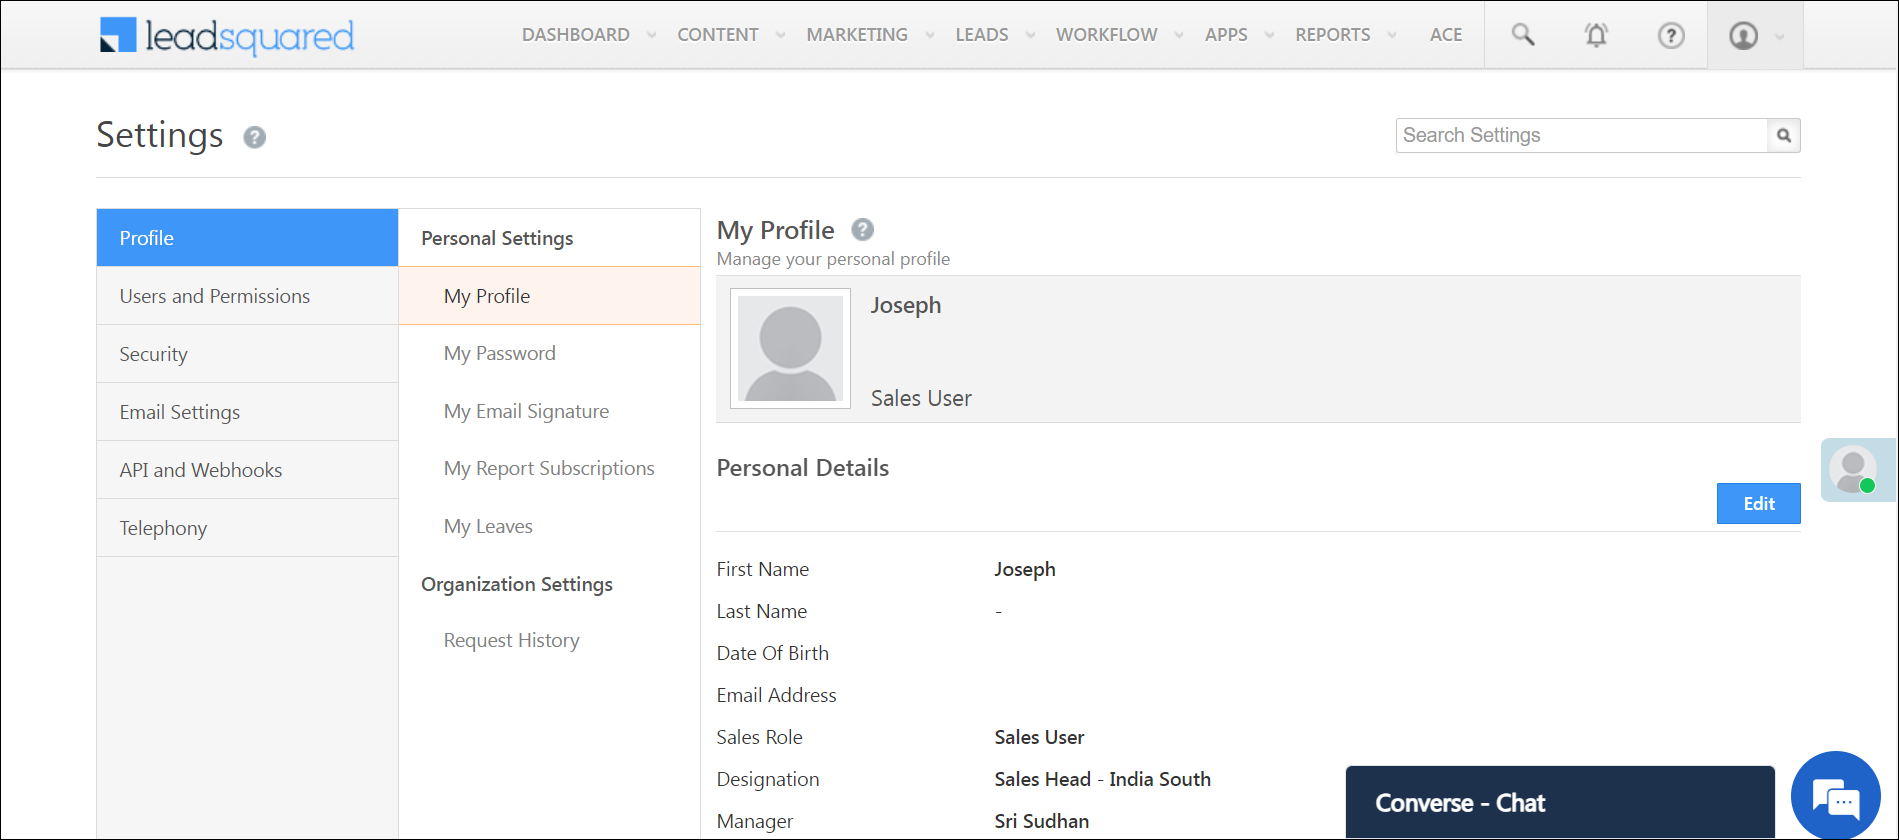
2. Manage Your Profile

Personal Settings allows you to add personal details, change your password and update your email signature. The information entered here (like city, time zone, manager, etc.) can be accessed by Administrators while assigning leads to you, applying permissions to different sets of users, creating sales groups, etc.
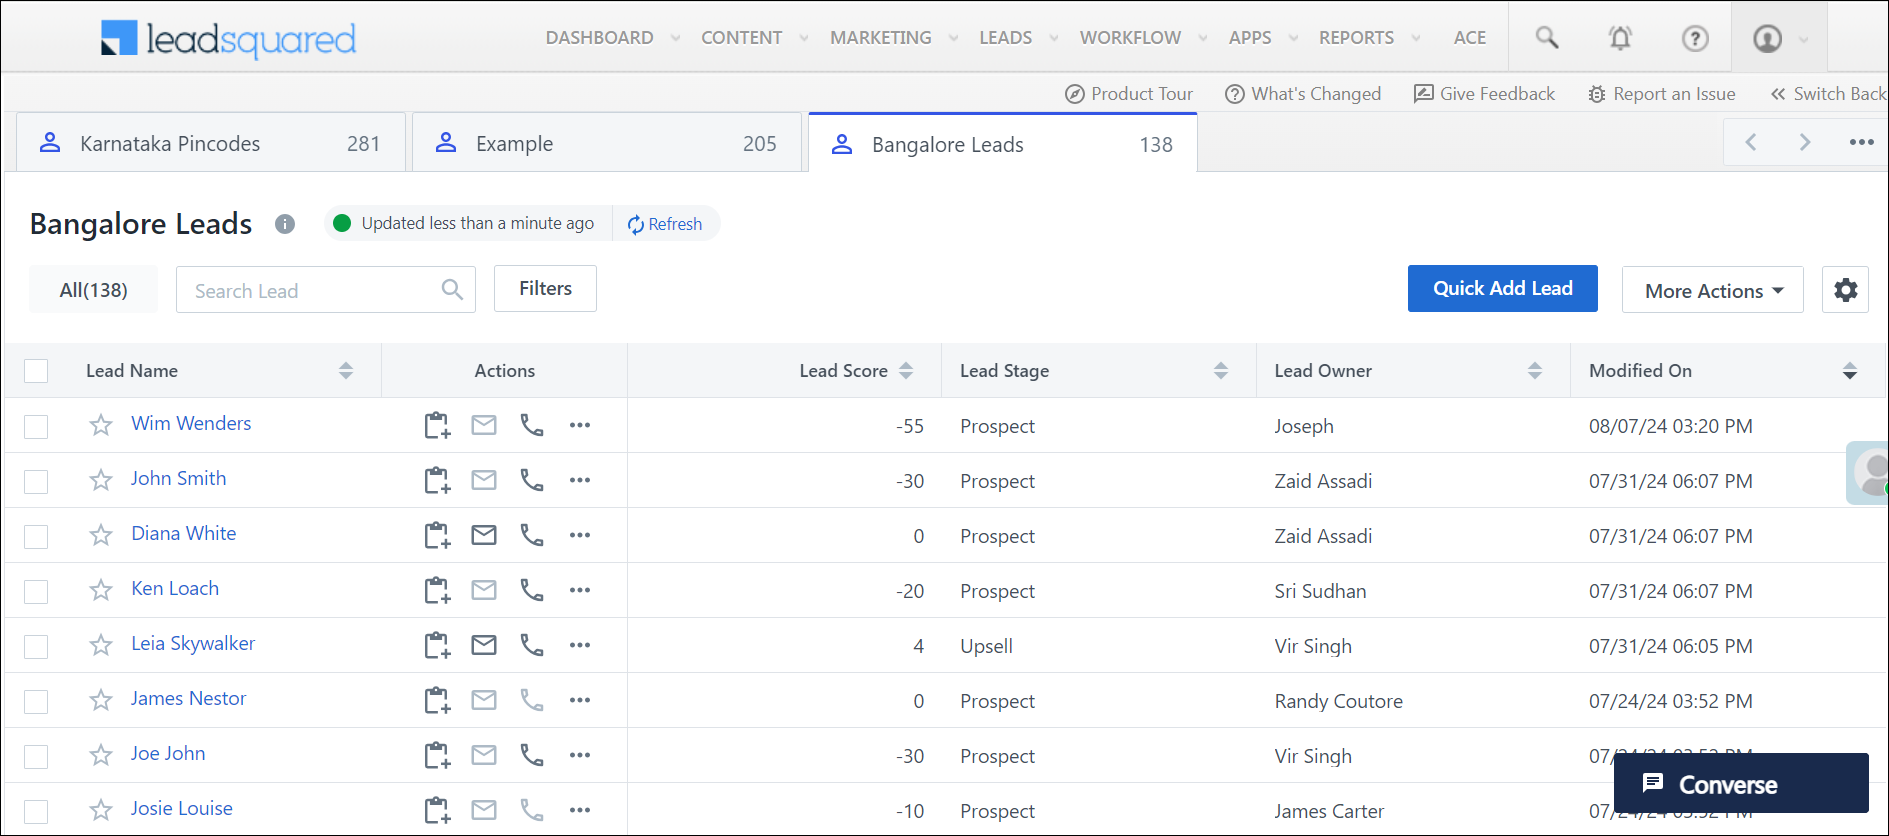
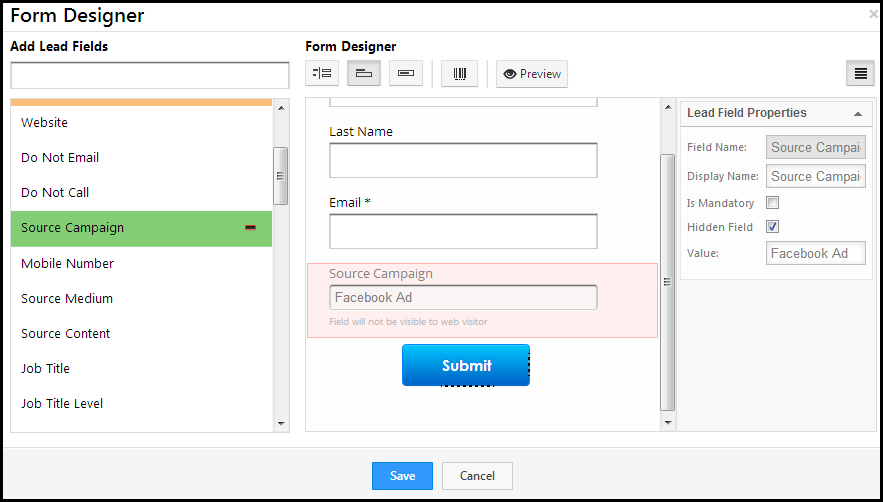
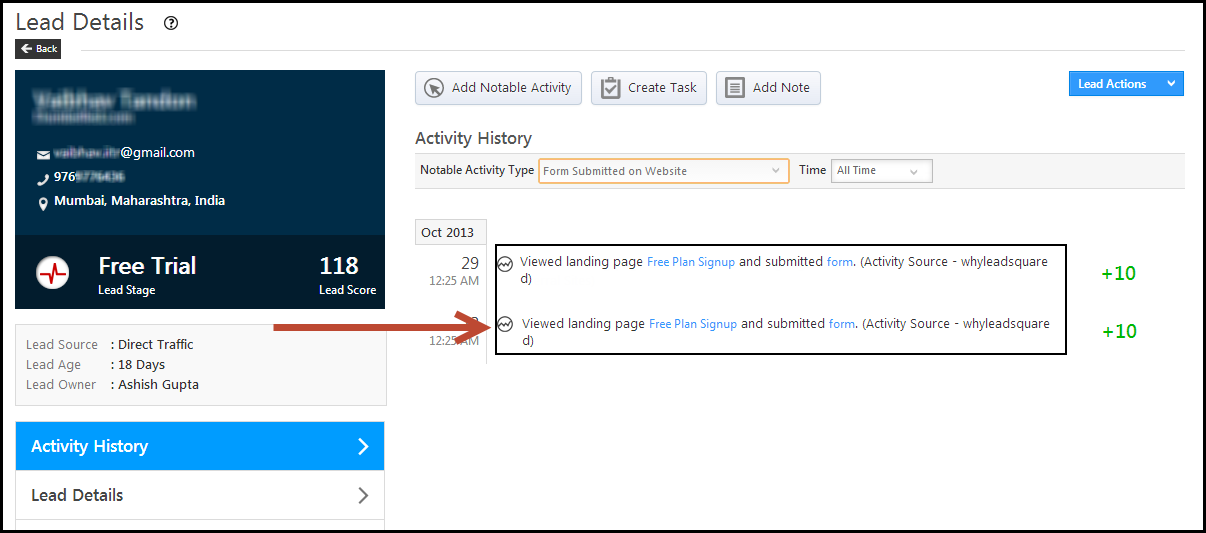
Help Article Description
Set Up Your Personal Profile Add your personal details and set up your LeadSquared profile
Update Your Password Change or update your LeadSquared Password
Update Email Signature Add an email signature to be used in all email communications from the LeadSquared application
Manage Your Leaves Create and manage your Leaves

Leadsquared - Sales User Getting Started


3. Manage Leads

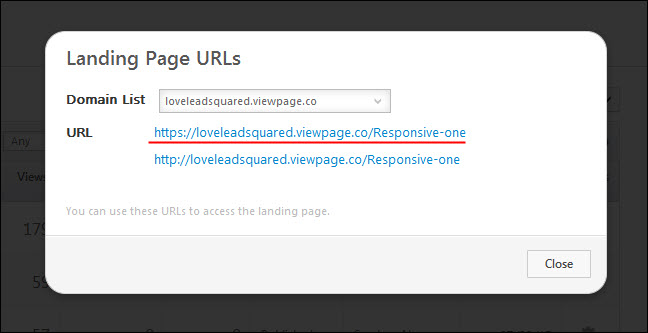
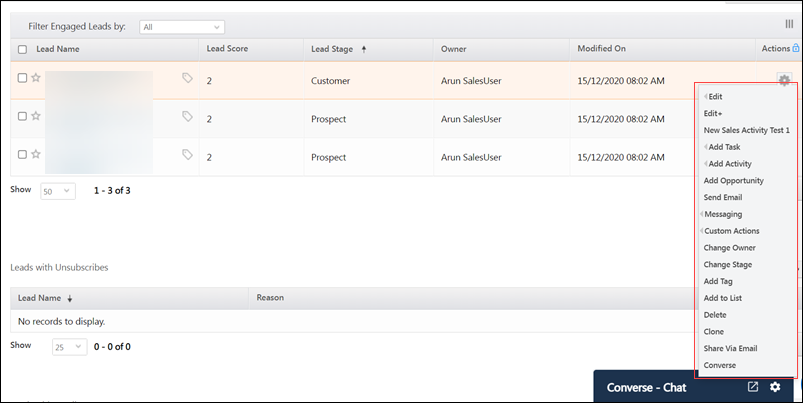
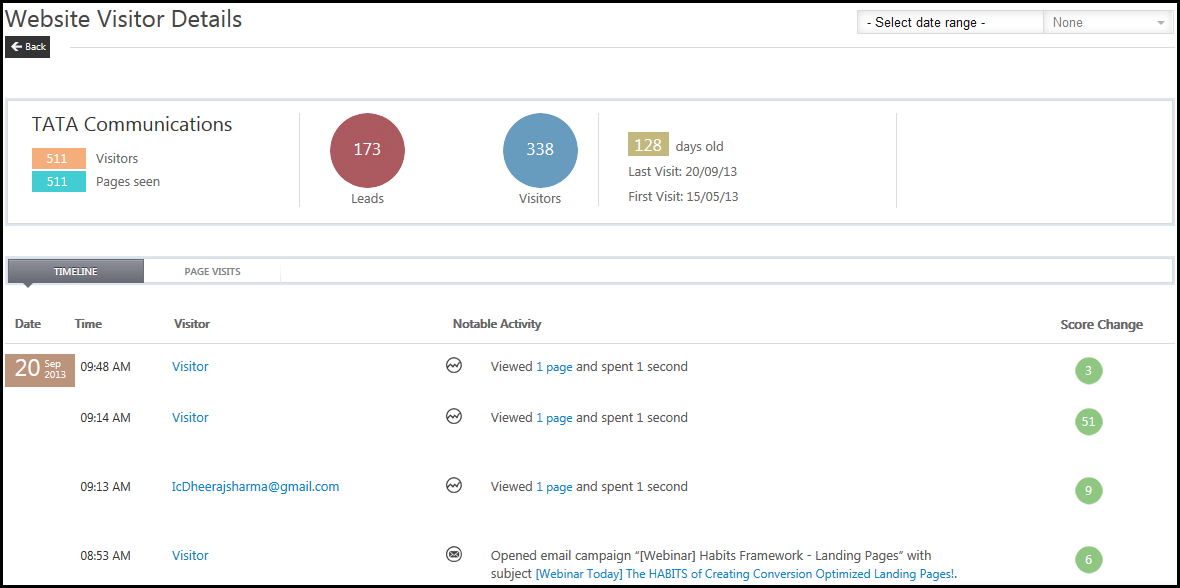
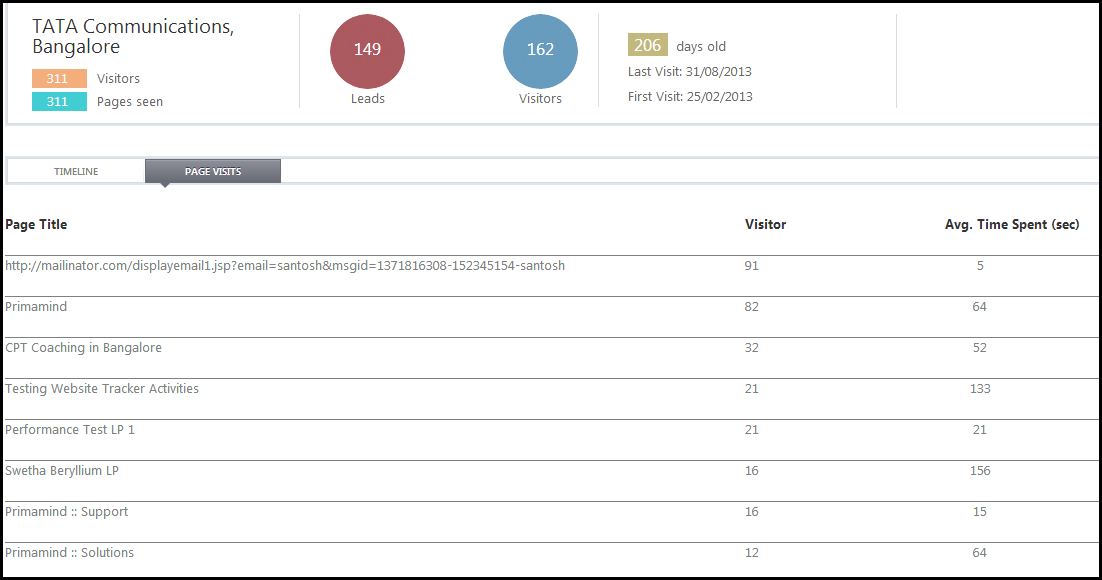
Leads are individuals or businesses interested in your product or service. In LeadSquared, you can track your lead’s journey from creation, through marketing and sales activities, all the way to conversion. As a sales user, you can create, view and manage leads. You can perform actions on leads like calling, adding tasks and activities, sending an email, etc. Additionally, you can search leads from the Manage Leads page using Quick Search or Advanced Search.

Help Article Description
Manage Leads View all your leads on a single page
Quick Add Lead Form Add leads instantly with minimal, essential information
Add New Lead Form Add leads with detailed information
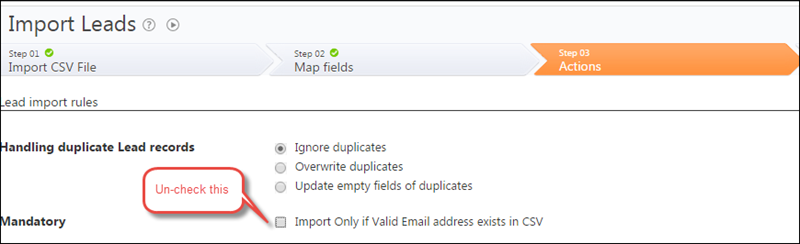
Import Leads Bulk import leads into LeadSquared
Quick Search Find leads based on specific properties by entering values in the search box with specific formats
Advanced Search Search for leads that satisfy one or more conditions
Actions Add, edit and perform various actions on your leads like sending emails, calling, adding an activity, etc.
Manage Lead Details View and manage details of a lead
Note: As a sales user, by default you can only view the leads that you are the owner of. However, other users can share leads with you via email or through automation.

Leadsquared - Sales User Getting Started


4. Manage Opportunities

Opportunities are potential sales or business engagements linked to leads. Opportunities are configured by your admin. Add opportunities to leads, and perform multiple actions on these opportunities such as bulk and grid updates, export opportunities and reset filters.

Help Article Description
Manage Opportunities Track various aspects of deals in progress
Actions Take multiple actions on existing opportunities, on the Manage Opportunities page


5. Understanding Lead Prioritization & Scoring

To prioritize leads effectively in LeadSquared, you can use features such as lead prioritization, lead scoring, lead quality criteria, and lead engagement scoring. By applying these criteria, you can further refine your lead list to target those who are most likely to convert, ensuring a more efficient and successful sales process.

Help Article Description
Lead Stage Helps you create and track your sales funnel within LeadSquared
Lead Scoring Measure of Lead activity in response to your marketing offers
Lead Quality Criteria Helps you set rules that would identify leads closest to your ideal customer persona
Lead Engagement Scoring Calculated based on the recent activities of leads


6. Smart Views

Smart Views serves as a single work area for the sales users for accessing accounts, leads, opportunities, activities and tasks. It serves as a better alternative to quick filters. With Smart Views, you can configure the views based on your business requirements. Your admins can also create and share views to their users.

Help Article Description
Smart Views Access your accounts, leads, opportunities, activities, and tasks in one place

Leadsquared - Sales user getting started


7. Communicate With Your Leads

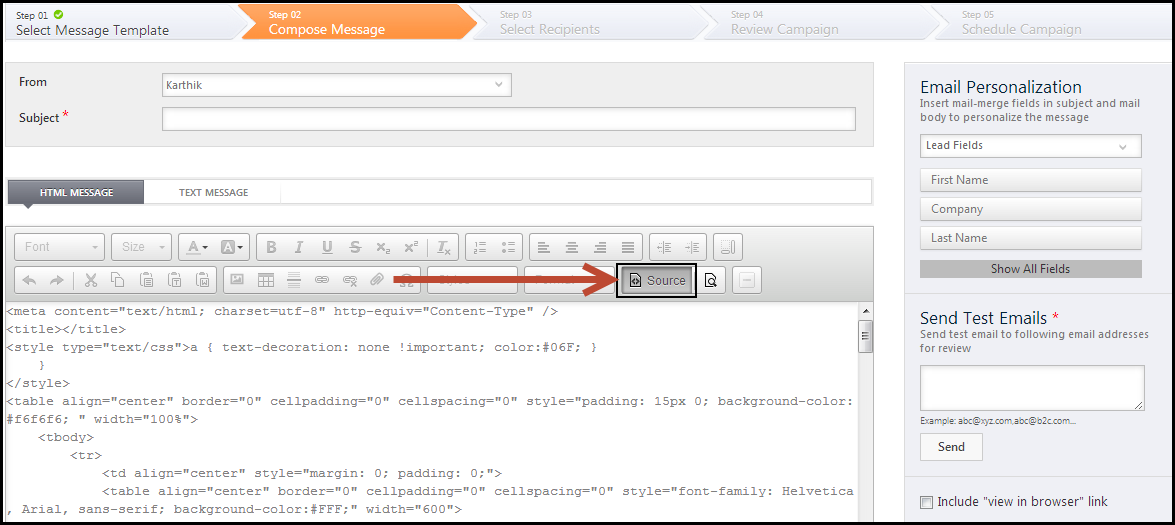
As a sales user, you have the opportunity to actively engage with your leads by reaching out through calls, personalized messages, email and WhatsApp. This direct communication allows you to build strong relationships, understand their needs, and address any concerns they may have.

Help Article Description
Telephony Call leads, connect leads with the right sales reps and take a specific actions after the call
Converse Have real-time conversations with leads
WhatsApp Business Messaging Connector Integrate your WhatsApp business account with LeadSquared
LeadSquared SMS Connector – India Send automated, one-to-one and bulk SMS to leads and opportunities in India, directly from LeadSquared (Reach out to your admin to enable this for you)
Emails Send emails to your leads immediately or schedule them to be sent at a later time


8. Manage Tasks

You can create and schedule various tasks and set up reminders in your LeadSquared account. These tasks can be linked to both Leads and Opportunities, allowing users and managers to monitor them directly on the respective Lead or Opportunity Details page.

Help Article Description
Manage Tasks Create and schedule tasks and reminders for leads

Leadsquared - Sales user getting started


9. Manage Activities

Once Leads and Opportunities are captured in your account, their progress through the sales funnel can be tracked by monitoring key interactions and events, known as Activities. Activities encompass actions such as email opens, website visits, link clicks, site visits, product demos, phone call and more.

Help Article Description
Manage Activities Create activities to monitor your lead’s progress down the sales funnel

Leadsquared - Sales user getting started


10. Manage Lists

Lists are a group or collection of leads. Lists can be created based on any criteria like leads from a particular city, leads who have performed certain activities or leads on whom certain tasks are to be performed. The Manage Lists page allows you to create, edit and view all your lists in one place. You can create lists to post activities, tasks, send email campaigns, set-up automations, make bulk updates, run exports, etc.

Help Article Description
Manage Lists Create and manage lists of leads based on different criteria
Send SMS Send SMS to leads on a list
Send Email Send Emails to leads on a list

Leadsquared - sales user getting started


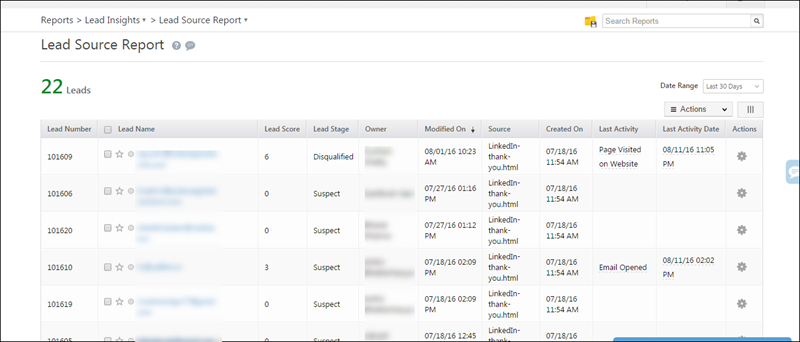
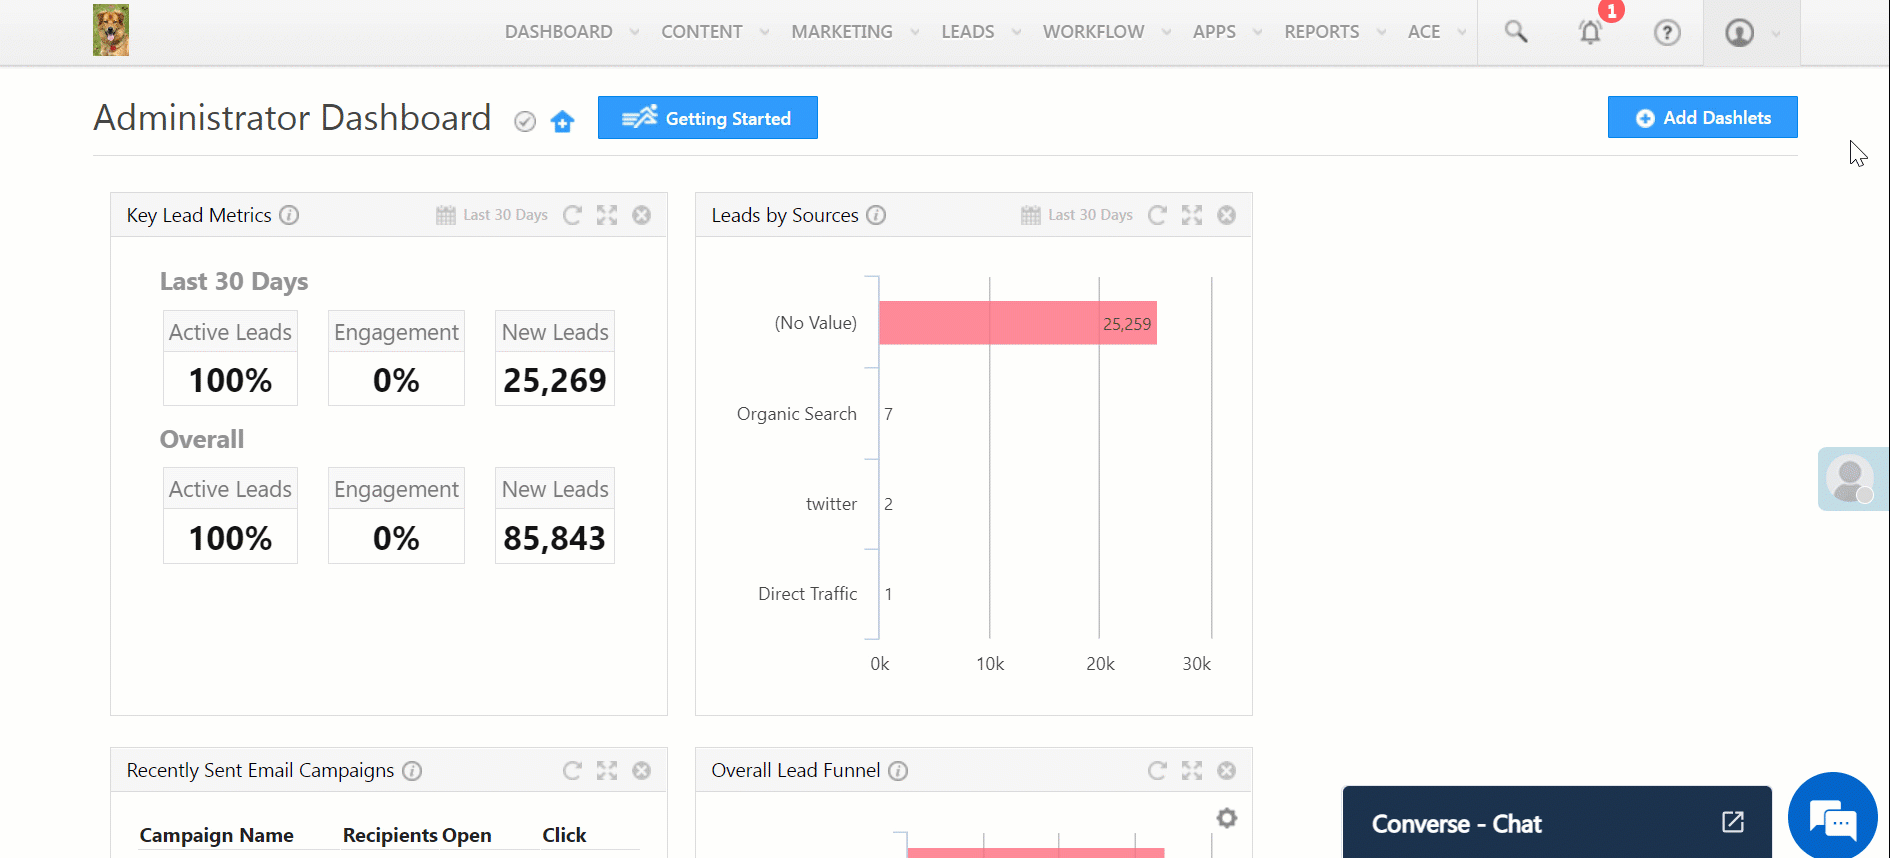
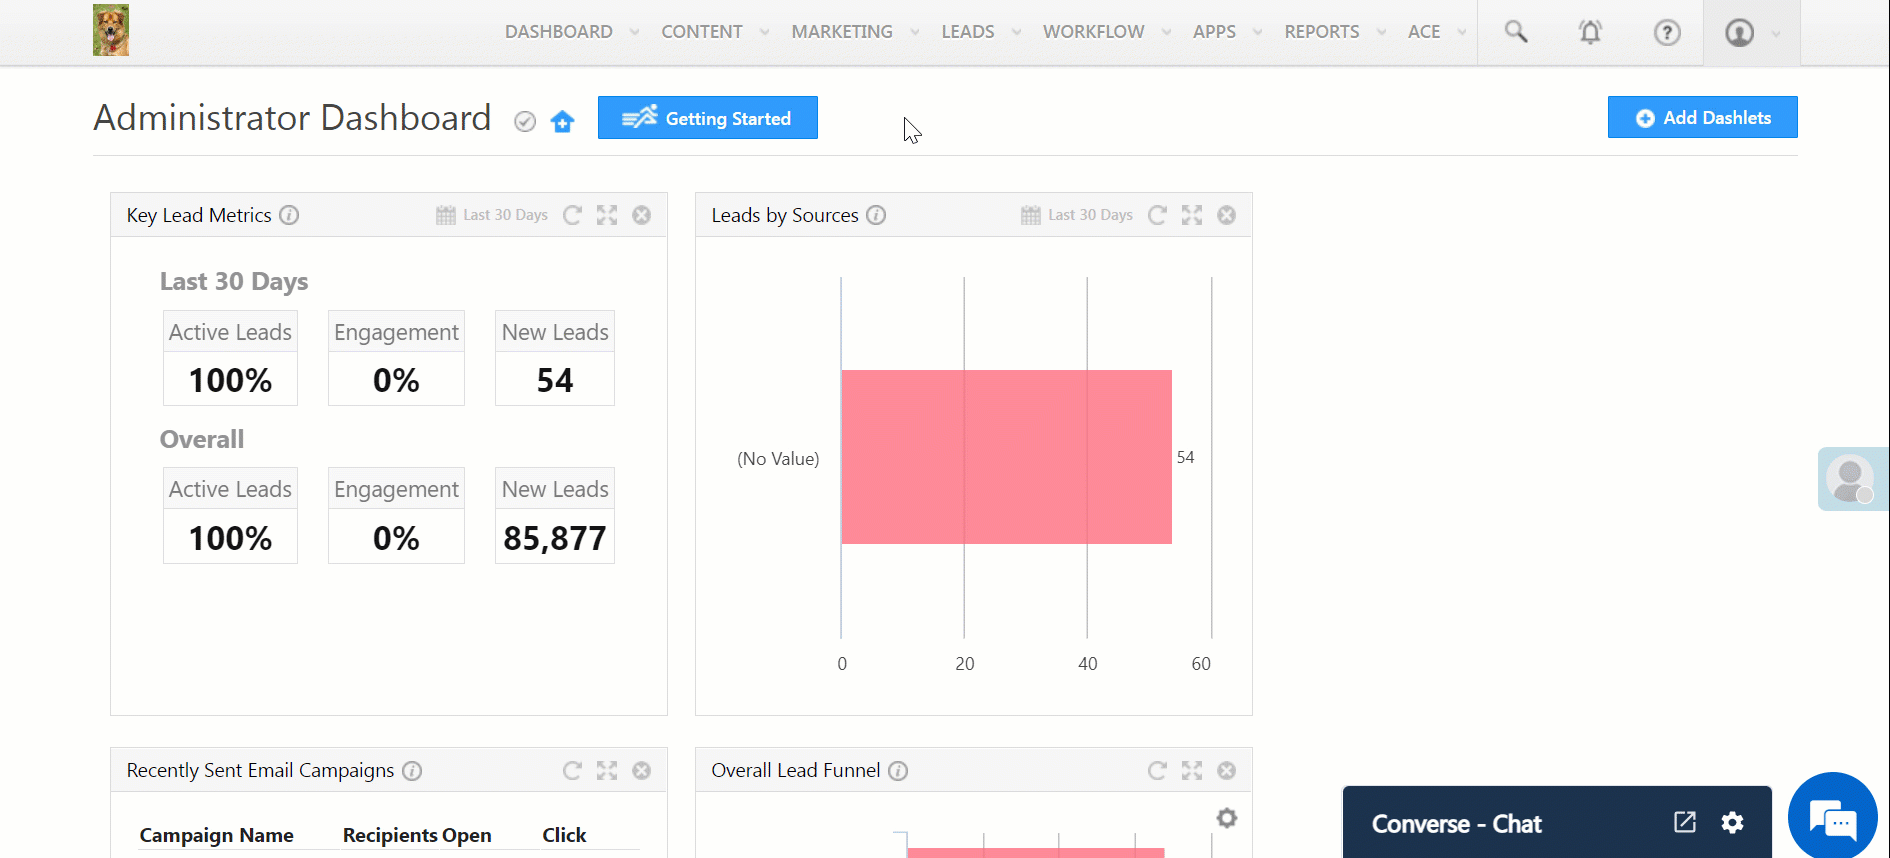
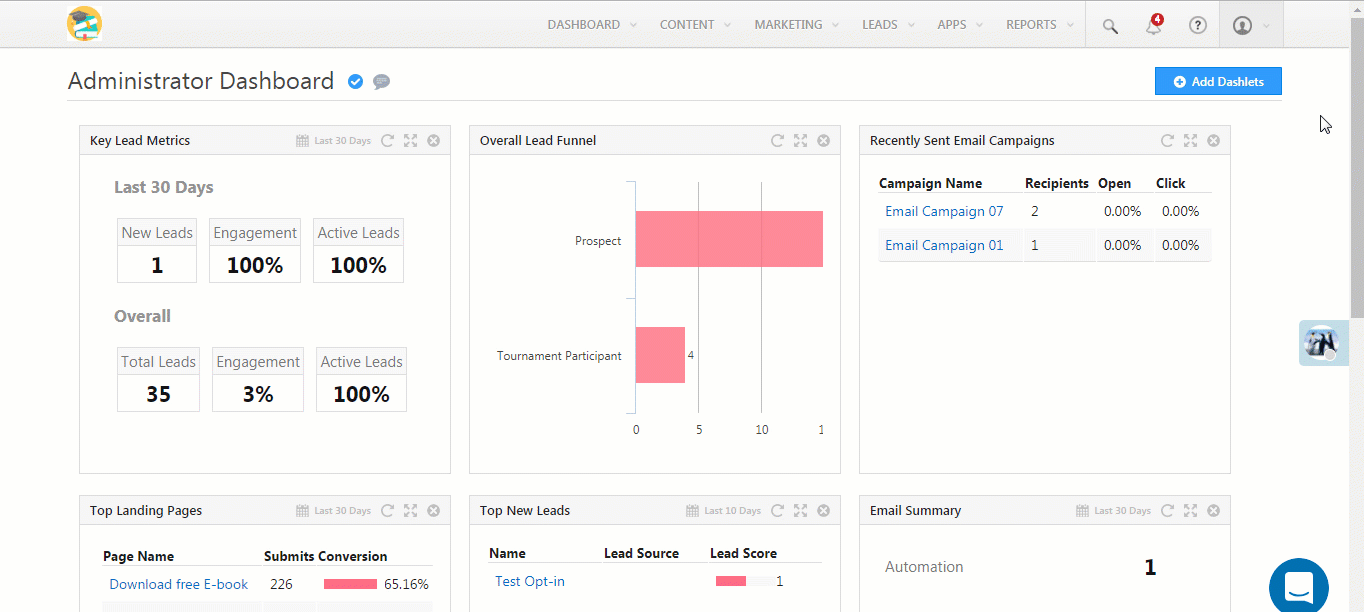
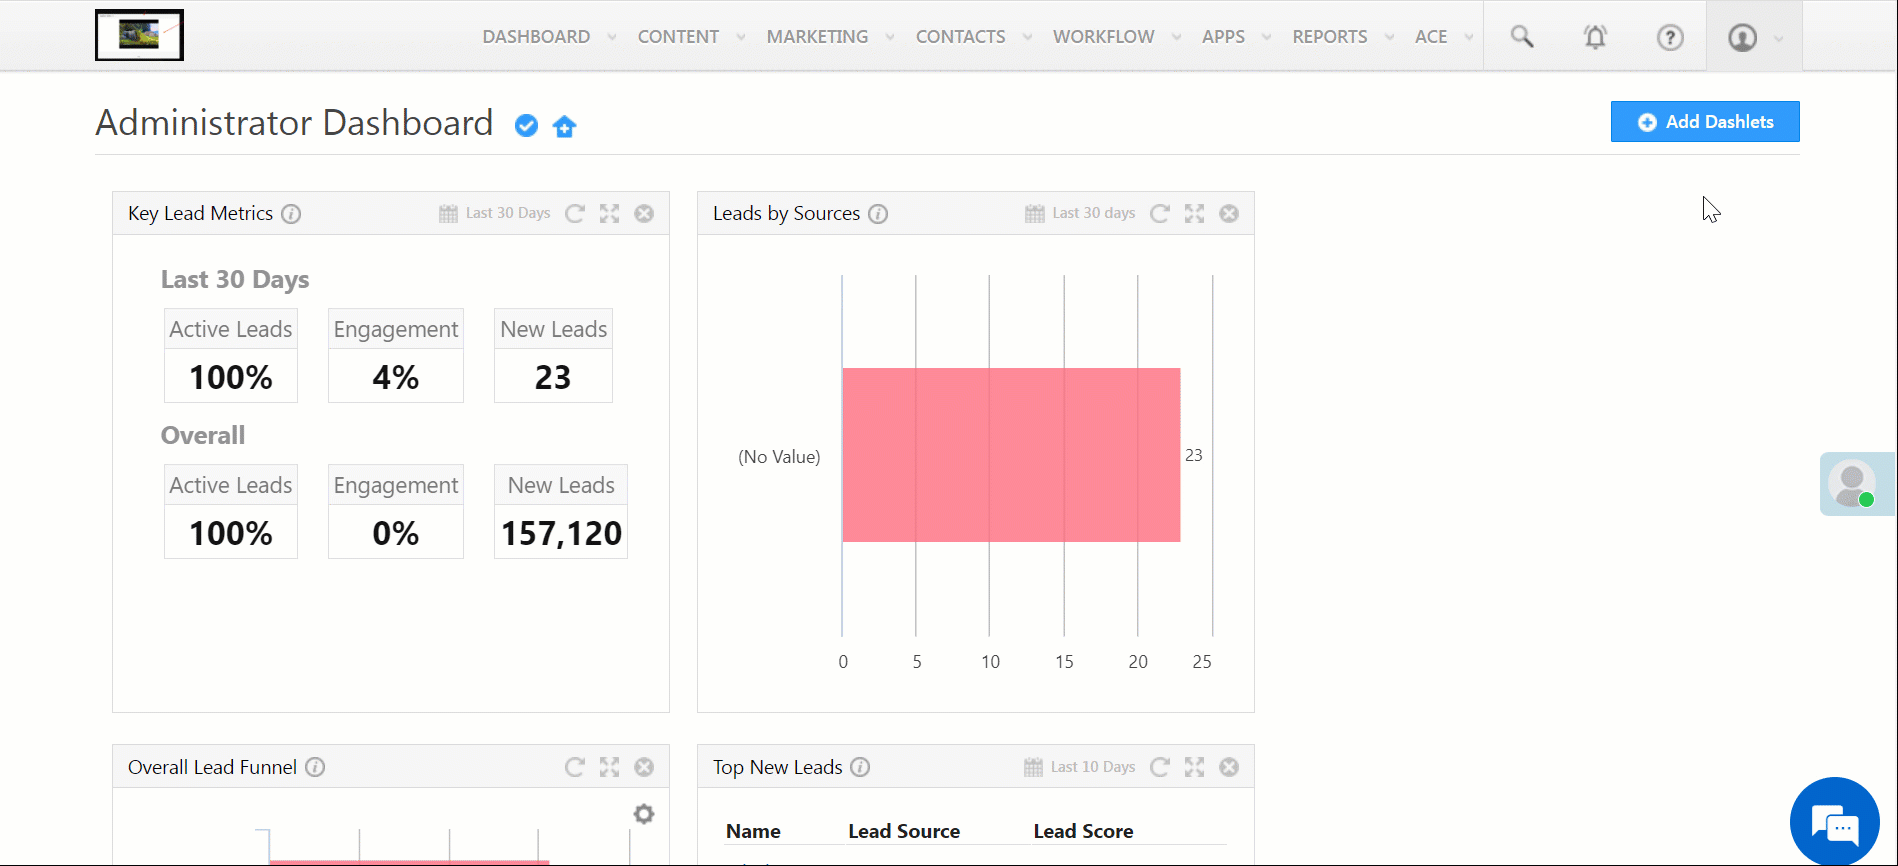
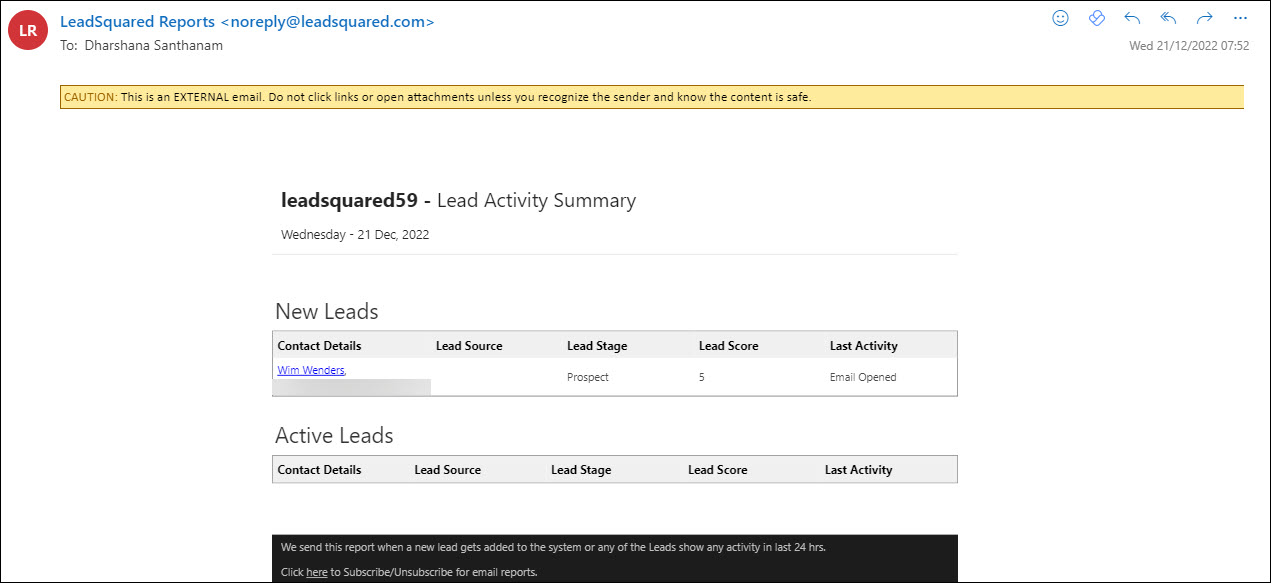
11. Dashboard and Reports

Dashboards present important marketing and sales metrics related to your account. Your dashboard is the first page you see when you log in to your LeadSquared account. Each dashboard is customizable and comprises a number of dashlets or a custom report. LeadSquared’s reports help you track and manage the activities performed by the lead and your users, across all LeadSquared features. The reports available to you will depend on your user role and the permissions enabled by your Administrator.
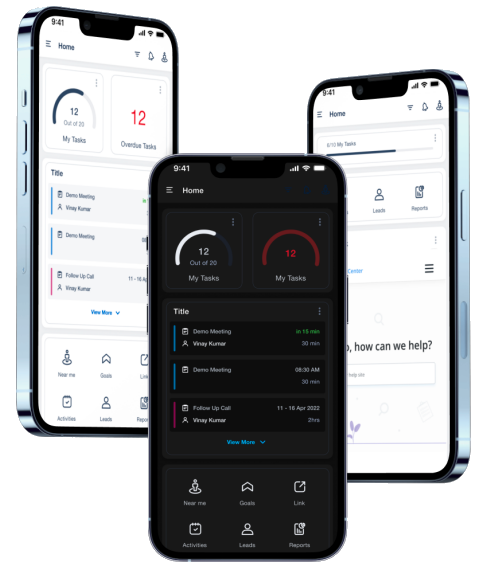
Help Article Description
Dashboard Customization View your call metrics, activity metrics, lead metrics, and task metrics
LeadSquared Reports Analyze marketing and sales business processes

Leadsquared - Sales User getting started


12. Mobile App

LeadSquared’s Mobile App is an end-to-end field sales solution that enables you to access CRM on the go. With the app, you can track the time spent on tasks, view nearby leads, and manage your sales activities efficiently.

Help Article Description
Journeys Field sales management feature for the mobile app
Manage Plans Create a Plan on your Mobile App
Field Sales Territories View and work within the territories assigned to you by your manager or administrator
My Trips Day-planning feature designed to boost your productivity by displaying the most efficient route
Location Tracking Your admins can track real-time location of the field sales team
Distance Travelled Report Your admins can track and monitor the distance travelled by field sales users
Task Timer Track the time spent on each task to record their activities
Near Me View all the leads and businesses located within your vicinity
Lead/Opportunity Level Check-In and Check-out Track the time a user spends on a lead or opportunity
Convert Speech To Text Record and add notes on their leads, opportunities, tasks, and activities on the go
Capture Text from Images Extract text information from important documents, and store this information against relevant lead fields
Track Calls with Opportunities Track phone call activities against opportunities in your LeadSquared account
Calls and SMS Using the Mobile App Make outbound calls and send SMS to leads directly from the LeadSquared Mobile App

getting started mobile


13. Support

For assistance with your LeadSquared account, please contact your administrator. Alternatively, you can email our support team at support@leadsquared.com with a detailed description of your issue.


Any Questions?

We’d love to answer your questions or hear your own unique use cases. Feel free to share your experiences in the comments section below.


How can I track who is visiting my website and browsing which pages?

You can track your website visits through the Website Visitor Report. In this report, you can see the Internet Service Provider (ISP) name, number of visitors and leads, their source, and the time since they visited. You must ensure that you have installed LeadSquared’s website tracking script in all pages of your website. For more information, see How To Deploy Visitor Tracking Script On Your Website?

Website Visitor Report

Navigate to Dashboard > Analytics > Website Visitor Report.

Website Visitor Report

  • Company Name: The ISP name from which leads are originating.
  • Website Visitor: Statistics of the number of visitors and leads. This will indicate the conversion rate.
  • Last Notable Activity: Date on which a visitor or lead performed a notable activity.
  • Source: The source from which the visitor or lead comes through.
  • Age: Time since the first notable activity was performed.
  • Actions: you can hide the particular IP or the company all together. If you hide IP address or the company, the report does not include the results of the hidden IPs and companies.

You can sort the reports by clicking on each of the headings of the report field. Sorted fields are marked with an arrow symbol.

Website Visitor Details

If you click on the required ISP name, you will see the website visitor details page. Here you will see the how many visitors visited how many pages of your website. You can see the first visit and the last visit dates. In the Timeline tab, you will see the visitor, the notable activity performed and the lead score attained. Here you will see the email address if the visitor is already a lead in LeadSquared, else it is displayed as Visitor.

Website Visitor Details

In the Page Visits tab, you will see the pages visited and the  time visited on each page by the visitors.

Pages Visited

How can I track Landing Page visits in Google Analytics?

Apart from analyzing the Landing Page Report, you can also track visitor trend using Google Analytics. To track the landing page visits in Google Analytics, you must paste the analytics code when you are creating the landing page in LeadSquared. You use this article to learn how to track landing page visits in Google Analytics.

Prerequisites

  • You have completed Step 1 , Step 2 , and Step 3 of creating a landing page in LeadSquared.
  • You have a Google Analytics account.

Procedure

1. Log in to your Google Analytics account. Navigate to relevant website data page. Click on the Admin tab.

Admin

2. In the Analytics Administration page, click on Tracking Info.

Tracking Info

3. Copy the tracking code present in box. You have to paste this code in Step 4 of creating a landing page. In this step, space is provided to paste google analytics code. You must paste it in the Embed JavaScript box.

Google analytics script

4. Now, you can track visits in Google Analytics.

5. In the Google Analytics home page, navigate to Traffic Sources > Search > Campaigns. Here you can see the various ad campaigns in which your landing page is present. In this page, you can view the Visits, Pages/ Visits and also the New Visits.

Report

How to invoke Google conversion code after form submission?

You will need to invoke the Google Conversion Code to track the conversions from Google Ads. That is, when visitors click on your Google Ads, and submits on the landing page, a conversion takes place. By tracking these conversions, you’ll know which ads, keywords and campaigns bring you business. This helps you invest more wisely in the best ones and, likely, boost your return on investment(ROI).

Conversion Tracking works by adding a single snippet of HTML and JavaScript code to your webpage. Specifically, this snippet is placed on the page your customers see after they complete a conversion, such as a Thank you page they see after submitting on a landing page.

You use this article to obtain a Google Conversion Code of your ad and then, use the code in LeadSquared to track conversions.

1. Log in to your Google AdWords account. Navigate to Tools and Analysis > Conversions.

Conversions

2. Click on the Conversion button to obtain the code for your Google Ad.

Add Conversions

3. In the New Conversion page, enter a conversion name and select a relevant source. Save it to continue.

Conversion Name

4. Next, select the conversion category based on your requirement, and choose the markup language. Retain default values for other options. Save it again to continue.

Conversion Category

5. Select the I make changes to the code radio button. You will see the conversion code. Copy this conversion code.

Conversion Code

6. You must paste this code in the Thank you page, or the page to which the visitors are re-directed to after they submit on the landing page. In Step 3 of creating a landing page,there is an option available for you to redirect the landing page visitor to an external URL. In the same page, you can paste the above code in the Javascipt box.

step-4Click here to see some addition addition help articles from Google.

How to track the source of your Leads using Lead Source Report?

LeadSquared’s Lead Source Report allows you to view the source from which the leads are getting generated for your business. By analyzing the Lead Source Report, you can analyze which sources are working for you and which sources need better marketing.

Example: If social media is generating more leads than Email Marketing, then you can take the required steps to increase your company’s business from social media. Hence, Lead Source Reports are highly helpful in taking vital business decisions.

Lead Source Report

To access Lead Source report:

  • From the default dashboard, go to Reports -> Reports Home –> Lead Insights and click Lead Source Report. You can view the total number of leads present in LeadSquared in the specified time range. You can also view the different sources from where the leads are generated.

LeadSquared Reports

  • Click the desired lead source to view the leads coming from that source. You can see the list of leads from the respective source. In the image below, you can see the leads generated from the source LinkedIn-thank-you.html.

LeadSquared Reports

If you have leads generated from Pay Per Click ads, then you can view the leads based on the keywords that they have entered. In the image below, you can see the different key words entered by leads. Click the required keyword to get lead details.

LeadSquared Reports

Lead Source Report becomes particularly useful when you use Tracking URLs.

Tracking URL feature in LeadSquared allows you to use landing page in multiple marketing campaigns, such as on Facebook, Google Pay per click ads etc. By using tracking URL feature, you can accurately track lead source.
For more information on this, refer to How to use Tracking URL feature?

Help Video – Adding New Leads

This video demonstrates four different ways to add leads in LeadSquared.

https://leadsquared.wistia.com/medias/h59vai1xzt?embedType=iframe&ssl=true&videoWidth=640

How to Prevent Emails from Ending up in the Spam Folder

There are steps you can take to prevent your emails from ending up in your recipient’s Spam folders. We’ve listed some of the best practices you should follow –

Maintaining the Reputation

IP Address Warming

  • Spammers often create new IP addresses and send large volumes of unwanted emails. To safeguard against this, Inbox service providers (ISP) treat mail received from new or ‘cold’ IP addresses with suspicion and are also sensitive to initial email volume.
  • When you start to use LeadSquared’s email campaigns feature, the IP addresses assigned to you have never been used to send emails before. To build up a positive sender reputation, ensure better email deliverability, and prevent your emails from ending up as spam, it’s essential to warm up your IP.
  • To warm up your IP, start by slowly and methodically sending small volumes of email, and then gradually ramping up to moderate and higher volumes. The objective is to build up approximately 30 days of sending history and data to familiarize ISPs with emails coming from your new IP address.


Follow a Consistent Schedule and Email Volume

  • Email service providers (ESPs) and spam filters monitor sending behavior. Sudden spikes in email volume can trigger spam filters, especially if you haven’t been sending regularly. These spikes can be suspicious and lead to your emails being sent to spam folders or even blocked.
  • Consistent sending patterns help them identify you as a legitimate and reliable sender, ultimately improving your sender reputation. This means your emails are less likely to be flagged as spam and more likely to reach inboxes. Monitor the health of the domain and IP reputation regularly.


Purge Your Lists

  • Keep your email lists clean. Remove old and unverified email addresses.
  • Regularly purging your list helps maintain a clean and up-to-date database of active subscribers. This ensures your emails reach real people who are interested in your content.
  • While purging your list might seem counterintuitive, it’s essential for long-term success. Remember, a smaller list of engaged subscribers is far more valuable than a large one with many inactive or uninterested recipients. By regularly purging your list, you can ensure your emails reach the right people, improve deliverability, and maximize the impact of your email marketing efforts.

LeadSquared - Purge Your List


Segmentation of Lists

By segmenting your list, you can tailor your emails to specific subscriber interests and demographics. This leads to more relevant content that resonates better with recipients.

LeadSquared - Segmentation of Lists


Send Emails Only to Interested Users

  • While buying mailing lists is an obvious no-no, you should also be careful about emailing people who didn’t give you explicit permission to do so.
  • When users receive emails, they didn’t sign up for or no longer want, they are more likely to mark them as spam. This negatively impacts your sender reputation, making future emails more likely to be filtered as spam for everyone on your list, even those who want your messages.


Avoid Spam Traps and Blacklists

  • Negative Impact on Sender Reputation
    • Spam Traps – These are email addresses specifically designed to catch spammers. Sending emails to them signifies poor list hygiene and potentially unethical practices, leading to a damaged sender reputation. This can significantly lower the deliverability of your future emails, even for legitimate recipients.
    • Blacklists – These are lists of IP addresses or domains identified as sources of spam. Getting blacklisted can severely hamper your email deliverability, potentially causing emails to be blocked entirely. This can significantly disrupt your communication and marketing efforts.
  • Increased Risk of Filtering and Blocking – Both spam traps and blacklisted addresses are used by email service providers (ESPs) and spam filters to identify suspicious senders. If your emails hit even a few spam traps, it can trigger filters to flag your future emails as spam, sending them to spam folders or even blocking them altogether.


Clear Information about Unsubscribing

If someone is frustrated and can’t find an Unsubscribe button, they’re more likely to just mark your email as spam. This hurts your sender reputation with email providers like Gmail and Outlook, which can then start filtering your emails to spam folders for other recipients as well. An easy unsubscribe option gives them a clear path to opt-out, reducing the chance of a spam complaint.

LeadSquared - Unsubscribe from Email Campaign link

Always add the Mailing preference link. This lets recipients choose exactly what kind of communication they want from you and how often they receive it. Everyone appreciates control, and offering this option can keep subscribers engaged for much longer.

LeadSquared - Mailing Preference Link


Focusing on Infrastructure

Authenticating with DKIM | SPF

  • The DKIM record allows LeadSquared to digitally sign your emails for your domain. Without this record, LeadSquared’s email provider still adds this to your emails, but it’s signed for the sending party’s sending server instead of your domain. For more information on this, see Email Link Domain and DKIM/SPF Settings for LeadSquared.
  • When you add the SPF record to your domain, that allows receiving email servers like Hotmail, Gmail, Yahoo, and others, to verify the identity of your emails for the SenderID authentication. If somebody else such as LeadSquared is sending Emails on your behalf, then that SPF record explicitly gives permission to LeadSquared to send email on your behalf.


Use Double Opt-in

  • Spammers often use fake email addresses. With double opt-in, only confirmed addresses make it to your list, minimizing bounces.
  • Double opt-in confirms a subscriber’s genuine interest. People who take the extra step to verify are more likely to be engaged with your content, leading to higher open rates and click-through rates.

LeadSquared - Welcome Email


Shared versus Dedicated IP Address

  • Shared IP for Low Volume – Shared IPs are a good starting point for low-volume senders or those with a good reputation established elsewhere. They’re cost-effective and don’t require initial reputation building.
  • Dedicated IP for High Volume and Control – If you send high volumes of email or prioritize maximum control over reputation, a dedicated IP is the way to go. It allows you to build your sender reputation from scratch and avoid the risks associated with other users’ actions.

Please reach out to support@leadsquared.com for assistance in upgrading to a dedicated IP.

Content Optimization

Use Branding and Personalization

  • Branded and personalized emails are more likely to resonate with subscribers, leading to higher open rates and click-through rates. Email providers track these metrics, and consistent engagement signals that your content is relevant and wanted.
  • Please ensure that mails can be sent with Sender name like “Shibani from LeadSquared” or “Team Leadquared” instead of lead owner names for the user to identify the mail and act on it. Avoid using no-reply in the email or sender name.

LeadSquared - Change Sender Name in Email Campaign


Send Welcome Email

If someone signs up for your list but never receives a welcome email, they might forget why they subscribed and end up marking your future emails as spam. A welcome email clarifies who you are and what they can expect, reducing confusion and the likelihood of spam complaints.


Keep the subject of the email relevant

The subject line is the easiest way to get your email filtered as spam. Keep it short and simple. Avoid heavy usage of emojis. Don’t use spammy words.


Send Relevant Content

  • If your content is consistently relevant and subscriber-focused, it helps build a positive sender reputation. This good reputation translates to your emails being less likely to be filtered out by spam filters.
  • If subscribers consistently receive emails that don’t align with their interests, they’re more likely to mark them as spam. A rise in spam complaints can significantly hurt your sender reputation and deliverability.


Making Optimized Content

  • Include a text version of your email – Including a text version of your email in HTML emails is the easiest way to avoid emails ending up in the spam folder. You are greatly reducing the chances of your email being filtered as SPAM.
  • Avoid spam trigger words and phishing phrases – Some phrases like “Once in a lifetime opportunity“, “Click here“, “Make billions“ and so on would easily catch the attention of spam filters. Also avoid too many exclamation marks and using all caps.
  • Avoid large attachments and certain attachment types – Avoid executable attachments such as .exe, .zip, .swf, etc. As a general rule, you shouldn’t send attachments to people on your list that aren’t expecting them. You can instead include a link in the email to download the file/attachment.
  • Code your HTML email properly – If your HTML Email code is bad, you appear as a spammer. Broken images, missing tags, and non web-safe colors are some of the things spam filters look for.
  • Maintain a good text to image ratio – Usually spam filters cannot identify images, and so if you include more images, it is likely to end up in the Spam folder. Optimal Text to Image ratio is 60:40.

LeadSquared - Text to image ratio in Email Campaign

  • No use of shortened URL and no broken URLs.
  • Be compliant with the CAN-SPAM Act: The CAN-SPAM Act, a law that sets the rules for commercial email, establishes requirements for commercial messages, gives recipients the right to have you stop emailing them, and spells out tough penalties for violations. Here are a few points to help you stay compliant –
    • Don’t use false or misleading header information.
    • Don’t use deceptive subject lines.
    • Identify the message as an ad.
    • Tell recipients where you’re located.
    • Tell recipients how to opt-out of receiving future emails from you.
    • Honor opt-out requests promptly.
    • Monitor what others are doing on your behalf.
Note: Please reach out to Leadsquared Support team for assistance in improving your email deliverability.


Any Questions?

We’d love to answer your questions or hear your own unique use cases. Feel free to share your experiences in the comments section below.

Can I use a Landing Page in multiple types of marketing campaigns?

Yes. You can use the landing page in multiple campaigns. You would ideally do so if you want to track leads from a particular campaign. For more information, see How to use Tracking URL feature?

Domain Settings for Email Links and DKIM/SPF Settings

1. Feature Overview

When you send emails to your prospects with links to web pages, we encode them so we can track who clicked on your emails. After they click on the links if they visit your website or landing pages, we further track their visits on your web pages. However, this tracking will work only if you ensure that you modify your DNS settings as described in this article.

Note: These modifications are necessary to accommodate the security restrictions of browsers. If we embed a link of our domain in your email, leads would visit your website from a domain different from yours (LeadSquared’s domain, for example – e.gtolink.in). The browsers would then prevent us from tracking the leads.

This article also explains how you can configure the DKIM/SPF settings in your LeadSquared account.


2. Prerequisite

You must be the Administrator or a Marketing User of your LeadSquared account.


3. Add CName Records in Your DNS

To ensure we are able to track, we recommend that you add a CNAME setting in your DNS server which will essentially be:

click.yourdomain.com pointing to e.gtolink.in*

 Type  Host  Data
 CName  click.<mydomain.com>

where mydomain.com is replaced by your domain’s name (e.g., leadsquared.com).

e.gtolink.in
or
e-in21.gtolink.in
or
e-in22.gtolink.in
or
e-us11.gtolink.in
or
e-ir31.gtolink.in
or
e-ca12.gtolink.in

Once this setting is done, we will encode the links in your emails pointing to click.mydomain.com instead of e.gtolink.in.  This will not only ensure tracking but also make your emails look professional.

Note: e.gtolink.in may also be e-in21.gtolink.in, e-us11.gtolink.in or e-ir31.gtolink.in depending on your domain.


4. Confirm New Domain on LeadSquared

Once the CName records are added in your hosting account, confirm the new domain in your LeadSquared account.

  1. Navigate to My Profile>Settings>Lead Tracking>Email Link Domain. You can view your current domain for email links on this page.
  2. Once the CName is live, the connection status on the Email Link Domain page gets updated. Now, click Confirm New Domain.

LeadSquared - Email Link Domain


5. DKIM/SPF Settings

DomainKeys Identified Mail (DKIM) helps verify that the sender’s server is legitimate and authorised to send the email. Sender Policy Framework (SPF) helps verify that mails claiming to be from your organisation are sent from one of your IP addresses. These settings help in avoiding spam mails being sent in your organisation’s name.

  • For DKIM/SPF cName records, please reach out to your account manager or support@leadsquared.com
  • After you get the cName records, add them to your DNS.

Note:

  • If you have different domains for your website and emails, the Email link domain settings are updated in the website domain and DKIM/SPF settings are updated in the Email domain. We suggest using a single domain for both websites and emails.
  • If you are unable to create CName records in your Domain Service Provider, contact support@leadsquared.com.


Any Questions?

We’d love to answer your questions or hear your own unique use cases. Feel free to share your experiences in the comments section below.

Can a landing page visitor place an order (like buying a product) using LeadSquared?

Yes. We have enabled sending the form data to the “redirect URL”.  We support both POST & GET based on what is required.  So you can use this feature to integrate with your automated user sign-ups, your own apps which require visitor data or even integrate with payment processing gateways like Paypal.

You can view this feature in Step 3 of the landing page wizard. Click on Is redirected to a URL button. Enter the relevant URL in the space provided. Select the Also Include Form Data check box. You can use either the GET or POST request-response. For more information on GET and POST methods, refer to HTTP Request Methods.

GET and POST