Capturing UTM Parameters

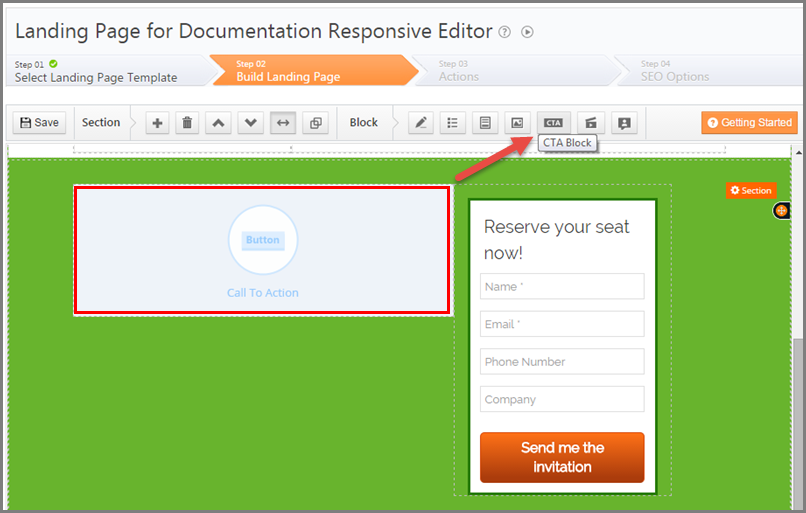
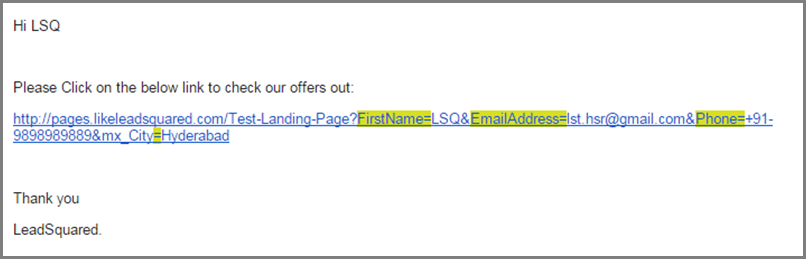
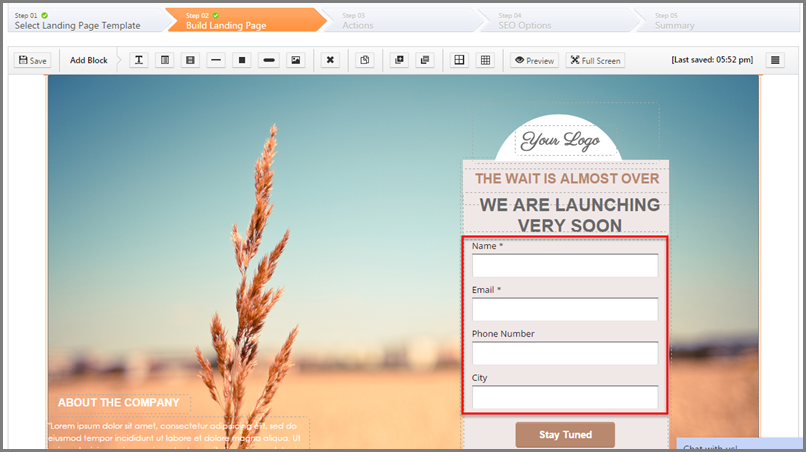
LeadSquared allows capturing value of UTM Parameters from URLs where the underlying page is a LeadSquared Landing Page. It can be a full landing page or one having just landing page ‘Form’ of LeadSquared.

If you are new to concept of UTM parameters, please check this article.

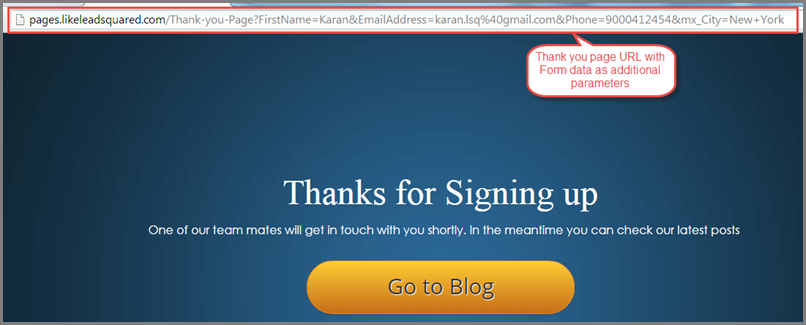
A typical URL with UTM parameters will be like:

http://pages.myleadsquared.com/Parallax-Example1?utm_source=PPC&utm_medium=adwords&utm_campaign=Apr2014&utm_content=none&utm_term=Landing%20Page&utm_device=mobile&utm_network=airtel

This URL contains following parameters:

  1. utm_source:  The values in this is captured in “Lead Source” field of Lead record in LeadSquared
  2. utm_medium: The values in this is captured in “Source Medium” field of Lead record in LeadSquared
  3. utm_campaign: The values in this is captured in “Source Campaign” field of Lead record in LeadSquared
  4. utm_content: The values in this is captured in “Source Content” field of Lead record in LeadSquared
  5. utm_term: The value of this field will be captured in lead field shows schema name is mx_utm_term.
  6. utm_device: The value of this field will be captured in lead field shows schema name is mx_utm_device.
  7. utm_network: The value of this field will be captured in lead field shows schema name is mx_utm_network.

For the first 4 parameters (utm_source, utm_medium, utm_campaign, utm_content) are capture by LeadSquared automatically in the corresponding system created lead fields (Lead Source, Source Medium, Source Campaign, Source Content).

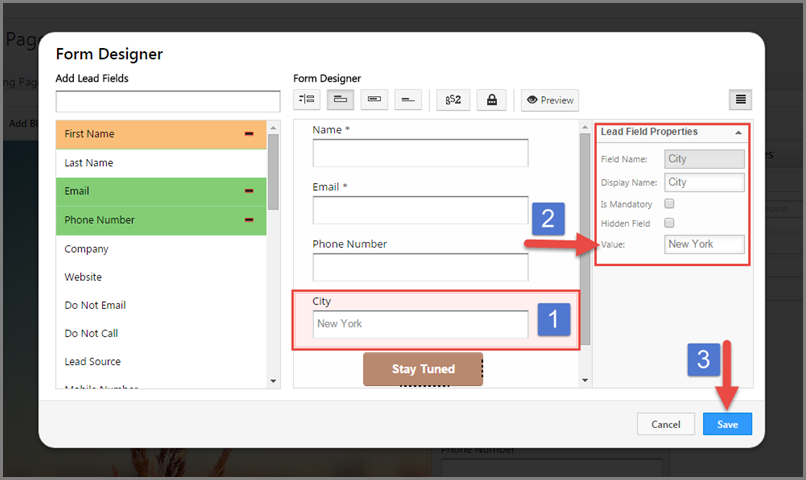
To capture other, you should create corresponding Custom Fields yourself.

  • the custom field must have the same name as url field
  • the custom field name must start with “utm”  (or UTM or Utm — case does not matter)
  • it can be with or without underscore (“_”)
  • it is not case sensitive

For example, the custom field for utm_term URL parameter can be “UTM Term” or “Utm_Term” or “utm_Term” etc.

A custom field has two names “Display Name” and “Schema Name”.  The schema name for custom fields with Display Name “My Custom Field” will me “mx_My_Custom_Field”.  “mx_” is a prefix that indicated it’s a custom field and then the display names are combined using underscores.

For custom utm parameters, LeadSquared looks for match between URL parameter name and schema name of the field.

Schema Name

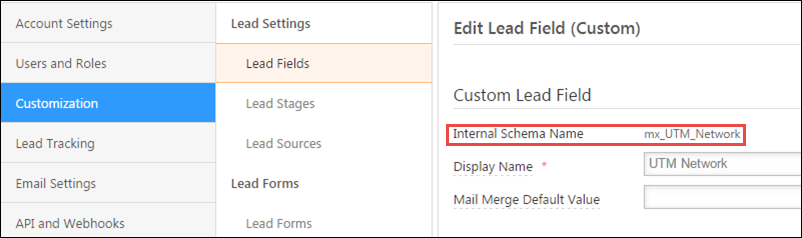
For example, for a URL parameter “utm_network”, LeadSquared will look for field having schema name as “mx_utm_network” (matching is not case sensitive).

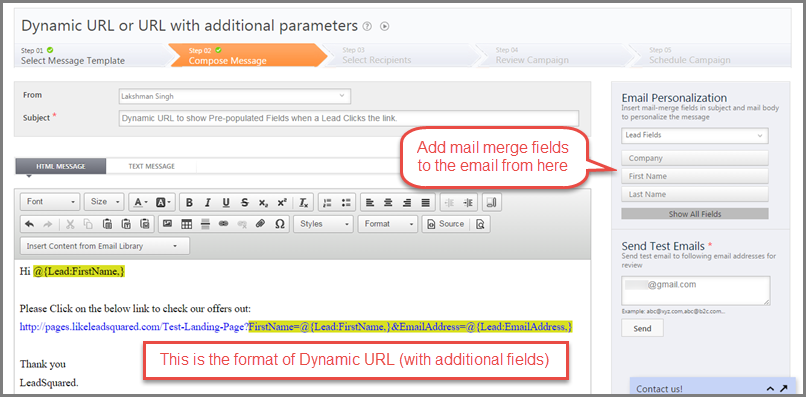
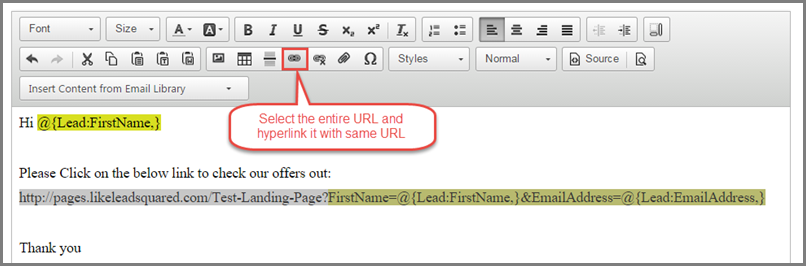
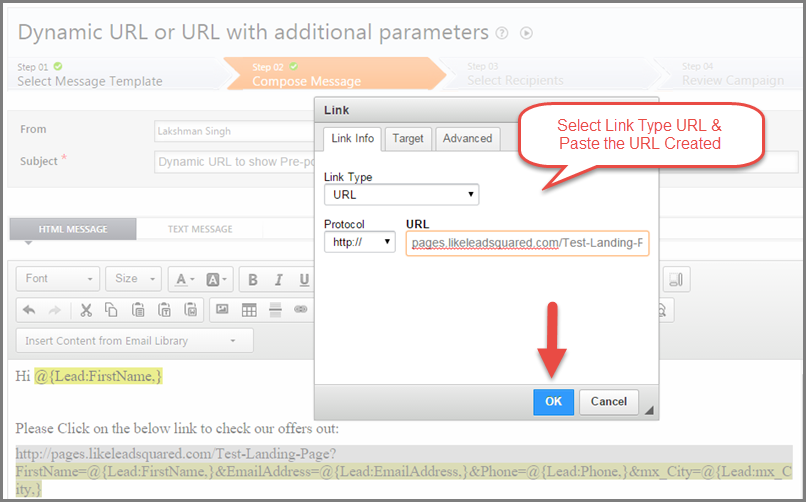
Once you have created custom fields, you can build/update URL accordingly. An example:

http://pages.myleadsquared.com/Parallax-Example1?utm_source=PPC&utm_medium=adwords&utm_campaign=Apr2014&utm_content=none&utm_term=Landing%20Page&utm_device=mobile&utm_network=airtel

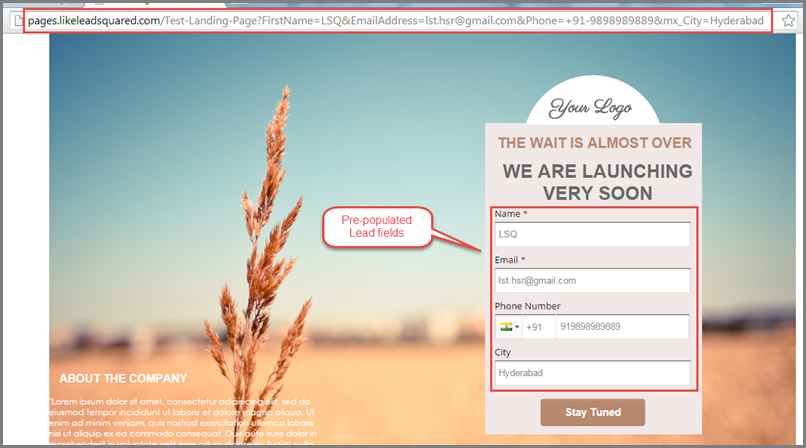
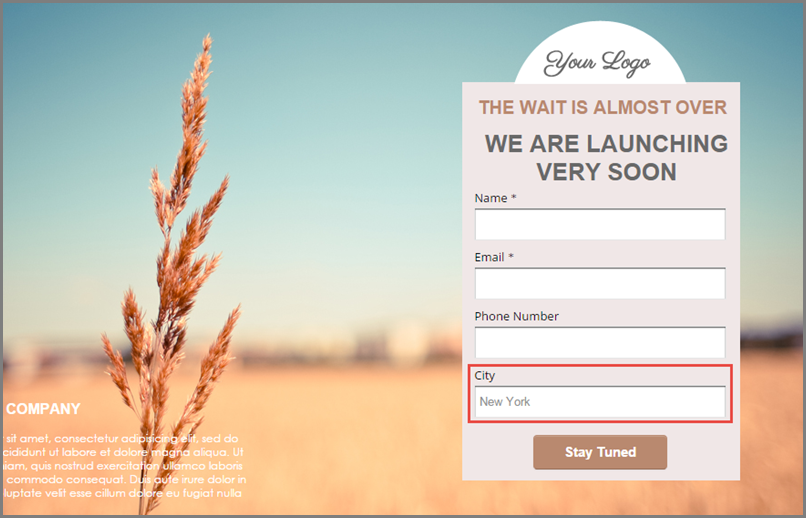
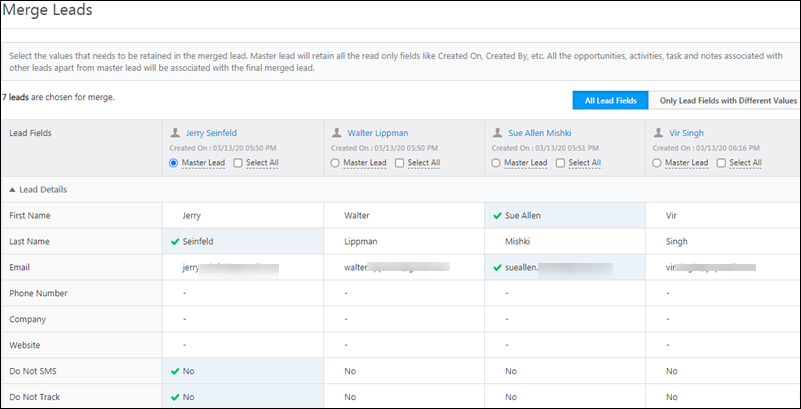
Submission on such URL will result in lead record similar to:

utm captured data

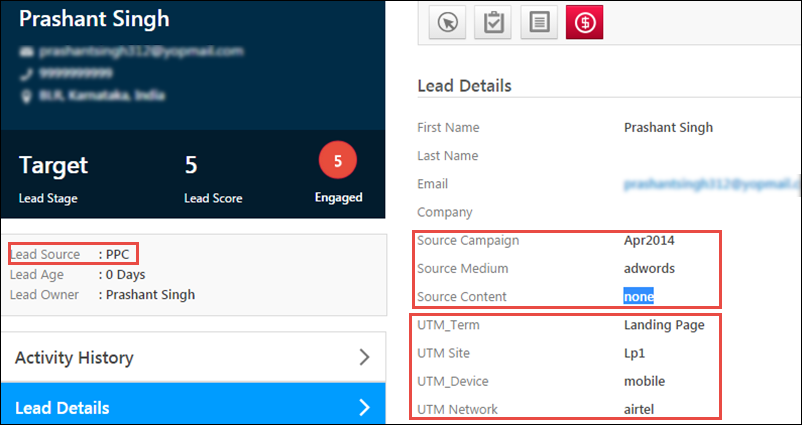
Why are UTM parameters not being captured in LeadSquared?

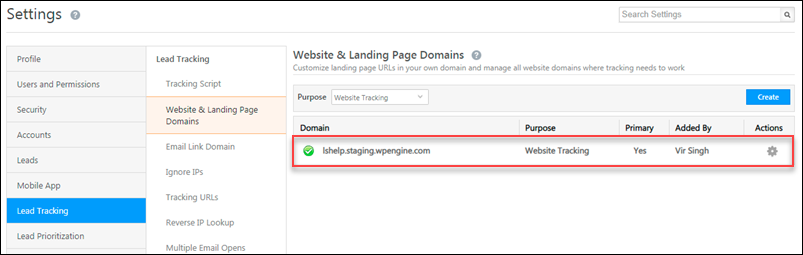
Ensure you’ve configured UTM parameters on your website and correctly installed the LeadSquared Tracking Script. If the issue still persists it may be because your web tracking license limits are exhausted –

  1. Navigate to Settings>Profile>Billing and Usage.
  2. Under Website Tracking, check the Max Web Events and Web Event Tracking sections. If you’re limits are exhausted, you need to purchase more licenses.
Note: UTM parameters are not captured on a visitor’s first visit to the website. The LeadSquared tracking script captures UTM parameters only when a lead is identified (e.g., via form submission or tracked event). If a user visits the site for the first time without filling out a form, their UTM parameters will not be stored.

LeadSquared Billing and Usage

Can I update system fields for UTM parameters (e.g., Source, Campaign, Medium) through Landing Pages?

No, system fields for UTM parameters cannot be updated through Landing Pages. However, you can capture UTM values by creating custom fields and mapping them accordingly.

Quick Search

1. Feature Overview

The Quick Search feature allows you to search for leads from the Manage Leads page using text-based queries. You can find leads by entering full words, partial words, multiple keywords, excluded terms, or exact phrases in the search box.

Quick Search supports multiple search formats to help retrieve leads based on names, email addresses, locations, company names, or other lead field values. This makes it easier to locate specific leads without manually applying filters or scanning through lead lists.


2. Prerequisite


3. Quick Search

To perform a quick search, you can click Search on the Manage Leads page.

leads quick search


4. Full Word Search

If you enter a full word in the search box (e.g., a city, first name, etc), the Manage Leads page will display all the leads that have the word as one of their values.

For example, if you enter “Sharma” in the search box, you will receive all the leads that have the word “Sharma” in any of their lead details.


5. Partial Word Search

Format: *

You can search for leads in your account with partial words by adding and asterisk (*) after the word. Your page will display all the leads associated with that partial word.

For example, if you enter Mich*, you will receive leads with Michael, Michelle, Michigan, etc as values in the lead details.

Note:

  • The asterisk (*) must be entered after the word. If not, no results will be displayed.
  • This feature is not supported for ESS tenants.


6. Multiple Word Search

Format: ++

You can search for leads using a combination of words by adding a plus sign (+) before each word.

For example, if you want to find John from California, you must enter +John +California in the search box.

Note:

  • You can use his method to search for a full name since it is the combination of First Name and Last Name.
  • If you try searching for a combination of words without using the given format, your page will display all the leads with either of the values entered. E.g., if you search for John Walters, you will get different leads with the name, John or Walters as one of their values.


7. Filter Leads

Format: +

You can filter out leads by entering a combination of words with a minus sign () before the word you don’t require in the lead field.

For example, if you want to find a lead with the name Sharma who is not in Mumbai, you can search for +Sharma -Mumbai.


8. String Search

Format: “”

You can search for a specific string of words by enclosing it in double quotes.

For example, if you want to find a lead working at Apple Inc., you should search for “Apple Inc.“.


9. Troubleshooting

1. I’m searching the lead’s ‘Secondary Email Address’ field but I’m unable to correctly retrieve the lead.

Since the ‘Secondary Email Address’ is a text type field (String), enclose your search within double quotes. For example “johndoe@example.com”.


Any Questions?

Did you find this article helpful? Please let us know any feedback you may have in the comments section below. We’d love to hear from you and help you out!

Add a Conversion Button to Your Landing Page

You can use a Conversion Button directly on a landing page besides the conventional way of using it in a form. The purpose of this would be to redirect the user to your company’s website, or to allow the user to download any document, or may be even to encourage users to try out your company’s product or service.

Procedure:

To Add a Conversion Button or Call To Action(CTA) button in your LeadSquared Landing Page:

If you are using Responsive Template/Designer follow these steps:

1. In Step 2 of creating a Landing Page:

a) Select the Section on the page/canvas where you want to add a CTA button.

b) Click on CTA Block from the Tool bar to add it to the required Section.

CTA in Responsive designer

2. To customize the CTA button double click on it or click on the block to see the block settings icon appear on top right corner of the block. Hover the cursor on the block settings to see list of options & click on Edit option.

Edit CTA block

CTA Block Designer opens.

3. Select one of the available Templates.  You can edit/customize the Text and Button here by double clicking on each element separately. 
RESP CTA TEMPLATE

4. Double click on the Text-element to see HTML Editor where you can create nice headline for the button. Save the headline once it is ready.

HTML Editor for CTA headline

5. Double click the Button to see Button Designer.

a) In Button Properties panel you can Name it and customize the Text on it, provide a hyperlink and set the Target window for the redirect web page on button click.

Button Designer edited
b) In Button Style panel you can customize the look and feel of the button. You can play with the options for designing the Button and the Text on it to get a desired CTA button on the landing page.

Click Save once the button is customized.

button style
6. You can also customize CTA Block using the block properties panel on the right of the Landing page Designer.

CTA Block properties

For help with the customizing the block properties and a complete understanding of the responsive editor/designer refer to Building Responsive Landing Pages

Building Responsive Landing Pages using LeadSquared.   (Downloadable PDF guide)

Slideshow on building responsive landing pages.  (Slideshare slideshow) 

Add a responsive slider content in Landing pages

You can now add a responsive slider with images or text in LeadSquared responsive landing pages.
Note that you have hosted the images and have the URL of it. Please contact support team if you need any assistance with the image URLs.

Prerequisites:

• You have logged in to LeadSquared.
• You have uploaded the images used for slider and have the URL ready.
• All the images used for slider are in same dimensions.
• You are using Responsive landing page editor to perform this operation.

Procedure:

• Choose Responsive landing page template/blank template.

• Add a HTML block on the top of the landing page where you need the slider.

• Double click the block to open the editor, click on  Source-in-landing-pages 2 to go to the HTML source view of the html block.

Download below attached code and paste it there.

• Customize the code by replacing sample image URLs with your image URLs.

• Add your desired captions at the sample caption text. (You can remove it, if not required)

• Click ‘Save’ after all the changes are done.

Below is the illustration of code:

Responsive slider

Click here to download the code.

The image indicators should be added in landing page Style Editor.
• Click on ‘styleeditorStyle Editor’ and select ‘StyleSheet 2’
• Add these two codes at the bottom of the existing code.

• Use below code to add color codes for indicators:
.carousel-indicators .active { background-color : red;}.carousel-indicators li { background-color : green; } 

• Use below code to add position of indicators:
.carousel { position:relative;}.carousel-indicators { bottom: -40px; }

• Click ‘Save’ and publish the landing page.

Note:
1. First item’s Class tag and List (li) tag should be marked Active
Eg:- ” {class=”item active”} and {li class=”active”} “;
2. The Width of the image is set as 100% in the above code and it can be changed based on your requirement
Eg: max-width:640px
3. You can also add captions to the images by replacing text in ‘Add your desired caption’ in the attached code.

Get Sitemap of Landing Pages

You should get sitemap of your landing pages in LeadSquared and submit it in your Google Webmaster account to make the pages indexable & searchable.

Click here to know about Google Webmaster 

By informing Google Webmaster  about your landing pages, your pages will start being indexed by Google and they may gradually start appearing in search results on relevant keywords.

Prerequisites:

  1. Your LeadSquared landing page domain setting is done and complete. Check: How to Publish Landing Pages within your Domain Name? 
  2. You have Admin or Marketing User role in LeadSquared
  3. There should be at least one published landing page in your account

Steps to generate the sitemap for landing pages

Step 1: Navigate to Marketing  -> Landing Pages and publish at least one landing page. If you already have published pages, just un-publish and republish at least one.  Note: This step is required since publishing a page only triggers fresh generation of sitemap file.

Step 2: Select “Access Sitemap”:

Access Sitemap

If you see any error, check the “Common Errors while Generating Sitemap” section in this article.

Step 3: If sitemap file generation is successful, XML file will open up in a new browser tab. It shows the sitemap.xml file for your landing page sub-domain.  In the screenshot shown below landing page sub-domain is http://pages.myleadsquared.com and sitemap URL is http://pages.myleadsquared.com/sitemap.xml .

SitemapXML

Step 4: Now login to your Google Webmaster account and add your landing page sub-domain as a site.  The example below shows adding pages.myleadsquared.com as a site.

Add Site

Add Site popup

Step 5: Submit the sitemap file. You just need to  type “sitemap.xml” in the textbox.

submit sitemap

Step 6:  Test the sitemap file and make sure there are no errors.

Test Sitemap

The sitemap is successfully submitted.

Common Errors while Generating Sitemap

You encounter one of the following errors if your landing pages are not published recently or cName setting is not done properly.

1)  404- File or Directory Not found:   Unpublish and republish at least one landing page to get rid of this error.

Server Error - Landing Page needs to be republished

2)  404- Not found:   This happens when cName setting is updated in LeadSquared but the cName record in DNS does not exist. Please check your DNS and make sure that the cName associated with landing page sub-domain is up to date. Please check: How to Publish Landing Pages within your Domain Name? 

cName setting is not working

3) The specified key does not exist: If you see an XML message with heading starting as “This XML file does not appear…”, it means the LeadSquared Landing Page domain setting is not done. Please check: How to Publish Landing Pages within your Domain Name?  to complete this setting.

cName Setting not done

How to pre-populate Landing Page Form fields?

You can auto-populate or show pre-populated Form fields in Landing Pages when a lead clicks the URL links you provide in Email Campaigns or one to one emails to leads.

This can be achieved by adding additional parameters to the Landing Page URL while drafting or composing an email in LeadSquared. URLs with additional parameters are often termed as Dynamic URLs.

When a lead clicks on the URL links in the email, the lead details will appear in the Form fields without leads having to type-in their details.

Procedure:

1. The basic URL of your landing page will be of the form:

http://subdomain.yourdomain.com/Landing-page-Name. Lets call it Base URL of the Landing page.

For example http://pages.likeleadsquared.com/Test-Landing-Page.

2. To the base URL add parameters using Mail-Merge fields available in Email Personalization section in the Email Composer, while drafting the email.

Email with Dynamic URL

Dynamic URL:

Dynamic URL enlarged view

3. Understanding Additional Parameters added to the URL:

A dynamic URL can be built using  5 blocks/elements. They are:

a. Base URL – The URL of the Landing Page itself          b.  ? (A Question Mark)         

c. Schema Name of the Field          d. = (Is eqauls to)         e. & (Ampersand)

Here is an example of a dynamic URL with one additional parameter added.

http://pages.likeleadsquared.com/Test-Landing-Page?FirstName=@{Lead:FirstName,}


4.
In the above URL you can see ” ?  after the landing page name and ” FirstName=@{Lead:FirstName,} ” following it.

FirstName is the Schema name of leads first name field.

And @{Lead:FirstName,} is its mail merge field added using Email Personalization section.

5.  The Schema Name can simply be taken right from the Mail Merge field itself. Explained below.

Mail merge field @{Lead:FirstName,} : Here “Lead” specifies that it is a Lead field and “FirstName” is the Schema Name of Lead’s First Name field.

6. Quick steps to build a URL with additional parameters:

    A. Add Base URL in the email body.

http://pages.likeleadsquared.com/Test-Landing-Page

     B. After base URL place a question Mark ‘?’

http://pages.likeleadsquared.com/Test-Landing-Page?

    C. Insert/add mail-merge field of required Lead Field next to ? using Email Personalization section.

http://pages.likeleadsquared.com/Test-Landing-Page?@{Lead:FirstName,}

    D. Take the Schema Name from the Mail merge field and insert Schema Name= in between ? and @ in the above URL.

http://pages.likeleadsquared.com/Test-Landing-Page?FirstName=@{Lead:FirstName,}

    E. To add another parameter, place & (Ampersand) next to the first parameter and add SchemaName=Mailmerge field of the required Lead Field as shown below:

http://pages.likeleadsquared.com/Test-Landing-Page?FirstName=@{Lead:FirstName,}&EmailAddress=@{Lead:EmailAddress,}

Similarly you can add more lead field parameters to the URL in the same pattern.

For Example:

http://pages.likeleadsquared.com/Test-Landing-Page?FirstName=@{Lead:FirstName,}&EmailAddress
=@{Lead:EmailAddress,}&Phone=@{Lead:Phone,}&mx_City=@{Lead:mx_City,}

7. Once the URL is ready hyperlink it with itself in the email to make it clickable.

hyperlink Dynamic URL
Hyperlink Dynamic URL to make it clickable

The links in the email you send will now be clickabel and will pre populate the lead details in the form fields.
(Provided the lead details corresponding to the lead/leads are available in your LeadSquared Account)

What happens when a Lead receives an email:

The system replaces the mail-merge fields in the email by the actual lead data of respective leads receiving the emails.

Here is how the url link appears in the email:

received email

A click on the link leads to the landing page with pre-filled lead fields.

prefilled lead fields

In case there is no data in any of the fields for a lead, the field will be shown blank.

Capturing Leads from Website forms

You can capture Leads from your website in LeadSquared. There are three common ways of doing it:

  1. You can create and embed an LSQ Form Widget on your web page or landing page
  2. For WordPress sites:  Use LeadSquared’s Contact  Form 7 Plugin
  3. Use LeadSquared API to capture Leads

Embed LeadSquared Form Widget on your website

An LSQ Form Widget acts as a “lead magnet”. An example of a lead magnet is a special deal offered to customers in exchange for their contact details. It can be a discount code, webinar, white paper, ebook, template, inquiry form, or another resource.

With LeadSquared, you can create and embed an LSQ Form Widget on your web page or landing page and start capturing leads in minutes.

For WordPress sites:  Use LeadSquared’s Contact 7 Plugin

Other than Form Widgets, If you have a site built on WordPress, you can also use Contact Form 7 to capture Leads. Leads from Contact Form 7 can be captured in LeadSquared using our plugin for it.

Check this help article to use the plugin

Use LeadSquared API to capture Leads

If you don’t want to make any changes to your website and still want to capture leads in LeadSquared, you may use our APIs.

LeadSquared supports REST APIs, and we accept and return JSON data.

Step 1:  Get Access Key and Secret key of an Admin user of LeadSquared

Step 2: Get  lead meta data  using GET call on https://api.leadsquared.com/v2/LeadManagement.svc/LeadsMetaData.Get?accessKey=<accessKey>&secretKey=<secretKey>

Replace <accessKey> and <secretKey> with the value you got in Step 1.  Check the SchemaName of the fields from the data that you get. SchemaName is the internal name of the field that you will use in all your Lead API calls.

Step 3: Prepare data that needs to be posted as JSON. An example is given below.

[ { "Attribute": "EmailAddress", "Value": "john.smith@acmeconsulting.co" }, { "Attribute": "FirstName", "Value": " John" }, { "Attribute": "LastName", "Value": " Smith" } ]

Step 4: POST the data on –

https://api.leadsquared.com/v2/LeadManagement.svc/Lead.Create?accessKey=<accessKey>&secretKey=<secretKey>

Here are help articles on using APIs:

  1. API Overview
  2. Lead Management API
  3. Sample Code

‘Star’ your Leads

1. Feature Overview

The Star feature allows you to mark important leads from the Manage Leads page for quick access later.

When you star a lead, it is automatically added to the Starred Leads List, available under the Manage Lists page.

This feature helps you temporarily group and track leads without modifying lead data or creating manual lists. The Starred Leads List is automatically maintained based on your actions.


2. Use Case

You can use the Star feature to manage leads that require focused attention.

For example:

  • Star leads that require follow-up.
  • Access them collectively from the Starred Leads List.
  • After completing the required action, un-star the lead to remove it from the list.

This allows you to maintain a dynamic working list without creating additional manual filters or static lists


3. How to Star Your Leads

  • Select one or more leads on the Manage Leads page.
  • Click the Star option to mark them.
  • Starred leads are automatically added to the Starred Leads List.
    • Navigate to Lead Management>Lists>Starred Leads.
  • If you un-star a lead, it is automatically removed from the list.
  • The list updates in real time based on your actions.

You can star individual leads or multiple leads in bulk.

Note:

  • User-Specific Setting:
    Starring a lead is personal to the logged-in user. If you star a lead, it will appear as starred only in your account. Other users will not see the lead marked as starred in their login, even if they have access to the same lead.
  • Automatic List Management:
    The Starred Leads List is system-generated. You cannot manually add or remove leads from this list except by starring or un-starring them from the Manage Leads page.
  • No Impact on Lead Data:
    Starring a lead does not modify any lead fields or properties. It functions only as a visual and organizational marker.

how to star leads


Any Questions?

Did you find this article helpful? Please let us know any feedback you may have in the comments section below. We’d love to hear from you and help you out!

LeadSquared Reports

1. Feature Overview

You can use the LeadSquared Reports feature to analyze your marketing and sales business processes. It helps you track and manage the activities performed by the lead and your users, across all LeadSquared features. The reports available to you will depend on your user role and the permissions enabled by your Administrator.


2. Reports

To view all your LeadSquared Reports, follow these steps –

  1. Navigate to Reports>Reports Home.
  2. Click All Reports.
  3. Scroll through the list to find your report, or use the search bar.

Navigate to LeadSquared Reports

2.1 Pinned Reports

You can pin reports by clicking the LeadSqaured Pin report iconicon. Pinned reports will appear in the Pinned Reports section.

Leadsquared pinned reports

2.2 Report Tags

Additionally, you can organize and find your Reports through Tags. Reports can be tagged and re-tagged by Administrators –

  1. Click on the leadsquared reports 3 dot icon icon.
  2. Select Edit Tag(s).
  3. Select your tag(s).
  4. Click Save.

Leadsquared report tags


3. Save Reports and Schedule Delivery

You can save or bookmark a report and schedule its delivery at a later time –

  1. Navigate to Reports>Reports Home and select the required report.
  2. On the top right side of your window, click LeadSquared - Bookmark report.
  3. Enter the name of the bookmark and click Save.
  4. To view your saved reports, click .
  5. To schedule your report’s delivery, click .
  6. Enter the relevant details and click Create Schedule.

Save and schedule leadsquared reports


4. SIERA Reporting

LeadSquared SIERA is a new-gen reporting module that empowers users to generate custom reports and dashboards. If SIERA is enabled in your account, the listing page will comprise two sections: Reports and Dashboards. Additionally, you will have access to the Create Report and Create Dashboard modules within their respective sections. Reports created using SIERA will have a SIERA tag on the report card.

Siera

Moreover, the Report Builder in SIERA features the Expression Builder module, enabling users to create custom formulas for building reports.

expression builder nav

Note: This is a paid feature, to enable it contact support@leadsquared.com. Read the following articles for more details on SIERA Report Builder –


5. Report Management

LeadSquared’s Report Management is aimed to help admins configure appropriate reports for their users. Each team/group/individual has their respective requirements, goals, and KPIs to track.

report management hierarchy

With LeadSquared Report Profiles you can manage report and dashboard access for your users. Using Profiles, you will be able to design the report listing page for all your users. While some reports may be common and may be available to all users, certain reports can be configured to be accessed by a select few. 

Report Management my space 1


Any Questions?

Did you find this article helpful? Please let us know any feedback you may have in the comments section below. We’d love to hear from you and help you out!

Send Quick Email to a List of Leads

1. Feature Overview

This article describes how to send bulk Emails to any List in your LeadSquared account. Some other ways of sending emails include –

You can either draft your own Emails or use the Email templates available on your LeadSquared account. You can learn more about List in this feature guide.

LeasSquared email template


2. Process

  1. Navigate to Leads>Manage List. Select the list you want to send the email to.
  2. Hover your cursor over “settings” and click Send Email.
  3. A window opens up where you can fill in details like Email Category, From, To, and Subject.
  4. Compose your email and select Test your email.
  5. After you successfully send the test email you will get an option to either Send Now or Schedule for later.

LeadSquared Email List


Alternatively you can also open the List Details page by clicking on the list name. Under List Actions dropdown select Send Email.

LeadSquared Email List


Note: It is mandatory to send a Test Email to preview your email. You can either send the email immediately or schedule it for later.


3. Send Now

To send the email immediately select Send Now from the Send option.

LeadSquared


4. Schedule for Later

To schedule the email for later-

  1. Under Send options select Schedule for Later.
  2. Enter details like the date and time you want to schedule the email for.
  3. Click Schedule.

You will be able to view the email scheduled on the List Details page.

Note: The email goes out immediately after you click send and it cannot be undone. You can view email delivery in respective leads in the list. The leads who have opted “Do Not Email” field will not receive the email.

You cannot track individual delivery, open/click report for this type of email. If you want to track such type of metric use the Email Campaign feature.

Clone a Lead

1. Feature Overview

The Lead Clone feature allows you to clone specific lead fields. This is useful when you have multiple leads that share common lead details (such as city, organization, etc.).

For e.g., if you have multiple leads in the same company, they are likely to have a few of the same details (company name, lead source, etc). With the Lead Clone feature, you can duplicate these details while entering a new lead in the database. You can then enter the specific lead details (Name, Address, Phone Number, etc) and save it as a new lead.

Note: Lead cloning is currently not supported in NextGen.


2. Prerequisite

For the lead fields you want to clone, enable the Use in Lead Clone setting.


3. Manage Leads page

To clone a lead from the Manage Leads page –

  1. Navigate to Leads>Manage Leads.
  2. Against the lead you want to clone, hover your cursor over, and click Clone.
  3. The lead fields for which lead clone is enabled, are automatically pre-populated with the cloned values.
  4. Enter the other lead details, and once you’re done, click Save or Save and Exit. The new lead is now created.

LeadSquared - Cloning leads from Manage Leads


4. Manage Lists page

To clone a lead from the Manage Lists page –

  1. Navigate to Leads>Manage Lists.
  2. Open the list that contains the lead you want to clone.
  3. Against the lead you want to clone, hover your cursor over, and click Clone.
  4. The lead fields for which lead clone is enabled, are automatically pre-populated with the cloned values.
  5. Enter the other lead details, and once you’re done, click Save or Save and Exit. The new lead is now created.

LeadSquared - Cloning leads from Manage Lists


Any Questions?

Do you have questions or issues with the content in this article? Let us know in the comments section below. We’ll get back to you asap!

Landing Page Style Editor

LeadSquared’s responsive landing page designer lets you control the formatting of the page using your custom stylesheet information. You can do it through the Style Editor in landing page designer:

Style Editor Link

You will see the default style information displayed. That cannot be edited. You can copy the default style using the clone icon.

Clone the default style

Give your style a name and save:

Style Name

Update the style information:

1) You can control style of each type of block in landing page that have pre-defined styles and templates:  Image Block, Feature block, CTA block, Testimonial Block, Media Block and Form Block.

2) The style templates can be edited and removed. New style templates cannot be created.

Style Editing

Save the style after editing. Saving does not apply the style immediately.

Save Style

Apply the style to see it in action landing page:

Apply Style

Configuring Multiple Domains in LeadSquared

1. Feature Overview

The Website and Landing Page Domain settings allow you to associate your business/brand domains (and sub-domains) with your LeadSquared account. We track website visits on these domains and post them as activities against your leads. In addition, you can also host Portals and Landing Pages built with LeadSquared on sub-domains created under your main domains.

Note:


2. Prerequisites


3. Your Default Domain

When you sign-up for a LeadSquared account, you provide a website domain for your business. That becomes your default domain. Once the LeadSquared tracking script is installed on all web pages of your main domain (e.g., www.mydomain.com) and any subdomain (e.g., sales.mydomain.com, offers.mydomain.com), your lead’s website visits get tracked in your LeadSquared account.

To view your default domain, navigate to My Profile>Settings>Lead Tracking>Website & Landing Page Domains.

default domain


4. Adding Website Domains

You can add more domains (subject to limits in your subscription plan) to track website visits of leads.

  1. Navigate to My Profile>Settings>Lead Tracking>Website & Landing Page Domains.
  2. Click Create.
  3. Select the purpose as Website Tracking.
  4. Enter the domain name. Don’t add ‘www.’ or any other prefix while entering the domain name.
  5. Click Save.

Add New Website Domains

Setting a Primary Domain
The primary domain is set up to track website visits that result from leads clicking links in your email campaigns. The email campaign links are encoded using the primary domain (for details, see Domain Setting for Email Link). You can set only one domain as primary –

Alongside the domain, hover your cursor over the settings icon, then click Set as Primary. You can also delete domains here.

set domain as primary

Note: Ensure that the LeadSquared tracking script is installed on all website tracking domains. When the tracking script is installed on a domain, you’ll see this icon green tick alongside the domain name.


5. Adding Landing Page Sub-Domains

The default domain to host LeadSquared landing pages is <yourdomainname>.viewpage.co.
viewpage.co is a domain name owned by LeadSquared.

Alternatively, you can host landing pages created using LeadSquared on your own sub-domain. For example, page.yourdomainname.com

5.1 Add a CNAME Record in Your DNS

First, add a CNAME record in the Domain Name System (DNS) server where your website is hosted (GoDaddy, Hostgator, Bluehost, etc.).
The CNAME record must point your landing page sub-domain (e.g., page.yourdomainname.com) to cloud.viewpage.co. Your service provider will have documentation available on this. Here are some docs of popular hosting providers

Note: The settings in your DNS may take up to 48 hours to reflect.

5.2 Configure the new sub-domain on LeadSquared

Once the DNS settings take effect, go to your LeadSquared account and –

  1. Add a new website domain as described in the previous section.
  2. Next, click Create to add a new domain.
  3. Under purpose, click Landing Page Hosting.
  4. From the drop-down, select the domain added in step 1.
  5. Enter the sub-domain name.
  6. Click Save.

add new landing page domain

Your landing page is now live. You’ll see a green tick green tick alongside the sub-domain.

landing page verification

You can add multiple landing page sub-domains across your primary domains. To mark a sub-domain as primary, hover your cursor over the settings icon, then click Set as Primary.

LeadSquared SSL Certificate


Any Questions

Leave us a comment below. We’d love to help you out!

How to send form data from Landing Page to an external URL?

You can send the lead data captured by the form (after a visitor submits on a landing page) to an external URL.

This URL can be another landing page or your company’s website or any URL you prefer.

Pre-requisites:

  1. You have logged in to LeadSquared.
  2. You have completed selecting the landing page template and created a landing page using the landing page editor. (Step 1 and Step2).


For a complete overview on how to create and publish a landing page refer to the following article below.

How to Create and Publish a Landing Page?

Procedure to send form data from Landing Page to an external URL:

In Step 3 – Actions Step of creating a Landing Page, under the section “What happens after the visitor submits the landing page?” you can choose to redirect the Lead to another URL .

The option “Is redirected to a URL” allows you to redirect the lead to a URL after submitting on the landing page.

You can select the landing page of your choice in the drop down menu (You can see landing pages in the drop down if you have created one earlier). Or you may choose to “Provide an External URL”

You can send the form data to the “redirected URL” i.e., a Destination Page by selecting “Include From Data“.

GET method of data inclusion

Now to send the form data to the “redirect URL”. Both POST & GET methods can be used based on what is required.

You can use this feature to integrate with your automated user sign-ups, your own apps which require visitor data or even integrate with payment processing gateways like Paypal.

When you include form data via Get, the data entered in the form will be sent to the URL and you can see the URL with additional parameters on the redirect page. (Refer to the figure below).

TY page with added parameters

Note: When Form data is included via Post the destination page  has to process by reading from the HTTP post.

How to show a pre-filled default value to a field in landing page form?

For an overview on how to create Landing Pages please refer to the following article.

How to Create and Publish a Landing Page?

And to know how to create a lead capture form refer to article; How to Create Lead Capture Forms?


You can show/have Pre-filled default values in the fields of lead capture forms.

For an instance, while targeting a group of leads from a specific city/state, you can have the city-name pre-filled by default in the field.

Similarly it should be useful in many such situations where fields can be pre-filled with some value.

How to show pre-filled default value to a field in landing page form:

Prerequisites:

  1. You have logged in to LeadSquared.
  2. You have navigated to Dashboard > Marketing > Landing Pages > Create Landing Page.
  3. Reached Step 2 of building Landing page and added form block.


You can see the form on landing page builder with empty fields as shown below.

Form with empty fields

Procedure:

1. You may double click or Select the Form block and click on Edit Content of the form block to see the Form Designer.

Edit content

2. Here is the Form Designer to Edit the Form Block on the Landing Page.

Click the field on the Form Designer to see the Lead Field Properties on the right side.

 Enter the required Text against Value field in Lead Field Properties Section and click on Save.

City by default

3. Proceed with building the Landing Page Steps and Publish/Republish the Landing Page.

Once published, you will see the landing page with the Pre-filled fields. (As shown below).

City by defaul previewt

How to Create a Dropdown Type Lead Field

1. Feature Overview

For lead fields that require a predefined set of options (such as course, product type, or salary range), LeadSquared lets you create dropdown type lead fields. LeadSquared supports three dropdown variants:

Type Description
Dropdown Displays all available options in a standard list.
Searchable Dropdown Filters options as the user types, useful for large option sets.
Dropdown with Others Includes a built-in “Others” option alongside your defined values.


2. Prerequisites

You must be an administrator of your LeadSquared account.


3. How It Works

Dropdown fields are a type of custom lead field. When you create one, you select the dropdown variant, then define the options users can choose from. The options can be entered manually or imported via CSV for larger sets.

Once saved, the field becomes available to add to your lead forms. The variant you choose determines how options are presented to users and how many options the field supports:

  • Dropdown and Dropdown with Others support up to 1,000 options entered manually.
  • Searchable Dropdown supports up to 1,000 options entered manually, or up to 100,000 options via CSV import.
  • Dependent dropdowns support up to 1,000 parent options and 5,000 child options across all parent fields.


4. Create a Dropdown Field

The steps below apply to all three dropdown variants. The only difference is the option you select in the Show As dropdown in step 3.

  1. Go to Settings>Leads>Lead Fields and click Create.
  2. From the Data Input Type dropdown, select Dropdown.
  3. From the Show As dropdown, select the variant you want to create: Dropdown, Searchable Dropdown, or Dropdown with Others.
  4. Enter your options under Select Options.
    • For Searchable Dropdown, enter options in comma-separated format or click Click here to import a CSV file of options.
    • To set a default option, click the default icon alongside it.
    • To reorder options, use the up and down arrows.
    • To remove an option, click the remove icon.
  5. To add more options, click Add.
  6. Click Save.
Note: For Searchable Dropdown fields with more than 100,000 options, see Large Options Set.

create a dropdown type lead field


Related Articles


Any Questions?

Did you find this article helpful? Please let us know any feedback you may have in the comments section below. We’d love to hear from you and help you out!

How to control lead export and lead delete permissions for users?

You can control all user permissions (including view, create, edit, export, delete, etc.) through the Permission Templates feature.

  1. First, you need to learn how to create a permission template. You can grant no access or full access for lead export and delete.
  2. Once you’ve created a permission template learn how to apply permission templates at the user, role or group levels.

How to embed Google Analytics Script in Landing Pages

LeadSquared offers you to track the visitor trend on the Landing Pages by using Google Analytics.

Prerequisites:

Obtain the tracking Script from your Google Analytics account (click here for help).

You have completed Step 1 , Step 2  , Step 3 of creating a landing page in LeadSquared.

Procedure to add Google Analytics Script to a Landing Page:

1. In Step 4 of the Landing Page builder (as shown in the figure below);

Step-4

scroll down to the bottom to reach ‘Embed JavaScript’ in ‘Other Actions‘ section.  Paste the Google Analytics Tracking Script in Inside Head tab. And click on ‘Next’ to proceed with further steps of creating landing page.

Google-analytics-script

Proceed until the last step (Step 5- Summary) of Landing Page builder.

Step-4

Scroll down to the bottom and click on Publish button to publish the landing page.

Publish LP

Now you can track the visits in Google Analytics.

Note: If Google Analytics Script was not added to an already published Landing Page, you can edit the Landing Page and add the script in Step 3 of the Landing Page Builder(as explained above). Then proceed to step 5 to republish the landing page.

Click on Republish button for tracking on the landing page to be effective.

click to republish

Merge Leads

1. Feature Overview

Merge duplicate leads in your account into a single lead. This feature enables you to choose the lead details you want to retain versus those you want to overwrite.

Note: You can also set up automations to merge leads programmatically. For details, see How to Merge Leads through Automation.

Merge


2. Prerequisite

You must be the administrator of your LeadSquared account.


3. Merging Leads

3.1 Using the Duplicate Leads Report

  1. Navigate to Reports>Reports Home, and search for the List of Duplicate Leads report.
  2. Once you open the report, from the Select Lead Field dropdown, select the unique lead field based on which you want to identify duplicate leads, and click Show Duplicates.
  3. Alongside the unique lead field value you want to merge, click Merge.
  4. On the Merge Leads page, click Merge. This will merge all the selected leads.

LeadSquared Leads Merge


3.2 From the Manage Leads Page

  1. From the main menu, navigate to Leads>Manage Leads.
  2. Use the Checkbox checkbox against the leads you want to merge. You can also use the Search Leads bar to select the leads.
  3. Hover your cursor on the Actions button, available on the top-right corner of your screen, and click on Merge Leads.
  4. On the Merge Leads page, you can filter by Only Lead Fields with Different Values or All Lead Fields.
  5. Once you make your selection, from the list of lead fields, click the lead fields you want to retain as the primary lead field. You will get a Tick tick against the fields you choose.
  6. Once you’re done selecting the fields, scroll to the bottom of the page and click Merge.
  7. On the Merge Lead confirmation pop-up, click Merge.
  8. Once the leads are merged successfully, you’ll get a notification stating the same. You can view the merged lead by clicking on Merged Lead.

Note: You can merge only up to 20 leads at a time.

Merge Leads


4. Merge Lead Activities

The details of the lead fields that have been merged are recorded as activities against the retained lead. You can view them in the Activity History tab on the Lead Details page.

  1. Navigate to Leads>Manage Leads, and click the merged lead.
  2. On the Lead Details page, under the Activity History tab, the entry for the lead merge is visible.
  3. Against the lead merge entry, click Details.
  4. On the pop-up, you can view the details of all the lead fields that have been retained.

Merge


Troubleshooting

Issue: Permissions and Restrictions on Merging Leads

  • Issue Description: Some sales users can merge leads without any restrictions, while others receive an “unauthorized” error despite having all permissions enabled.
  • Cause: If a user has partial access to specific Lead Fields in the Permission Template Settings (i.e., restrictions on editing fields), they will be unable to merge leads.
  • Solution:
    1. Check the Permission Template assigned to the affected user.
    2. If the template has “Edit” restrictions on Lead Fields (partial access), the user will be unable to merge leads.
    3. To allow merging, grant full edit access to the required Lead Fields in the Permission Template.
    4. If restrictions are intentional, the expected error message will appear: “Error in Merging Leads. You do not have permission to update these fields.”


Any Questions?

Did you find this article helpful? Please let us know any feedback you may have in the comments section below. We’d love to hear from you and help you out!

Logging Custom Website Activities

The LeadSquared Web Tracking feature by default tracks web activities such as website visits and form submissions through its tracking script. You can also track custom web events such as button clicks, image clicks or video views. This will enable you to track your prospect action beyond page views and submissions, since there may be more important activities that help you learn more about your prospects.


Prerequisites

  1. To use this feature, you need to have basic JavaScript skills.
  2. Please ensure that LeadSquared tracking script is installed on all the pages where you need to use this feature.
  3. You’ll need two additional pieces of information- Your Account Number and the Activity Code for the activity.


Procedure

Once you have the Account number and Event Code, you just have to add the following JavaScript code on the respective event you would like to capture.

logMXWebEvent('Account Number','Activity Code','Description','score');

‘Description’ and ‘Score’ are optional parameters, you can pass them only if required.

  • In our example above, assuming account number is 1, we would call:
    logMXWebEvent(1, 154,'Home Page Main CTA', 5);
  • If I don’t need to pass description and custom score, I would call:
    logMXWebEvent(1, 154);

This function would be called inside the event handler you want to capture. You would see the leads’ events in the activity history when logged:

Logging custom activities


Any Questions?

If you encountered any errors while following the procedure listed here, or if you have any other related questions, go ahead and enter them in the comments section below.

How to embed Google maps in a landing page

You use this procedure to embed lead capture forms on your website.

Prerequisites
• You have logged into LeadSquared.
• You have searched for your desired location in Google maps

You can embed a basic map or driving directions to your landing page from google maps. When your visitors are signed in to Google, they can also see their home and work, saved places, and more in your embedded map.

• Open the Google map you’d like to embed.
• Click the settings gear icon in the bottom right.
• Click ‘Share and embed map’.
Embed Google maps in landing page

• In the box that appears, make sure the ‘Embed map’ tab is selected.
• Copy the embed code (You can also choose the embed size if you want)

google maps 2

• Login to LeadSquared, navigate to landing page designer
• Add HTML block > Double click on the block to open > Click ‘Source’
• Paste the embed code > Save.

google maps 3

google maps 4

Publish the landing page to view the embedded Google map on your landing page.
Keep in mind that traffic information and some other Maps features may not be available in the embedded map.

Configuring LeadSquared CallRail Connector

CallRail provides trackable phone numbers for your marketing campaigns. LeadSquared connects with CallRail and allows you to capture your phone calls with prospects inside LeadSquared.

Note: Below procedure is for CallRail configuration as part of LeadSquared Telephony Connector App.

To setup CallRail app, navigate to Apps -> Apps Market place > and select CallRail and click on Install button.

install call rail

To configure the CallRail app, hover the mouse over Settings and click on Configure.

configure call rail

If you are looking for the new CallRail Connector Setup the Article will be available soon.

Procedure:

Add the LeadSquared Telephony Connector to your account, and click on Configure.

Select “CallRail” as the telephony provider.  It will show the webhook URLs that you need to configure in CallRail.

To configure the LeadSquared CallRail connector, you need to copy these URLs and add them to respective pre and post call Webhooks in CallRail :

1. Navigate to the Company data which you want to integrate with LeadSquared.

CallRail - Select Company

2. Click on Integrations -> Webhooks

CallRail - Webhooks

3. Add the pre-call and post-call webhooks respectively to the webhook fields in CallRail, and Save. CallRail connector is ready to capture your phone calls in your account.

CallRail - Update Webhooks

How to Edit DNS Settings in Web Hosting Services

cPanel

1. Log in to the cPanel administrative console. Click on the Simple DNS Zone Editor under the Domains section.

2. Fill in the name for your new CNAME sub-domain(sub-domain that you have specified in LeadSquared) in the Name field and cloud.viewpage.co in the CNAME field.

3. Click the Add CNAME Record button.

4. If you have completed specifying the sub-domain name and adding the CNAME record, you will see a success message in LeadSquared.


GoDaddy.com

  1. Log in to your Account Manager at www.godaddy.com.
  2. Next to Domains, click Launch.
  3. From the DNS menu, select DNS Manager, and then click Edit Zone for the domain name you want to update.
  4. Go to the Zone File Editor for the domain name you want to update. Click Add New Record. The Add DNS Record window displays.
  5. From the Record type list, select CNAME (Alias).
  6. In the CNAME (Alias) section, click Quick Add. If you’ve already created a CNAME record for the address, you can click anywhere in the existing CNAME record’s row to edit.
  7. In the new row that appears, enter the following information:Host: Enter the sub-domain name (which you have specified in LeadSquared); Points to: Enter cloud.viewpage.co.
  8. TTL: Leave the TTL value to the default selection.
  9. At the top or the bottom of the page, click the Save Zone File button.
  10. Click OK in the pop-up.


ix web hosting

  1. Log in to your account at ix web hosting.
  2. Click Manage below the Hosting Account section.
  3. On the left side, click the domain you’d like to use with your landing pages.
  4. Next to DNS Configuration, click EDIT.
  5. Click Add DNS CNAME Record.
  6. In the Name field, enter only the subdomain you want to use. For example, if you picked landingpages.mydomain.com as your landing page address, just enter landingpages.
  7. In the Data field, enter cloud.viewpage.co.
  8. Click Submit.


1and1

  1. Log in to your account at https://admin.1and1.com
  2. If it’s not already selected, click the Administration tab.
  3. Click Domains. The Domain Overview page appears.
  4. From the New drop-down menu, select Create Subdomain. (If you’ve already created a subdomain for your landing pages, skip to step six.)
  5. Enter only the subdomain you want to use, and click OK. For example, if you chose landingpages.mydomain.com for your landing pages, you should enter landingpages here.
  6. Select the checkbox next to the subdomain that you will be using. (Example: landingpages.mydomain.com)
  7. From the DNS menu, select Edit DNS Settings.
  8. Click the radio button next to CNAME.
  9. Enter cloud.viewpage.co next to Alias.
  10. Click OK.


Yahoo!SmallBusiness

  1. Log in to your account at smallbusiness.yahoo.com.
  2. Click Domain Control Panel below the domain you’d like to use with your landing pages.
  3. Click Manage Advanced DNS Settings.
  4. Click Add Record.
  5. In the Source field, enter only the subdomain you want to use. For example, if you designated landingpages.mydomain.com as the address of your landing pages, enter landingpages in the Source field.
  6. Enter cloud.viewpage.co in the Destination field.
  7. Click Submit.


No-IP

  1. Log in to your account at No-IP.
  2. On the left side, click Host/Redirects.
  3. Click Manage underneath Host/Redirects.
  4. Click Add for a new entry, or click Modify and skip to step six for an existing entry.
  5. Enter the host name (example: landingpages from landingpages.mydomain.com), and select your domain name.
  6. Select DNS alias CNAME at the host type.
  7. Enter cloud.viewpage.co as the Target Host and click Modify.


DNS Park

  1. Log in to your account at DNS Park.
  2. On the left side, click DNS Hosting.
  3. Click the domain you’d like to use with your landing pages.
  4. Since DNS Park is your hosting service, and not your domain registrar, be sure that your domain points to DNS Park’s nameservers. This will allow your MX record configuration to take effect.
  5. Click Alias Records.
  6. Under Host Name, enter only the subdomain you selected in LeadSquared. If you have chosen landingpages.mydomain.com to host your landing pages, enter landingpages.
  7. Under Destination Nameenter cloud.viewpage.co.
  8. Click Add Alias.


Big Rock

  1. Login to your Control Panel of Big Rock.
  2. Click Manage Orders > List/Search Orders.
  3. Search for the Order for which you have activated the DNS Service.
  4. On the next page, you would see a list of all your Product/Service Orders bought through BigRock. Click any domain name to reach its Overview.
  5. Click the DNS Management tab. This will bring up the DNS Service interface.
  6. Click the Manage DNS link. The DNS Management Console will pop-up through which you may add the DNS records.
  7. There you would find 3 fields:
  • Host Name: Here the domain name, for which you are adding the Record for, would be pre-filled (e.g. yourdomainname.com). Now, if you wish to add a new Record for my.yourdomainname.com, then you would have to put in my the text box. If you wish to add a Record for just yourdomainname.com, then you can leave this box blank.
  • Destination IPv4 Address: Here you would have to enter the IPv4 IP Address of the Web Server, where you wish to host this domain name.
  • TTL: This is the Time To Live for this Record, in seconds. Any Server which once queries this Record will query it again after this time interval. The ideal TTL is 86400, which is 1 day. It can not be set to less than 14400, i.e., 4 hours.

Click the Add Record button to submit your Record.


BlueHost

  1. Login to your Bluehost Control Panel.
  2. Select the DNS Zone Editor icon in the Domains section.
  3. Select the domain you’re modifying from the drop-down box.
  4. Scroll down to the heading named Add DNS Record.
  5. In the Host Record field, enter the desired record name. If you wish to add a new Record for my.yourdomainname.com, then you would have to put my in the text box.
  6. Leave the TTL field at it’s default setting.
  7. In the Points To field, enter the address that the record should resolve to. Enter cloud.viewpage.co.
  8. Other fields may appear depending on the type of record you are creating.
  9. Click on the Add Record button to create the record.