1. Overview
LeadSquared Portals now support UDS-based validation for signup (registration/login) forms. This ensures that only verified and approved users can sign up on your portal
When a user submits a registration form, the portal sends the form data to a UDS flow for real-time validation before the user account is created. UDS can run any custom logic—such as checking duplicates, verifying phone or email, blocking blacklisted users, or validating against external systems.
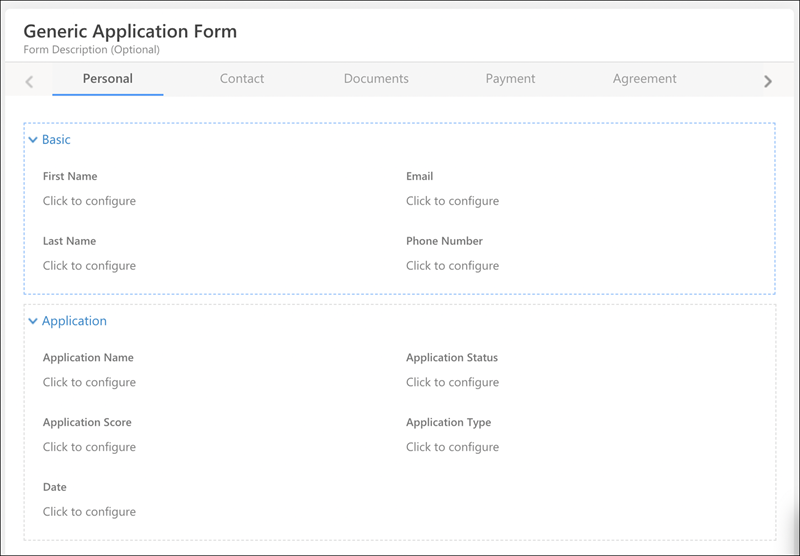
The validation runs on the Register Save Request at each step of the signup process — applicable to both single-step and multi-step forms.
Note: Non-registration forms are not supported in this integration.
2. Core Rules
|
Parameter
|
Description
|
|
Integration Point
|
The UDS endpoint can be integrated only with the Portal Signup Form.
|
|
Execution Trigger
|
The UDS flow is executed during the Registration Save Request (Save at Each Step).
|
|
Form Compatibility
|
Supports both single-step and multi-step signup forms.
|
3. Response Handling and Error Logic
The Portal’s behavior depends strictly on the HTTP status code returned by the UDS endpoint.
3.1 Successful Submissions
The signup submission proceeds only if the UDS returns a 200 status code.
Example – Success Response (200)
{
  "statusCode": 200,
  "responseHeaders": {},
  "body": {
    "status": "SUCCESS",
    "success": true,
    "errors": {},
    "data": "{{Write your message here}}",
    "requestId": "c1d2e3f4-5678-9012-3456-abcdefabcdef"
  }
}
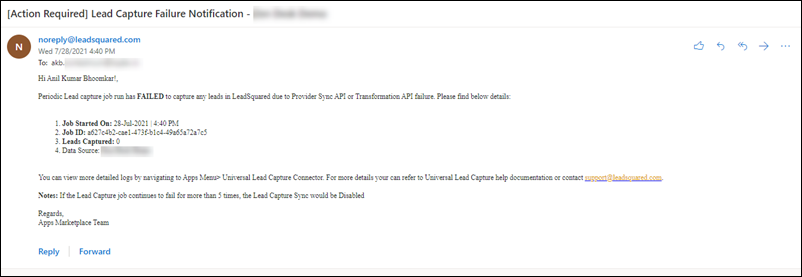
3.2 Error Handling
If the UDS returns any other status code (e.g., 400, 500), the save request will be restricted. The error message displayed to the user depends on the response body received from the UDS.
Here are two possible error scenarios:
3.2.1 Scenario 1 – Custom Error Message (From UDS)
If the UDS response includes a correctly formatted body with an errors message array, the portal displays the custom message returned by UDS.
Example:
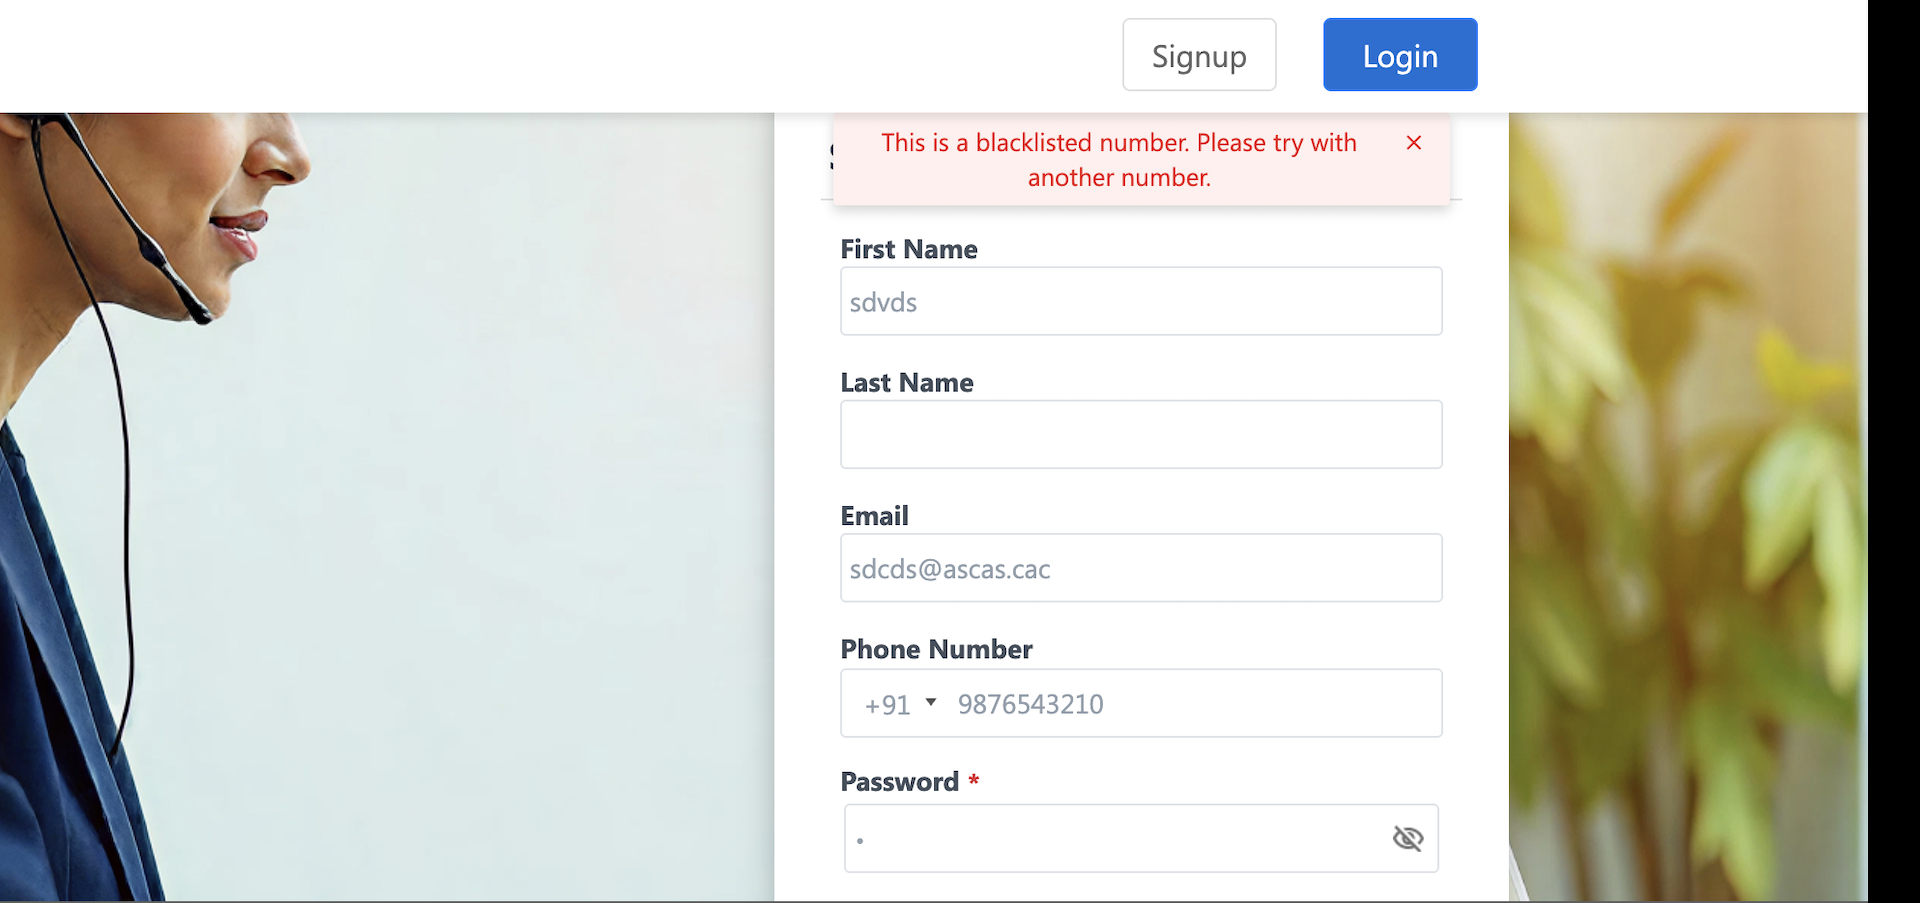
As seen in the screenshot, the user enters a blacklisted number.
The UDS returns a 500 status code, the UDS response body includes a requestId and an errors.message array containing, “This is a blacklisted number. Please try with another number.“.
The portal UI correctly displays this custom message to the user.
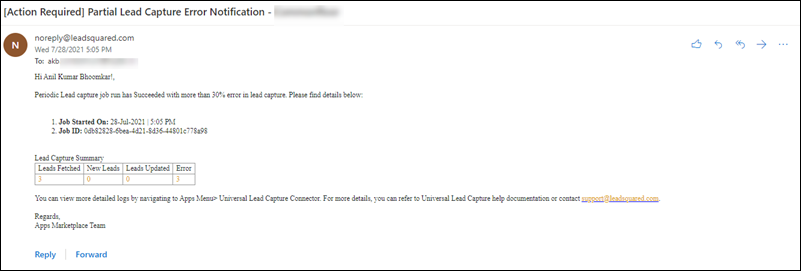
3.2.2 Scenario 2 – Default Error Message (Fallback)
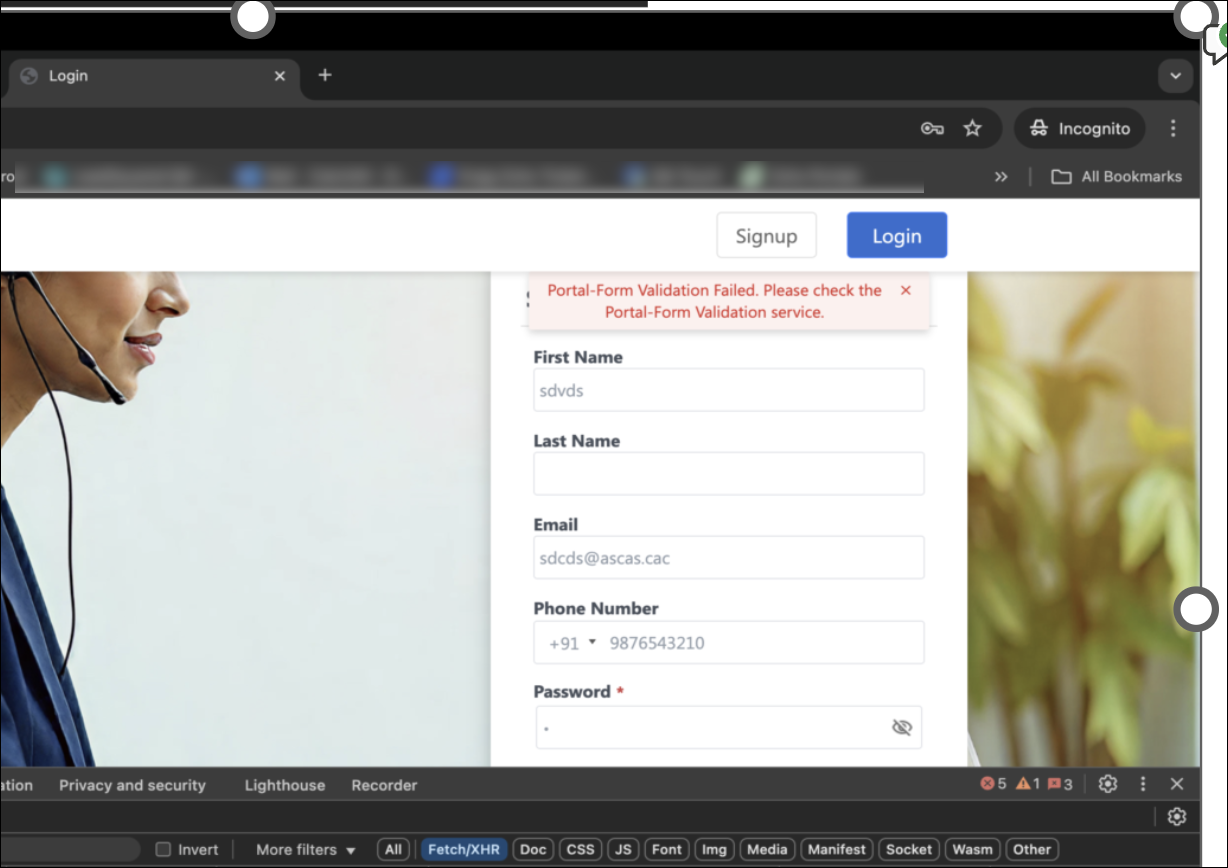
If the UDS response is not formatted correctly or lacks required fields, the portal shows a default error message.
Default Message: “Portal-Form Validation Failed. Please check the Portal-Form Validation service.“
Triggers for Default Message:
- UDS returns an error status, but the response body does not include
errors.message field.
- The UDS response is missing either the
status code or the request ID.
Example:
The screenshot shows a 500 status in the network request, but the UI displays the default “Portal-Form Validation Failed...” error. This indicates the UDS response for that specific error did not provide the required message or Request ID in the expected format.
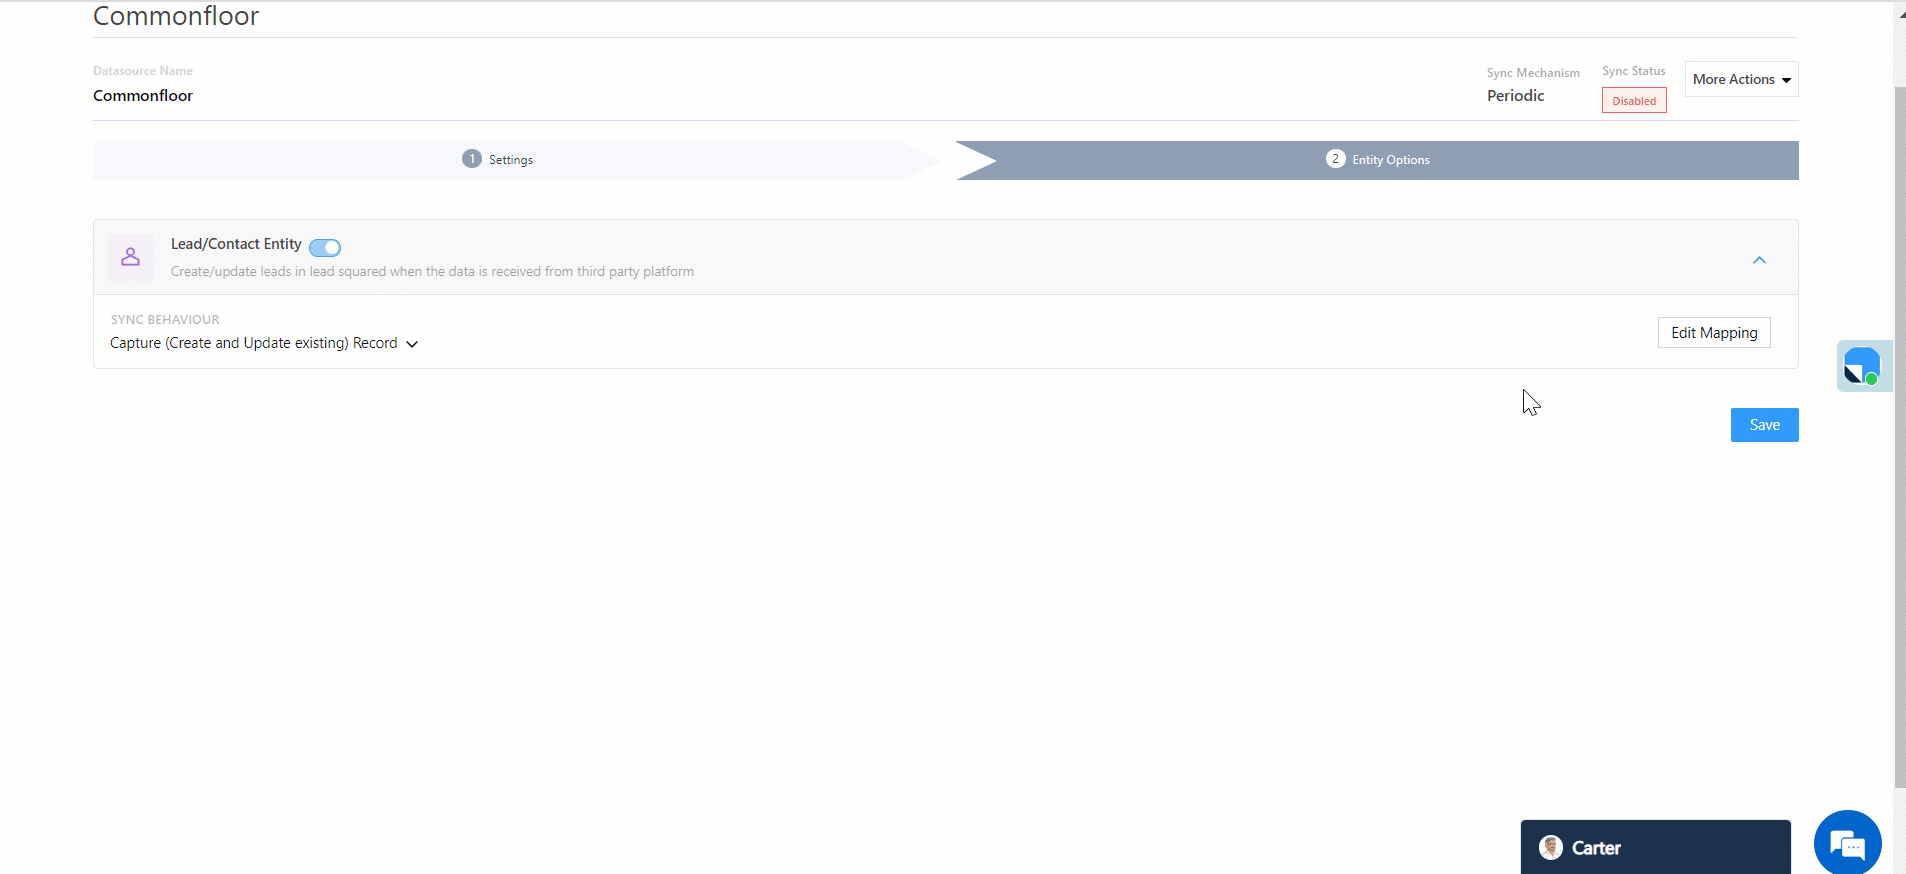
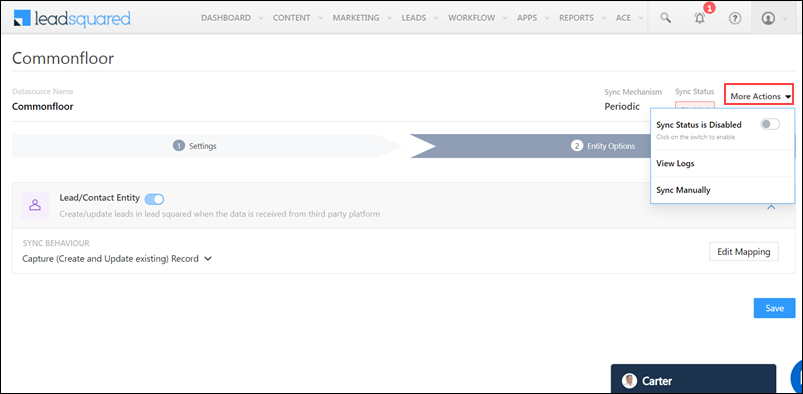
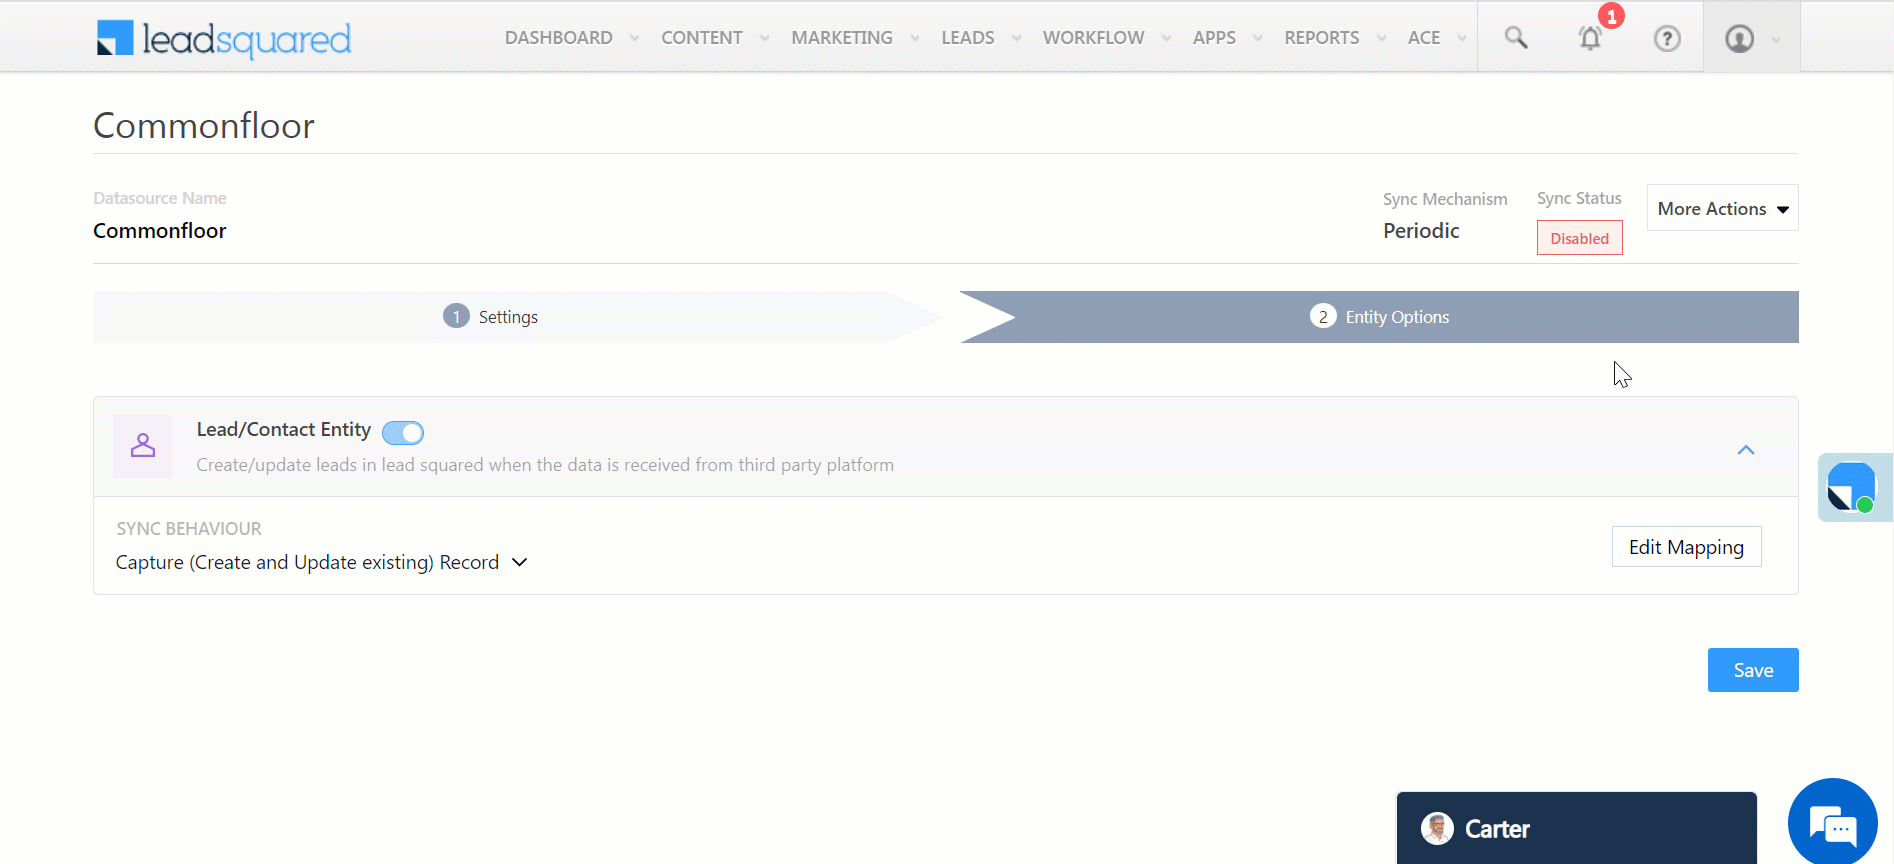
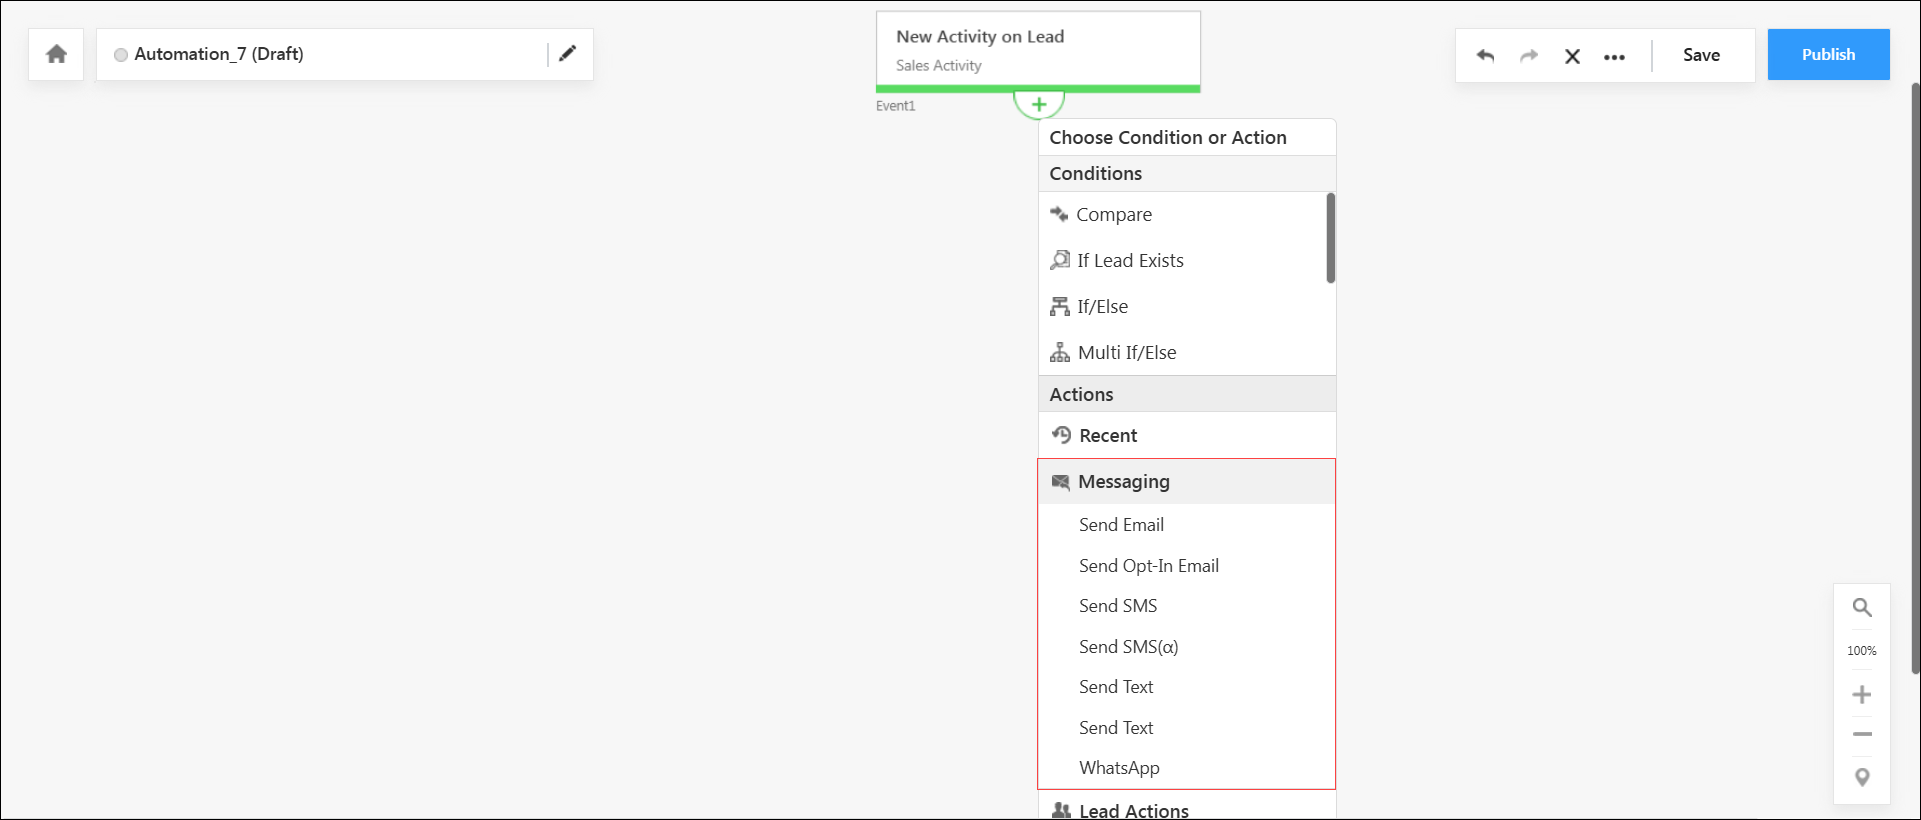
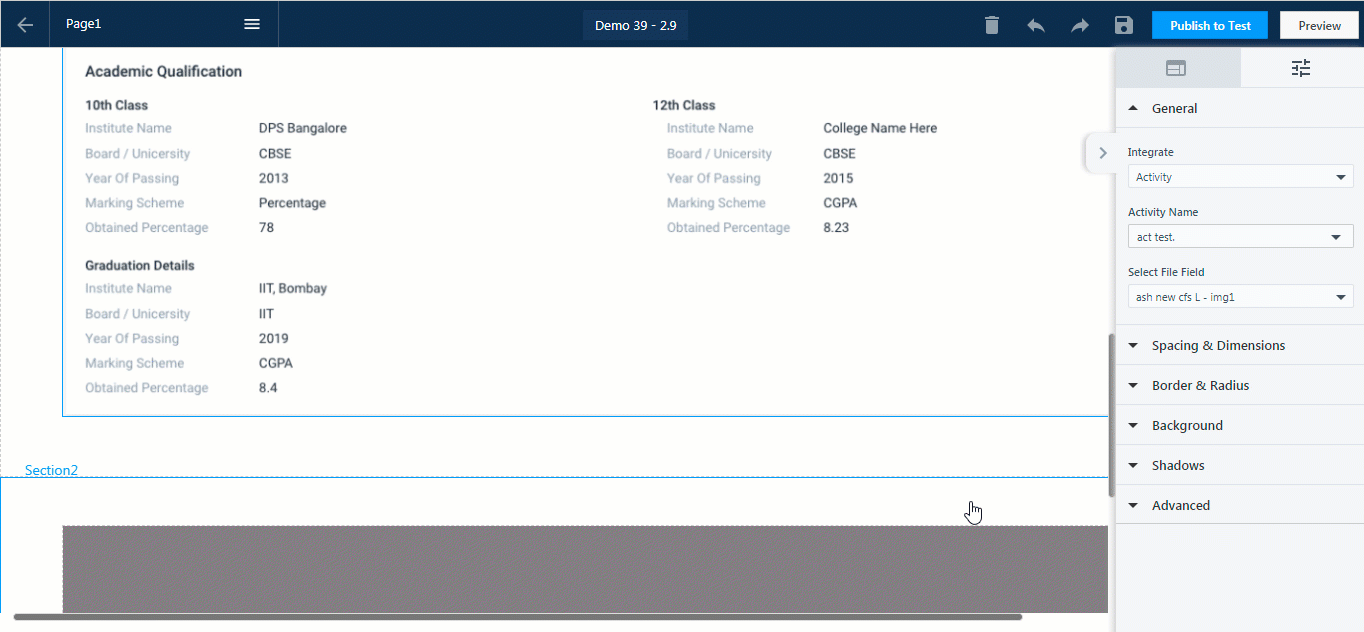
4. UDS Configuration
To ensure successful validation, the flow should be a custom configuration type with real time response. Configure the UDS flow with the following settings:

The flow must be initiated by a Custom Trigger and must use the Return Response action to send data back to the portal.
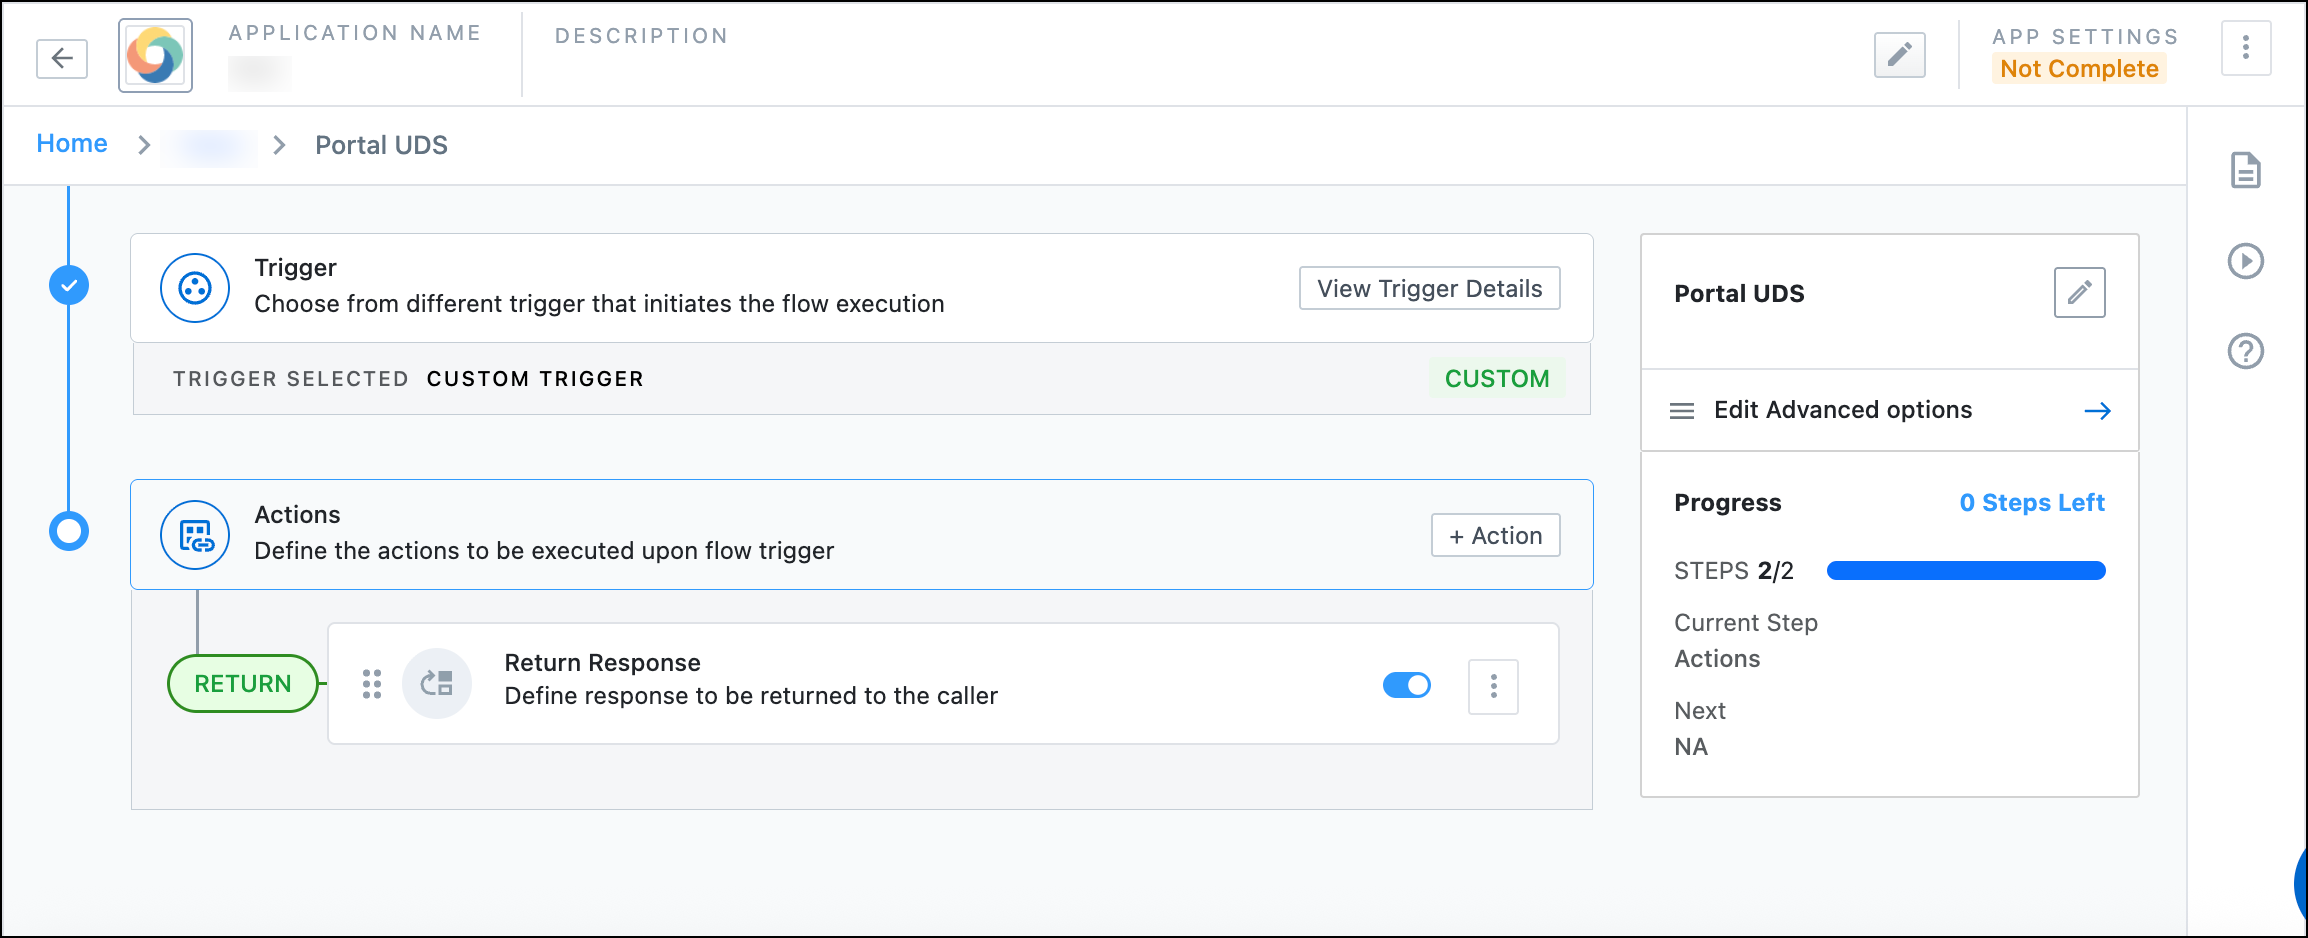
Next, copy the custom webhook URL.
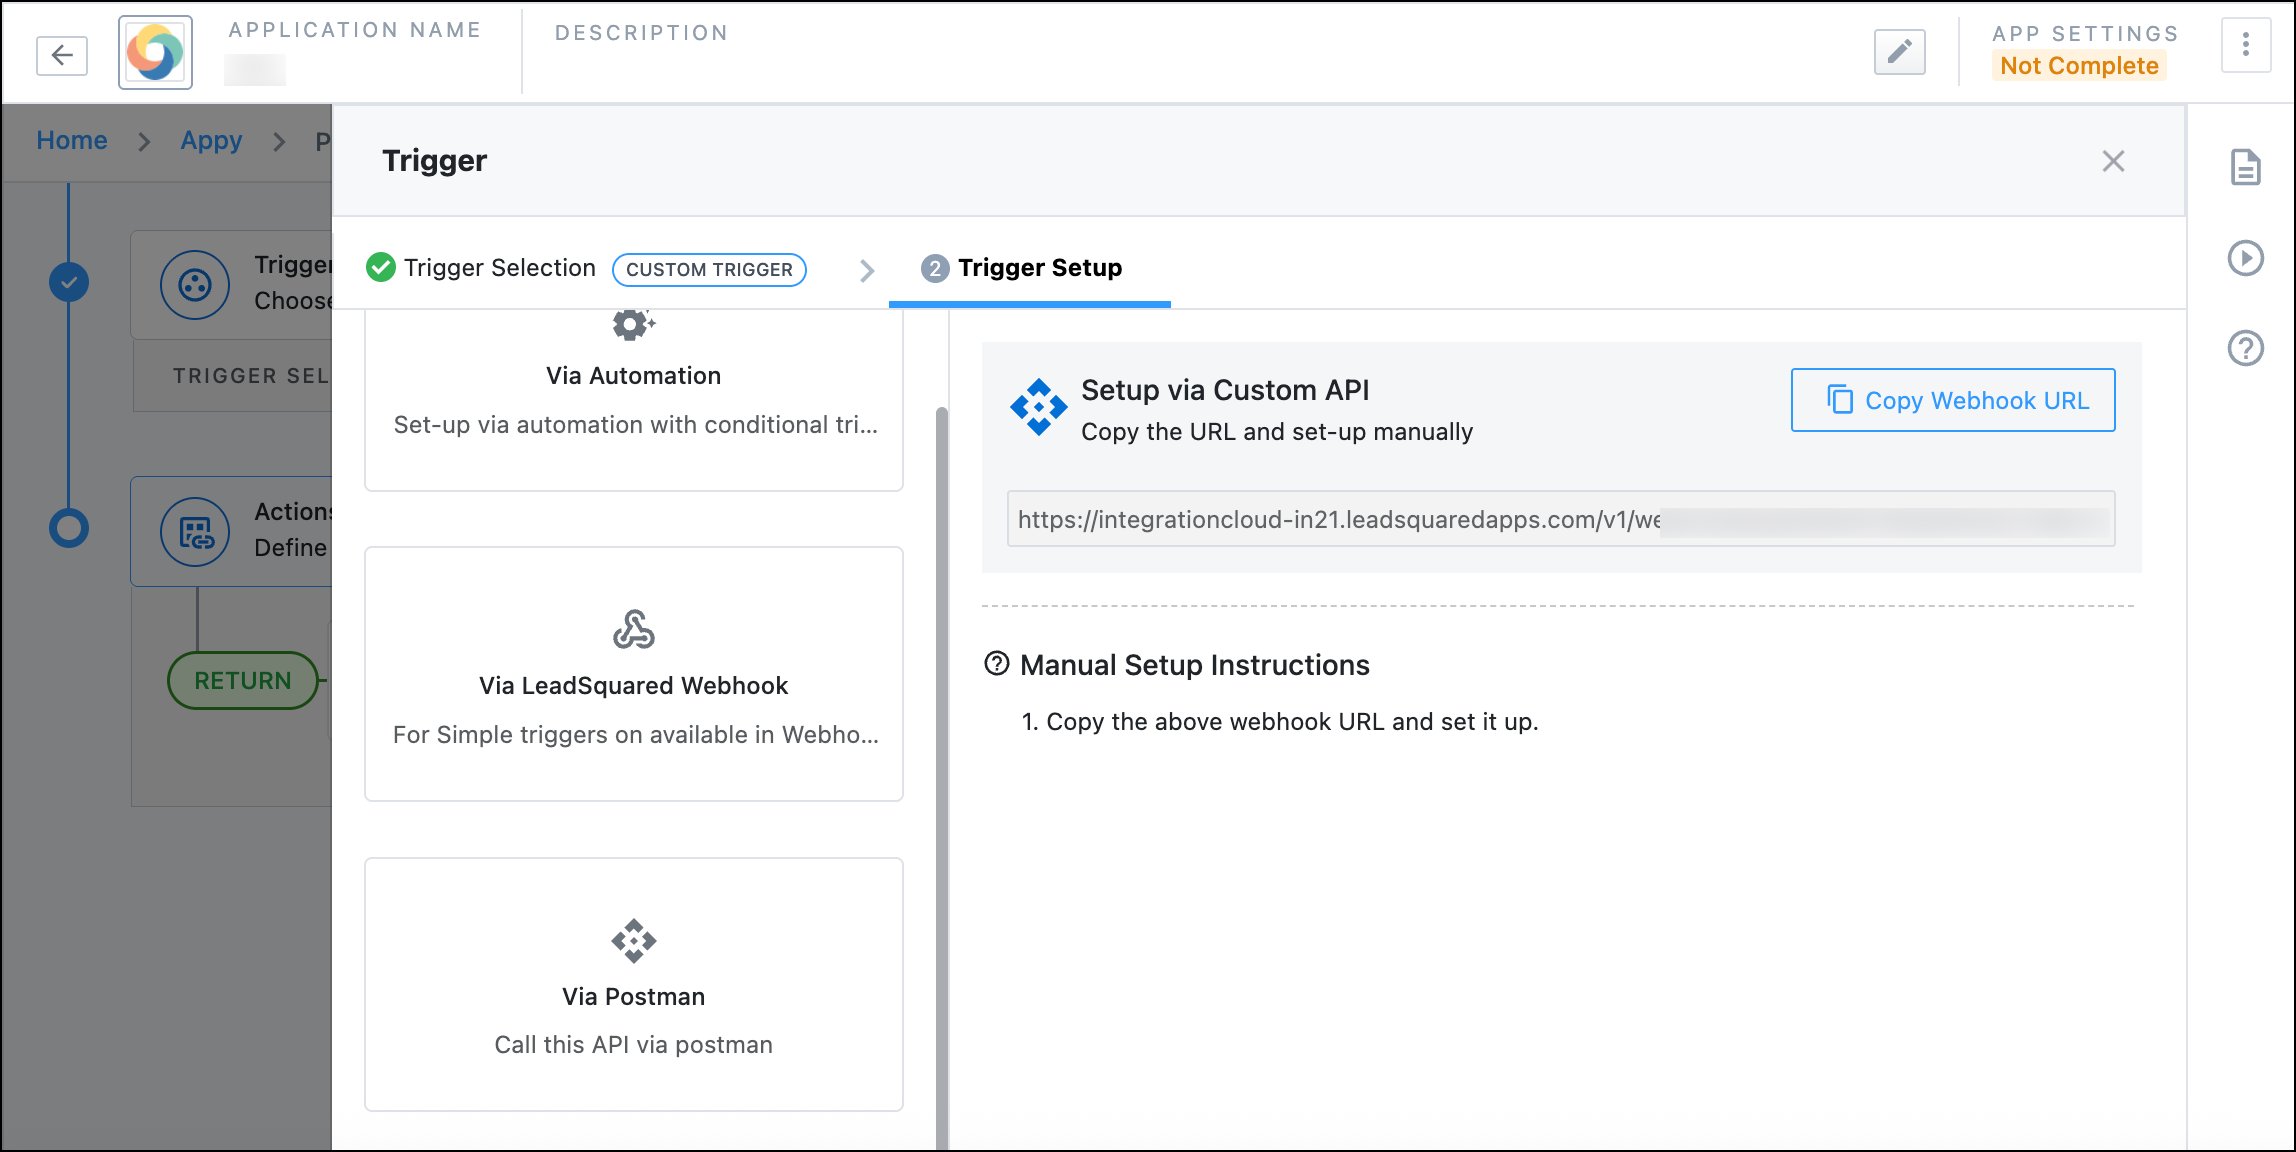
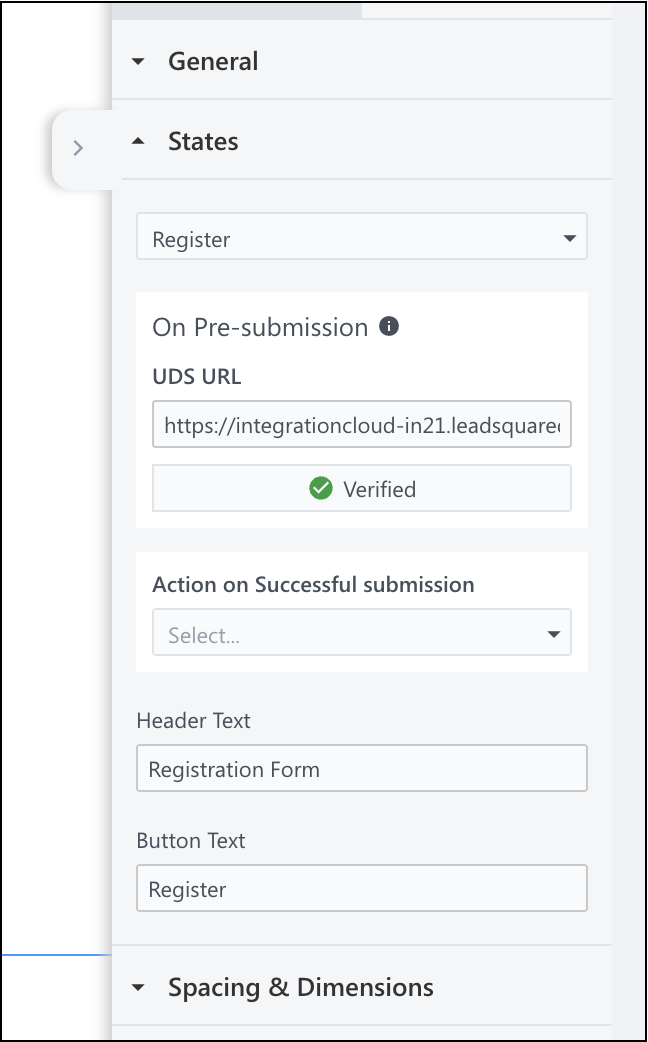
On the Portal Designer, select your Registration Form. Under States, paste the webhook URL in the UDS URL field. You should see a succesful validation.
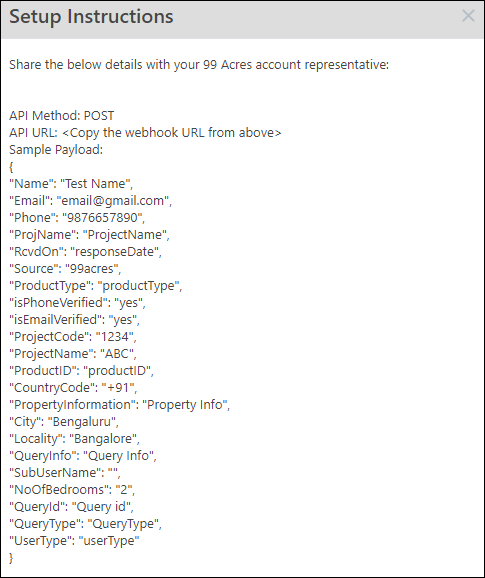
5. Trigger Details – Sample Payload data
Note: The following link provides a sample custom UDS app: UDS-POR Phone Number Dup Check. You can import this file directly to create the sample UDS flow (This file contains sensitive information and is accessible only to LeadSquared’s internal team). For assistance, contact support@leadsquared.com.
Below is a sample payload sent from the Portal during registration save. You can copy this payload directly into UDS to create a sample flow.
{

    "TaskId": "",

    "ActivityId": "",

    "FormId": "bf34eb59-4520-11ef-8227-064299b60867",

    "PageId": "dllkufl5y",

    "IsFormPreValidationEnabled": true,

    "OpportunityId": "",

    "FormEntity": [

        {

            "FormId": "bf34eb59-4520-11ef-8227-064299b60867",

            "TabId": "tab1",

            "SectionId": "bf34eb59-4520-11ef-8227-064299b60867_tab1_section1",

            "LeadFields": [

                {

                    "SchemaName": "EmailAddress",

                    "Value": "fjdsi@jifods.com",

                    "RuleAppliedInfo": {

                        "Hidden": 1,

                        "Mandatory": 0

                    },

                    "DataType": "Email",

                    "RenderType": "Email"

                },

                {

                    "SchemaName": "Phone",

                    "Value": "+91-9123411101",

                    "RuleAppliedInfo": {

                        "Hidden": 1,

                        "Mandatory": 0

                    },

                    "DataType": "Phone",

                    "RenderType": "Phone"

                },

                {

                    "SchemaName": "FirstName",

                    "Value": "firstname",

                    "RuleAppliedInfo": {

                        "Hidden": 1,

                        "Mandatory": 0

                    },

                    "DataType": "Text",

                    "RenderType": "Textbox"

                },

                {

                    "SchemaName": "mx_Street1",

                    "Value": "address",

                    "RuleAppliedInfo": {

                        "Hidden": 1,

                        "Mandatory": 0

                    },

                    "DataType": "Text",

                    "RenderType": "Textbox"

                }

            ],

            "ActivityFields": [],

            "TaskFields": [],

            "OpportunityFields": []

        }

    ],

    "ProcessFormEntity": [

        {

            "FormId": "bf34eb59-4520-11ef-8227-064299b60867",

            "TabId": "tab1",

            "SectionId": "bf34eb59-4520-11ef-8227-064299b60867_tab1_section1",

            "LeadFields": [

                {

                    "SchemaName": "EmailAddress",

                    "Value": "fjdsi@jifods.com",

                    "RuleAppliedInfo": {

                        "Hidden": 1,

                        "Mandatory": 0

                    },

                    "DataType": "Email",

                    "RenderType": "Email"

                },

                {

                    "SchemaName": "Phone",

                    "Value": "+91-9123411101",

                    "RuleAppliedInfo": {

                        "Hidden": 1,

                        "Mandatory": 0

                    },

                    "DataType": "Phone",

                    "RenderType": "Phone"

                },

                {

                    "SchemaName": "FirstName",

                    "Value": "firstname",

                    "RuleAppliedInfo": {

                        "Hidden": 1,

                        "Mandatory": 0

                    },

                    "DataType": "Text",

                    "RenderType": "Textbox"

                },

                {

                    "SchemaName": "mx_Street1",

                    "Value": "address",

                    "RuleAppliedInfo": {

                        "Hidden": 1,

                        "Mandatory": 0

                    },

                    "DataType": "Text",

                    "RenderType": "Textbox"

                }

            ],

            "ActivityFields": [],

            "TaskFields": [],

            "OpportunityFields": []

        }

    ],

    "ExecutionId": "",

    "ActionId": "",

    "ProcessDesignerId": "",

    "ActivityCodeToUpdate": "",

    "FormOpportunityCode": "0",

    "ActivityCodesToUpdate": [],

    "FormOperation": 1,

    "DraftId": "",

    "ActivityIdsToBeRemoved": [],

    "RemovedOriginalSubformIds": [],

    "PaymentVerificationKey": "",

    "CurrentTabId": "",

    "IsPortalRegistrationForm": true,

    "UseRegisterV2": true,

    "RegisterLeadEntity": {

        "Email": "fjdsi@jifods.com",

        "Password": "e5/ttqpaoGaZ8YOwJi1oMhD5G84sNxxxxxxxxxxxxxxxxxxxnQsxxxxxxxxxxxxxxxxxxxxxxxxxxxxxxxd88fnYUpUG8s4NJYLYSRPuJJiimQCZLnomE5+4E5WTCpP3ok4EAXJt9LEfZxxxxxxxxxxxxxx=",

        "ConfirmPassword": "iJtO8GCA0LWnogZ0BrjXXZ8lXQKTKxxxxxxxxxxxxxxxxxxxqErxxxxxxxxxxxxxxxxxxxxxxxxxxxxxxxDKbOvM0d19OeYujwgDx52sbZlyhry0ZilMBfQs6TqCMZttI/nOECUjaubcxPJ1CUtdKna9AZyYXLQTxxxxxxxxxxxxx="

    },

    "PortalSpecificDetails": {

        "TimeZoneInfo": "US/Central"

    },

    "URLSearchParams": {},

    "LockKey": "",

    "PortalDetails": {

        "URL": "https://landingpagecreate4-dobwavuz.marketxpander.net/",

        "IPAddress": "10.230.13.6",

        "ConnectionSpeed": "4g",

        "Platform": "Windows",

        "BrowserName": "Chrome",

        "BrowserVersion": "141.0.0.0",

        "DeviceType": "Desktop",

        "PageUrl": "https://landingpagecreate4-dobwavuz.marketxpander.net/",

        "ReferrerUrl": ""

    },

    "RenderSettings": {

        "ProcessDesignerId": "",

        "ActionId": ""

    },

    "SavedTabIds": [],

    "ConnectionSpeed": "4g",

    "Platform": "Windows",

    "BrowserName": "Chrome",

    "BrowserVersion": "141.0.0.0",

    "DeviceType": "Desktop",

    "PageUrl": "https://landingpagecreate4-dobwavuz.marketxpander.net/",

    "ReferrerUrl": ""

}
6. Sample Return Response Logic
Here’s an example of how the Return Response action can handle phone number validation within a UDS Custom Flow.
const main = (input) => {

    const phoneField = input?.data?.FormEntity?.[0]?.LeadFields?.find(

        field => field?.SchemaName === "Phone"

    );


    const phone = phoneField?.Value;


    function findLead(phone) {

        if (!phone) {

            return {

                statusCode: 200,

                responseHeaders: {},

                body: {

                    status: "SUCCESS",

                    success: true,

                    errors: {},

                    data: "Number is not provided",

                    requestId: "c1d2e3f4-5678-9012-3456-abcdefabcdef"

                }

            };

        } else if (String(phone) === "+91-9876543210") {

            return {

                statusCode: 500,

                responseHeaders: {},

                body: {

                    status: "ERROR",

                    success: false,

                    errors: {

                        message: [

                            "This is a blacklisted number. Please try with another number."

                        ]

                    },

                    data: null,

                    requestId: "3bfcfe46-39dd-7c86-6a87-5196d2c65971"

                }

            };

        } else if (String(phone) === "+1-9876543210") { // +1 -> 400

            return {

                statusCode: 400,

                responseHeaders: {},

                body: {

                    status: "ERROR",

                    success: false,

                    errors: {

                        message: [

                            "Bad request for this US number."

                        ]

                    },

                    data: null,

                    requestId: "a1111111-2222-3333-4444-555555555001"

                }

            };

        } else if (String(phone) === "+93-9876543210") { // +202 -> 202

            return {

                statusCode: 202,

                responseHeaders: {},

                body: {

                    status: "SUCCESS",

                    success: true,

                    errors: {},

                    data: "Accepted for asynchronous processing",

                    requestId: "a1111111-2222-3333-4444-555555555002"

                }

            };

        } else if (String(phone) === "+98-9876543210") { // +98 -> 400

            return {

                statusCode: 400,

                responseHeaders: {},

                body: {

                    status: "ERROR",

                    success: false,

                    errors: {

                        message: [

                            "Invalid or malformed number for +98 sample."

                        ]

                    },

                    data: null,

                    requestId: "b2222222-3333-4444-5555-666666666098"

                }

            };

        } else if (String(phone) === "+95-9876543210") { // -> 401

            return {

                statusCode: 401,

                responseHeaders: {},

                body: {

                    status: "ERROR",

                    success: false,

                    errors: {

                        message: [

                            "Unauthorized - sample number."

                        ]

                    },

                    data: null,

                    requestId: "c3333333-4444-5555-6666-777777777401"

                }

            };

        } else if (String(phone) === "+355-9876543210") { // -> 405

            return {

                statusCode: 405,

                responseHeaders: {},

                body: {

                    status: "ERROR",

                    success: false,

                    errors: {

                        message: [

                            "Method Not Allowed - sample number."

                        ]

                    },

                    data: null,

                    requestId: "d4444444-5555-6666-7777-888888888405"

                }

            };

        } else if (String(phone) === "+213-9876543210") { // -> 415

            return {

                statusCode: 415,

                responseHeaders: {},

                body: {

                    status: "ERROR",

                    success: false,

                    errors: {

                        message: [

                            "Unsupported Media Type - sample number."

                        ]

                    },

                    data: null,

                    requestId: "e5555555-6666-7777-8888-999999999415"

                }

            };

        } else if (String(phone) === "+376-9876543210") { // -> 429

            return {

                statusCode: 429,

                responseHeaders: {},

                body: {

                    status: "ERROR",

                    success: false,

                    errors: {

                        message: [

                            "Too Many Requests - sample number."

                        ]

                    },

                    data: null,

                    requestId: "f6666666-7777-8888-9999-aaaaaaaa429"

                }

            };

        } else if (String(phone).toUpperCase() === "NA" || String(phone).toUpperCase() === "N/A") {

            return {

                statusCode: 422,

                responseHeaders: {},

                body: {

                    status: "ERROR",

                    success: false,

                    errors: {

                        message: [

                            "Phone value marked as NA (not applicable)."

                        ]

                    },

                    data: null,

                    requestId: "09876543-21ab-cdef-0000-00000000NA01"

                }

            };

        } else {

            return {

                statusCode: 200,

                responseHeaders: {},

                body: {

                    status: "SUCCESS",

                    success: true,

                    errors: {},

                    data: "Valid number for registration",

                    requestId: "96d8df97-0c27-821f-5cc8-ee04ac8c91b7"

                }

            };

        }

    }
7. Debugging Errors
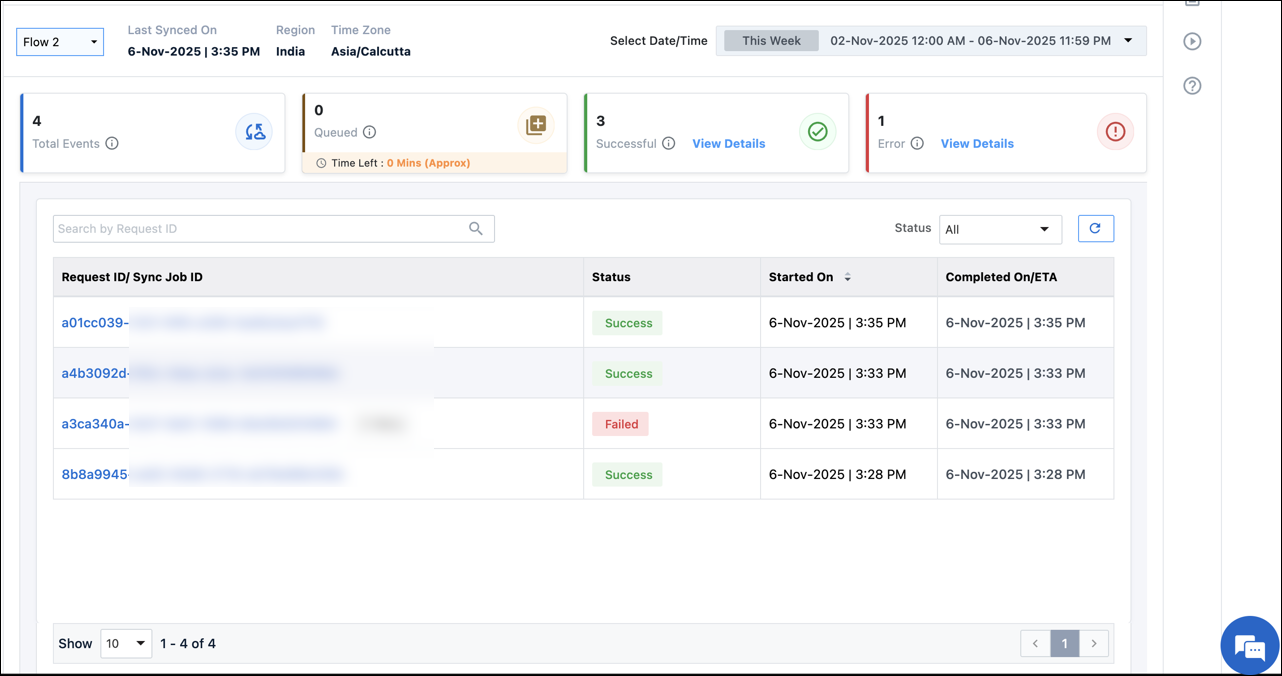
Refer to the UDS logs for any failures in execution. The Logs feature in UDS allows you to monitor and troubleshoot the execution of your data sync flows: Universal Data Sync (UDS) – Logs.
Any Questions?
If you have any questions related to forms that weren’t answered here, please leave comments below. We’ll be happy to help!