Make Calls on Your Phone Using the Web Platform

Important:

  • This feature is only supported on Android mobile phones.
  • Before you get started –

1. Feature Overview

Phone calls you initiate through the LeadSquared desktop application can be placed through the LeadSquared mobile app on your smartphone.

Call logs are automatically posted as activities on the respective leads in your account.

Note: To initiate calls directly through the mobile app, see How to make Outbound Calls and Send SMS through the Mobile App.


2. Prerequisites

  • You must be the Administrator of your LeadSquared account.
  • Install the Custom Lead and List Actions connector.
  • You must install the Call and SMS tracker connector.
  • Install and configure the Nudges Connector.
  • The Lead’s details should include their telephone number.
  • You must be logged into your LeadSquared Mobile Application while the call is being placed.
  • Autostart Permission must be enabled in the LeadSquared Mobile Application of your phone.
  • Enable Permissions on the device setting to Make a Call,  Read Contact and Read Call History.


3. How it Works

  1. Install the Call and SMS tracker connector.
  2. You’ll use the Nudge Connector to create a nudge (notification) on the LeadSquared mobile app. When a user taps the nudge, the phone call will be placed to the respective lead. Note down the Nudge template ID.
  3. You’ll create a new ‘initiate/place phone call’ action on the Manage Leads (and Smart Views) and Lead Details pages, using the Custom Lead and List Action connector. When a user clicks this action from the desktop, the phone call nudge (configured in the previous step) is sent to the user’s LeadSquared mobile app.


4. Create a Call Routing Nudge

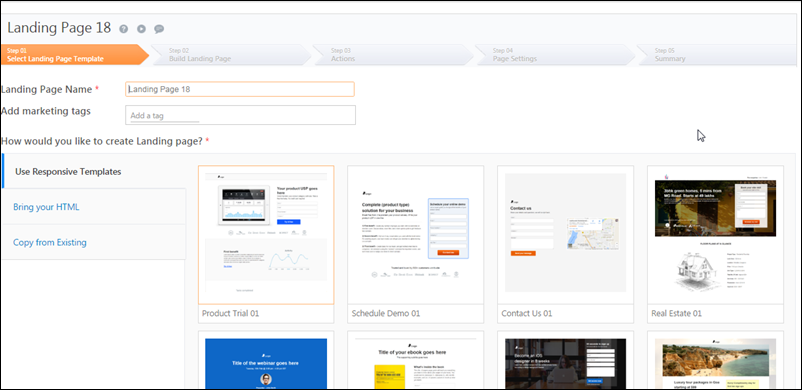
  1. Navigate to Apps>Manage Nudge Templates>Custom Nudges.
  2. Click Create New Template.
  3. Enter the relevant details in the 1st and 2nd pages of the pop-up window. To know more about creating a nudge, see Nudges Connector.
  4. In the 3rd page, click Add Action and enter the Action Type as Call Routing.
  5. Click Save and close.

Once you’re done creating a call routing Nudge, click on it to view the Nudge Template ID. Copy this ID to use in Section 5.

Note: To learn more, see Nudges Connector.

LeadSquared - Create a call routing nudge


5. Create the Desktop Action

Before you proceed, get the authorization token from your account manager.

  1. From the main menu, navigate to Apps>Apps Marketplace>UI Customization>Custom Lead and List Actions.
  2. Hover your cursor over and select Configure.
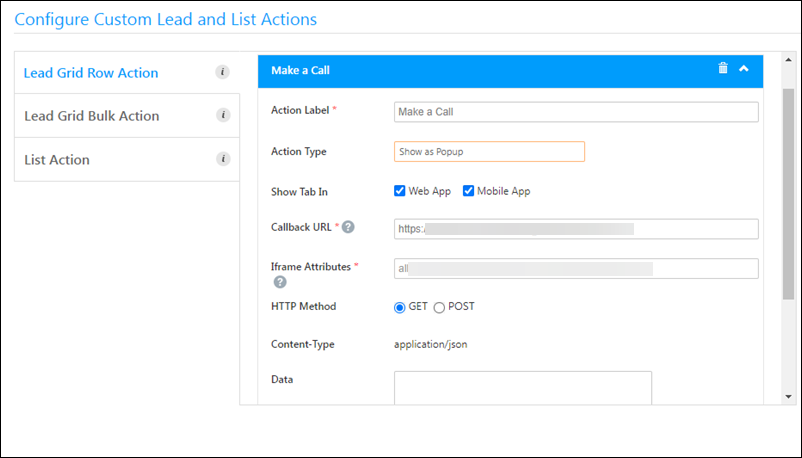
  3. On the pop-up window, select Lead Grid Row Action and click Add Action.
  4. Enter the following details –
    • Action Label – Enter an action name (Make a Call, Call from Mobile, etc.)
    • Action Type – Select Call an API.
    • Callback URL – Paste the following URL – https://nudges-api.leadsquaredapps.com/nudges/notificationPushEvent/api?templateId={TEMPLATEID}&leadId=@{Lead:ProspectID,}&to=@{User:UserId,}
      • The Template ID to be entered here can be obtained from the Manage Nudge Templates page once you create a Nudge.
    • HTTP Method – Select POST.
    • Data{"x-auth-token":"AUTHORIZATION TOKEN"}
  5. Click Save.

Note: To obtain the Authorization Token for the Data field, contact your account manager or write to support@leadsquared.com.
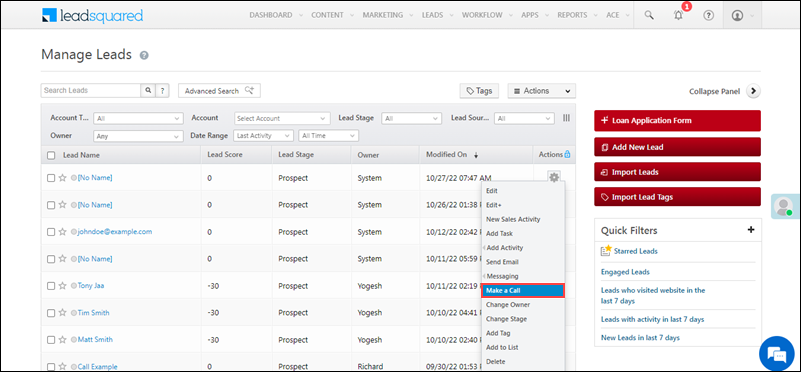
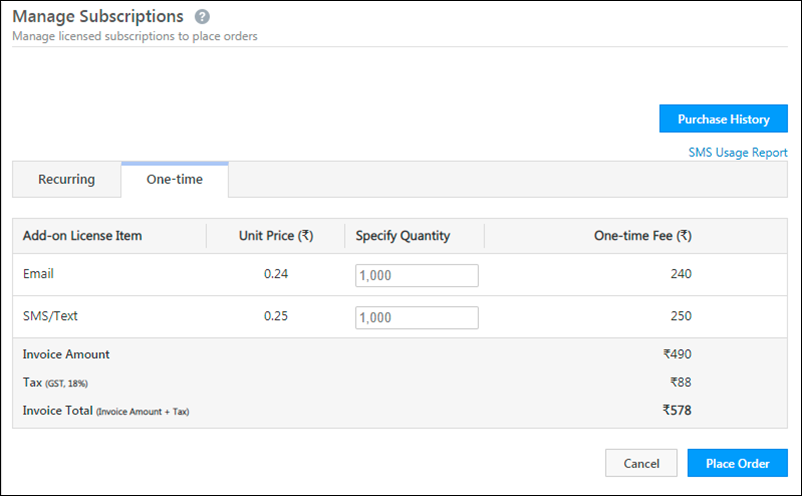
LeadSquared - Create the desktop action


6. Make a Call

Once the setup is completed, you can make a call from your mobile using the web application. To do so –

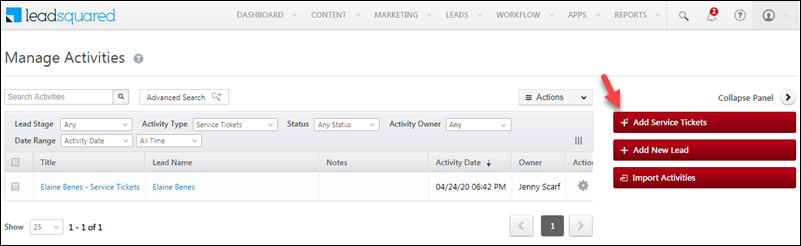
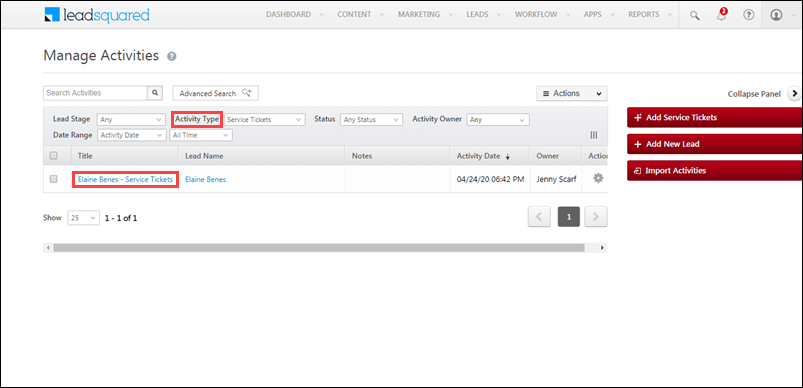
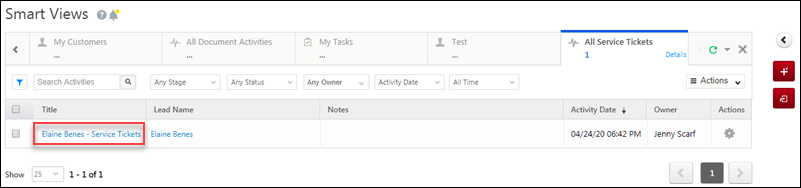
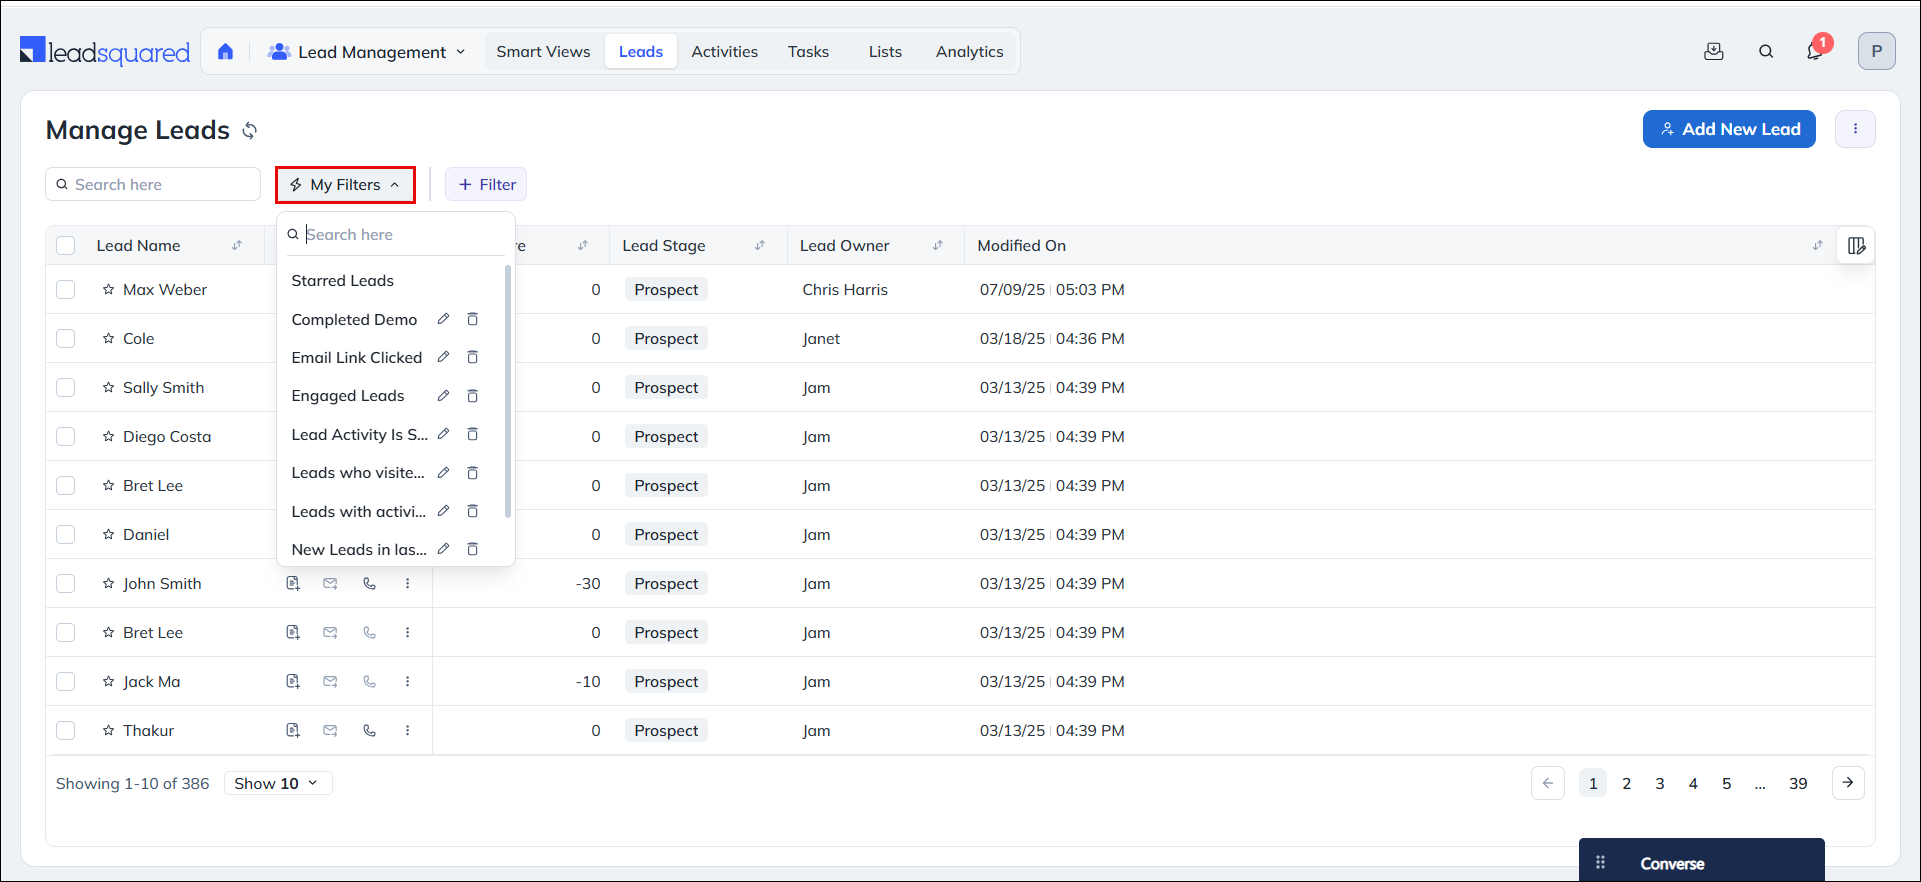
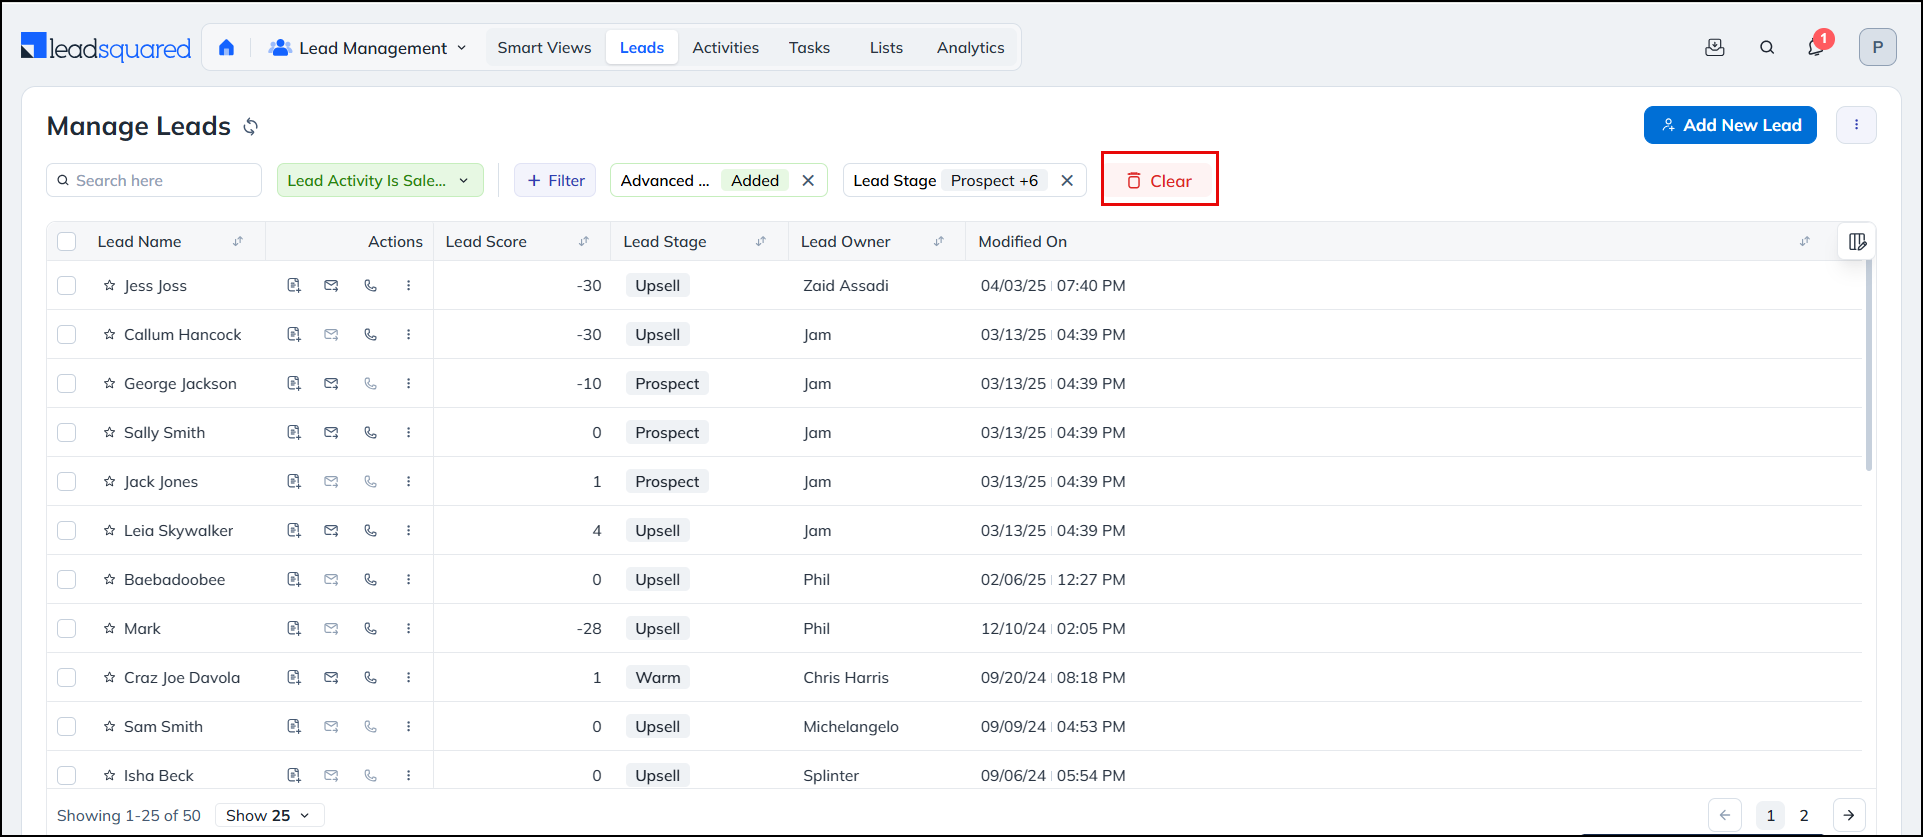
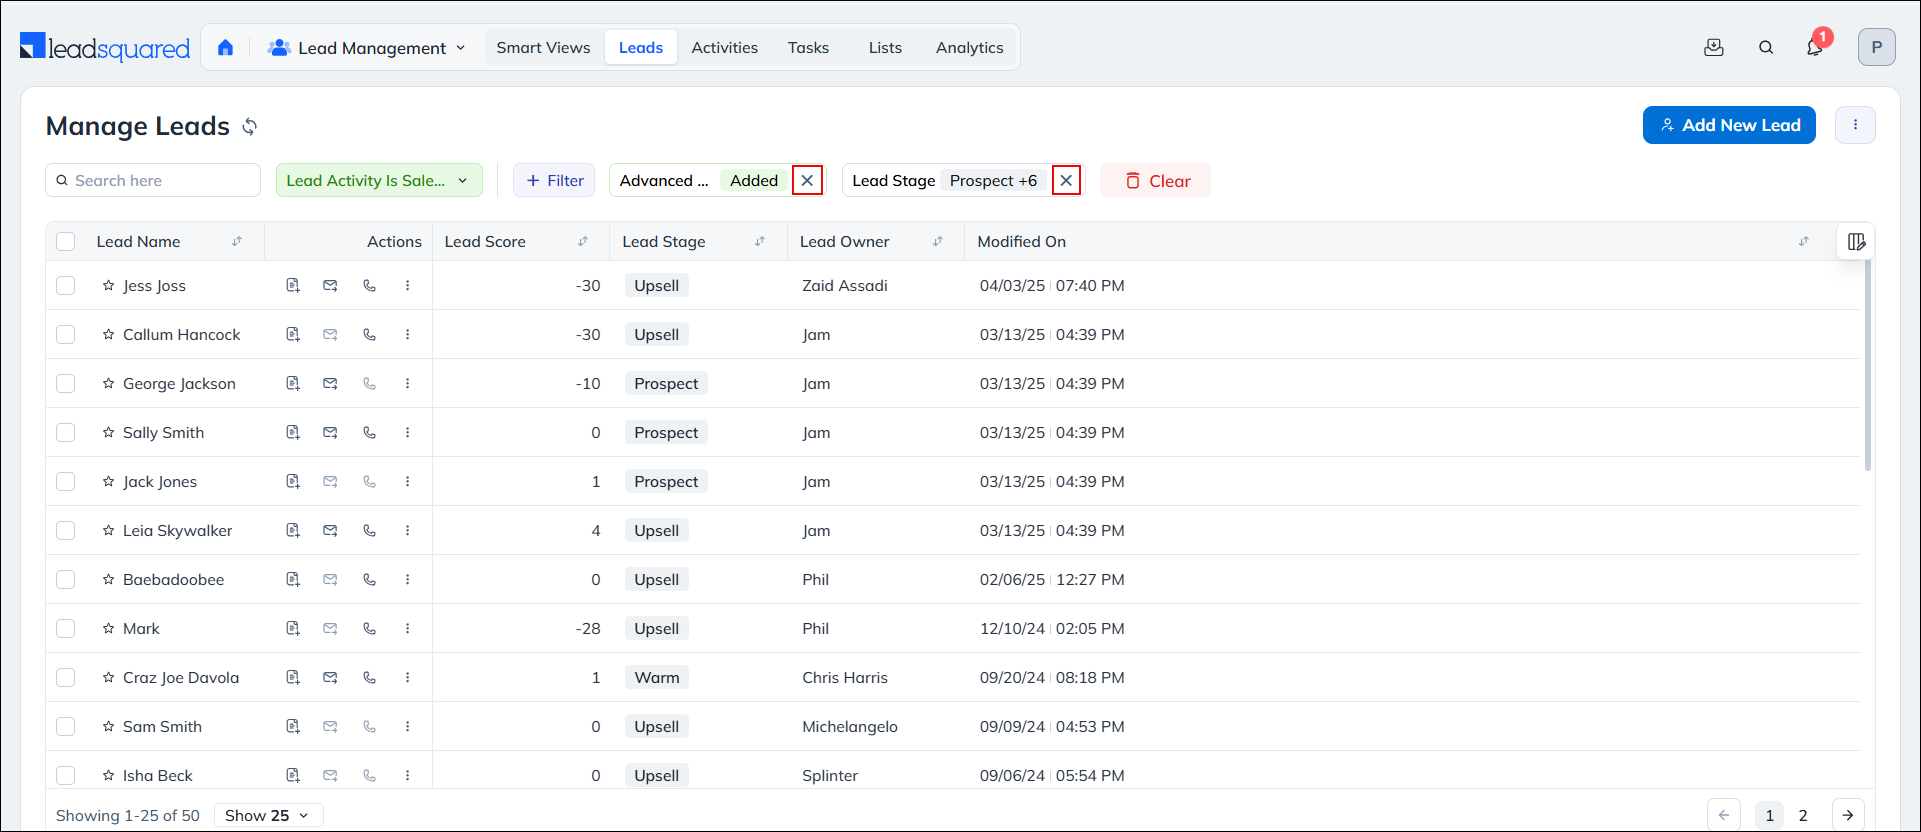
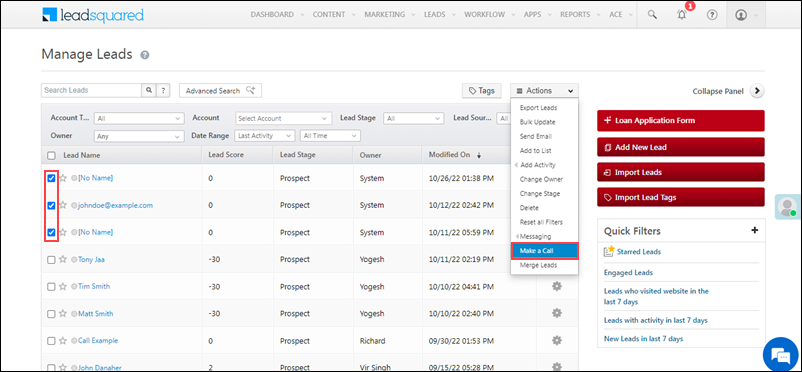
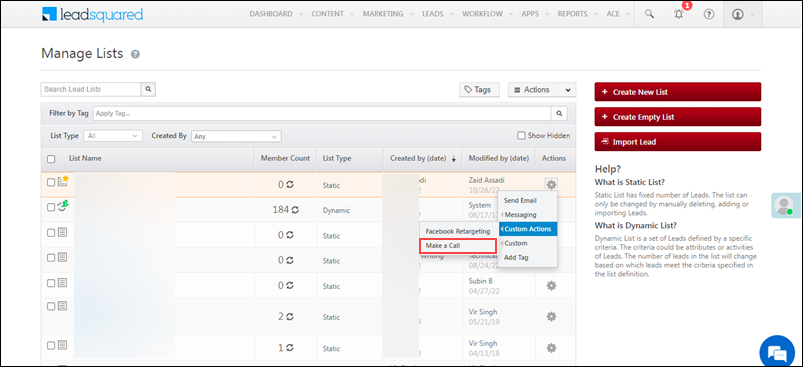
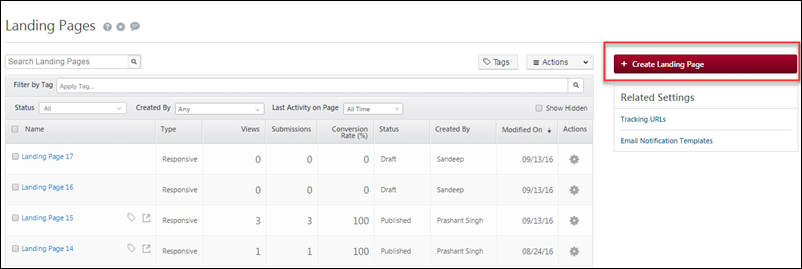
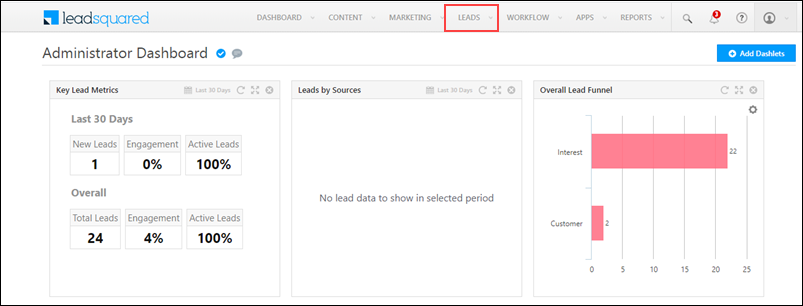
  1. Navigate to Leads>Manage Leads.
  2. Hover your cursor over and select the name of the action you’ve created (Make a Call, Call from Mobile, etc.).
Note: Once you’ve selected the action (Make a Call, Call from Mobile, etc.), your mobile app will redirect you to the dial pad with the lead’s phone number entered in it. You must tap the call button to place the call. The notification that the call is being placed is silent.

LeadSquared - Make a call

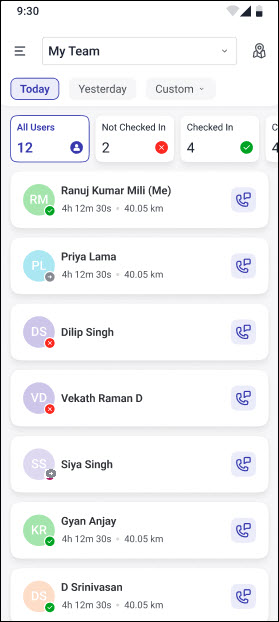
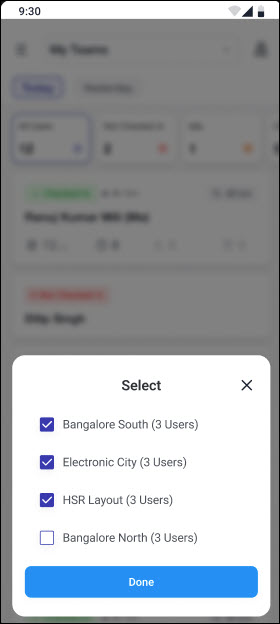
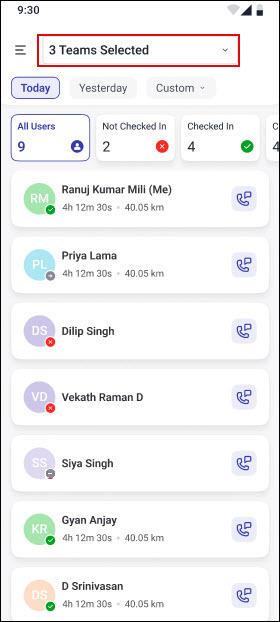
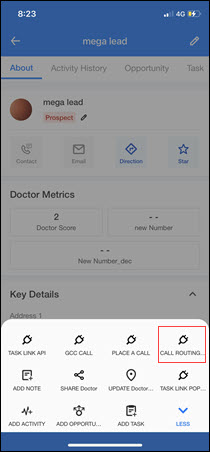
The nudge for call routing is available on the mobile app as well –

LeadSquared - call routing nudge

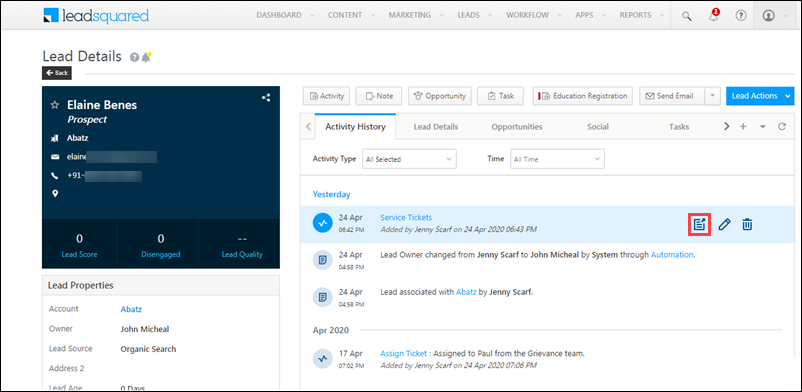
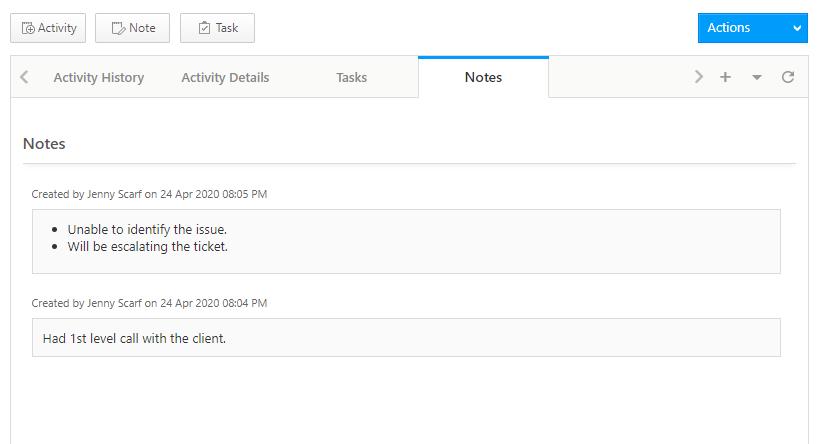
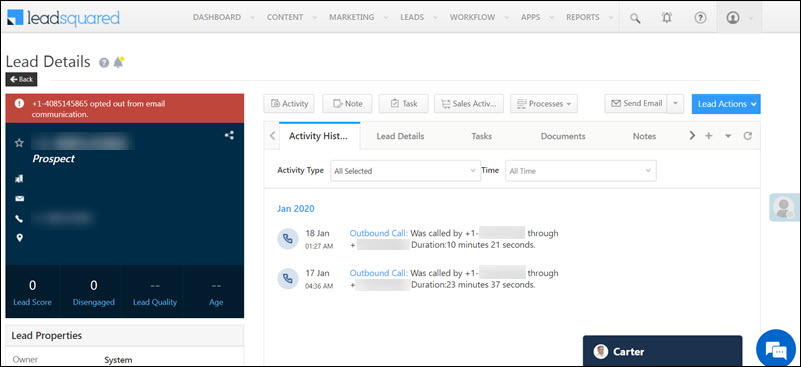
Once the call ends, an activity is posted on the Lead Details page.
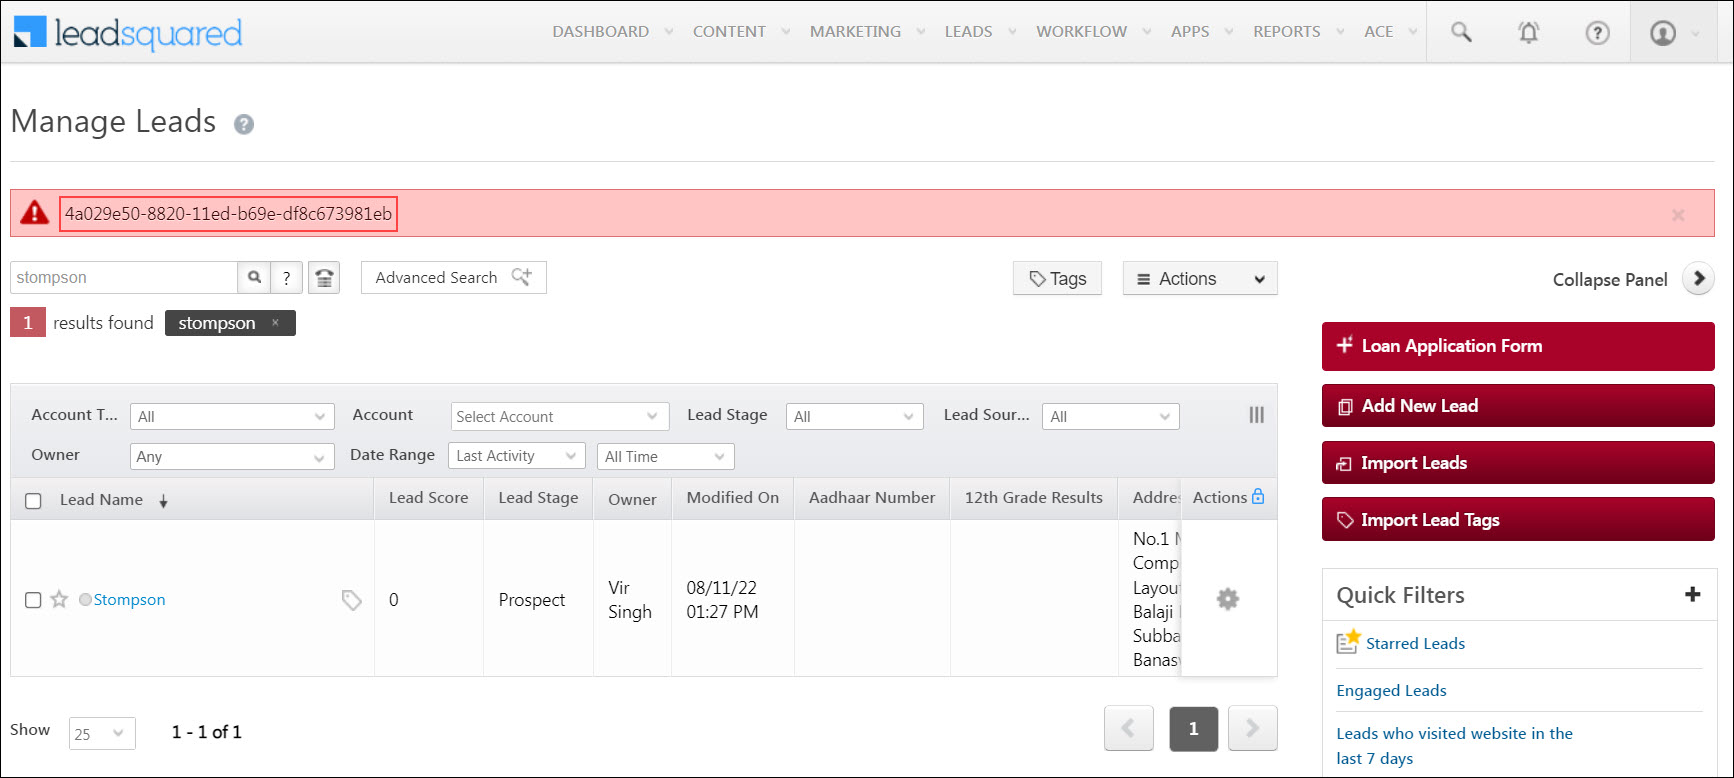
LeadSquared - Call logs on Lead Details


7. Troubleshooting

If your phone call doesn’t get placed, copy the reference ID shown below. Write an email to  support@leadsquared.com with this reference ID for help.

LeadSquared - Troubleshooting message


Any Questions?

Did you find this article helpful? Please let us know any feedback you may have in the comments section below. We’d love to hear from you and help you out!

How to Structure and Align Your Emails Better in LeadSquared

There are some great email templates in LeadSquared to work with. But, I am sure you would want to customize them more.

This video tutorial tells you how to modify the default templates, add structures and change the alignment of the content.

How to Easily Resend Emails to New Leads

If you hate redoing the same work again and again, this nifty little hack is for you. What happens if you have sent out a great campaign to your lead list and a few days later new lead gets added to that list? Well, you don’t have to set up the whole campaign again – just one click would do.

This tutorial would show you how to easily resend your emails to new leads.

How to Change Fonts to Make Your Emails More Readable

Want to improve your click-rates? Making your emails more readable would help. You will be surprised to know that small things like changing your email fonts can also have a major impact on the readability of your emails.

This video tutorial shows you how you can change fonts easily in LeadSquared:

How to Create Recipient and Suppression Lists for Your Emails

The Recipient and Suppression lists make sure that your emails reach a very specific group of people. Check out how you can do it easily in LeadSquared. (You need to be on Step 3: Select Recipients and Tags of creating your email campaigns to use this tutorial.)

P.S: We increased our email click rates by 48% by using this feature very effectively. You can read about it here.

How to Add Hyperlinks to Your Emails in LeadSquared

Nothing builds trust with your leads like sending them useful content. Hyperlinks in emails allow you to quickly direct the email recipients to this content – be it on a landing page or a web page.

This quick tutorial helps you to understand how to add Hyperlinks to your Emails in LeadSquared. (You need to be on Step 2: Compose Message of creating your email campaigns to use this tutorial.)

How to Edit Images in your Email

Images allows you to improve the look and feel of your email, and capture the recipients’ attention very easily. In LeadSquared, inserting and editing images are simple.

Here’s how you can do it. (You need to be on Step 2: Compose Message of creating your email campaigns to use this tutorial.)

How to Attach Documents to Your Emails with LeadSquared

Looking to share important documents with your leads through email? It’s very easy to do in LeadSquared.

This video tutorial shows you how. (You need to be on Step 2: Compose Message of creating your email campaigns to use this tutorial.)

How to Improve Look and Feel of Your Emails with LeadSquared

If your emails are getting opened, but not getting enough clicks, (even with great offers), maybe the look & feel and readability of your email is the problem.

This quick video (2 minutes) helps you understand how to fix the look and feel of your emails and enhance their readability in LeadSquared. (You need to be on Step 2: Compose Message of creating your email campaigns to use this tutorial.)

Dependent Lead Fields

1. Feature Overview

In some instances, there’ll be a dependency between two lead fields (e.g., the Campus field is dependent on the Department field for an account created for colleges) . Here, you can create a dependency between these lead fields by selecting one as the parent field (Campus) and the other (one or more) as the child field (Department).

You can also create multi-level dependencies by assigning multiple child fields to a parent field. For example, you can add both Department and Courses Offered as the fields dependent on the Campus field. When a user enters a value for Campus, only the Department and Courses Offered in that particular Campus will be shown.

Note:

  • When adding Dependent dropdown fields, you can add up to 1,000 parent options, and up to 5,000 child options (across all the parent fields).
  • To create multi-level dependencies, select the child field of the original dependent pair as the parent field of the new pair.
  • Dependencies can only be created for Dropdown and Dropdown with Others type lead fields. It cannot be created for Searchable Dropdown.


2. Prerequisites


3. Create Dependent Lead Fields

  1. Navigate to Settings>Leads>Dependent Lead Fields. and click Create.
  2. From the Select Parent Field dropdown, select a relevant field.
  3. From the Select Child Field dropdown, select a relevant field, and click Next.
  4. For each Parent Field shown in the next window, select the corresponding Child Field.
  5. Once you’re done, click Save.

Note: 

  • You cannot use system lead fields to create dependent lead fields.
  • Lead Source and Lead Stage fields are not displayed in the child field dropdown.
  • If a lead field has the Lock After Create setting enabled, you cannot use it as a child field.
  • If the Use in Lead Clone setting is enabled for the child field, it must be enabled for the parent field as well.
  • The values given to the child field in the Dependent Lead Fields page overrides the default values given to it in the Lead Fields page. If the dependency is removed, the lead fields restore their default values.

LeadSquared - Create Dependent Lead Fields


4. Other Actions

  1. To edit a Dependent Lead Field, click Edit.
  2. To delete a Dependent Lead Field, click delete.
Note: When you delete the dependency of a Lead Field, the respective lead fields will not get deleted.

LeadSquared - Edit Dependent Lead Field


5. Next Steps

Once you have created the dependencies between the dropdown fields, you can add these fields to Lead Forms (see How to create a Form and Lead Form Customization).

Note: 

  • When a Child Field is added to the form, the Parent Field is also added.
  • If you create multiple dependencies on the Parent Field and add the last Child Field to the form, all the dependent fields get added.
  • Before removing Parent Fields from a form, the dependent Child Fields must be removed first to avoid errors.
  • Dependent Fields included in the form cannot be deleted from the Lead Fields page. You must move the field to the Hidden Fields section in the form before deleting it.


Any Questions?

Did you find this article helpful? Please let us know any feedback you may have in the comments section below. We’d love to hear from you and help you out!

How to Enable Geotracking for LeadSquared Mobile App Users

1. Feature Overview

Using Geo-tracking, you can capture the geographical location (physical location) of your Field Sales Users through the LeadSquared mobile app. There are two ways in which Geotracking works –

This feature can be used to monitor authenticity when your Field Sales Users are –

  • Collecting KYC documents from your lead’s location.
  • Collecting the lead’s signature.
  • Delivering parcels to your lead.

Note:

  • Your user’s location is continuously tracked every few minutes through their Android device. But if they’re using an iOS device, they need to show signs of movement for their location to be tracked.
  • To ensure your users complete tasks and post activities only within a defined radius, enable LeadSquared’s Geofencing feature.

LeadSquared - Location tracking screenshot - Web App


2. Prerequisites

  • You must be the Administrator of your LeadSquared account.
  • Ensure location tracking is enabled on your user’s mobile device. To know more, refer to Location Tracking on LeadSquared Mobile.
  • Users must be checked-in to LeadSquared for their locations to be tracked.
  • In order to access this feature, you must be running the following versions of the mobile app –
Note: If the user has checked out of their LeadSquared account, they will no longer be tracked.


3. Enable Geo-tracking

  1. From the LeadSquared web app, navigate to Settings>Leads>Custom Activity & Scores.
  2. Alongside the Custom Activity type for which you want to enable tracking, click Edit.
  3. On the Update Custom Activity Type pop-up box, alongside Track Location, click Checkbox.
  4. Once you’re done, click Next. After you fill in the other details, click Save.
Note: To add an activity through Mobile Application, see Activity Management – Feature Guide.

LeadSquared - Enable Track Location on Web app


4. Track Real Time location

You can track the real time location of your sales users when they are checked-in to LeadSquared. You can also view the user’s location history through LeadSquared Reports.

To enable the Track real-time location setting –

  1. From your LeadSquared web app, navigate to Settings>Mobile App>Permissions. 
  2. Click Edit.
  3. Scroll to the bottom of the page and alongside Track real-time location, click Checkbox.
  4. Once you’re done, click Save.

Note: To know more about Mobile App settings, see Configure Mobile App Settings from the Web Platform.

LeadSquared - Enable Track location permission


5. View Location

The location of your field sales user will be displayed on the Activity History page in Web and Mobile Applications. The entire location history of the user will be displayed on the Reports page.

  • From the Lead Details page.

LeadSquared - Location tracking screenshot - Web App

  • From the LeadSquared mobile app.

LeadSquared - Location Tracking using Mobile App - screen

  • User Location History view from the mobile app.

LeadSquared - User location history report

  • View Location History Reports
    1. From the main menu, navigate to Reports>Reports Home.
    2. Click Field Sales Tracking, and click on any of the following reports –
      • Field Sales Activity Tracker
      • Last Known Location of Users
      • User Location History Tracker

LeadSquared - Location History report


Any Questions?

Did you find this article helpful? Please let us know any feedback you may have in the comments section below. We’d love to hear from you and help you out!

Activity Details Page (Add Activities/Tasks on Activities)

1. Feature Overview

In addition to adding activities and tasks on leads, you can now add them directly to activities (activities on activities, tasks on activities). The Activity Details Page enables you to view and add activities, notes and tasks on existing activities.
This is beneficial for a variety of use cases.

Let us take an example of a service ticket.

  • Consider you have a ‘Service Ticket’ activity.
  • On the service ticket, you can set up another activity to assign the ticket to the relevant team.
  • You can set up a task on the service ticket for the actions to be taken up by the team in resolving the ticket.
  • On the service ticket, you can also set up an activity for when there are escalations on the ticket, and who should receive the escalation.
  • You can set up a completion task on the service ticket.

This means that instead of tracking activities against the lead, you can directly track activities and tasks against the service ticket.


2. Prerequisites

  • You must be an administrator user in your LeadSquared account.
  • To enable this feature, contact your account manager, or write to support@leadsquared.com.


3. Process

3.1 Enable Details View

The first step is to enable the activity details view for an activity. You can enable the view for any activity against which you want to add more activities and tasks.

  1. Navigate to Settings>Leads>Custom Activities and Scores. You can either Add the view to a new Custom Activity, or Edit edit and update an existing activity.
  2. On the page, check the Enable Details View checkbox. After you enter other details, click Next.
  3. Complete the remaining steps, and click Save.

Activity Details

3.2 Add Activity to a Lead

Next, post the activity for which you enabled the view, on a lead. This can be done from the Lead Details page as well as the Manage Activities page.

3.2.1 From the Lead Details Page
  1. From the LeadSquared dashboard, navigate to Leads>Manage Leads and click on any lead.
  2. Click the Activity button on the Lead Details page.
  3. From the Activity Type dropdown, select the activity that you’ve created.
  4. Click Add.
  5. Once you have added the activity, hover on the the activity name and click the icon. This will open the Activity Details page.

Activity Details

Note: You can also post activities on leads from other pages in LeadSquared. To know more, refer to How to Add a Custom Activity.
3.2.2 From the Manage Activities Page

You can also add activities on leads from the Manage Activities page –

  1. Navigate to Leads>Manage Activities.
  2. From the Activity Type dropdown, select the activity you’ve created.
  3. Click the Add Activity button on the right side of the page.

add activity from manage activities

Note: You can also add activities to leads from the Smart Views page.


4. Activity Details Page

Once you have added the activity to a lead, you can now access the Activity Details page. On the Lead Details page, hover on the activity name and click the icon. This will open the Activity Details page.

Activity Details

On the Activity Details page, you can –

  • View all details of your Lead.
  • Use the Activity button to add an activity to your Activity.
  • Use the Task button to add a task to your Activity.
  • Use the Note button to add a note to your Activity.
  • Use the Actions dropdown menu to perform actions on the activity.

Activity Details

4.1 Add Activities on Activities

You can assign as well as keep track of activities. To add an activity to an activity, on the Manage Activities page –

  1. Click the Activity Details button.
  2. Select an activity from the Activity Type dropdown menu.
  3. Enter the activity date and time.
  4. Post a note if required.
  5. Click the Add button.
  6. You can now view the list of activities on the Activity History tab.

4.2 Add Tasks on Activities

You can assign as well as keep track of tasks. To assign a task –

  1. Click the Activity Details button.
  2. Select a Task from the dropdown.
  3. Enter the task details.
  4. Click Save.
  5. You can now view the list of tasks on the Tasks tab.

Activity Details

4.3 Add Notes on Activities

Click the button to add a note. This will ensure all the stakeholders are on the same page.

Note: You can also access the activity details page from Manage Activities page.

Activity Details

As well as from Smart Views activity type tabs.

smart views activity details page


Any Questions?

Did you find this article helpful? Please let us know any feedback you may have in the comments section below. We’d love to hear from you and help you out.

Create Quick Filter to Find Leads

1. Feature Overview

Quick Filters allow you to save frequently used filters, making it easy for you to find leads and opportunities faster. For example, you can create filters like Leads who visited a site last week or Leads who completed demo. Once created, all your Quick Filters appear under the My Filters dropdown, located above the Manage Leads or Manage Opportunities grid. Simply select a filter to instantly view the corresponding records in the grid.

Note: The filters remain saved unless you edit or delete them.

Leadsquared - Create Quick Filters


2. How It Works

  1. Create an Advanced Filter with your preferred search criteria.
  2. Save it as a Quick Filter for future use.
  3. Access the saved filter anytime from the Manage Leads or Manage Opportunities grid to instantly view matching records.


3. Create Quick Filters

  1. Navigate to Lead Management>Leads.
  2. On the Manage Leads page, go to Filter>Advanced Filters.
  3. An Advanced Search pop-up will appear. Select Search Criteria and click on Add.
  4. The selected criteria will appear. Now click Save as a Quick Filter.
  5. Assign a name to the filter and click Save.

You will get a notification on the successful creation of the Quick Filter. You will also see that the new filter has appeared under My Filters dropdown on the Manage Leads/Opportunities page.

Leadsquared - Create Quick Filters


4. Edit or Delete Quick Filters

  1. Locate the saved quick filters under My Filters on the Manage Leads page.
  2. You will find the Edit and Delete icons.
    1. Click on the Edit icon to edit the filter.
    2. Click on the Delete icon to delete the filter.

Leadsquared - Quick Filters


5. Remove Filters

To reset all filters on the page, click the Clear button alongside the filters.

Leadsquared - Create Quick Filters

To remove just the one particular filter, click the X icon alongside relevant filter.

Leadsquared - Create Quick Filters


Any Questions?

Do you have questions or issues with the content in this article? Let us know in the comments section.

Tracking LeadSquared Email opens in Google Analytics

1. Feature Overview

You can track opens events of emails sent using LeadSquared Email in Google Analytics.


2. Procedure

You can do this by specifying a GET request in an HTML image tag in the Email body. This request sends the Email data to Google Analytics when the Email tries to fetch the image from the HTML tag. This can be achieved by following the below steps –

2.1 Create a New Custom Metric

Create a new custom metric in the Google Analytics admin interface for your Web Property. To do this:

  1. Log on to Google Analytics using your credentials and click Admin in the top-left corner.

LeadSquared Google Analytics Integration

2. Select the corresponding Account and Web Property, and click Custom Definitions>Custom Metrics under the Property column.

LeadSquared Google Analytics Integration

3. Click NEW CUSTOM METRICThe Add Custom Metric pop-up box appears.

LeadSquared Google Analytics Integration

4. Enter the required details as shown in the image above and click Create.


2.2 Creating an Email Campaign

  1. From the default LeadSquared Dashboard, go to Marketing>Email Campaign and click Create Email Campaign.
  2. The Create Email Campaign wizard appears. For more information, refer to How to Create and Schedule Email Campaigns?

LeadSquared Google Analytics Integration

3. Select a relevant template and proceed to Compose Message.

LeadSquared Google Analytics Integration

4. Drag-drop an HTML block to the email body, and click the block to edit the HTML content through Content Properties on the right side.

LeadSquared Google Analytics Integration

5. Enter the following content in the Content Properties box:

<img src=”http://www.google-analytics.com/collect?v=1&tid=UA-XXXXXXX-YY&cid=*|UNIQID|*&t=event&ec=email&ea=open&el=*|UNIQID|*&cs=newsletter&cm=email&cn=062413&cm1=1″ />

The parameters in the HTML block is explained in the table below:

Parameter Name Parameter Value Description
v 1 Protocol Version (required)
tid UA-XXXXXX-YY Tracking ID / Web Property ID (required)
cid *|UNIQID|* Client ID (required). This anonymously identifies a particular user, device, or browser. The value – *|UNIQID|*- is a dynamic parameter (merge tag).
t event Hit type (required). The tracking is done with event tracking.
ec email Event Category
ea open Event Action
el *|UNIQID|* Event Label
cs newsletter Campaign Source
cm email Campaign Medium
cn 062413 Campaign Name
cm1 1 Custom Metric 1


Note – The HTML block with the above image tag is hidden from the email recipient.

6. Complete the remaining steps of the Email Campaign Wizard.

When an email is opened, the Email Open is recorded as a Metric in the Event Tracking Reports of Google Analytics.

LeadSquared Google Analytics Integration


Any Questions?

Did you find this article helpful? Please let us know any feedback you may have in the comments section below. We’d love to hear from you and help you out!

Custom Lead and List Actions Connector

1. Feature Overview

This LeadSquared connector allows you to extend LeadSquared’s functionality and create Custom Actions (in addition to the actions available by default) on a lead, group of leads, or a list.

For example, you can create Custom Actions to –

  • Post/retrieve lead data from external systems.
  • Make a phone call to a number stored in a custom field.
  • Send all the phone numbers of the leads in a list to a call center application for automated dialing.
  • Trigger a data post on a custom Webhook.
  • Send a custom notification to the Lead Owner.
  • Show all support tickets stored in external systems (like Zendesk, Freshdesk, etc.) associated with the Leads and display it as a separate window or pop-up.

Note:

custom lead row action


2. Prerequisite

You must be the administrator of your LeadSquared account.


3. How It Works

The connector enables you to create a custom action using a callback URL with mailmerge parameters (such as @{Lead:OwnerId, }, @{Lead:Company, }, etc.). You can also configure Iframe attributes to define how your action will be displayed on the Manage Leads and Lead Details page. You can use this to create single as well as bulk actions. To use the Custom Lead and List Actions connector on your account –

  • Install the connector
  • Configure the connector
  • Use the new custom action (on the Smart Views, Manage Leads, Manage Lists, and Lead Details pages)


4. Install the Connector

  1. From the main menu, navigate to Apps>Apps Marketplace.
  2. In the search box, type “Custom Lead and List Actions”, and click the Search icon.
    • Alternatively, from the left panel, click UI Customization. The Custom Lead and List Actions connector is listed on this page as well.
  3. On the Custom Lead and List Actions connector, click Install.

Install Custom Lead and List Actions


5. Configure the Connector

  1. Once the Custom Lead and List Actions connector is installed, hover your cursor over the  icon, and click Configure.
  2. On the Custom Lead and List Actions pop-up, select the area you want the action to appear from the left panel –
    1. Lead Grid Row Action – Allows you to add a custom action to the lead which is available from the Lead Details and Managed Leads features.
    2. Lead Grid Bulk Action – Allows you to add a custom action that can be applied for multiple leads from the Managed Leads feature.
    3. List Action – Allows you to add a custom action that can be applied to leads in a list. This is available from the Managed Lists feature.
  3. Click Add Action.

Configure Custom Lead and List Actions

Attribute Description
Action Label The display name of the action. This attribute is mandatory.
Action Type Three action types are available –

  • Show as Popup
  • Call an API
  • Open in New Window
Show Tab In To make the tab visible on your Web App and/or Mobile App, click the Checkbox checkbox.
Callback URL Enter the HTTPs URL which will be rendered as a custom action. The URL should be of an action that accepts LeadSquared mail merge fields as parameters and passes them to an external application (e.g., a support system, another CRM or marketing system, another LeadSquared account, etc.) to get the data. Click the question markquestion mark iconicon to view the available mail merge fields. This attribute is mandatory.
Iframe Attributes Pass Iframe attributes you want to render on the pop-up. Applicable only for the Show as Popup action type.
HTTP Method GET and POST methods are supported.
Content-Type application/JSON is the only supported content type.
Data You can pass any data here in JSON format.

Once you’re done, scroll to the bottom and click Save.

Note:

  • To delete an existing custom action, click the delete icon against the action’s name.
  • To edit an existing custom action, on the Configure Custom Lead and List Actions pop-up, click the Down Arrow icon and makes changes, and click then Save.

Edit and delete


6. Use the Custom Row Action

  1. From the LeadSquared main menu, navigate to Leads>Manage Leads.
  2. Against an existing lead, hover your cursor over the  icon, and select the custom action from the dropdown list.

custom lead row action

Note: The Custom Row Action will reflect on the Lead Details page as well.

lead grid row lead details


7. Use the Custom Bulk Action

Follow the same steps as in Lead Grid Row Action to create the actions.

To view the custom bulk action –

  1. From the LeadSquared main menu, navigate to Leads>Manage Leads.
  2. Select the leads you want to view the bulk action for, by clicking the Checkbox checkbox.
  3. Hover your cursor over the Leads button, and select the custom action from the dropdown list.

Bulk lead grid row


8. Use the Custom List Action

Follow the same steps as in Lead Grid Row Action to create the actions.

To view the custom list action –

  1. From the LeadSquared main menu, navigate to Leads>Manage Lists.
  2. Against an existing list, hover your cursor over the  icon, and select the custom action from the dropdown list.

manage lists lead custom action


Troubleshooting

The custom action is not visible on the Manage Leads/Manage Lists page even though it’s added in the connector –

This may be caused by a caching issue or if the action is hidden on the Lead Details View Customization (LDVC).

If you still face issues, contact us at support@leadsquared.com.


Any Questions?

Did you find this article helpful? Please let us know any feedback you may have in the comments section below. We’d love to hear from you and help you out!

Billing and Usage

1. Feature Overview

The Billing and Usage page displays your LeadSquared plan details and product usage. You can see the features available in your plan, their limits, and your current usage. You can also buy more items (users, leads/contacts, emails, automations, API rate limits, Forms, Processes, SMS credits) and view the purchase history for all your orders.

Note: Reach out to your account manager or contact us at support@leadsquared.com to –

  • Receive consolidated invoices at your desired frequency.
  • To send timely billing and usage notifications to specific admins.

LeadSquared Billing and Usage


2. Add Licenses

In case you exceed the usage limit for any feature, or if you’re approaching the limit and want to purchase more licenses, click the add licenses button button. You’ll be directed to the Manage Subscriptions page where you can place orders for add-on license items.

Note:

  • The Add Licenses feature is not available by default. Contact your account manager or write to us at support@leadsquared.com to get it enabled for your account.
  • The prices listed in all screenshots are for illustrative purposes only. Actual pricing will depend on your LeadSquared plan.


3. Manage Subscriptions

You can purchase items on a recurring or one-time basis.

billing and usage LeadSquared

3.1 Recurring Billing

Add-on license items bought through recurring billing are billed monthly, from the current date till the next billing date.

Note: LeadSquared generates a bill at least 15 days prior to the end of your billing cycle. If your next billing date is less than (or equal to) 15 days from the current date, the license amount will be calculated on a pro-rata basis considering your next billing date of the upcoming cycle.

The pro-rata fees are calculated as follows –

  • Daily Subscription Fee = Monthly Fees/30
  • Pro-rata Subscription Fees = (Subsricption End Date – Subscription Start Date) * Daily Subscription Fee

recurring billing

3.2 One-time Billing

Under one-time billing, you can purchase emails (minimum 1000) and SMS/Text credits (minimum 1000). Note that SMS credits can only be purchased if you’re using the SMS Marketing app. Click the SMS Usage Report link to analyze your SMS usage.

LeadSquared Billing and Usage


4. Pre-paid Billing

If pre-paid billing is enabled for your account, you’ll be directed to a payment gateway to complete the payment for the items you’re purchasing. The items will be added to your account only after successful payment.

  1. To purchase items, enter the quantity alongside the item. The invoice amount is automatically calculated. Click the help help icon alongside the total for more information.
  2. Click the place order button button to place your order.

sept 2021 updates

Next, enter your payment information.

place license order

You’ll see the following success message when the payment is processed successfully –

success message for place order

Click the purchase history button button to view your orders. You can also download the invoice by clicking LeadSquared invoice number. The feature limits on the Billing and Usage page will be updated to reflect your purchases.

LeadSquared Billing and Usage


3. Post-paid Billing

If post-paid billing is supported on your account, items you purchase will be added to your account as soon as you place an order, and you’ll be charged on your next billing date.

  1. Specify the quantities for each of the add-on license items.
  2. Click the place order button button
  3. To check your orders, click the purchase history button button.

billing leadsquared

You’ll receive email confirmations for all your orders (pre-paid and post-paid) –

email billing confirmation


Any Questions?

If you have any additional questions, please leave them in the comment section below.

How to Add Email Categories in Landing Pages

Email Categories allows email recipients (Leads) to selectively subscribe/unsubscribe from specific types of emails rather than completely unsubscribing from all emails. For more information on Email Categories, refer to Manage Email Subscription Preferences using Email Categories.

You can add Email Categories in the Landing Pages feature of LeadSquared to allow your customer to selectively subscribe from Emails when they submit information in the Landing page form.

To add Email Categories in Landing Pages:

  • From the default LeadSquared dashboard, go to Marketing -> Landing Pages and click Create Landing Page. The Step 01 Select Landing Page Template window appears.

LeadSquared Email Campaigns

LeadSquared Email Campaigns

  • Select the required template and click Next. The Step 02 Build Landing Page window appears.

LeadSquared Email Campaigns

  • Click the form block section as highlighted in the above image to go to the Form Designer pop-up box.

LeadSquared Email Campaigns

  • Click add-field against Mailing Preferences to add this to the form. You can see that the Email Categories you had created is available under Mailing Preferences in the form. Select the required Email Categories to be added.

LeadSquared Email Campaigns

  • Click the Mailing Preference section and the Lead Field properties section appears on the right display pane. You can edit the display name of the Email Categories and can also make it a mandatory or hidden field from here.

Note: You can move the Mailing Preferences section anywhere in the form using the anchor button  anchor .

  • Click Save.

Once the landing page is published, you can see the Email Categories in the Landing Page as shown in the image below:

LeadSquared Email Campaigns

Export Lists

1. Feature Overview

LeadSquared lets you export lead data by exporting the list that contains those leads. This is useful when you need offline access to data or want to share lead information with external systems or teams.

For example, if you want to export details of all leads located in Mumbai, you can first add them to a list and then export that list. During export, you can choose to:

  • Export all lead fields, or
  • Export only specific fields such as Lead Stage, Lead Score, Owner, and more.

Once the export is complete, the data is sent to your registered email address as a CSV file. To learn more about creating and managing lists, see List Management – Feature Guide.


2. Export Lists

  1. Navigate to Manage Lists and click the name of the relevant list.
  2. On the right side of the screen, above the list of leads, hover your cursor over Actions icon.
  3. Select Export Leads.
  4. On the Export Leads pop-up, choose whether you want to Export all fields or Export selected fields.
    • If you’ve  selected Export all fields, all the lead fields across all pages will be exported into the CSV file.
    • If you’ve selected Export selected fields, only the lead fields you select will be exported into the CSV file –
      1. To select a lead field, click the checkbox alongside it.
      2. Reorder the selected fields as required, by dragging and dropping.
  5. Click Export when you’re done.

Leadsquared - Export Lists


Any Questions?

Did you find this article helpful? Please let us know any feedback you may have in the comments section below. We’d love to hear from you and help you out!

My Teams – Feature Guide

1. Feature Overview

The My Teams feature on the LeadSquared Mobile App gives Sales Group Managers or Reporting Managers real-time, actionable insights into their team’s performance and daily activities. As a manager, you will be able to view your team’s check-in/check-out status, distance travelled and quickly connect with them via call, SMS or WhatsApp. Additionally, you can view the leads added, opportunities created, tasks completed and other activities performed by the users.

Benefits

  • Real-Time Team Tracking: Managers can view check-in/check-out status and track distance travelled for better field oversight.
  • Seamless Communication: Managers can quickly connect with team members from the app.
  • Performance Monitoring & Accountability: Key metrics help track productivity and ensure accountability.

Note:

  • This feature is aligned with the Reporting To or Sales Group hierarchy and is not connected to the Teams feature in LeadSquared.
  • On LeadSquared, you can either use Reporting Manager or Sales Group Hierarchy features, not both. By default, LeadSquared accounts come with the Sales Group feature enabled. If you wish to change this to the Reporting Manager feature, please reach out to us at support@leadsquared.com.
  • My Team is not visible to admins, sales managers and sales users who are not group managers.
  • The reporting manager can view only the data of their direct reportees. For instance, if User A reports to User B, and User B reports to User C, then User C cannot see User A’s data.

Leadsquared - My Teams


2. Prerequisites


3. How It Works

  1. The Administrator must add My Teams to the mobile app menu using the Web App Settings or the Menu Builder. Once added, the feature will appear in the side menu or bottom menu and be accessible to Sales Group Managers or Reporting Manager. The feature can be made visible in the Homepage when configured using Casa Widgets.
  2. From the My Teams page, managers can can view their users’ daily activities including their status, distance travelled, leads, opportunities and activities added, and tasks completed individually.


4. Add My Teams to the Menu

The Admin can configure the mobile app menu via the Web App settings or using the Menu Builder.

4.1 Add My Teams to the Menu via Web App Settings

To add My Teams to the mobile app menu –

  1. Navigate to Settings>Mobile App>Mobile Navigation.
  2. Select My Teams from the Hidden Menu Tabs and drag it to Visible Menu Tabs. Click Save.

Leadsquared - My Teams

4.2 Add My Teams to the Menu using the Menu Builder

If you have Casa enabled, you can use the Menu Builder to add My Teams to the mobile app menu.

  1. Navigate to Apps>Casa from your LeadSquared Dashboard.
  2. From the left menu, select Menu under Mobile.
  3. Click the edit icon alongside the relevant menu and you will be taken to the Menu Builder page.
  4. In the Menu Builder you can configure My Teams to be visible in the Bottom Menu or Side Menu.

Leadsquared - My Teams

Once configured, tap Publish on top of the page. On the Publish Menu popup, click the slider alongside Set as default menu or select a team from the dropdown, as per your preference and tap Publish.

Leadsquared - My Teams


5. Add My Teams to the Homepage using Casa

The Admin can add My Teams to the Mobile App Homepage by configuring it in the following Casa Widgets:

  • Quick Launcher
  • Banner
  • Image Tiles
  1. Navigate to Apps>Casa and select Homepage from the left menu under Mobile.
  2. While configuring the Quick Launcher / Banner / Image Tile widget, select My Teams from the Navigate To dropdown.
Note: You will not be able to view the My Teams option on your mobile app if it is not enabled on your account.

Leadsquared - My Teams


6. List View of your Team

Once the Admin configures My Teams using the Menu Builder, on logging into the mobile app as the Reporting or Sales Group Manager can view their team’s performance.

  1. Navigate to the side menu from your mobile app dashboard.
  2. Tap My Teams. Here, you can view all the users in your team.

Leadsquared - My Teams

As the manager of multiple sales groups, if you want to view the users and performance of one particular group, you can tap the My Teams dropdown at the top and deselect the other teams.

Leadsquared - My Teams     Leadsquared - My Teams     Leadsquared - My Teams

Alternatively, if My Teams is configured in the bottom menu, you can tap the option and view it directly from the homepage.

Leadsquared - My Teams

6.1 Filter by Day

On My Team, you can view the user activities based on the date selected from the Today, Yesterday or Custom date chips. Today is selected by default. If you want to view user activities for a custom date, tap Custom and select the relevant date from the popup calendar. This allows you to view your team’s daily activities for a past date.

Note: If you select Custom, you will only be able to access data for the past three months.

Leadsquared - My Teams

6.2 Checked-In / Checked-Out / Not Checked In

You can get an overview of your team’s activity through the three chips next to the All Users chip. They show the number of users who are checked in, checked out, and those who have not checked in for the selected day. Tap on any chip to see the list of users in that category and contact them if needed.

Leadsquared - My Teams

6.3 User Card

The User Card gives you an overview about the user and his activities.

Leadsquared - My Teams

Username – The name of the user. The current user will be marked with a “(Me)” tag.

Leadsquared - My Team

Status – The dot below the profile icon denotes the status of the user.

  • If it is Leadsquared - My Team, the user has checked in
  • If it is Leadsquared - My Team, the user has checked out
  • If it is Leadsquared - My Team, the user has not checked in for the day

Leadsquared - My Team

Check-In Duration – If the user is currently checked in, this displays the duration of their check-in. If the user has checked out, it shows the duration of their last check-in. If the user has not checked in today, this field will be blank.

Leadsquared - My Team

Distance Travelled – This displays the distance traveled by the user for the day while they are checked in.

Leadsquared - My Team

Contact – Tapping the Leadsquared - My Team icon will open a popup with contact options. You can contact the user via call, SMS or WhatsApp.

Leadsquared - My Team


7. Map View of your Team

An interactive map view lets you visualize your team’s real-time field activity. Tap the map view icon on top of the My Teams screen to view the current or last known location of your checked in or checked out users for the current day (Today). Your location is clearly displayed on a tab above the map.

The users are displayed on the map with Color-Coded Status Pins:

  • Green – Checked-In Users
  • Grey – Checked-Out Users
  • Dark Blue – You (Logged-In User)
  • Blue – Selected User

Leadsquared - My Teams

User cards are visible at the bottom of the screen. These cards includes details about the user and their field activity including the Check-in Status, Duration, Distance Travelled and Contact Button. Tap on the user card to get detailed insights about the user.

Leadsquared - My Teams

Tapping on the Leadsquared - My Teams Help icon on the top-right corner of the screen opens the legend of the map explaining each icon.

Leadsquared - My Teams


8. User Details Page

You can navigate to the User Details page by tapping the relevant user card from My Team.

Leadsquared - My Teams

You can get a detailed view of the selected user and their daily activities based on the date you have filtered by. On this page, alongside the check-in status, check-in duration, distance travelled, contact card and the group of the user, you can view –

Tab Description
Contact Options From the menu –

  • Tap SMS to send an SMS to the user.
  • Tap WhatsApp to contact the user through WhatsApp.
  • Tap Call to call the user.
Task Progress Displays the number of tasks that the user has completed for the day.
New Activities Displays the total number of activities added by the user across all activity types.
New Leads Displays the number of leads the user has added for the day.
New Opportunities Displays the number of opportunities the user has added for the day. If Opportunity is not enabled on your account, this tab will not be visible
Map View Shows the user’s current location if they are checked in. If they are checked out, it displays their last known location at the time of check-out.

Leadsquared - My Team


Any Questions?

Did you have any trouble understanding or implementing organization switch? Is there something more you’d like to know? We’d love to converse with you in the comments section below!

List Actions

1. Feature Overview

Once you create a list, you can perform various actions on the list from the List Actions dropdown. The actions you can perform differ based on whether your list is Static or Dynamic. To know more about Lists, see List Management – Feature Guide. 

Note: Certain apps and connectors must be installed and configured to perform lead level and list level actions (such as Messaging List through WhatsApp, Facebook Retargeting, etc.).


2. Prerequisites

  • You must be the Admin User of your LeadSquared account.
  • You must have at least one list in your account.


3. List Actions

To access List Actions –

  1. Navigate to Leads>Manage Lists.
  2. Click on the name of the list you want to view.
  3. Once you can view the List Details page, click List Actions, and perform the desired action from the available options.

LeadSquared - List actions


4. List Actions for Static Lists

You can perform the following actions on a Static List –

  1. Quick Add New Lead – You can add a lead directly to the list from the List Details page, by providing basic details. LeadSquared - Quick add new lead - List Actions
  2. Add New Lead – From the Add New Lead pop-up, enter relevant details and add new leads to the list.
  3. Edit – Edit the list name and list description.
  4. Add More Leads – Add additional leads to your list. LeadSquared - Add more leads - List Actions
  5. Delete List –Deletes the list. Doesn’t delete any lead data.
  6. Send E-Mail – Send an email to the entire list from the email pop-up. LeadSquared - Send email - List Actions
  7. Update All Leads – Lets you to update Lead Details for all the leads in the list. For example – if City is updated to Bengaluru, the City field of all the leads gets updated to Bengaluru.
  8. Messaging – Send messages to all the leads in your list through SMS or any other messaging service configured in your account. LeadSquared - Send message - List Actions
  9. Add tag to List –Add tags to all the leads present in the list.
  10. Tag all leads – Apply tags (e.g., Bengaluru, Female, etc.) to all the leads in the list.
  11. Trigger Automation – Let’s you trigger the automation that was published using the selected list. When using this, you must keep the following things in mind –
    • Automation Trigger can be applied only for Static Lists.
    • The automation should be built using the Add Lead to List trigger.
      • On the Automation starts when a Lead is added to list(s) pop-up, once you select the list, you must enable the Allow Manual Trigger option. This will ensure that you can use the Automation Trigger function for the selected Static List.

LeadSquared - List actions


5. List Actions for Dynamic Lists

  1. Send E-Mail – Send an email to the entire list from the email pop-up.
  2. Update all leads – Let’s you update Lead Details for all the leads in the list. For e.g., if City is updated to Bengaluru, the City field of all the leads gets updated to Bengaluru.
  3. Messaging – Send messages to all the leads in your list through SMS or any other messaging service configured in your account.
  4. Add Tag to List – Add tags to all the leads present in the list.
  5. Tag all Leads – Apply tags (Bengaluru, Female, etc.) to all the leads in the list.

LeadSquared - List actions - dynamic


Any Questions?

Did you find this article helpful? Please let us know any feedback you may have in the comments section below. We’d love to hear from you and help you out!

How to Rename the Lead Entity to Reflect Your Business Terminology

1. Feature Overview

A ‘lead’ in LeadSquared refers to both an individual (a person, a contact, etc.) and an enquiry (What are the services the lead is looking for? Through which marketing channel did the lead find us?). The ‘leads’ terminology works best for businesses whose objective is to acquire customers for a single product or service. But there are a few scenarios, for certain businesses when the usage of ‘leads’ doesn’t entirely hold true. These scenarios are for –

  • A business where the lead enquires for multiple products. An example is a bank, where the same person might enquire for a savings account, a credit card and a vehicle loan. In such cases, you would have to distinguish the customer from the enquiry. Here, you can rename the ‘lead’ to ‘Contact’ or ‘Applicant’ or anything that suits the business, and use ‘Opportunities’ to model each enquiry.
  • A business where salespersons deal with leads that are referred to by a specific noun. Examples of this are –
    • An education platform, where ‘leads’ can be renamed to ‘Students’.
    • A healthcare service, ‘leads’ can be renamed to ‘Patients’.

In the above-mentioned scenarios, the ‘lead’ display name can be changed to better reflect the nature of the business. This change will get displayed across the LeadSquared platform – on the main menu, the Manage Leads page and the Lead Details page. Leads

Exclusions:

  • Lead and Contact/Person will continue to remain synonymous in LeadSquared.
  • The name change will not change or affect the display name on the Settings page. This will continue to remain as Leads.
  • The name change will also not change or affect the display name in APIs and Reports. This will continue to remain as Leads.


2. Prerequisites

You must be the Admin of your LeadSquared account.


3. Process

You can change or edit the display name of your Leads on the Lead Settings page.

  1. From the main menu, navigate to Profile>Settings>Leads>Lead Settings>Rename Leads.
  2. On the Rename Lead tab, under Actions, click the Edit icon.
  3. On the Rename Lead pop-up, change the Display Name and Plural Name, and click Save.
  4. On the Confirmation pop-up, click the Confirm button.
  5. You will receive a confirmation notification at the top of the page once the name change has been accepted by the system.

Leads

Notes:

  • It will take up to one hour for the name change to reflect in your account.
  • If you want to revert back to the default name, you can edit it on the Lead Settings page. Click the Edit icon to change the name.


4. View Changes

The change in name will reflect across the main menu.

Leads

And also the Manage Leads page, and the Lead Details page.

Leads


Any Questions?

Did you find this article helpful? Please let us know any feedback you may have in the comments section below. We’d love to hear from you and help you out!


How to Use Dependent Lead Fields in Landing Pages

The dependent Lead Fields feature can also used in the forms of Landing pages in Lead Squared.

Prerequisite

You should be an administrator user of the LeadSquared application to create dependent lead fields. You should be a administrator/marketing user to use the dependent fields in Landing Pages.

Procedure

Consider that you are creating dependencies between the below three lead fields:

  • Country
  • Customer State
  • Customer City

For more information on creating dependent lead fields, refer to Dependent Lead Fields.

After creating the dependencies, follow the steps below:

LeadSquared Landing Pages

  • Click Create Landing Page. The Landing Page builder window appears.

LeadSquared Landing Pages

  • Select the required template and click Next.
  • In the Step 02 Build Landing Page, click the form to go to the form designer.

LeadSquared Landing Pages

LeadSquared Landing Pages

  • Search for the required dependent lead fields from Add Lead Fields and click add button to add it to the form.
  • Click Save. The values in the dependent child fields are available once the landing page is published.

For more information on Landing Pages, refer to Building Responsive Landing Pages.

Manage Lead Tags

Important: This feature was deprecated, and is no longer available on LeadSquared after 31st August, 2023. However, this does NOT impact the Marketing Tags feature, which will continue to be available.

1. Feature Overview

Tagging is a quick way to add a label to a lead, for easy identification of leads. The Lead Tagging feature enables users to associate leads with relevant tags (e.g., the lead’s city – Bengaluru, Chennai, the lead’s profession – Doctor, Accountant, etc.). These tags can be created using words or phrases. The intent of tagging is to describe certain attributes that are not captured in lead fields or activities.

Note: To know how to add tags to your leads, refer to Tag Your Leads.


2. Prerequisite

You must be the Administrator of your LeadSquared account.


3. Create a Lead Tag

  1. Navigate to Settings>Leads>Lead Tag Manager.
  2. Click Create.
  3. On the text bar, enter the Lead Tag, and click .
  4. To save the current tag and add more Lead Tags, click Save & New.

LeadSquared - Create Lead Tag


4. Other Actions

  • To edit an existing Lead Tag, alongside the tag, click Edit.
  • To delete an existing Lead Tag, alongside the tag, click delete.

LeadSquared - Edit Lead tags


5. Permission to Add New Tags

By default, all the users in your account can add existing tags to your leads. In addition to this, you can also permit users to add new tags to leads directly from the Lead Details page.

LeadSquared - Tag permissions

For example, if you have existing tags “Bangalore”, “Chennai” and “New Delhi” in your account, and you want to add the tag “Hyderabad”, you can enter this term in the search box, and hit ENTER. This new tag is added to your lead, and a new tag is automatically created in your account.

Lead Tags


6. Alternatives to Lead Tags

We recommend the following alternatives to address the exact same use cases for tagging your leads –

  1. Create a custom lead field 
    Set the data type of the field to multi-select dropdown and create the lead tags as options. For more details, see How to Create Custom Lead Fields.
  2. Create a Custom Activity Field
    Add a multi-select dropdown field to an activity type of your choice and use it to tag your leads. For more details see How to Add Custom Activity Types.
  3. Use the lead notes feature to add tags
    Add relevant tags as notes to your leads from the lead details page.

LeadSquared Lead Management Notes Feature

You can then use advanced search to help you filter leads and create lists according to your tags.


Any Questions?

Did you find this article helpful? Please let us know any feedback you may have in the comments section below. We’d love to hear from you and help you out!

Custom Tab Connector

A custom tab allows you to fetch and display data from external sources on the lead or account details pages. Here are some examples of what you can achieve with custom tabs –

  • Show all support tickets associated with a lead stored in external systems (e.g., Zendesk, FreshDesk, etc.)
  • Display the list of products added to lead’s cart on an E-commerce site.
  • Create a tab for the real estate properties a lead may be interested.
  • View the list of invoices generated for a particular account
  • Set up a news feed tab for a specific account


Prerequisites

  • You must be an Administrator user of your LeadSquared account.
  • If you want to create a custom tab on the account details page, you must first enable the accounts feature.


Installation

You must install and configure the Custom Tab Connector from the Apps Marketplace to create custom tabs.

  1. On the main menu, navigate to Apps>Apps Marketplace.
  2. In the search box, enter ‘Custom Tab Connector’.
  3. Click Install

Custom Tab Installation


Configuration

Once the connector is installed –

  1. Hover your cursor over the settingsSettings iconwheel, then click Configure.
  2. On the Configure Custom Tab Connector pop-up, use the Select Entity drop-down to choose where you’d like to create the custom tab, then click Add Custom Tab.
    • You can either select All Leads to create a custom tab on the lead details page.
    • Or you could select an account type to create a custom tab on the account details page for all accounts of the chosen type.
  3. Enter the following details
    • Title: This will be the display name of the custom tab.
    • URL: Enter the HTTPs URL which will be rendered as a custom tab.*
    • Show Tab In: You can display the tab on the Web App or the Mobile App.
  4. Click Save.

*The URL should be of an application (it will be most likely a custom application that you create) that accepts LeadSquared lead merge fields as parameters and passes it to an external application (like a support system, another CRM or marketing system, or another LeadSquared account) to get the data. You will then need to render the response in HTML so it can be displayed in the custom tab. For example – https://<yourdomainname>.com/Project/UploadDocuments
Click the help help icon to view the list of mail merge fields you can use in your URL.

Custom Tab Configurations


View Your Custom Tab

You can now view your custom tab on the Lead Details or Account details page depending on where you configured it. the example below shows an ‘Upload Documents’ tab where users can upload identification documents for leads.

custom tab on lead details


Any Questions?

Please feel free to ask questions or share your feedback in the comments section below.